Filed under: Daisy Delight Box with Mary Alice Sinton, Embroidery Guild of America, Fauquier County Chapter
Since the Daisy Delight Box by Mary Alice Sinton was working up so quickly and was such fun to watch develop, I kept on going.
Here’s the background done.
And, finishing was easy enough as the lid is padded and pops out of the box top. I did an inner (not pictured) and outer running stitch (seen in the upper right and lower left corners) to gather the fabric underneath. A little lacing to really secure it. Then, it popped right into the lid with the beaded circle falling in exactly the correct place around the lid. No glue needed.
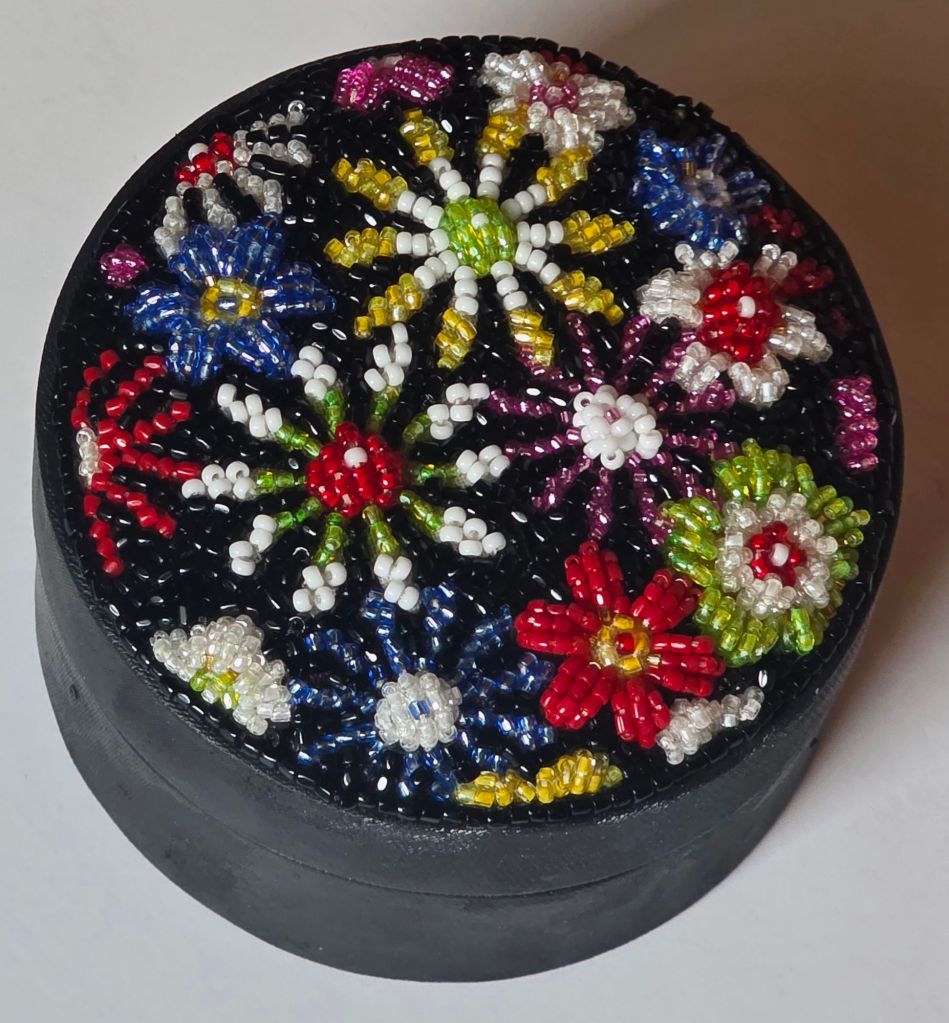

Love it!!
Filed under: Daisy Delight Box with Mary Alice Sinton, Embroidery Guild of America, Fauquier County Chapter
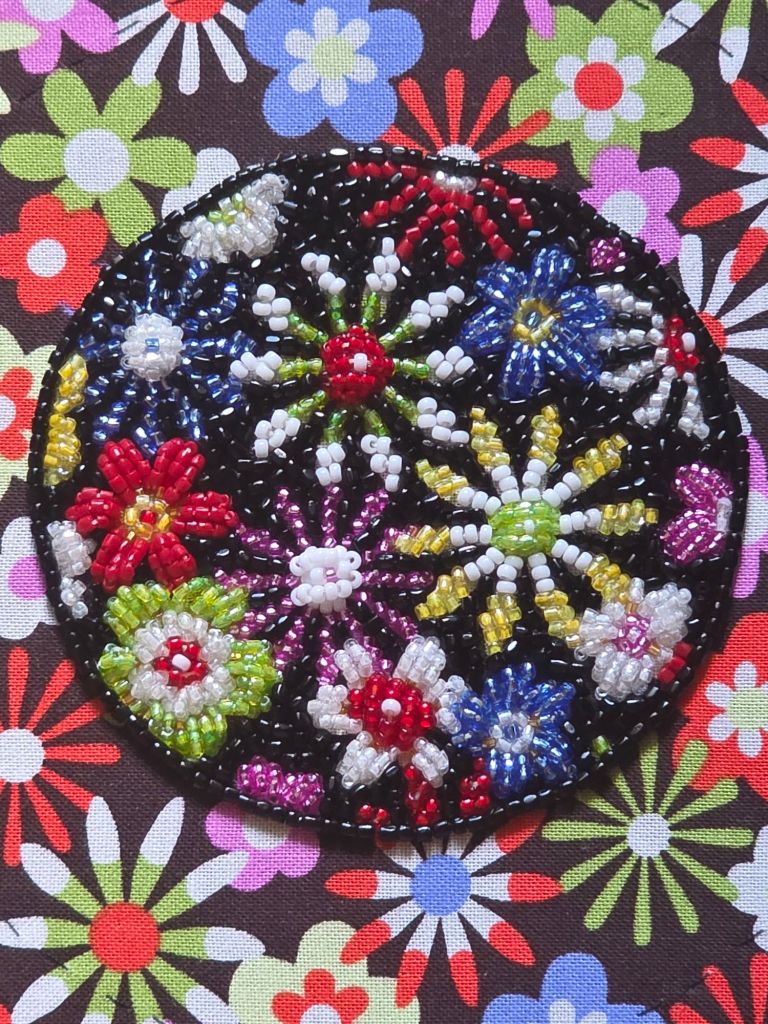
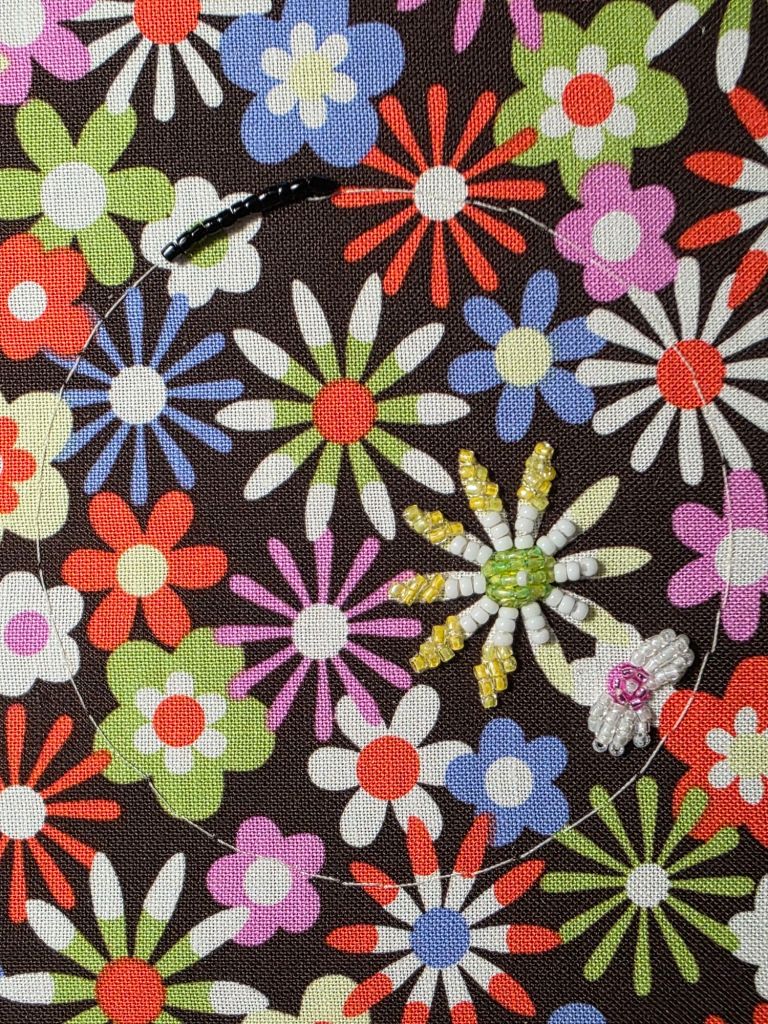
After saying that I needed to lighten up on the beads, I didn’t. The blue/white and white/red in the right are loaded!
The pointed tip thin petal pink/white flower is less believe it or not. You can see fabric showing through the beads on the petals. The center is supposed to be padded. The white and the contrast to the skinny petals makes it looks bigger.
I like the flowers looking like they are in full bloom. So, only the pointed tip thin petals flowers are lighter.
Since this is working up quickly and is such fun to watch bloom, I am going all the way to completion.
Next up is background and finishing.
Filed under: Daisy Delight Box with Mary Alice Sinton, Embroidery Guild of America, Fauquier County Chapter
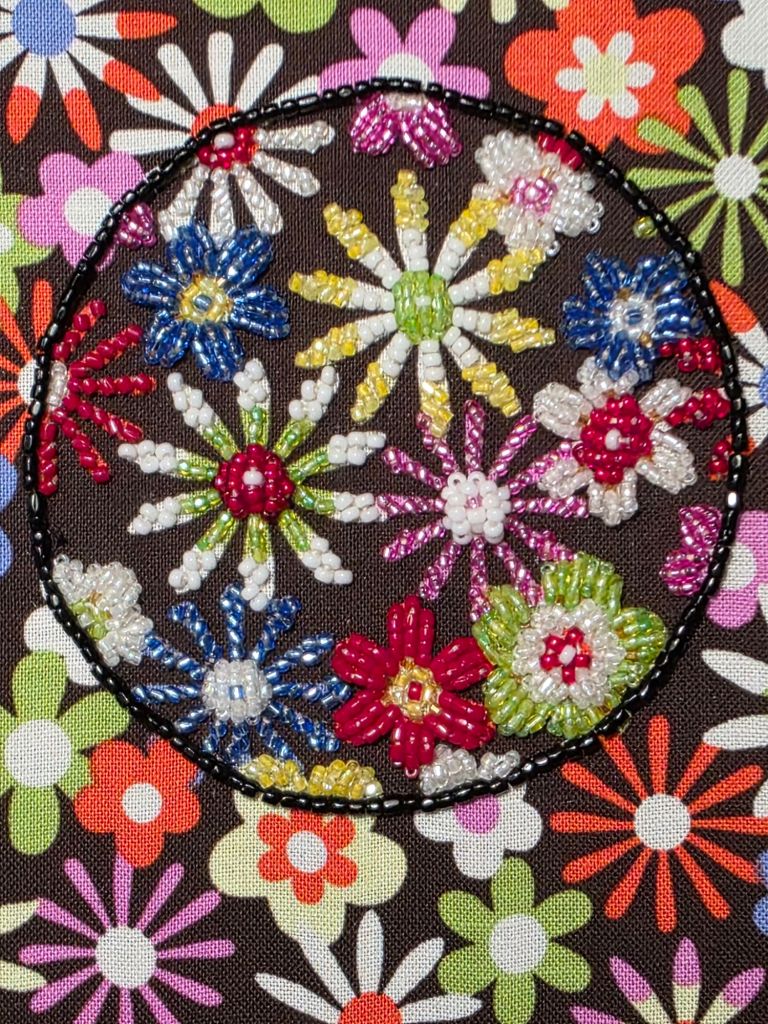
It’s not a race! That what Mary Alice Sinton told us when she showed the progress on another student’s Daisy Delight Box during the afternoon session. Good thing because I felt like I was all thumbs in the morning especially using the Koma but I think what I did by the end of class looks good. I understand how to use the Koma and just need to focus.
Mary Alice’s critique was that I don’t need to cram the beads together to cover all the fabric. So, I will continue on these flowers as I started but will adjust going forward.
First, I needed to finish the border of black tri-cut beads. I do love the Koma for couching beads! It took some practice and getting used it but as I neared the end, I would have liked to have more to do! The flowers don’t need the Koma.

Filed under: Daisy Delight Box with Mary Alice Sinton, Embroidery Guild of America, Fauquier County Chapter
Monday’s Zoom class (10 am – 5 pm) is Daisy Delight Box with Mary Alice Sinton sponsored by the EGA Fauquier County Chapter. It’s been awhile since doing an all day Zoom class but it looks like it’s going to be fun. This was not one of my 2025 goals but I wanted to try this entry-level piece of Japanese Bead Embroidery and there is nobody better to teach it than Mary Alice.
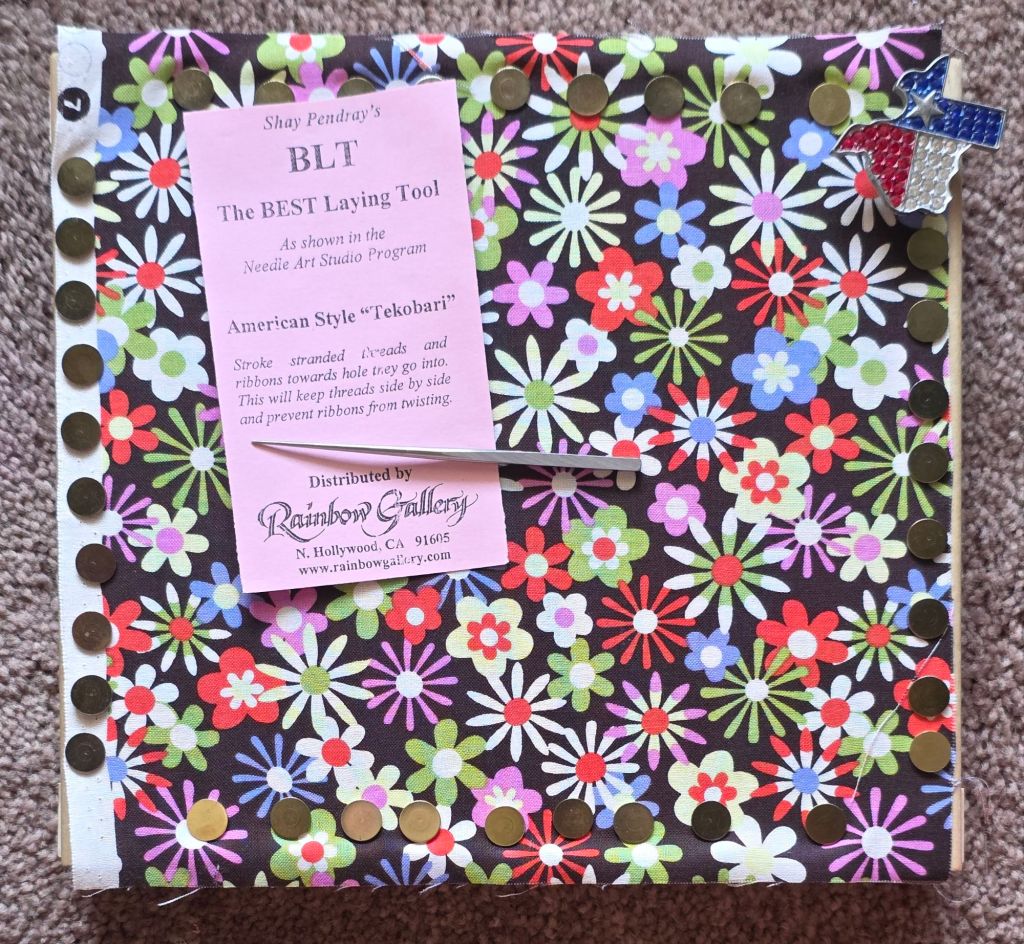
Ample materials have been supplied. The satin round box is also called a Minaudiere. The lovely floral 100% cotton fabric is called Flowers Aplenty by Michel Miller. The beads are a variety of Tri-cut and Seed beads (looks like way too many for the 3″ diameter round top). There are 2 sizes of Japanese needles (really tiny things-no extras-so I must not lose them), needle threader (a must have), and Gutermann threads. I’m guessing the brown felt is a mini bead tray (under the 2 spools of thread). I purchased (extra) the Japanese Beading Koma made by her husband John (wooden spool with a black band wrapped around it tightly) although Mary Alice will teach the class in a manner that doesn’t require using it since the sponsoring chapter wanted to keep costs down. But, I want to give it a try.

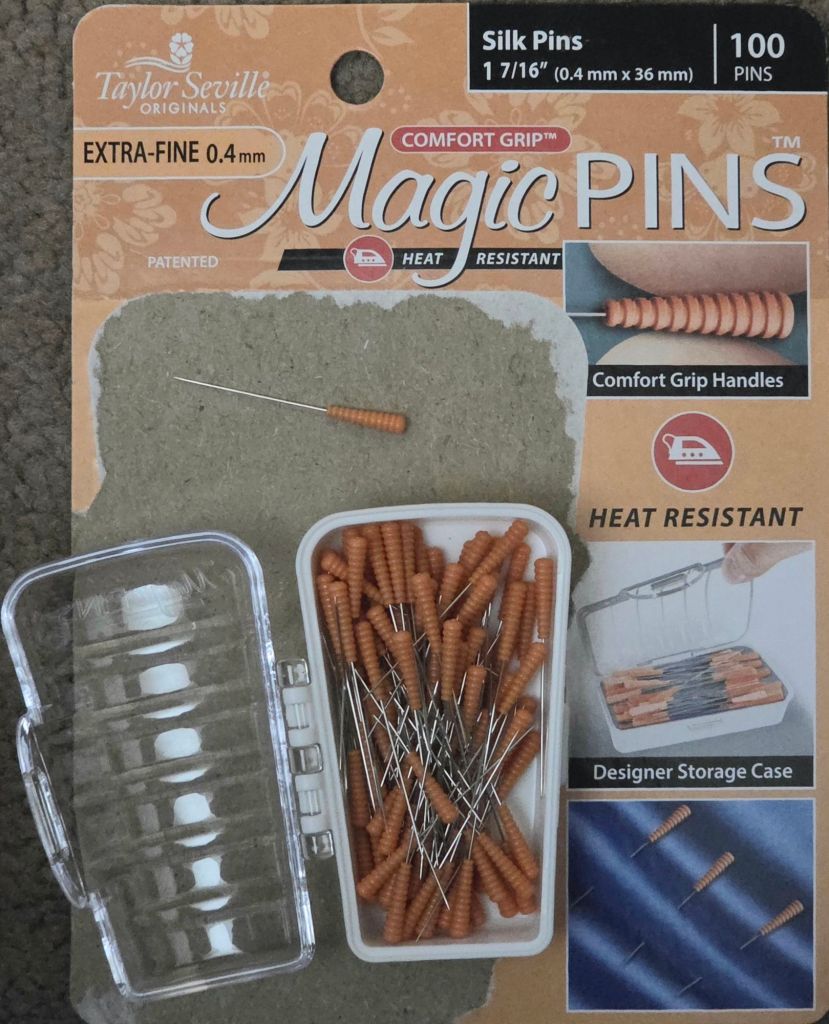
Not having Joann’s anymore or quilt shops near me has me relying on Michael’s but their online inventory let me down for silk pins. The silk pins are supposed to be very fine so as not to leave holes in the fabric when pinning through it. So, I ordered these on Friday and had them on Sunday. These are extra fine at 0.4 mm and I like the comfort grip feature. Cute storage case too.
I don’t have an awl or a real Tekobari tool but I was able to find my BEST Laying Tool (in my 3rd tool tote not counting my travel tool kit). Inquiring minds might ask why 3? Stuff I use very often, is in a bag within arm’s reach next to my stitching chair. Stuff I need often enough is a short walk away from my stitching chair in a lovely tool tote that Linda made. And, stuff I rarely use is my 3rd tool tote in the basement. I prefer my fancy trolley tool for laying threads at home and the standard Trolley Tool for travel. My fancy laying tool is not even in one those totes just mentioned. That is in my Ort Box with a Twist which is next to a large coffee cup (thanks again Linda) on the top of the table within arm’s reach of my stitching chair! My happy place.

I’ve read the directions several times, placed the fabric on Evertites (very taut), placed my Texas Lone Star needle minder on the frame, and am ready for class! Mary Alice has such clear instructions that I’m resisting the urge to baste the outline and create the border using the Vertical Horizontal Technique.