Filed under: All That Simmers by Sundance Beads, ANG Main Line Stitchers Chapter
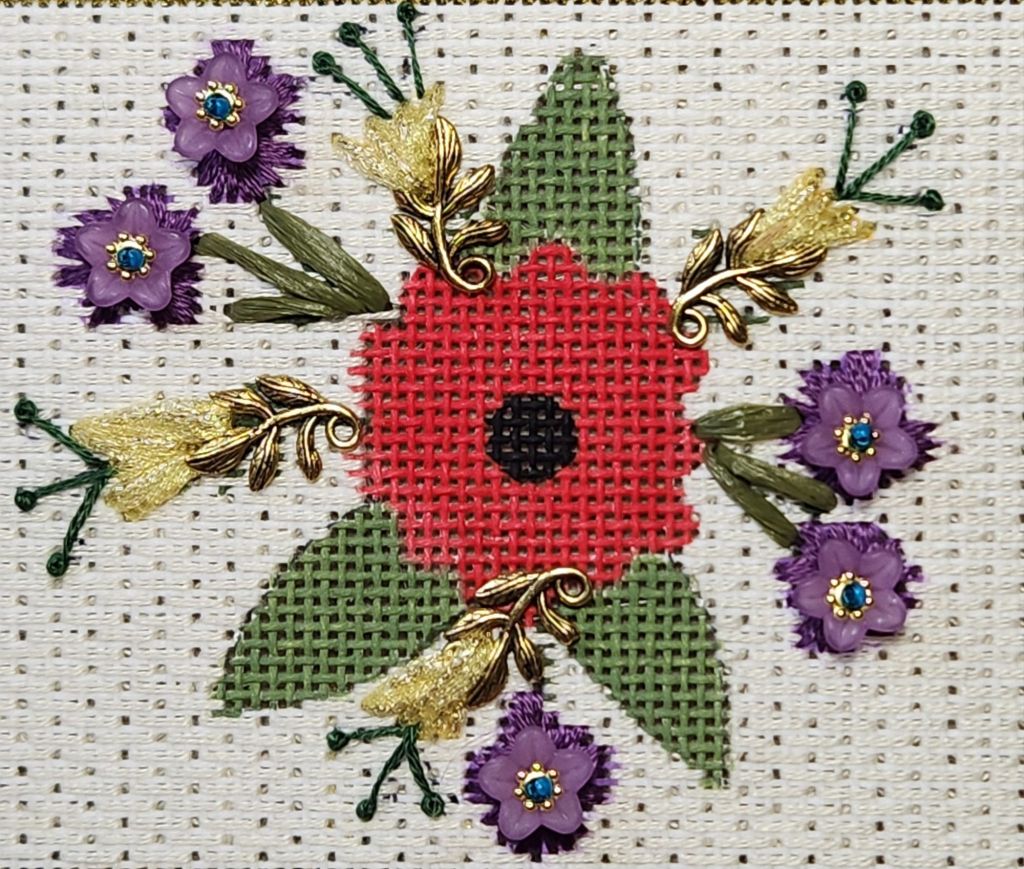
I finished this in 2024 but never posted about the last area, the red poppy, in All That Shimmers. This was a painted canvas with a stitch guide by Sundance Beads done with my ANG Main Line Stitchers chapter.
Kristen’s tip to place the running stitch along both sides of the red ribbon before gathering was very sensible. Doing the second edge after the bottom is gathered and in place has to be next to impossible. The red ribbon is called Christmas Red by BE Ribbons and appears to be available only at Sundance Beads (sundancedesignsonline). It comes in great colors. The green leaves are also BE Ribbons, Retro Ribbon Avocado. They are clearly different materials, but the website doesn’t provide details. I guess I would have to email them if I had questions about buying more ribbon.
The center was too large and I had to cinch it smaller so that the center of the flower didn’t disappear. The first three beads slipped through the metallic center, so I used 5-7 beads to show through. Thanks again to Kristen for leading us through this project and to Sundance Beads for making a stitch guide available.
This needed a deep box, but not really knowing where I’d put it, I didn’t take it to a framer. But, since I had such great results with Treasures of the Great Lakes, I decided to give this a go, too. There is a difference in that this is on monocanvas and slightly larger than 5″ x 7″. I found 6″ x 8″ is also a standard frame size in shadow boxes for medals (at Michael’s). That required additional borders (5 and 7 canvas threads wider) to be stitched. I used the Woven stitch in the four colors matching the original tent stitch outer borders with the same Kreinik #12 Braid. I found them in my stash and even had enough!
Then, I added a row of buttonhole over 2 canvas threads so that I could cut it exactly to fit the frame opening. Because I stitch on Evertites, it was exactly square when I took it off the bars.
And, it fit liked a charm. I did lace it to the interior back board provided just so it wouldn’t shift when it gets moved about. But, it doesn’t photograph well because of glare. In person, it looks really good. It’s standing upright as Sundance apparently intended it to be displayed. But, which way do you like it?
New camera in the Samsung S25 Ultra is making a big difference.
Filed under: All That Simmers by Sundance Beads, ANG Main Line Stitchers Chapter
I’m glad I worked on All That Shimmers at my ANG Main Line Stitchers Saturday Stitch-in because Kristen was there. She’s already stitched it.
Underneath the purple flowers, I just couldn’t use the magenta overdyed thread. Kristen helped me pick DMC floss 327 to be the shadow underneath the flowers. Much better.
Once home, I pulled out the raffia and thought it was plastic! But Kristen used it on hers, and it looked nice. I also googled it and found out it is from the leaves of a raffia palm tree. Luckily, as I threaded the needle, it ripped down the center, which thinned it, and I like. It’s a very stiff thread, but I was able to anchor it in the stitching underneath the flower.
The raffia opens up to 1.25 inches wide and is very thin. So, I actually only ripped off 0.25 inches.
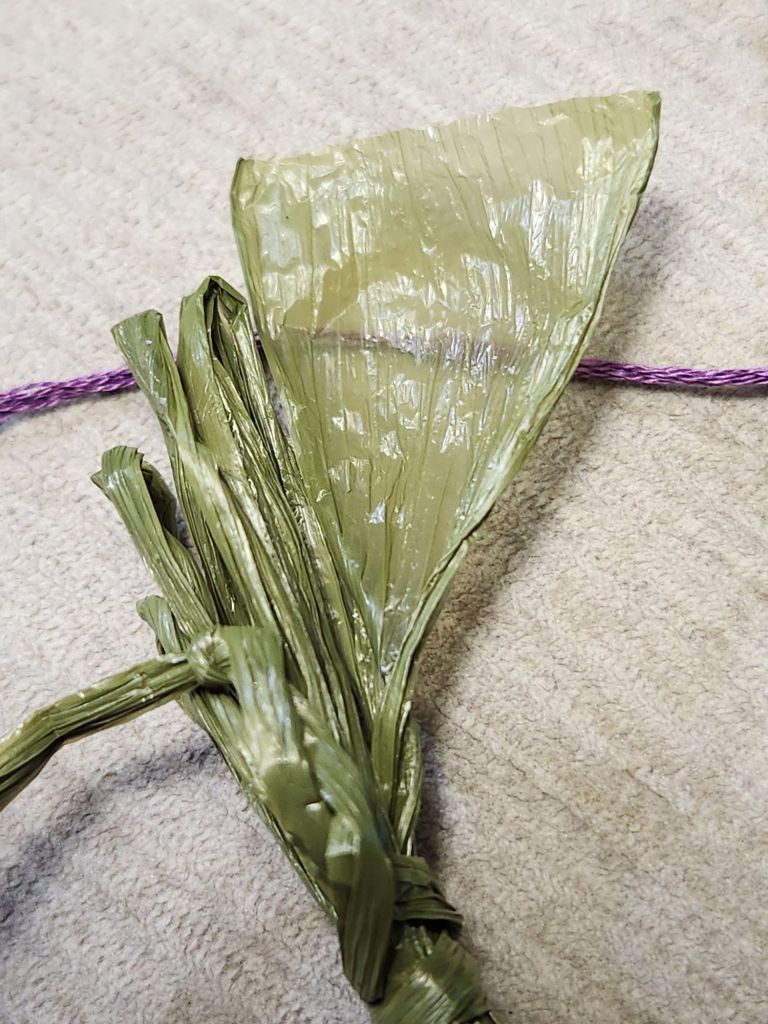
I’ll throw it into my stash, but I can’t say I’ll be seeking out more of it.
In order to get the 15 mm wide ribbon (BE Ribbon-Retro Avocado) threaded for the leaves, I needed an 18 Tapestry needle. I enlarged the hole and still had to work to pull it through (left long ends). I didn’t want to rip the canvas. I only ran it under the yellow Frosty Rays. Then, I did the veins and secured the ends of the ribbon with that thread.
Lastly, I tent stitched the red in the center and covered the gold ends.
We’re letting folks catch up, and the red center flower will be discussed at our November meeting. It’s looking good!
We’re using a stitch guide by Sundance Beads.
Filed under: All That Simmers by Sundance Beads, ANG Main Line Stitchers Chapter
The metallic leaves are reversible, so you could vary the bend in the stems. I stitched through the round ends with 2 strands of invisible Sulky thread and then went through them again.
The yellow Frosty Rays was too thick to go through the round ends more than once or twice. So, the other 2 stitches covered the round ends. They are probably a little bigger than what was painted, but I wanted to see them when viewed from a distance.

For the stamen, I used French Knots (anther) on a Stick (filament) and am relearning flower anatomy in the process!

The inner round ends will get covered by the red flower. I am ready for tonight’s ANG Main Line Stitchers chapter meeting. We’re using a stitch guide by Sundance Beads.
Filed under: All That Simmers by Sundance Beads, ANG Main Line Stitchers Chapter
Last month at our ANG Main Line Stitchers chapter meeting, Kristen asked us to do the center white background next by stitching over the 4 stems and the yellow flowers. She said we’d still be able to see the stems and flowers, and she was correct. Between what we’re able to see through the stitching and a photo of the unstitched canvas, we’ll be able to stitch them later with no trouble.
I covered the edges of the purple flowers because the purple flower embellishments won’t cover the area entirely. We’re using a stitch guide by Sundance Beads.
Filed under: All That Simmers by Sundance Beads, ANG Main Line Stitchers Chapter
Once again, I used my ANG Main Line Stitchers chapter Stitch-in (last month) to work on All That Shimmers. I finished the beads for ribbon 4, which is the green one with orange beads. I’m behind on posting this!
The way the stitch guide is written, the metallic bicone would be anchored into place right on top of a strand of Silk Lame Braid and wobbled unless you pierced a canvas thread and returned through the bicone and pierced into same place. The single beads are right on top of a thread, too. So, I used 2 strands, stitched a 2×1 stitch catching a bead, came back up, and lassoed the bead (place strands around each side of the bead and under the bead). So, no wobbling at all.
Ribbon 3 is the orange one with magenta beads. I shifted the squares to create a symmetrical arrangement. Top is how the stitch guide had it. My diagram and my stitched piece is pictured below.

You can see now the color of the beads used in one ribbon are adjacent to the color of a ribbon of the same color. It adds interest in my opinion.
Filed under: All That Simmers by Sundance Beads, ANG Main Line Stitchers Chapter
I had the stitching all done prior to our Stitch-in yesterday. I manipulated the overdyed so that the dark areas fell on the outer edge and the light portion of ThreadworX 1006 appeared in the full diamonds to emphasize the diamond motifs in Ribbon 2.
With a little push, the Silver Square (MA006) metallic accent fit perfectly into the bed of beads, which was then anchored into place with another bead. I used 2 strands of beading thread. Believe it or not, that’s the beading needle laying in the yellow area looking mangled! It started out straight.

I would have gotten it done during our Stitch-in, but since we were at Fireside Stitchery, I spent some time buzzing around the threads for my butterfly. I found some good ones, but that is for another post.
Filed under: All That Simmers by Sundance Beads, ANG Main Line Stitchers Chapter
Kristen, from ANG Main Line Stitchers chapter, is leading All That Shimmers using the stitch guide by Sundance Beads. We got a discount ordering for a group through The West in Arizona. The kits came with the beads and ribbons, not the threads. Kristen stitched this in advance of the chapter.
It’s not a large piece at 7″ x 5″. Sundance shows it displayed as a 5×7, but I think the balance of stitches will be better displayed as 7×5. We’ll see.
I didn’t take a photo of all the stuff (threads, beads, metallic accents, raffia, and ribbons) that goes on the canvas prior to getting started, and I didn’t get a photo prior to stitching the borders! I was delayed because I switched to all Kreinik #12 Braid thanks to my stash and Linda’s!
You may notice that I’m working in the well, as Kristen suggested, because there’s only about an inch and a quarter around the design. That makes ending threads too difficult.
I’m only going to share photos of the fun beads and metallic accents as I use them, which is why we selected this project.
For Ribbon 1, we use Size 11 beads and MA005 Gold Coil.

I rediagrammed the pattern for the overdyed blue and ecru threads by shifting it slightly because I didn’t like where the metallic accents fell. It is now symmetrical, and that makes me happy!
Then, I also revised the suggested stitch surrounding the bead from a 3×4 rectangle to a hexagon that nicely nestles the metallic accent. Rather than using a Silk Lame Braid as called for, I’m using a Kreinik Braid #8 that matches the color Kreinik used in the border.

To aid centering the accent in the hexagon, I went down into the adjacent hole from where I came up. I used a doubled length of Sulky Invisible thread that started out with 2,200 yards. I doubt I’m below 2,000 yards yet – a lifetime supply!

Appropriately, I finished Ribbon 1 at today’s ANG Main Line Stitchers chapter Stitch-in.
