Filed under: ANG Main Line Stitchers Chapter, Razzle Dazzle by Ann Strite-Kurz
If you work with Watercolours often enough, you should come to realize that when you unwind the skein, the color flow can look different than how it is packaged. I shouldn’t have been but was surprised to see one span of light teal portion and the rest was all the blue. So, I found the repeating pattern of color and cut a long enough length to move from light teal in the center moving towards blue for the outer edges. Very pretty. But, I didn’t realize the full impact of the Watercolours until I went to pull threads for Area 2 of Razzle Dazzle by Ann Strite-Kurz.
Initially, I picked up Petite Very Velvet (V660, a blue) but based on Ann’s color scheme it should be the teal color. So, I selected V662 Green Aqua at our ANG Main Line Stitchers May Monday meeting. I was thinking of staying with silk but there isn’t the correct blue in Grandeur (a silk #5 pearl). So, I went home to regroup. In my stash there was a full skein of DMC #5 Pearl 517, a blue cotton. That’s when I realized that the Watercolours caused the first four petals to be more blue than teal and I need to make the diagonal petals more teal. I had inadvertently inverted (partially) the colorway. So, back to my stash and into the teal drawer. What should appear but a lovely spool of Trebizond, a silk, in a lovely aquamarine (TRA701). I only had the one spool until stopping at Nimble Needle in NJ for another 2 spools. Problems solved!
One of Ann’s comments after giving us guidance on selecting colors for her design is, “Beyond this, anything goes, so have fun playing with threads.” That part is easy! In studying various versions of the design I’ve seen online, they can and do vary. So, as long the colors look good together, it should be fine. In a recent email with her, Ann said she believes a dark canvas is better because it creates a negative space better than the lighter canvas colors. I can see that as well but working on the darker colors is tougher on my eyes and I will not stitch a third colorway.
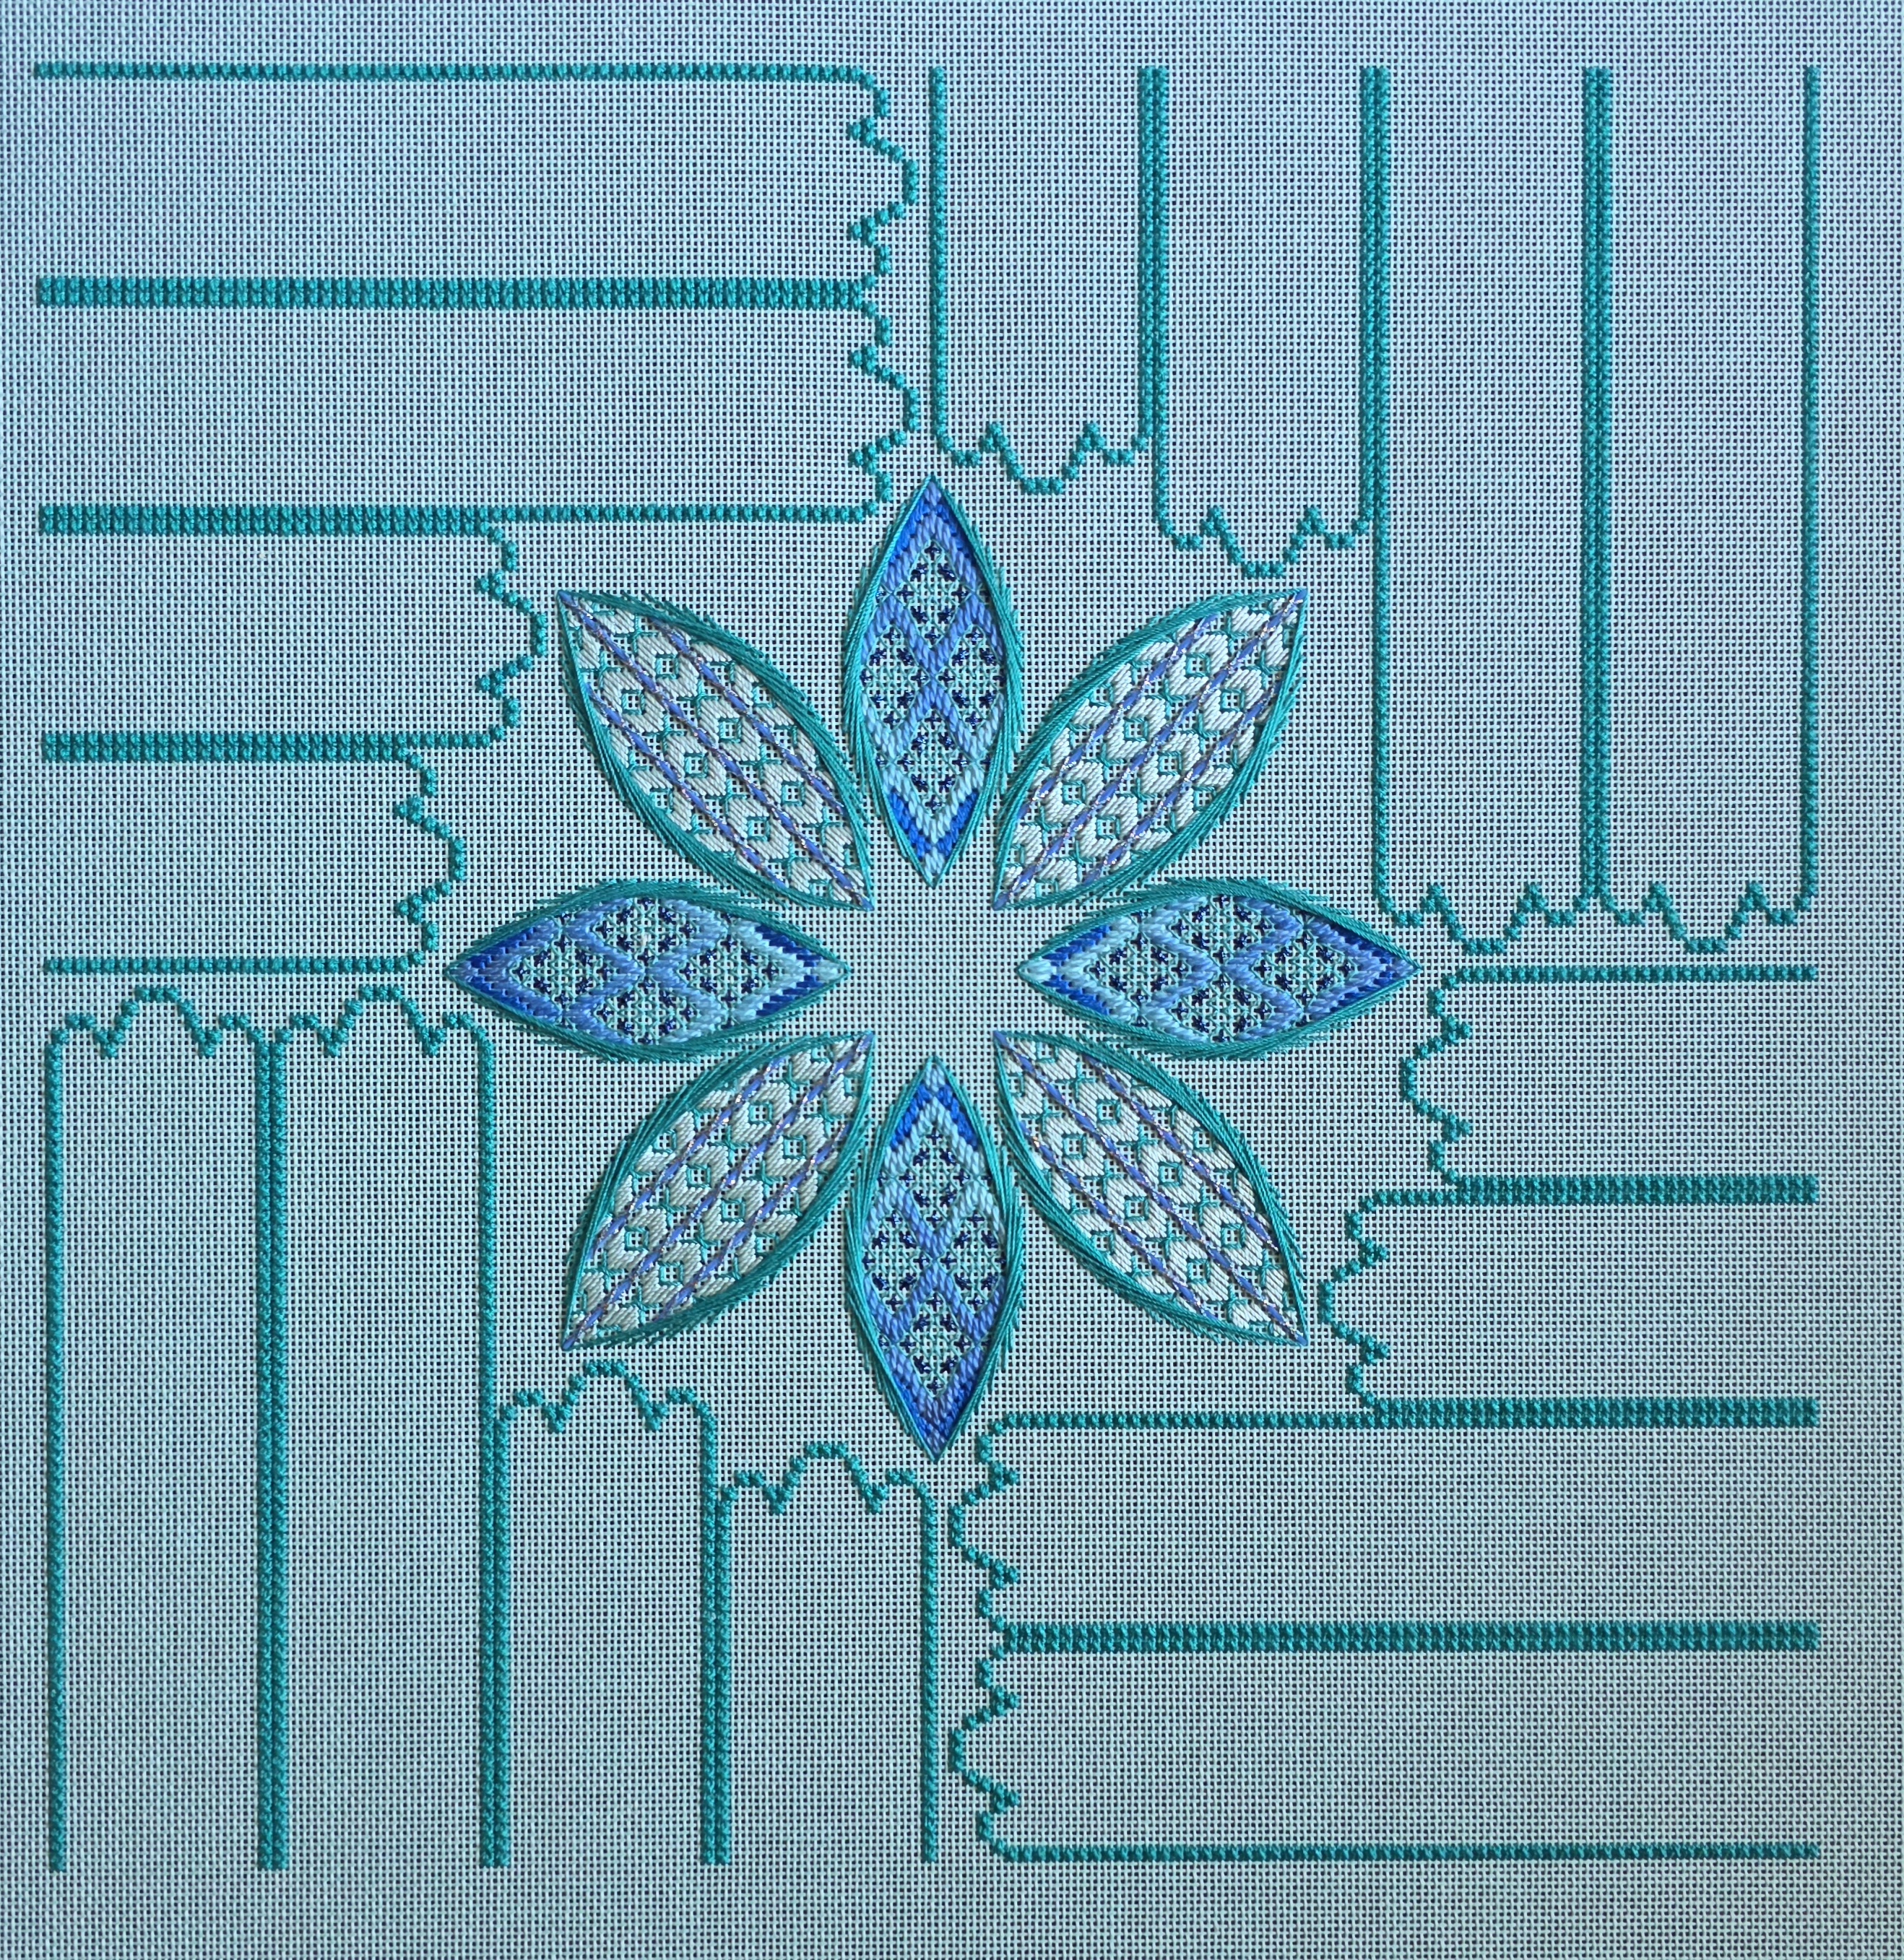
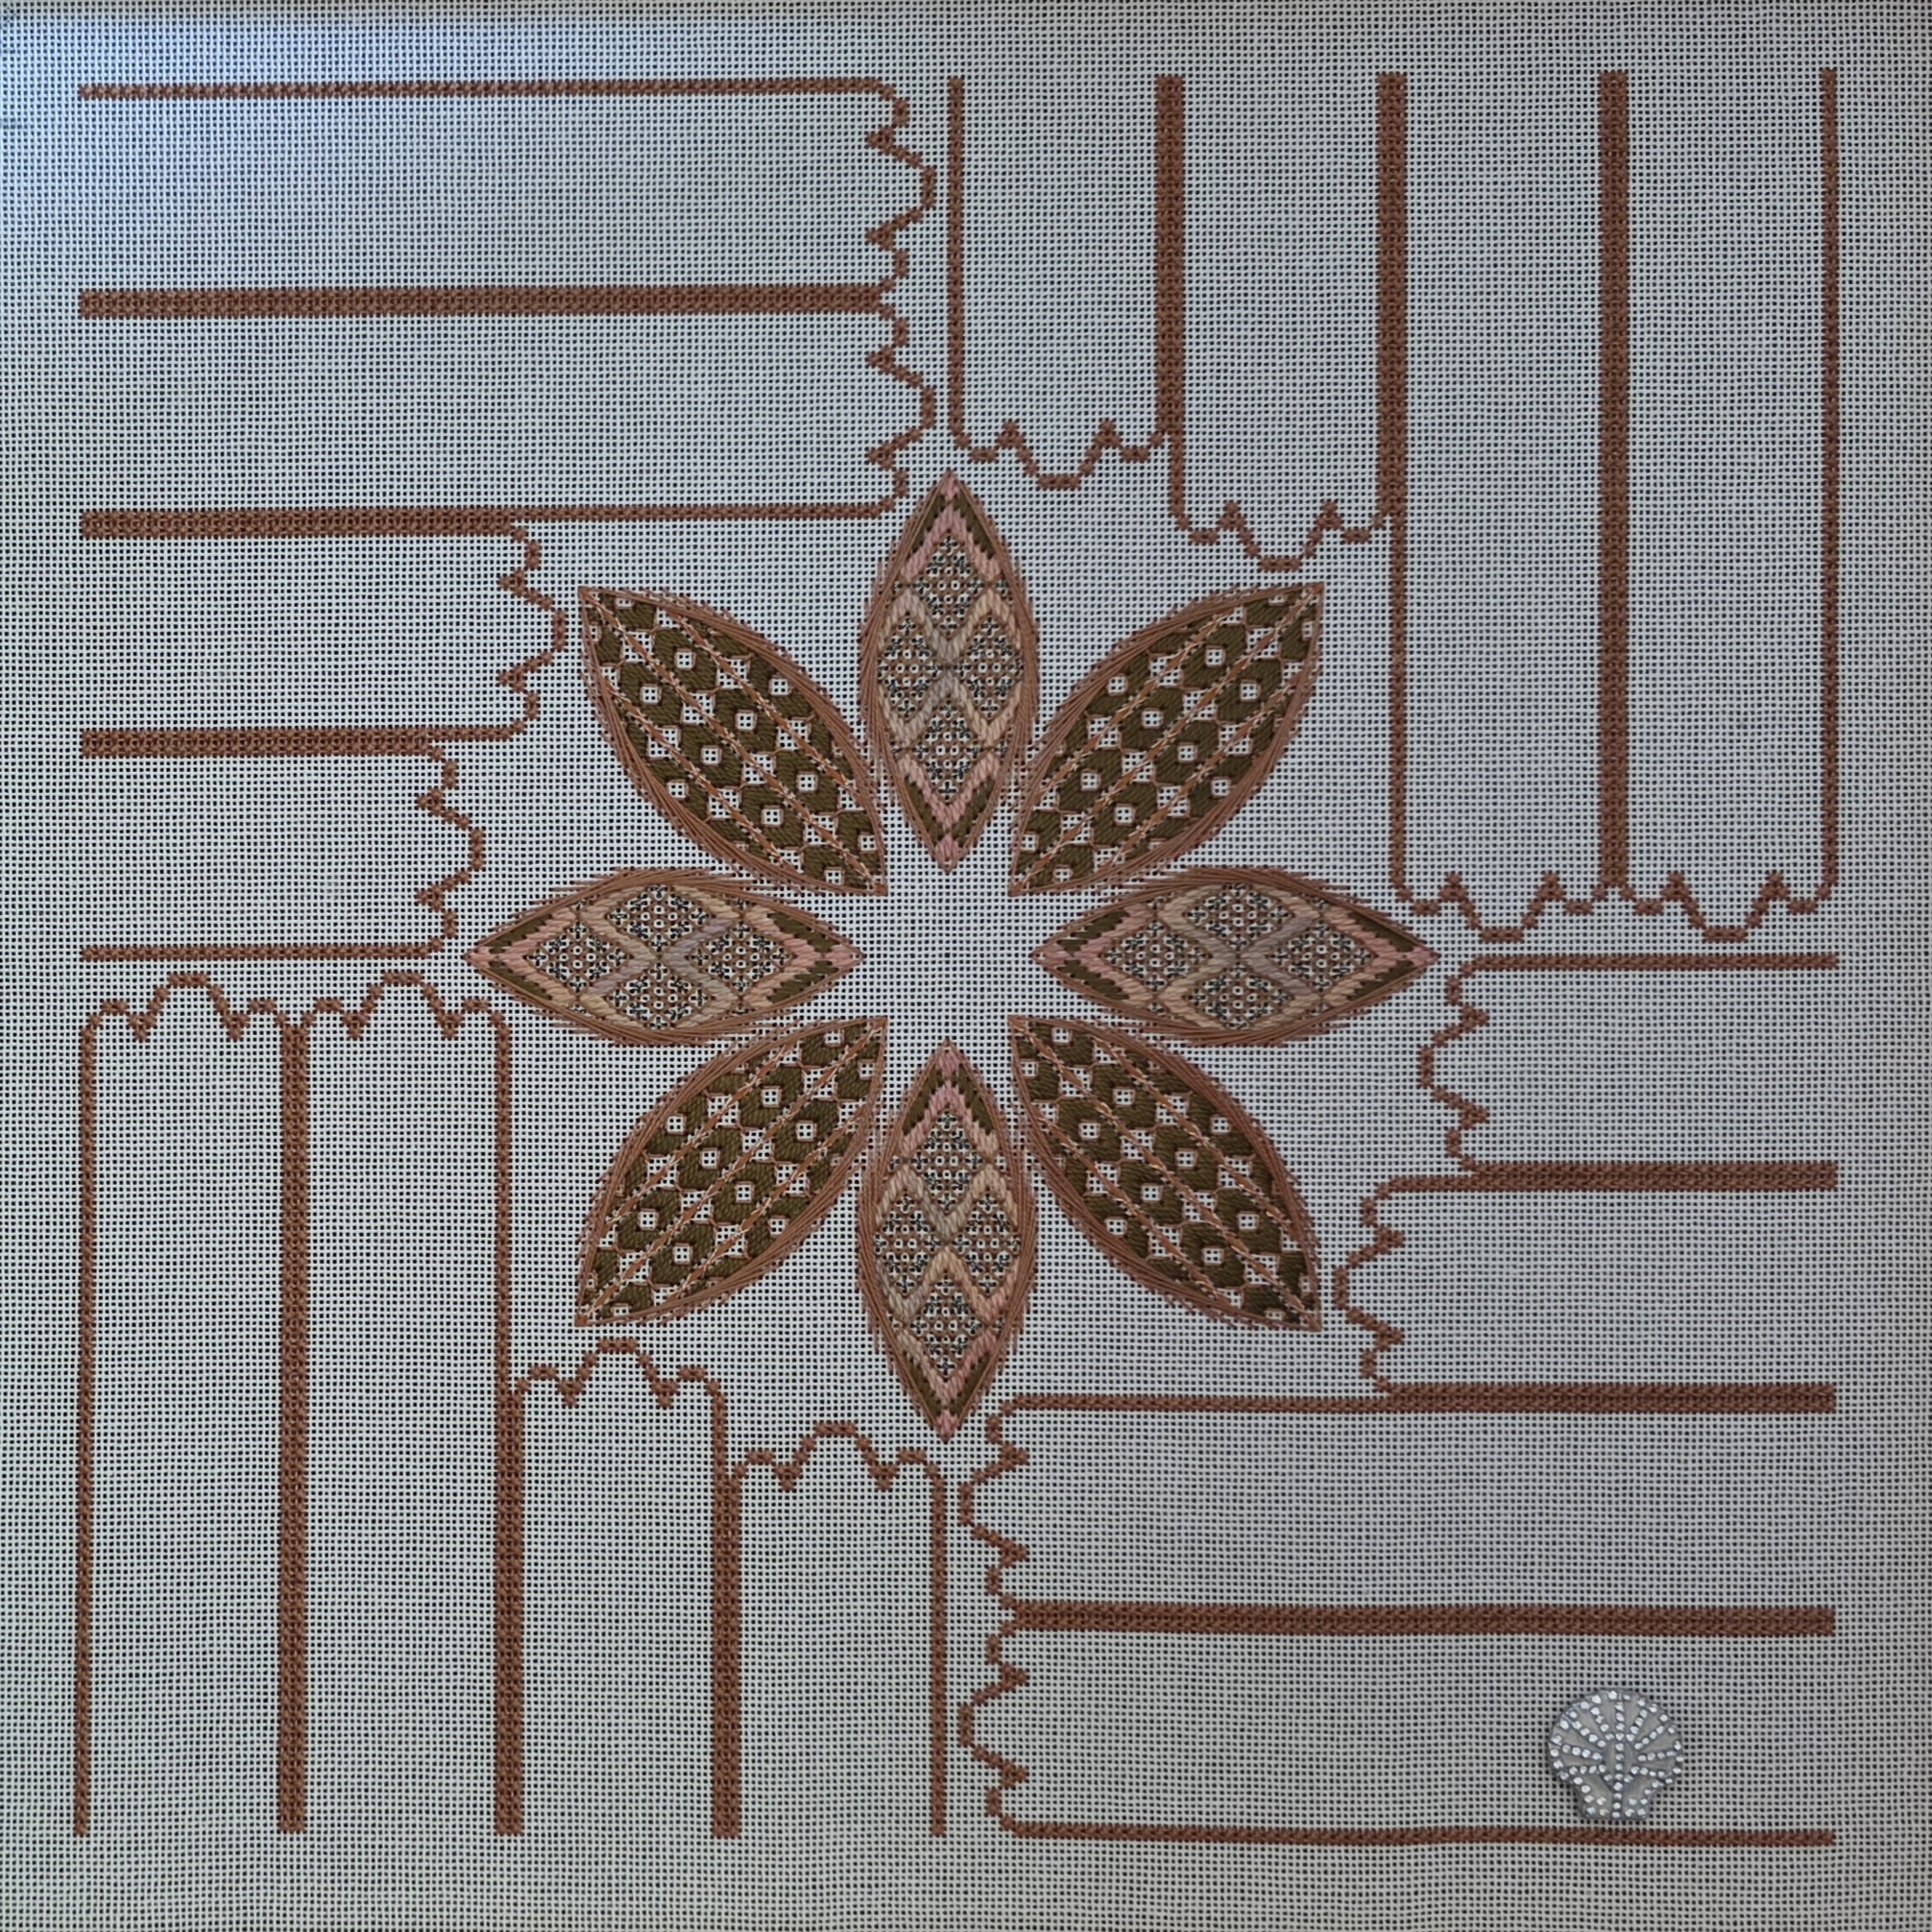
I did go back to do the Autumnal colorway and as you can see the diagonal ovals are stitched in an overall darker value than you see in the diagonal ovals of the Aquamarine colorway. Ann is correct in that it is fun to see these develop.
Next up (at tomorrow night’s June meeting) will be filling in the center and tips around the ovals. While that will be pretty, I am really looking forward to getting to the ribbons and I have enough thread to go in whatever direction moves me.
Filed under: ANG Main Line Stitchers Chapter, Razzle Dazzle by Ann Strite-Kurz
The four center areas in Razzle Dazzle by Ann Strite-Kurz, Ribbon Borders are done. Nothing too difficult because she charted the blackwork. Except for the side trips on the sides, it never felt intuitive. I guess that’s something!
Ready for the next area. Or am I? The colorway isn’t popping for me. What is a stitcher to do!?!
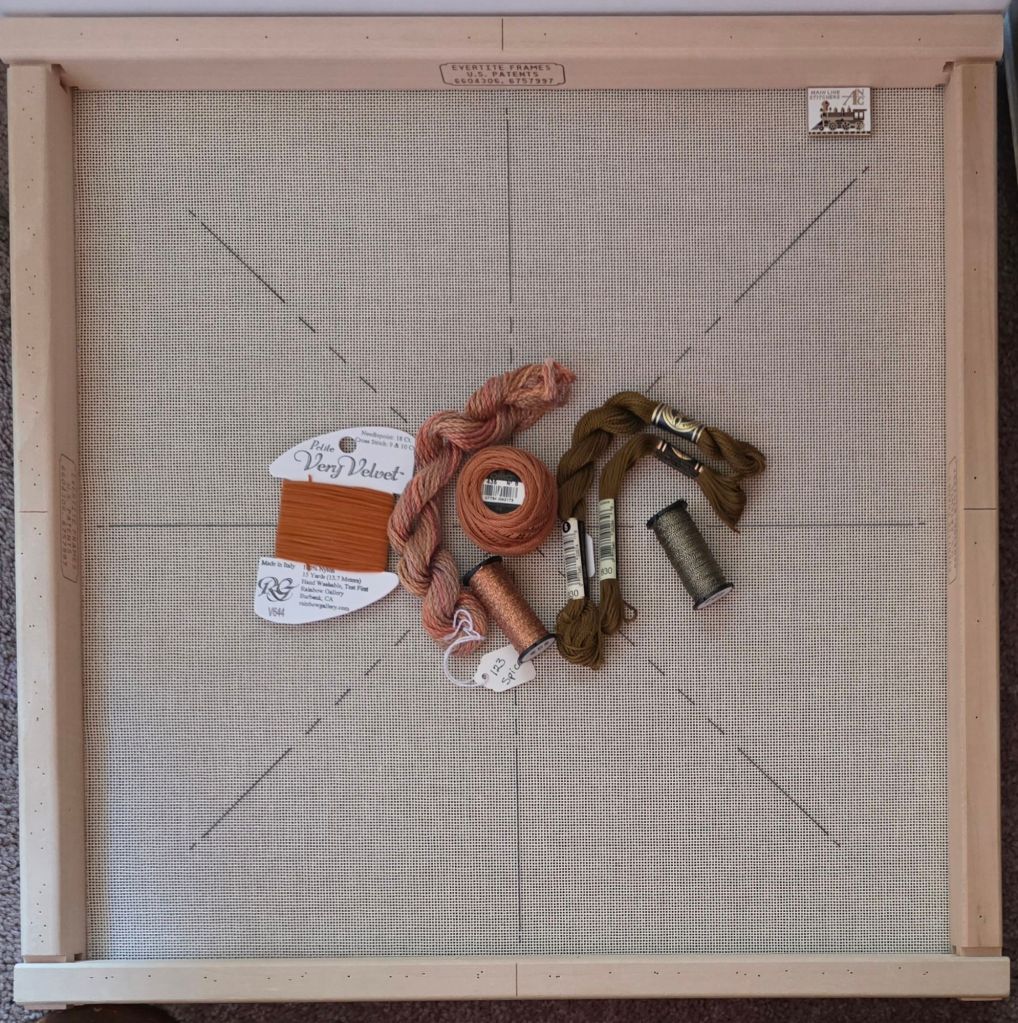
I had recently found 2 pairs of 21″ bars in the basement. Thinking I might switch to another colorway and that I could shop for it at the last EGA Stitch-in at Fireside, I calculated how many cards of Elegance (a silk pearl #8) I would need in place of 2 balls of DMC Pearl cotton #8 (since Fireside doesn’t carry it). It turned out to be 9 cards but I thought it might be brighter and I wanted as much pop as I could get (so, worth the extra cost). Fireside’s website had indicated they didn’t have any colored 18 count canvas left. So, I didn’t think I’d be shopping for a new colorway and didn’t bring the instructions. However, when I arrived, they did have the aquamarine canvas that I wanted. So, I found Watercolours 068 Mediterranean that looked great with the canvas. There was a fantastic color available in Elegance E880 Teal and I found 2 colors of Kreinik #8 Braid (033 and 044). I couldn’t remember what other threads I needed except for Petite Very Velvet. More about that next time.
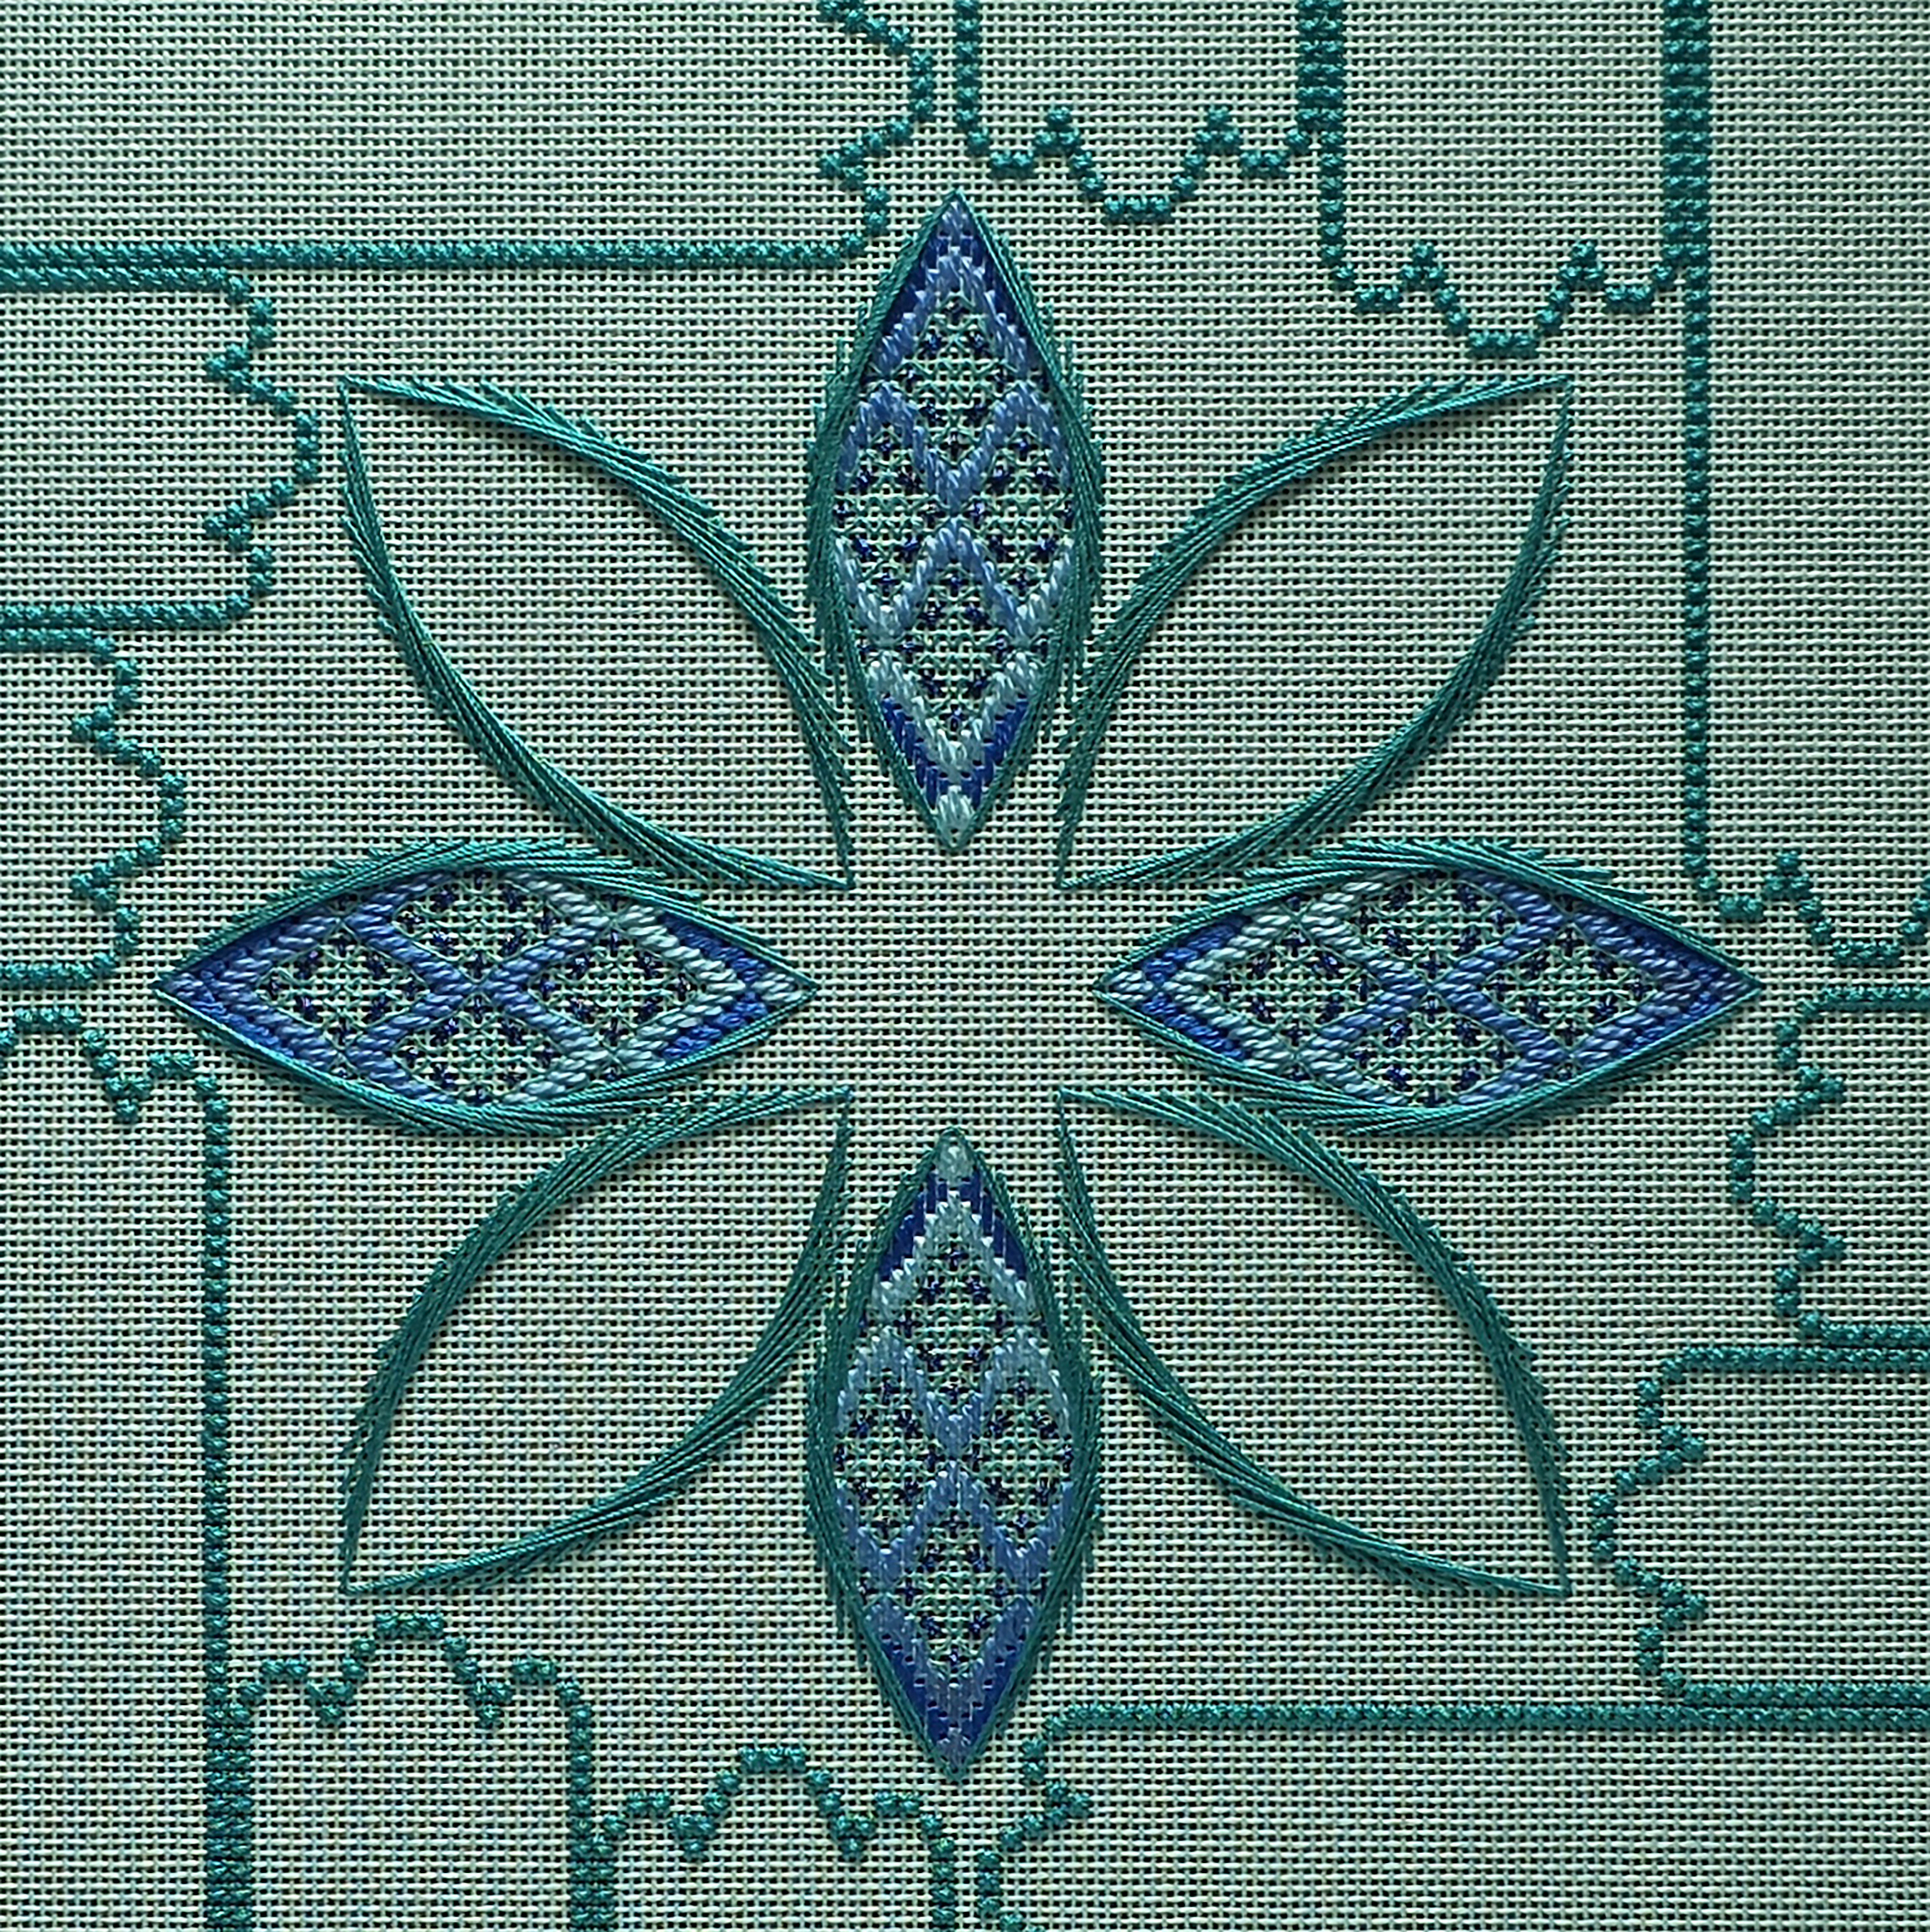
It was much easier stitching this the second time around. It took 10 days to get this done and I worked on 2 other projects to break up working on all those Smyrnas! I still needed to look at the blackwork diagram frequently. I’m very happy with this one. And I will continue with both colorways for now.
Filed under: ANG Main Line Stitchers Chapter, Razzle Dazzle by Ann Strite-Kurz
Thanks to the Masters weekend (golf), there was lots of time to stitch and it made the Smyrnas easier to get through.
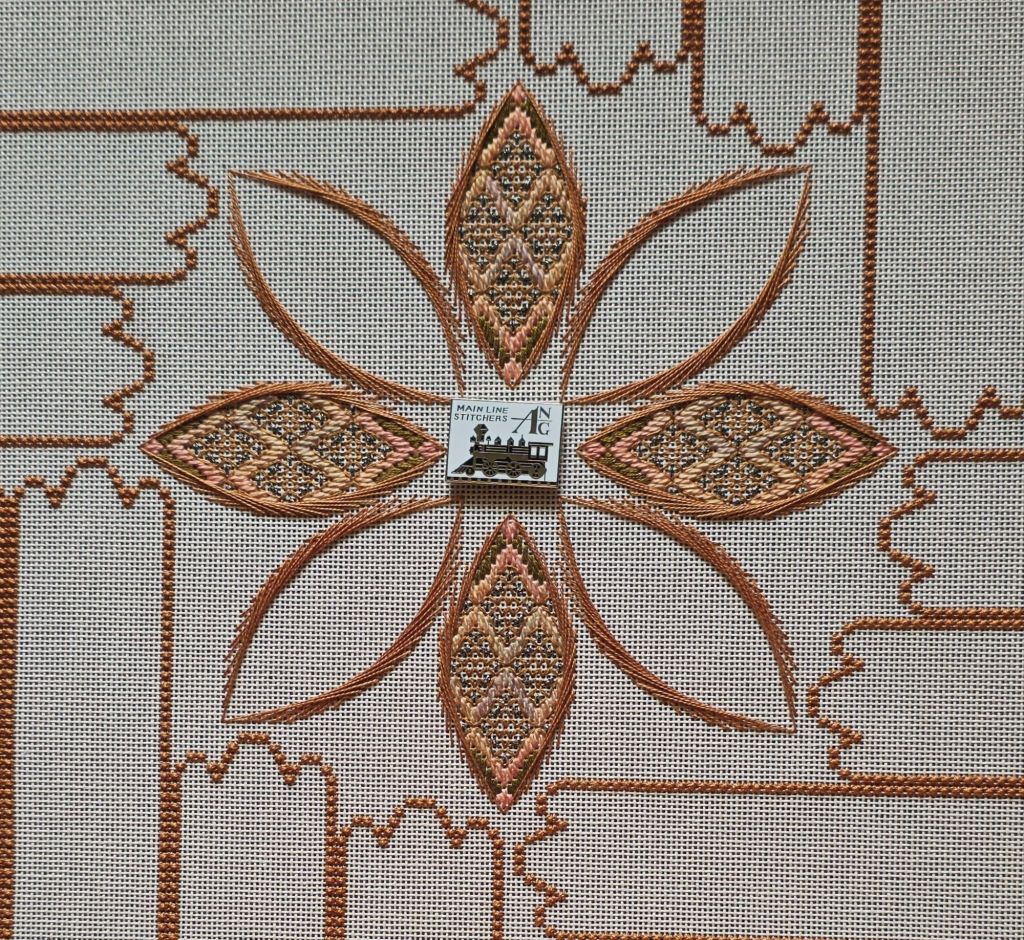
All ready for the next area. Linda M from Main Line Stitchers has finished hers ahead of us in order to walk us through the project over the next few months. The upright interior portion of the center area is the topic of tonight’s meeting along with progress 6 members have made on Songbirds, a painted canvas (each is different). Of course, we’ll have Show & Tell.
Filed under: ANG Main Line Stitchers Chapter, Razzle Dazzle by Ann Strite-Kurz
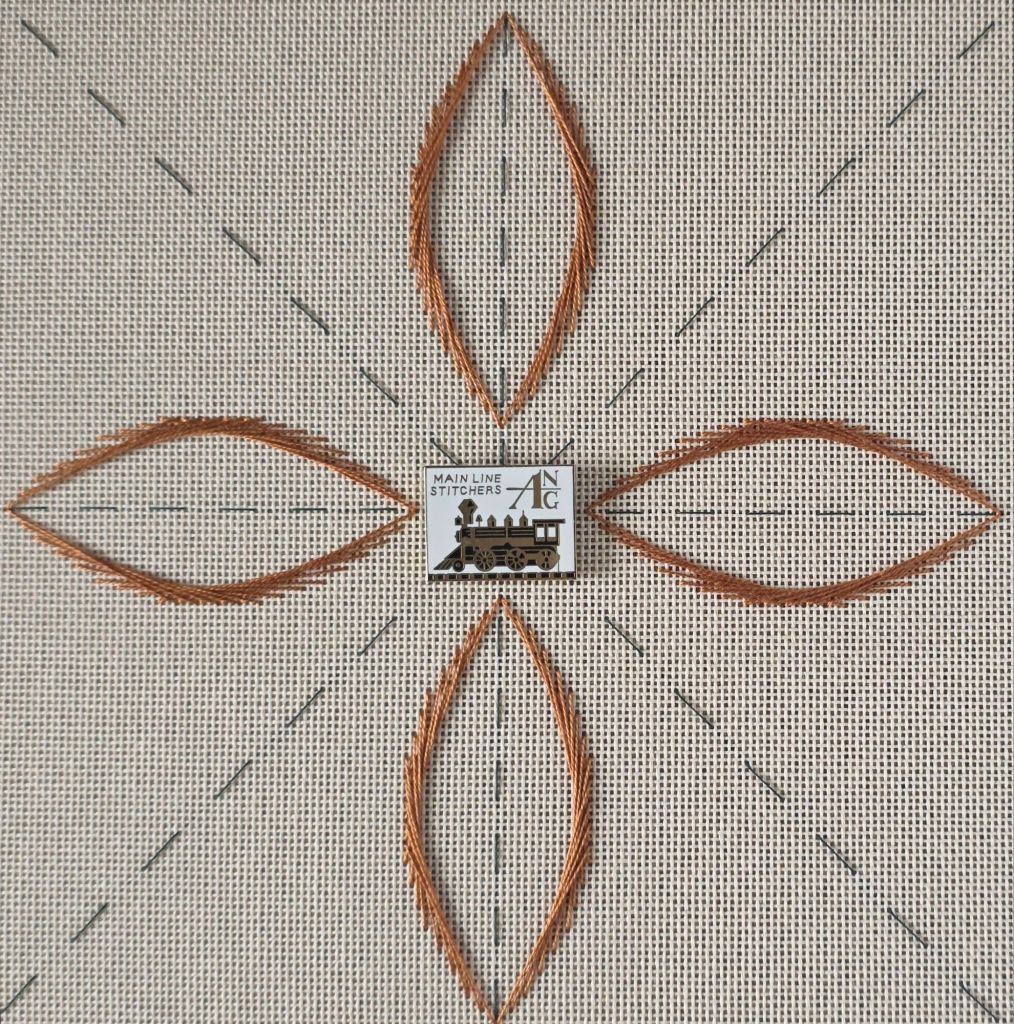
In the ribbon borders of Razzle Dazzle by Ann Strite-Kurz, there are 277 Smyrnas in each of 4 quadrants for a total of 1,108. So, here is the first quadrant done.
The tops edges requires some thought but the rows do not. So, I’ll have to break it up by other projects because it is too monotonous once you get to the straight rows. Hopefully, these will be done in advance of our April Monday meeting with ANG Main Line Stitchers on the 13th.
Filed under: ANG Main Line Stitchers Chapter, Razzle Dazzle by Ann Strite-Kurz
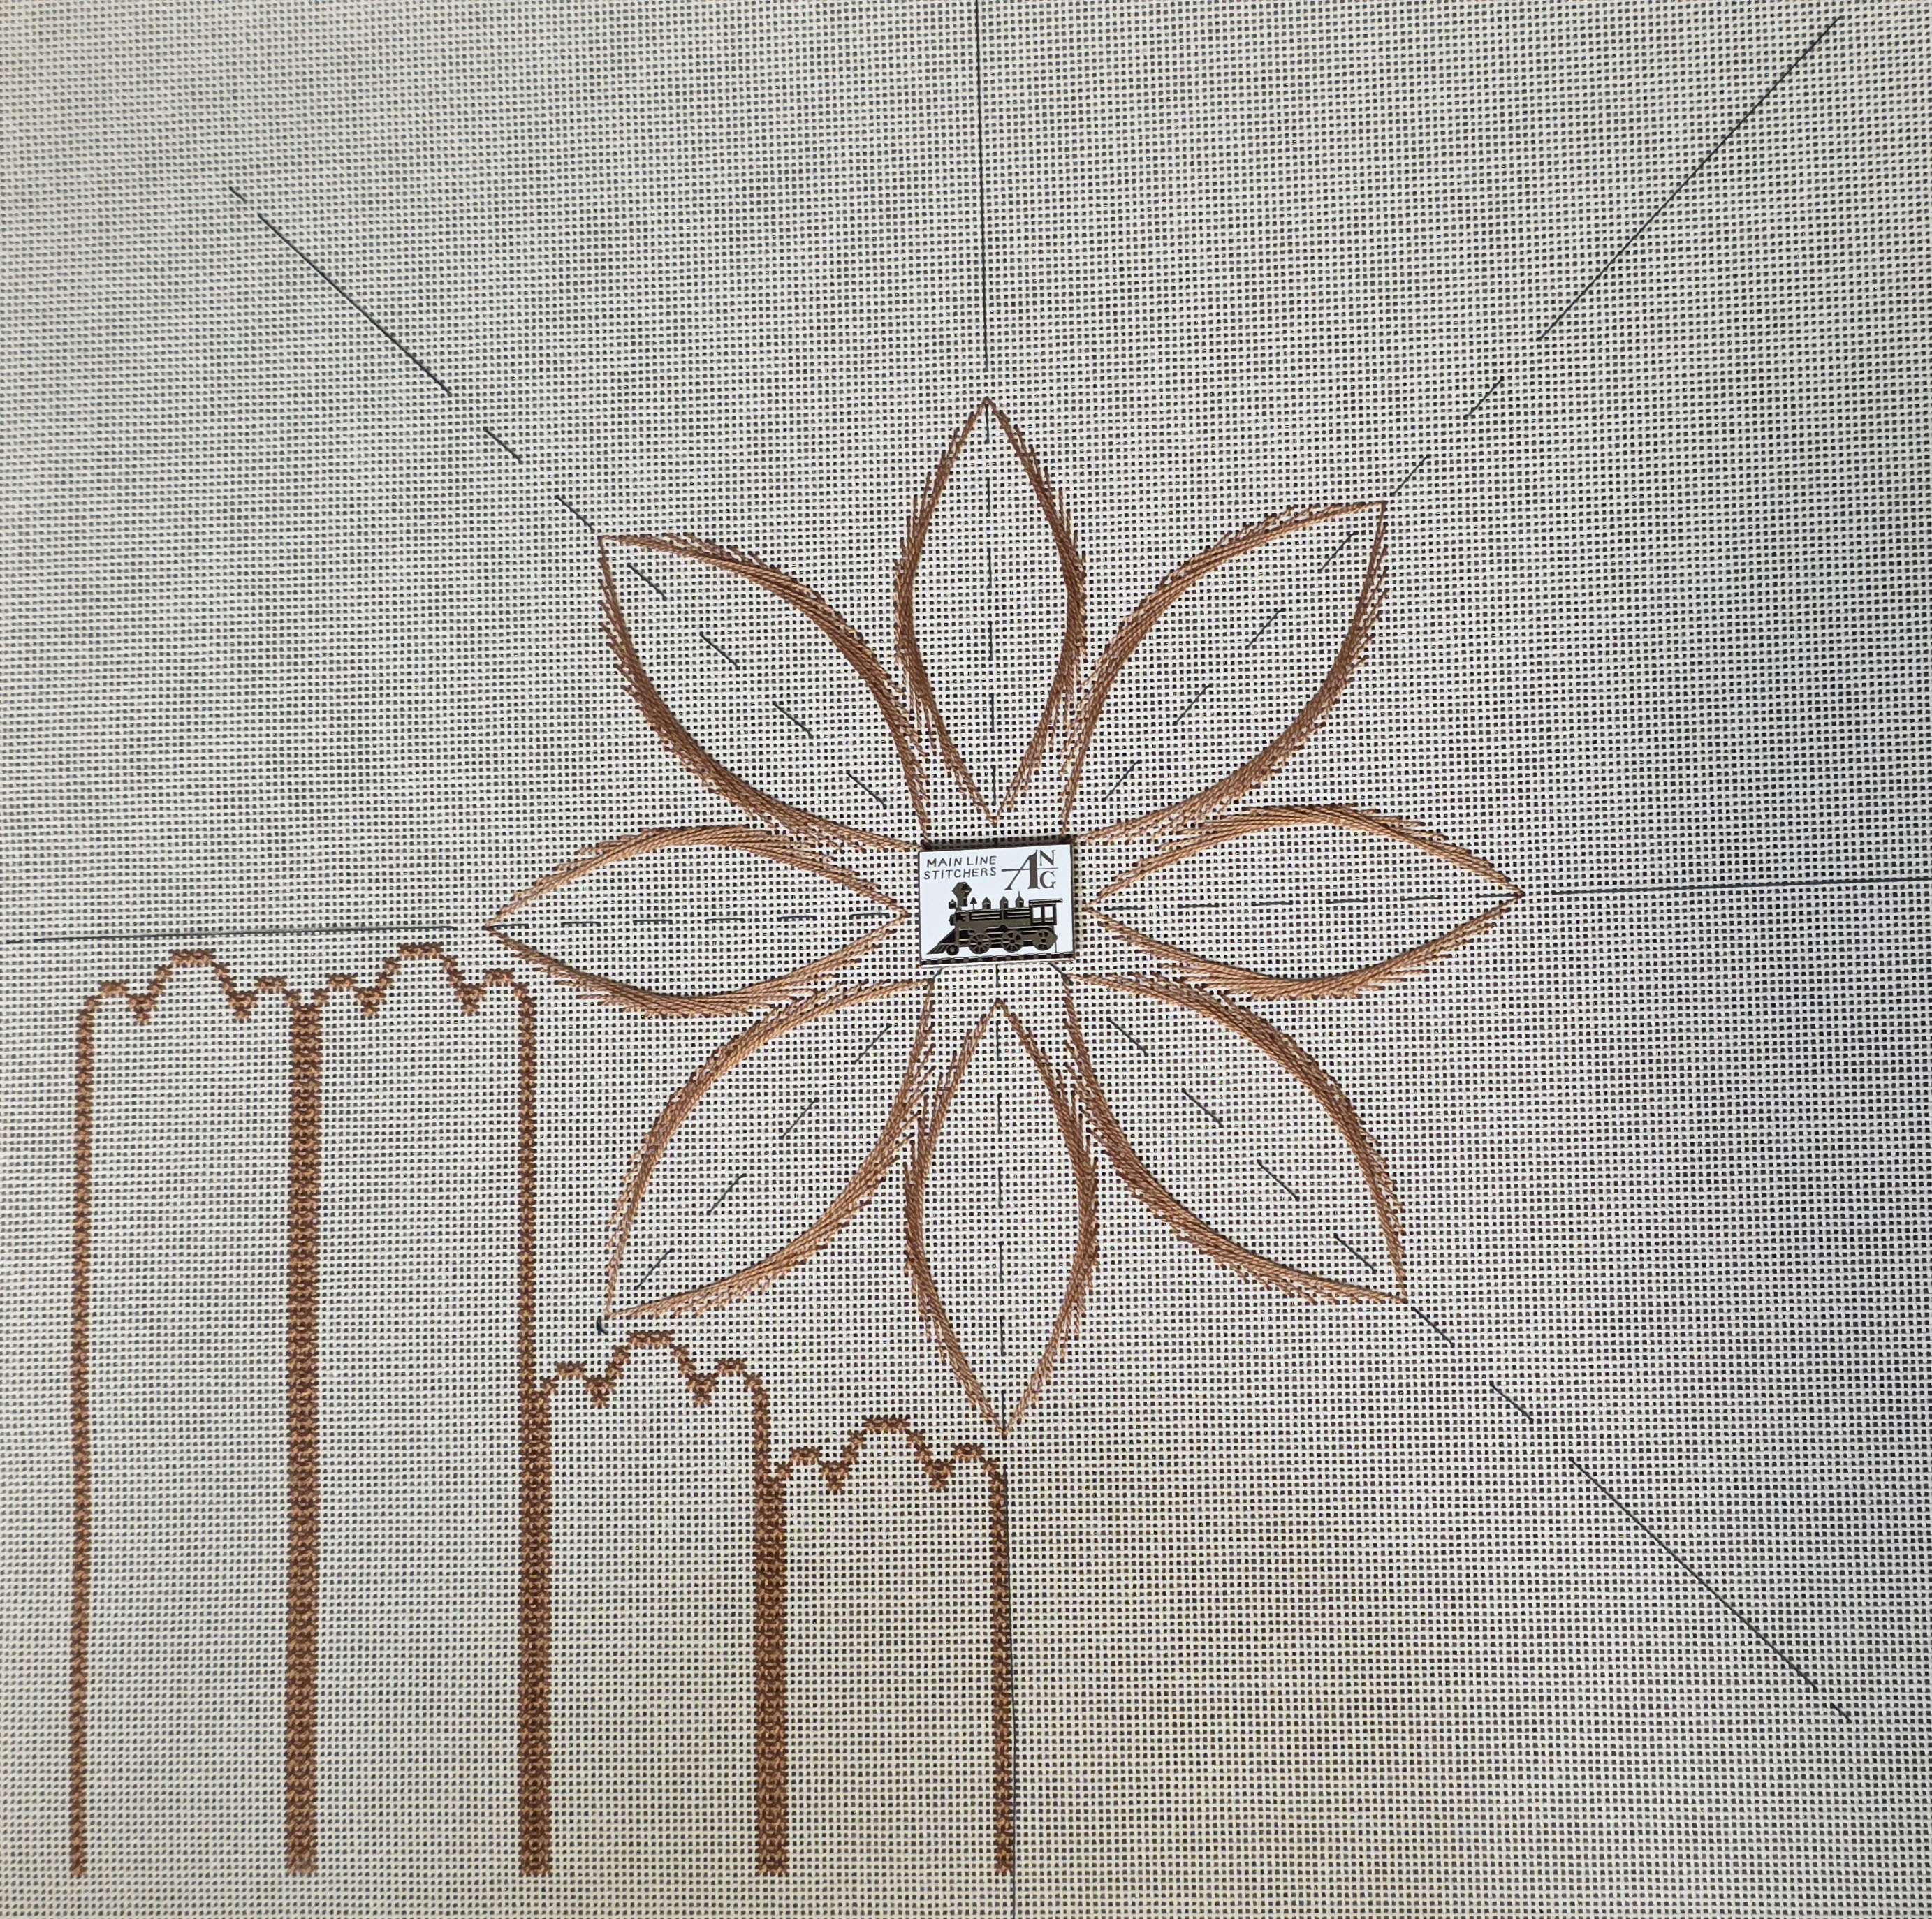
With careful counting and checking the location of stitches compared to other reference points, I made it through without too much undoing. You know quickly when the count is off. Having the basting lines were very helpful too.
The first one took the longest and then by the third one, muscle memory (yes, I still have some) kicked in and they got easier and quicker. Not that I hurried because getting these correct is key to further success.
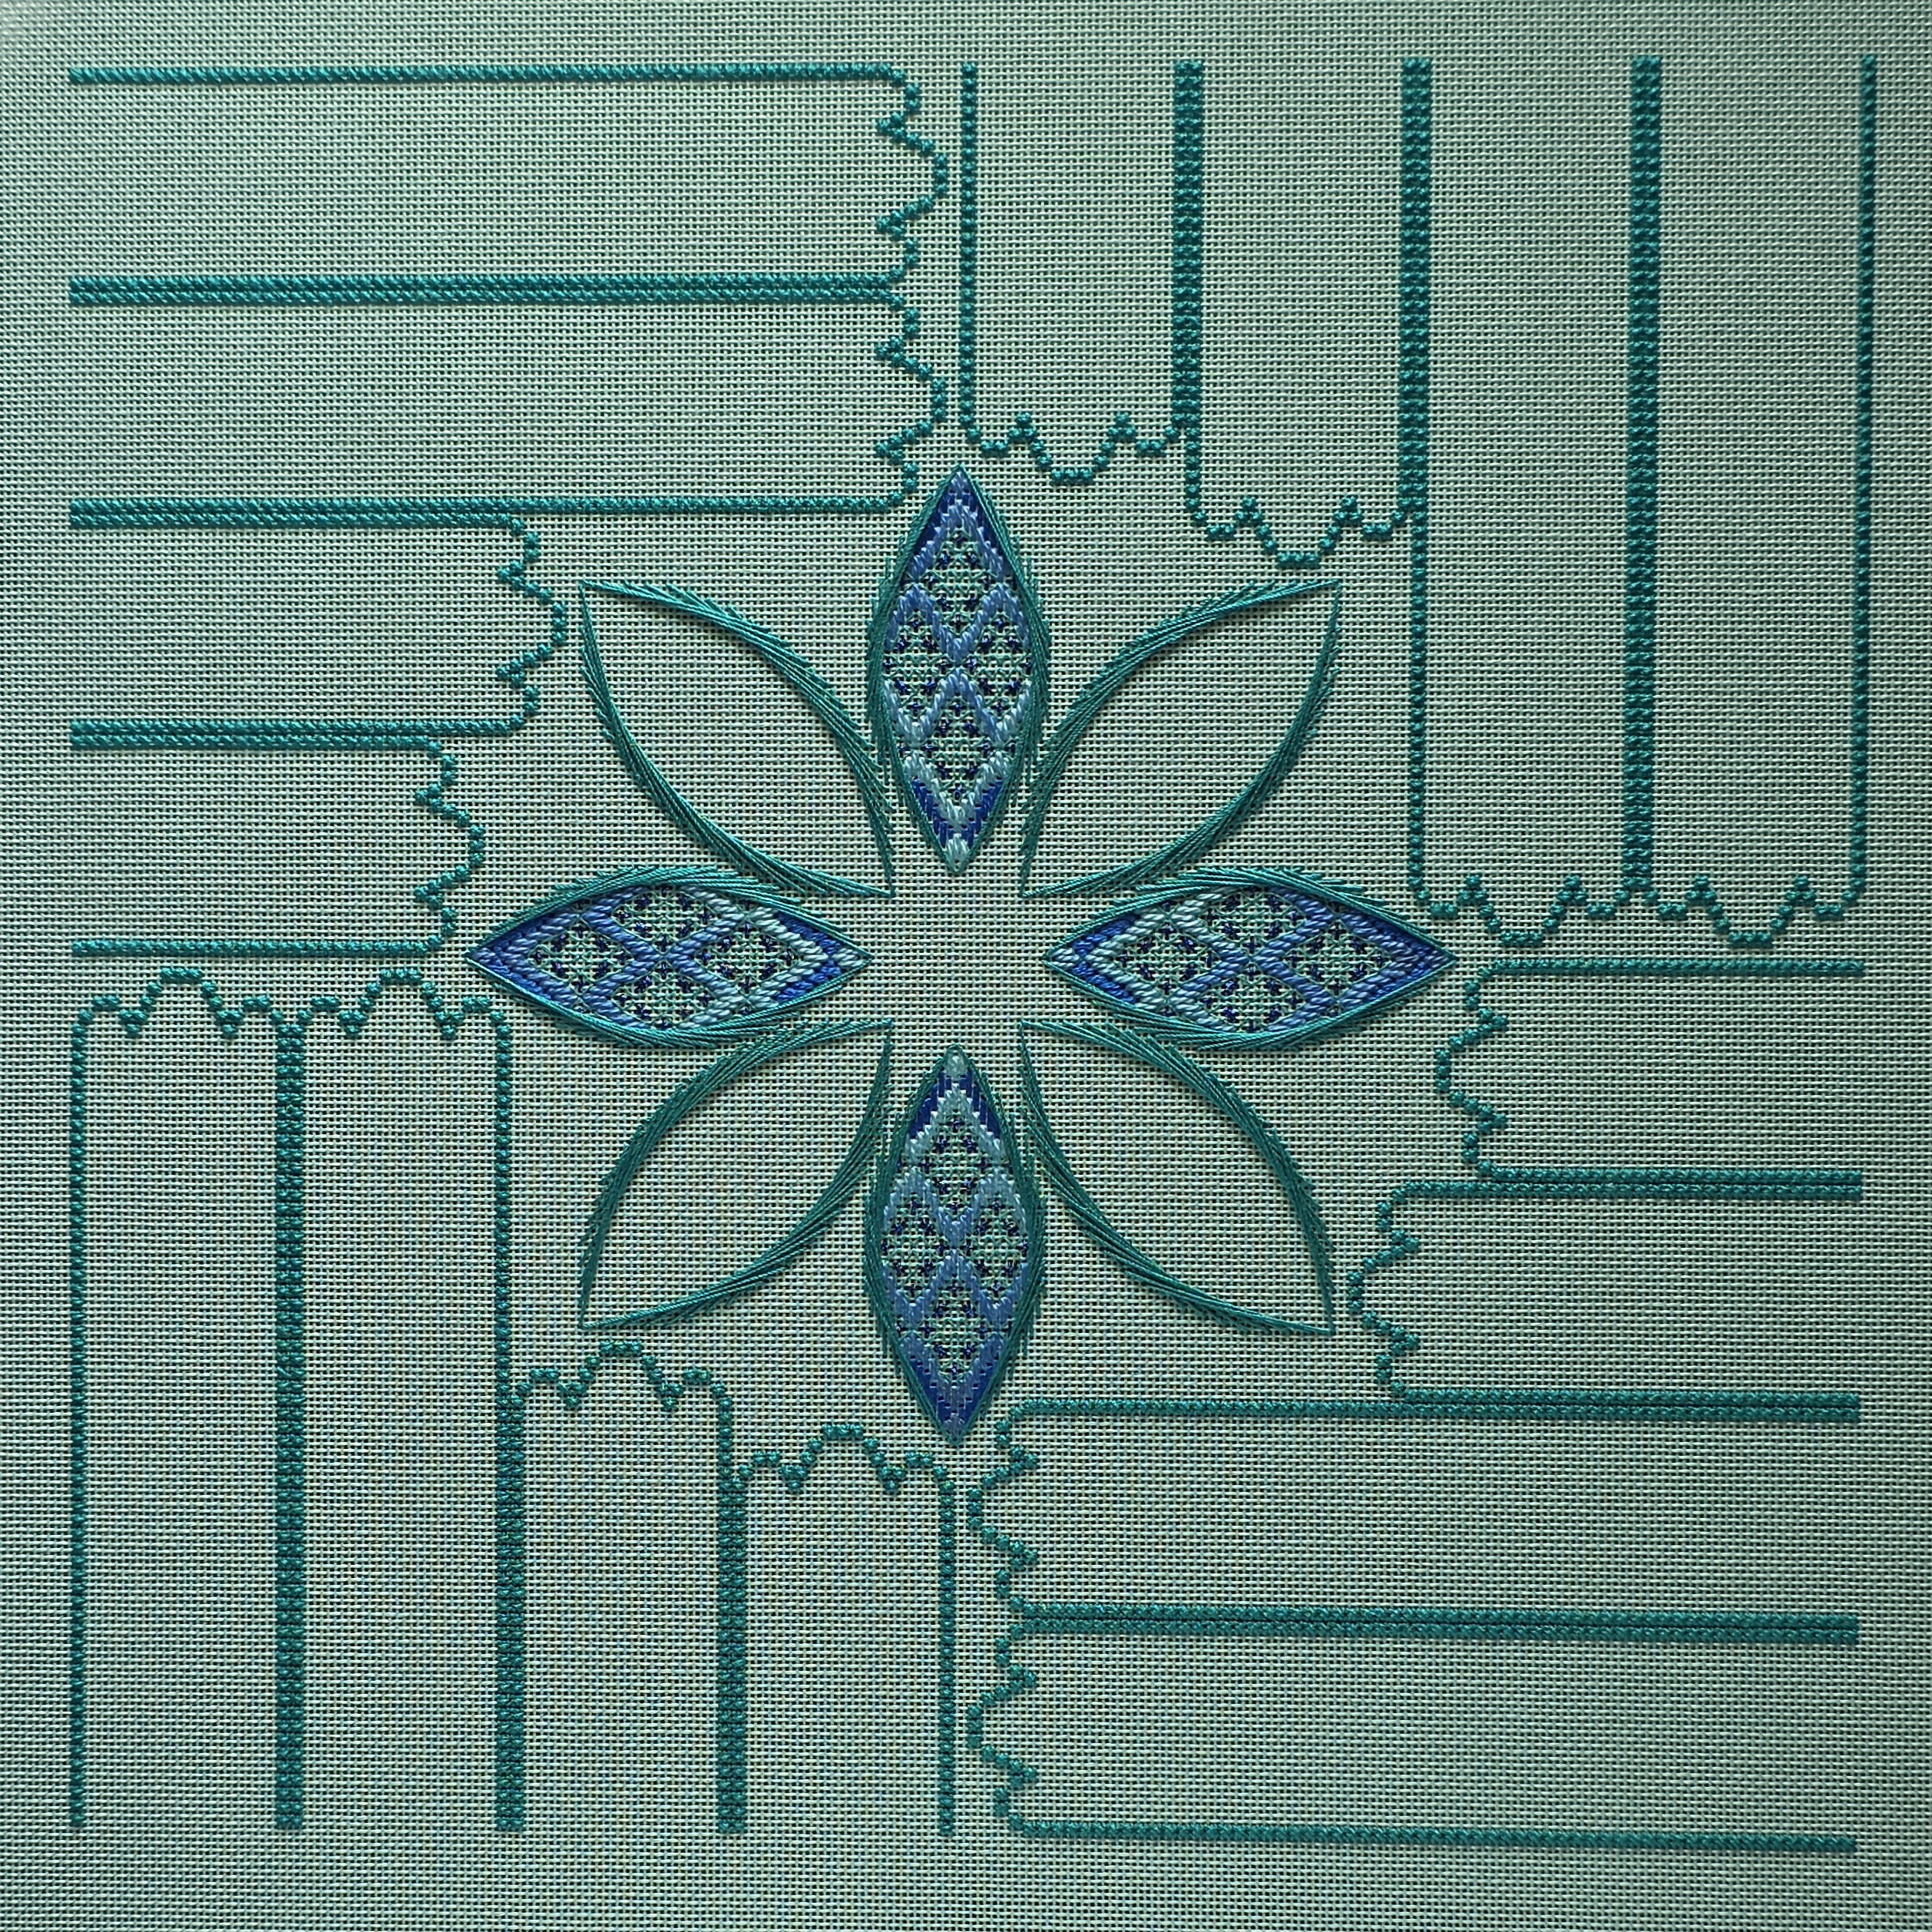
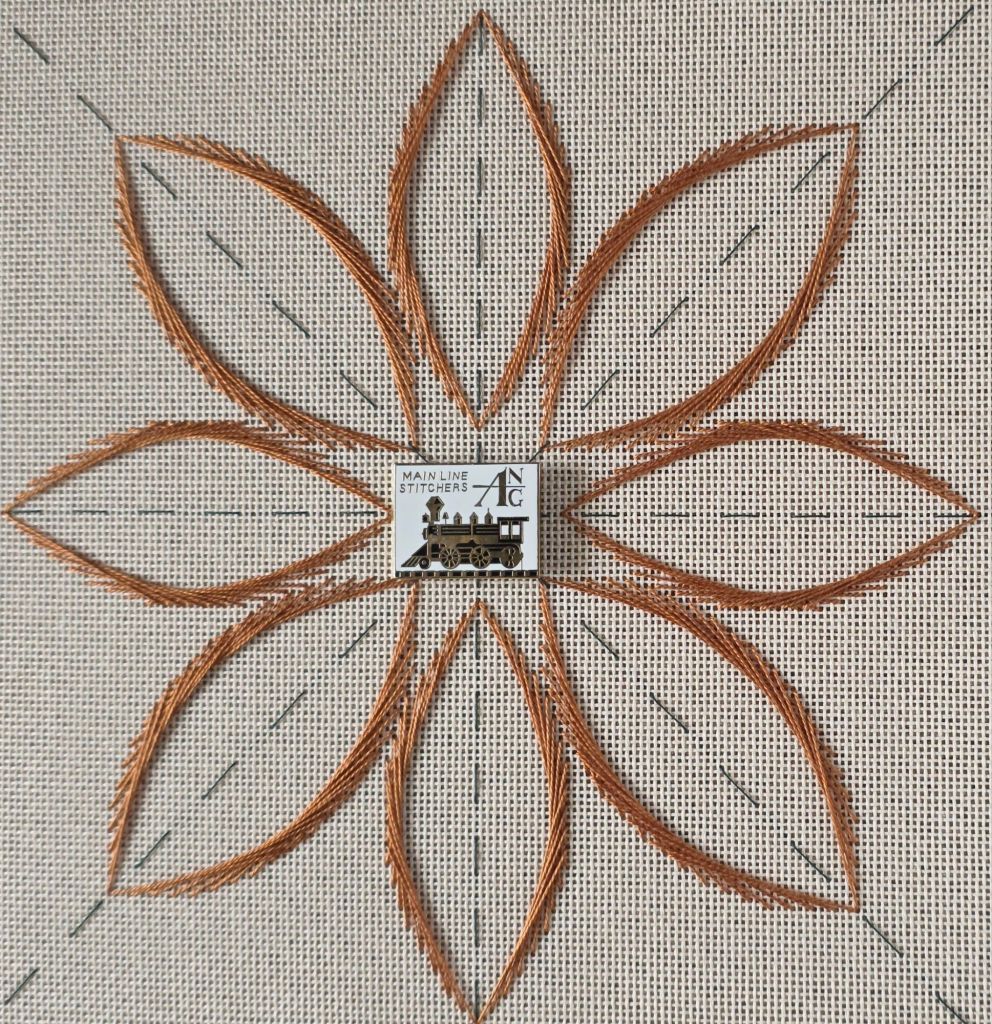
The diagonal ones seemed even easier. Here are the completed outlines forming the center Rosette.
I worked out where to use pin stitches to start and end the threads (inside of where the first stitch goes down through the canvas).
Hopefully, other ANG Main Line Stitchers Chapter members are making out as well.
Filed under: ANG Main Line Stitchers Chapter, Razzle Dazzle by Ann Strite-Kurz
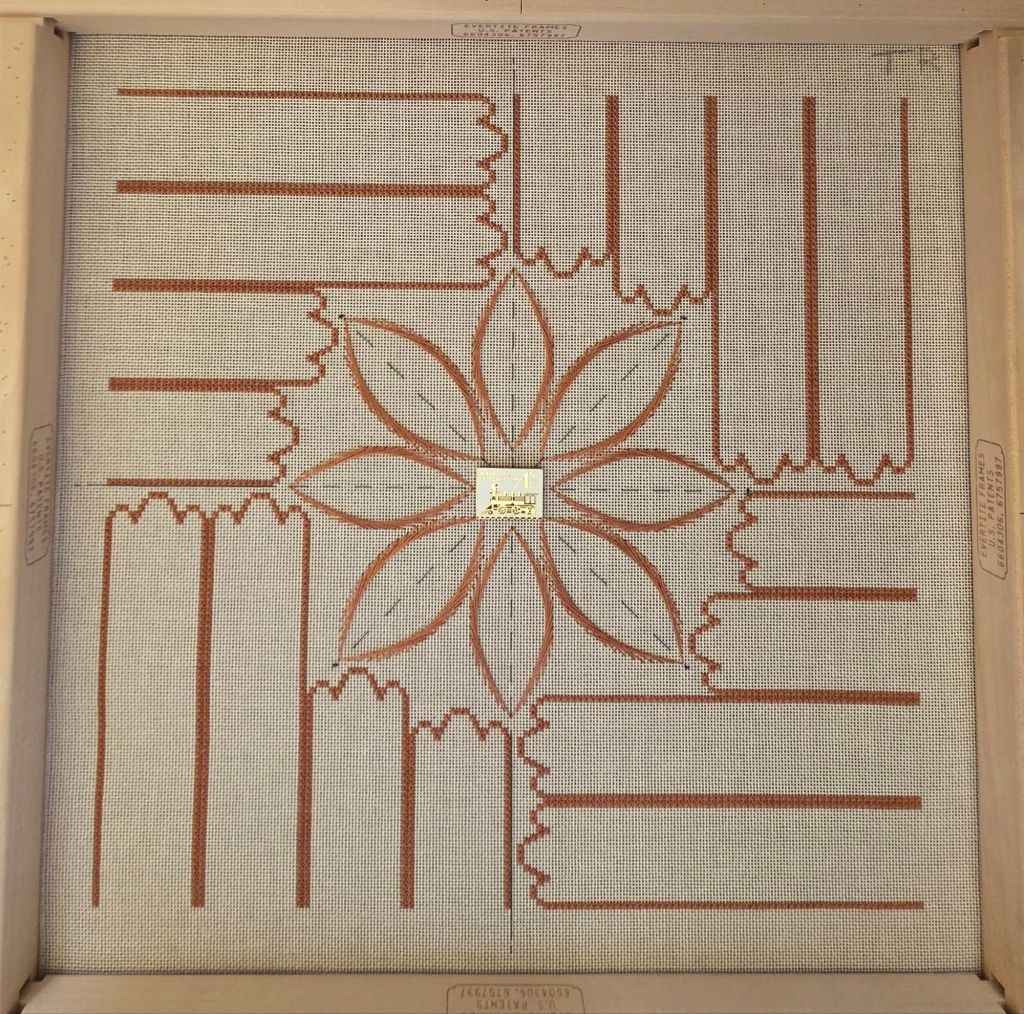
Linda M got us started on Razzle Dazzle by Ann Strite-Kurz at our March ANG Main Line Stitchers chapter meeting. It’s a large piece. The canvas is 18″ square. As you can see, I am working in the well because the design goes too close to the bars which makes ending threads more difficult.
Good news is that we rotate the canvas most of the time to work in the bottom right quadrant so I don’t have to reach and it’ll easier to see. Lots of counting. This will be challenging. I’ve been wanting to stitch this for awhile. Let’s get going!
Filed under: ANG Main Line Stitchers Chapter, Razzle Dazzle by Ann Strite-Kurz
At the January 3rd Saturday Stitch-in with a few members of my ANG Main Line Stitchers chapter, Linda M helped several of us select our own colorways for Razzle Dazzle by Ann Strite-Kurz. Linda has already started stitching and that helps to have an understanding of where the threads will be in relation to the others.
I selected an eggshell canvas and fall colors based on Watercolours 123 Spice. I’m waiting on my DMC #8 Pearl before getting the thread photo.
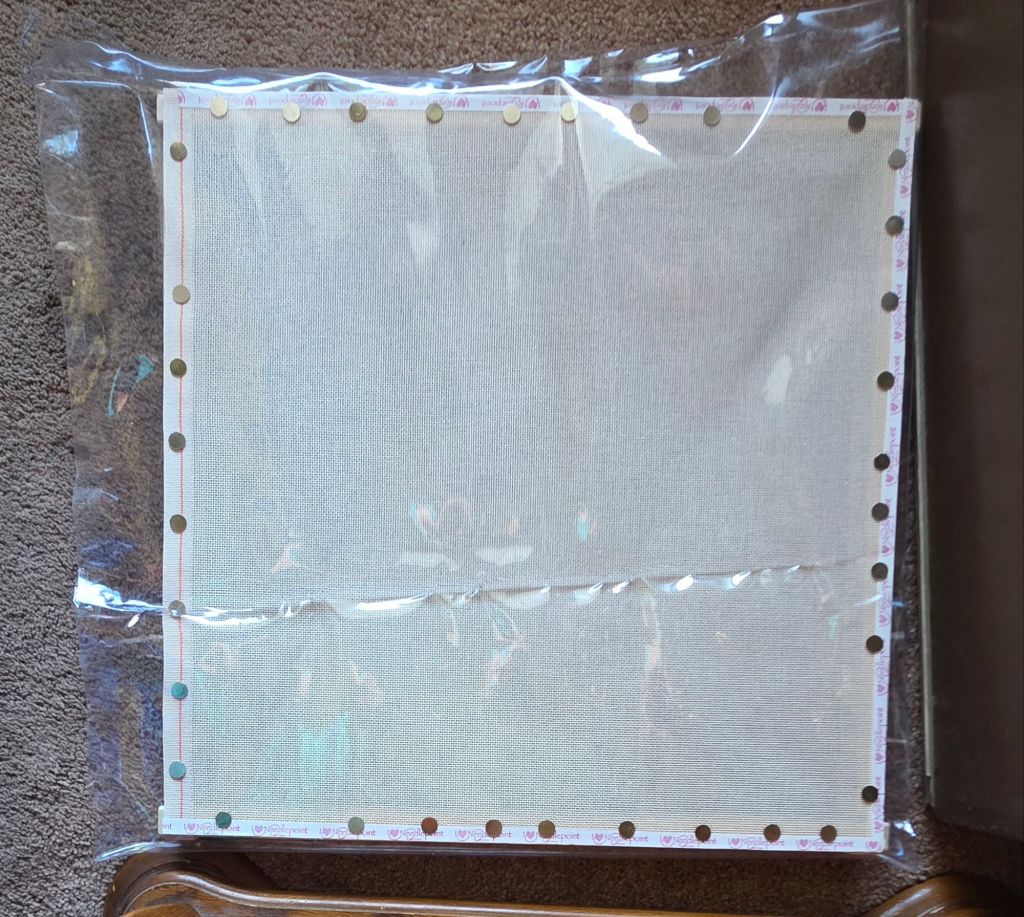
After putting my canvas on 18″ x 18″ Evertite bars, I realized that I didn’t have a project bag large enough to hold it. So, I recalled that I had purchased a large sheet of vinyl (from Joann’s) and knew I had used very little of it and am likely to use very little of it.
I cut it so that one of the creases would be at the very bottom and one ended up at the very top for a slight flap by chance. But there is a crease on each side that I didn’t bother trying to get rid of. I read that you can place parchment paper on top of the vinyl and iron on low heat. But it’ll be fine like this. I am going to work in the well anyway because Linda says 18″ square bars make it a little tight for ending threads around the edge.
It was a perfect width of vinyl leaving me still enough for whatever else I might need it for in the future. The bag doesn’t have a handle but this size project doesn’t need to travel. I will need my comfy chair, light, and quiet because counting will be so important for Razzle Dazzle.
Nothing fancy was used to make the bag, just clear packing tape to close the sides. Here is the ‘Rough and Ready’ Bag.
Filed under: ANG Main Line Stitchers Chapter, Laurel Burch Rainbow Butterfly by Danji
The background from my Sharon G Vases with Curly Bamboo used the T stitch and a very light blue floss because it appears very delicate almost invisible. She did not want to detract from the vases. I, too, did not want distract from the butterfly. So, that’s what I used to create the appearance of it flying in the sky. I used an overdyed thread with a slight color change. Don’t ask me what thread I used – I didn’t make a note about it and don’t see anything in my stash that matches! I’m slipping.
I made an outline on Velum (stiff tracing paper) of where I wanted the outer edge and used it to trace the shapes for the upholstery batting (obtained from Fireside Stitchery as recommended by Sue Parsons for finishing on the front side – it is fluffy on one side and thicker than the Pellon sew-in stabilizer) that I used for the fabric backing. A piece of magazine board was placed in between the front and back for some stiffness but it remains light and the single loop I placed on the back is sufficient.

Goal # 2 for 2025 is done!
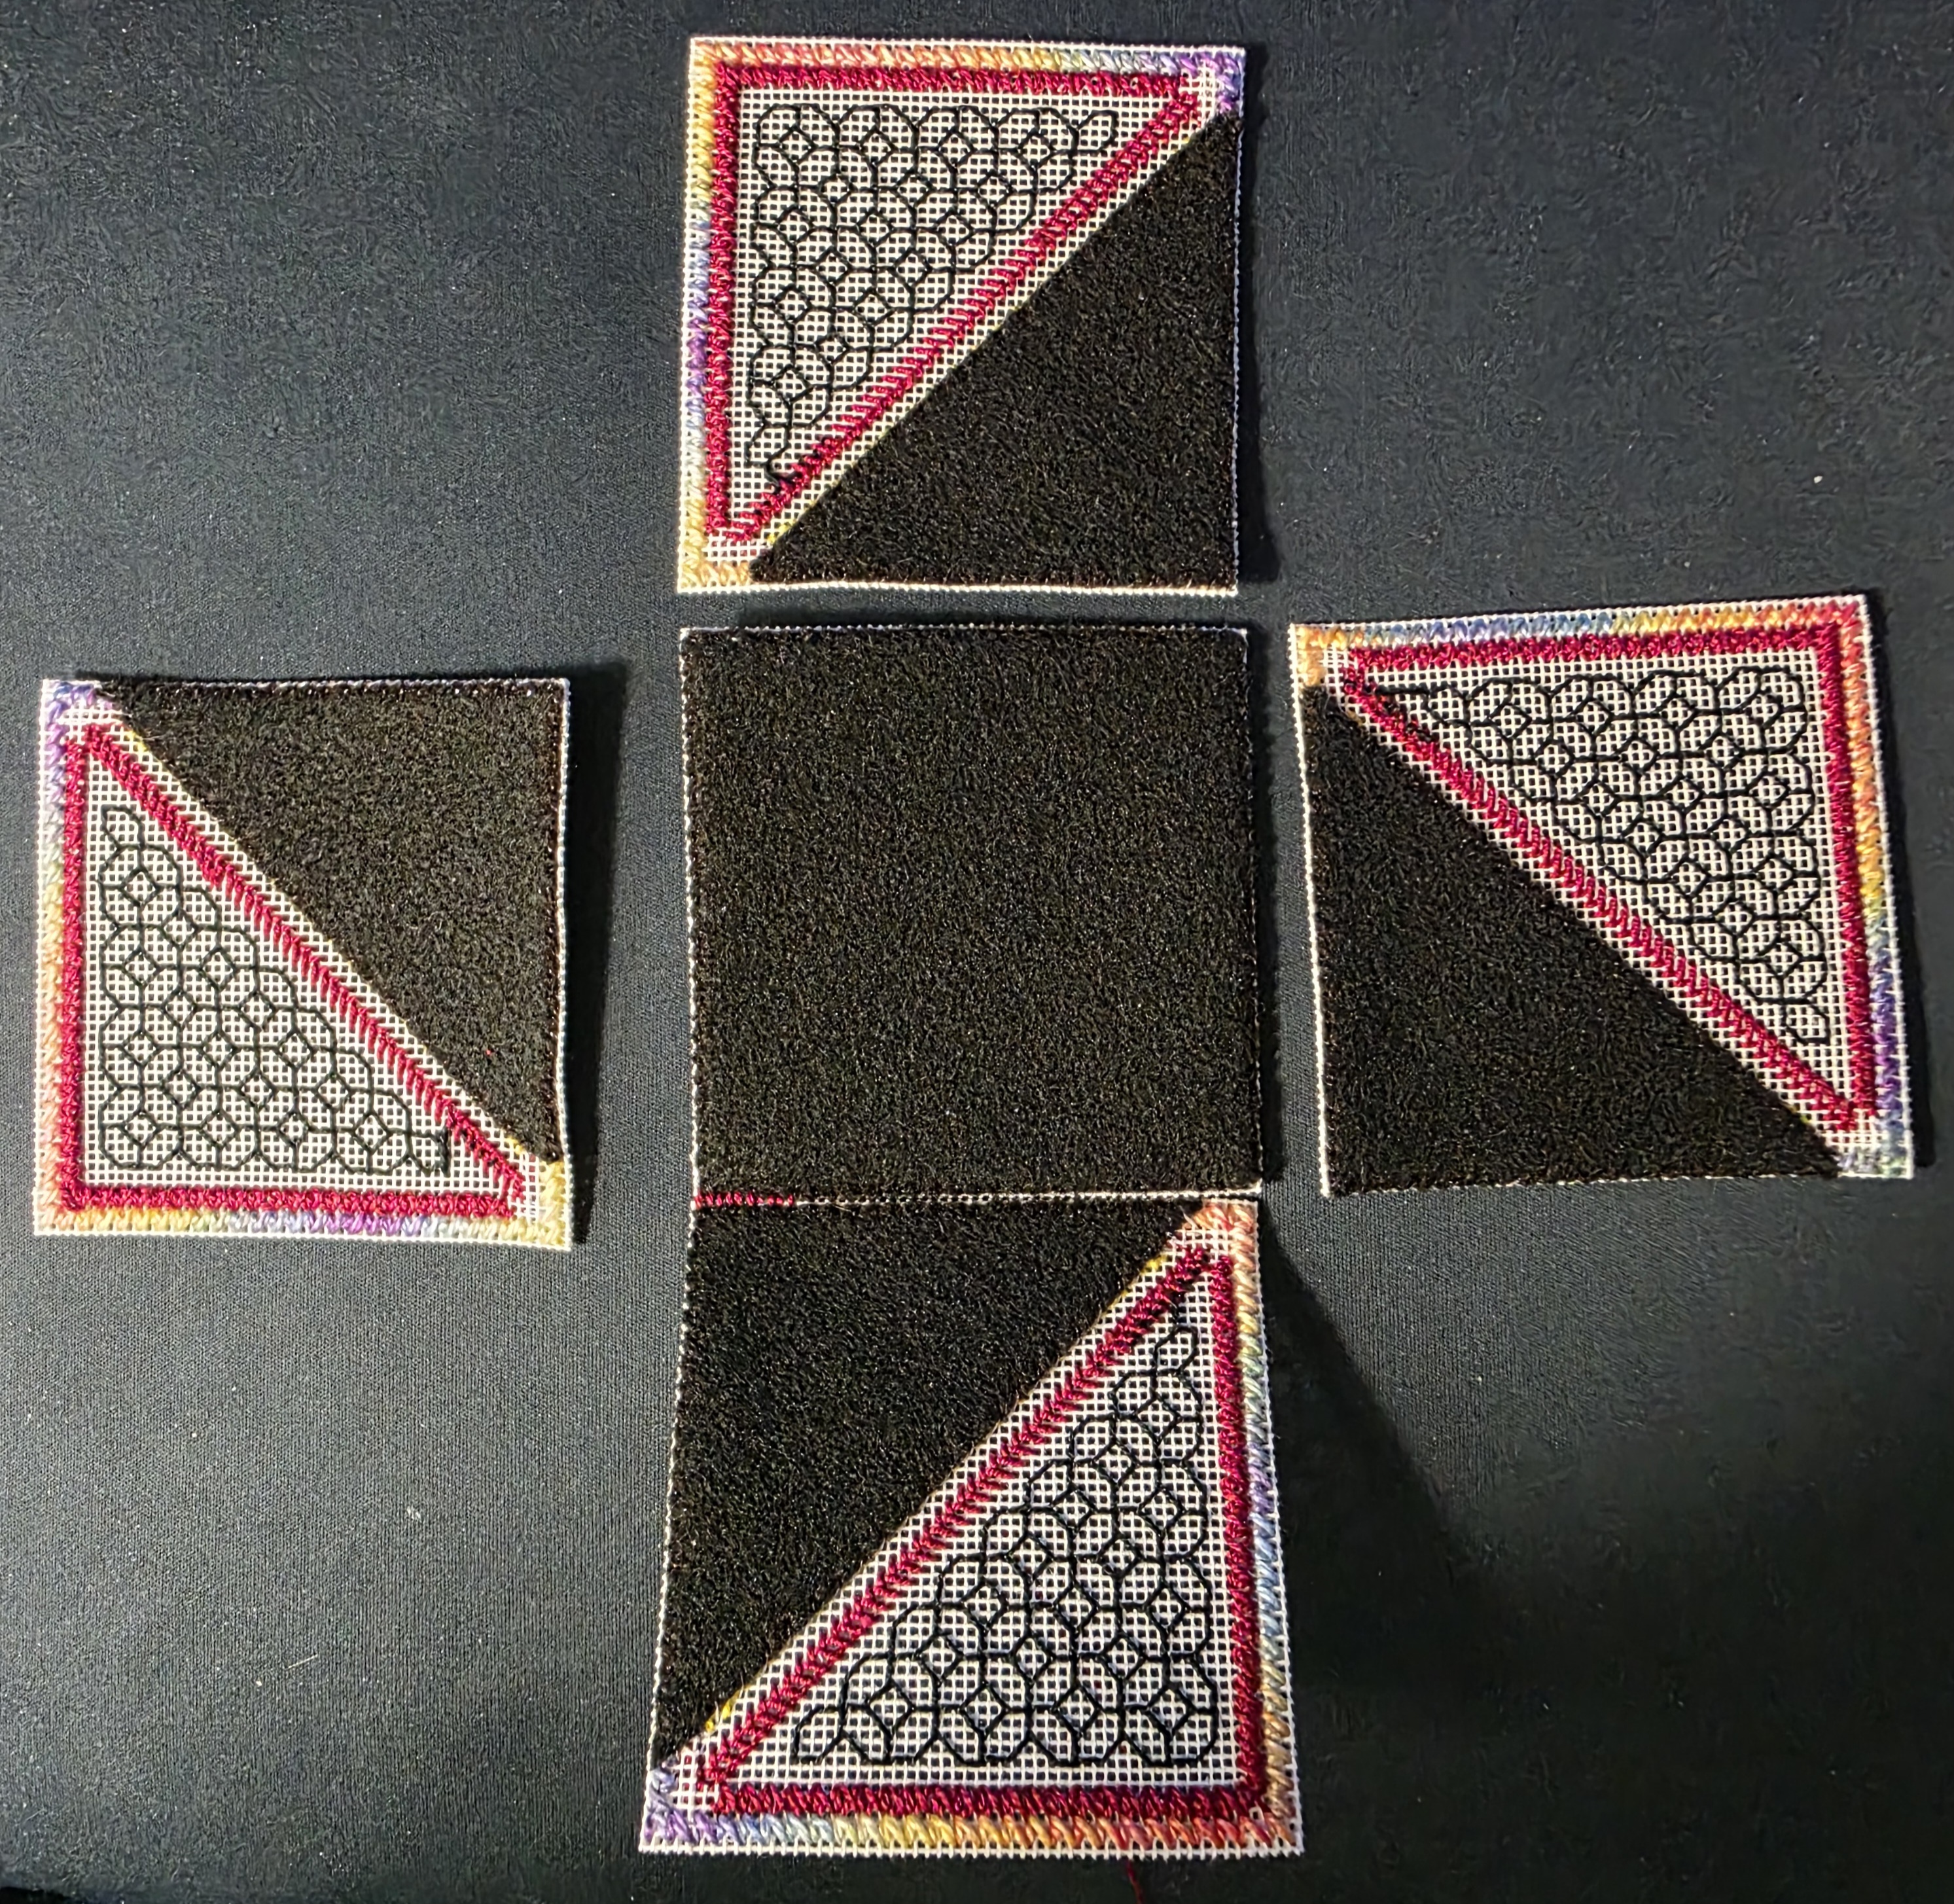
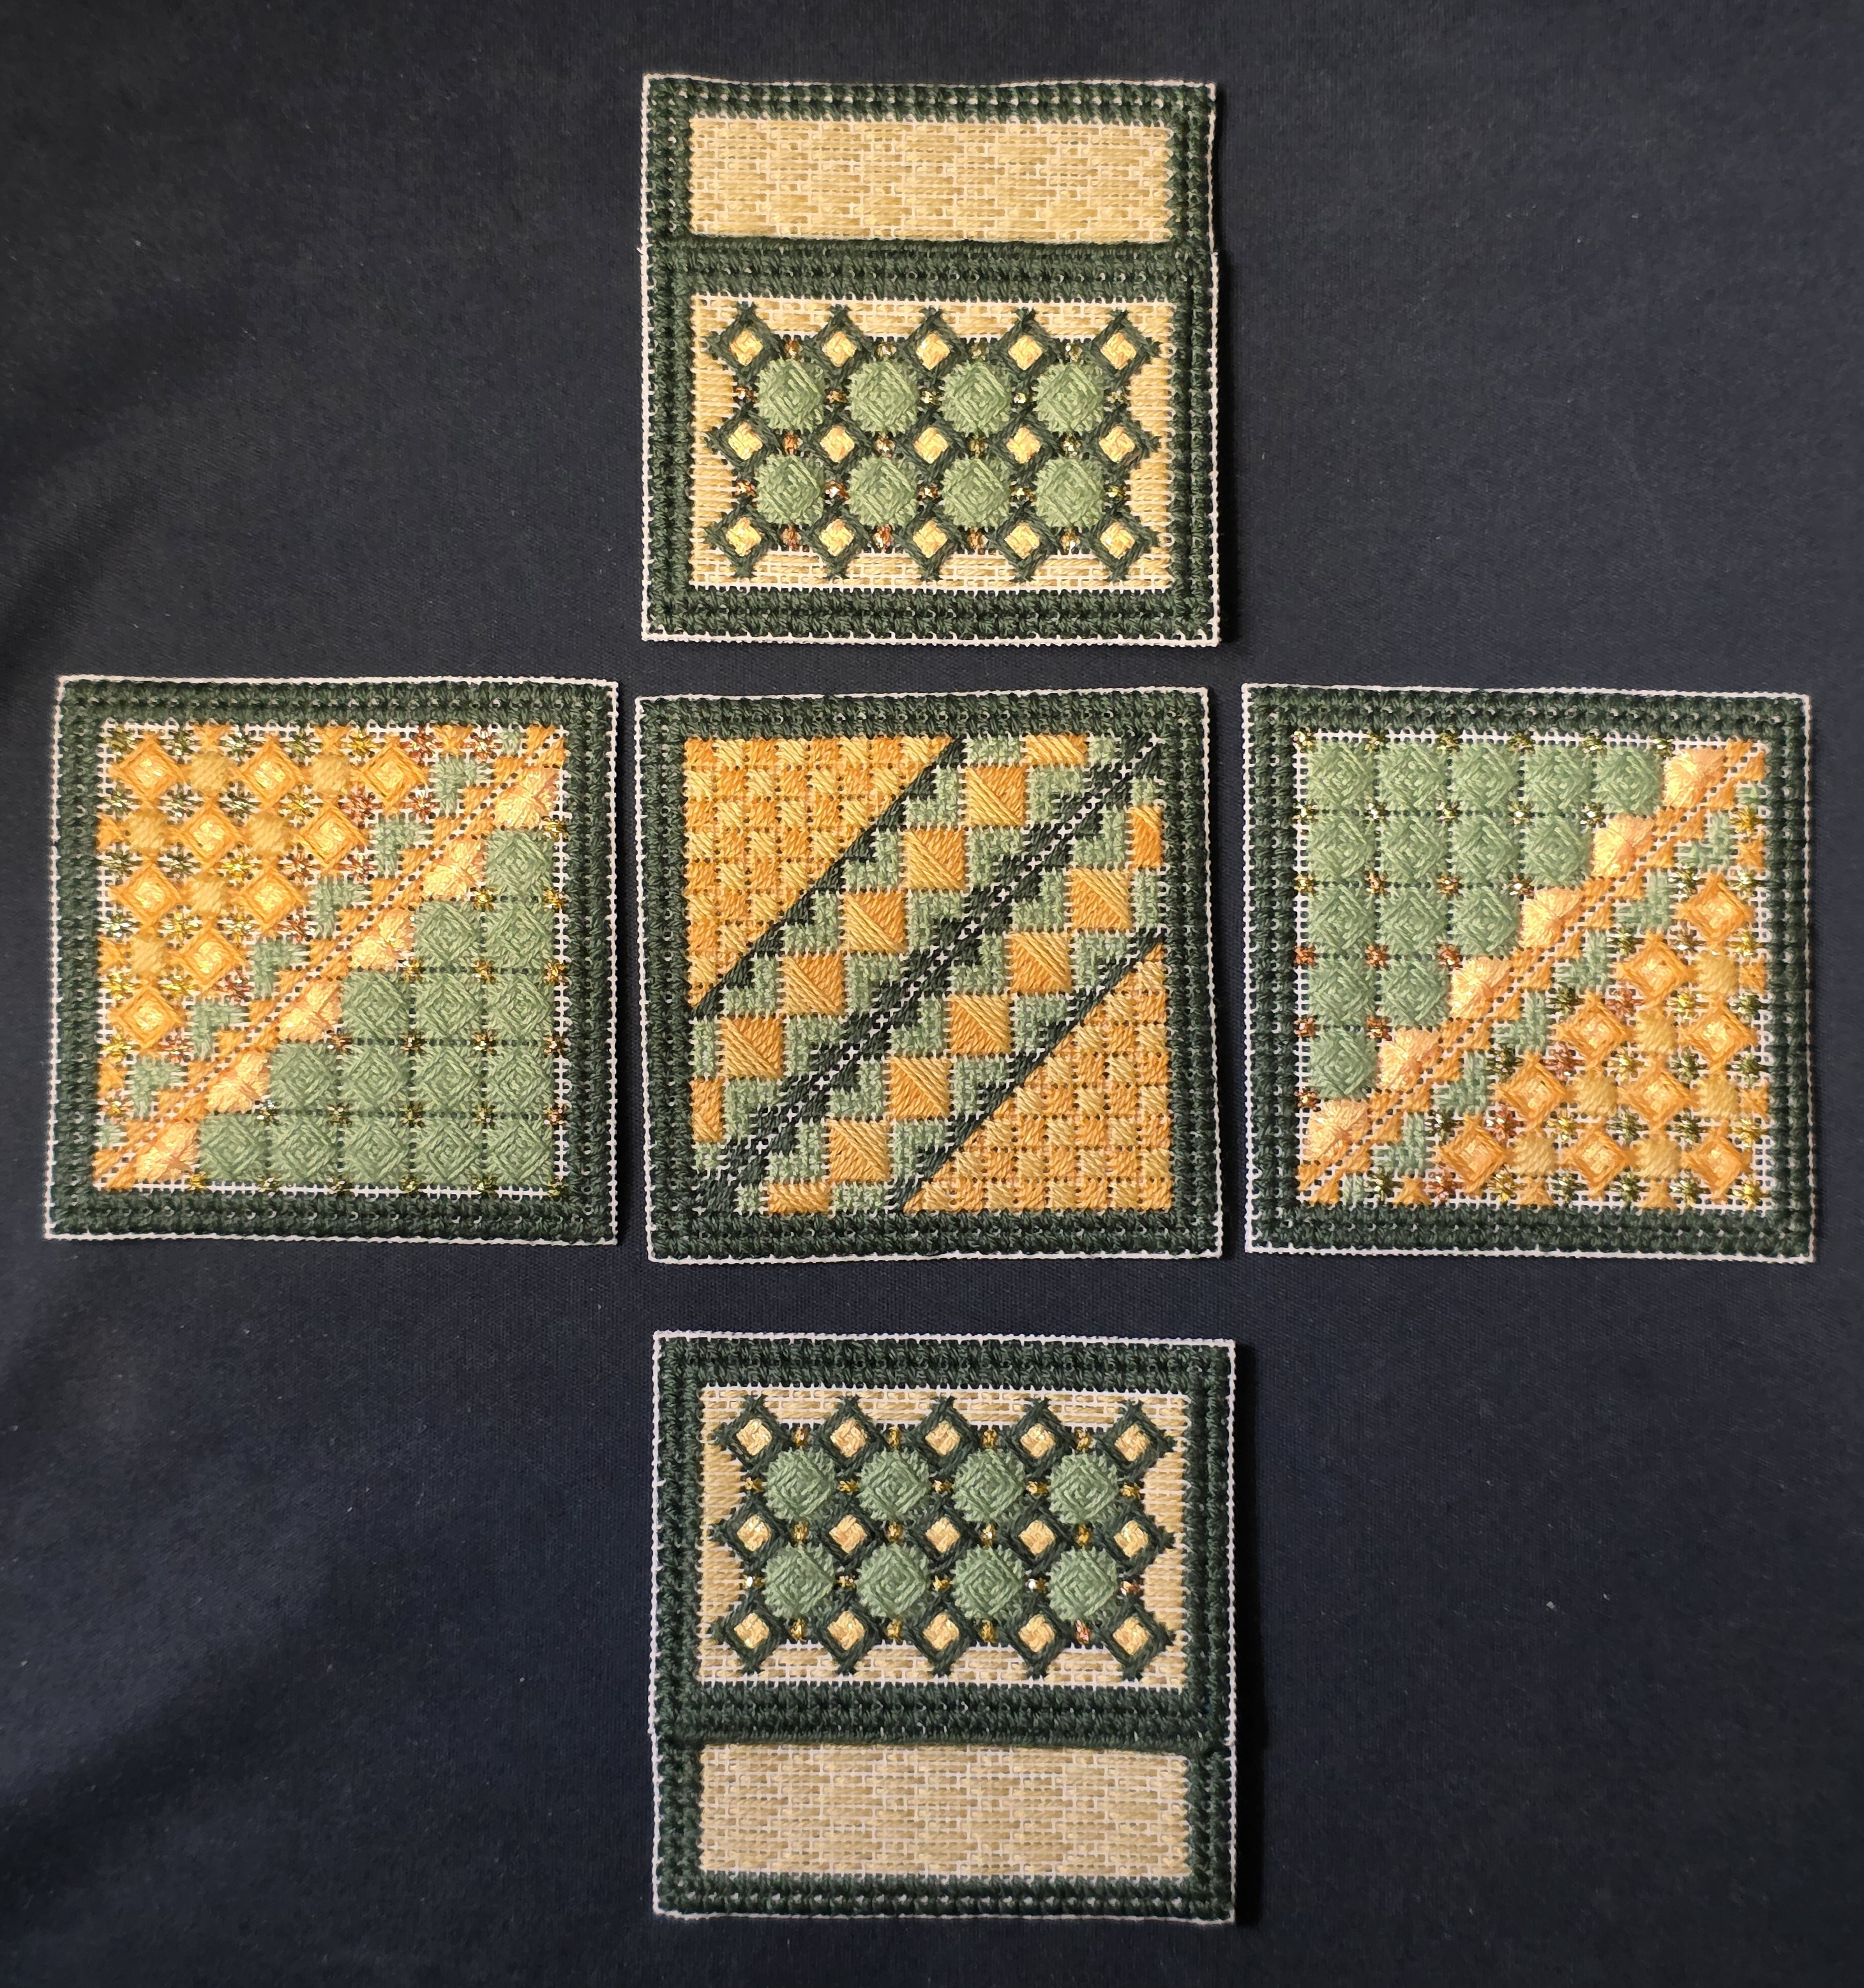
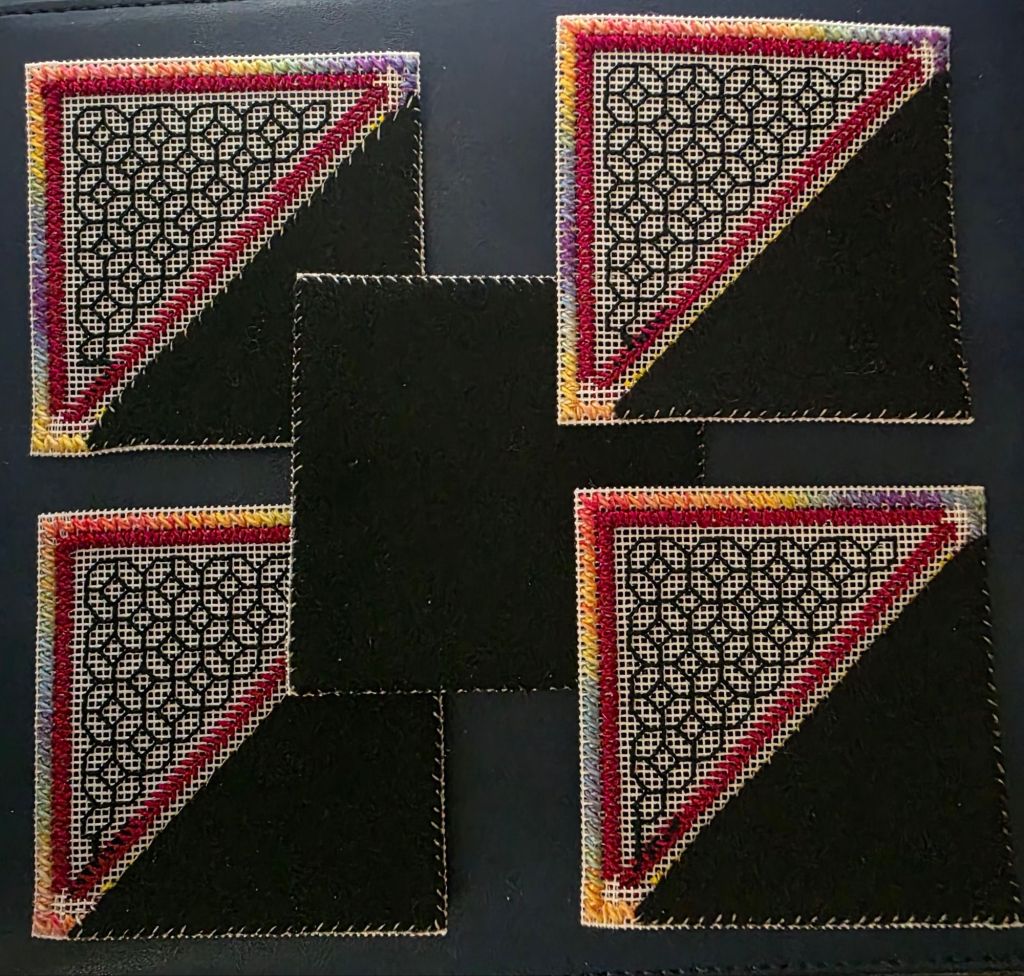
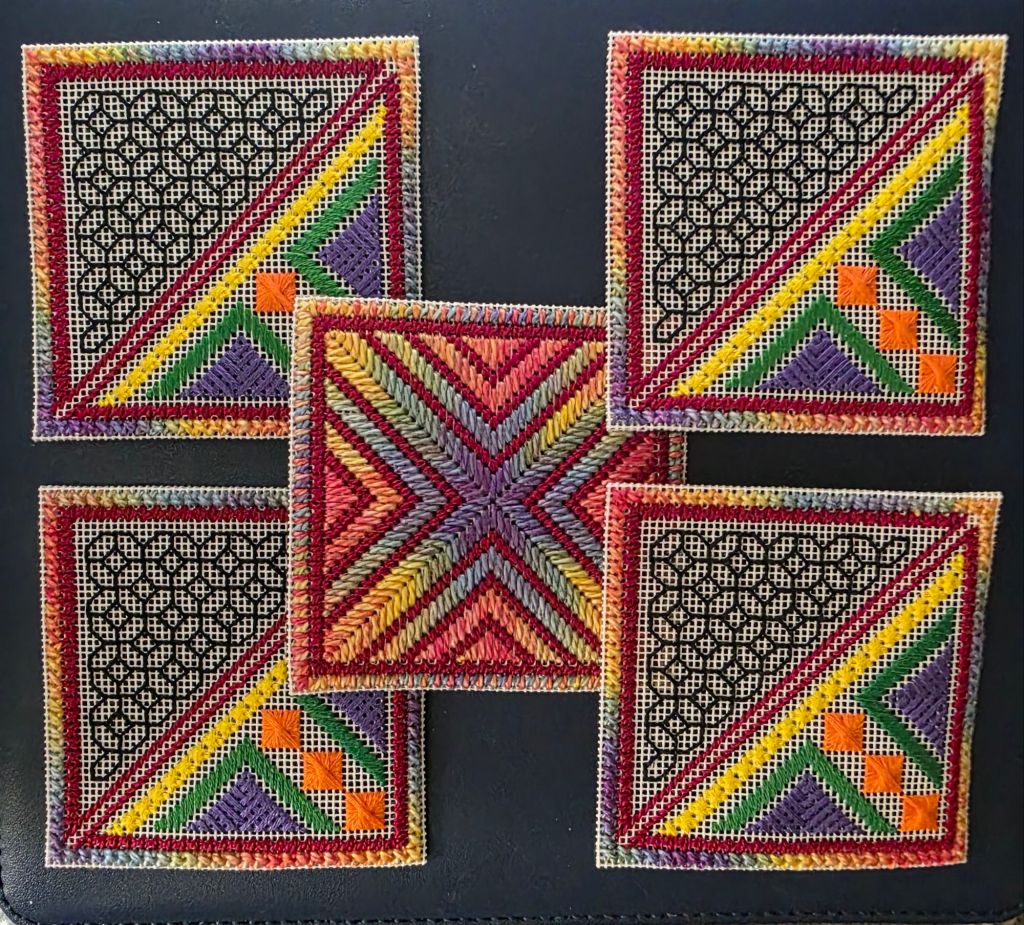
Once you get the stitching done and lining in place on the Folding Ort Box and the Ort Box with a Twist (Pockets), the final step is to do the binding stitch to attach the pieces. My thought throughout the process of creating these has been that Marilyn Owen was really so ingenious to have constructed this to begin with. I had a lot of time pondering that as each side gets attached to the bottom, then side to side, and finally the top edge times and I did that times two!
Check your layout – you don’t want to be wrong now.
Also, check your thread. I used Pearl #8 for binding on the Folding Ort Box and it is a tad thicker than the three strands of floss. Mine does lie flat but it would be flatter had I used floss as Marilyn instructed. By the time I realized it, I wasn’t going back.

At least two of my chapter members are finished and several more are getting close. Thanks again Marilyn!
The linings are attached. I used white thread to attach the black ultrasuede on the Folding Ort Box which matches the canvas and is not seen from the front. However, it did show on the inside. So, I used a black marker to color the thread. Can you spot the one diagonal row not done yet?
I love the colors with black and the overdyed thread.
For the Ort Box with Pockets, I have a green border, green ultrasuede, and green sewing thread. So, no marker needed.
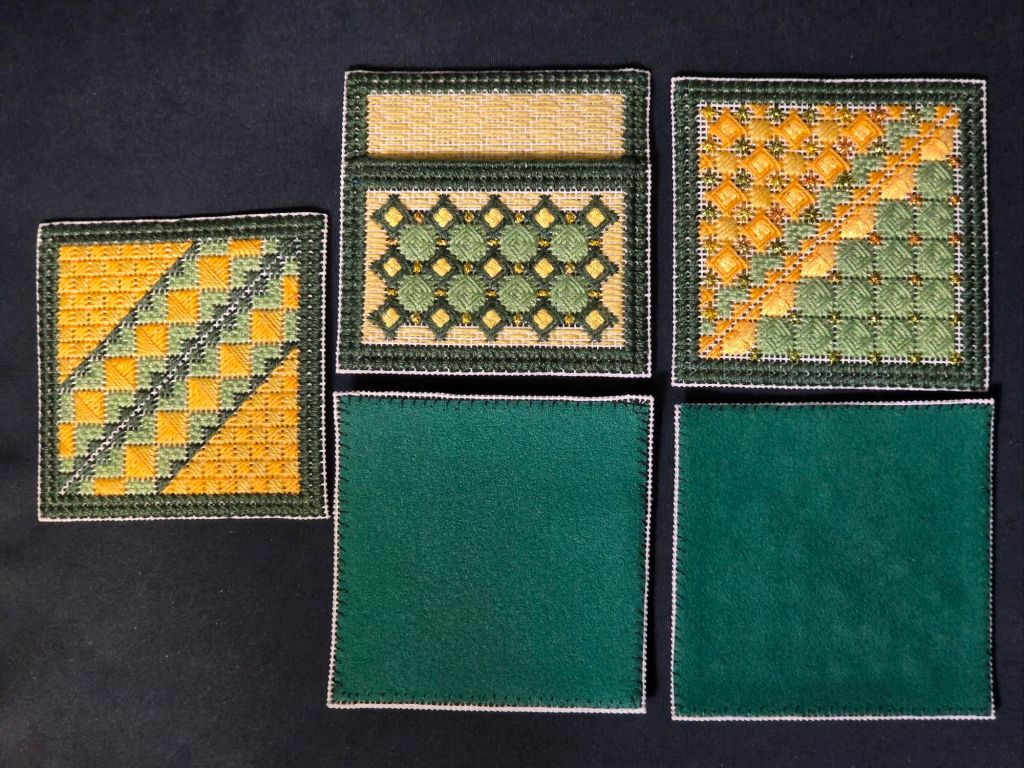
I’m ready for assembly.
This will make a good travel project (small and no bars). I plan switch between reading and stitching during the 3-hour flight to New Orleans. I have gathered my stuff to take with me. One of Debbie Stiehler’s riffs during her talk at the NAN dinner was on who brings needlepoint to stitch on to an event where you will be taking needlepoint classes. Guilty!
