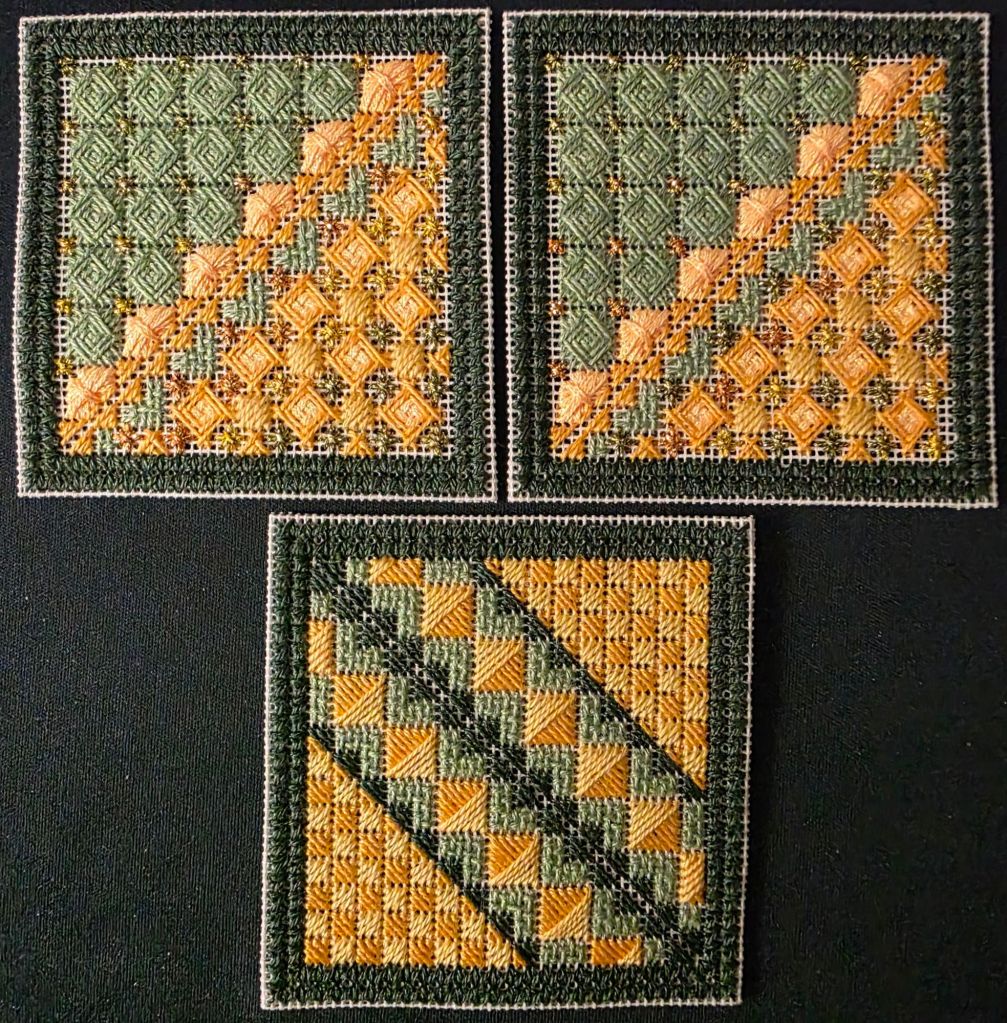
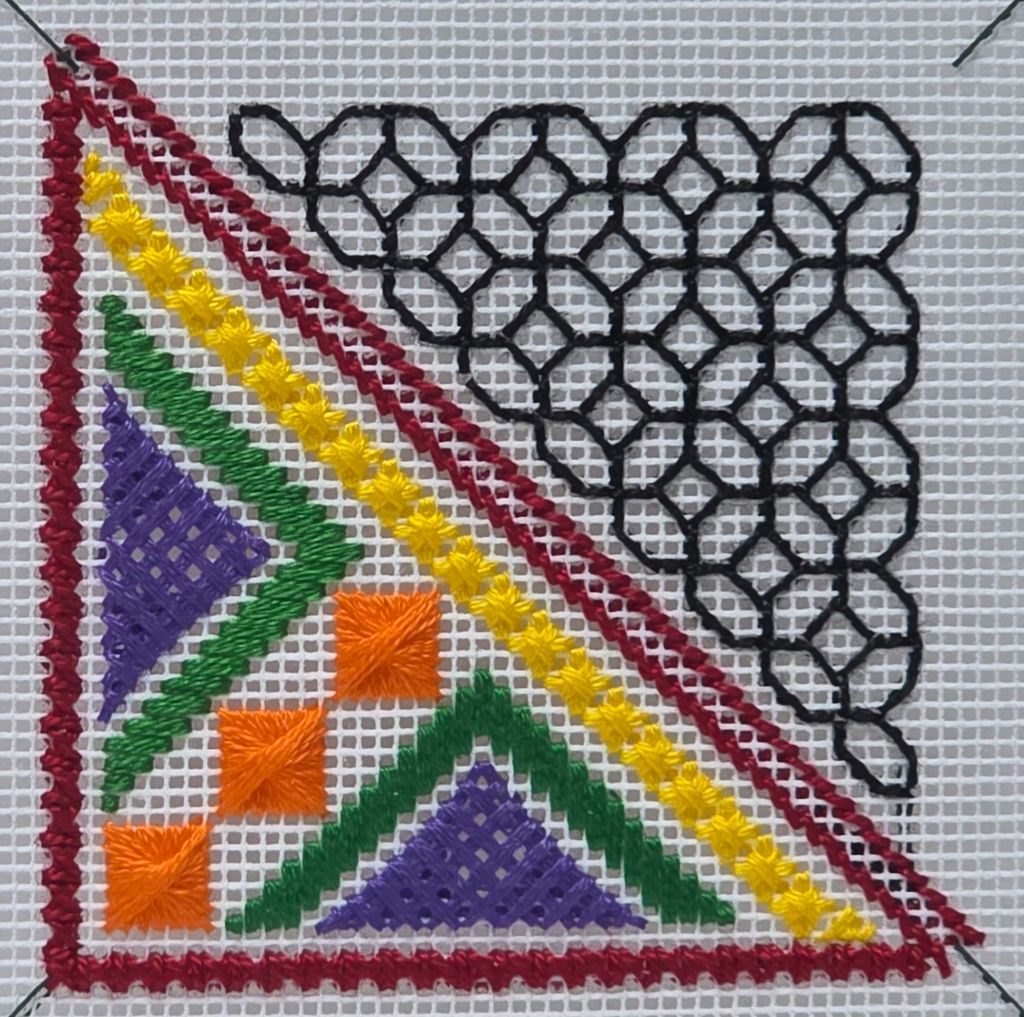
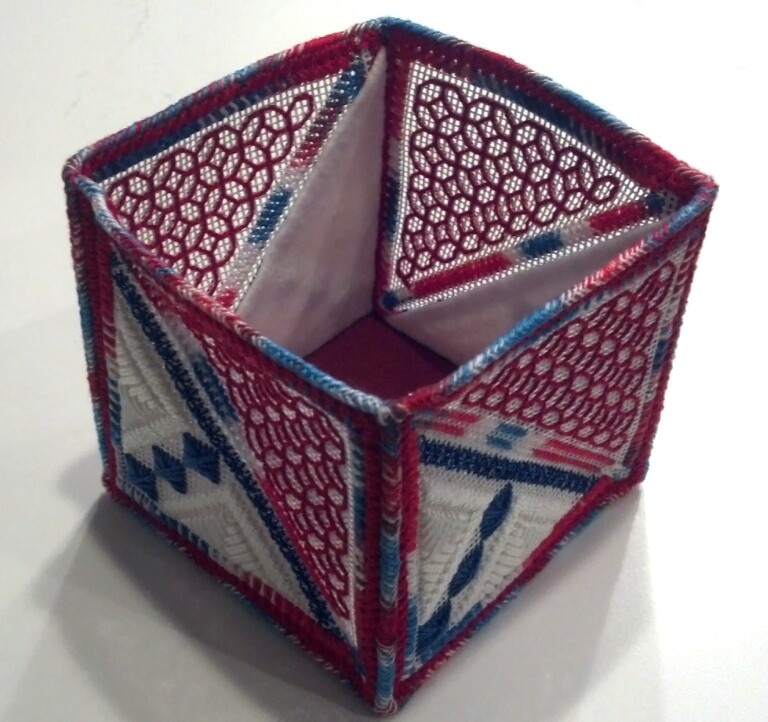
There were 4 patterns to use or not as we saw fit for the bottom of the Folding Ort Box by Marilyn Owen. I modified the bargello pattern by adding the short red rows. The color matching is pretty close.
I’ve already used solid red for the inner borders and decided another red border and red binding will not be exciting enough. So, I tied in the Watercolours used on the bottom for the outer borders. Then, for the binding, I will go back to red.

The Ort Box with Pockets also needed to be cut apart, edges folded back, and lots of cross stitches for the borders. The holes all have to line up to stitch the borders correctly.
Next up is how to do the lining by August 11, our next ANG Main Line Stitchers Chapter meeting!
The blackwork actually made a lot more sense this time (first one was stitched in 2013).
I had thought we’d do a small pattern during our June ANG Main Line Stitchers chapter meeting but I figured out that wouldn’t work because it took me 3 trys to get started correctly and over an hour to stitch the sample.
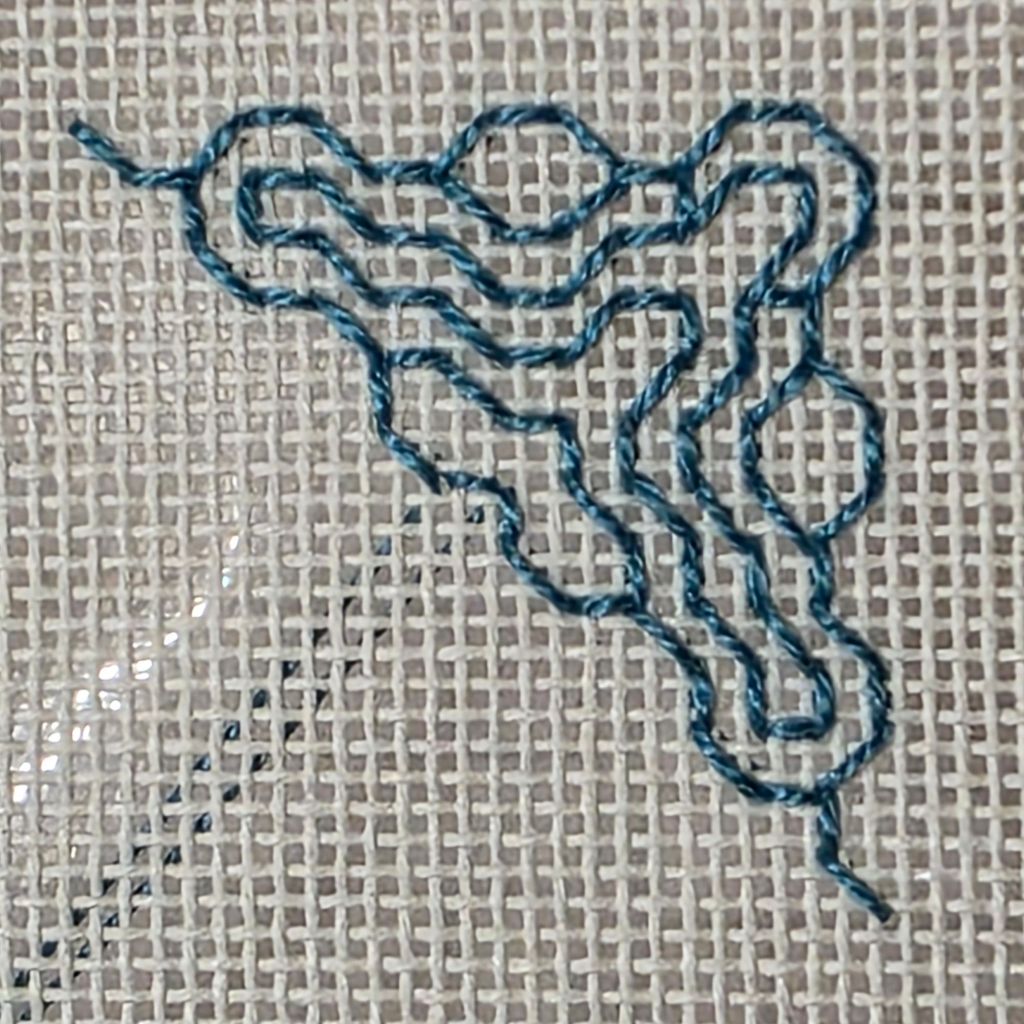
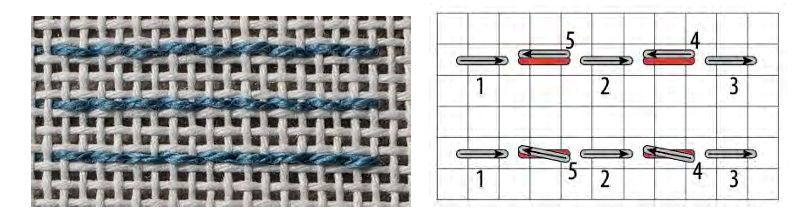
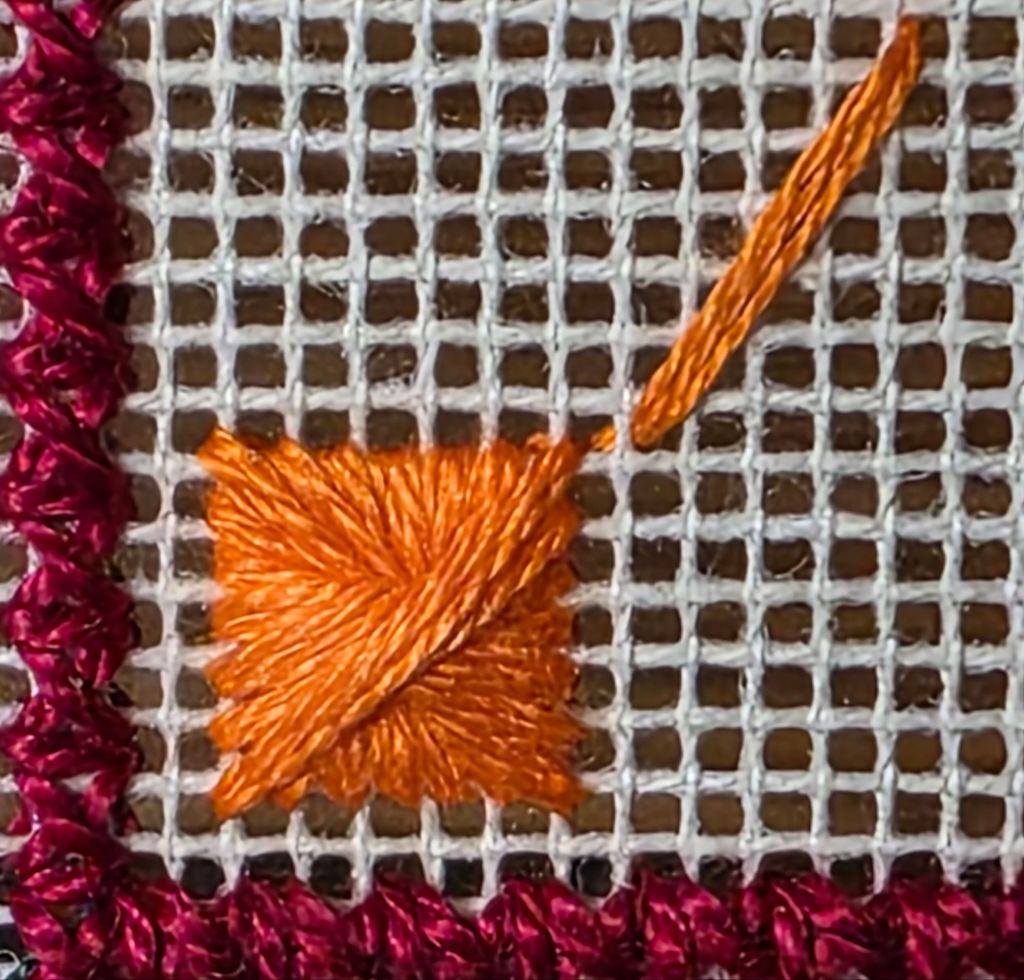
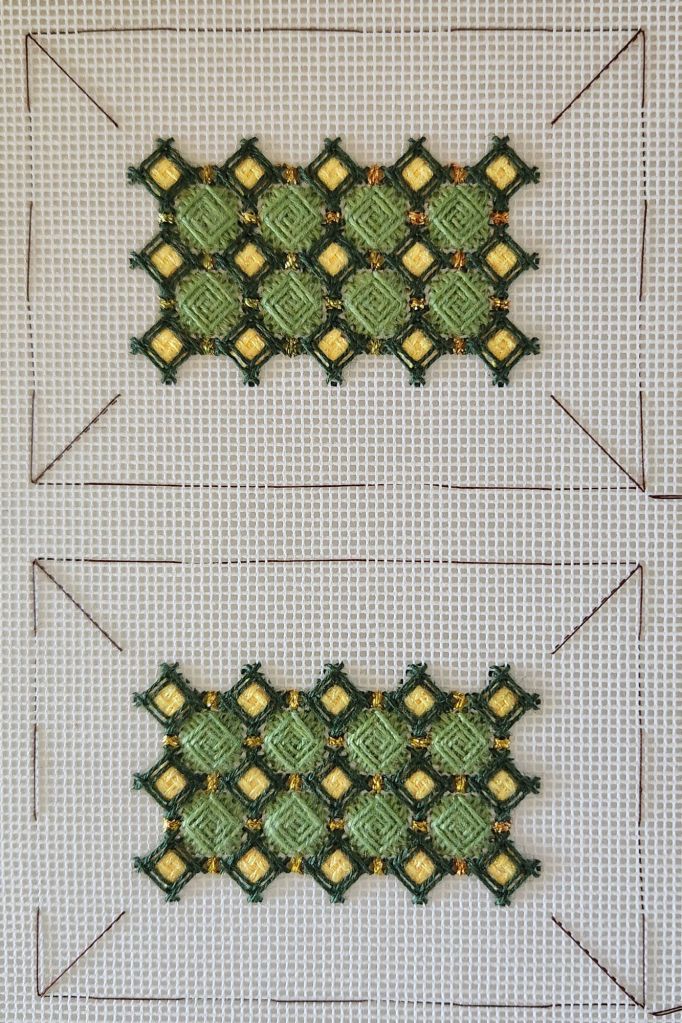
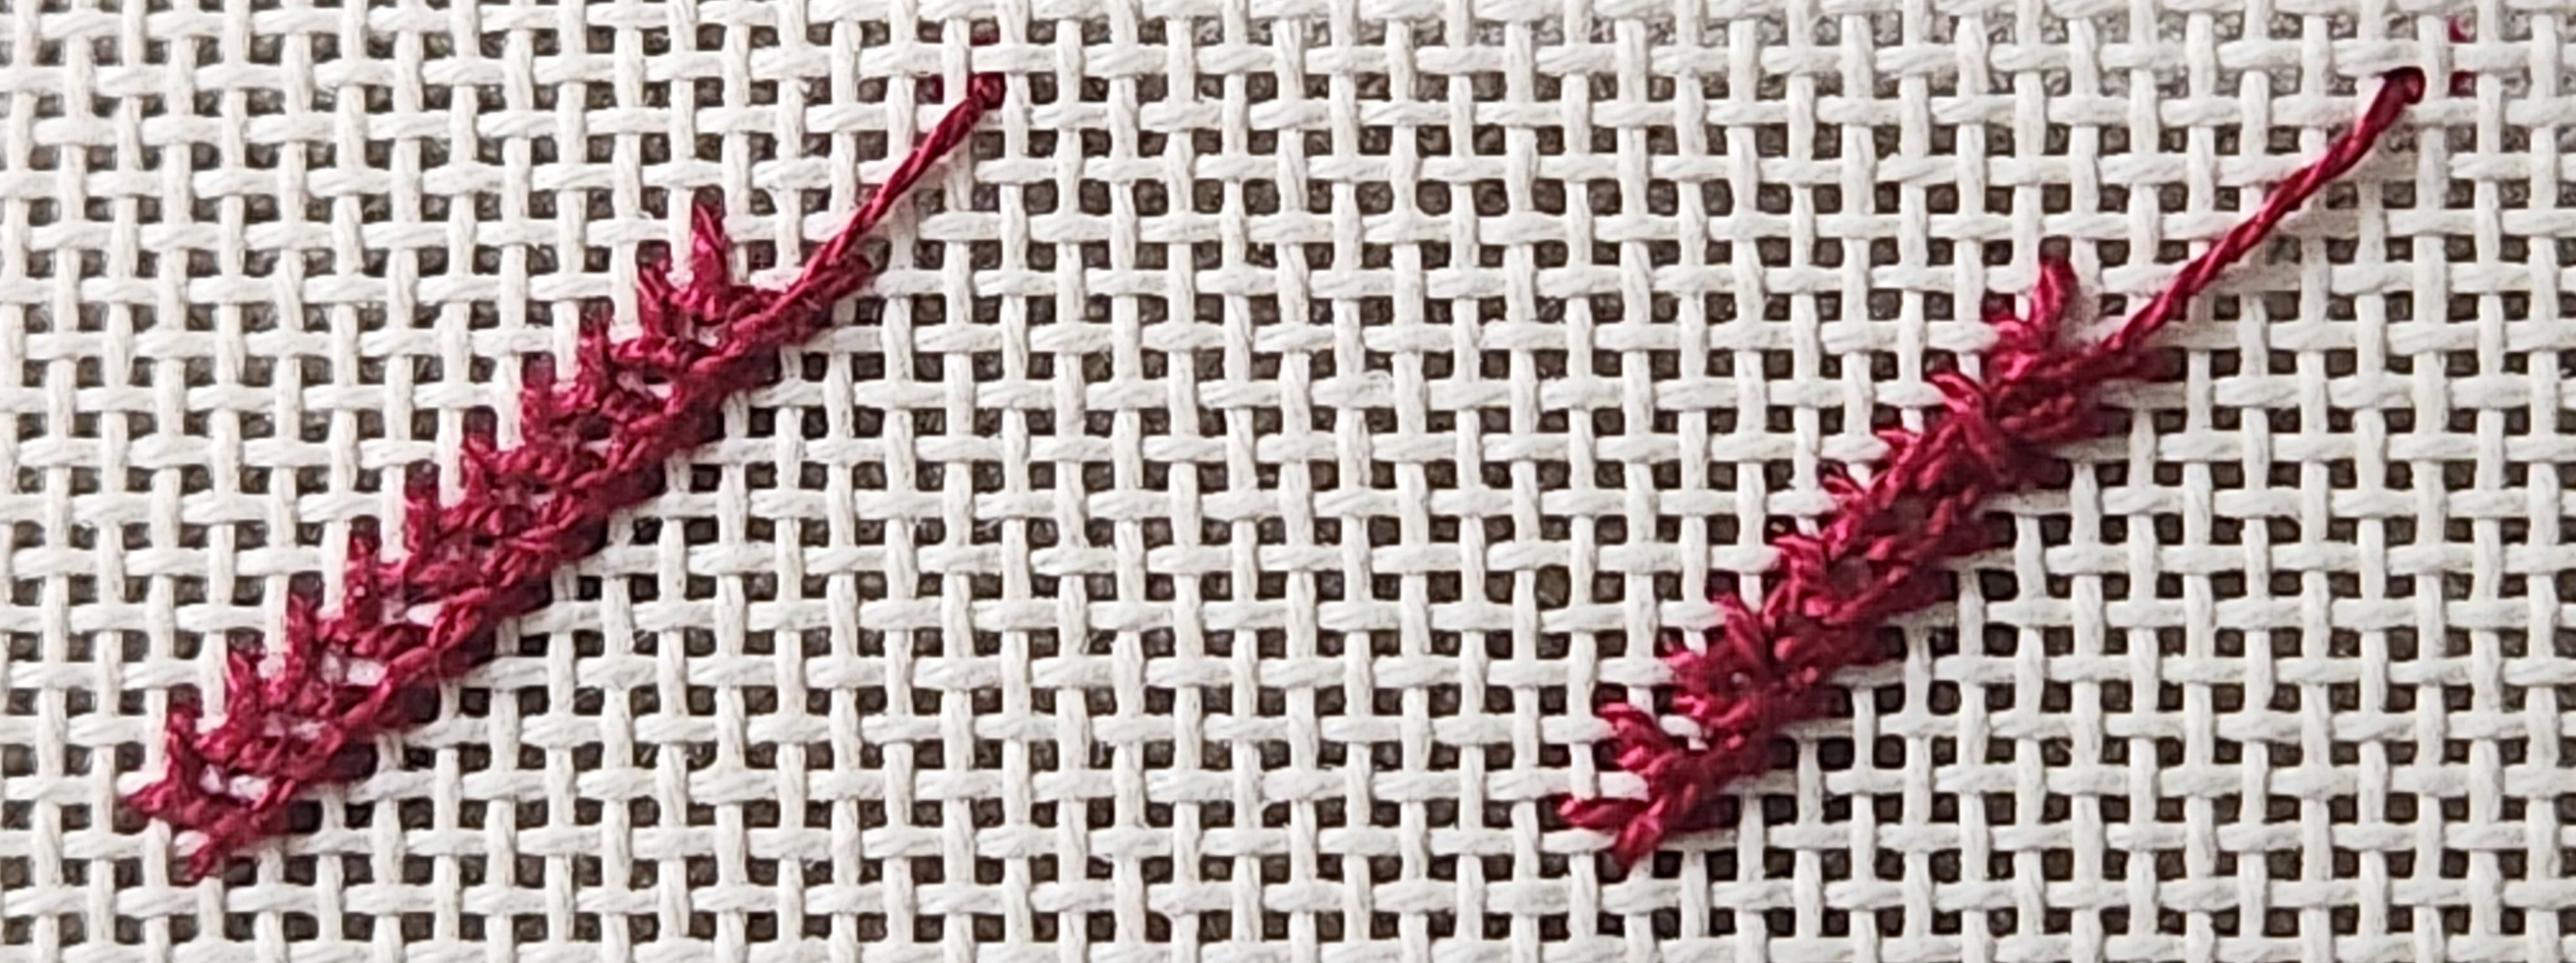
So, at the meeting, I discussed blackwork basics (focusing on reversible blackwork) starting with a double running stitch which means you stitch every other stitch along a line. Come back along the same line, filling in the gaps. When filling in the gaps of your double running stitch, adjust your needle placement: Bring the needle up just below the previous stitch. Take it down just above the same stitch. This technique reduces stitch distortion and helps maintain straight lines (2nd row). Or, use a sharp needle and split the stitches on the return (3rd row). Red indicates the thread below the canvas. The top row always stayed above the thread and appears the waviest.
A few people became interested in learning more about blackwork. That’s what I had hoped to accomplish – exposure to a new form of needlework. Nobody contacted me (yet) saying that they couldn’t do the pattern for the ort box. That’s a good sign. While I learned more as well and itvis pretty, I will not be delving into it more.
There isn’t much to say about the bottom of the Ort Box with Pockets other than it’s pretty too.
Now to construction of the box.
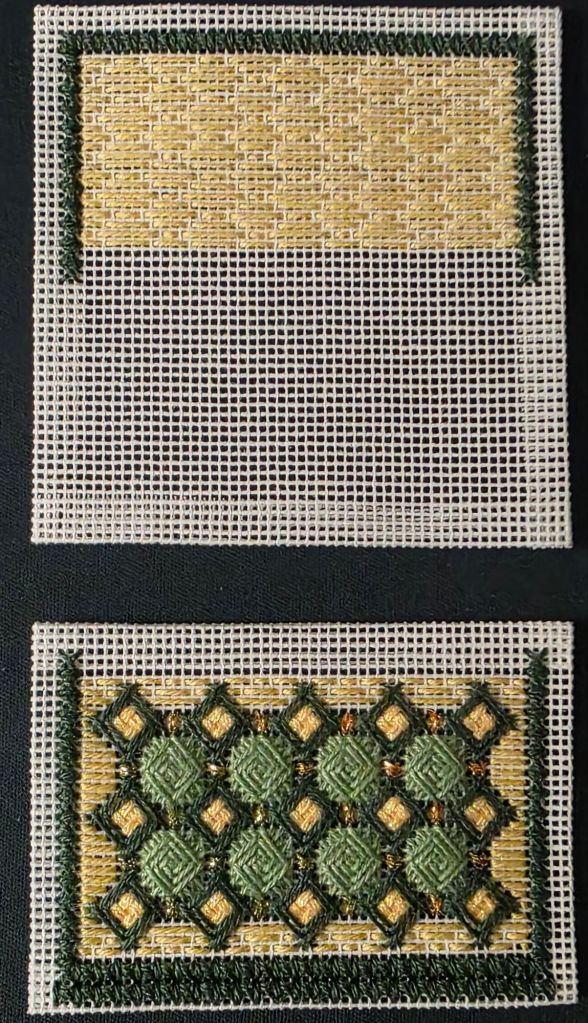
Here’s where I am up to on both ort boxes. These ort boxes have good lessons on how to have thread not show through canvas.
There are 2 sides each like this one.
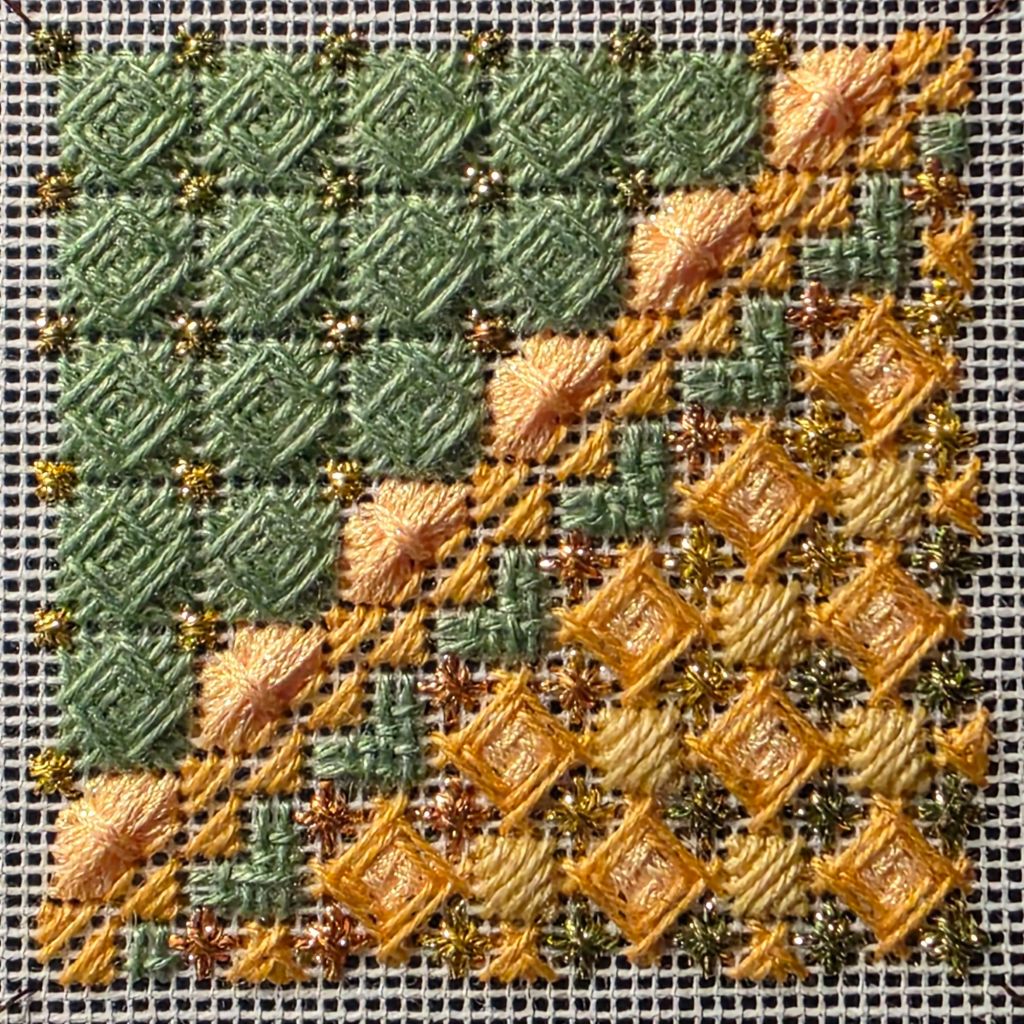
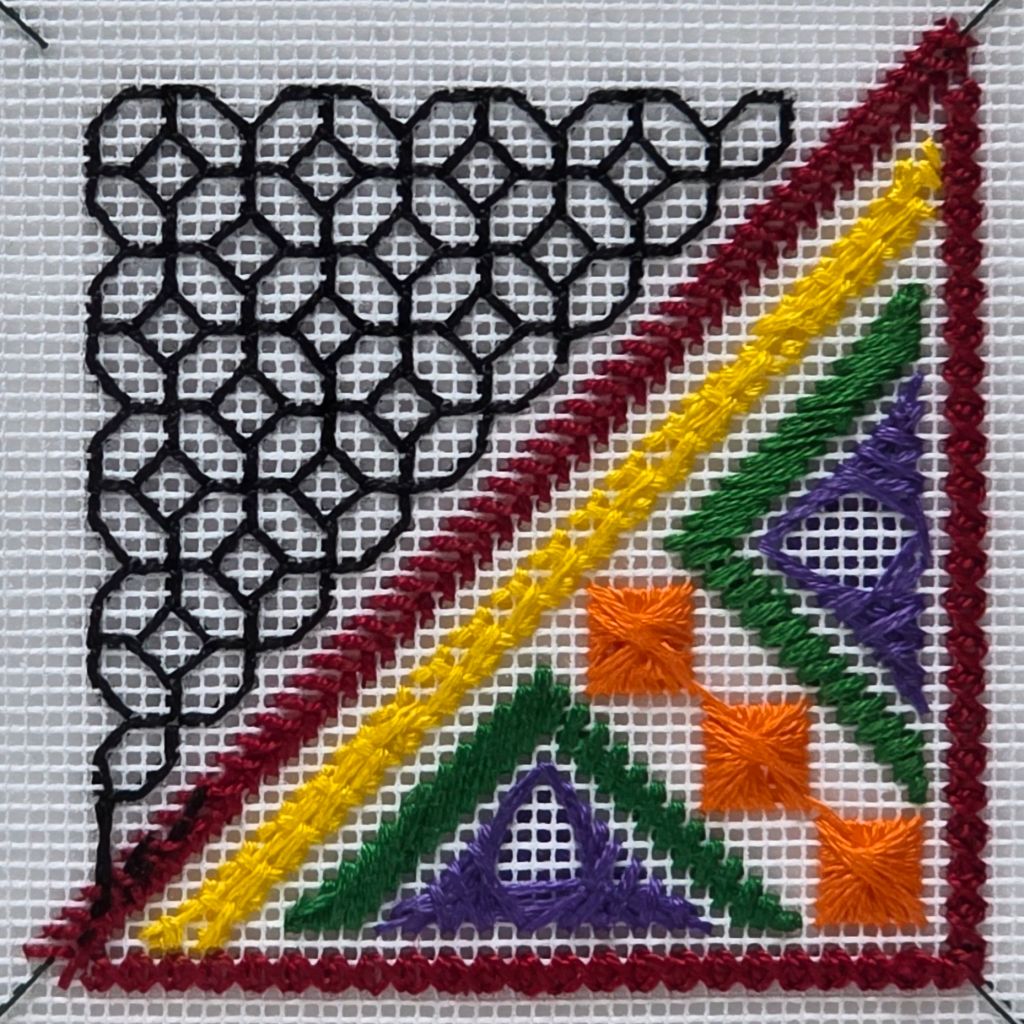
And, love how my color wheel folding ort box is shaping up. The blackwork pattern is next.

Even for members not stitching the project, there are lessons to learn. This shows when and why to use locking or tacking stitches especially when traveling to the next motif.

Next month, everyone can give blackwork a try!
I am caught up with last month’s suggested areas to complete. It’s always hard to figure out a pace when so many people are involved. At least two people are already to cut and assemble and others have paced themselves with stitching on other pieces.

I’ll post my next areas after our meeting. I still have some more to work ahead on the Folding Ort Box for the next ANG Main Line Stitchers chapter meeting on Monday May 12. Luckily, this weekend is The Truist Championship PGA Tour being held at the Philadelphia Cricket Club in Philadelphia.
Filed under: All That Simmers by Sundance Beads, ANG Main Line Stitchers Chapter
I finished this in 2024 but never posted about the last area, the red poppy, in All That Shimmers. This was a painted canvas with a stitch guide by Sundance Beads done with my ANG Main Line Stitchers chapter.
Kristen’s tip to place the running stitch along both sides of the red ribbon before gathering was very sensible. Doing the second edge after the bottom is gathered and in place has to be next to impossible. The red ribbon is called Christmas Red by BE Ribbons and appears to be available only at Sundance Beads (sundancedesignsonline). It comes in great colors. The green leaves are also BE Ribbons, Retro Ribbon Avocado. They are clearly different materials, but the website doesn’t provide details. I guess I would have to email them if I had questions about buying more ribbon.
The center was too large and I had to cinch it smaller so that the center of the flower didn’t disappear. The first three beads slipped through the metallic center, so I used 5-7 beads to show through. Thanks again to Kristen for leading us through this project and to Sundance Beads for making a stitch guide available.
This needed a deep box, but not really knowing where I’d put it, I didn’t take it to a framer. But, since I had such great results with Treasures of the Great Lakes, I decided to give this a go, too. There is a difference in that this is on monocanvas and slightly larger than 5″ x 7″. I found 6″ x 8″ is also a standard frame size in shadow boxes for medals (at Michael’s). That required additional borders (5 and 7 canvas threads wider) to be stitched. I used the Woven stitch in the four colors matching the original tent stitch outer borders with the same Kreinik #12 Braid. I found them in my stash and even had enough!
Then, I added a row of buttonhole over 2 canvas threads so that I could cut it exactly to fit the frame opening. Because I stitch on Evertites, it was exactly square when I took it off the bars.
And, it fit liked a charm. I did lace it to the interior back board provided just so it wouldn’t shift when it gets moved about. But, it doesn’t photograph well because of glare. In person, it looks really good. It’s standing upright as Sundance apparently intended it to be displayed. But, which way do you like it?
New camera in the Samsung S25 Ultra is making a big difference.
Filed under: ANG Central Jersey Chapter, ANG Chapter Book Projects, ANG CyberPointer's Chapter, ANG Main Line Stitchers Chapter, Orchid Lady by Mary Knapp, Starburst by Patricia Hartman, Summer Fireworks by Ann-Marie Anderson-Mayes
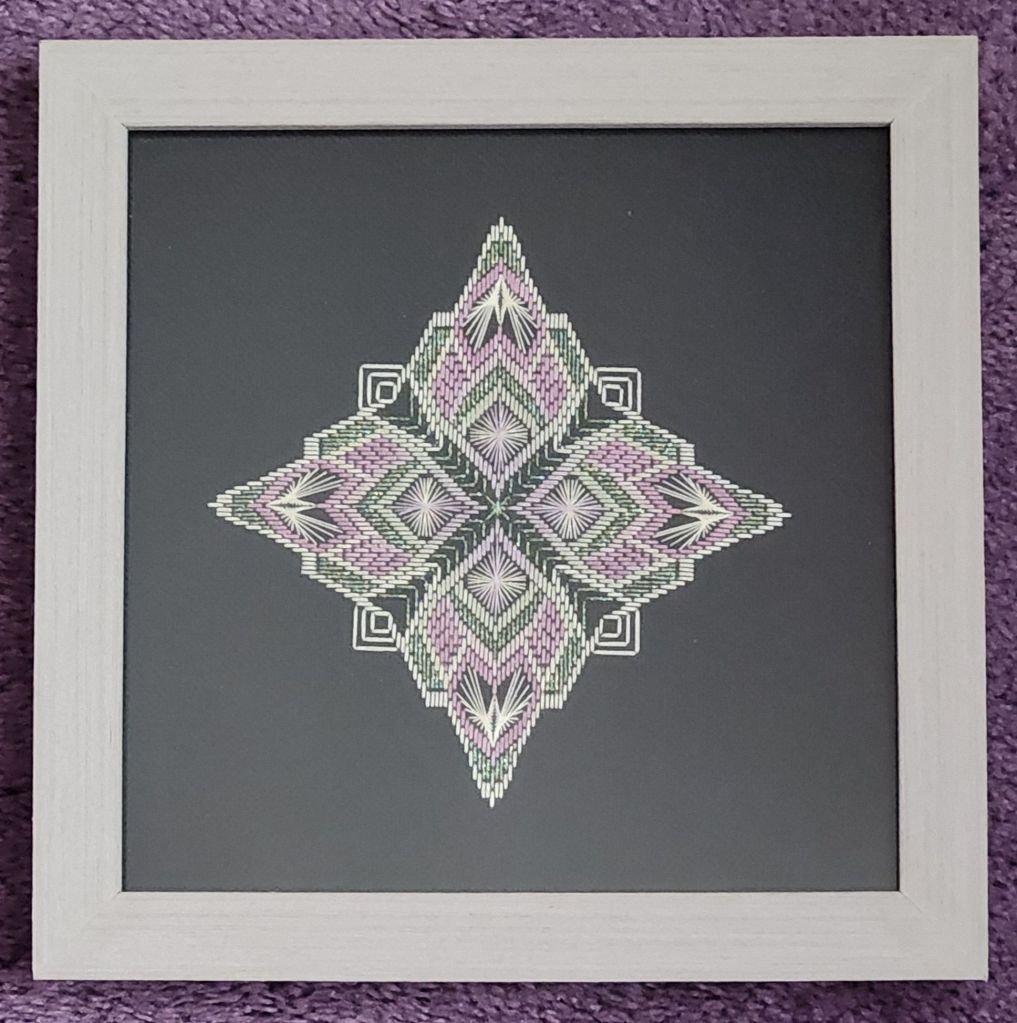
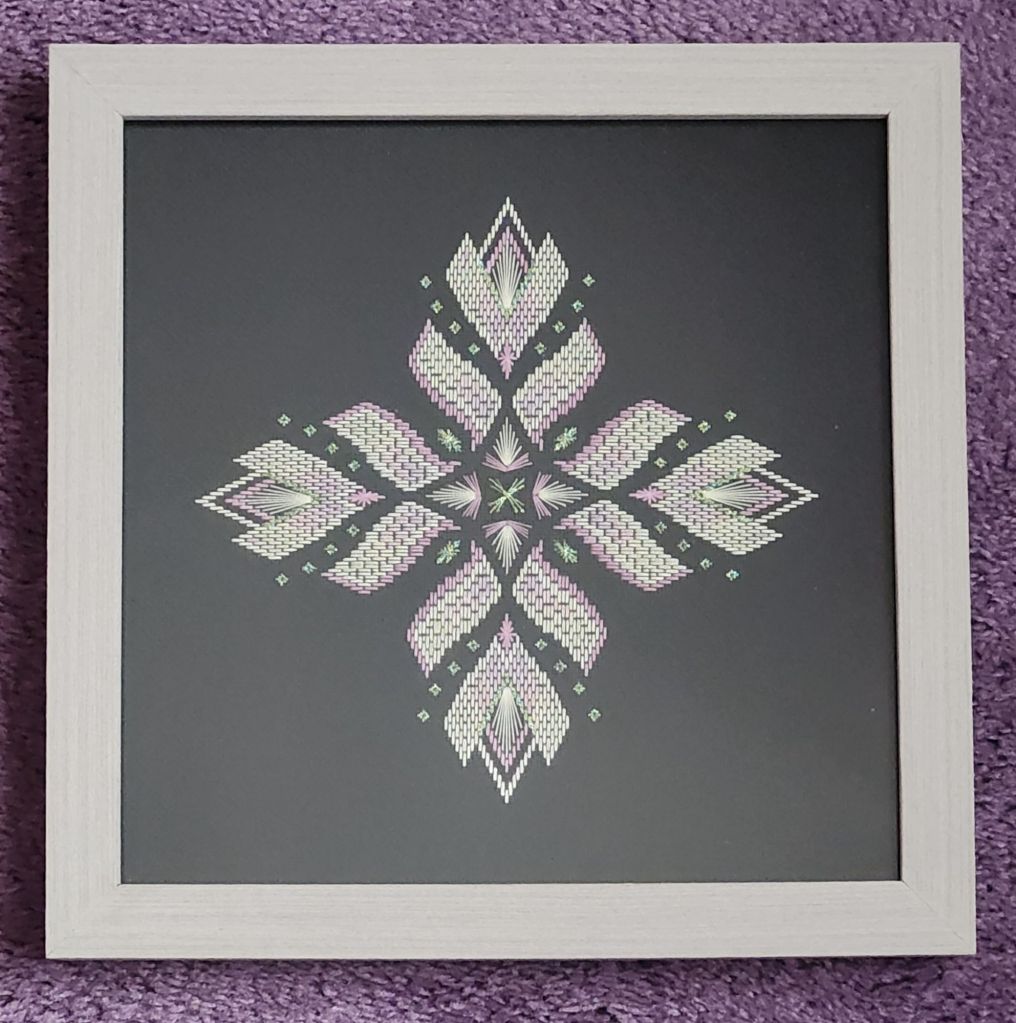
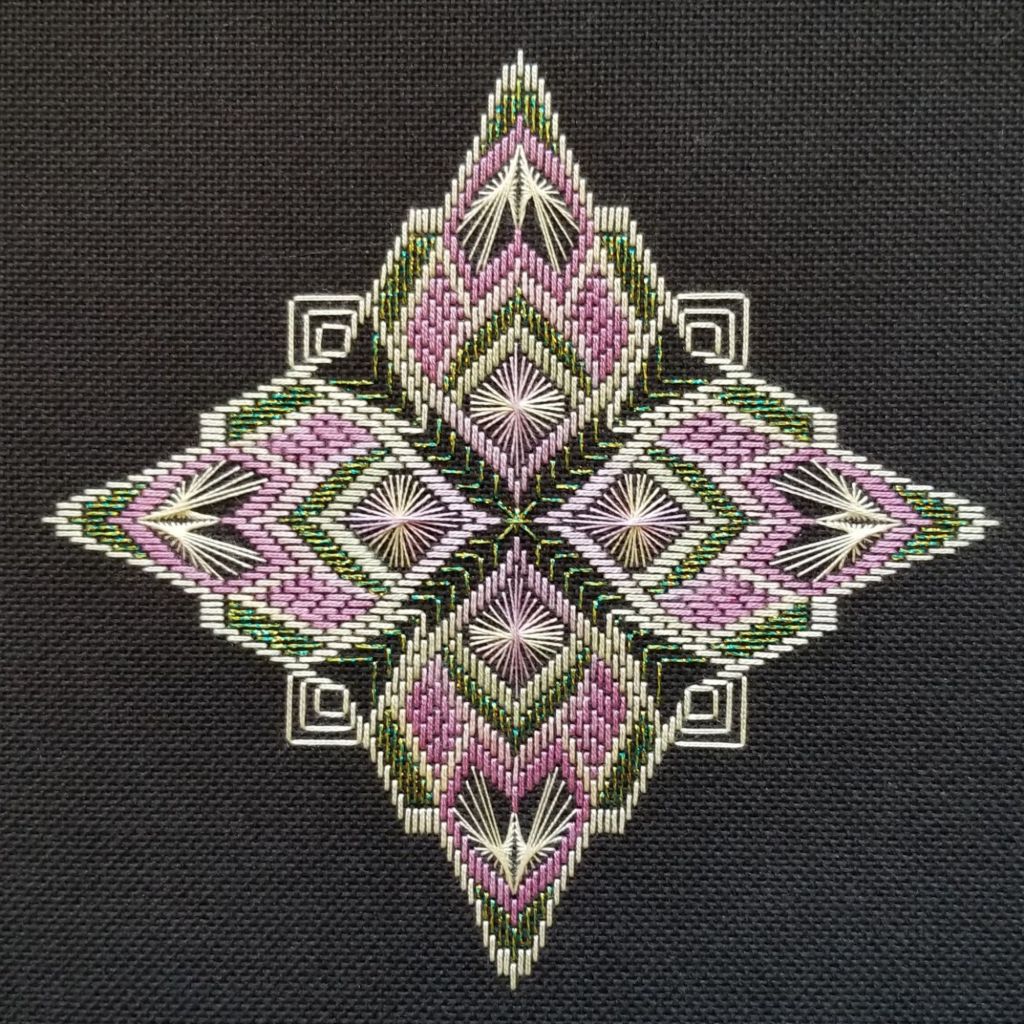
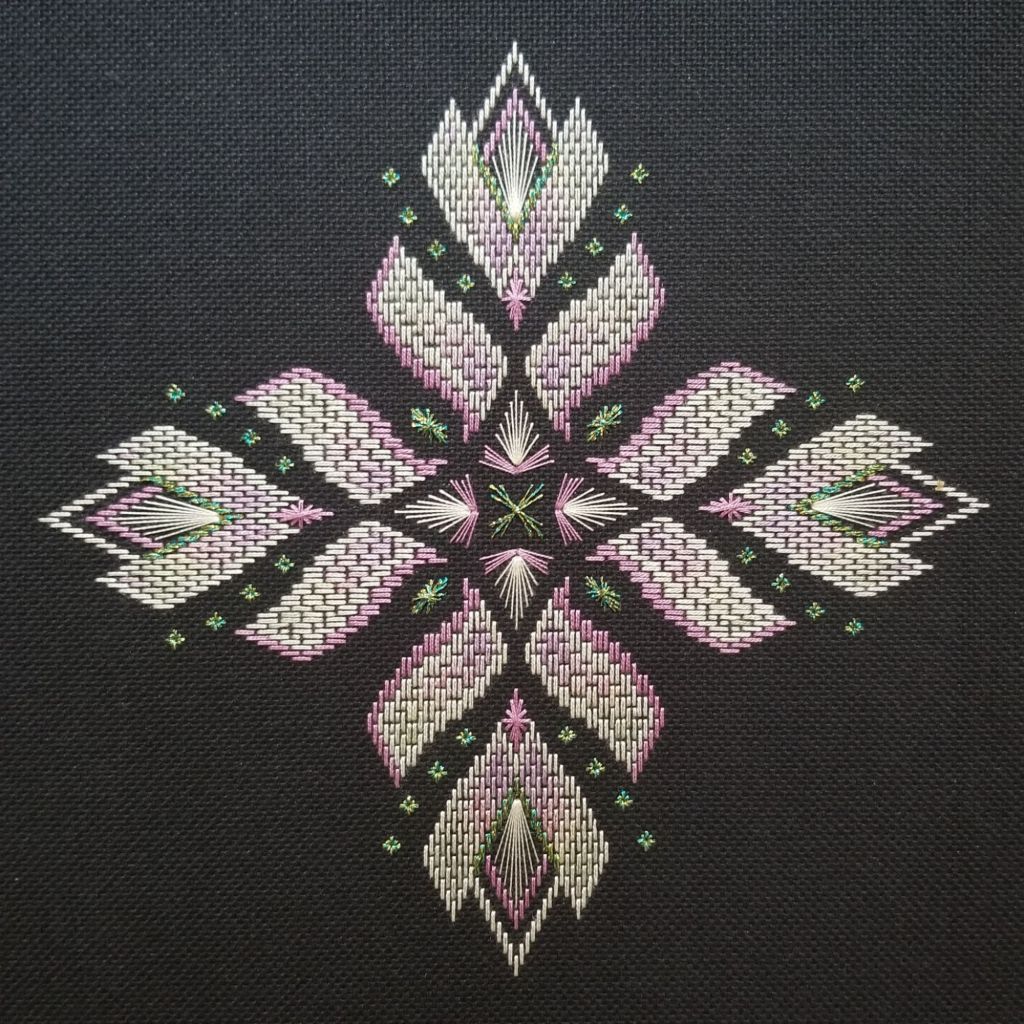
I realize I never posted Starburst by Patricia Hartman (from the 2013 Chapter Project Book that was an ANG Main Line Stitchers project) or Orchid Lady by Mary Knapp (an ANG Cyberpointers project from 2021) after they were framed at Repenning Fine Arts.
Both are counted projects completed with the same thread line called Beautiful Stitches from Ann-Marie Anderson-Mayes in Australia.
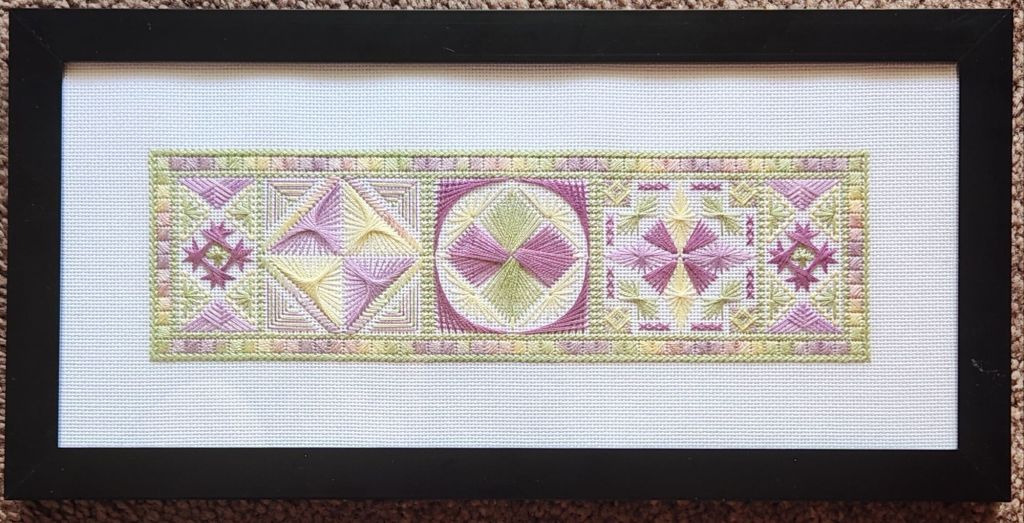
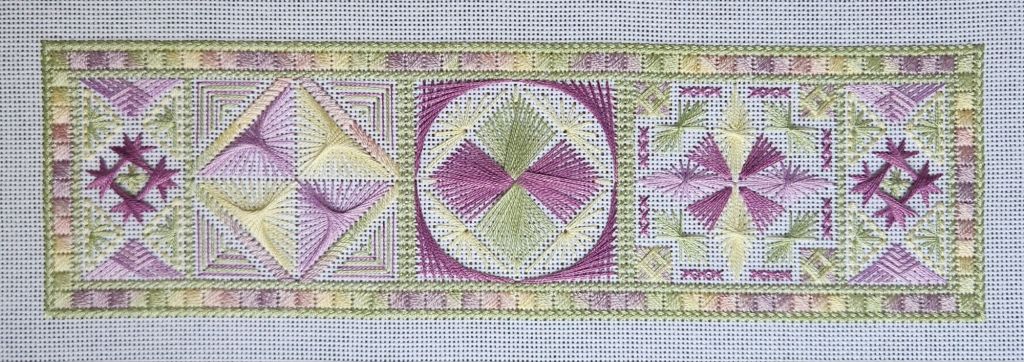
The ANG Central Jersey Chapter is doing Summer Fireworks by Ann-Marie Anderson-Mayes this year as one project, and I had enough threads left to complete it and match these other 2 pieces.
I didn’t use museum glass, and that makes photos difficult. Both were stitched on a black Congress Cloth and have a light gray frame.
Summer Fireworks by Ann-Marie Anderson-Mayes was done on white Congress Cloth and placed in a 5″ x 11″ black frame (by me). I laced it to magazine board. Foam core would have been too thick. It came with plexiglass. I used it and still got a decent photo. The stitches are slightly raised but don’t look like they are getting squished.
Since the photos are not showing the color on the first 2 as well, here they are before framing. Stitching on black makes a totally different look.
Goal #10 for 2025 is completed and framed.
I have a recent EGA Brandywine Guild project that is easy, portable, and would be perfect for the leftover threads! Ann-Marie also has a companion piece, Autumn Fireworks (also free instructions). That sounds like I am adding another project to the 2025 goals which is something that I was trying to avoid. We’ll see what happens.
My ANG Main Line Stitchers Chapter is stitching the Folding Ort Box (OB) and the Ort Box with a Twist (OBT) both designed by Marilyn Owen. I stitched the Folding Ort Box years ago on 14 count interlock canvas and was never happy with it because it is too big and floppy. I was happy with the blackwork but that small area is about as much blackwork as I need in my life. The path needed to take is tricky – reminds me of organic chemistry in college – you have to see where you’re going too many steps in advance. I didn’t need organic chemistry in the pharmacy and I don’t need blackwork in my life!
I am stitching both now on 18 count interlock. Because I save everything, I have my extra detailed blackwork map that I created years ago. Maybe it’ll be easier this time.
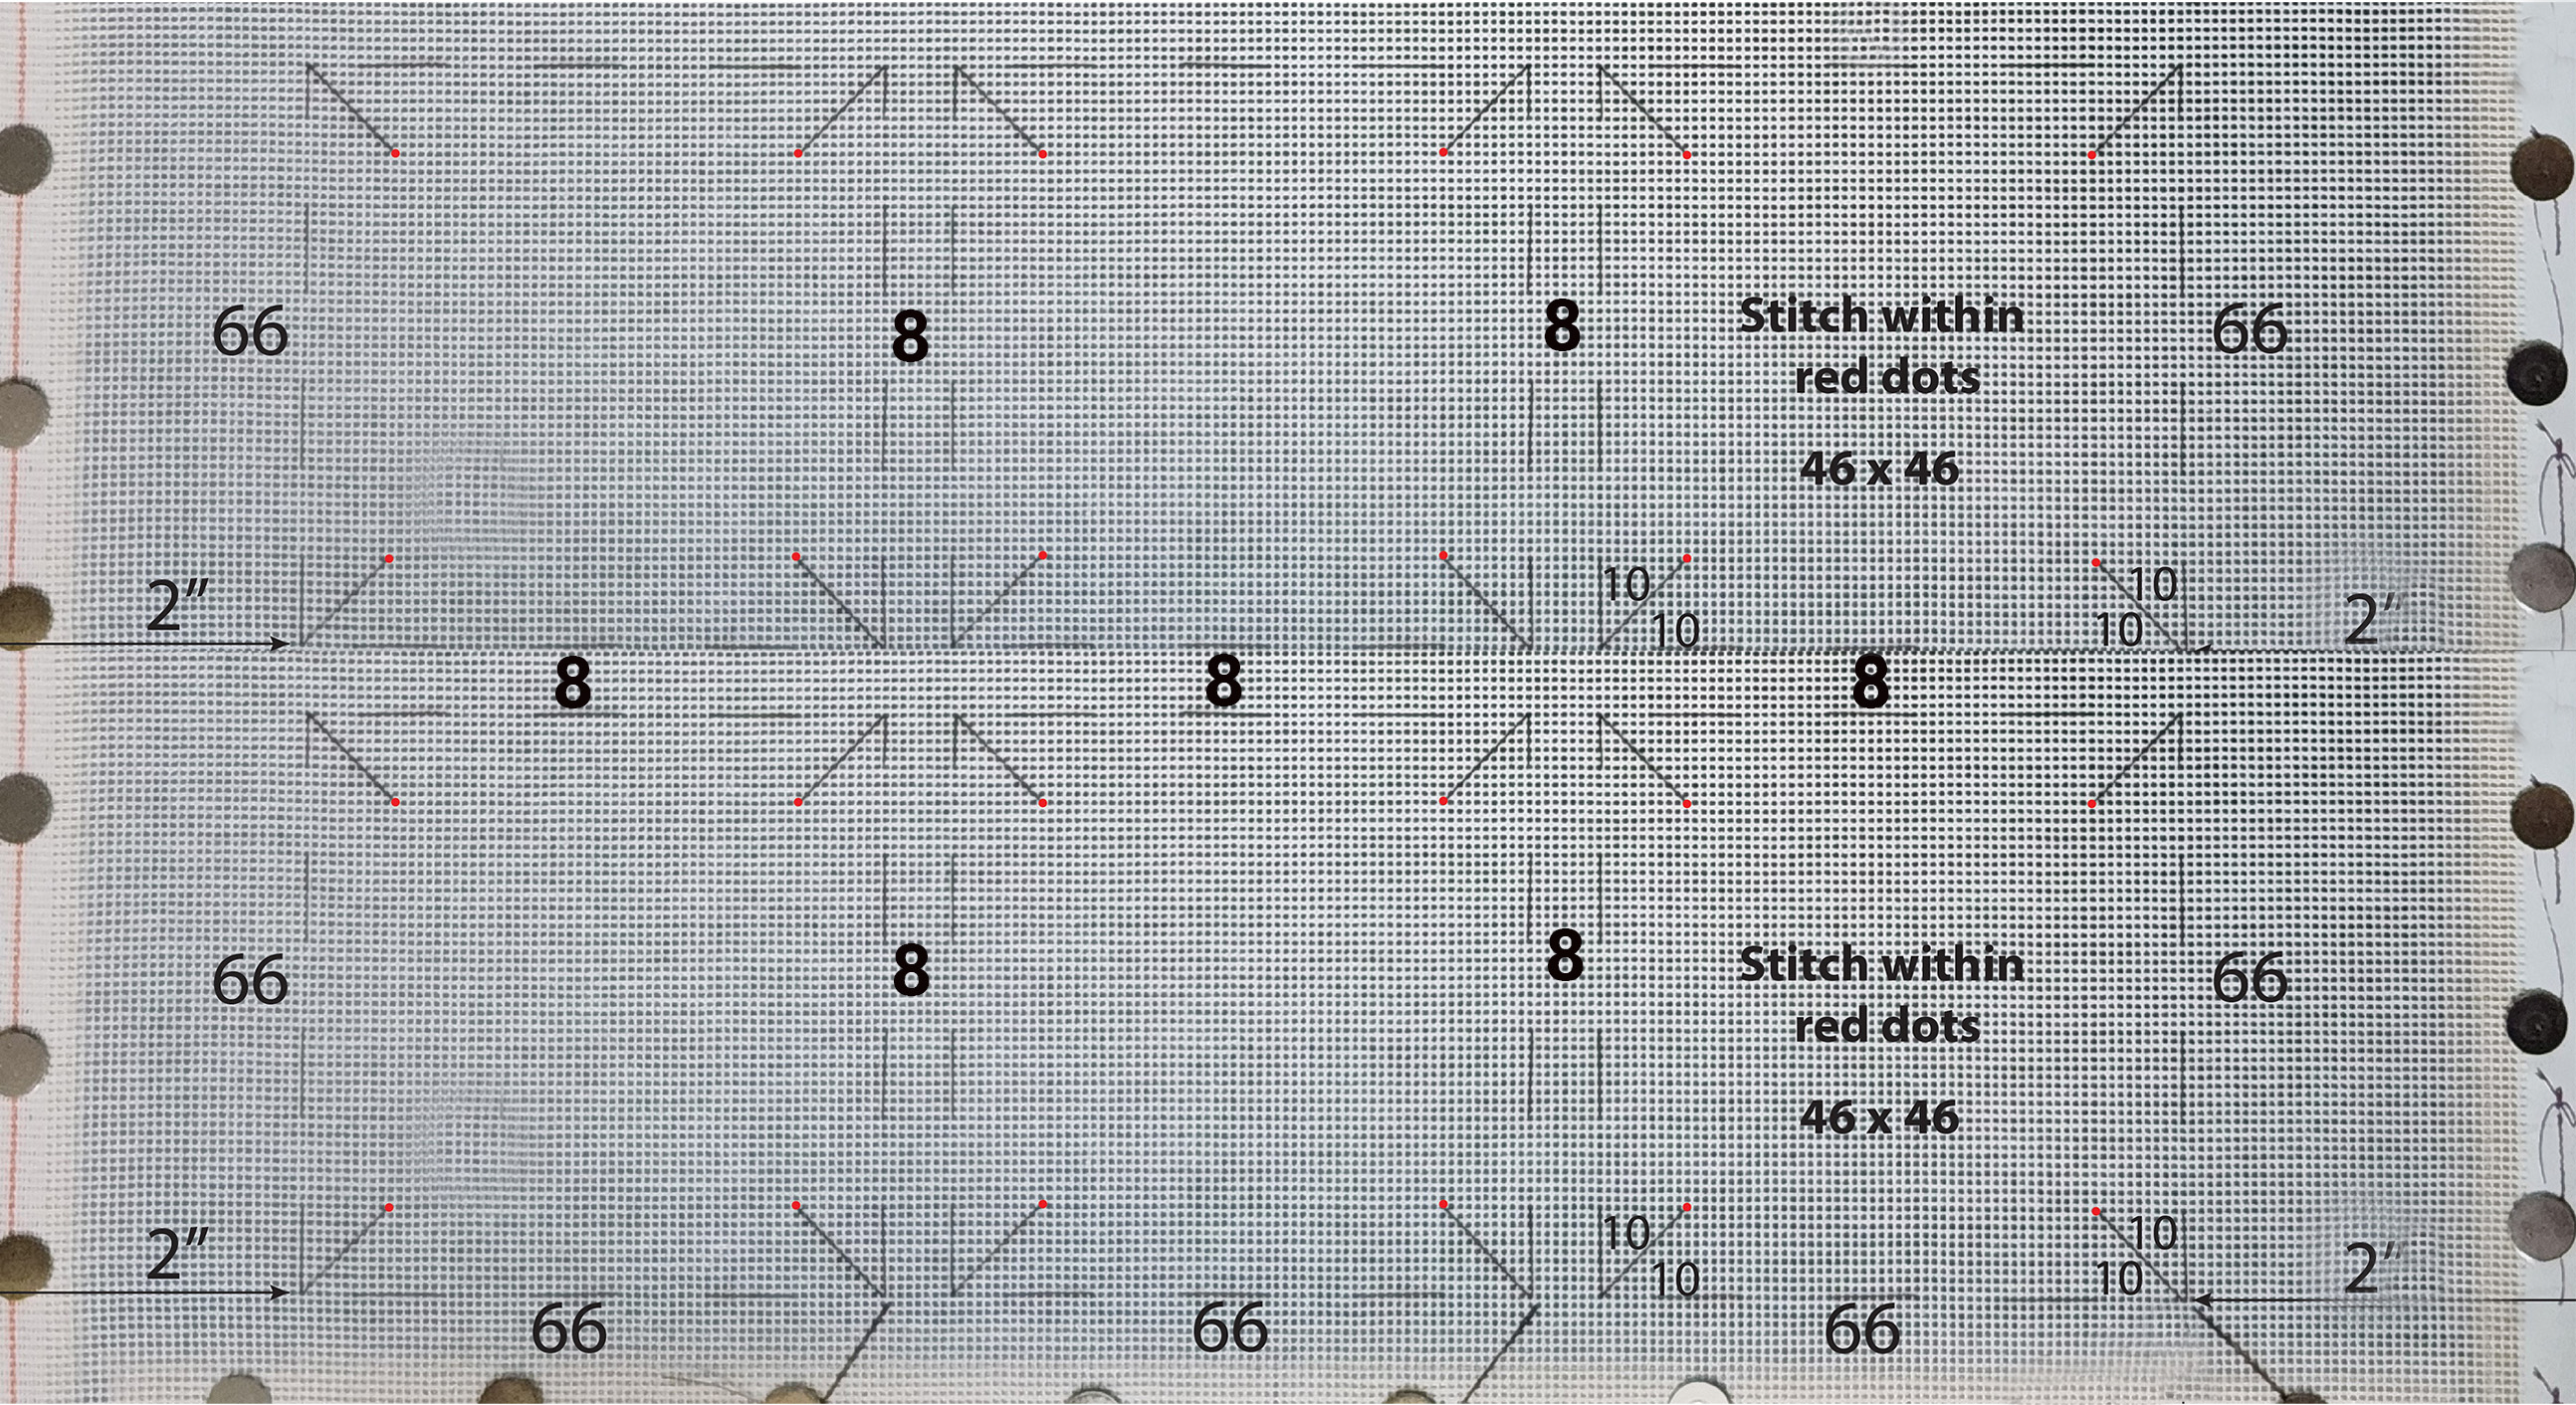
There are 7 members stitching the OB and 6 stitching the OBT. I am leading both pieces. Last month we covered colorways and basting. It took me 3 tries to get the basting on the OBT and Patrick found a mistake on my OB basting but that was easily fixed.
The error in this photo is pretty evident (stop laughing MO!). You’d have to count to find the one error (56 basted but should have been 66) and the other is marking the inner area.
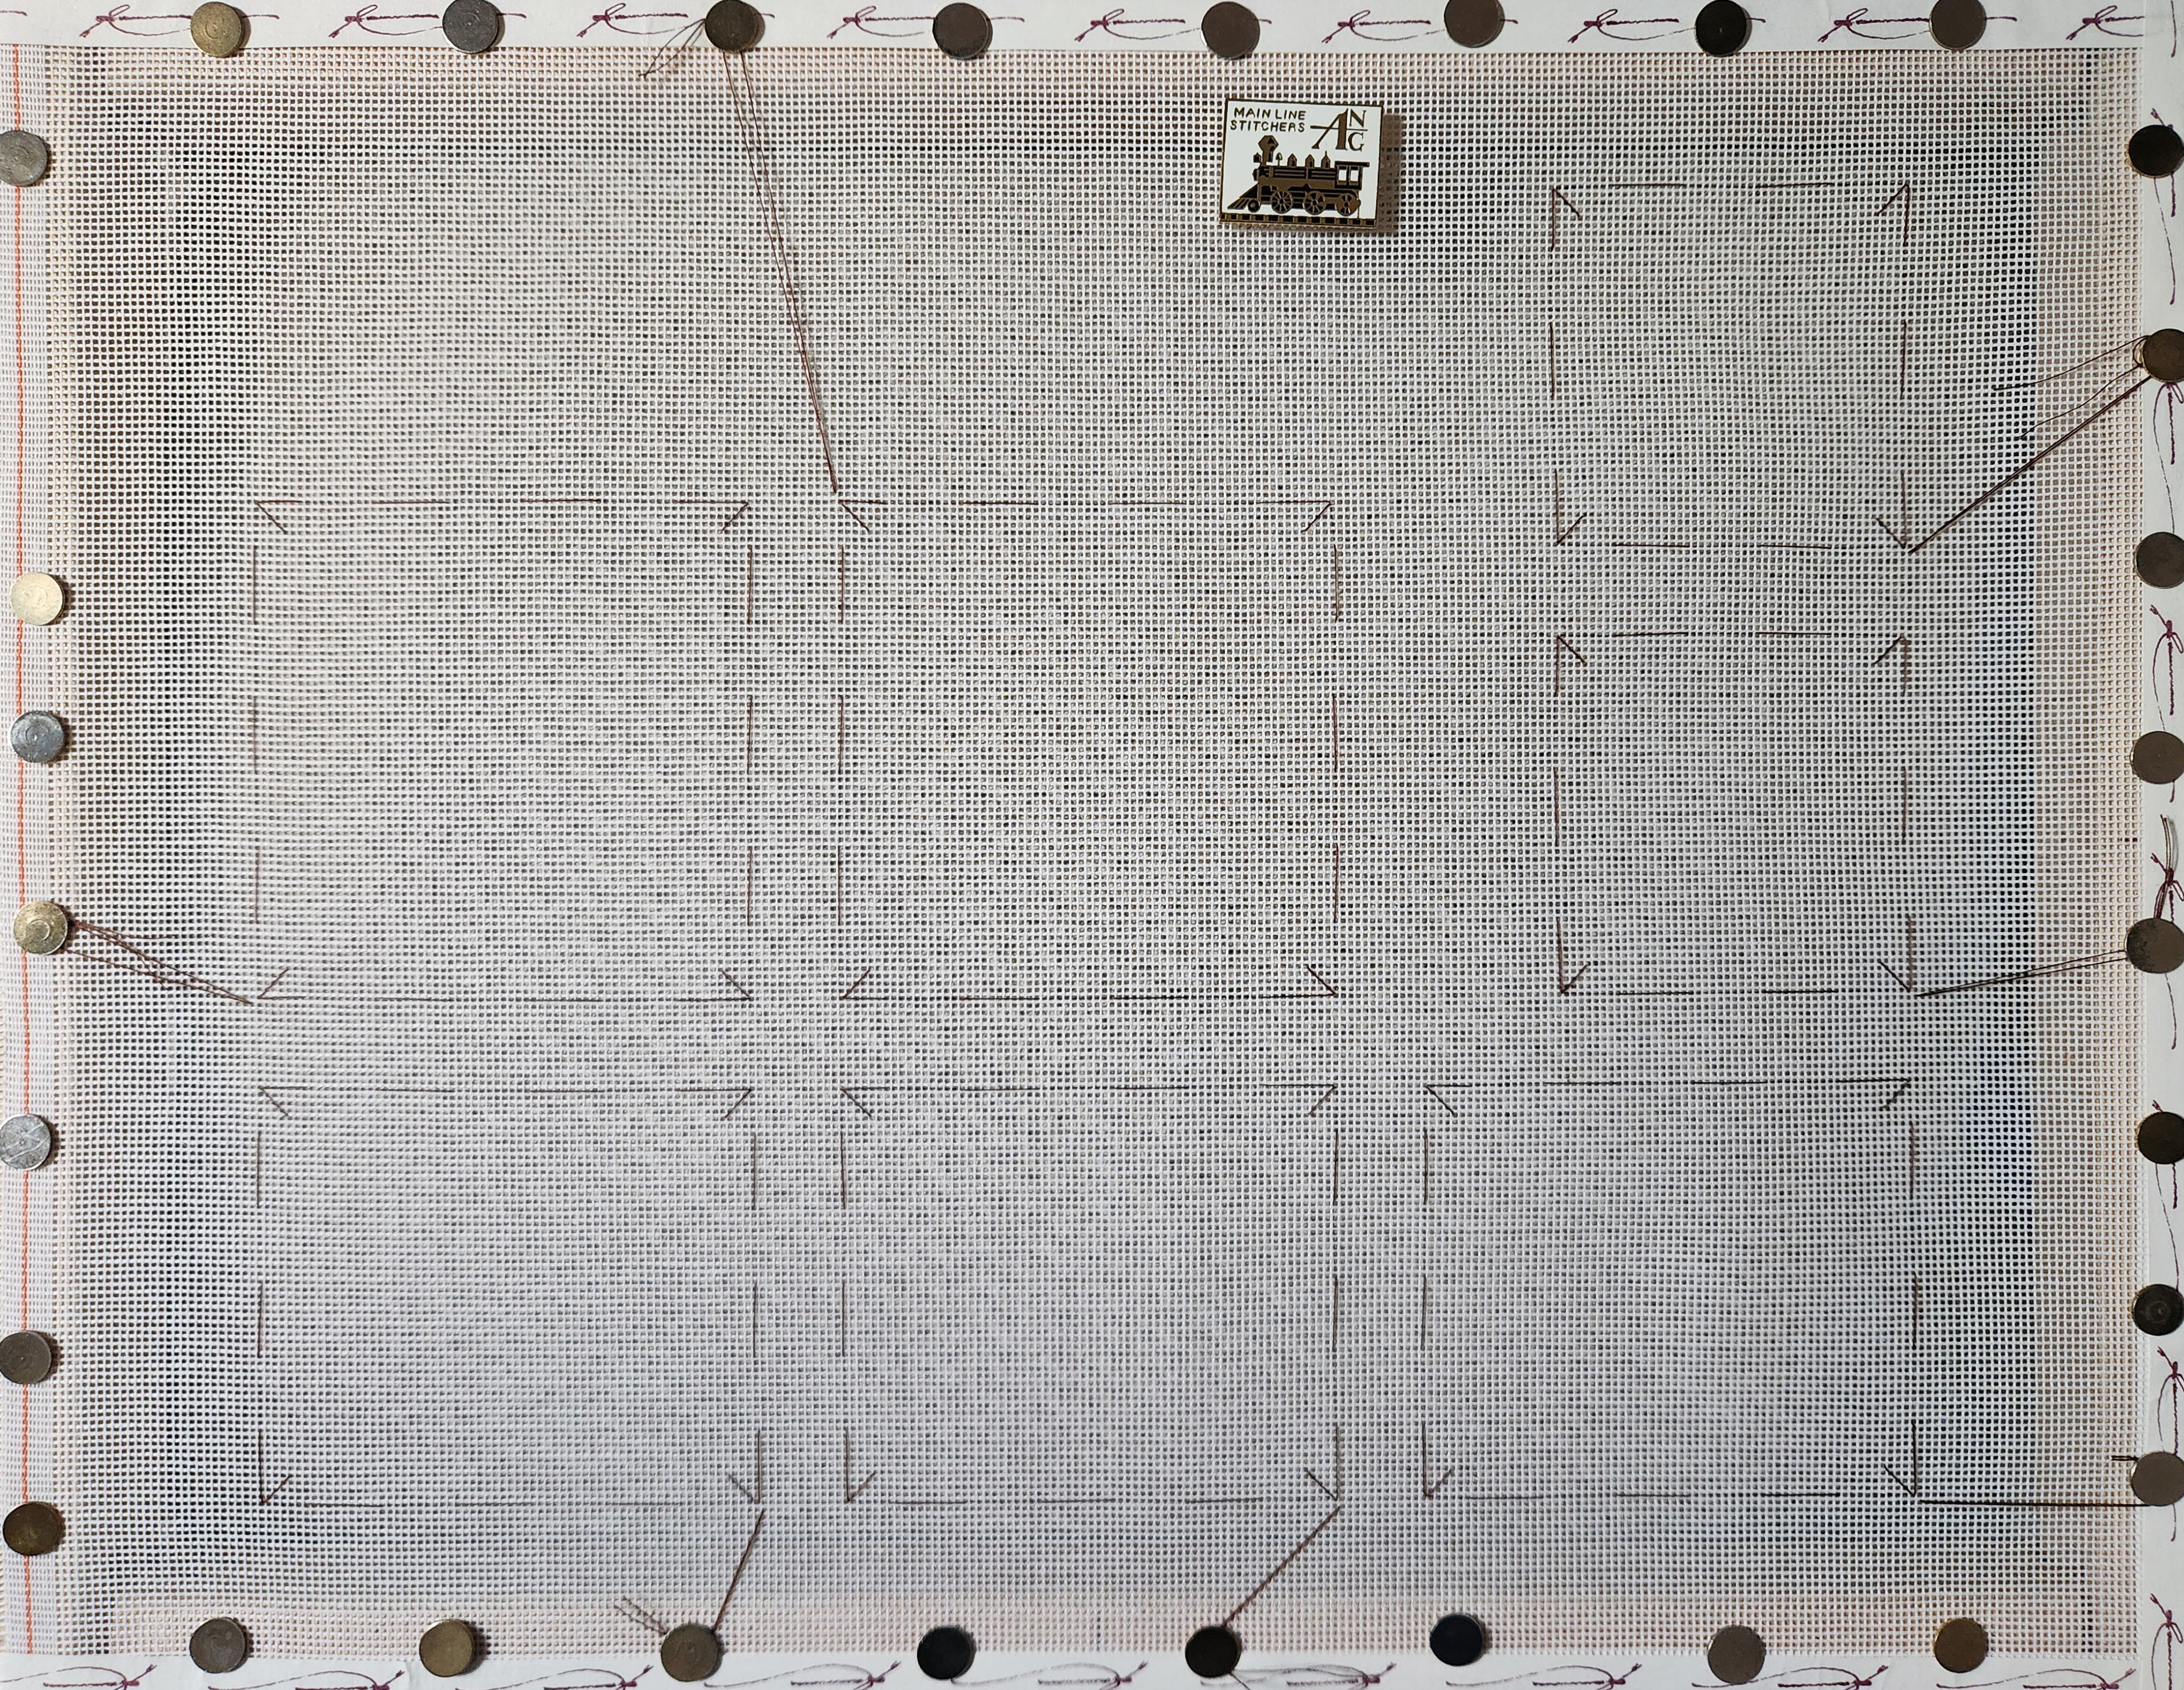
Finally, I got it correct. Had I drawn lines instead of basting, the canvas would have been a mess!
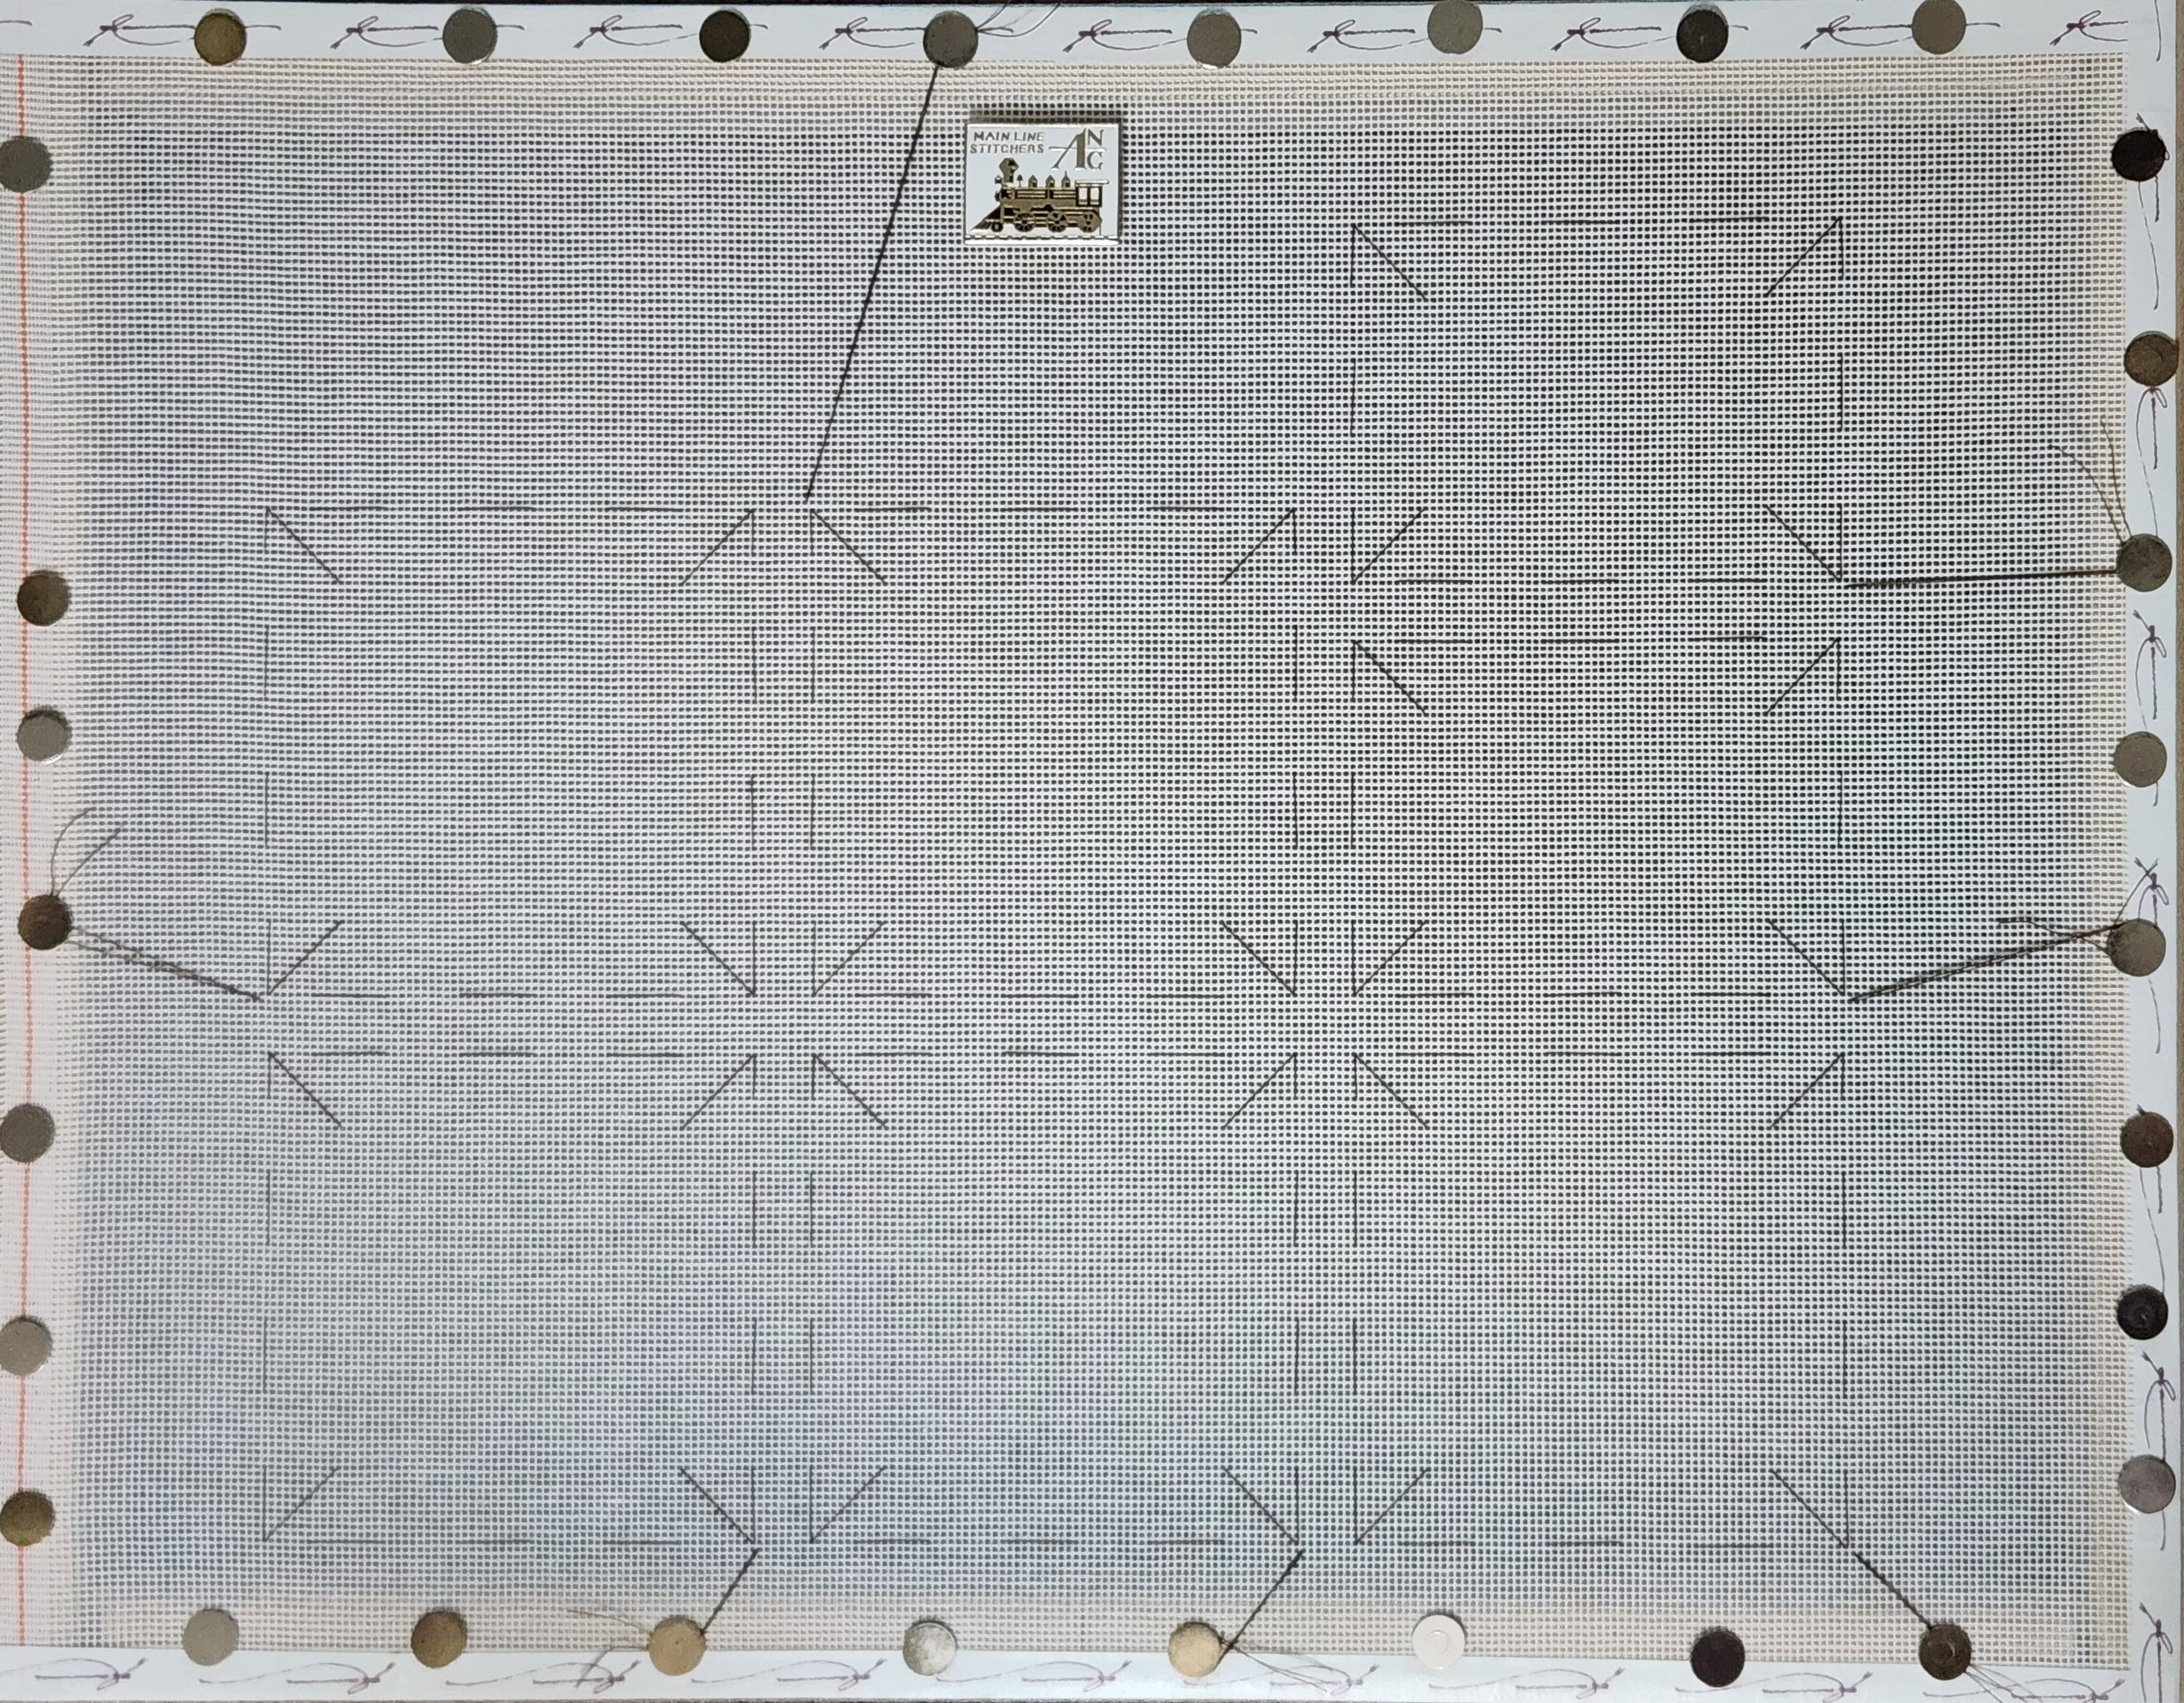
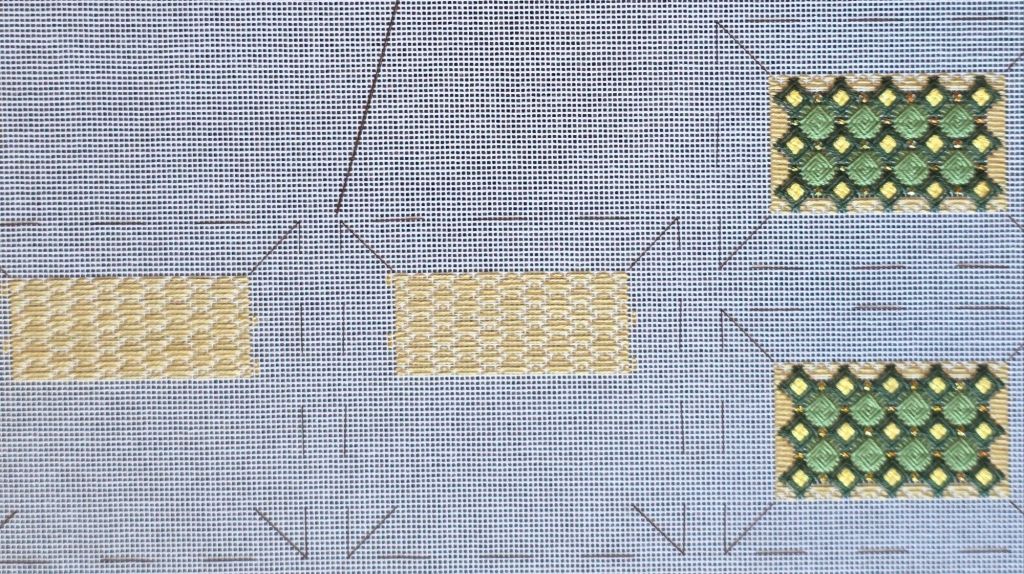
For both, I provided details as seen in this photo.
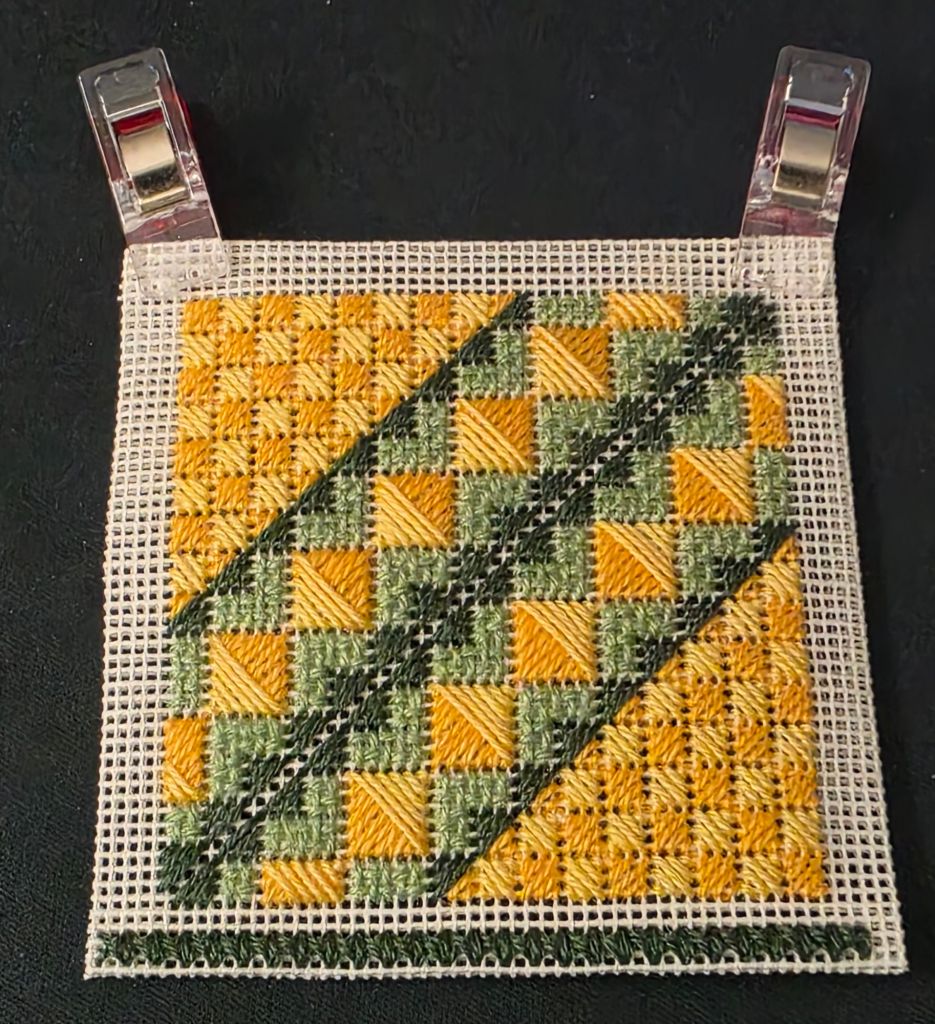
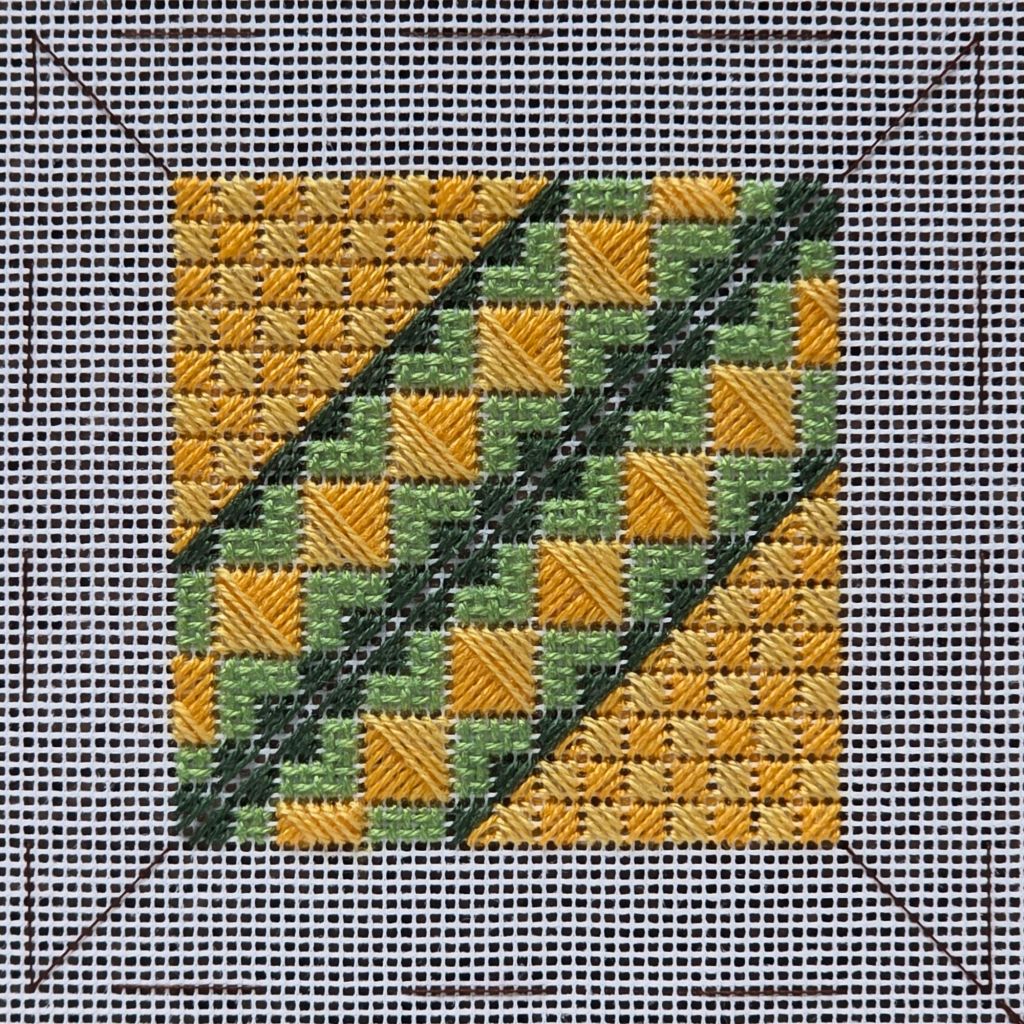
For this month, I am going to focus on the diagonal divider of the OB and the pockets of the OBT. The idea is to get less thread on the back in the dividing line. Marilyn figured out how to do that. I pretty much had to flip the canvas to catch the thread (left side of photo below) or else I wound up with a hot mess (right side of photo below).

The pockets will prevent the same type of folding on the OBT and what dividing lines there are, they are different (easier).

So, I need to finish these areas and get to next month’s areas.
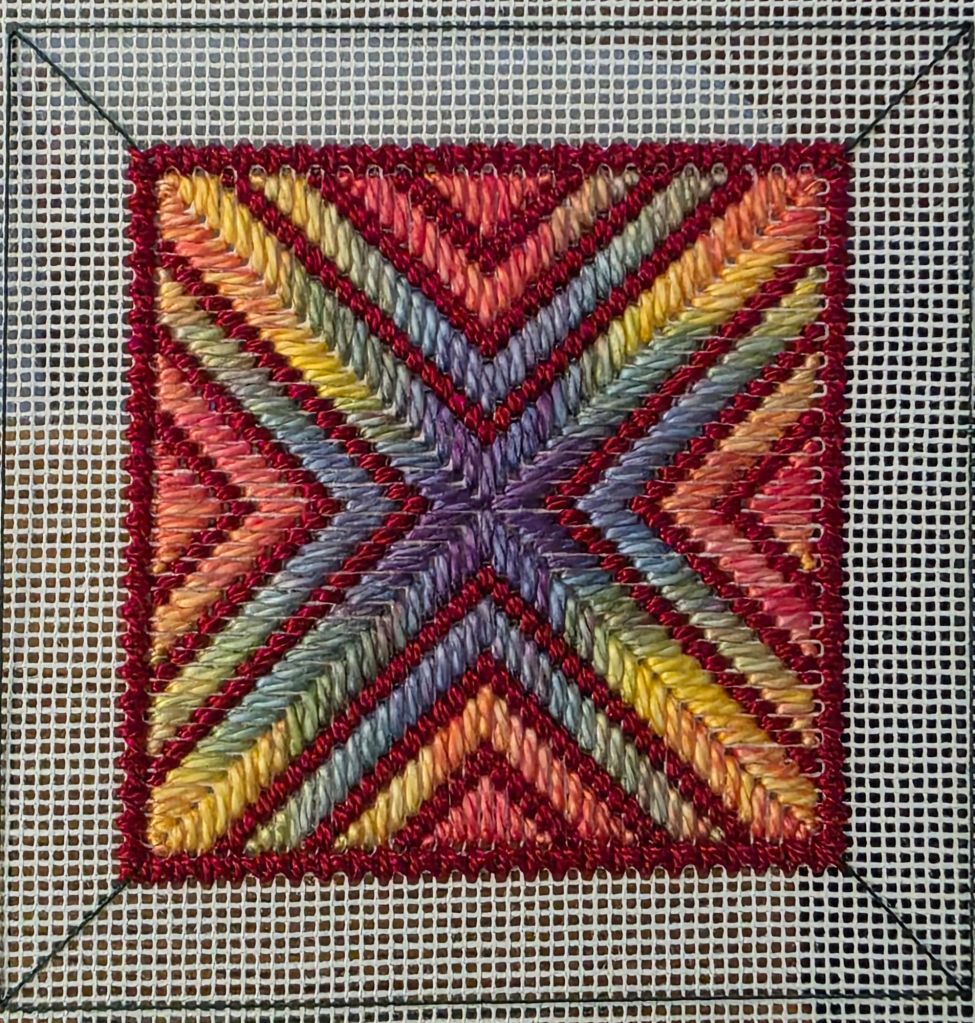
In 2021, my ANG Main Line Stitchers chapter stitched Rainbow Ribbons by Kam Wenzloff published in Nov/Dec 2019 issue of Needlepoint Now. We had a variety of colorways using beautiful threads from Color Complements. It was a fun project.

I am cleaning out folders in my computer and realized that I hadn’t posted my pillow. I had it finished at Needle Me in Havertown. It’s a purple overdyed Pearl with a gray Ultrasuede border.

Filed under: ANG Main Line Stitchers Chapter, Laurel Burch Rainbow Butterfly by Danji
This post is out of order. I wanted to share how I stitched the lower areas. I started with a 3×3 Jessica and placed a couple of stitches in the center to help raise the center sequin and black bead.
There are black daisy stitches couching a short length of the Waterlilies African Sunset (all 12 strands).
I ignored the dark blue painted area and stitched the light blue Planet Earth Silk 8 ply Azure 1233 (3 strands) in a Hesitation Stitch (Painted Canvas Embellishment An Idea Book by Carole Lake and Michael Boren, pg 65) leaving room for a dark blue bead (Seed Beads, 14/0). The beads are from Beads by Blanche in Bergenfield, NJ, which closed after 27 years in May 2024. A few years ago, several of us from the ANG Keystone Garden chapter benefited from Trish Vine’s downsizing. I have a 30 gm tube of these tiny blue beads. I needed to diagram the Hesitation Stitch before stitching it to see if it would work.

A buttonhole stitch with 2 strands of Silk Lame Braid Petite (SP174) surrounds the center sequin and bead.

Filed under: ANG Main Line Stitchers Chapter, Laurel Burch Rainbow Butterfly by Danji
The final steps (antennae, outlines, and beads) of my Rainbow Butterfly by Danji.
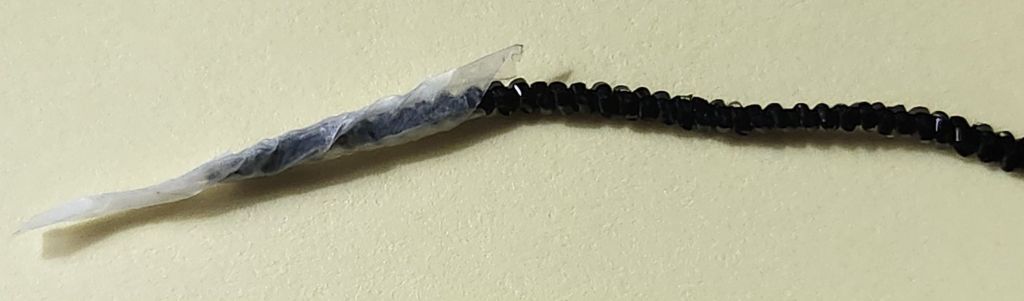
I wanted the antennae to be more substantial than the black outlines, so I used Kreinik Facets and Petite Facets, respectively. These were all couched into place with Kreinik #4 Braid in matching 005 Black. I had to make the starting and ending holes pretty large to sink the Facets. Wrapping the thread with tape and making a pointed end allowed me something to grab and nudge through the enlarged hole, which I then tacked into place.
I planned my path with the Petite Facets to minimize the number of starting and ending holes. One long piece goes from the top left side of the yellow-orange wing down and around the body and across to the top right side. Two shorter pieces follow along the top of the fuchia-purple area. I made the “tape needle” again to start each side but used a large eye needle to finish.
The Kreinik Petite Facets 002 Gold looked more gold than the Kreinik #16 Braid 002 Gold that I had used for the body, and it was too thick, especially considering how much was getting outlined. I couldn’t have gone to #12 Braid because I needed the thicker #16 Braid to cover the width of the outline. I couched with #4 Braid 002 again. I also used #4 Braid to outline the edge of the small green and blue areas.

I often refer to Marilyn Owen’s article in the ANG Needle Pointers May/June 2021 issue for beading techniques. I used 2 different methods to attach the same size bead with 2 strands of black DMC floss. Both methods orient the beads vertically, but one is over 2 canvas threads and the other over 1 canvas thread. This allowed the same size beads to appear larger on the top half compared to the bottom, which is how the canvas was painted. I used Mill Hill Antique Glass Beads 11/0 (03040).

I’ll wait to share the background until it’s fully finished.
