Filed under: General comments, Serendipity - Stitching Club with Ellen Johnson, Spring Stitch Challenge, Tips
Ellen of Serendipity challenged us to stitch the Trellis Cross stitch in 2 different ways and compare results.
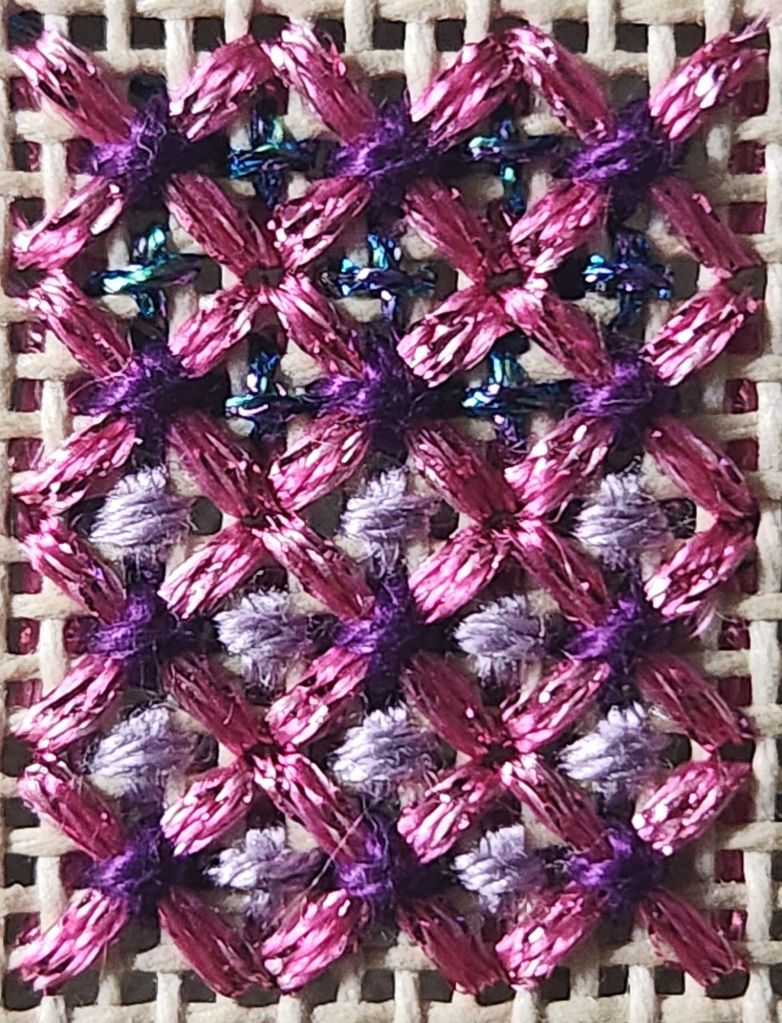
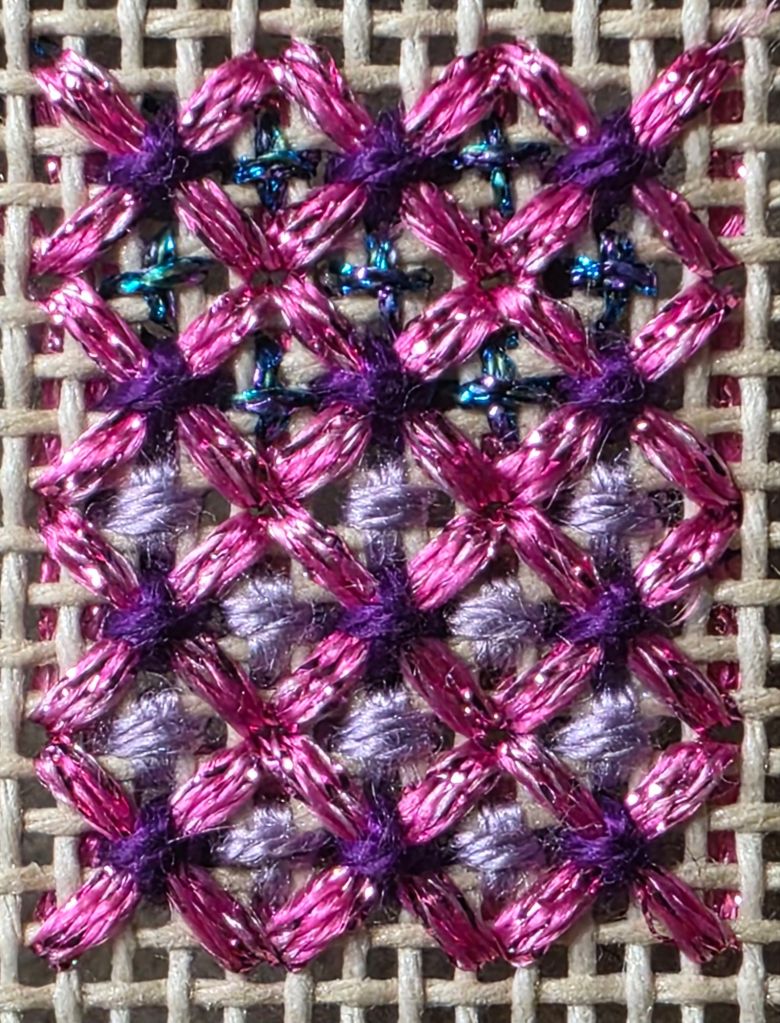
In this stitch sample, I used a pink Neon Rays+ as Step 1 for the large cross. For Step 2, I used dark purple DMC Perle #8 over the Neon Rays+ intersections. Then, on the top half, I filled in with blue and purple Kreinik Braid #8 which added too many colors, too much sparkle and left exposed canvas. If this was a painted canvas, exposed canvas might look better. On the bottom half, I used 4 strands of Splendor in a light purple. So, using 2 purples looks better to me. And, there is less exposed canvas which looks better too. Zooming in on the stitching shows more canvas than looking at it at a normal distance.
Here’s the photo with my old phone.
Here’s the photo with the new phone.
I don’t pretend to understand the specs they list but the new Samsung S25 Ultra has optical zoom vs the old digital zoom (S22+) which is what I have been using. They explain it at: https://www.samsung.com/uk/mobile-phone-buying-guide/samsung-galaxy-s25-camera-specs-explained/
Quite a difference in clarity!
I thought I could handle the transfers (Bill and I have to upgrade together) but it took maybe 2 hours on the phone (and I was following instructions quickly) and a short second phone call to complete both phones! I had a very helpful young lady on the first call. These phones better last for a long time. I don’t need to do that again any time soon. I might just reshoot some (all?) of my needlepoint pieces some rainy day.
Some explanations have come in from someone more technically savvy than I:
Optical zoom means they have added another lens so that the light is bent (in complicated ways) on its way to the camera sensor to provide the additional detail.
Each of the little circles on the back of my phone is a different camera and lens. The phones don’t really have “zoom”, but rather 2 to 5 separate cameras. My old phone only had 3 cameras. There are options for 0.6X, 1X, 2X, 3X, 5X, 10X, 30, and 100 magnification that the various cameras provide. As soon as I use my fingers to zoom between sizes, I go back to digital zoom. That would be better to do in Photoshop.
Wow. That’s so much great info!
Here’s I took a photo at 30X. The one with the new phone I already posted was at 2X or 3X. According to the megapixels I discovered in the details of the photo, this new 30X one has 10MP while the other one has 6MP and the old phone had 5MP. It should be even better. The lighting is different and my hand may not have been asked steady.
I wanted the search terms to pick up fix, repair, mend, torn, or ripped, which accounts for the title.
Katie C on Needlepoint Nation shared that one of her canvases has a small tear. She asked for any tips on how to fix this spot.
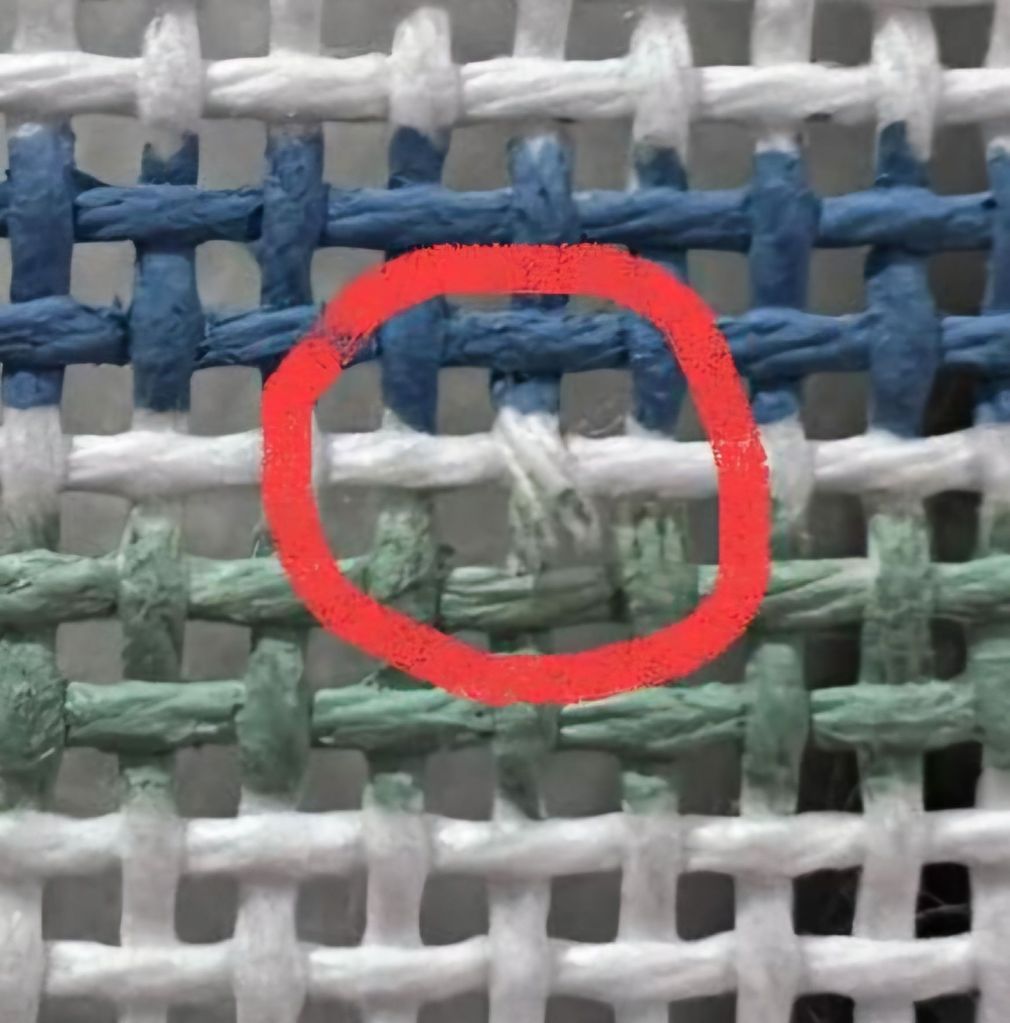
She got such good responses that I need to save them. I just hope I never need to try these.
Felice F said, “You might consider cutting a small square of canvas and placing it underneath so when you stitch the area, you stitch through both canvases.”
Michael J said, “For tiny spots like this, you can use a piece of dental floss. At least an inch away start an away knot or waste knot with the dental floss in same line that is broken. Weave in and out. Go past your affected area about 1 inch. Your dental floss will become your new thread. Finish off by burying your tail and end with waste knot that will be covered.”
Susan K P said, “Many years ago, in a class, the instructor had us cut the canvas on purpose. She then had us pull a single thread from the selvage, and weave it in about two/three threads below and above the cut…… making sure we ended up on the reverse side. Snip it with scissors and stitch. This is the same method to repair cuts on linen or other fabrics like that. It is simple, easy, and quick. No need to to cut and attach a square to your canvas or pay someone to repair it. Same thing can be done to a damaged, yet stitched, canvas or fabric. It is also the method used to repair hardanger that has been cut incorrectly.
But what ever method you do….. please don’t use glue on that expensive canvas with the expensive fibers. Unless you have access to a “restoration” type product, the chemicals in the glue can damage the canvas and can cause the fiber colors to change.”
Thanks to those who shared their knowledge. Do you have any more suggestions?
Had it been in the middle of a large area and not doing a tent stitch for a pillow, I think I probably would have selected a Smyrna, Scotch, or Rhodes to cover that one small rip.
Did you know there are two ways to stitch Alternating Continental?

That link to ANG has changed since I diagrammed it (https://acrobat.adobe.com/id/urn:aaid:sc:VA6C2:3fba9f78-8199-4564-8b67-aec23e9a3779 and only ANG members have access to all previous Stitch of the Month projects).
Does it make a difference?

Yes. You can see the difference in carrying the thread below the hole (left) compared to not (right). Correct me if I’m wrong, but I believe the right side is more like how to work a blackwork pattern or a double running stitch.

Filed under: General comments, Silk Threads, Threads, Tips
I pulled out my Beeswax following a suggestion to possibly use it to prevent the silk thread from snagging while working on Nautilus.
The first thing I noticed is how much red thread got left in the wax from a previous project. So, I cleaned it up by scraping off the top layer. I also see in the photo that this only cost $4.40. So, getting a new one wouldn’t break the bank but I like the heart shape! This looks better.
Before I did use it though, I decided to research the issue on Mary Corbett’s website (On Thread Conditioning & Beeswax for Embroidery – NeedlenThread.com https://share.google/oEKTD6N6ppVkR75pm).
She says in part: If you coat your threads with beeswax (or anything, really) it changes the look (darkens) and performance of the thread (won’t spread or reflect light as well).
So, I searched her website again and found her post with lots of great suggestions in Working with Soie de Paris (& Other Filament Silk) at NeedlenThread.com https://share.google/8Z1Z6onu77qKHBRZ1 .
Thanks to Mary, I’m less afraid of starting back on Nautilus now! Mary is on vacation and taking a well-deserved break from posting. Her website is such a great resource. If you haven’t checked it out you’re missing out!