Florentine Fancywork by Toni McKelley is progressing nicely despite some discrepancies. They are allowing me to make my individual interpretations here and there which Toni encourages anyway.
Other than making it a little longer, there are no overly evident differences in the Bargello Ribbon. Once you establish the first line, the rest is easy and fun.
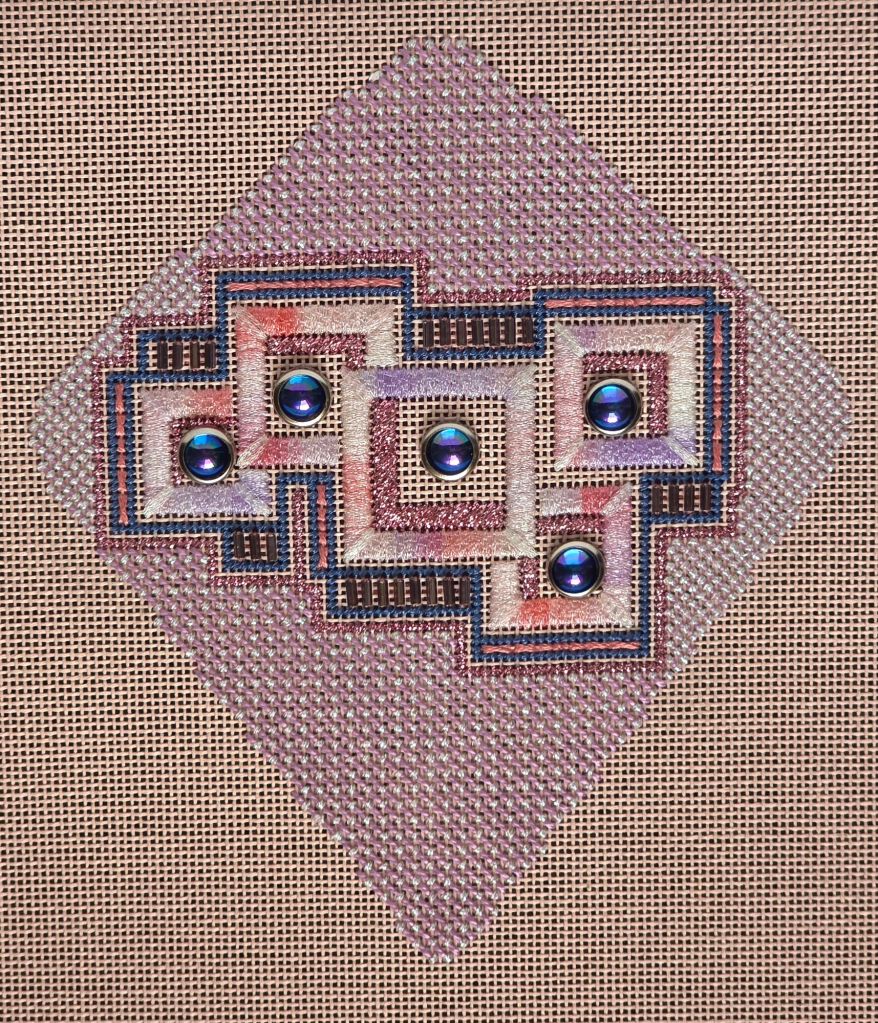
I did select the thread portions of the Watercolours. The yellows are on the top and bottom smaller areas while the peach/orange areas are for the center three areas.
The dark areas are a brownish portion of Rainbow Tweed selected for contrast. Toni recommended 1 strand which is a little thin but 2 strands looked too heavy. Since it is on a brown canvas, I stayed with 1 strand.
The horizontal band if Hungarian Diamond or Pavillion stitch is larger than the way it’s diagrammed in The Needlepoint Book by Jo Ippolito Christiansen and so I am calling it a variation.
Since my space is slightly wider (not sure why), I got full units which makes me very happy. Having one side differ from the other was not thrilling me.
Since Toni used a different overdyed thread from mine, I didn’t have enough of a blue portion in either skein of Watercolours 239 Wheat Fields I had and so I used more of the pink/orange portions than the yellow/orange portions used around the border. I’ll use the blue portion elsewhere.
Filed under: Florentine Fancywork by Toni McKelley, Other People's Designs
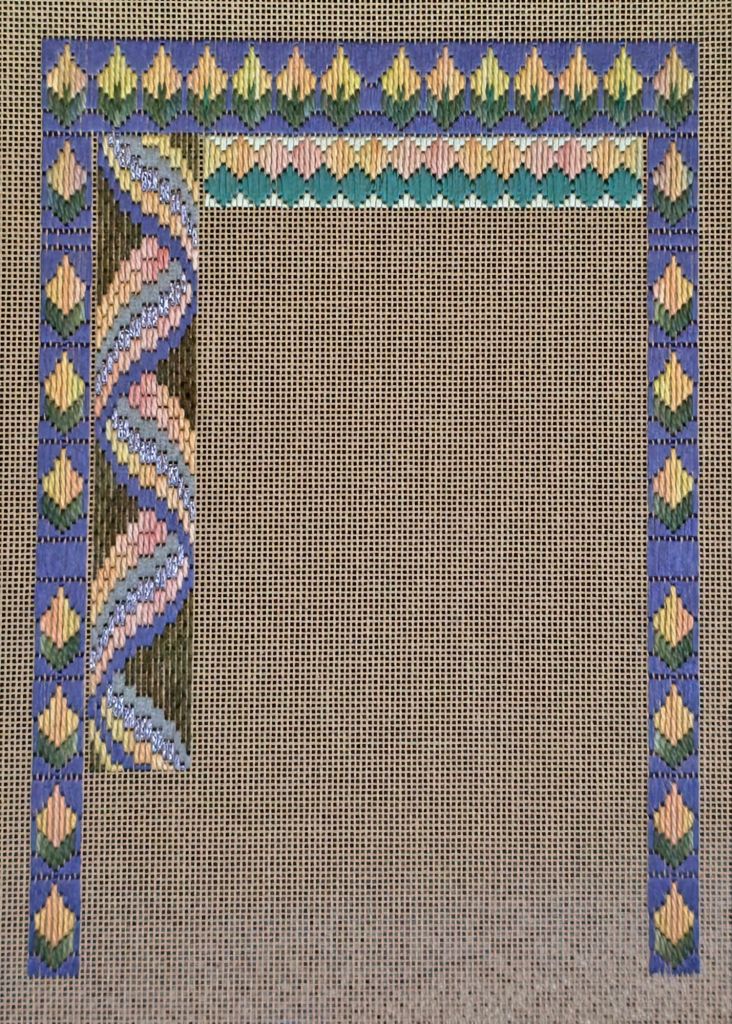
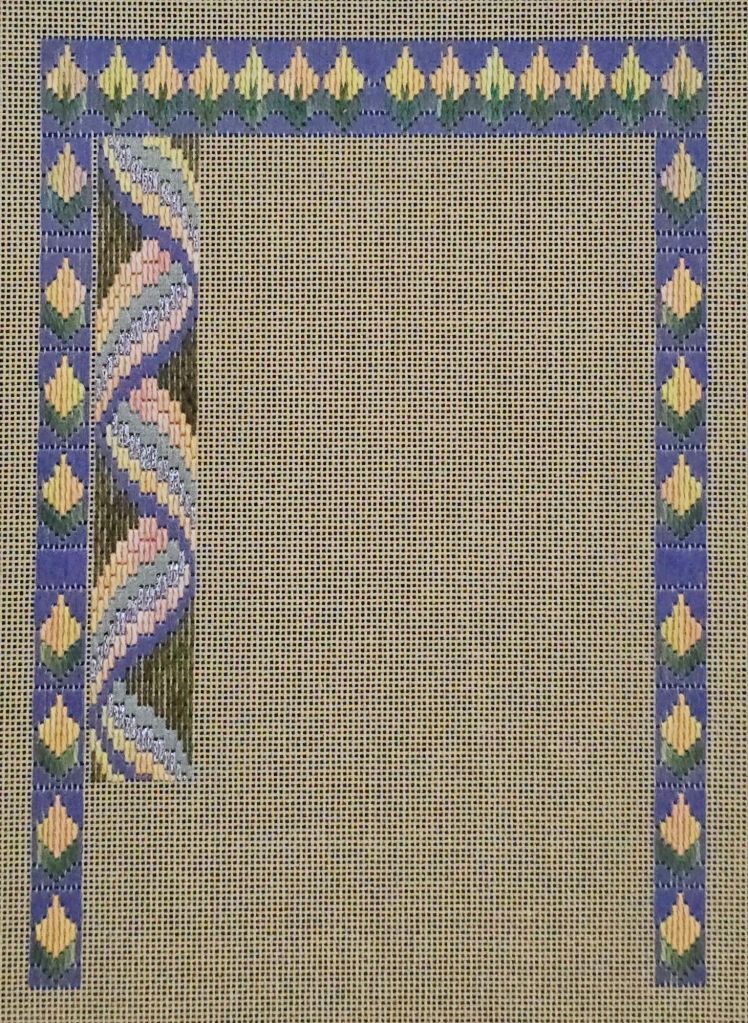
Once I determined my side border strategy for Florentine Fancywork by Toni McKelley, it worked up nicely. It is different from both of hers (stitched and diagrammed as they differ from each other).
By extending the band, I can fit 9 flower motifs but space them into 3 groups: 2, 3, and 4. Her stitched grouping of 8 was 3, 1, and 4 but more space in between each group. And the diagram was for 9 flower motifs with no spacing.
This is fun!
Filed under: Florentine Fancywork by Toni McKelley, Other People's Designs
There are opportunities in this piece to use color-matched portions of Watercolours 088 Mountain Meadow in the border. I enjoy doing that.
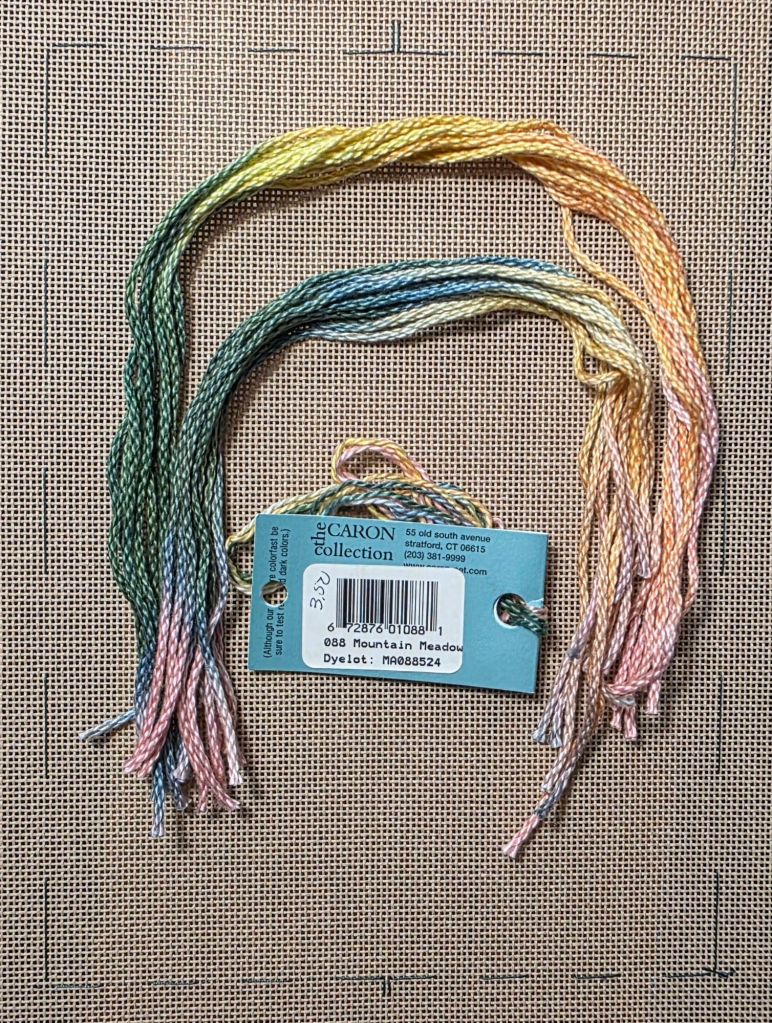
The flowers are the yellow/peach portions while the bottoms are the green portions. I worked from the sides to the center.
And, I have another full skein of Watercolours (different lot but very similar) for the rest of the design to use as it comes off the skein.
I started in the middle of the top border with the Periwinkle in case I had basted incorrectly. But, it was fine. I did make a counting error by not looking closely enough at the Master Diagram which I did correct (after some hesitation).
Normally, I would complete the whole border and Toni recommends the top and left side be done first. However, after looking at the Master Diagram and the stitched piece on the cover, I found definite differences. It took some studying to figure out what was happening because the overall size is the same or similar. Finnally, I saw the biggest difference is the 8 flower motifs spaced 3, 1, 4 on her original stitched piece versus the 9 evenly spaced flower motifs on the Master Chart. She probably thought it would be easier for stitchers to do the 9 but I really prefer the 8. So, I will stitch the side borders later just to be sure no more variations occur.
Also, the flower motifs were not diagrammed with the green stem extending into the flower. So, I am adding an oblong cross stitch over part of the flower in the center. Here’s half done, half not done yet. Which do you prefer?

Filed under: Other People's Designs
My mother’s mother, Mae – Grandma to me was very crafty – into everything (rug hooking, crochet, knitting, ceramics, leather tooling)! Here she is at 62 and it would be about 10 years later when she’d be teaching me needlework.
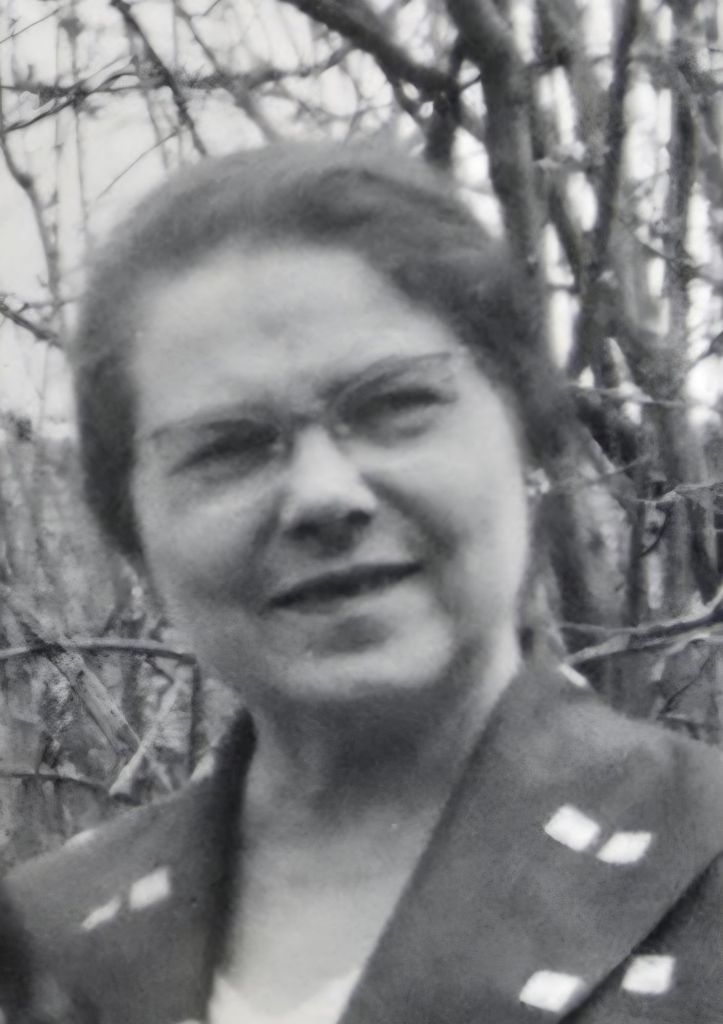
I’ve posted some of her pieces but realized that I have missed a few.
These appear to be crewel embroidery. And, she probably did the finishing too. The oval ones are dated 1981 (2 years prior to her death at 85 years of age). The square ones are not dated but I think they would be from the 70s.

Great memories of our time together!
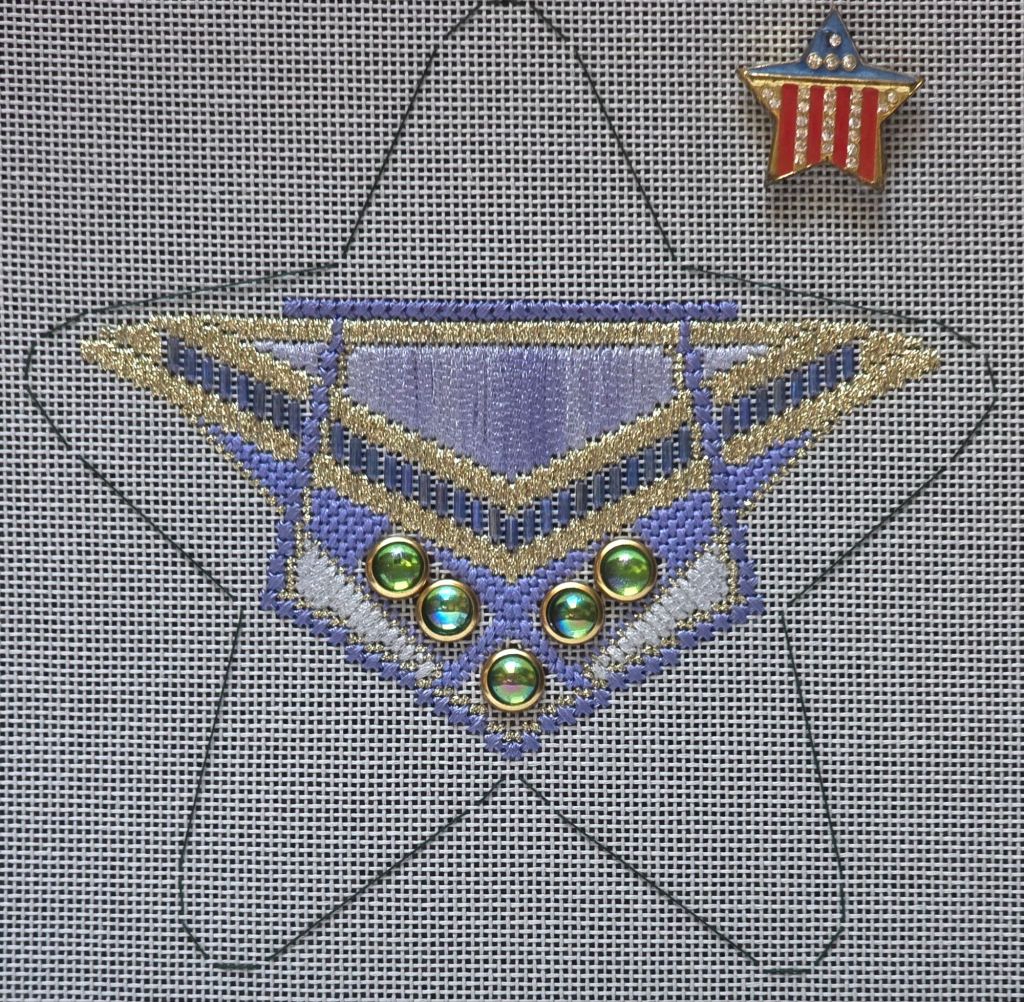
I had to cut out portions of Rhapsody to get enough of the purple color to span the top wide area. I used the lighter white portions on both smaller side areas below.
Again, I swapped out French Knots for cross stitches. The 1×2 alternating cross stitches fit nicely in the area with the top cross pointing towards the center as has been done throughout this design.
This is my progress after stitching during my EGA Brandywine’s Quarterly meeting, ANG Main Line Stitchers chapter Stitch-in, and football.
I’ll save the background for another Stitch-in.
A snowy long weekend allowed me time to do some finishing work.
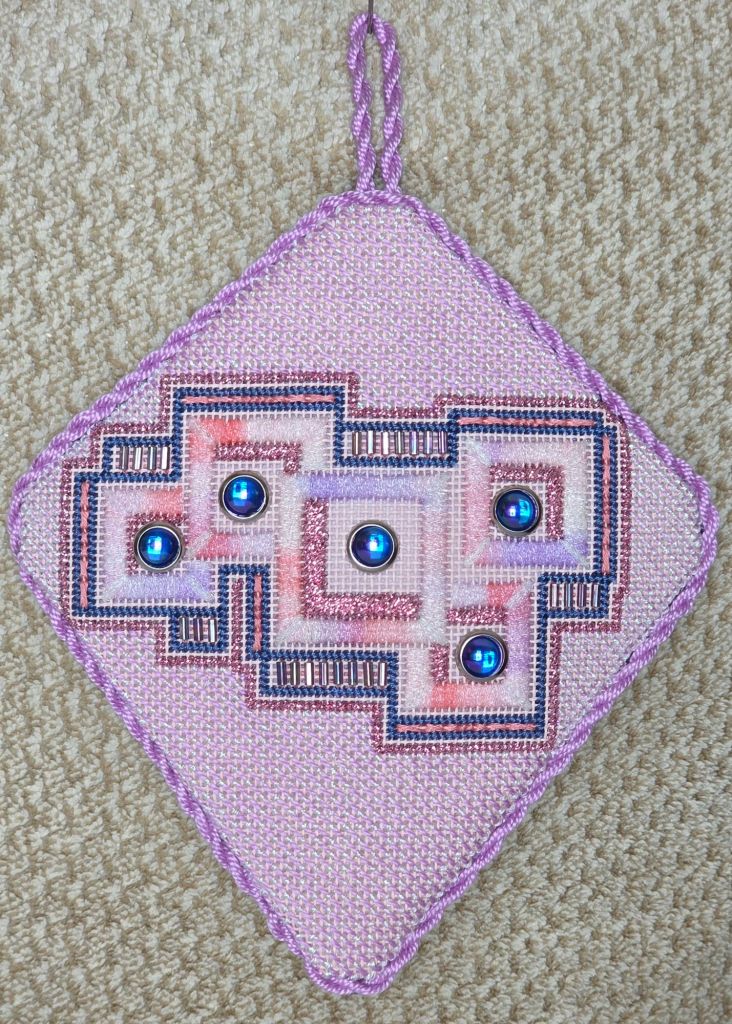
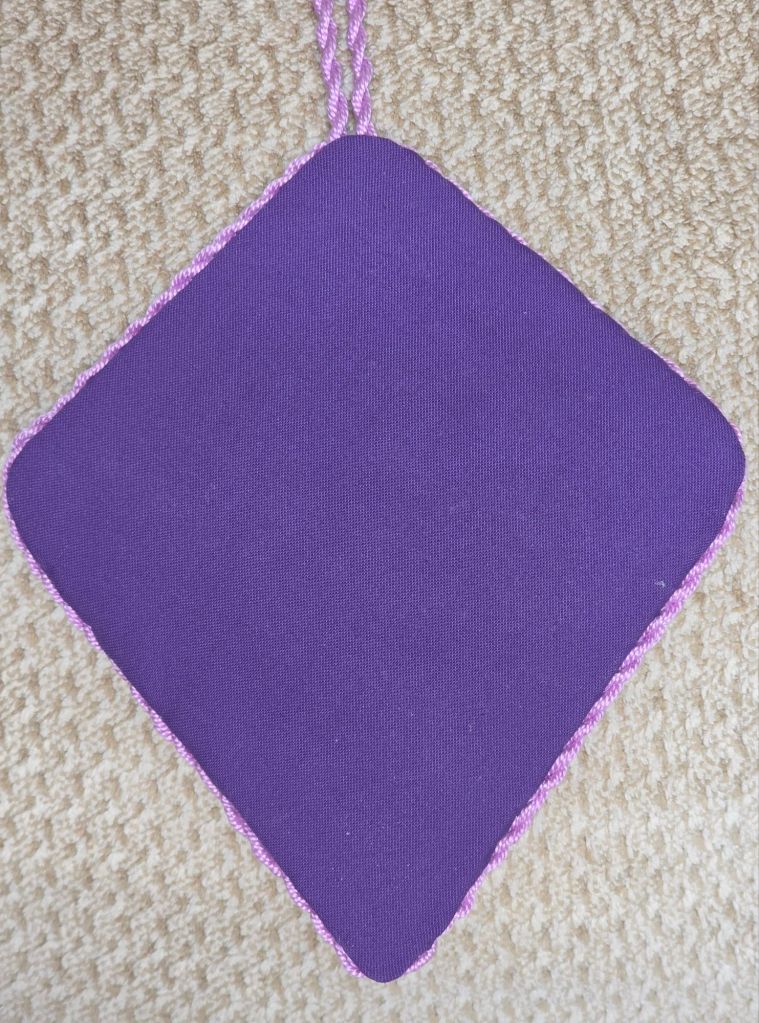
I’d had no luck finding fabric at any Michael’s recently. Initially, when JoAnn’s closed, it looked like Michael’s were stepping it up on the fabrics. But, they didn’t restock. So, when I found fat quarters (18″ x 21″) at Walmart awhile ago, I grabbed a few solid colors including the purple (solid pansy) on the back of this one. It’s a pink canvas but the one long light thread that was couched in the piece is a light purple.
My preferred finishing process is a stabilizer (tacked into place on the canvas with invisible thread) and one layer of felt glued onto magazine board. Then, I attach a loop to the stabilizer side. And, both sides are.attached to each other with cording sewed in place.
It’s taking awhile to get through the 4 pieces I’d piled up because we’ve watched a great show on BritBox called Riot Women and lots of football games. Since there are 4 pieces, I progressed in stages across each one until I got to attaching the cording. My fingers need to rest between each one.
I finished Peace, 3rd in The Cabochon Series by Susan Portra first.
Here’s my four finished cabochons on the banister.
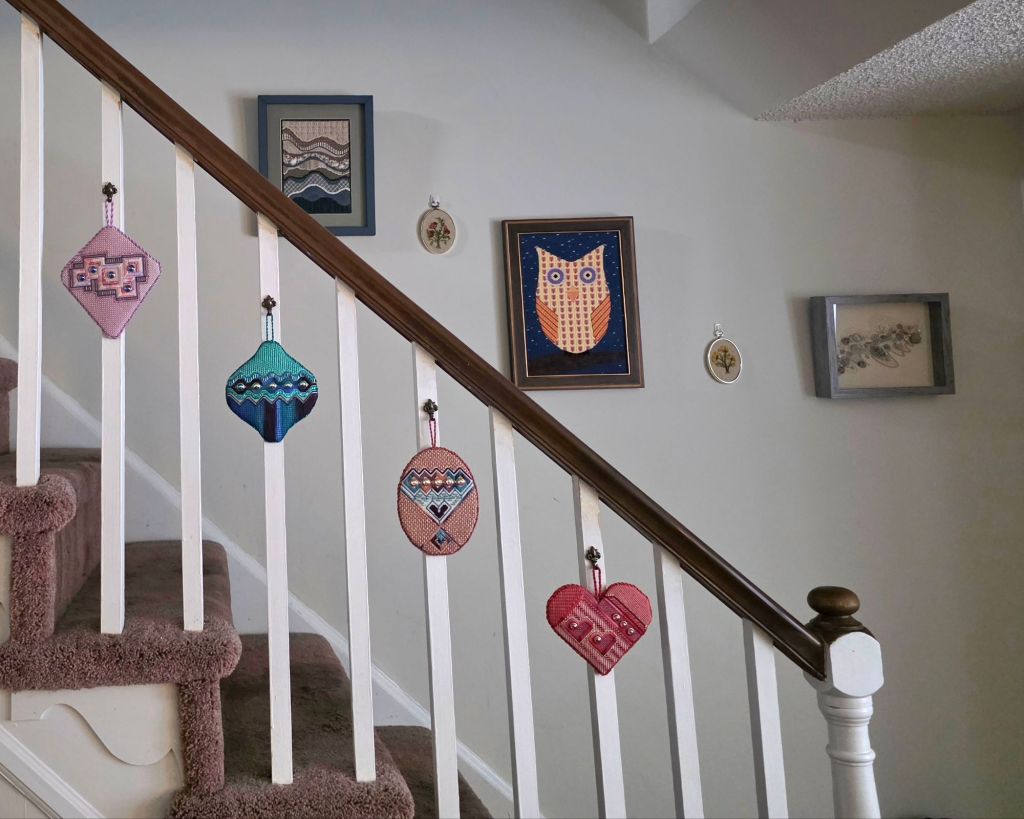
In the background, currently, two Dawn Donnelly pieces flank my owl which Bill loves! And, the owl has a buddy (gifted to Bill many years ago from the ladies in his Binks office)! I rotate among different pieces on the staircase.
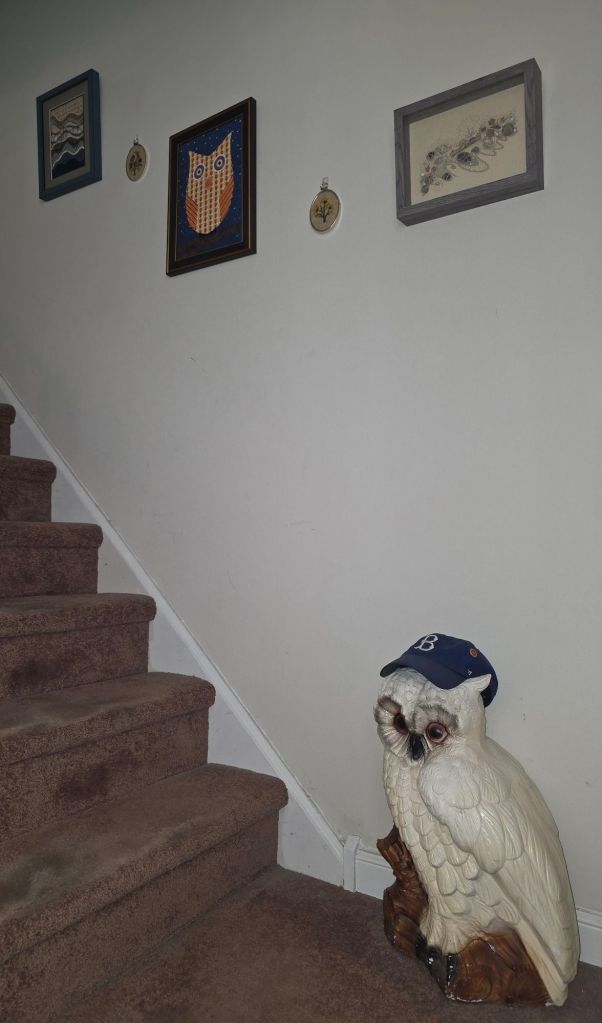
The two small ornaments are my grandmother’s which I realize I have not blogged about – yet.
It’s rather appropriate that the first of the Cabochons by Susan Portra to start in 2026 is Hope since I am hopeful that I will complete the series this year. It’s actually the 4th in the series (still missing 11 and 12 if anyone has a lead on how to get them).
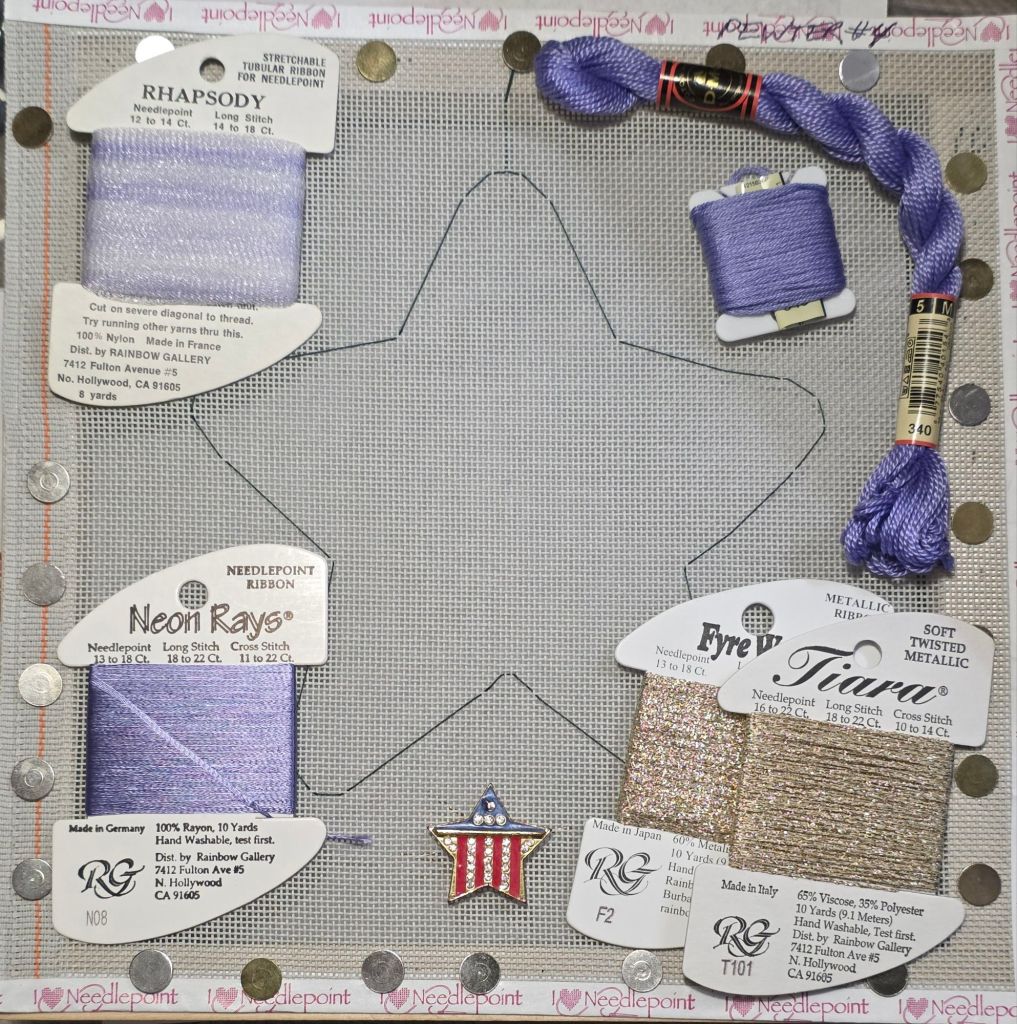
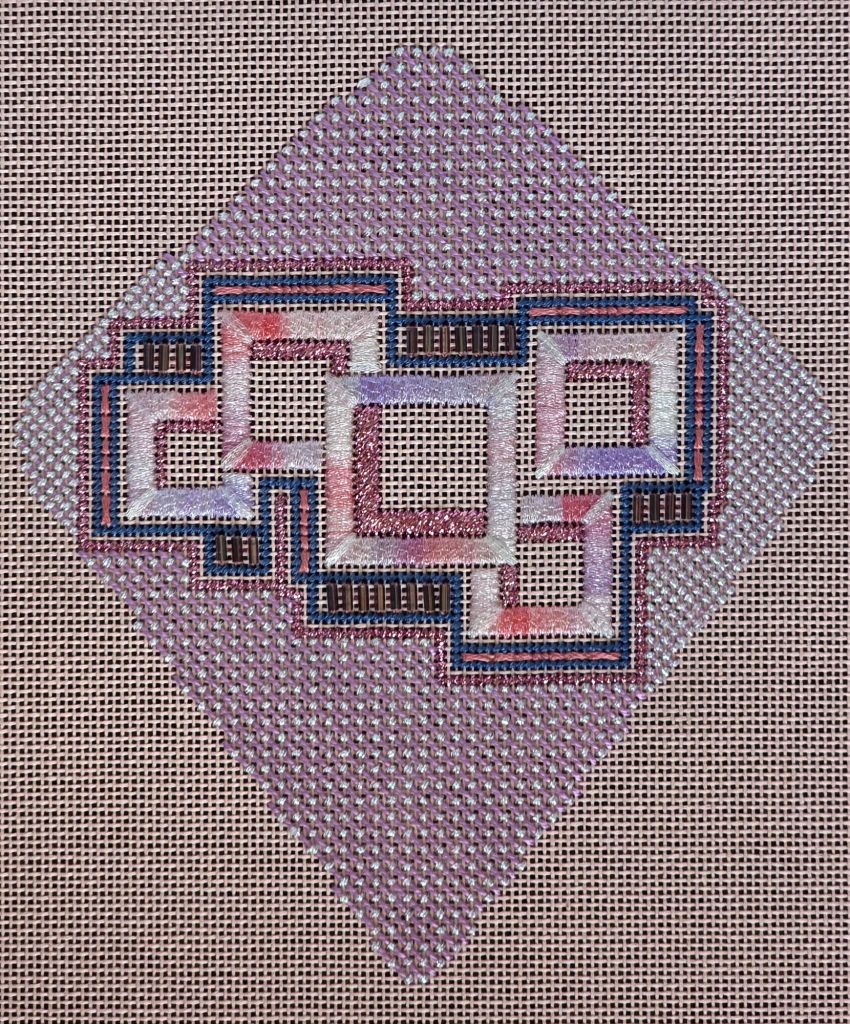
Hope is supposed to be on a gray canvas using Rhapsody R04. My canvas is called pewter, a type of gray that looks great with this Rhapsody. Although my card of Rhapsody is not numbered, it goes great with Neon Rays N08 which is in Susan’s original colorway. I am switching out Anchor Floss and Pearl #5 for DMC threads.
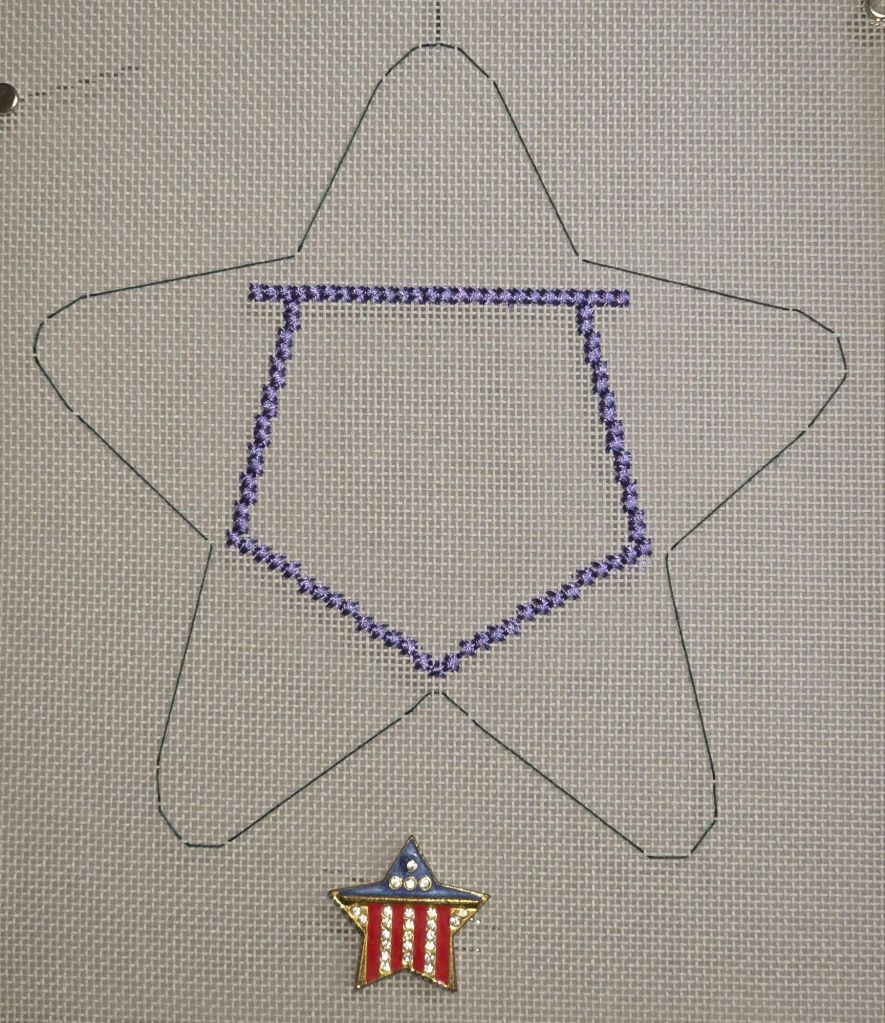
The basting of the outline was done last night. I did get the top row of 26 cross stitches in at our ANG Main Line Stitchers chapter Stitch-in today but I was convinced to rip them out because I had not done that many and they had not been done according to the instructions. The top stitches of the cross stitches are supposed to point to the center. I had spent too much time shopping and talking to restitch them there. And, I had forgotten to get my unstitched starting photo.
So, this was my progress during the Saturday night football games.
This church ornament by Cross My Heart, Inc was a destashed item from Sally that I took out to have a small piece to work on periodically. The company is still online at EverythingCrossStitch(.com) but this kit is from 1992 and no longer available.
Having not done a cross stitch kit in years, I had forgotten that the threads come all together. It took some time because the greens are quite close but I separated them onto a couple of floss organizers.
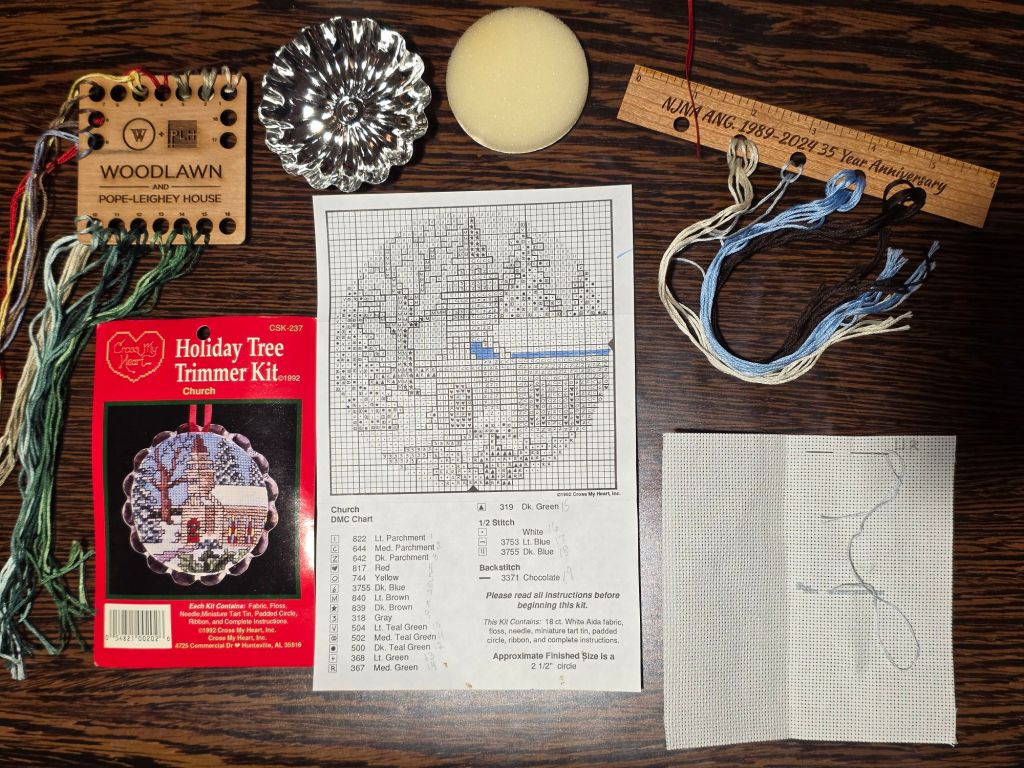
I made a copy before marking it up further and enlarged it. Only the outlining in backstitch remains.
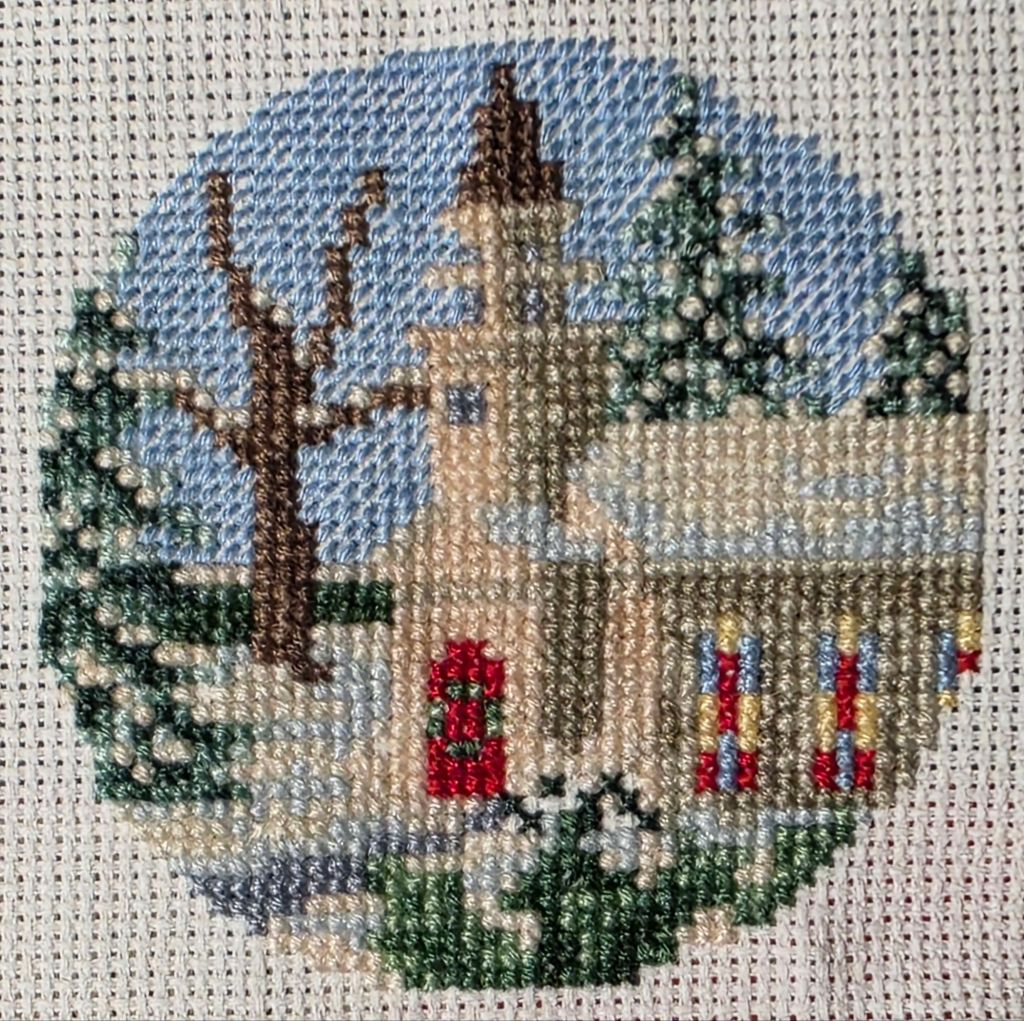
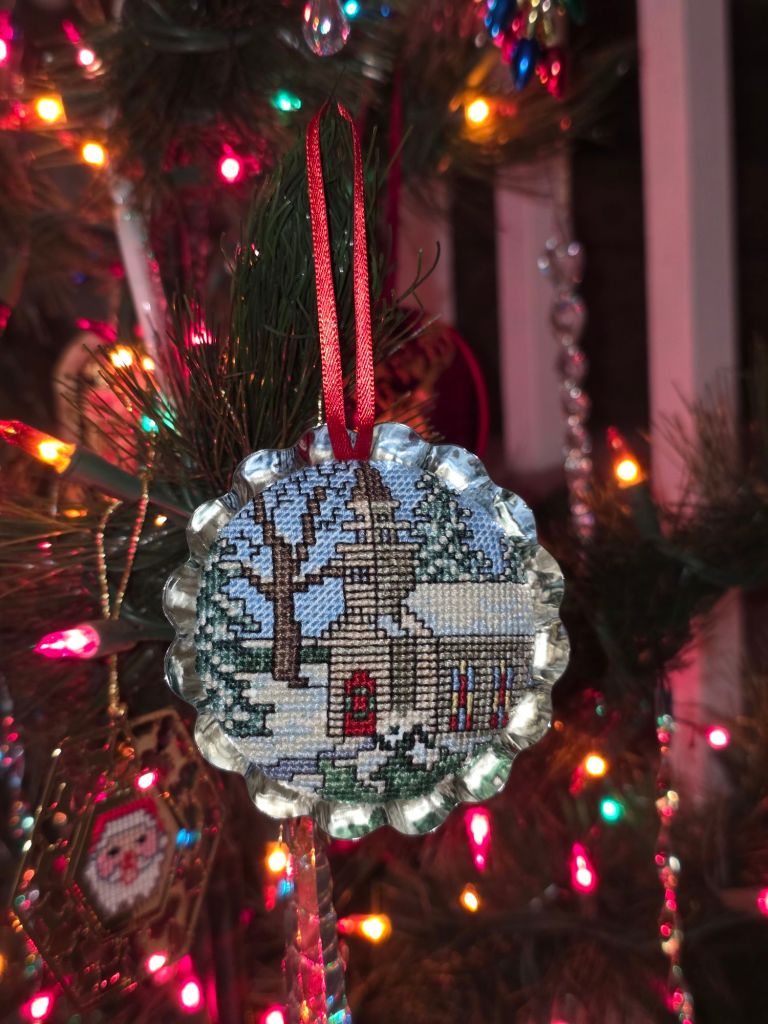
You can see how the outline helps define the shapes. While the overall design was evident, now it pops. Very easy finishing. After attaching the ribbon, some E6000 around the back edge adhered it to the metal tart tin. Cute idea!
Filed under: Florentine Fancywork by Toni McKelley, Other People's Designs
Florentine Fancywork by Toni McKelley was an ANG Correspondence Course years ago but I didn’t get it and regretted it. So, I put a saved search on Ebay quite some time ago and forgot about. Back in June, I got notified that the instructions had been posted and I bought it. When it arrived, I asked my husband to put it away for Christmas. Again, I forgot about it! What a wonderful surprise to open it today. That’s definitely going to be on my must stitch list for counted pieces in 2026!
Toni used Rainbow Gallery Overture which she calls a space-dyed thread! Haven’t seen that term before. It’s what I call overdyed. And, it calls for V114 Victoriana that has been discontinued! Of course. Toni uses segments of it in the border but not everywhere. Apparently, it has greens, yellows, and peaches according to the text and photos. I have one card of Overture that isn’t V114. But, the separated strands are slightly thinner than strands of Watercolours. Since I have lots of skeins of Watercolours and coverage will be better, I will switch to one or two skeins of Watercolours.
There is also Rainbow Tweed RT66 Leaf Green which is still available but I think I’ll stay with Watercolours.
First, I will pull the solids. Flair, Mandarin Floss, Neon Rays, and 3 Splendors are all available at Fireside Stitchery which I can pick up on Saturday January 3rd at our rescheduled December Stitch-in. That leaves Gold Rush 14, WG53C, Violet Blush that is not available at Fireside Stitchery but is still available elsewhere. I do have Gold Rush 14, WG86C, Lilac that is a bit darker but might work just fine. Once I obtain the solids and decide on the Watercolours, I will decide on the Gold Rush.
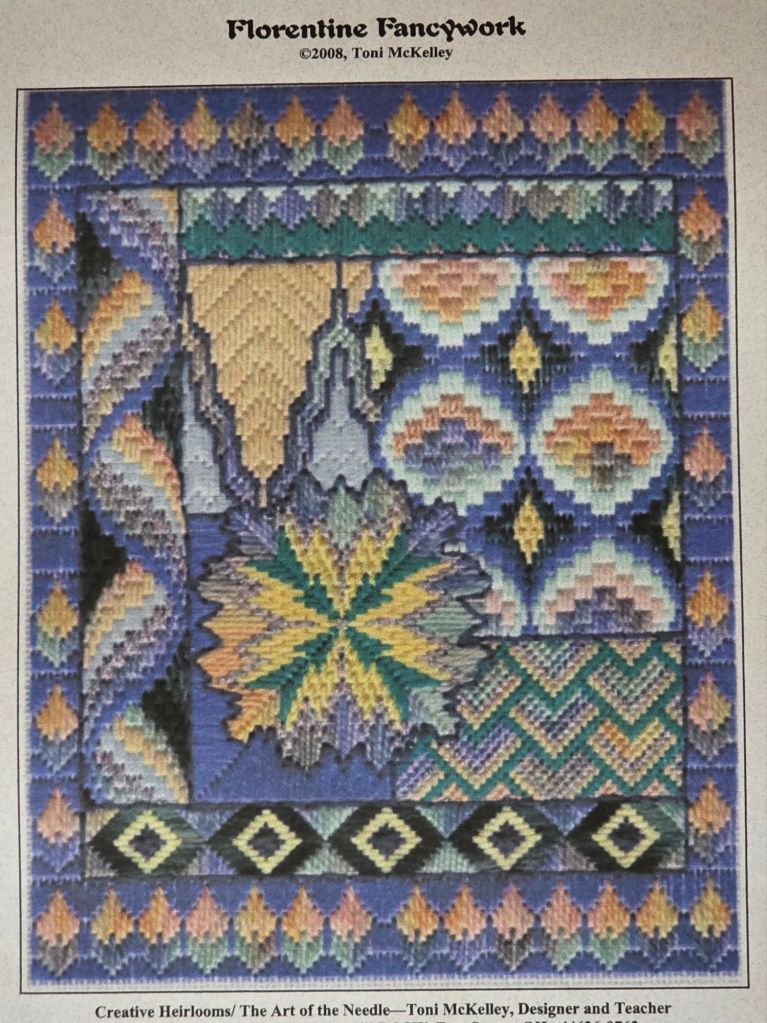
Very pretty design combining the various bargello patterns together.
Filed under: Susan Portra, The Cabochons, Peace
Tiara by Rainbow Gallery is next on my list of threads that I don’t like!
Good news is that laying the long lengths of pearl in advance of couching was not difficult except for the thread. Tiara separated at the ends and was catching. I’m not getting a break with nasty threads.
I worked on the background during a Zoom call, during football games, and a movie. It’s interesting to see Susan’s choice to do the denser tent stitches on the sides and skipping every other for the more open pattern on the top and bottom.
The cabochons went on easy enough.
It’s now added to my finishing pile. And, I won’t allow myself to start the next cabochon until this one is finished. So, I’ve got to find time!!
