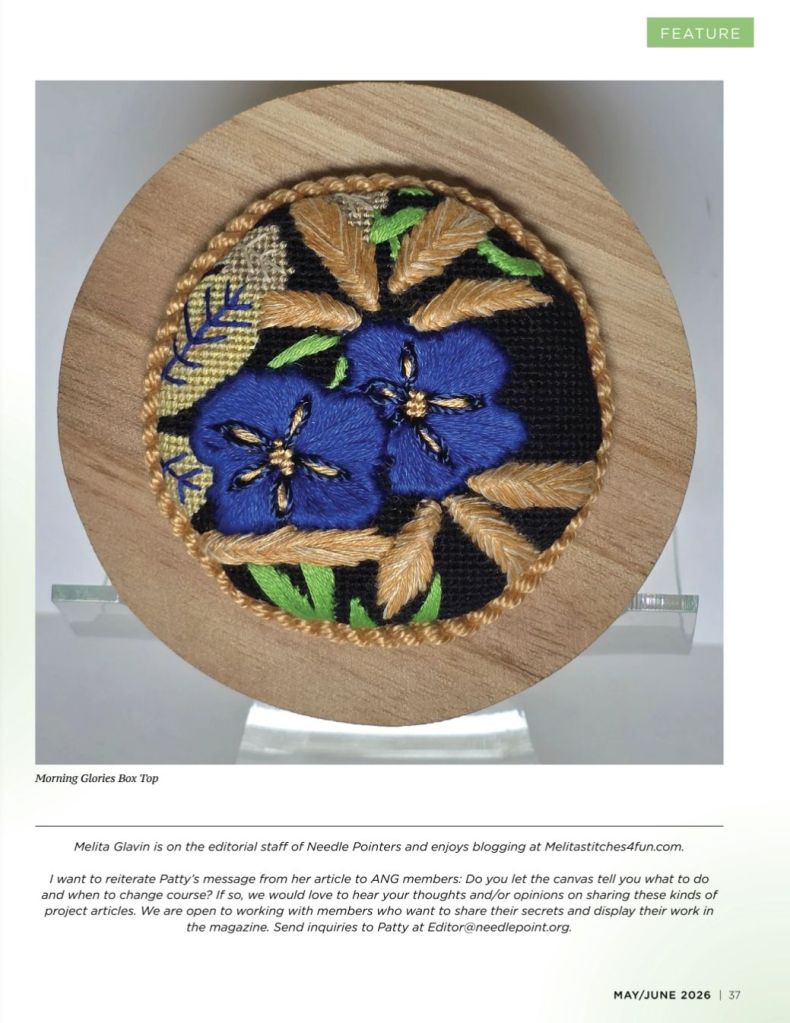
Patty W, the editor of ANG Needle Pointers, asked me to review an article she was writing on a small painted canvas she had just stitched discussing her perspective on thread and stitch selections. It reminded me that I was doing the same thing for my posts regarding the canvas, Morning Glories by Lani. My first post shows the canvas and threads from my stash. It also discusses how I learned that these are Morning Glories (https://melitastitches4fun.com/2025/07/07/morning-glories-by-lani/). So, I asked Patty if she’d be interested in running this design in the magazine not as a stitch guide rather as a discussion of thought process.
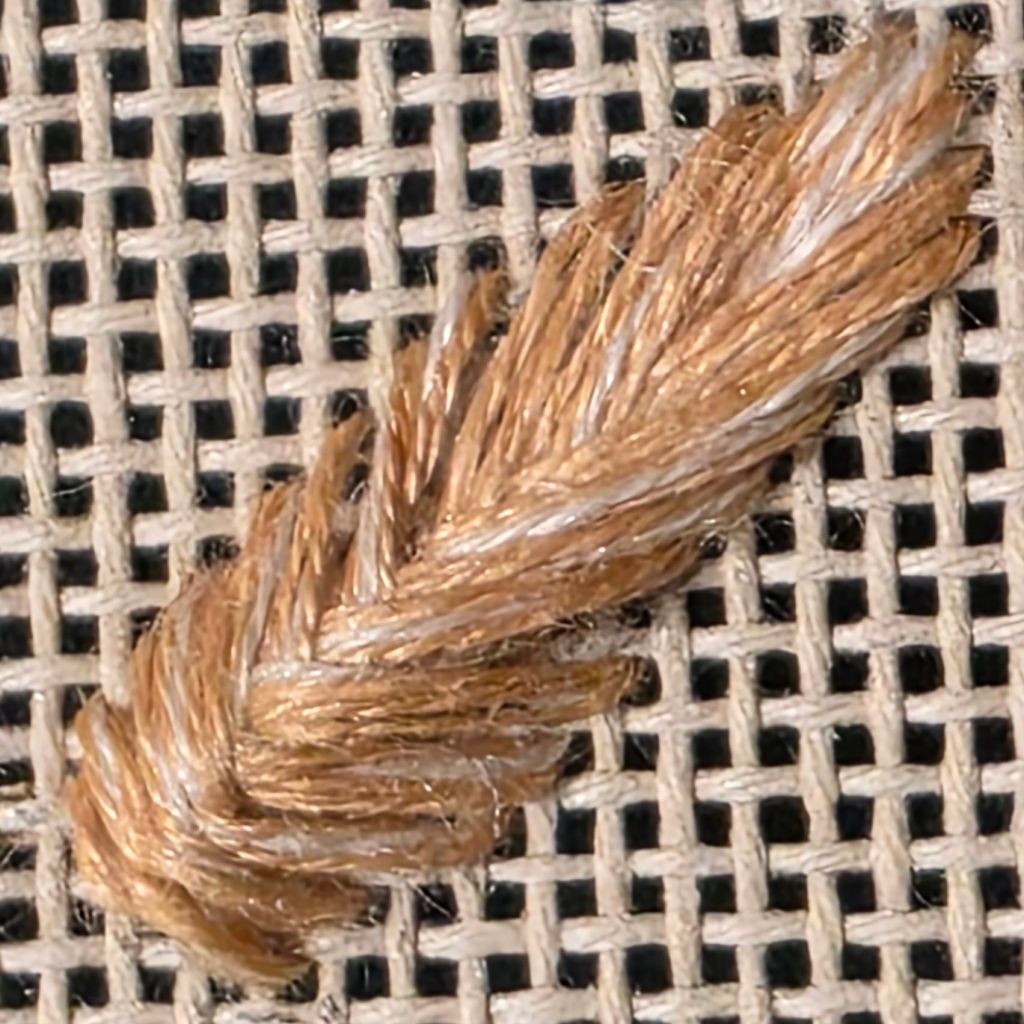
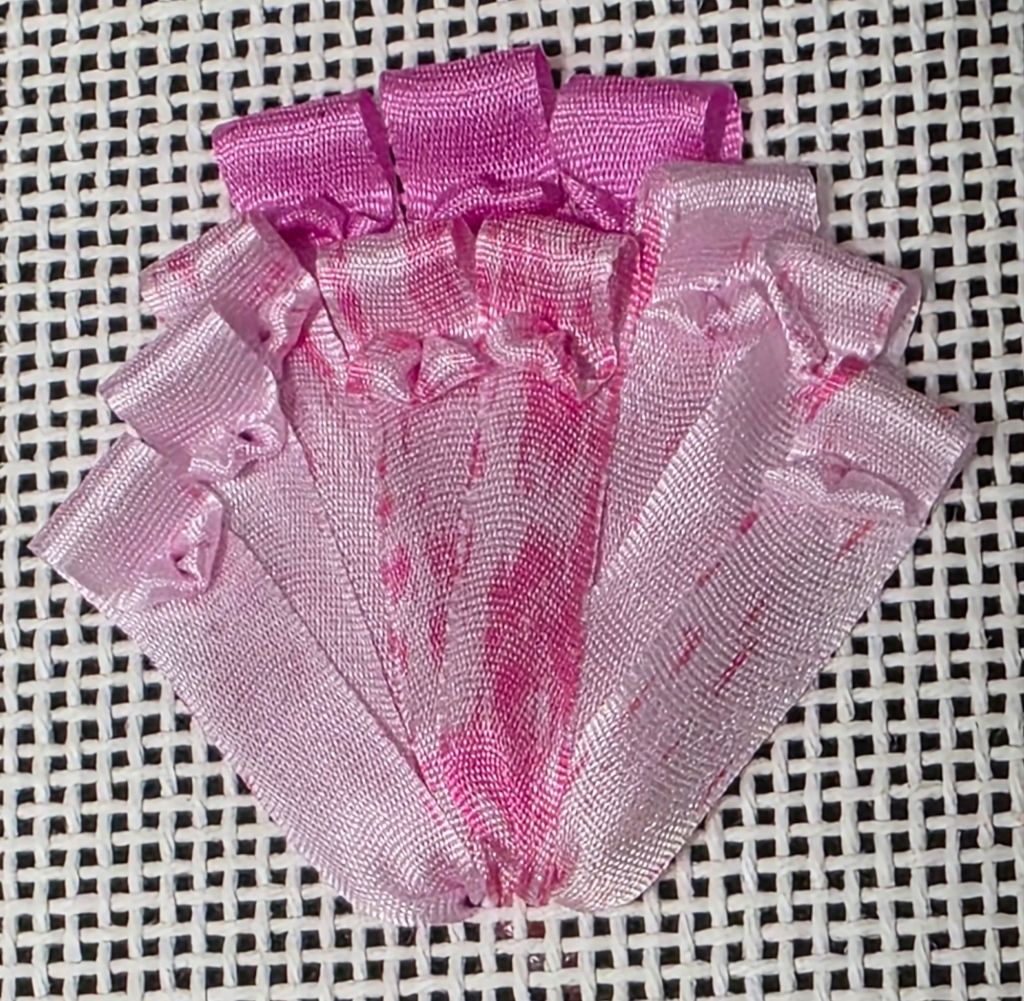
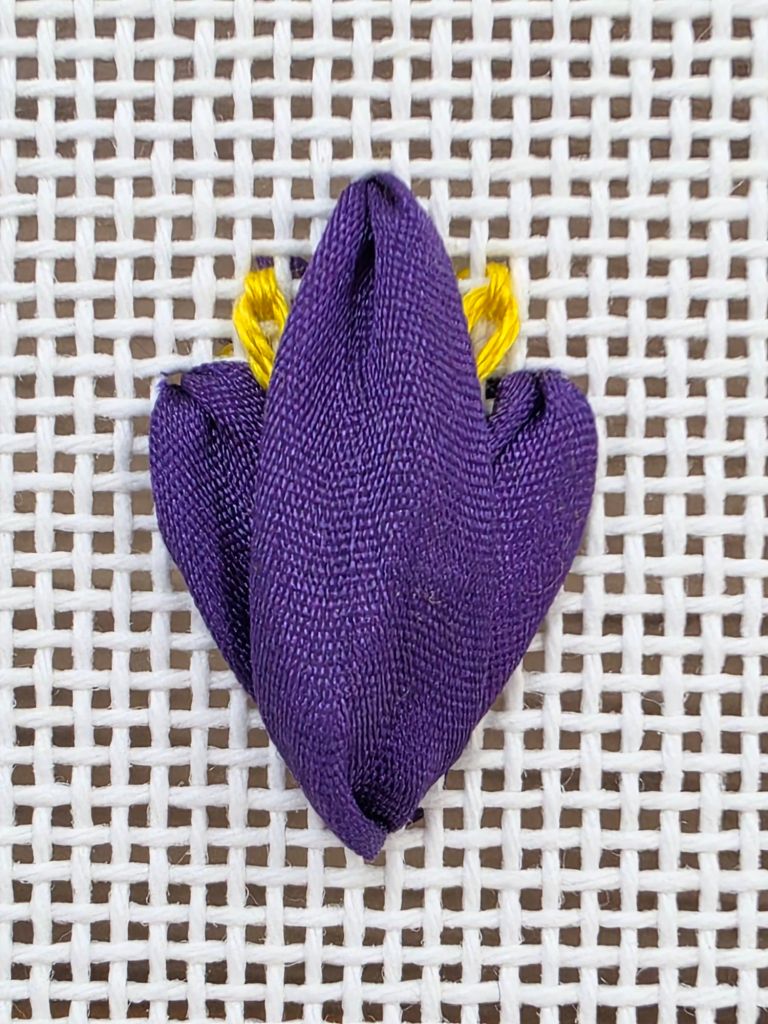
After looking up what Morning Glory buds look like and going through The Needlepoint Book by Jo Ippolito Christensen, I selected the Raised Close Herringbone.
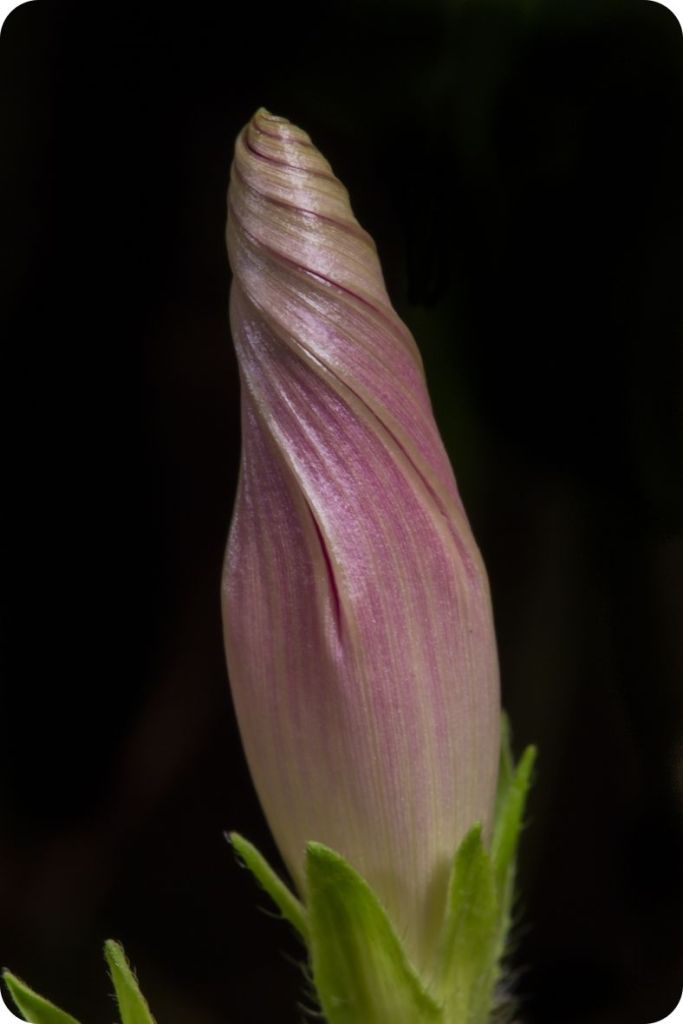
I know it’s not exactly the same but I’m not a botanist and the three dimensionality really hit the mark for me. Plus, the size and shape can vary which is very important.
For the rest of the story, you’ll have to be a member of ANG because the article appears in the current issue of Needle Pointers. It’s easy to join (needlepoint.org) and ANG has tons to offer.
I also want to give a shout out to Sue Parsons for her excellent finishing class held at Fireside Stitchery (July 2025). I really learned a lot and modifed my process based on what I learned.

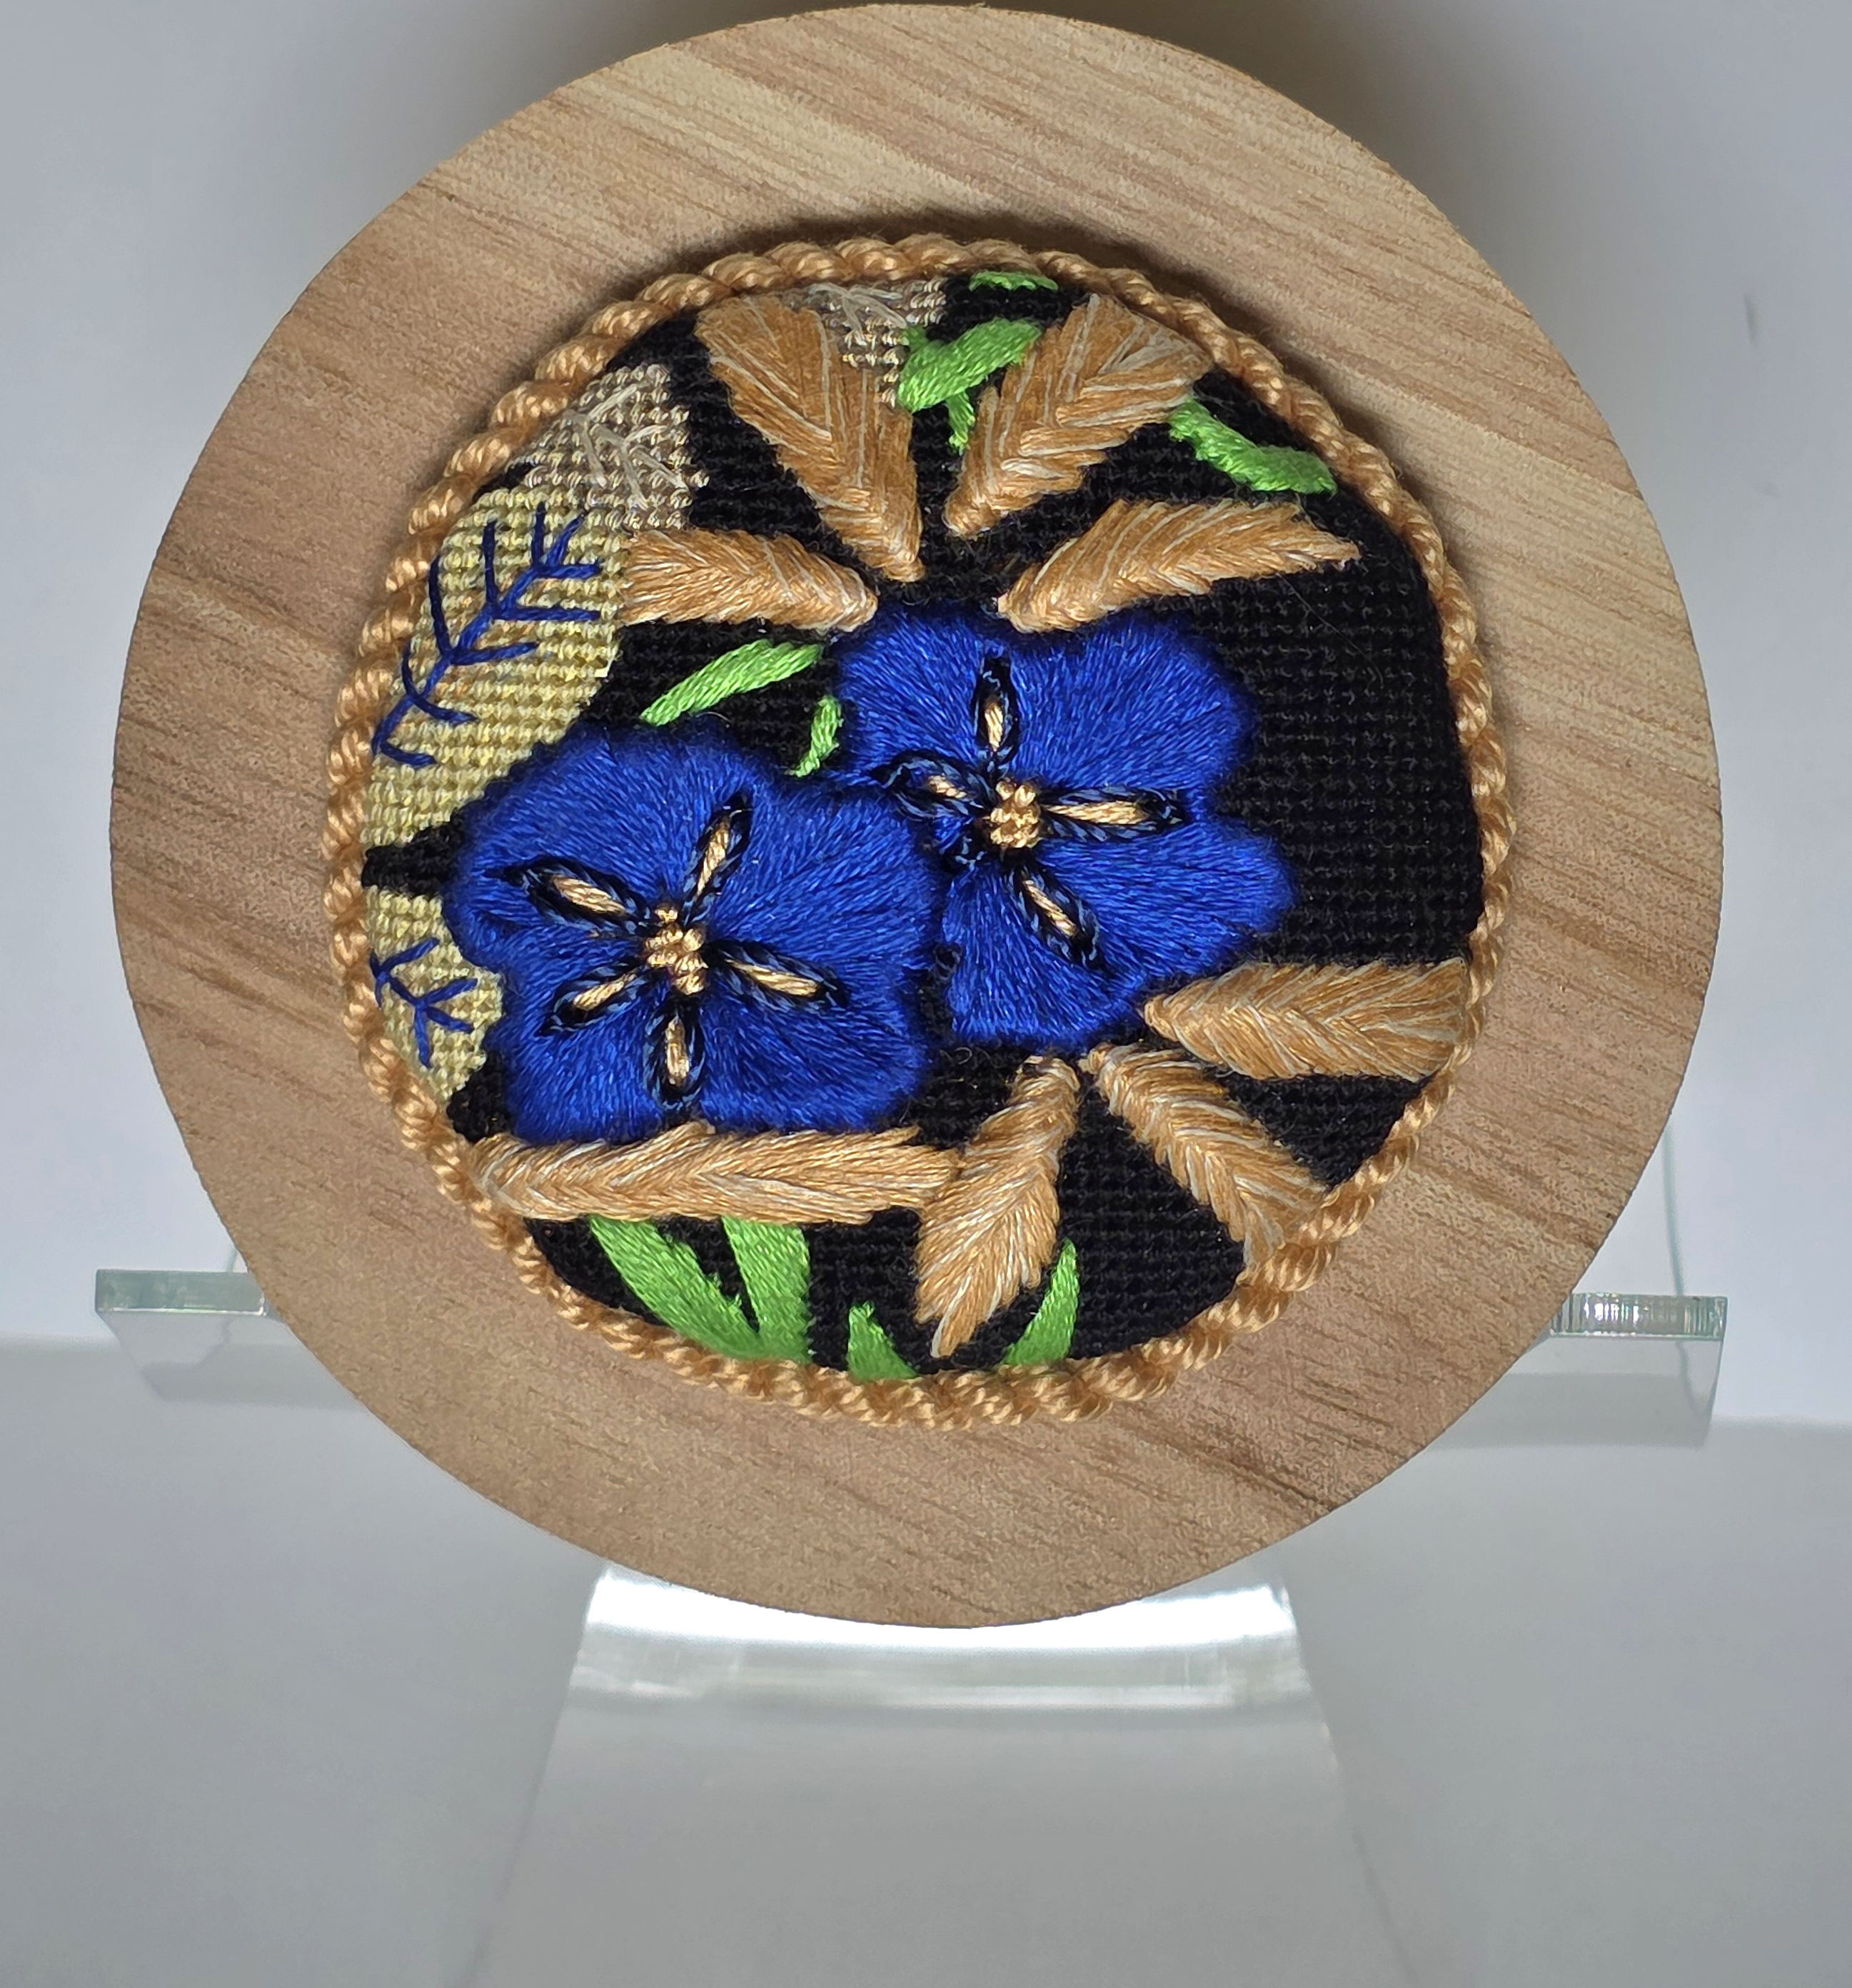
I decided to tack the finished piece onto a self-adhesive felt fabric.
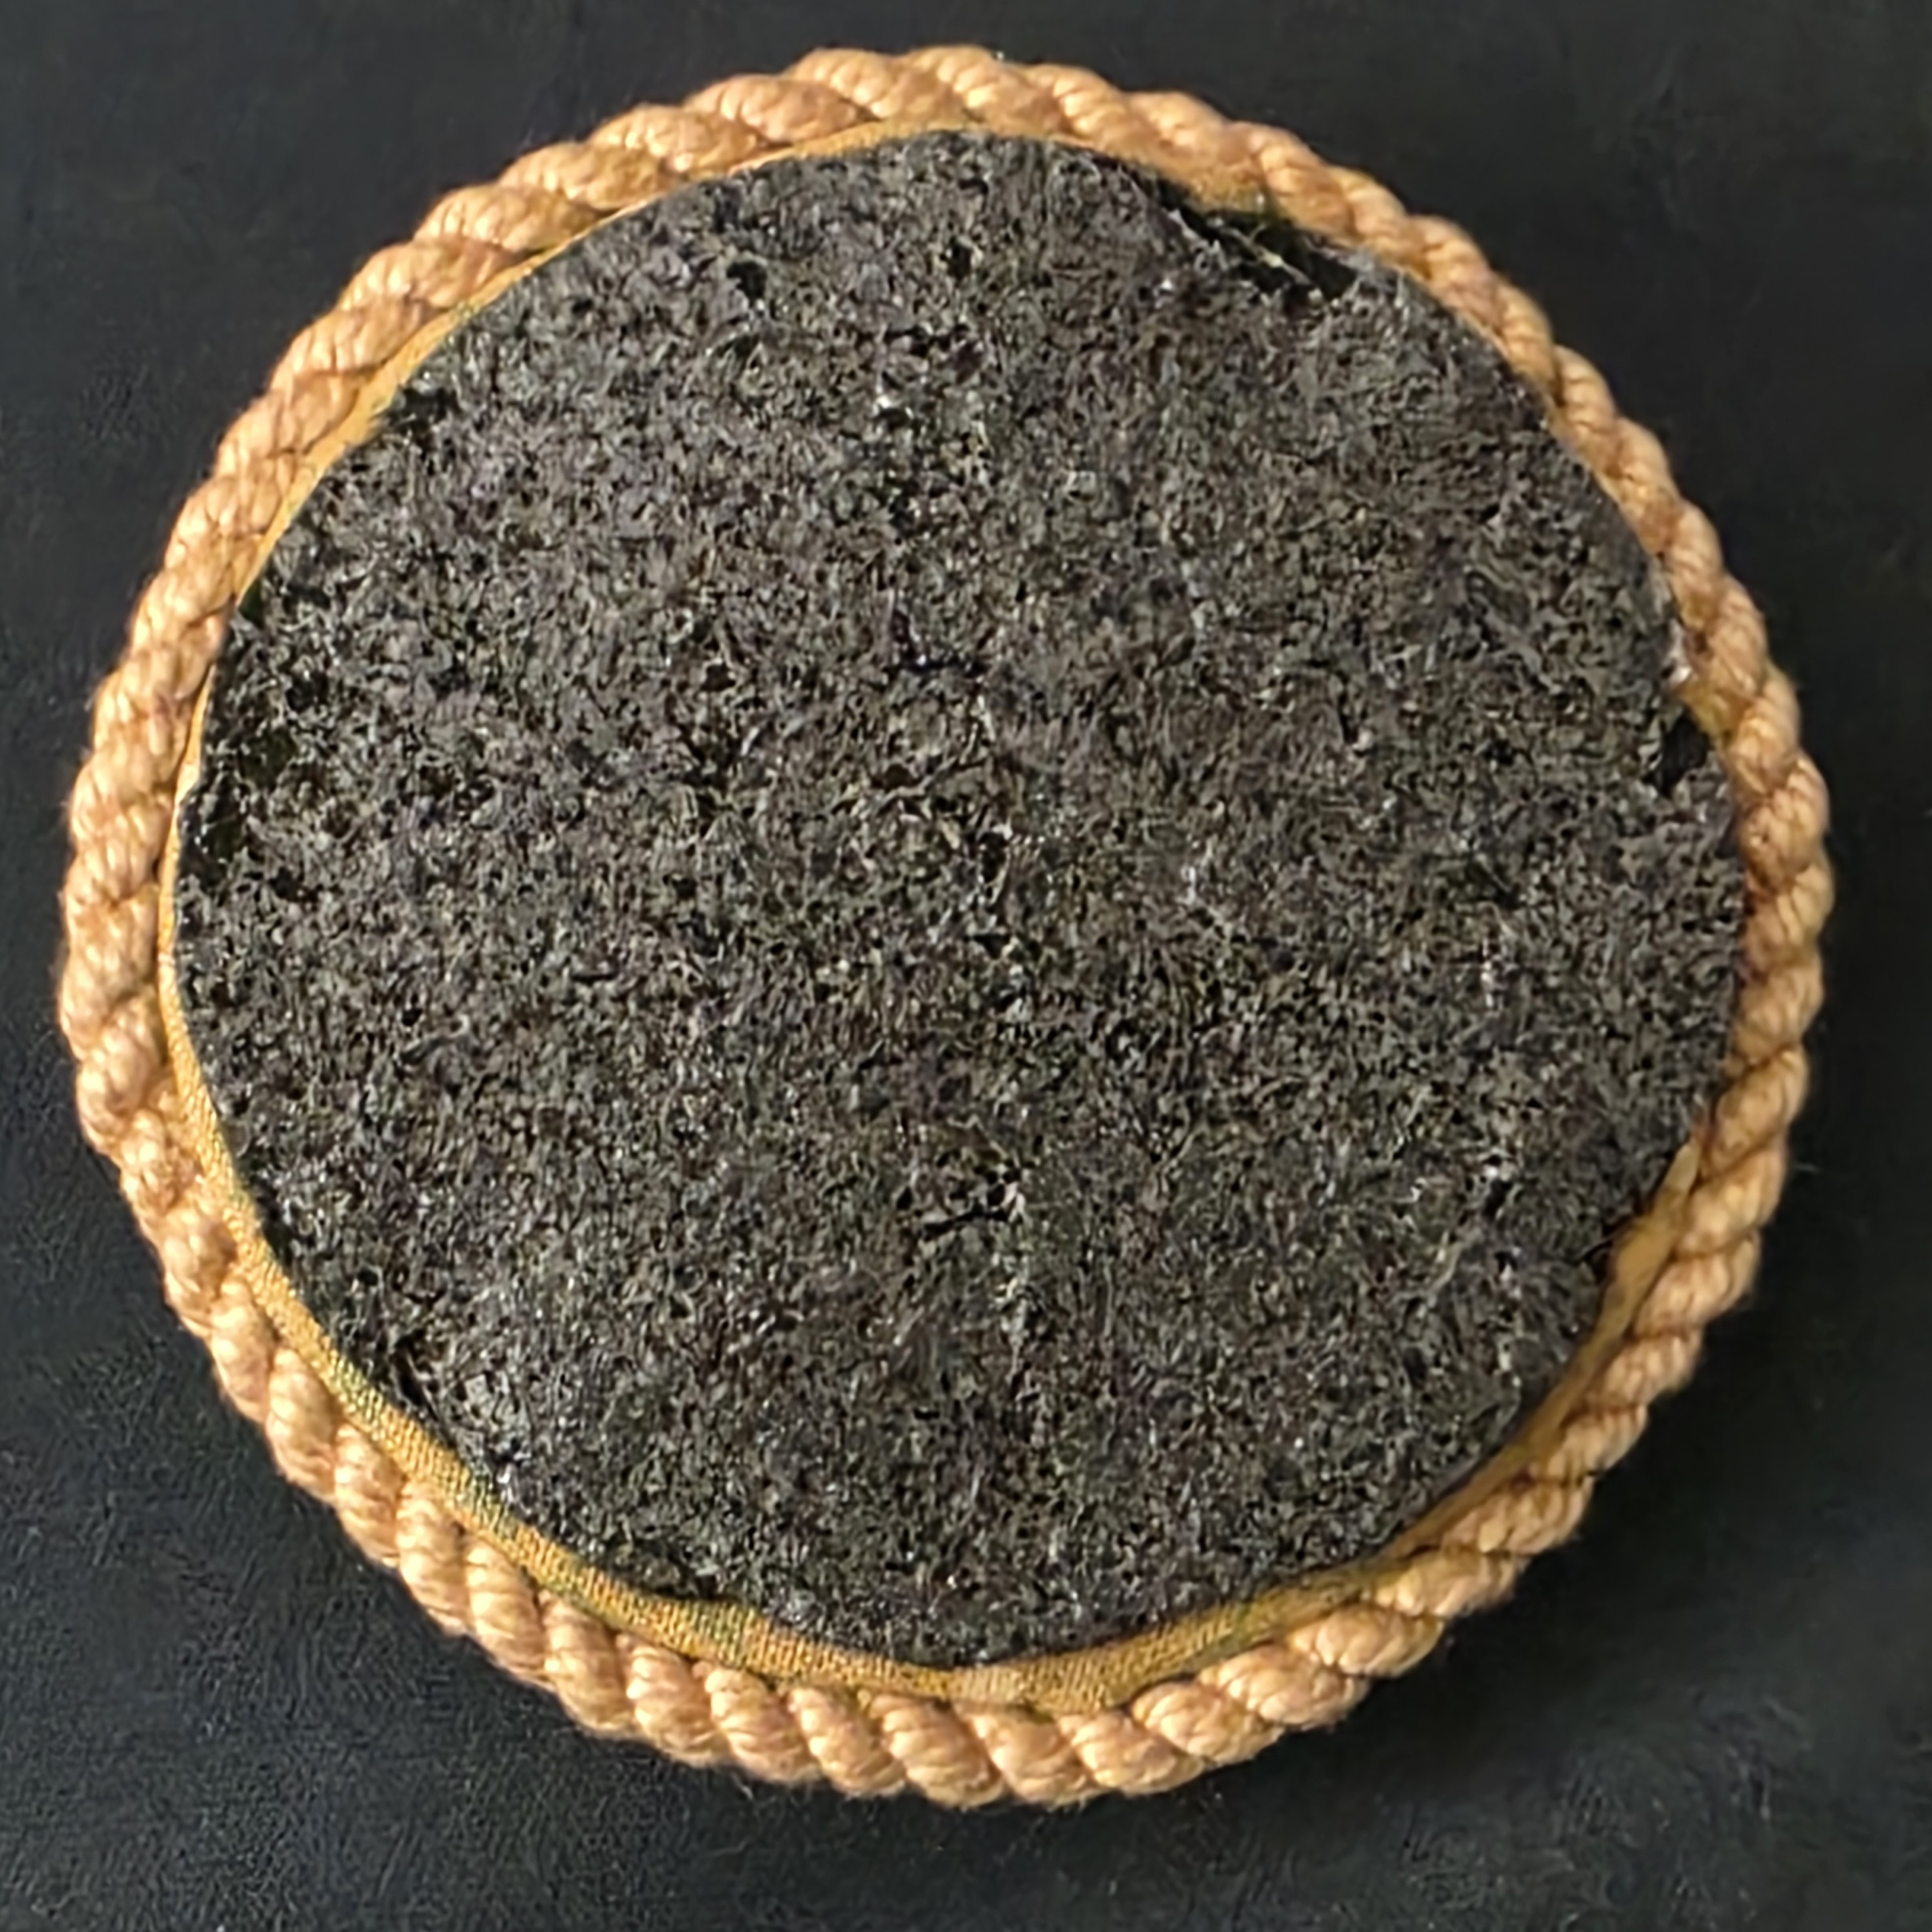
Here it is attached to an unfinished box top.
Filed under: ANG Needle Pointer's Timeless Treasures From the Archives, Morning Glories by Lani, Other People's Designs
My issue arrived in the mail and the Timeless Treasures from the Archives article in the May/June 2026 issue of Needle Pointers Magazine explores butterflies. There is lots to explore from past articles by Margaret Kinsey, Debbie Rowley, and Linda Reinmiller.
I learned how to make my butterflies in Flowers Along a Rhode from Debbie Rowley’s Explore and Design class in 2024.
There is lots more to enjoy in this issue too. In particular, the Tale of Two (or Three) Stitchers included two people I know. Jacqui C of ANG New Jersey Needle Artists Chapter and Sharon B of ANG Central Jersey Chapter. Sarah N of IL also joined to stitch Lazy Morning at the Bay by PLD Designs. It’s always interesting to see different interpretations of the same canvas.
And, my thoughts and process about selecting stitches and threads for Morning Glories by Lani is published in this issue.
If you’re not a member of ANG, the American Needlepoint Guild (needlepoint.org), it’s easy to join. There are many free designs exclusively available to members including access to all past issues (since 1980s) and yearly Stitch of the Month projects (since 1998).
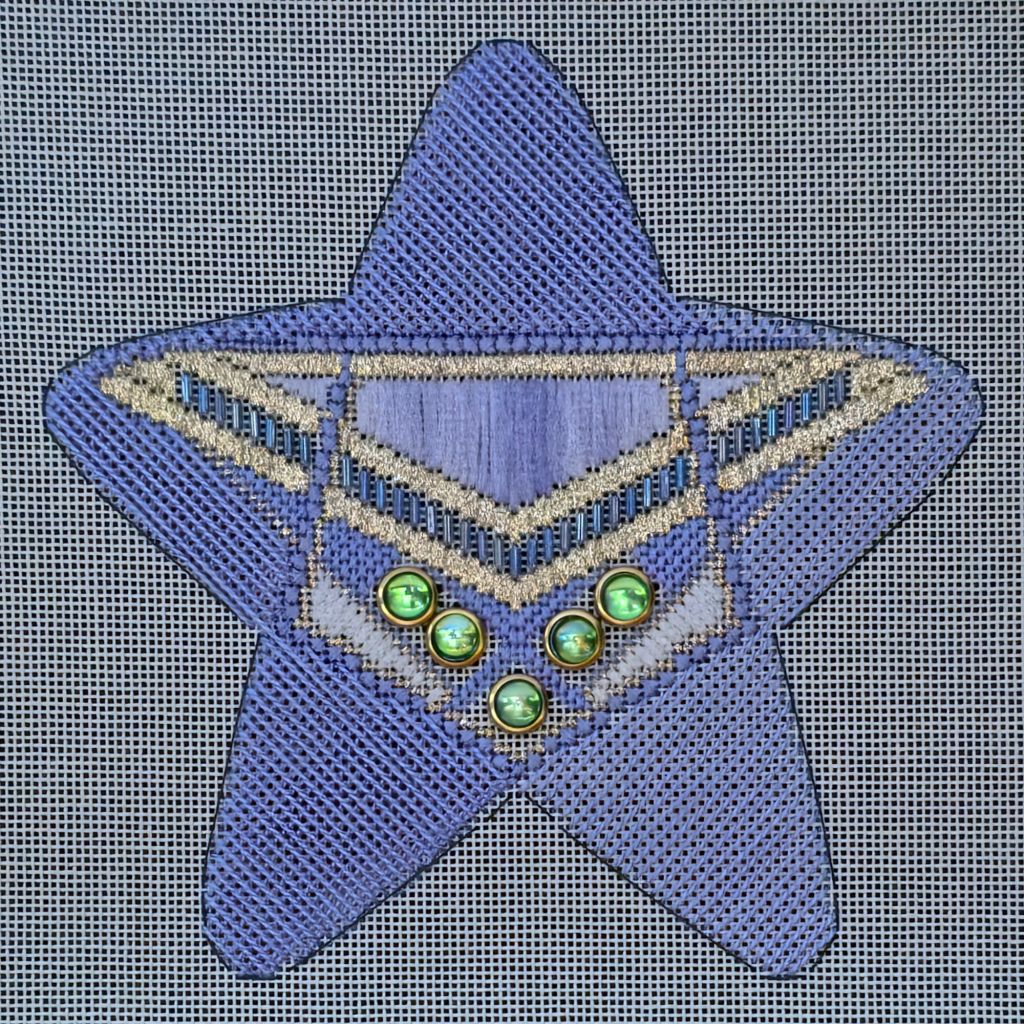
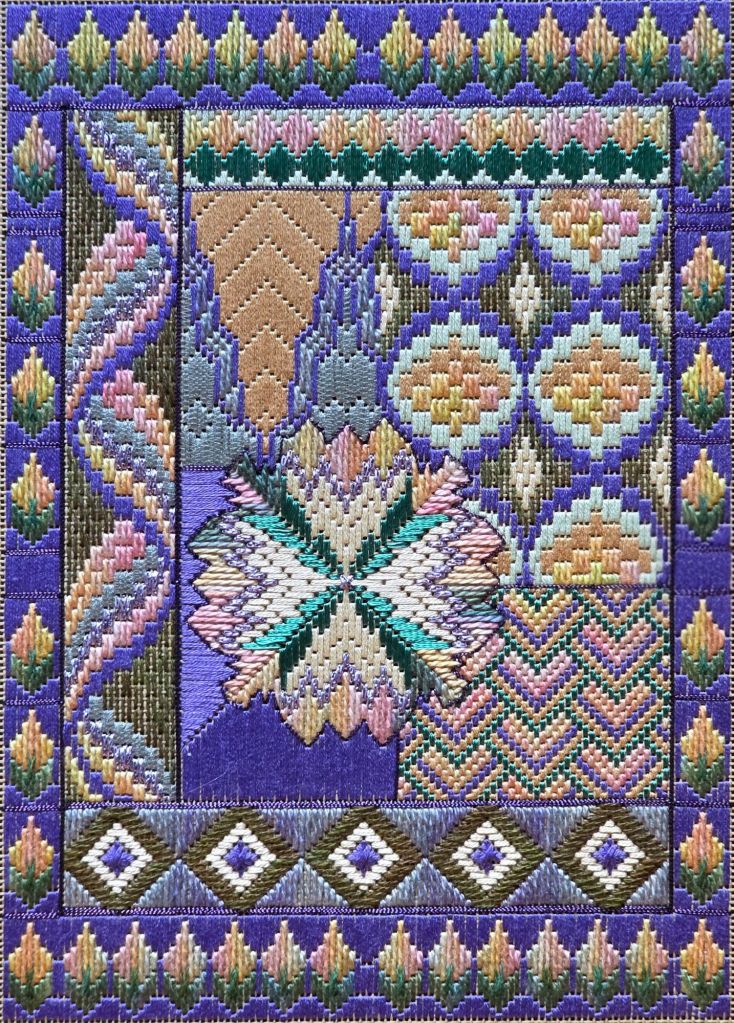
Next up is Faith from The Cabochons Series by Susan Portra. It’s on a lovely Lavender canvas. Most of the thread colors are in Rhapsody. The blue Fyre Werks is the outlier but all work together nicely.

I got the center column of Rhapsody in before Saturday and added the outlines during our Stitch-in. I would have gotten more done except for having to remove my first outline row on the right side. It didn’t become apparent until I reached the bottom and was off by one canvas thread! Oh well. I was back on track soon enough and finished later that night watching a classic 1940 sci-fi horror film Dr. Cyclops presented by Svengoolie on MeTV, our usual Saturday night.

Part of my fascination with this series is seeing so much fit into a relatively small area and how everything fits together in a cohesive design.
Step 1 of filling in the background of Hope from The Cabochons Series by Susan Portra was the long strands laid on the true diagonal first one way and then the other. I only went wrong a couple of times and saw it quickly enough.
I wanted the long stitches laid before our Saturday ANG Main Line Stitchers Chapter Stitch-in (in April) to be sure of the pattern. It took a couple of nights to get these in. The top ones were a little tricky even though they are on the true diagonal.
When I saw this photo, I thought it was the light that reflecting oddly. Can you see it? I didn’t see anything missing. So, I continued.
I got 2 tack down stitches in when I remembered how much I disliked Tiara. So, I went to my Kreinik gold drawer and found 102 looked so close to Tiara T101 that I decided to switch. I happened to have 2 full spools and one very full spool in #8 Braid. I won’t have to Hope that I’ll have enough. That made my day!
I got 3 rows of tacking stitches in when I saw it wasn’t the light that was an issue! I missed laying the threads in the opposite direction on the two right areas. That was easy enough to remedy.
Although I was ready to stitch, I didn’t get any done at that Stitch-in because I was working on our group Santa canvas. It’s looking good!
But, I did have time to work on it a few days later at a Stitch-in with my EGA Brandywine chapter and again during a couple of Zoom meetings over the last month. The tacking stitches took some time but it really turned out nicely. The color in the photo below is more accurate than what’s in the previous photo. Today was an overcast day when I got the photo.
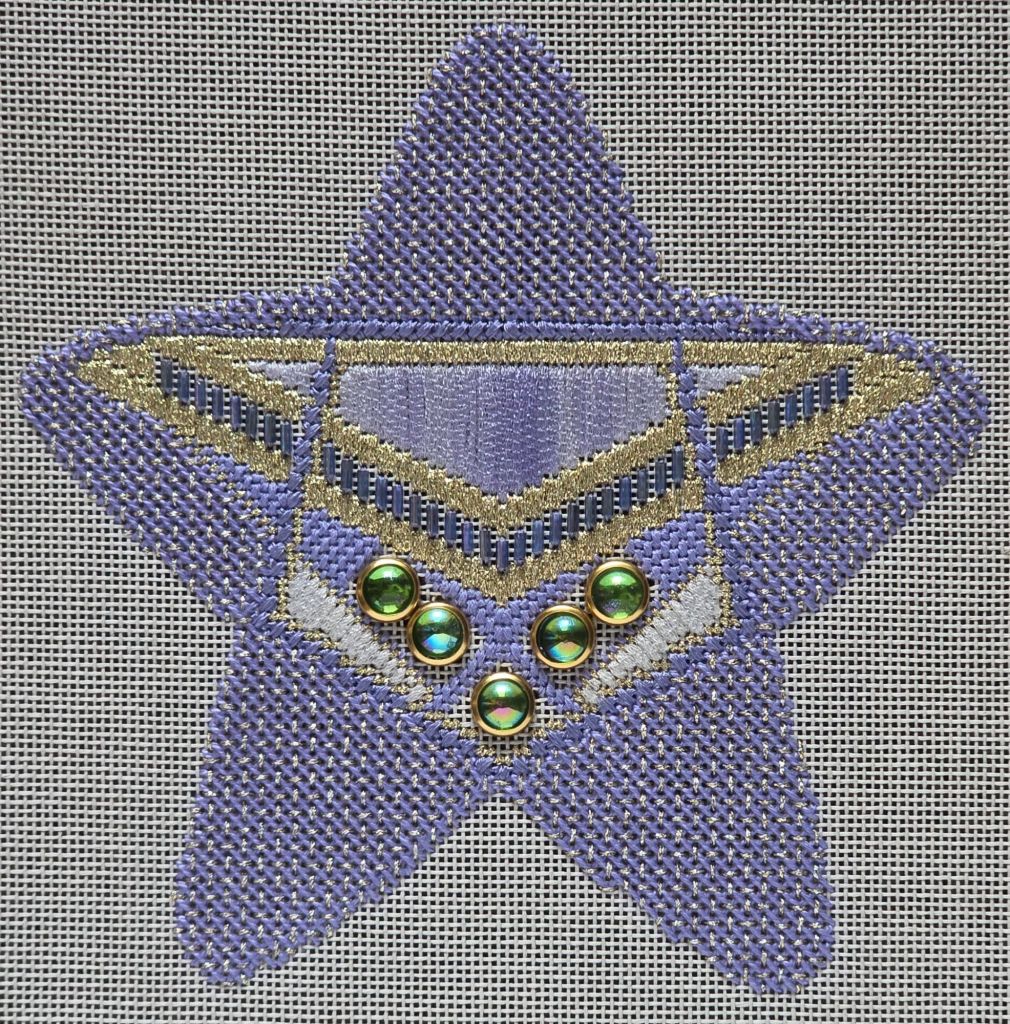
I’ll use this ornament to demo finishing for my Needlework and Textile Guild of Media in June. I’ve got a couple of weeks to prepare.
Now, I’ll get the next Cabochon ornament on the bars for our May 22nd Saturday Stitch-in with ANG Main Line Stitchers. I’m excited to see what’s ahead.
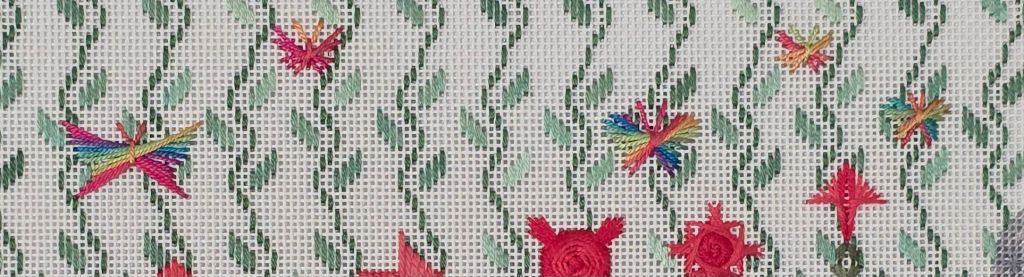
Our double knock out yellow roses are the first to bloom in our backyard this year. Spring, flowers, and no air conditioning needed. Wonderful. And it makes me happy to get some work done in my Spring Lollipop Garden by Tamara Abdee.
I’ve added the pink Tulip although I need to pay more attention to what part of a marbled ribbon I cut.
The purple Lilac was the most complicated one yet. The three blue Forget Me Knots are quite cute. The two bluefish purple Hyacinths are not supposed to be symmetrical in order for them to be more realistic. I think the right one really nailed it but the left one is fine.
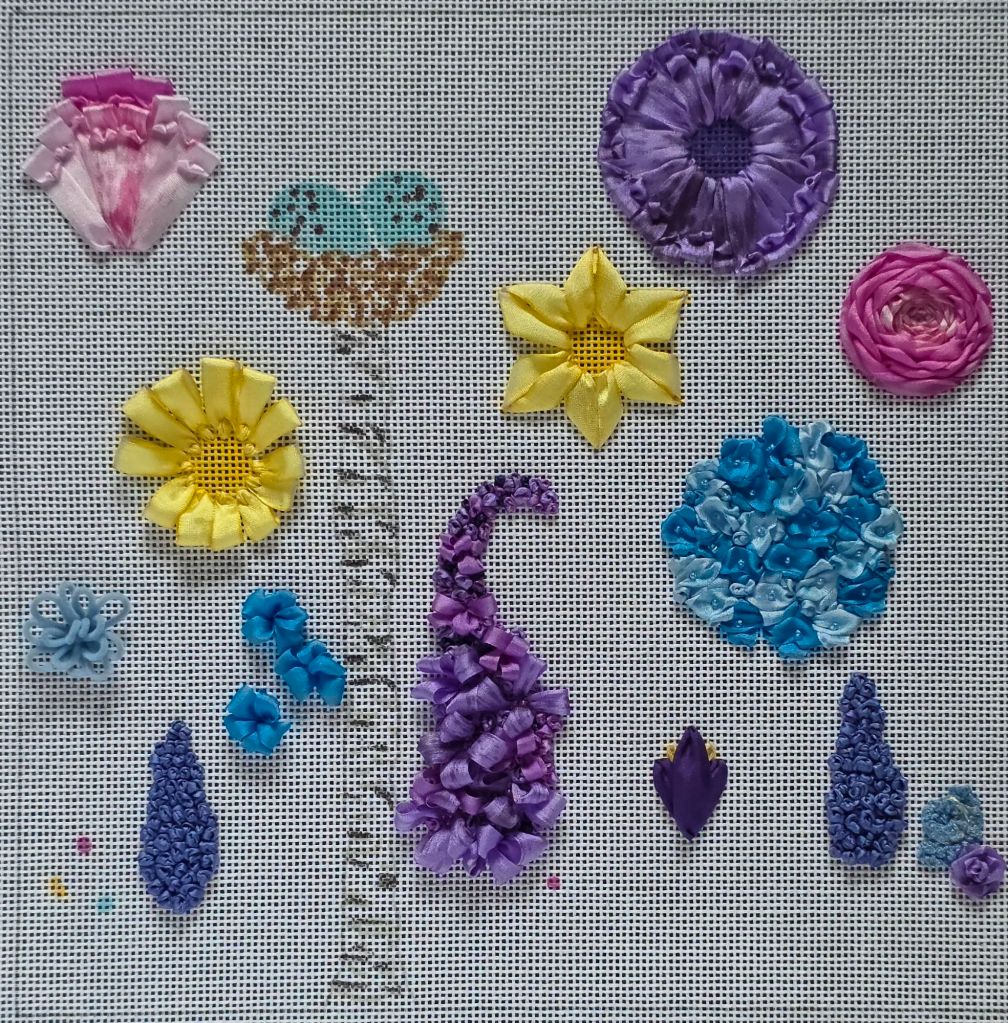
That’s it for the flowers. Next up is the Birch Tree and Nest.
Even with white board relecting the light, there are still shadows. Photographing needlework is tough!
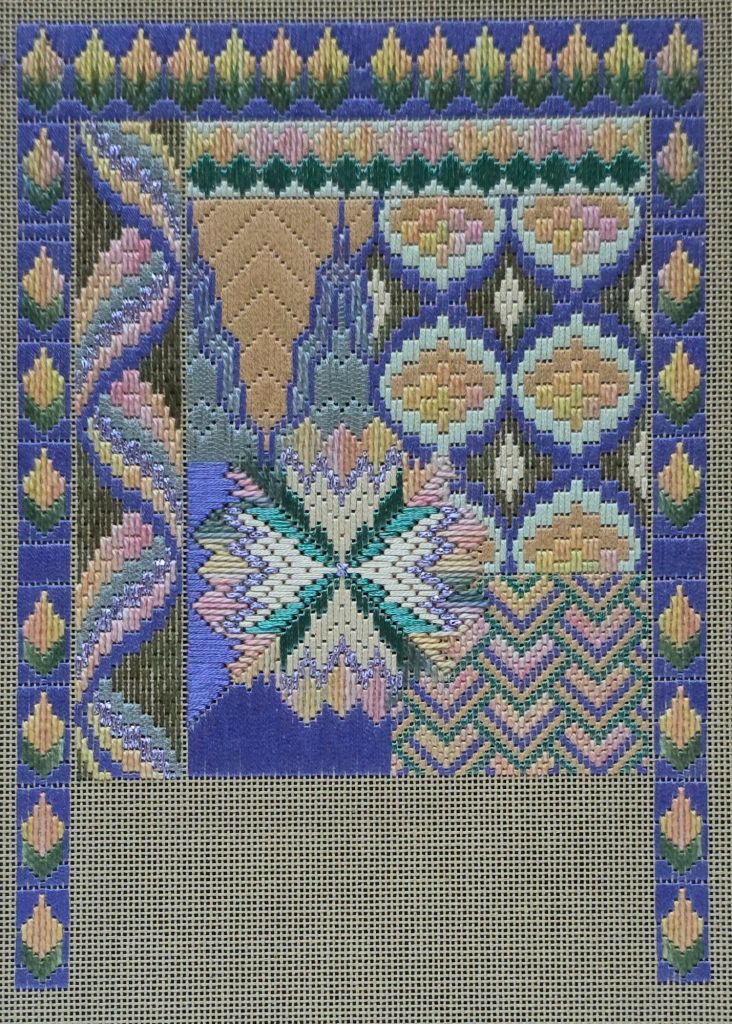
Ta Da! Florentine Fancywork by Toni McKelley is finished. The bottom border was easy enough. I’d saved the sections of Watercolours to match all the other flowers and Rainbow Tweed for the small green stems (done in oblong crosses).
Rather than use the purple Splendor to outline the areas, I went to my favorite stash – Bijoux and found Amethyst MMT412. In order to get the full effect of any Bijoux, long stitches are needed but these were so long that they need to be couched. The construction of the thread creates ridges. I used either 2 or 4 strands laid and 1 to couch with.
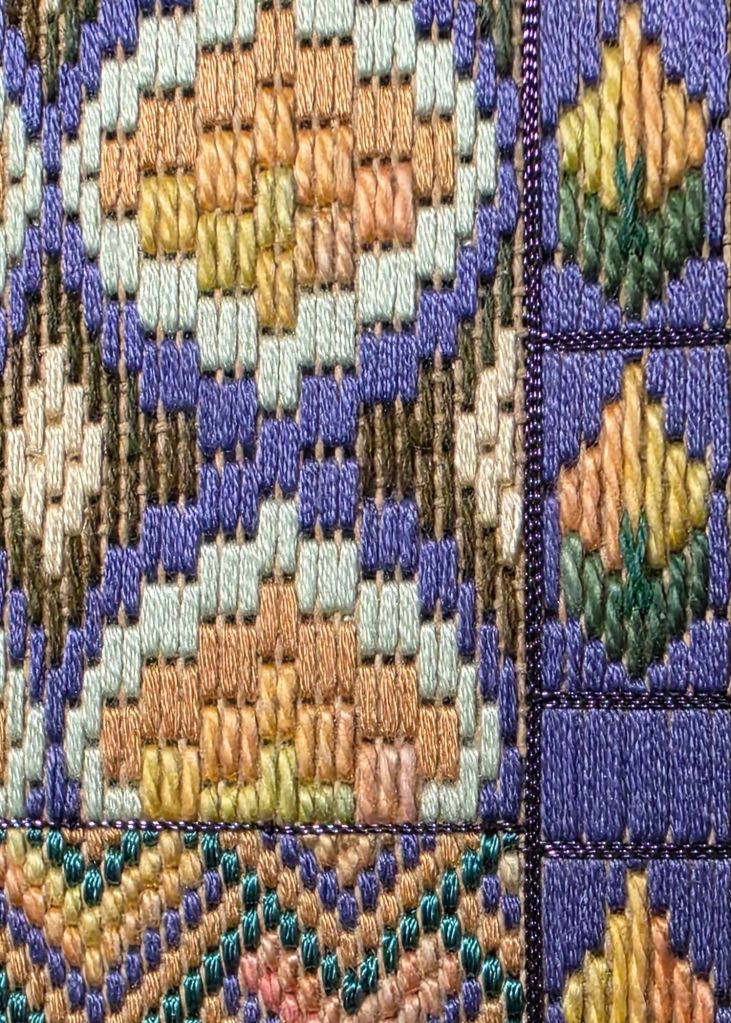
From a distance, you don’t see that but the outline is apparent.
Love it!
With this done, I can return to and rotate through Magical Colors by Jennifer Riefenberg, Spring Lollipop Garden by Tamara Abdee, and Razzle Dazzle by Ann Strite-Kurz.
I’ve decided that I don’t care for the feel of Rainbow Gallery’s Rainbow Tweed. It’s 44% Cotton, 39% Wool, and 17% Acrylic. But, this is the end of it for this piece.
Toni McKelley called this area in Florentine Fancywork a God’s Eye Variation based on motifs from the 70s. I vaguely recall them after I googled them but didn’t know that’s what they were called.

Nearing the finish now! Exciting.
Tiny Little Hearts = Huge Headache when you don’t count correctly! I was off and couldn’t figure out why. So, I sent photos to Linda M and in no time she found where it was off.
Initially, I decided to add one extra stitch and quickly found out that didn’t help at all. So, I did what I should have done from the beginning and removed the wrong portion. Then, it moved along until I tried to compensate along the side. I had to wait until all the full motifs were done. Then, it took some effort but I got it!
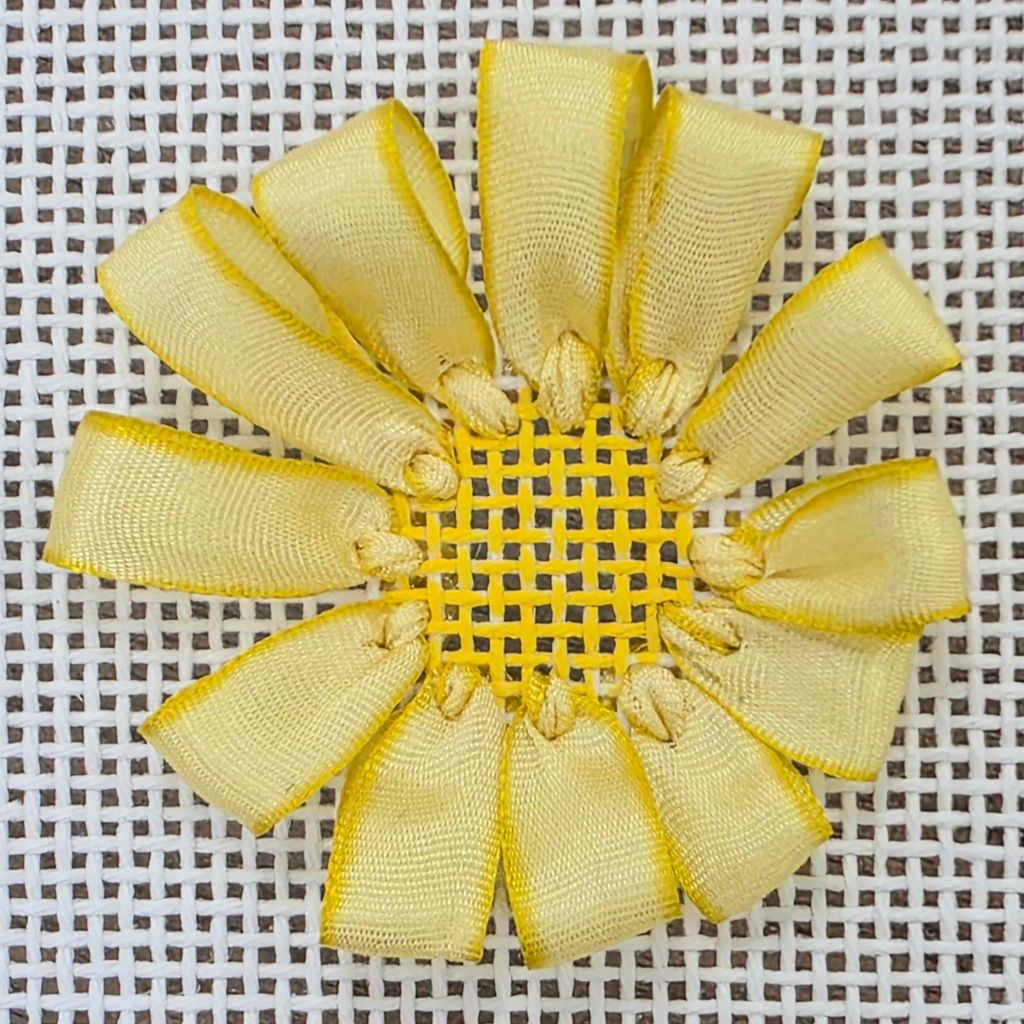
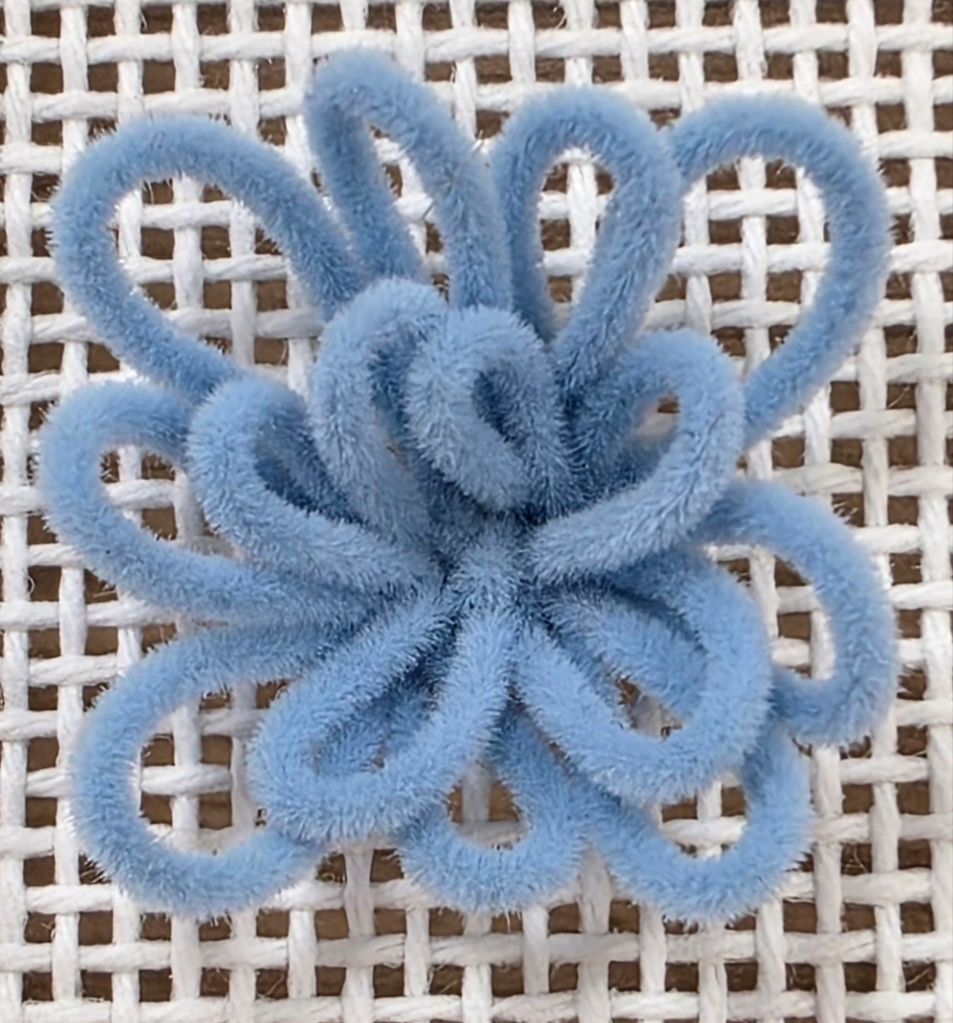
Day 2 of Spring Lollipop Garden by Tamara Abdee started with the Loop Stitch Flower.
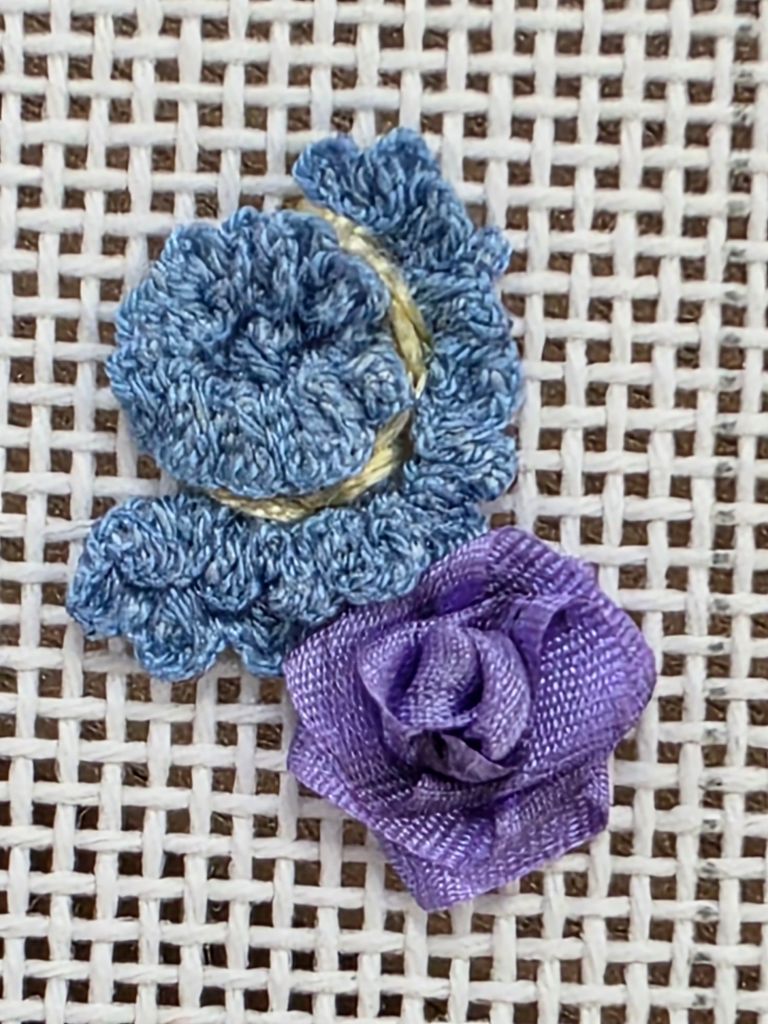
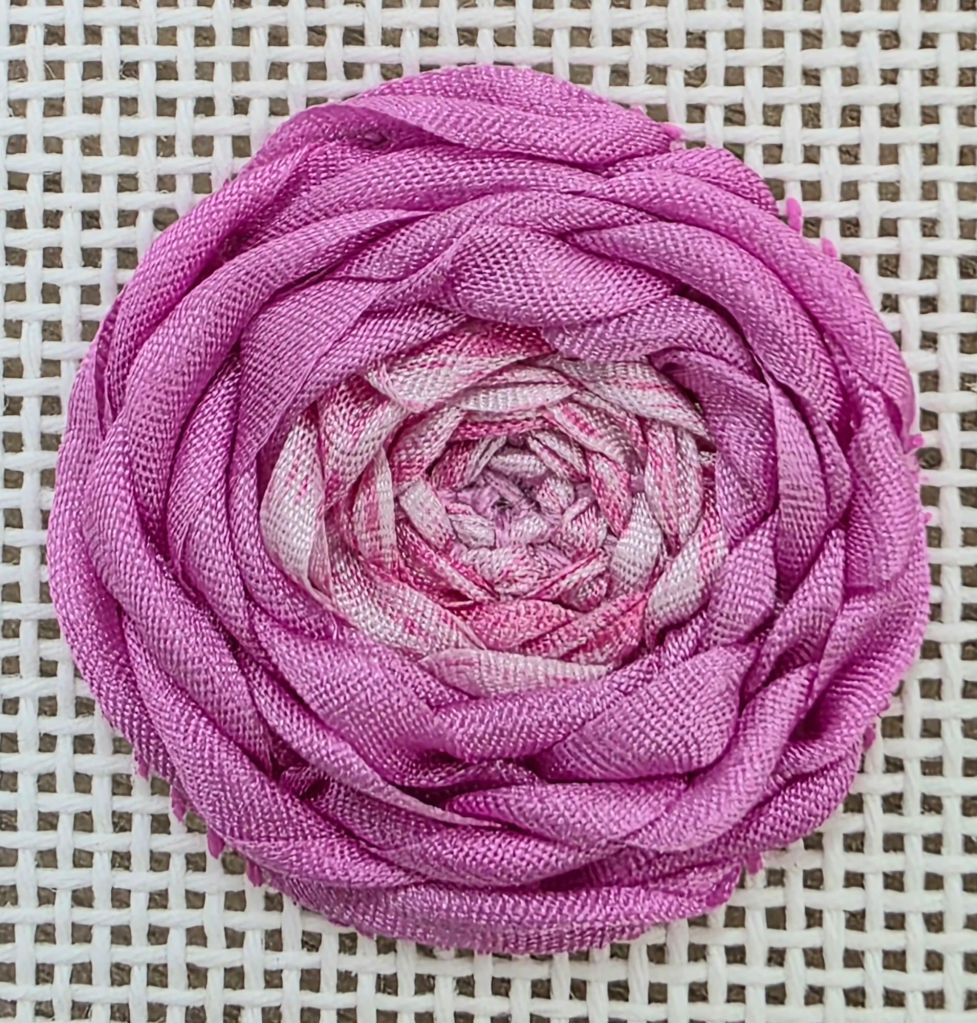
The French Knot Ribbon Rose is Lynn’s variation of the one Tamara teaches. One of the most beautiful, delicate roses I’ve ever seen!
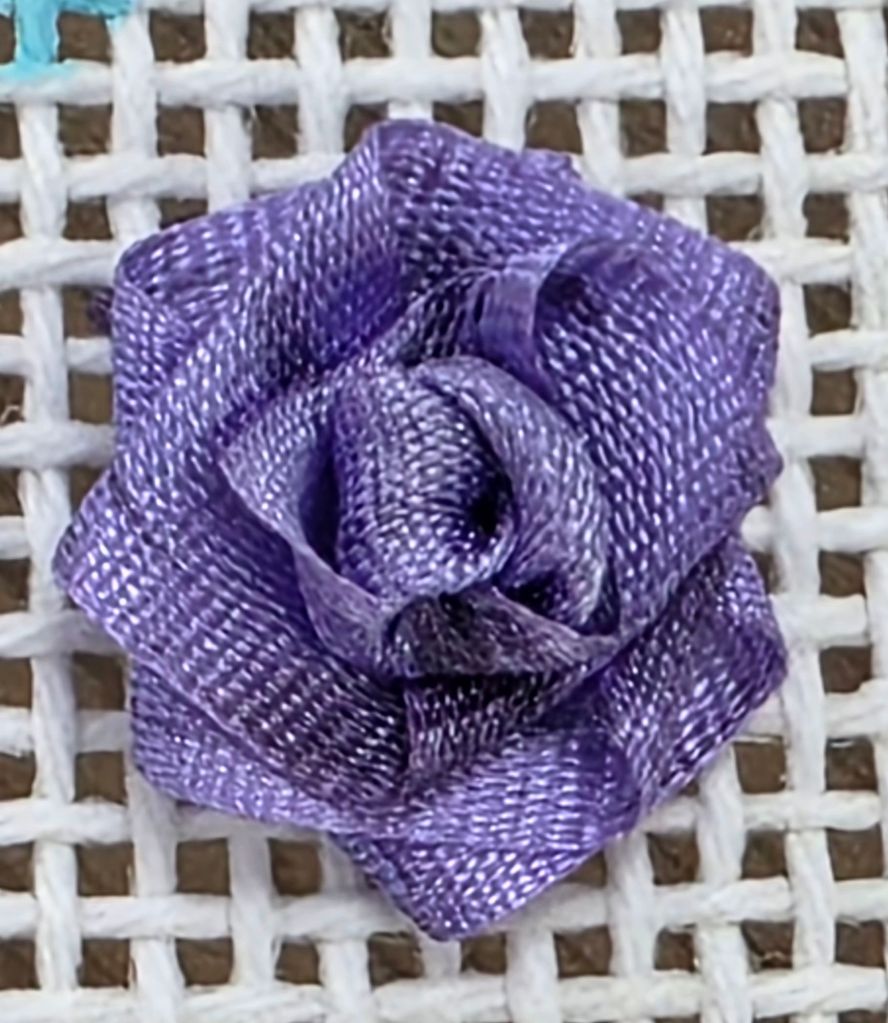
Next to it, I added a flower with rouched Soie Tissee by Silk Road Fibers. It is my own crunchy version of whatever flower you want to call it!
Ali, Lynn’s daughter, was very supportive during class on both days. She even volunteered to iron our ribbons! Such service!! Lunch both days were supplied by Fireside Stitchery. Nothing fancy but plentiful, healthy, and delicious. There’s an extra large table that we were all able to fit around and enjoy lunch away from our work areas.
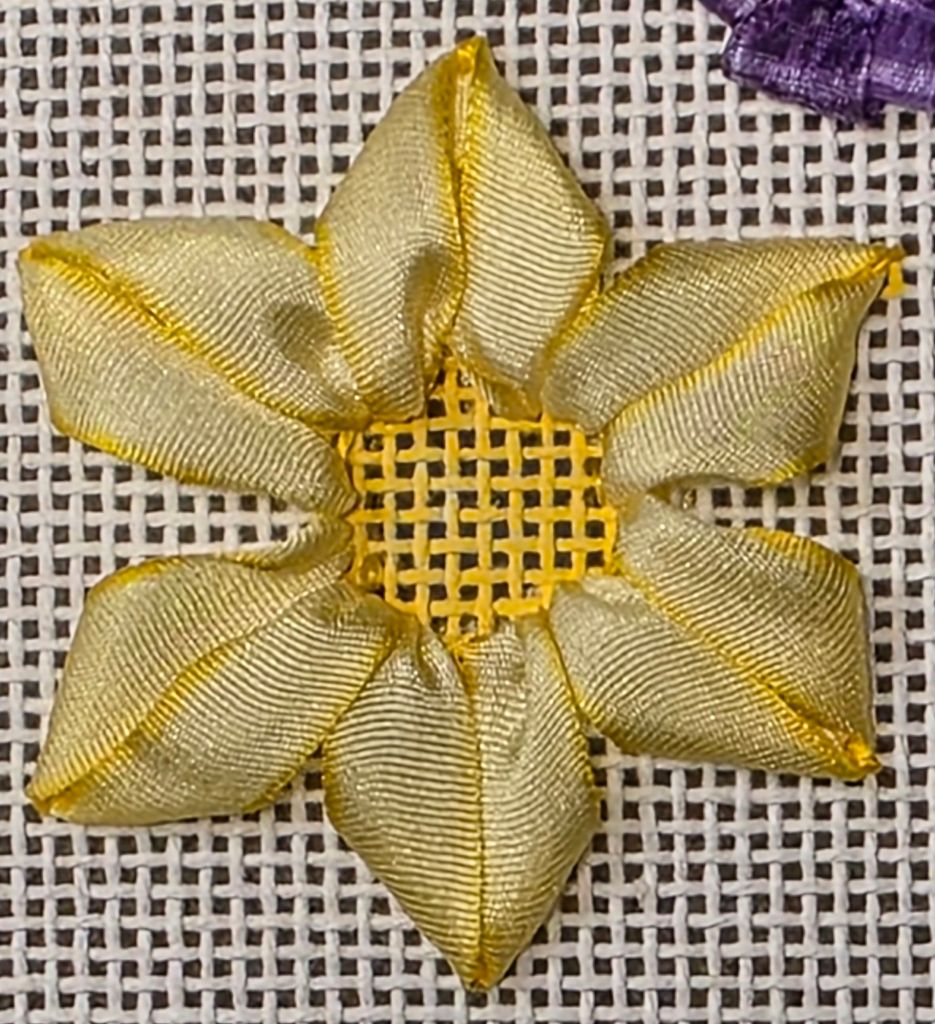
Right after lunch, we worked on our Daffodils. We used a Tilli Tomas ribbon which creates a lovely effect because the edges are a slightly darker color.
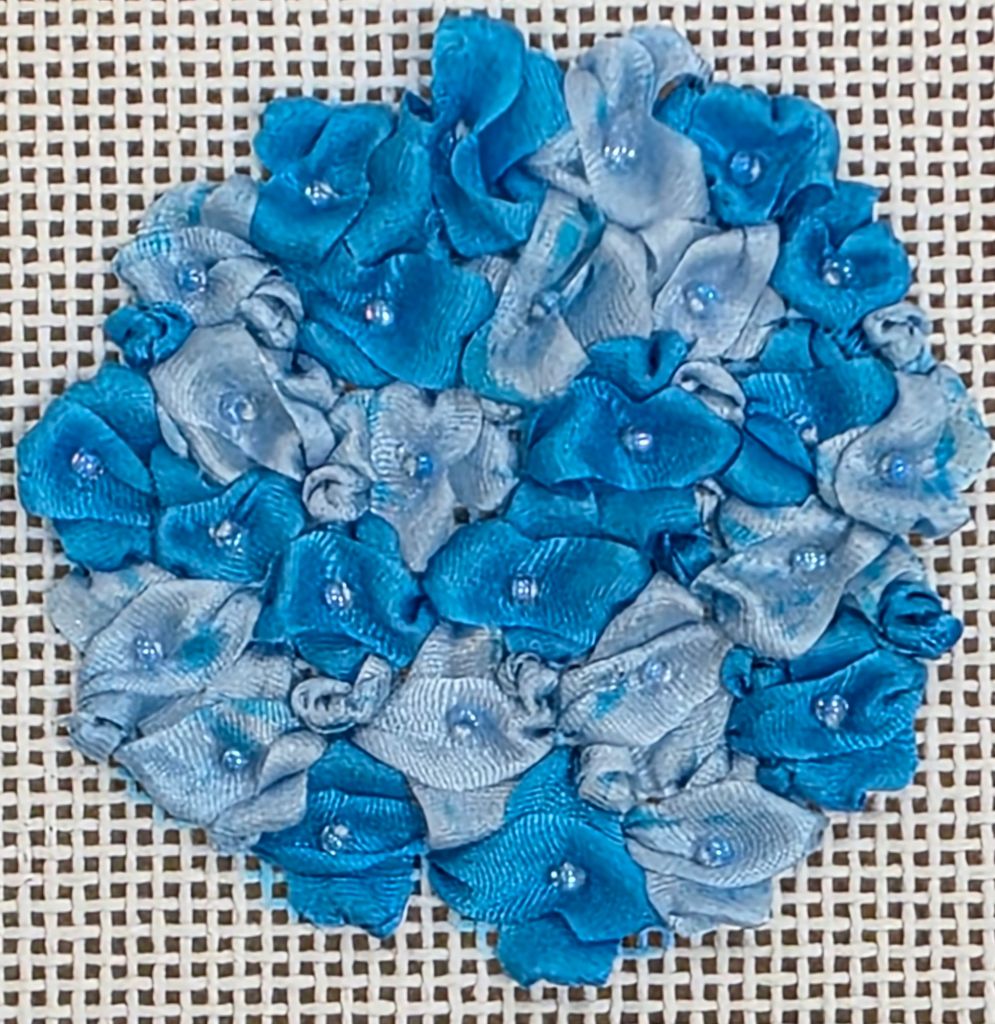
The last of the afternoon was spent finishing whatever we wanted to do. I elected to finish my Blue Hydrangea (with a couple of French Knots and Colonial Knots to fill in the little spaces). Some class members shopped but I will be back on the 25th and 30th for Stitch-ins with ANG Main Line Stitchers and EGA Brandywine.
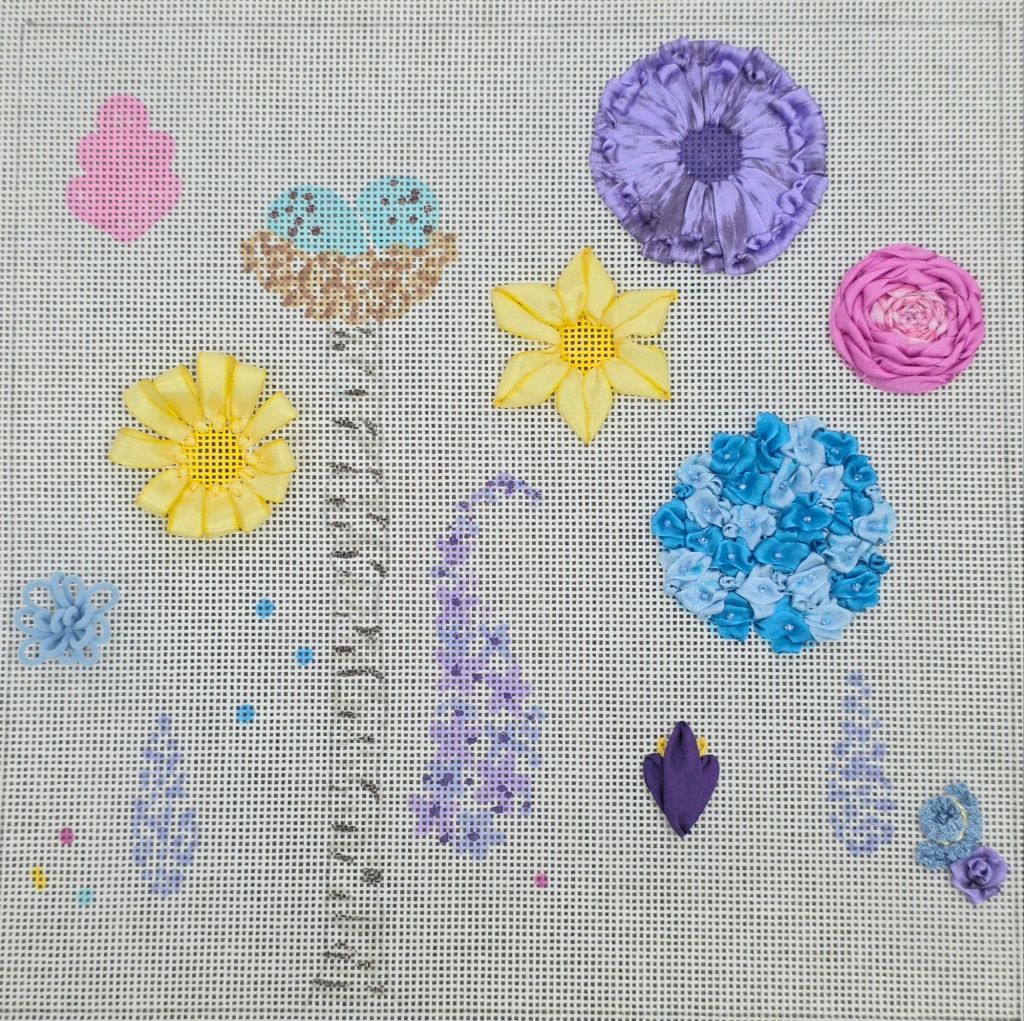
So, what does the canvas look like by the end of our 2 days? It looks like I’ll be doing 5 more big flowers, several small sequin ones, leaves, stems, a Birch tree, a nest, Robin’s eggs, and some background motifs. This will be fun.
It sounds like Tamara will be returning to Fireside Stitchery at some future date. In the meantime, while we don’t have stitch guides for specific painted canvases, we have been given enough instruction to tackle one.
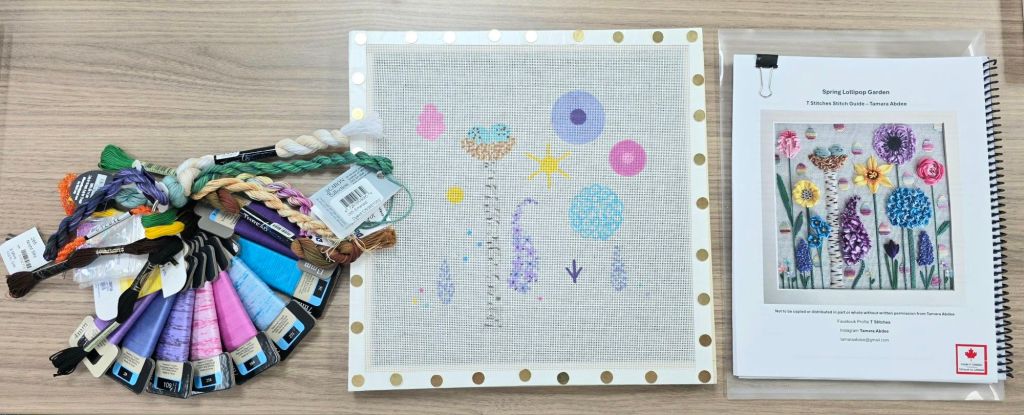
What a lovely display by Tamara Abdee as we walked into the classroom area at Fireside Stitchery. There were 2 tables all ready for us. I signed up for Spring Lollipop Garden. But, Tamara is teaching 3 different designs for 12 people. She filled two 2-day classes. Four other members from our ANG Main Line Stitchers Chapter are there including Lynn (and store owner), Kathy P, Pat K, and Karen P. I think we’ll be getting a new chapter member too!

There are 9 different ribbons, 13 threads, and 10 bags of beads in the kit! The canvas is partially pre-painted by Tamara.
I love my Twisted Spider Web Rose. It is a 9-spoke rose (but was supposed to be 7) because I had 8 when I started weaving the ribbon (but it must be an odd number). So, I squeezed the 9th in on the right which you can tell now that I have told you but had I not, you probably wouldn’t have known. Can’t see it? The right is slightly tighter than the left. I also practiced adding extra on the left side only.
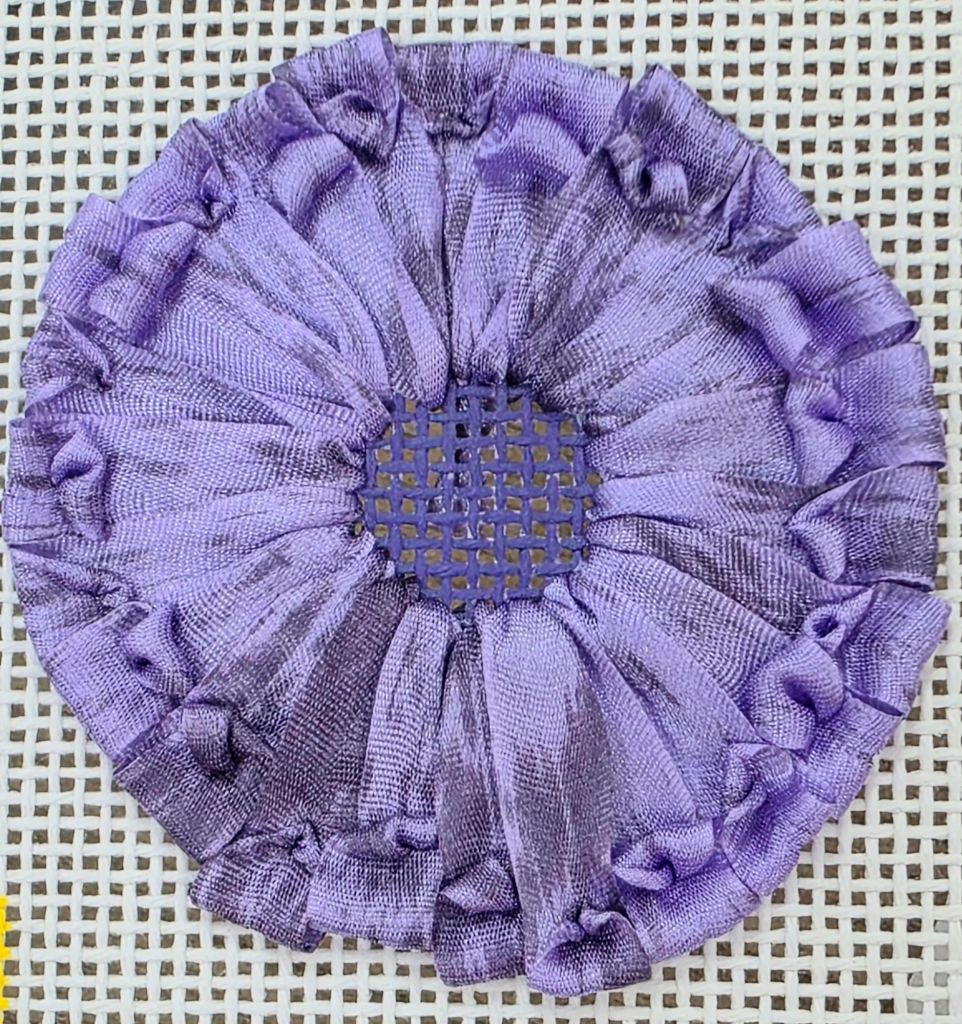
The Crocus used the widest 13 mm ribbon. And, Lynn placed 2 more next to the one which I may do as well.
Varying the length of the stitches in the Anemone was the hardest part.
The Velvet Loop Flower done with Very Velvet was an extra flower I squeezed onto my canvas. Some stitches repeat in each of the 3 designs but in differ in color. This flower is not in mine but she taught it to all of us. I may add beads or a sequin.
The blue Hydrangea is going to be fantastic once it’s done.

I will wait to share my progress on the full canvas until after tomorrow’s class.
Tamara is an excellent teacher and is imparting wonderful tips in addition to sharing her ribbonwork techniques!
