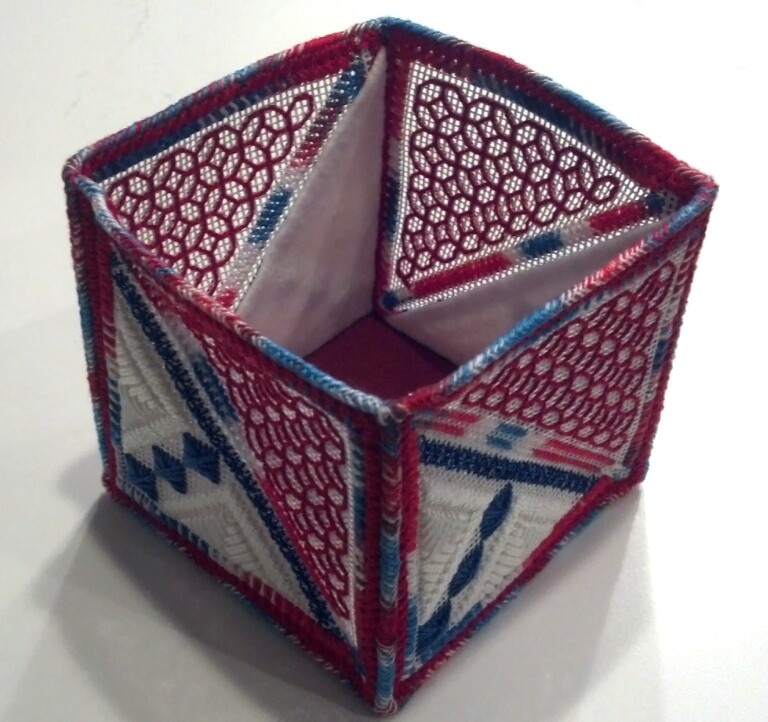
Once you get the stitching done and lining in place on the Folding Ort Box and the Ort Box with a Twist (Pockets), the final step is to do the binding stitch to attach the pieces. My thought throughout the process of creating these has been that Marilyn Owen was really so ingenious to have constructed this to begin with. I had a lot of time pondering that as each side gets attached to the bottom, then side to side, and finally the top edge times and I did that times two!
Check your layout – you don’t want to be wrong now.
Also, check your thread. I used Pearl #8 for binding on the Folding Ort Box and it is a tad thicker than the three strands of floss. Mine does lie flat but it would be flatter had I used floss as Marilyn instructed. By the time I realized it, I wasn’t going back.

At least two of my chapter members are finished and several more are getting close. Thanks again Marilyn!
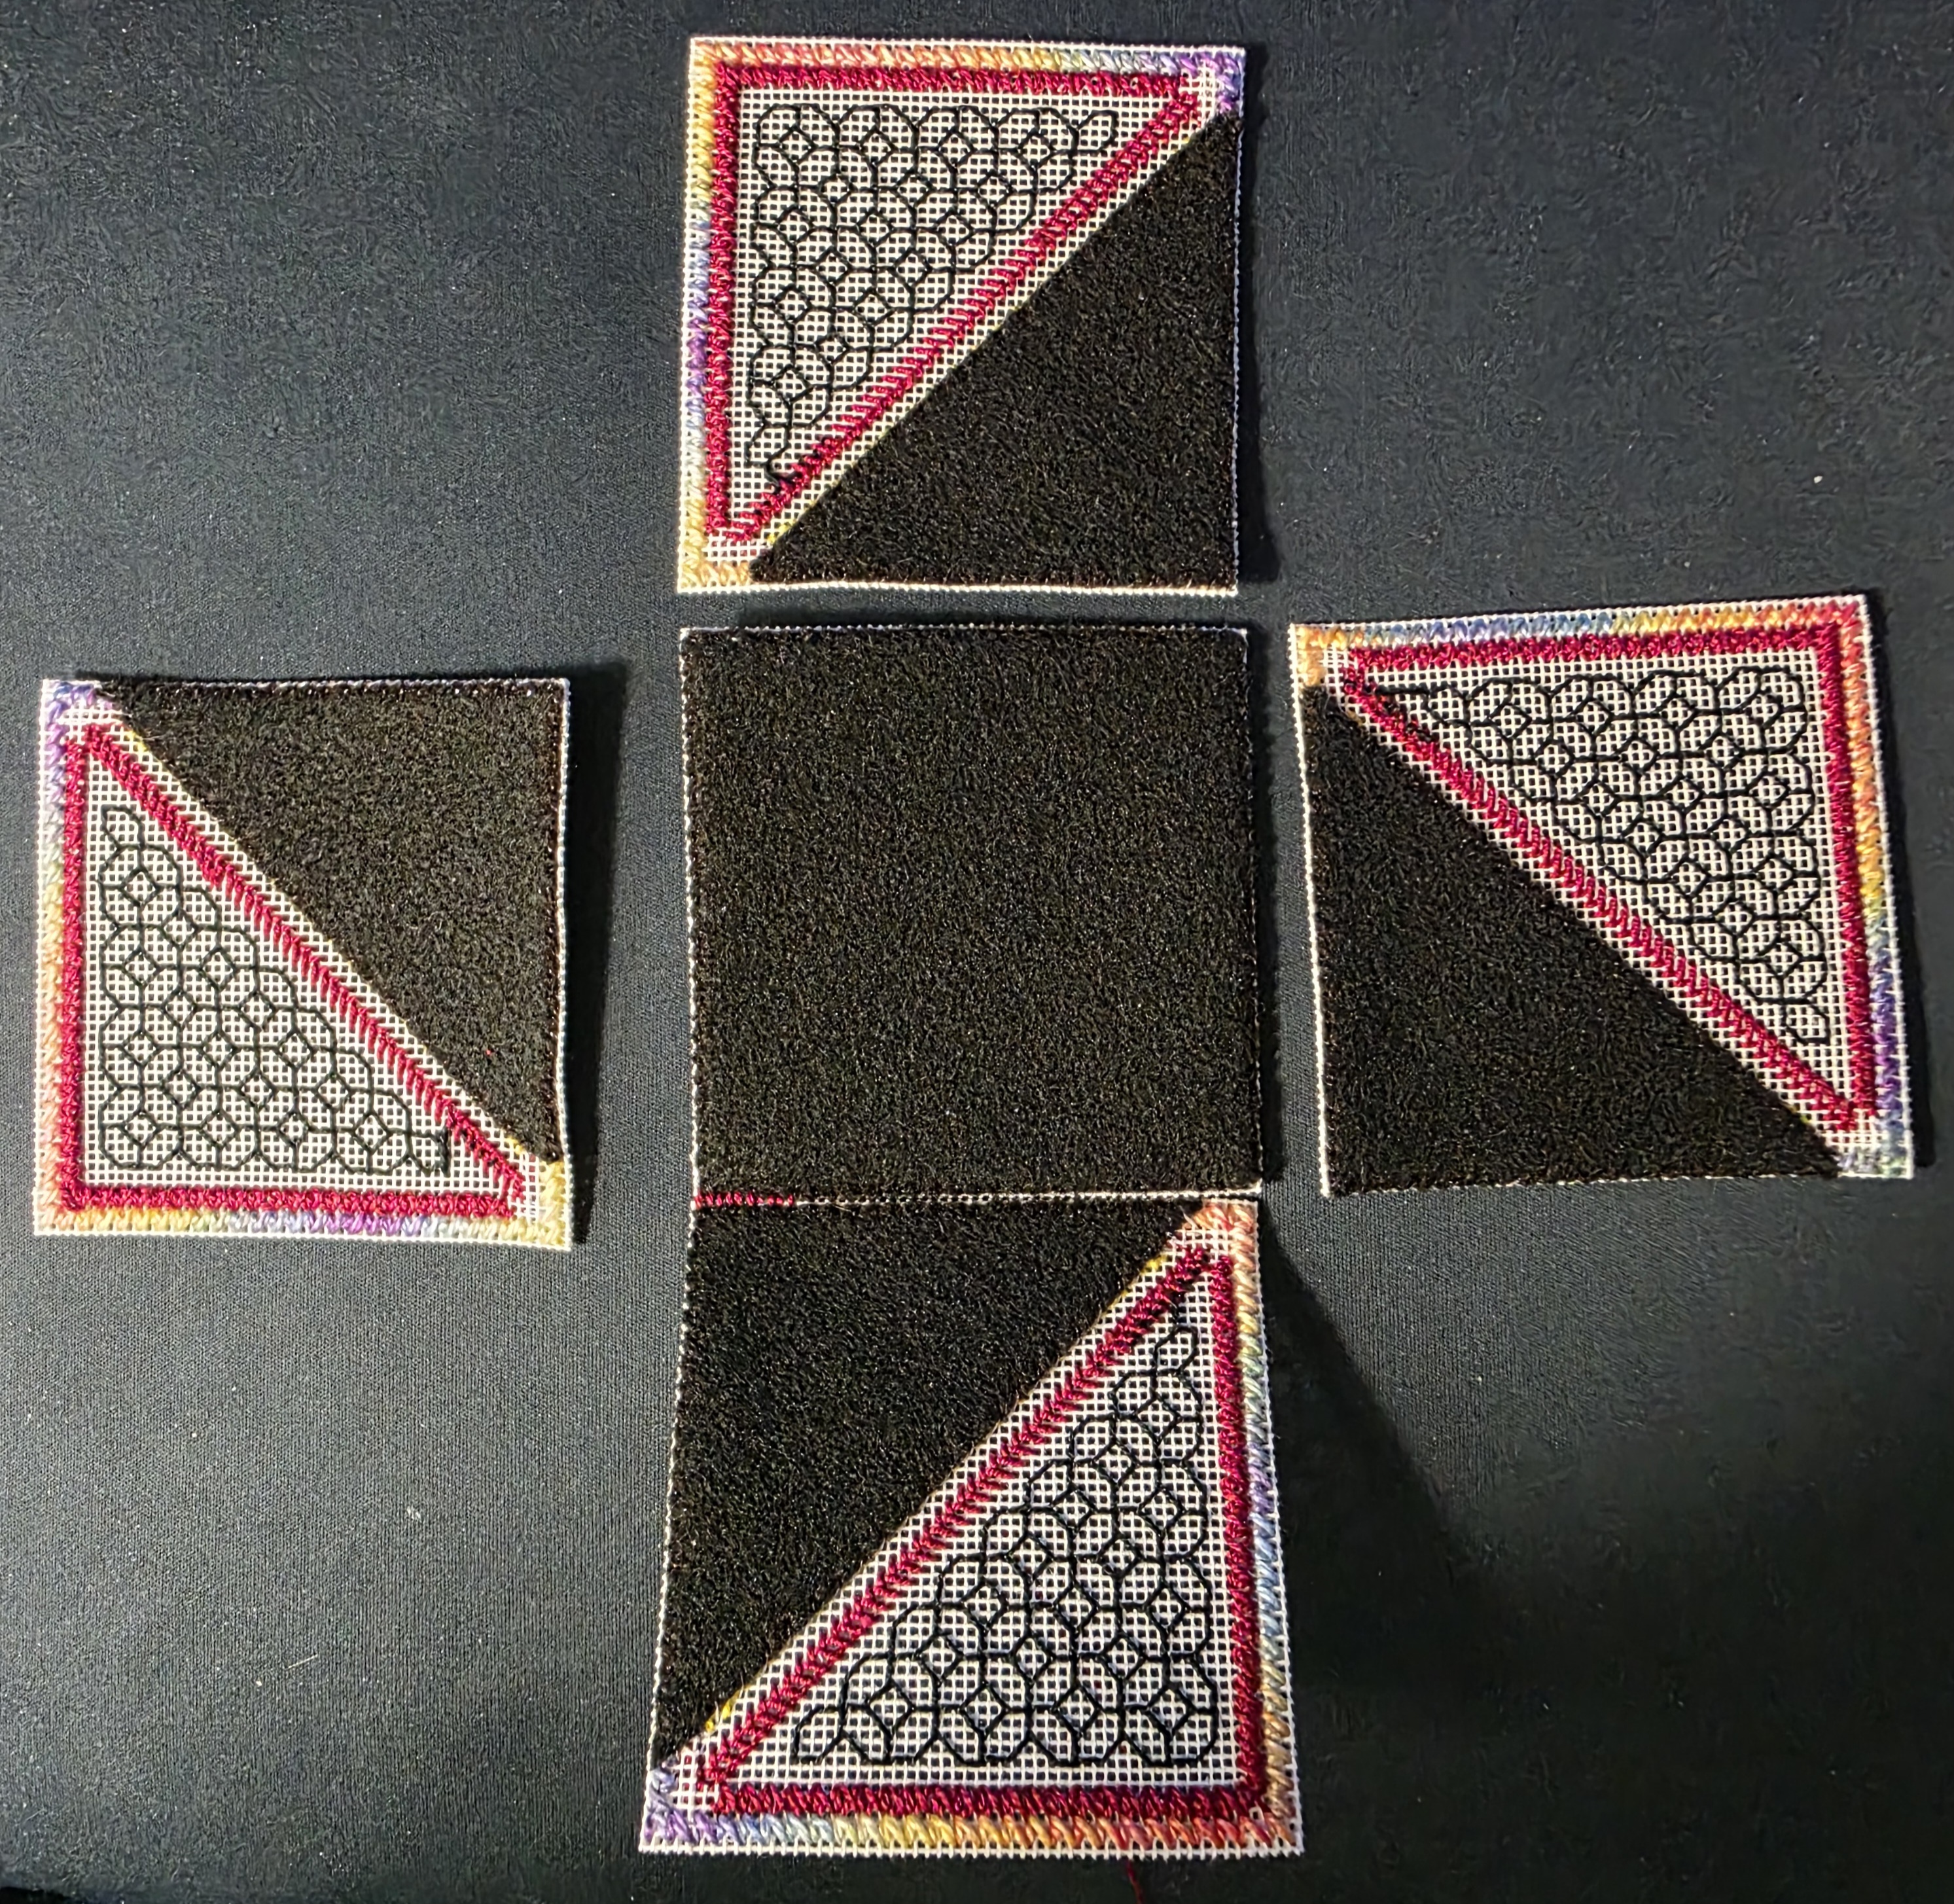
The linings are attached. I used white thread to attach the black ultrasuede on the Folding Ort Box which matches the canvas and is not seen from the front. However, it did show on the inside. So, I used a black marker to color the thread. Can you spot the one diagonal row not done yet?
I love the colors with black and the overdyed thread.
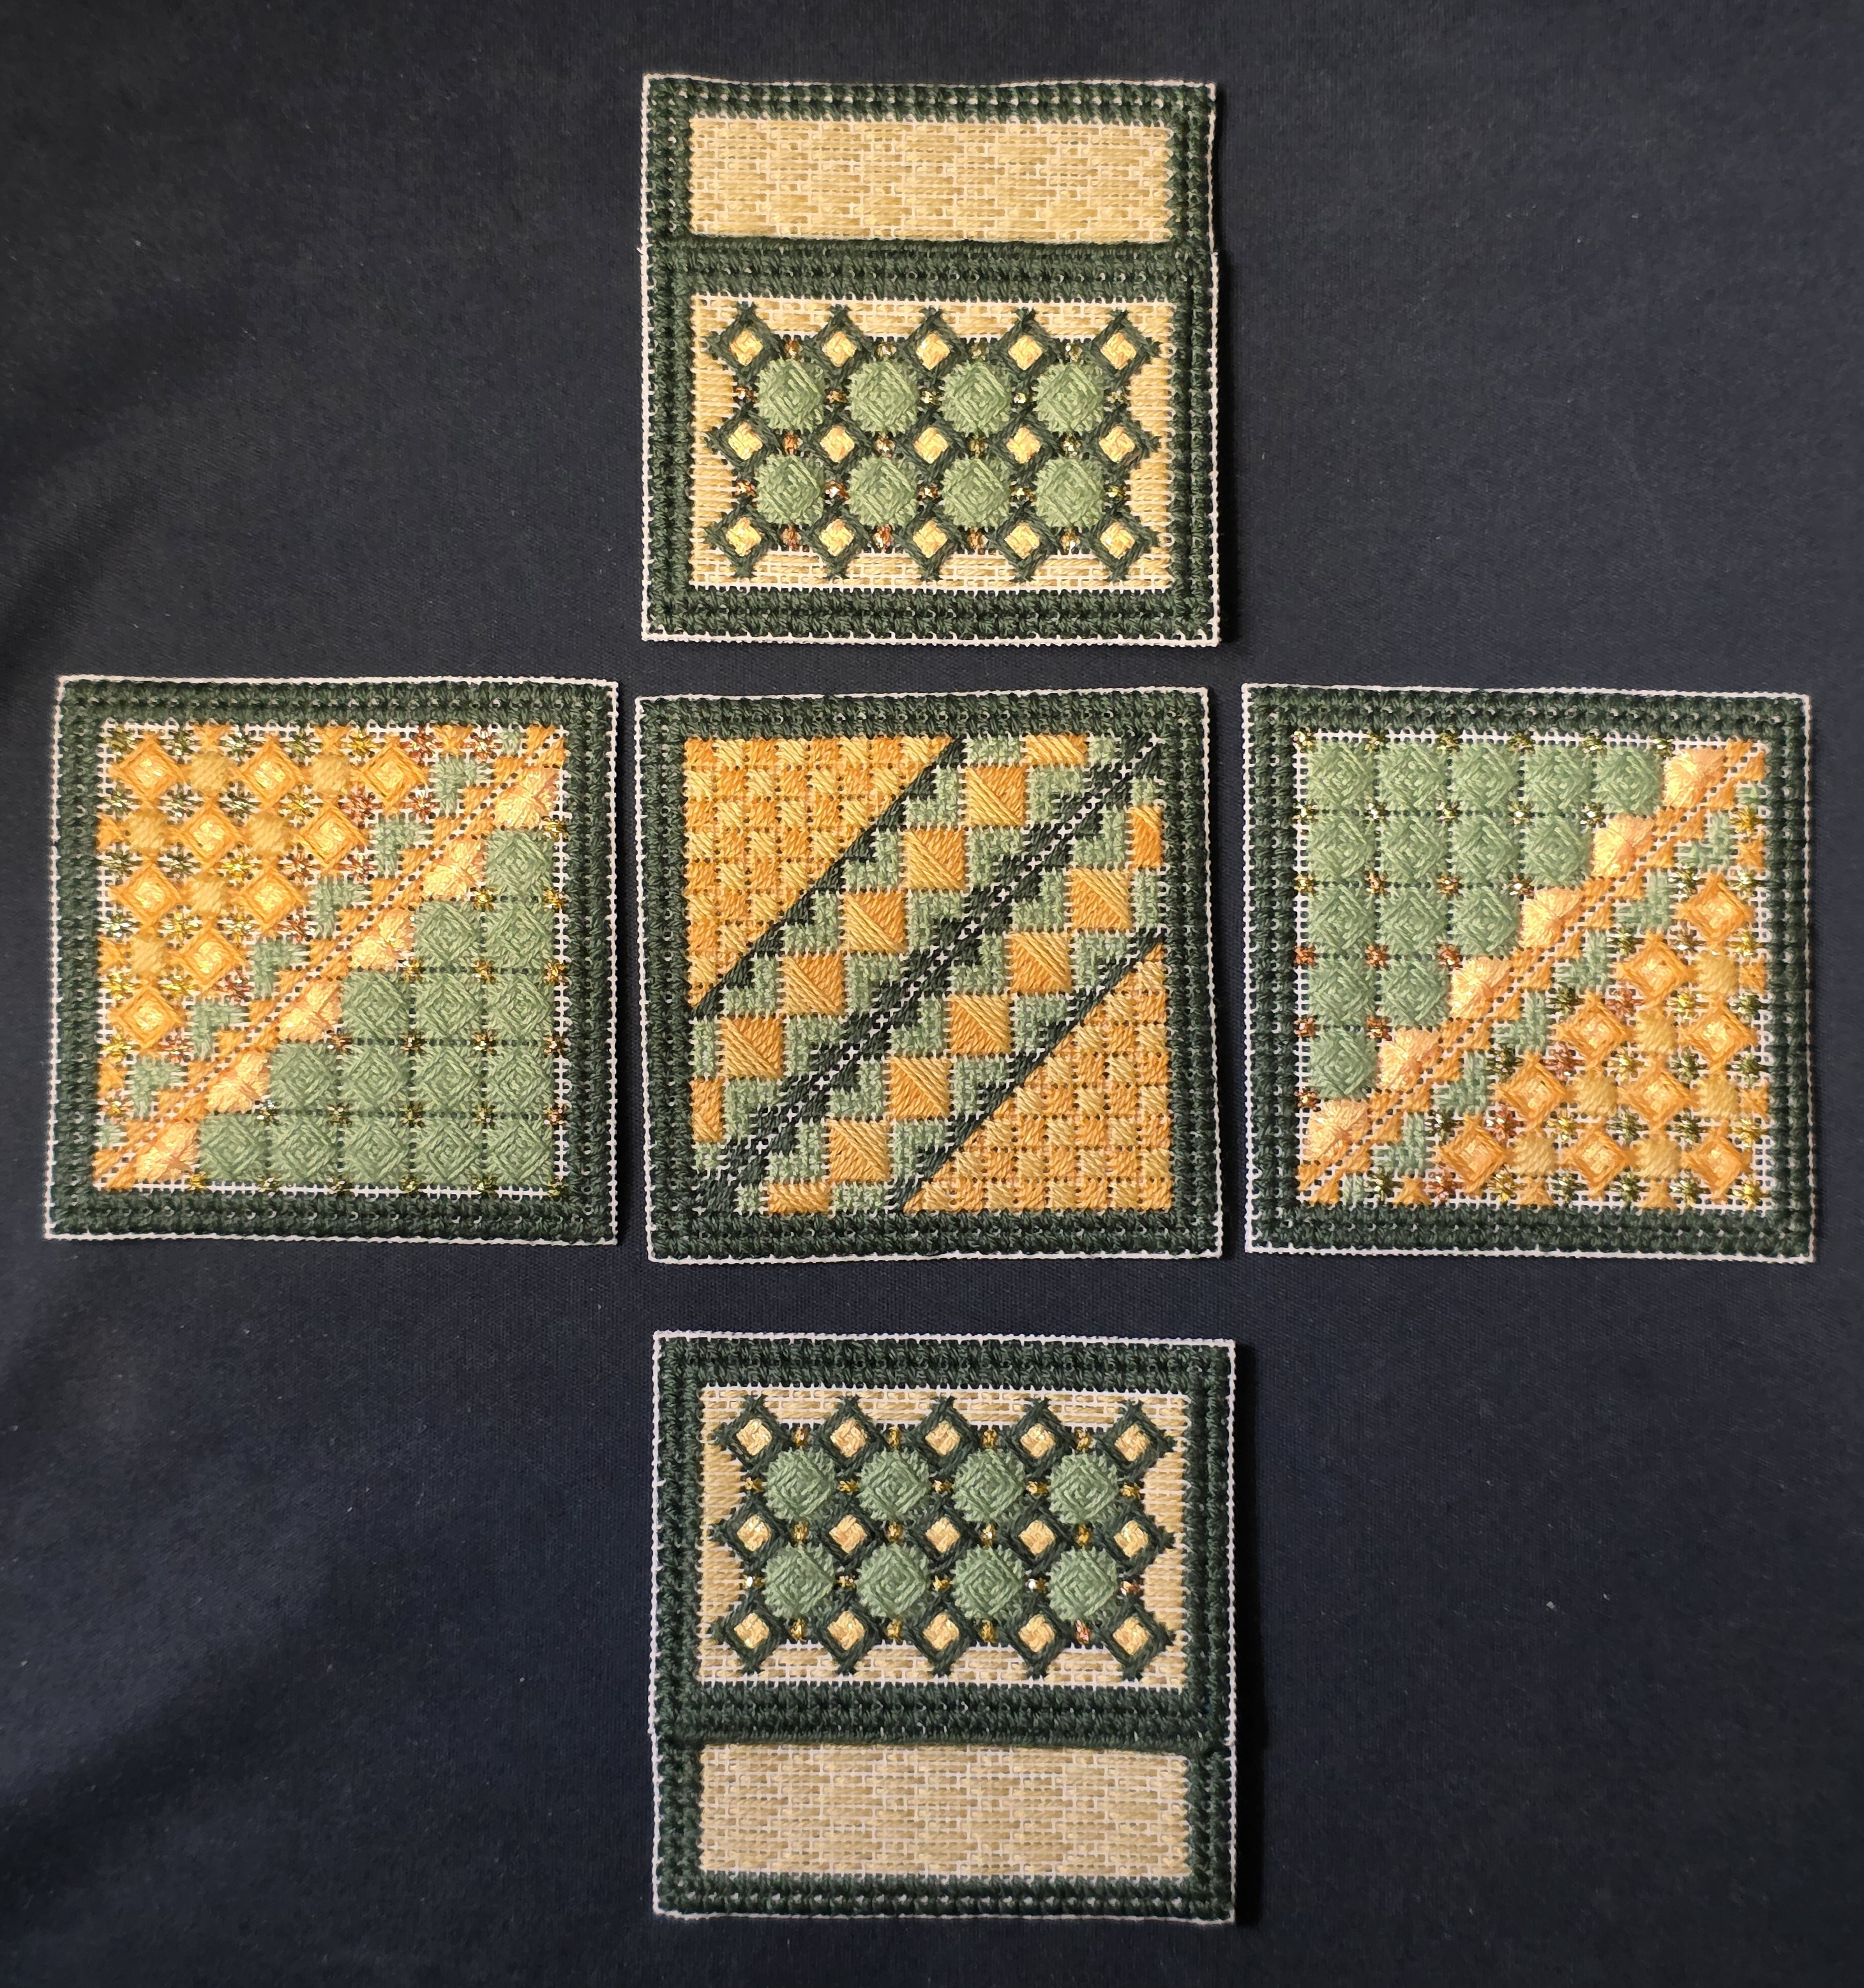
For the Ort Box with Pockets, I have a green border, green ultrasuede, and green sewing thread. So, no marker needed.
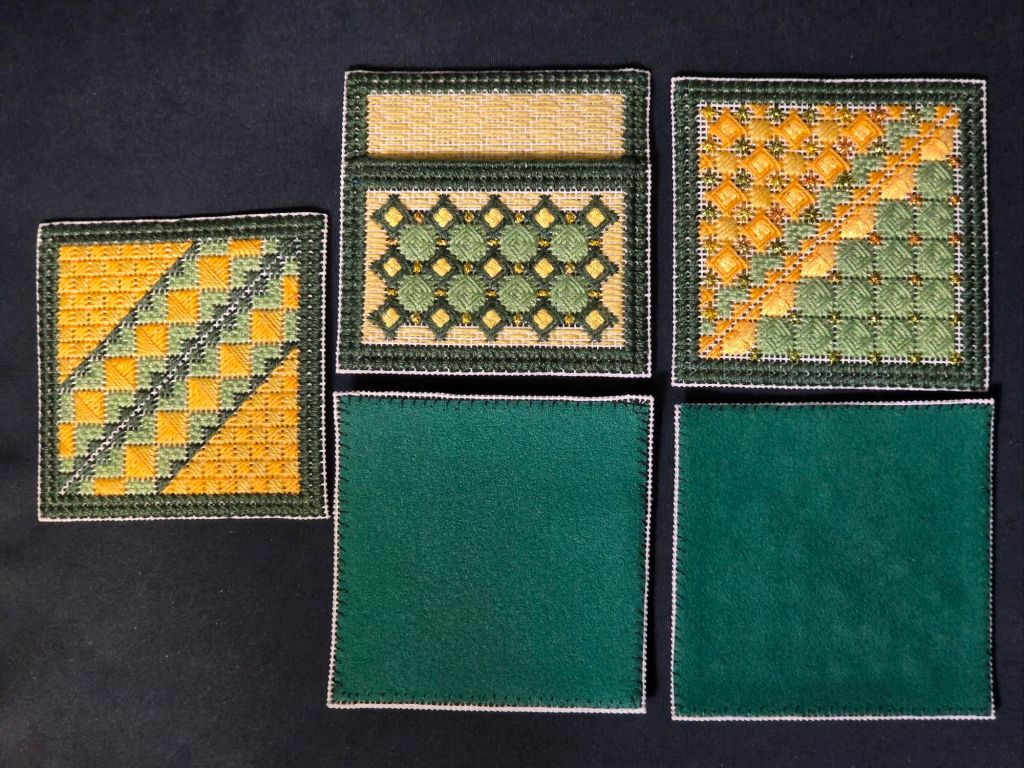
I’m ready for assembly.
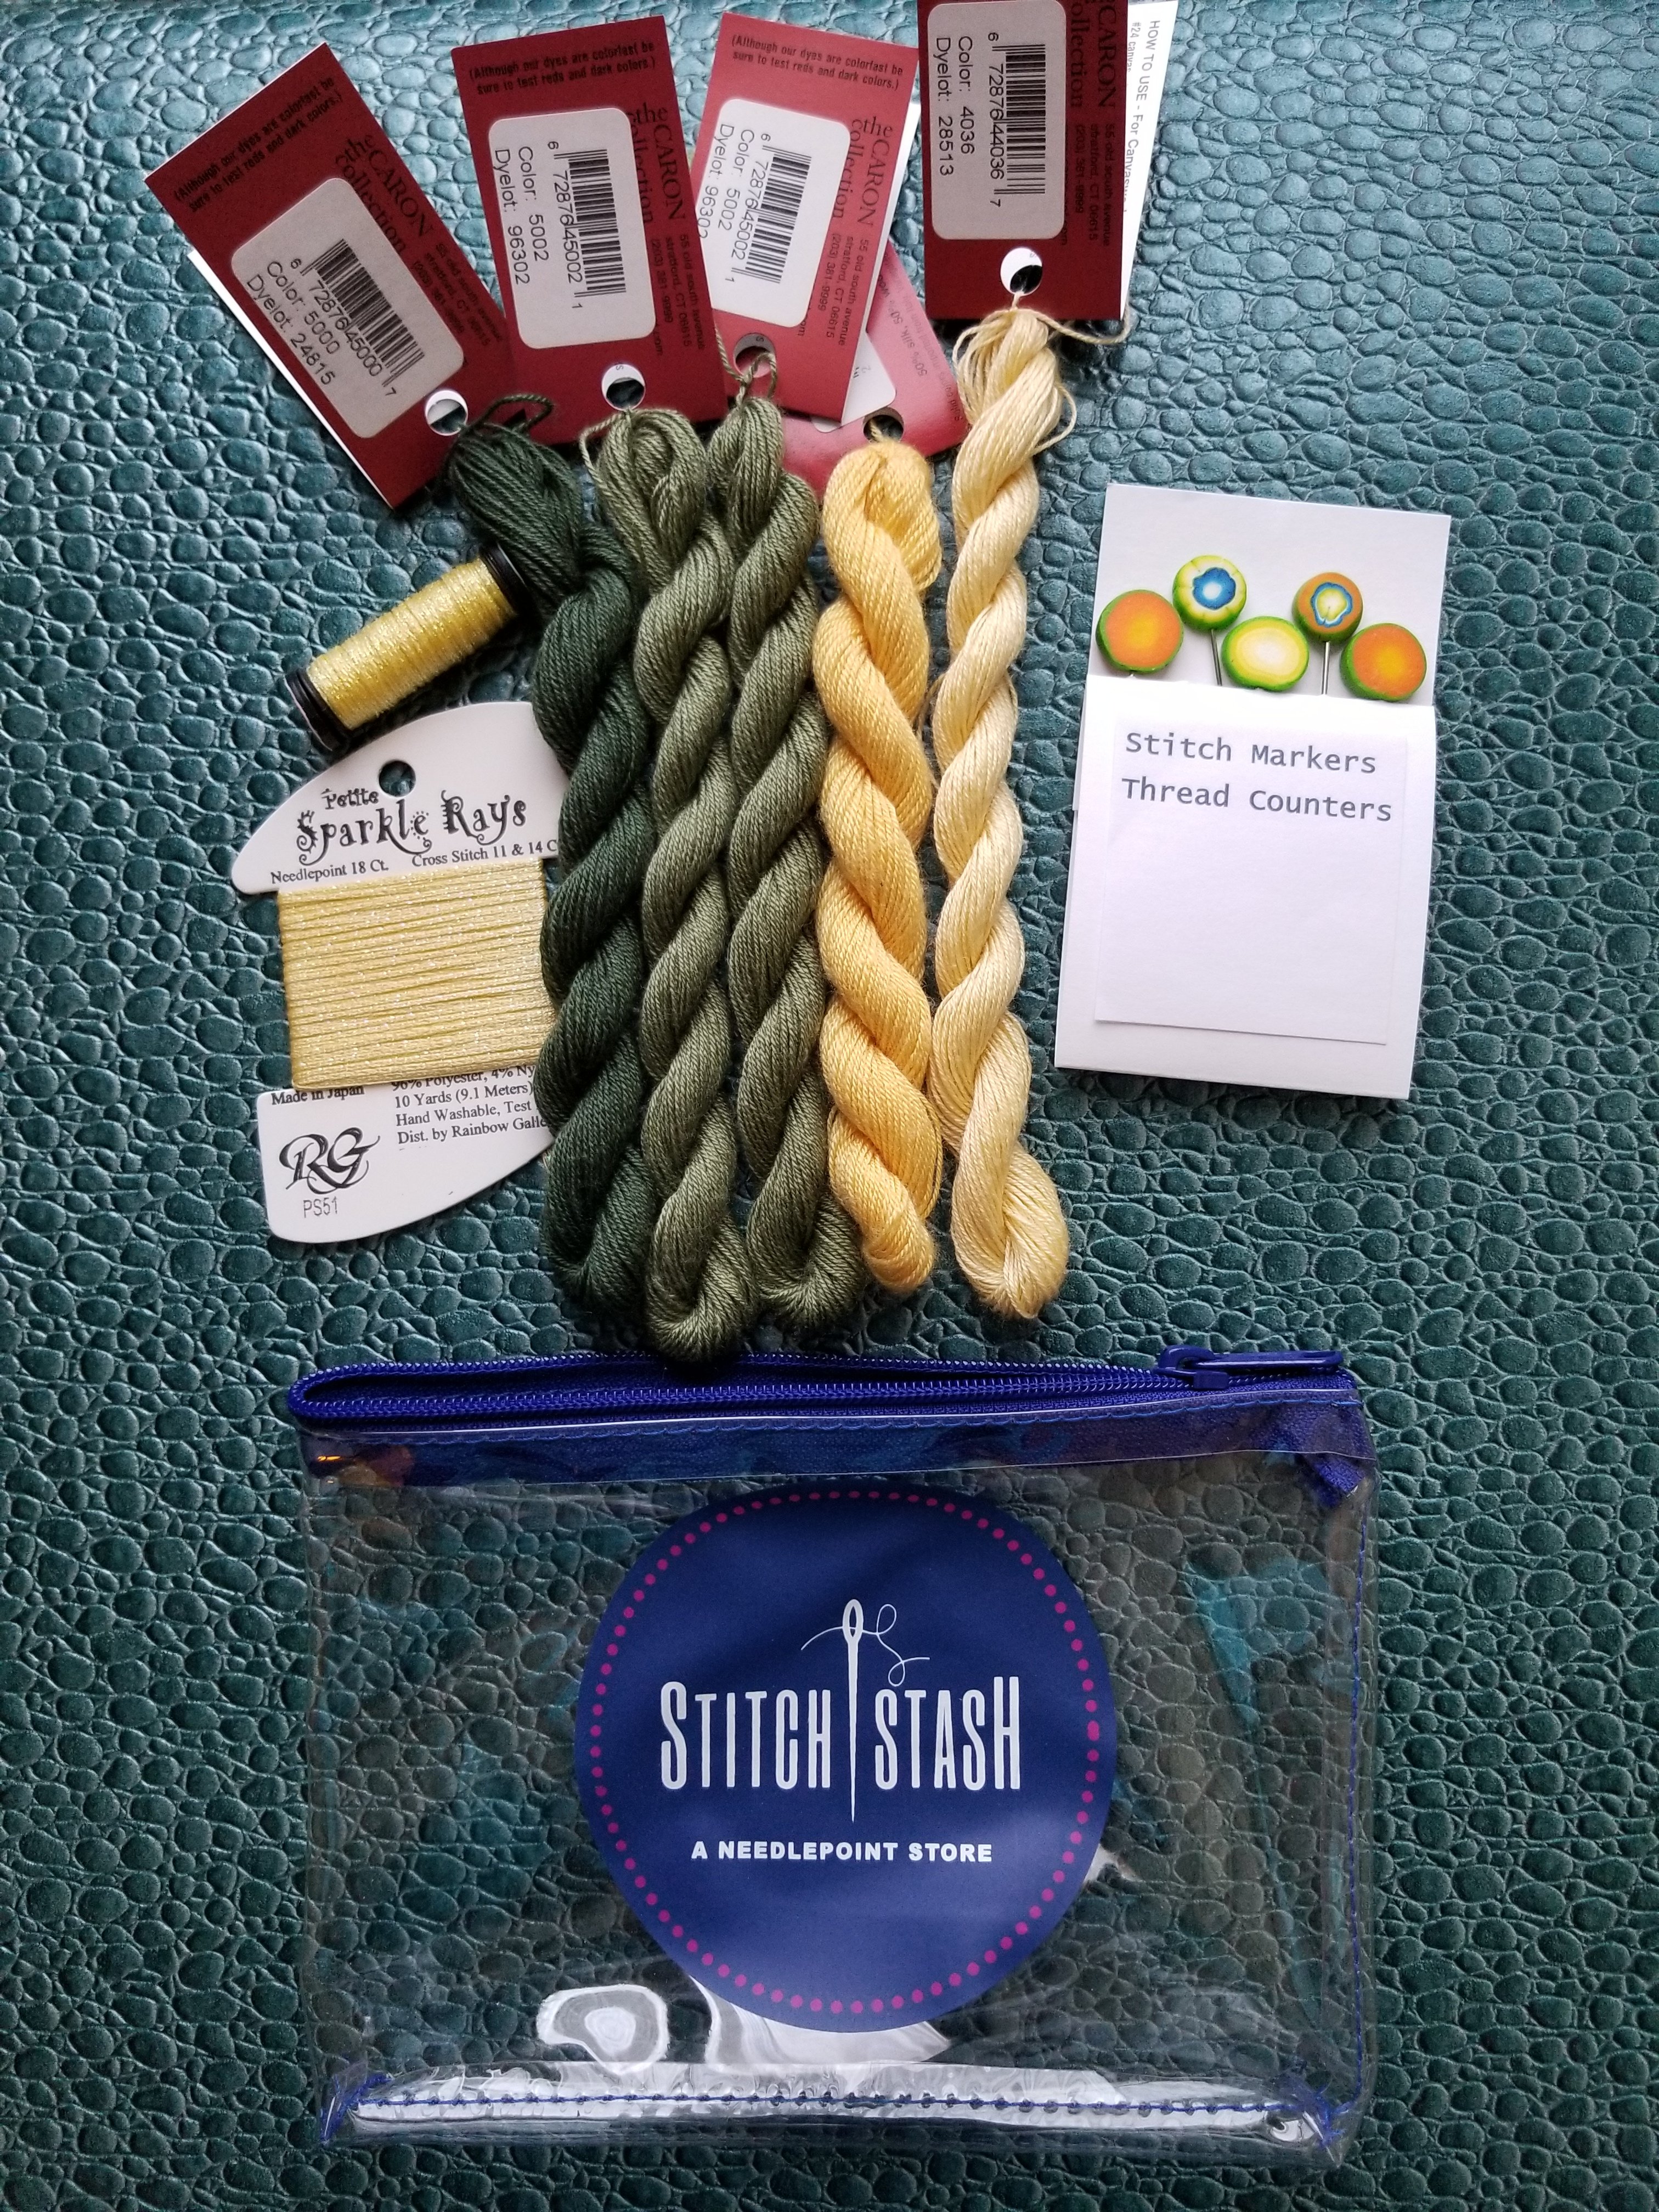
This will make a good travel project (small and no bars). I plan switch between reading and stitching during the 3-hour flight to New Orleans. I have gathered my stuff to take with me. One of Debbie Stiehler’s riffs during her talk at the NAN dinner was on who brings needlepoint to stitch on to an event where you will be taking needlepoint classes. Guilty!
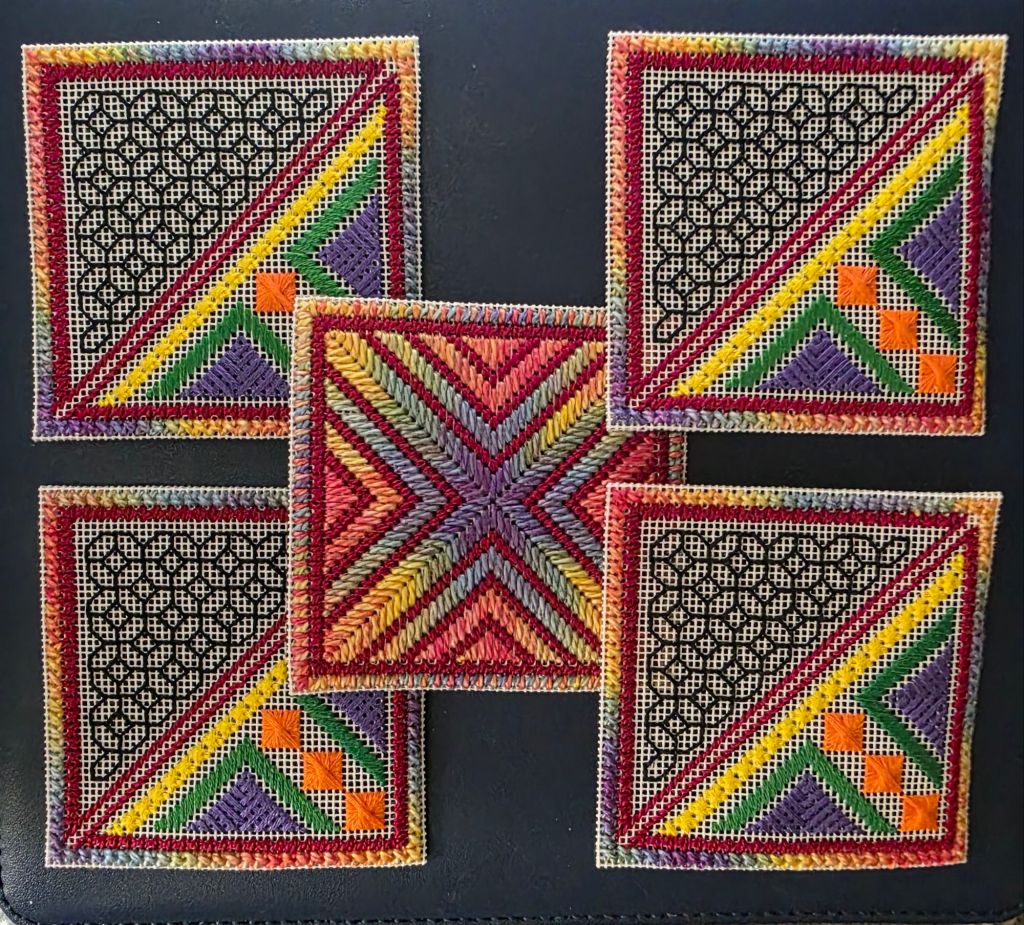
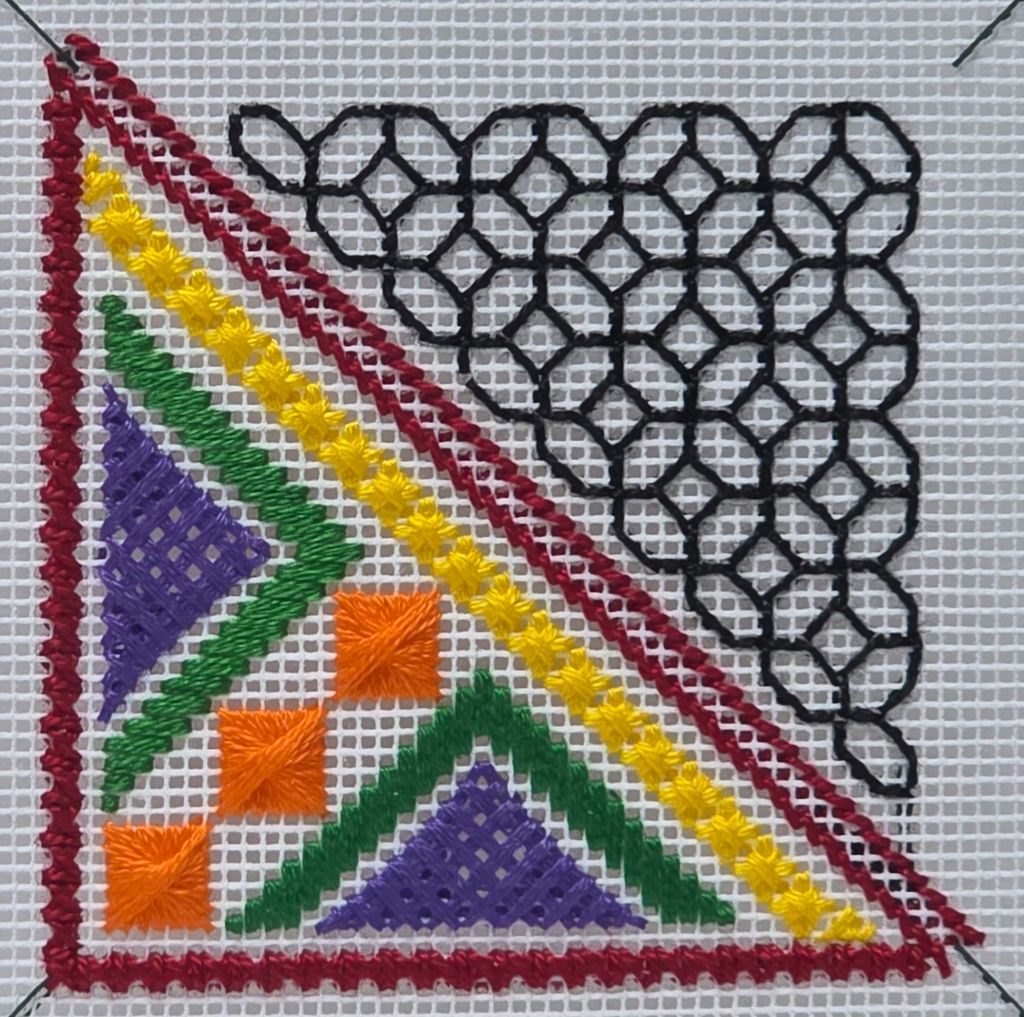
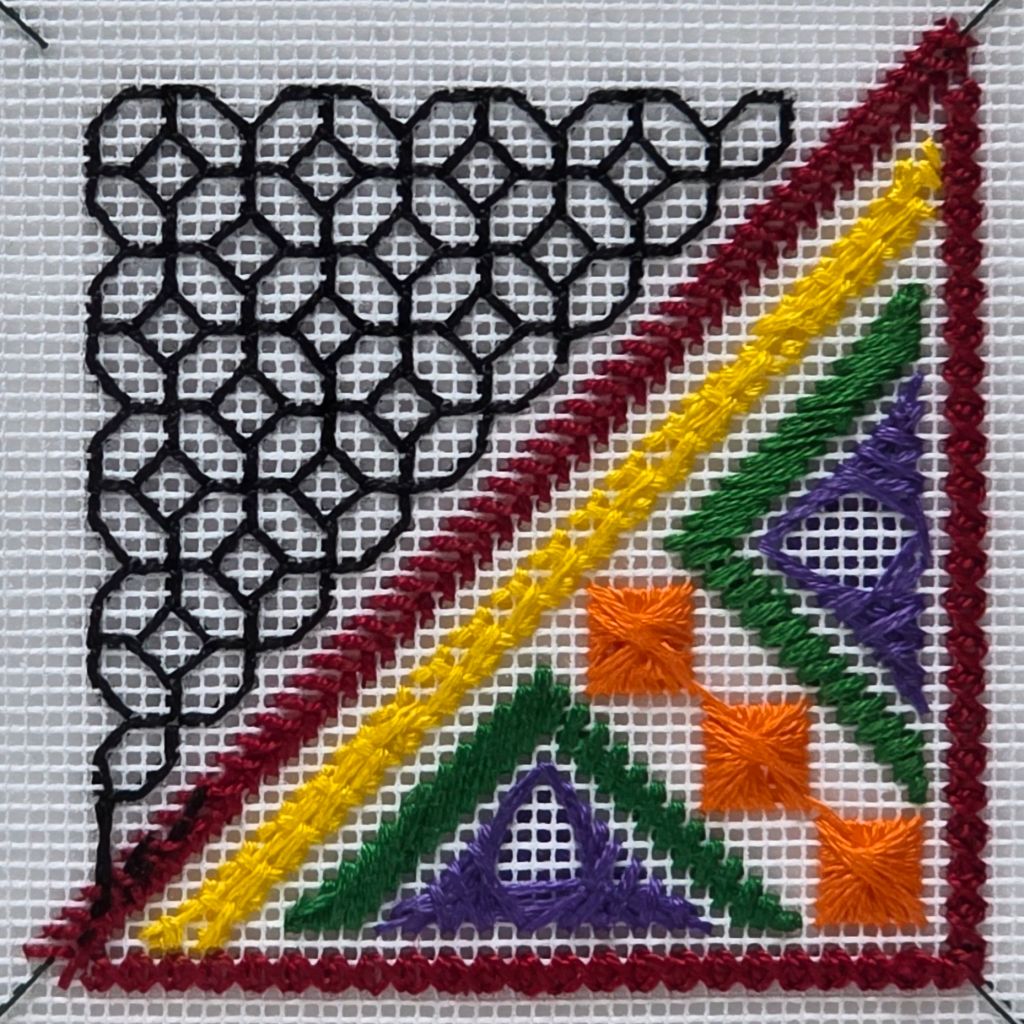
There were 4 patterns to use or not as we saw fit for the bottom of the Folding Ort Box by Marilyn Owen. I modified the bargello pattern by adding the short red rows. The color matching is pretty close.
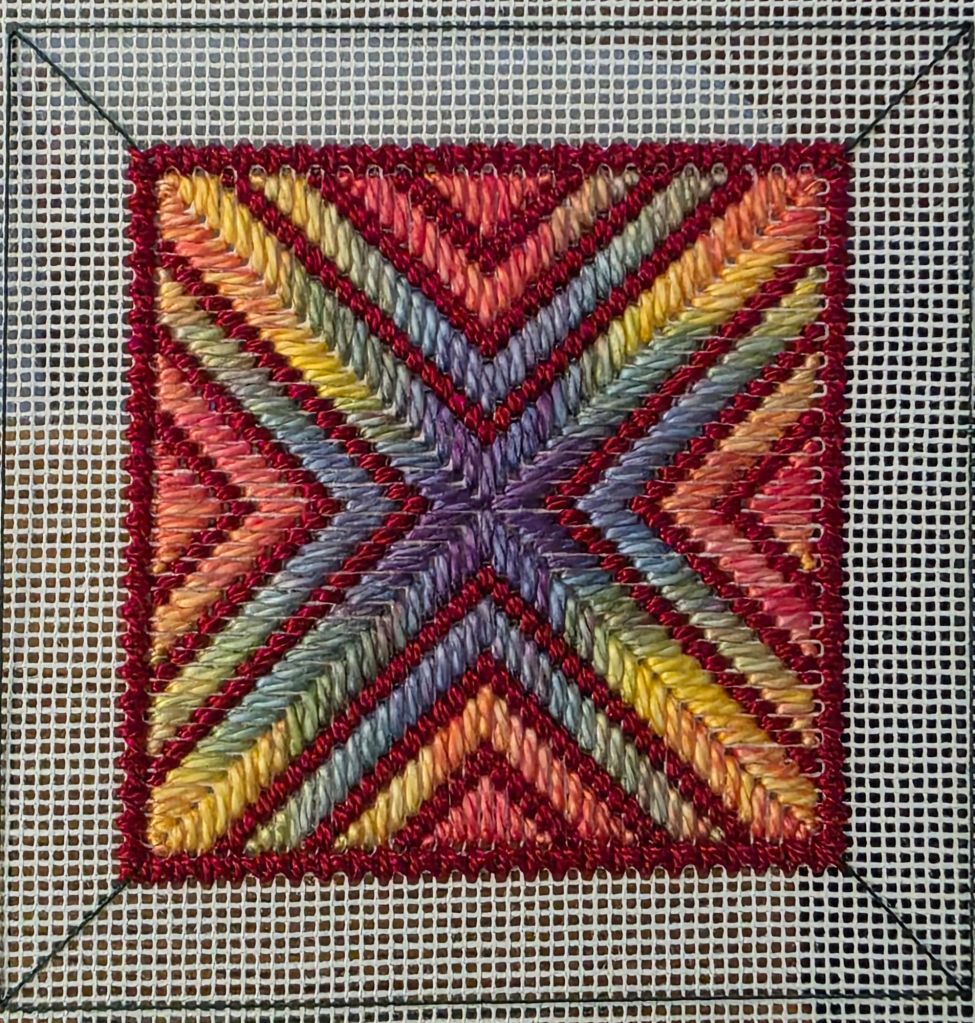
I’ve already used solid red for the inner borders and decided another red border and red binding will not be exciting enough. So, I tied in the Watercolours used on the bottom for the outer borders. Then, for the binding, I will go back to red.

The Ort Box with Pockets also needed to be cut apart, edges folded back, and lots of cross stitches for the borders. The holes all have to line up to stitch the borders correctly.
Next up is how to do the lining by August 11, our next ANG Main Line Stitchers Chapter meeting!
The blackwork actually made a lot more sense this time (first one was stitched in 2013).
I had thought we’d do a small pattern during our June ANG Main Line Stitchers chapter meeting but I figured out that wouldn’t work because it took me 3 trys to get started correctly and over an hour to stitch the sample.
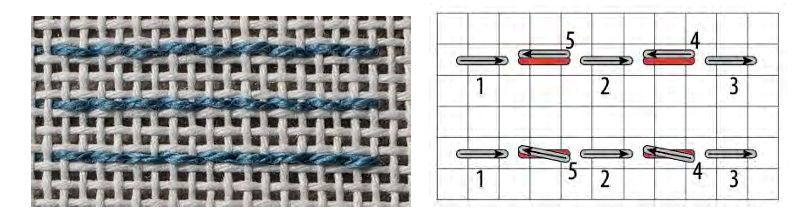
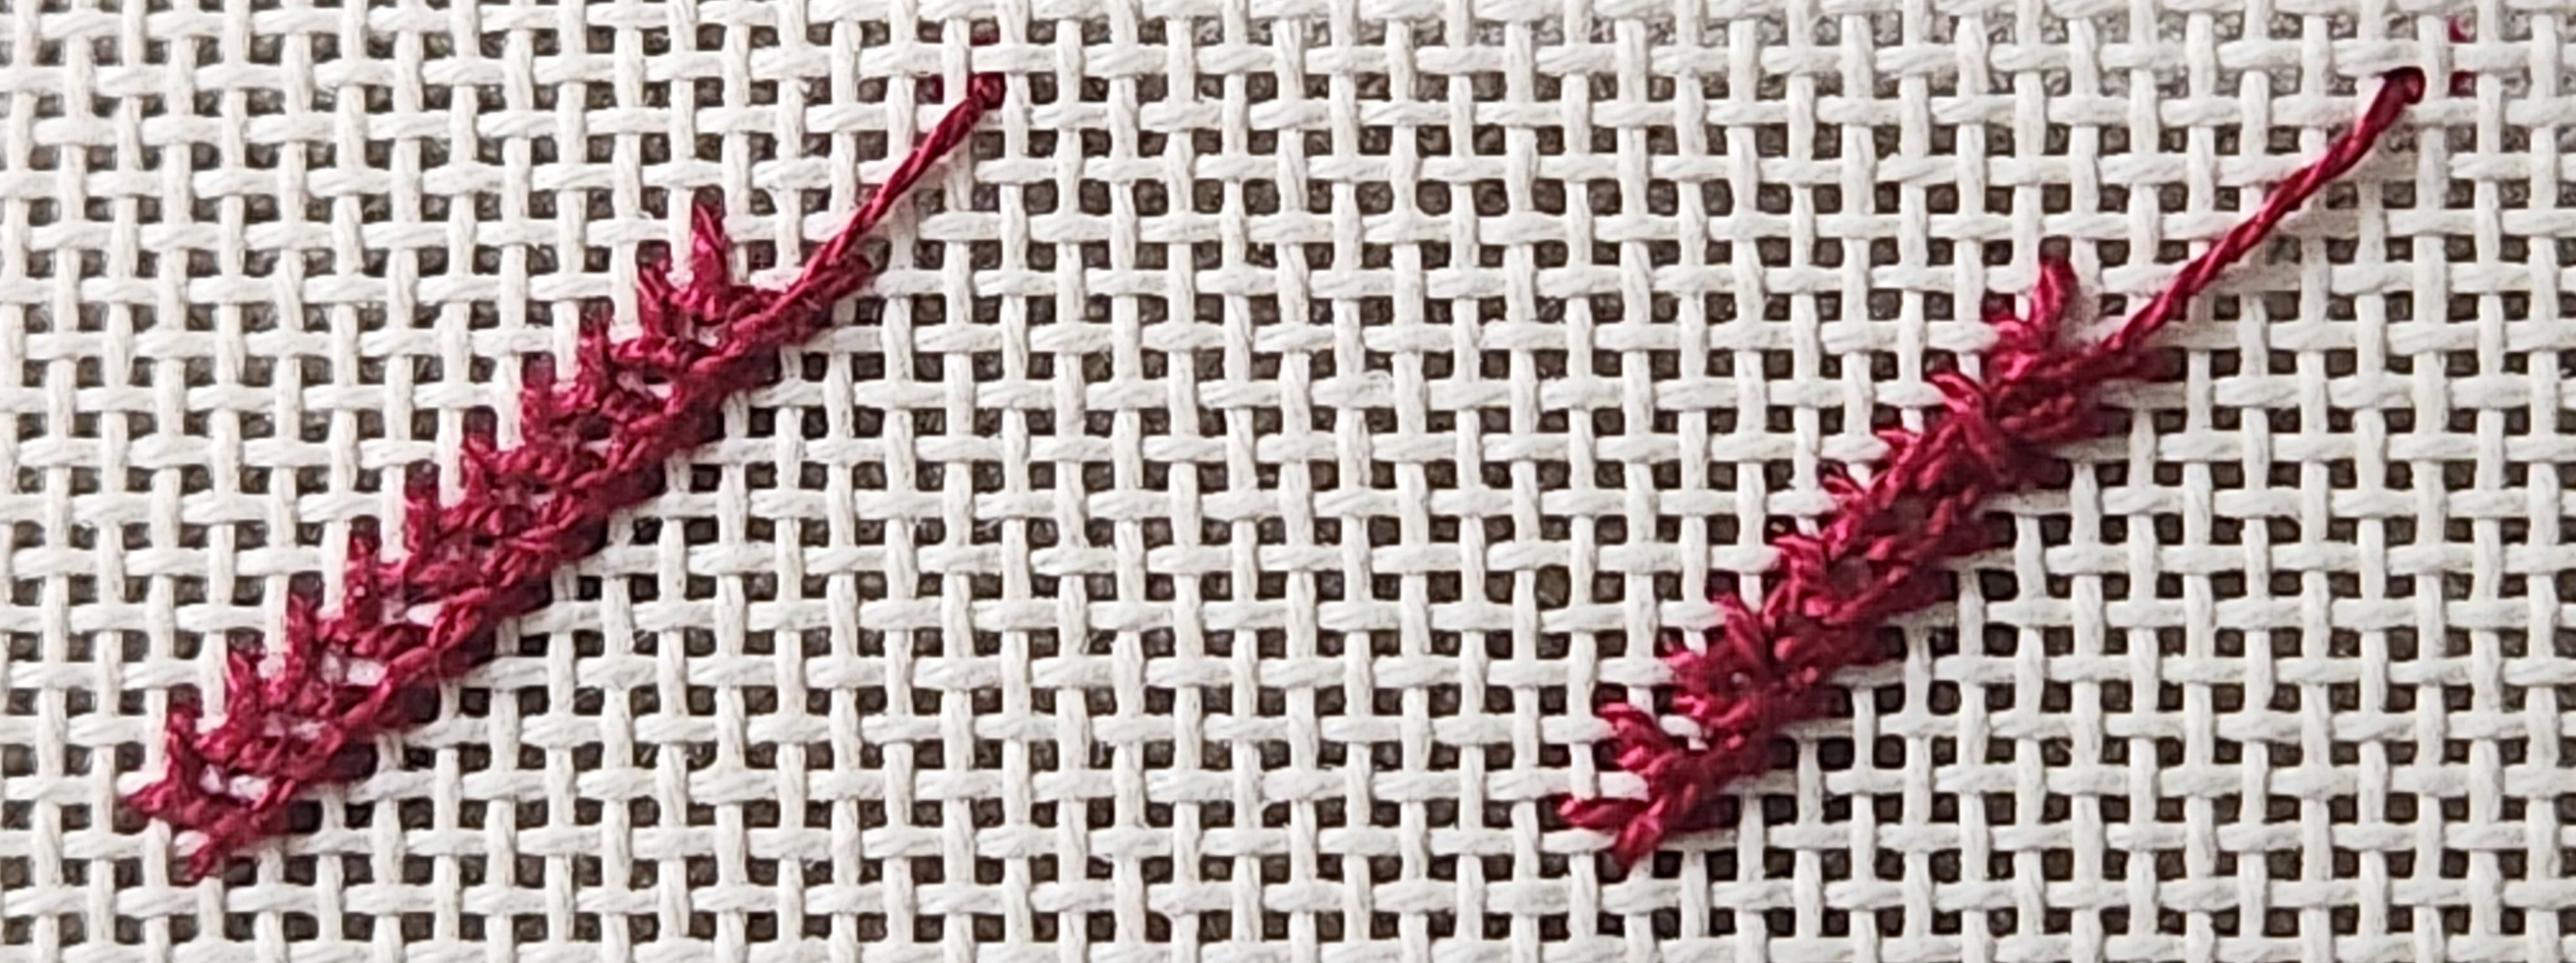
So, at the meeting, I discussed blackwork basics (focusing on reversible blackwork) starting with a double running stitch which means you stitch every other stitch along a line. Come back along the same line, filling in the gaps. When filling in the gaps of your double running stitch, adjust your needle placement: Bring the needle up just below the previous stitch. Take it down just above the same stitch. This technique reduces stitch distortion and helps maintain straight lines (2nd row). Or, use a sharp needle and split the stitches on the return (3rd row). Red indicates the thread below the canvas. The top row always stayed above the thread and appears the waviest.
A few people became interested in learning more about blackwork. That’s what I had hoped to accomplish – exposure to a new form of needlework. Nobody contacted me (yet) saying that they couldn’t do the pattern for the ort box. That’s a good sign. While I learned more as well and itvis pretty, I will not be delving into it more.
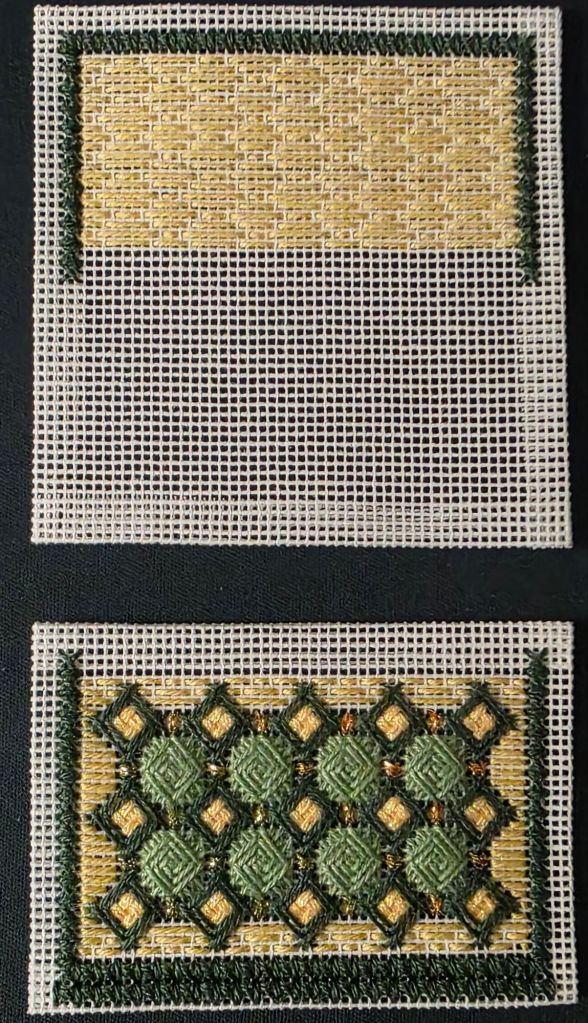
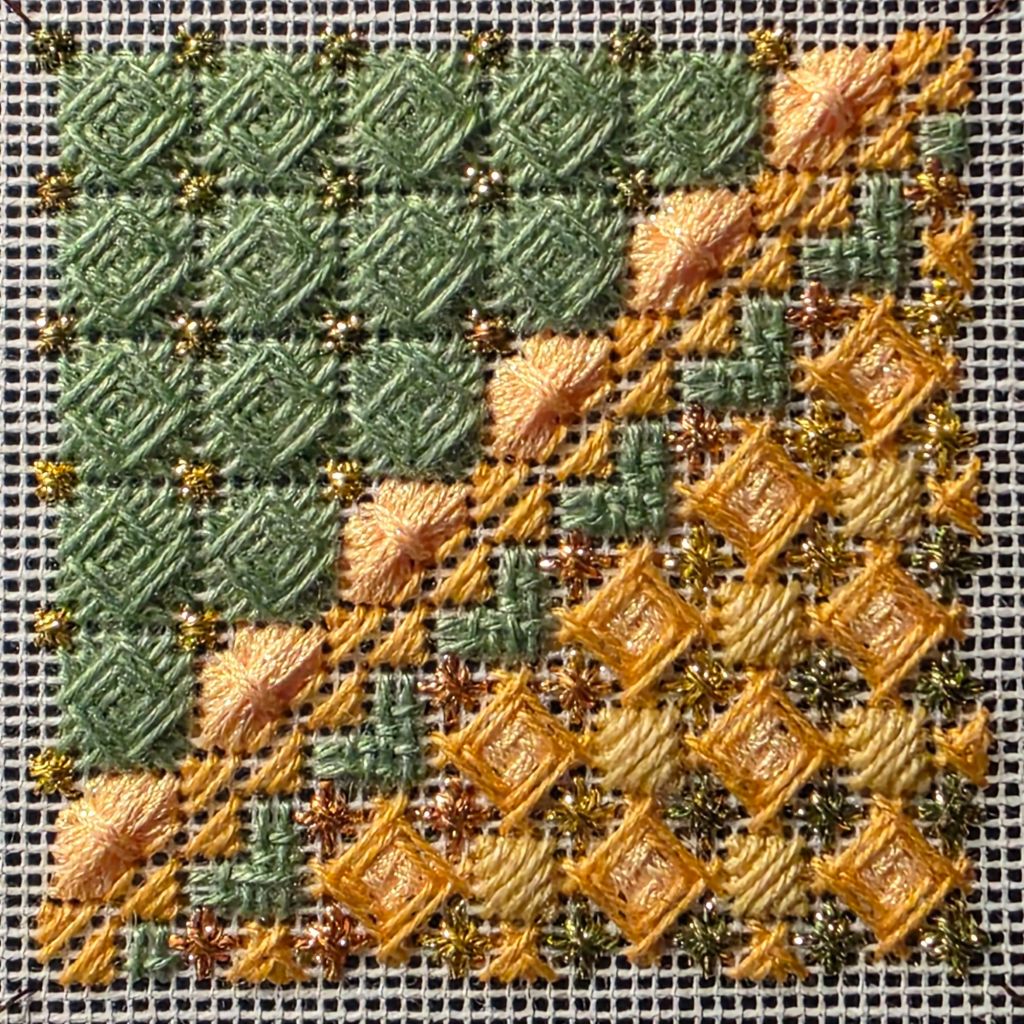
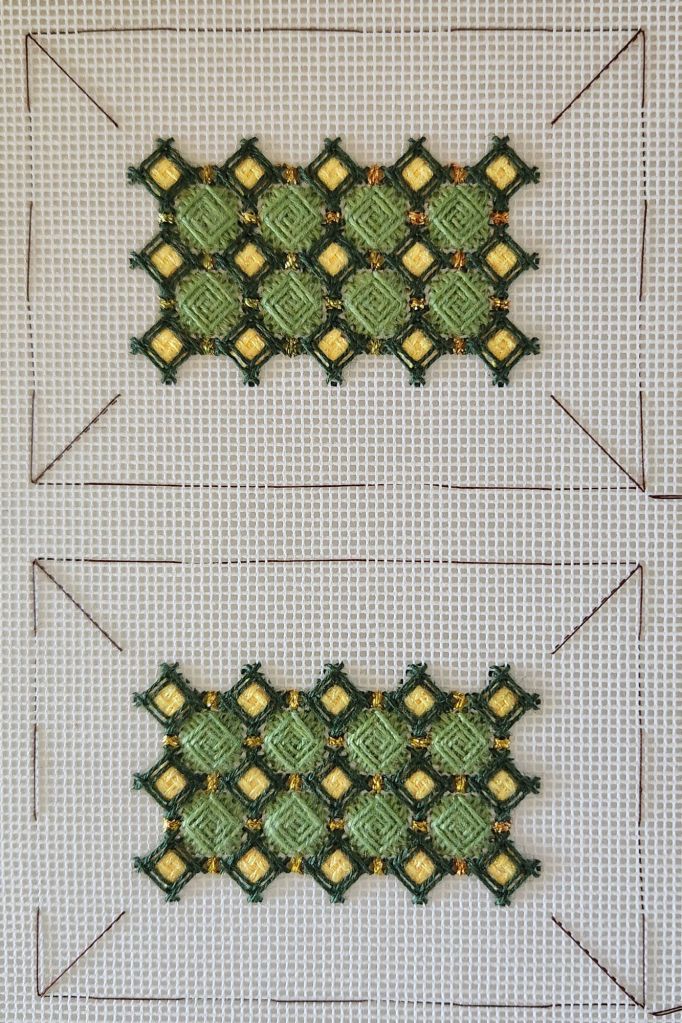
There isn’t much to say about the bottom of the Ort Box with Pockets other than it’s pretty too.
Now to construction of the box.
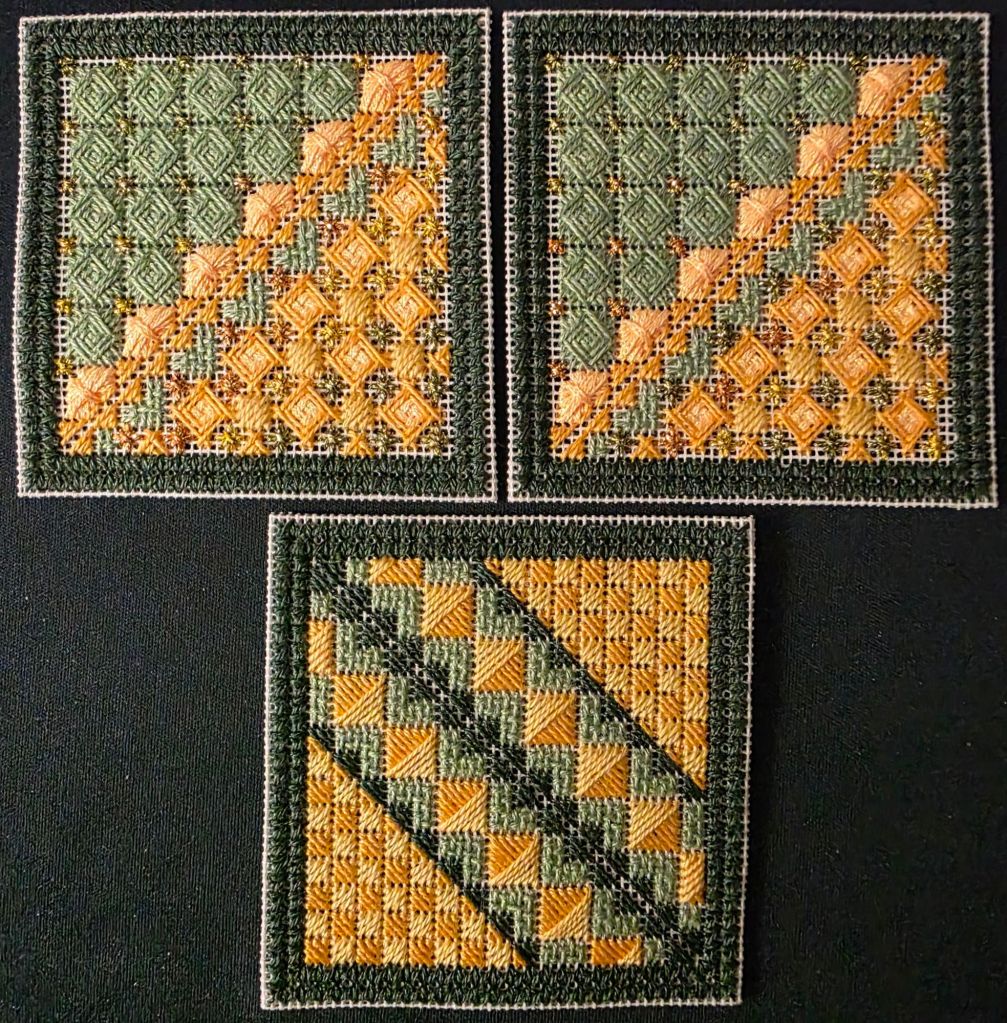
Here’s where I am up to on both ort boxes. These ort boxes have good lessons on how to have thread not show through canvas.
There are 2 sides each like this one.
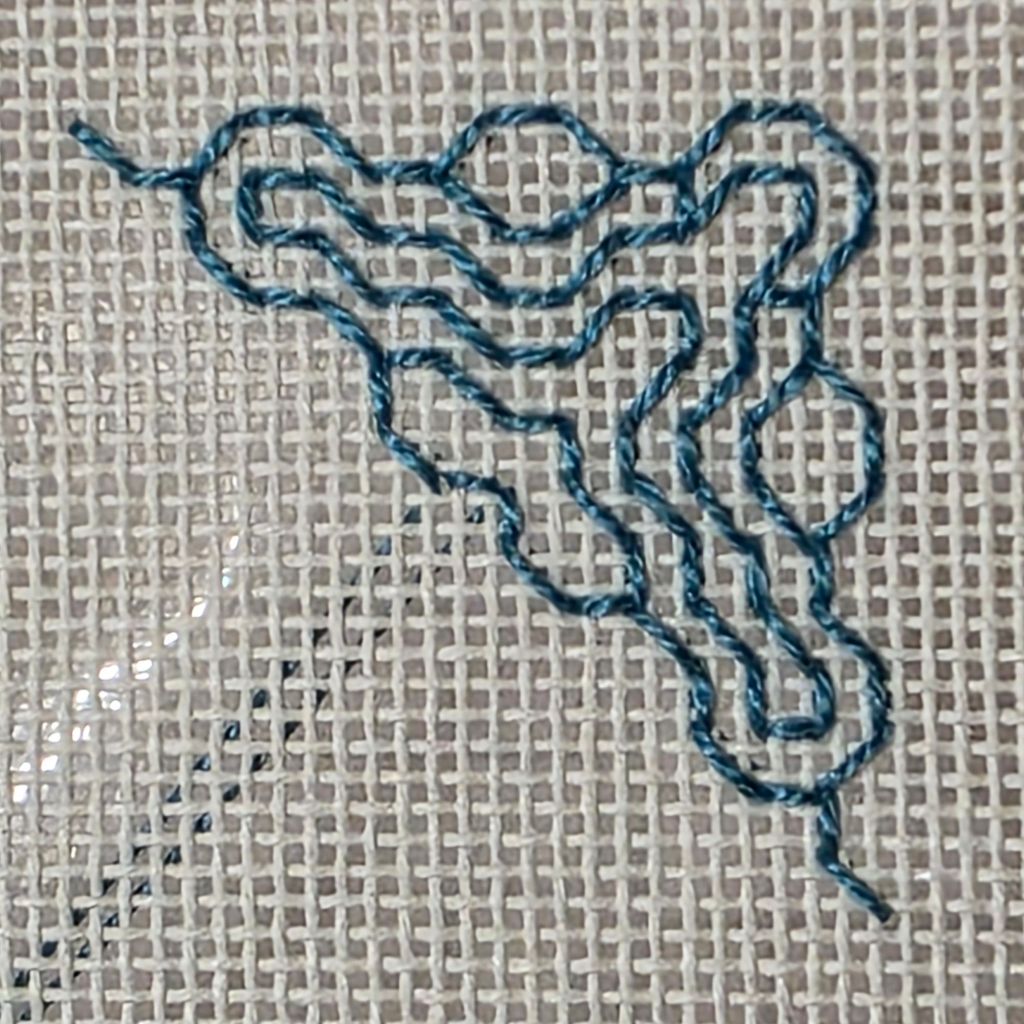
And, love how my color wheel folding ort box is shaping up. The blackwork pattern is next.

Even for members not stitching the project, there are lessons to learn. This shows when and why to use locking or tacking stitches especially when traveling to the next motif.

Next month, everyone can give blackwork a try!
I am caught up with last month’s suggested areas to complete. It’s always hard to figure out a pace when so many people are involved. At least two people are already to cut and assemble and others have paced themselves with stitching on other pieces.

I’ll post my next areas after our meeting. I still have some more to work ahead on the Folding Ort Box for the next ANG Main Line Stitchers chapter meeting on Monday May 12. Luckily, this weekend is The Truist Championship PGA Tour being held at the Philadelphia Cricket Club in Philadelphia.
My ANG Main Line Stitchers Chapter is stitching the Folding Ort Box (OB) and the Ort Box with a Twist (OBT) both designed by Marilyn Owen. I stitched the Folding Ort Box years ago on 14 count interlock canvas and was never happy with it because it is too big and floppy. I was happy with the blackwork but that small area is about as much blackwork as I need in my life. The path needed to take is tricky – reminds me of organic chemistry in college – you have to see where you’re going too many steps in advance. I didn’t need organic chemistry in the pharmacy and I don’t need blackwork in my life!
I am stitching both now on 18 count interlock. Because I save everything, I have my extra detailed blackwork map that I created years ago. Maybe it’ll be easier this time.
There are 7 members stitching the OB and 6 stitching the OBT. I am leading both pieces. Last month we covered colorways and basting. It took me 3 tries to get the basting on the OBT and Patrick found a mistake on my OB basting but that was easily fixed.
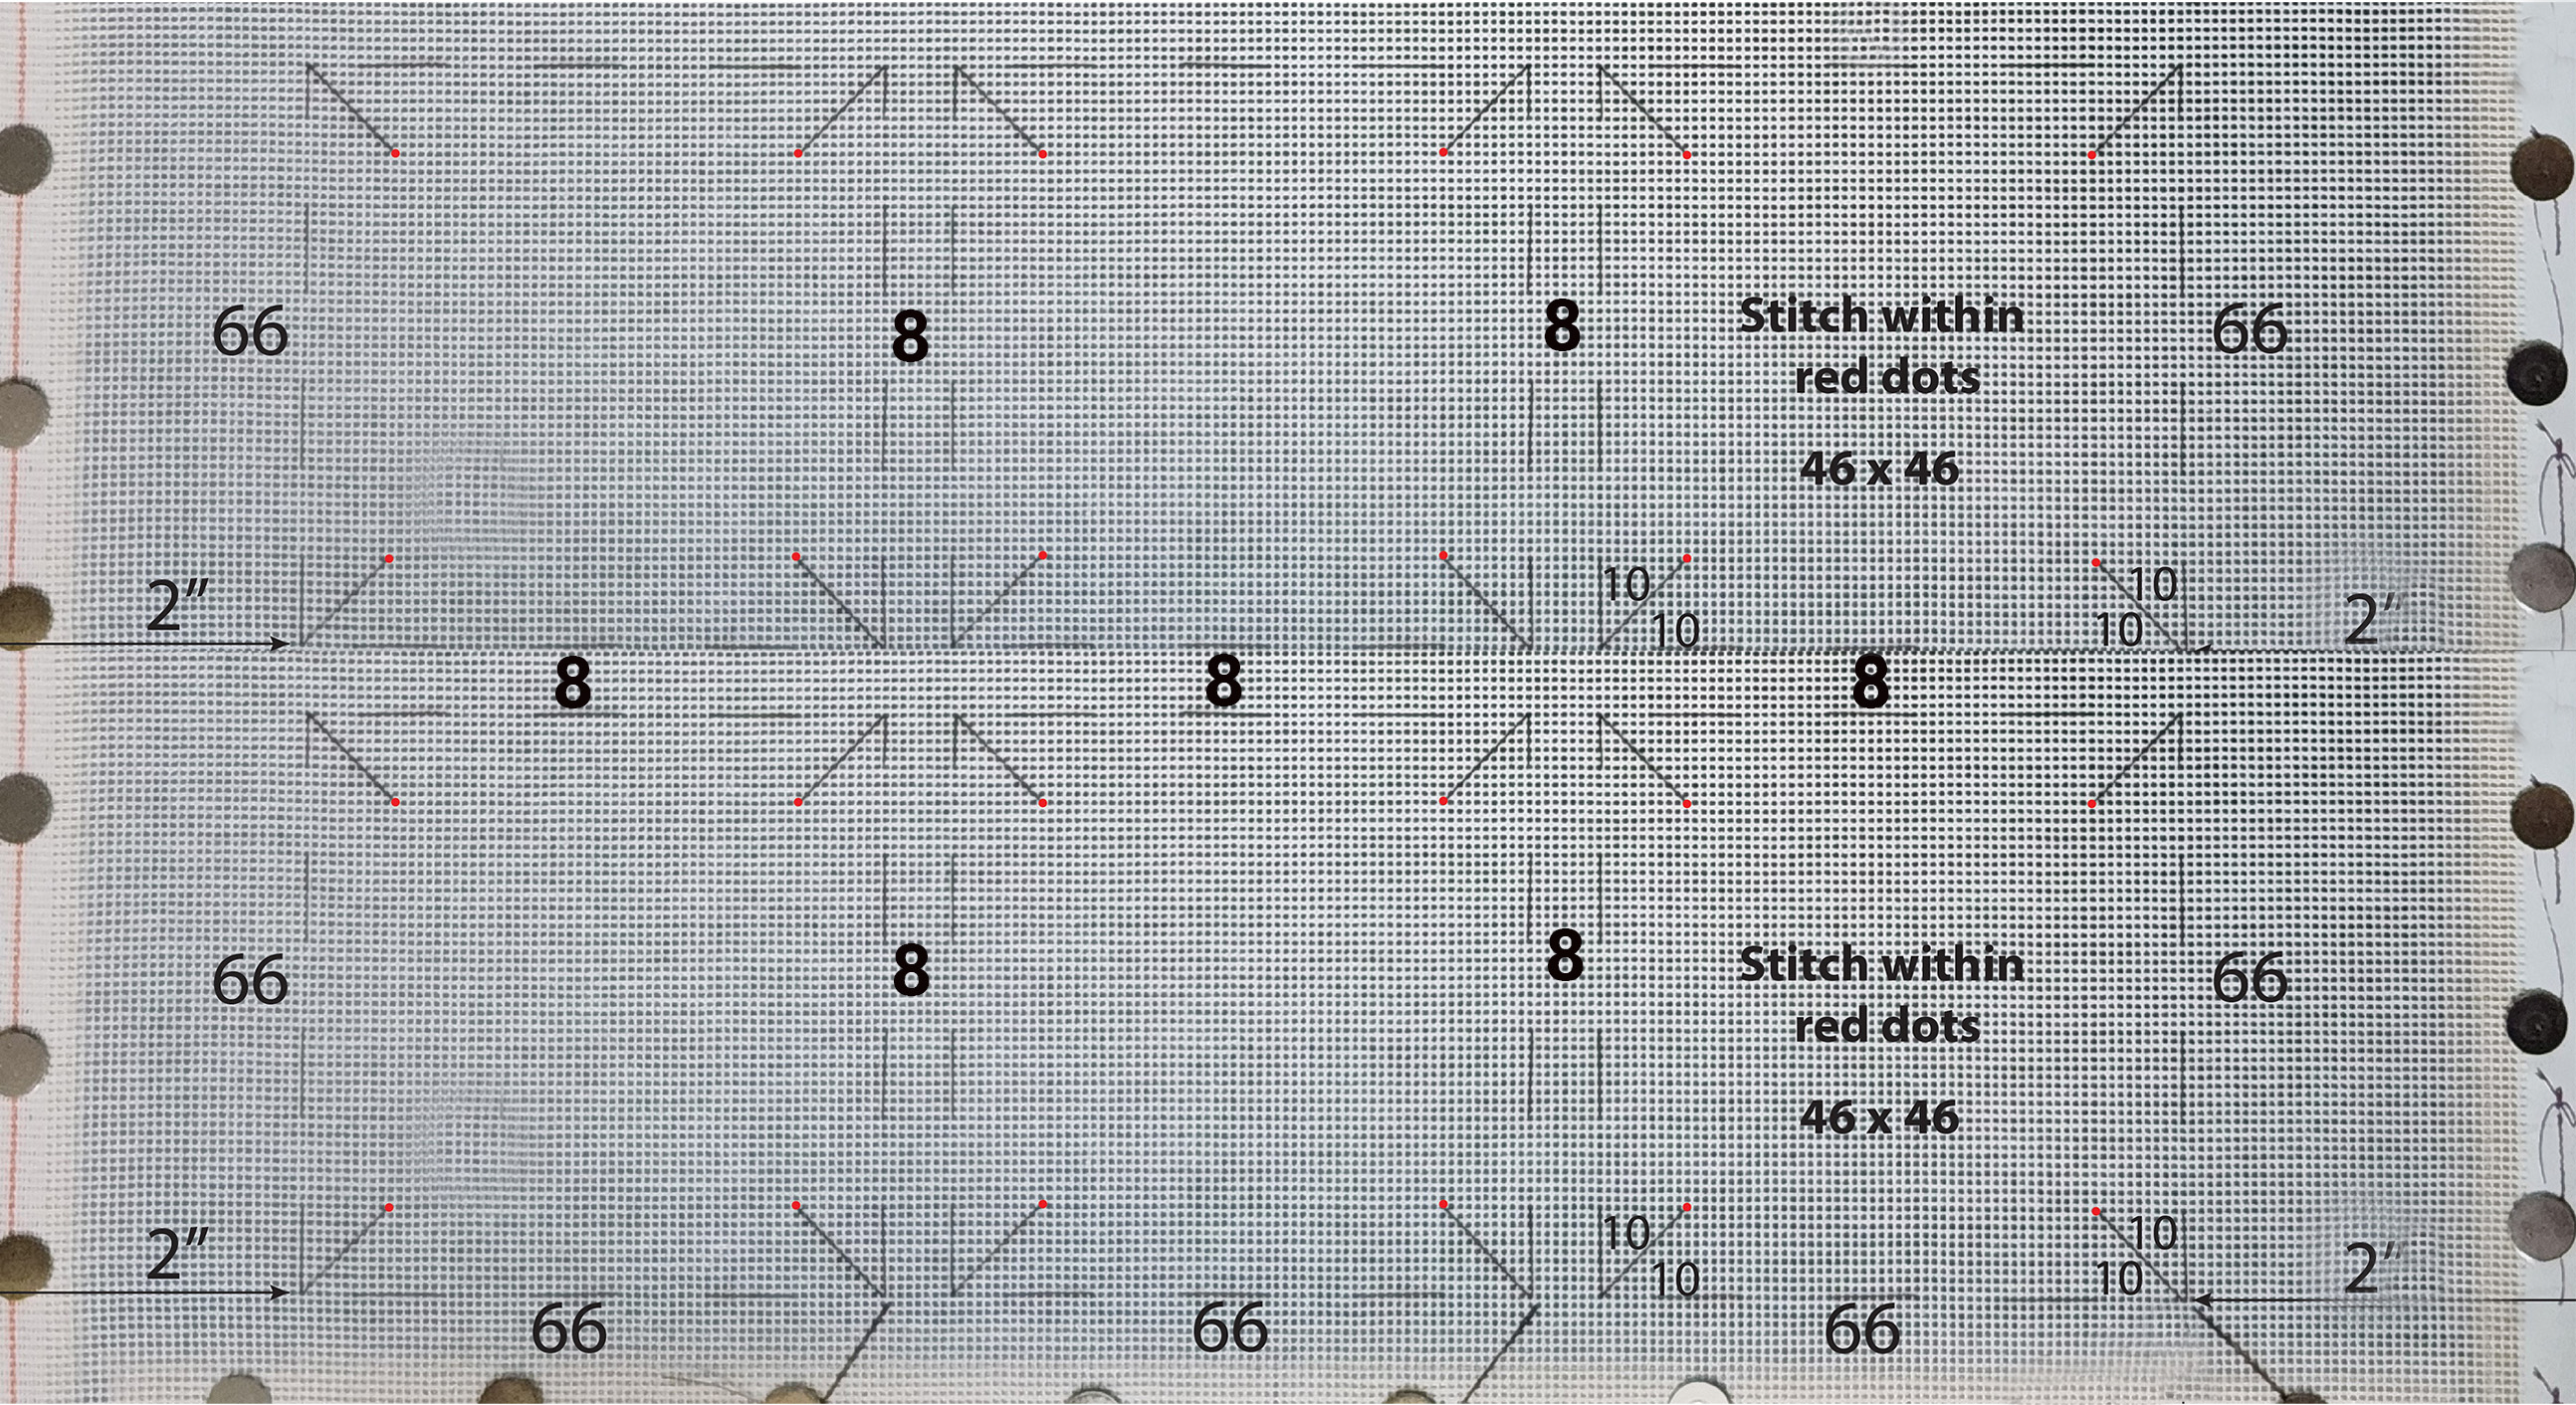
The error in this photo is pretty evident (stop laughing MO!). You’d have to count to find the one error (56 basted but should have been 66) and the other is marking the inner area.
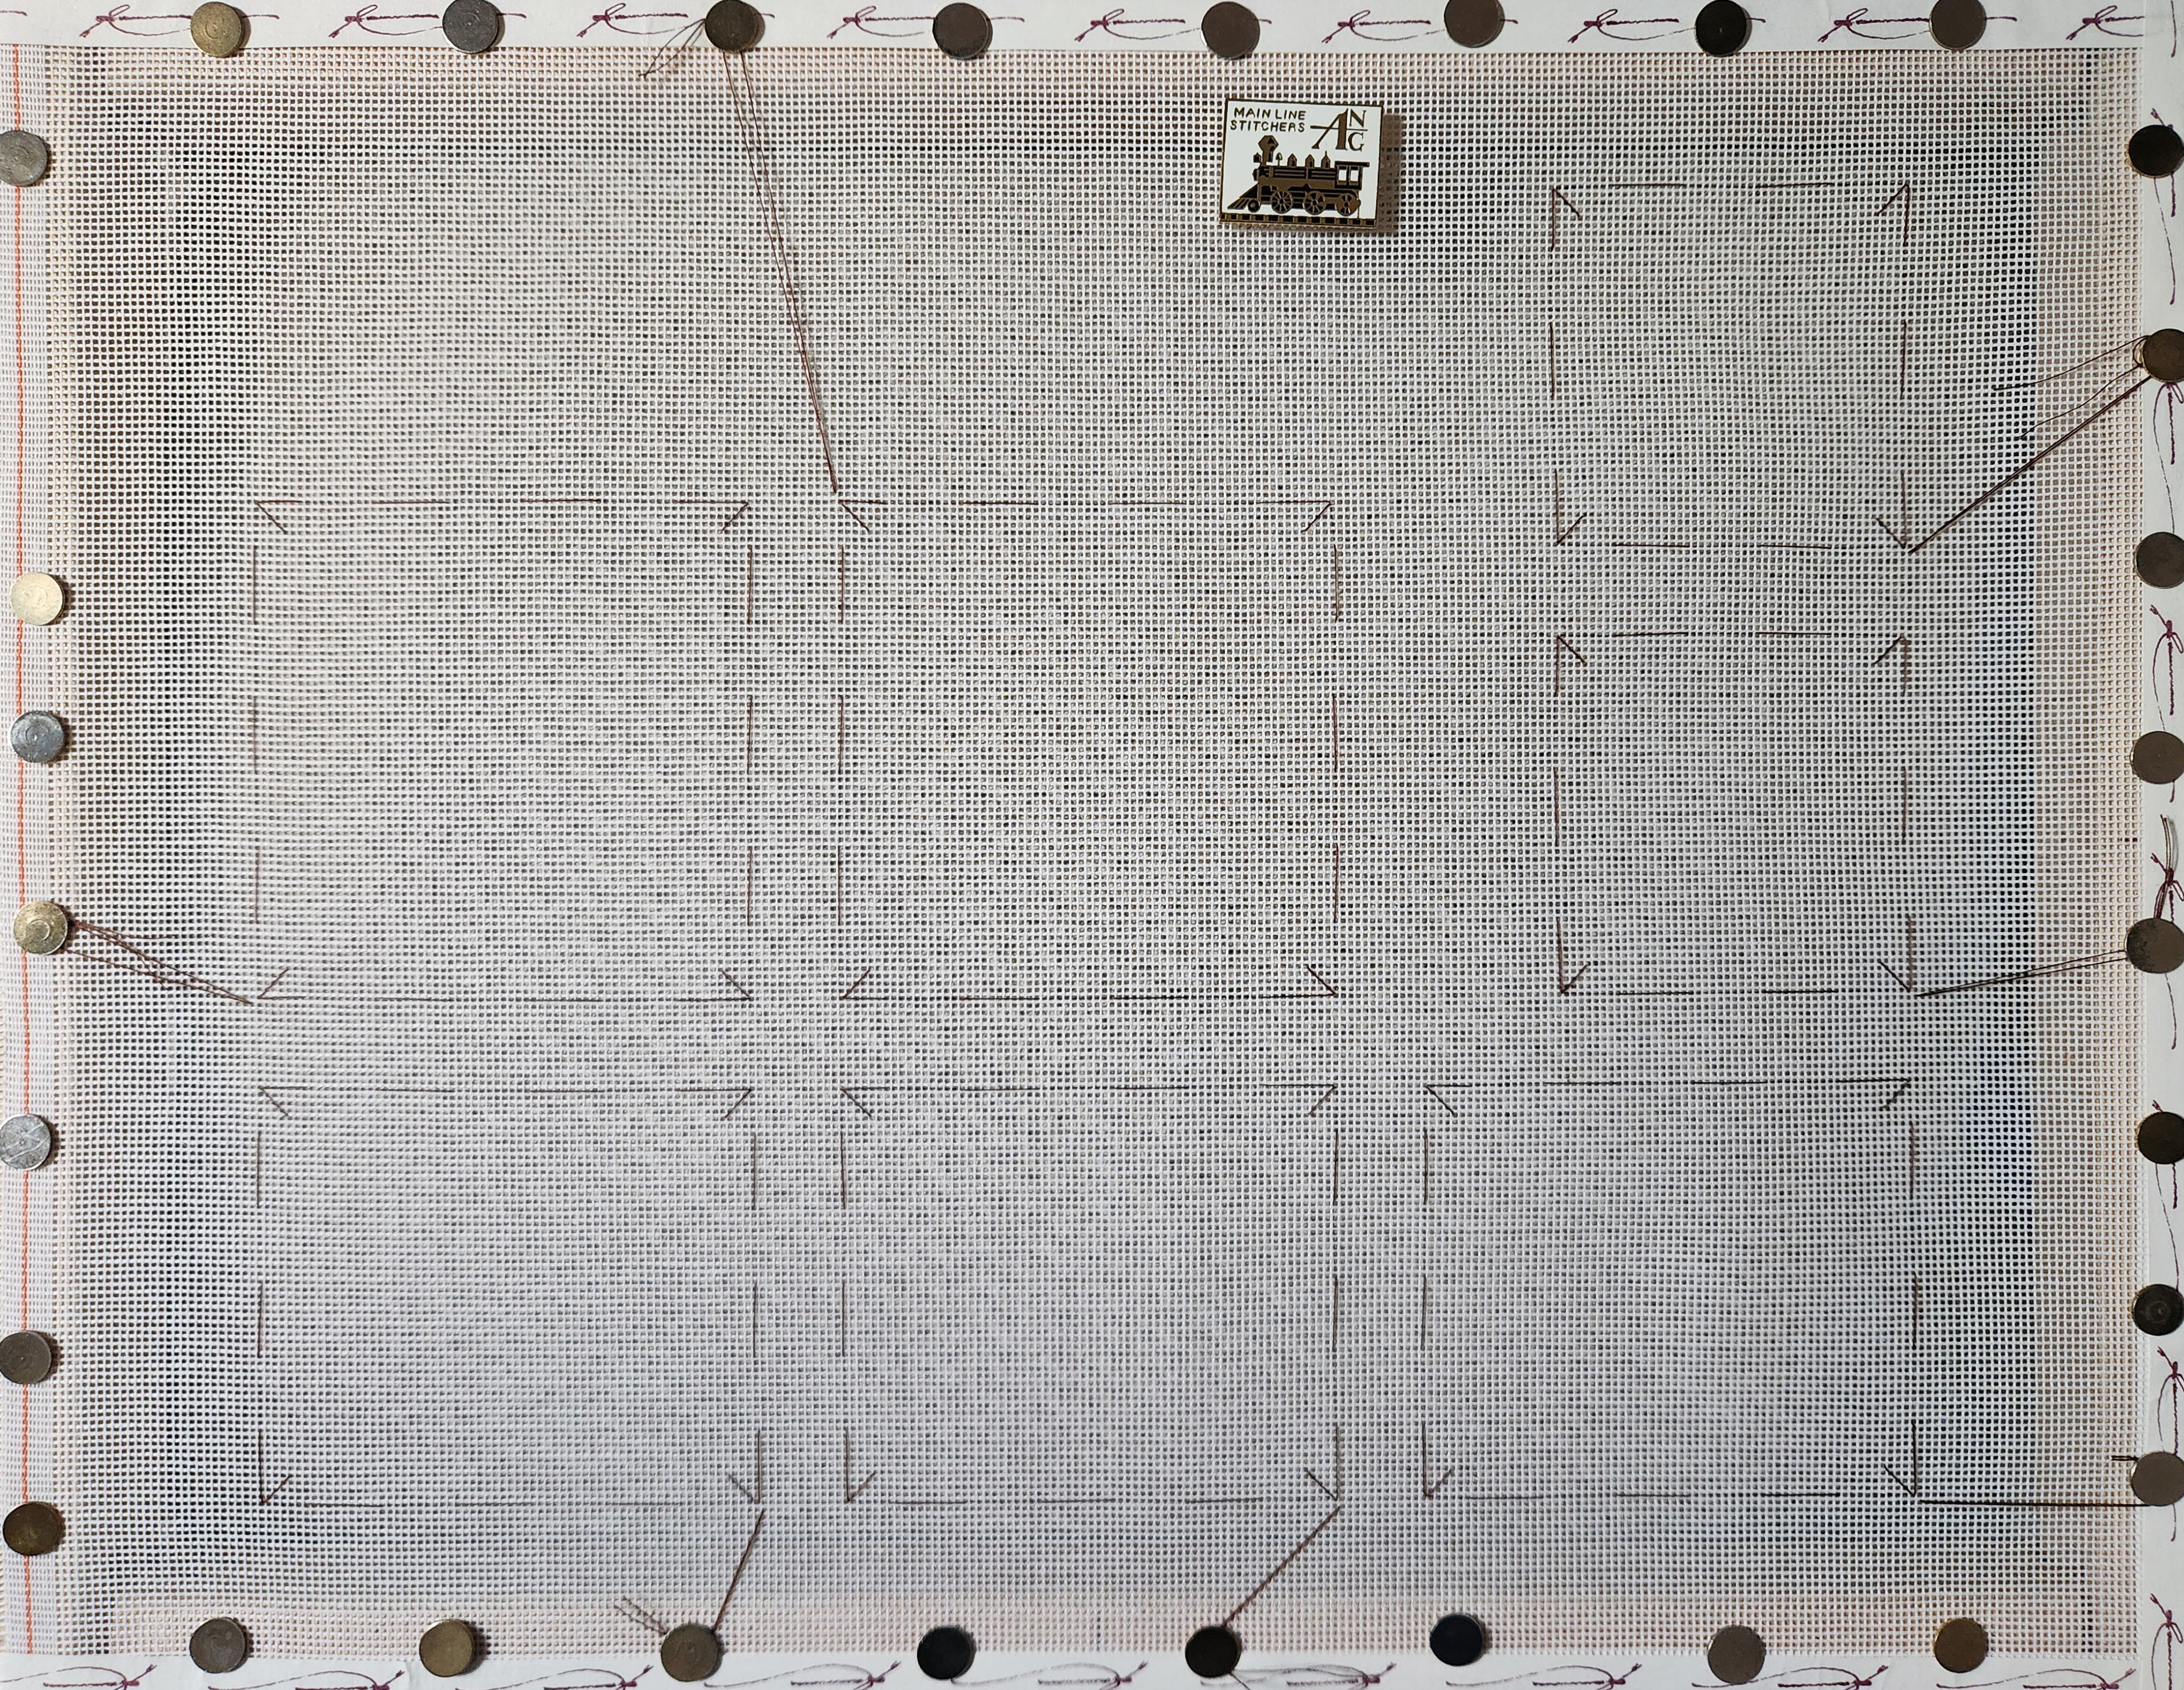
Finally, I got it correct. Had I drawn lines instead of basting, the canvas would have been a mess!
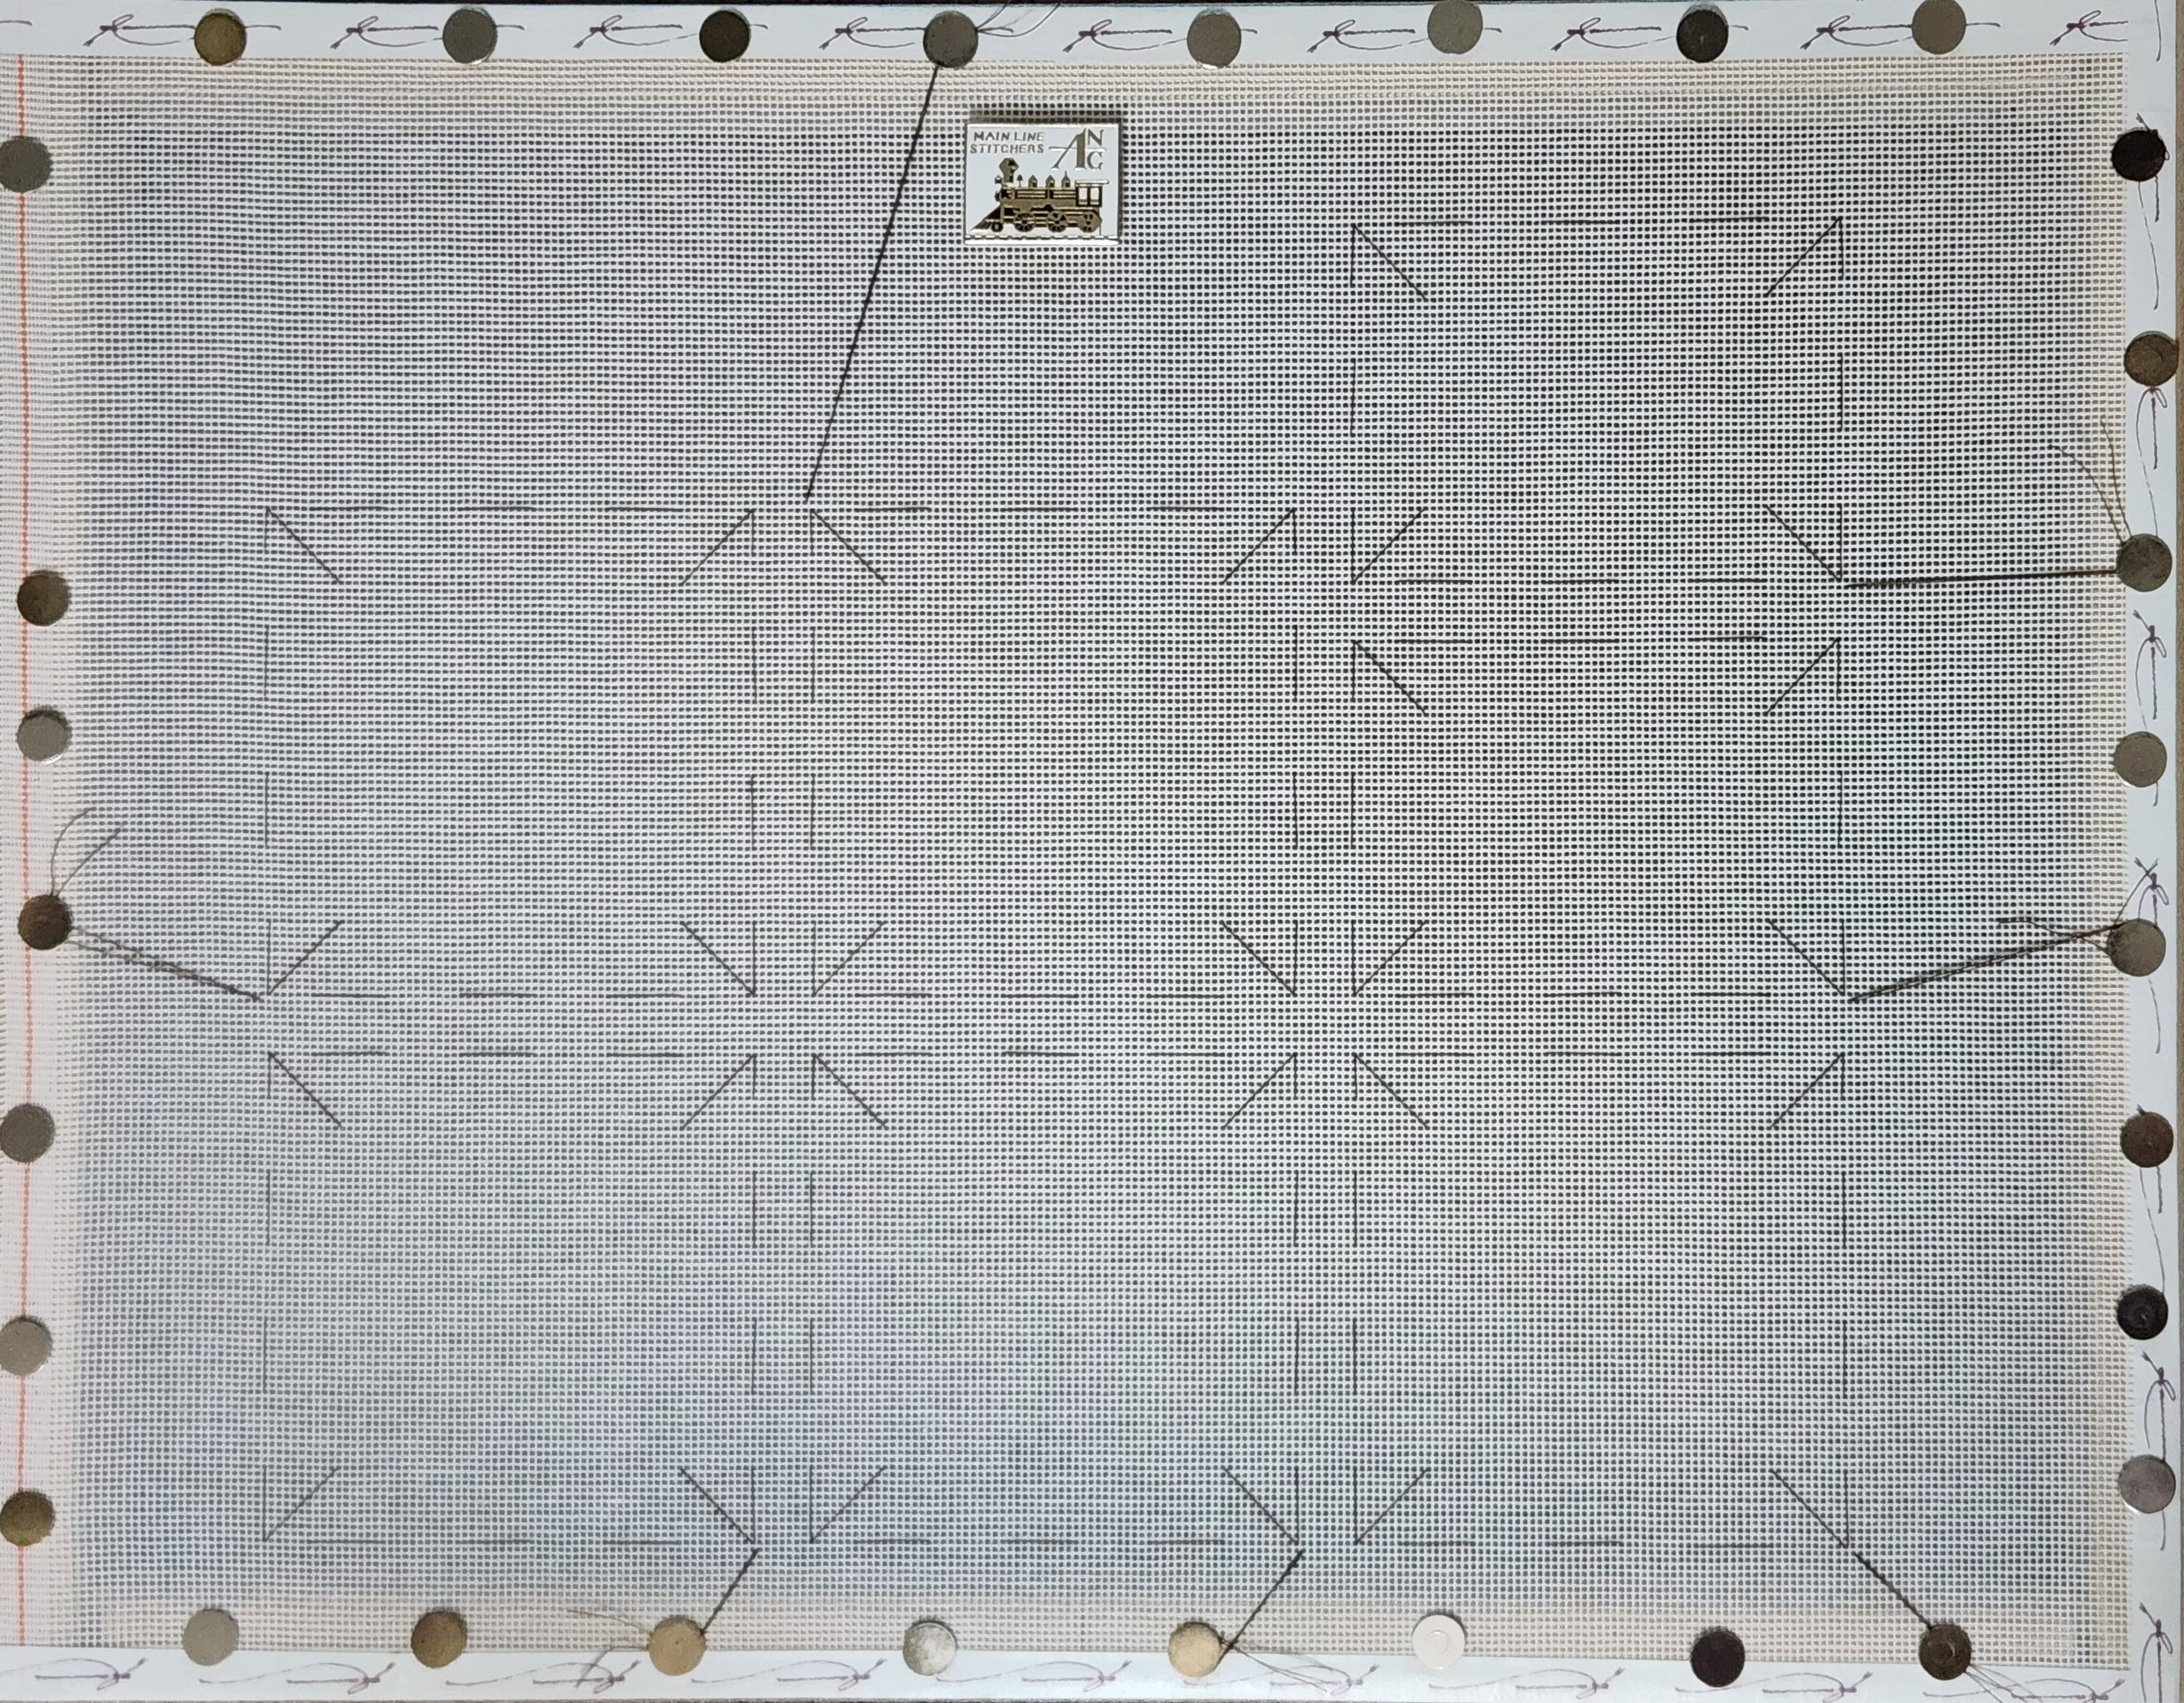
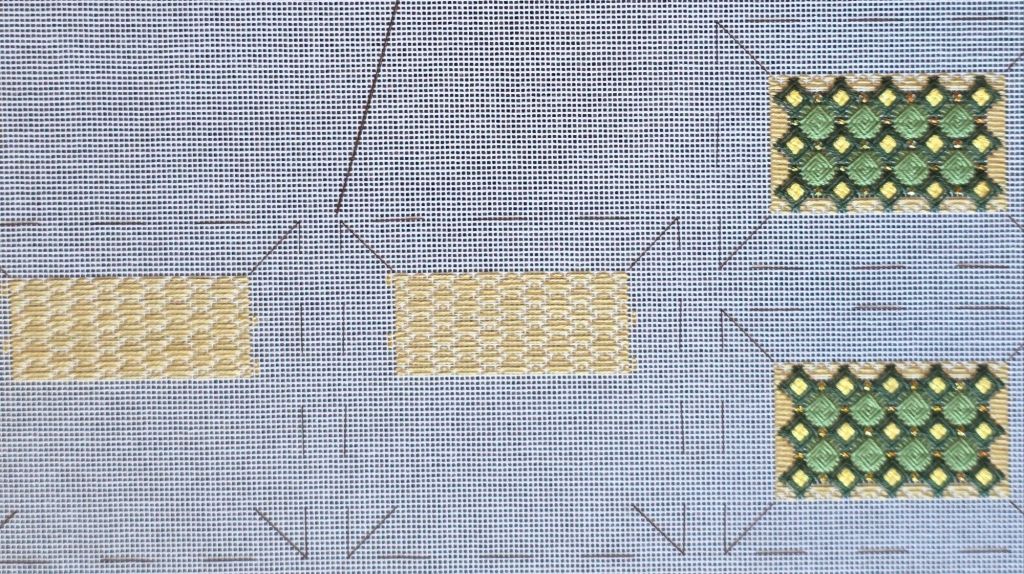
For both, I provided details as seen in this photo.
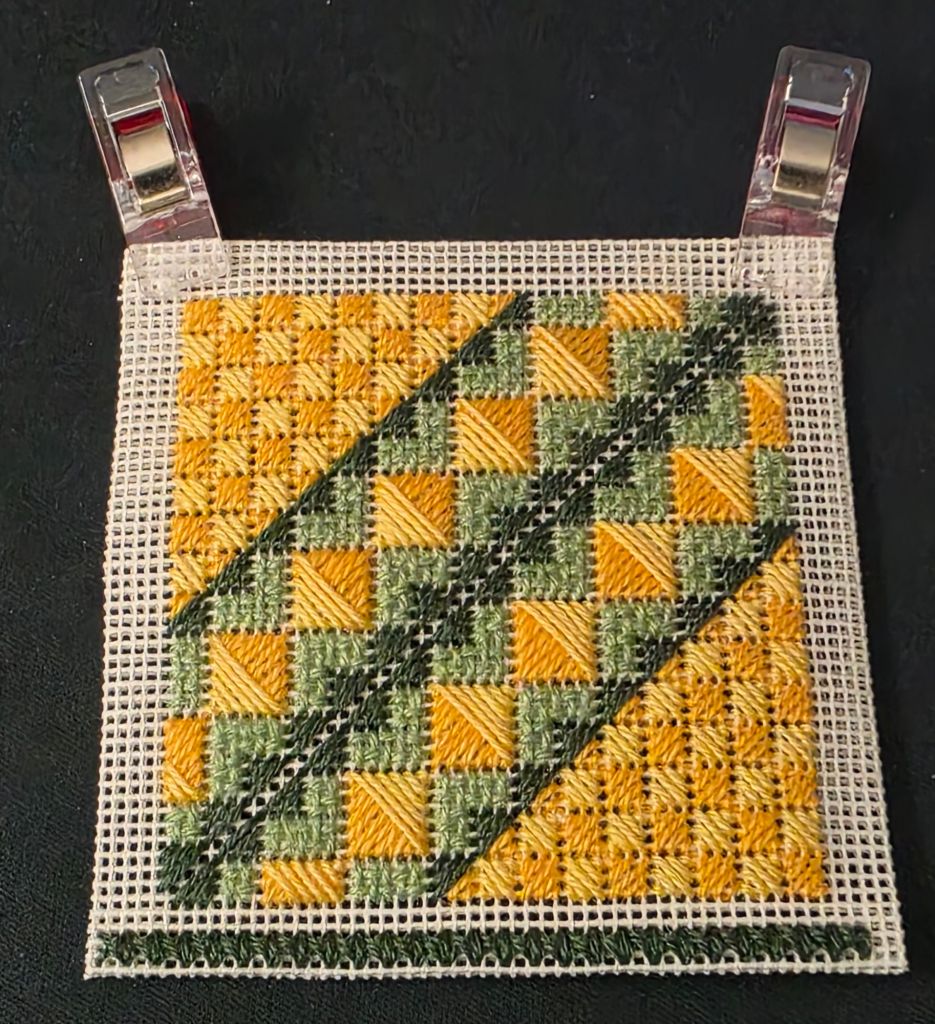
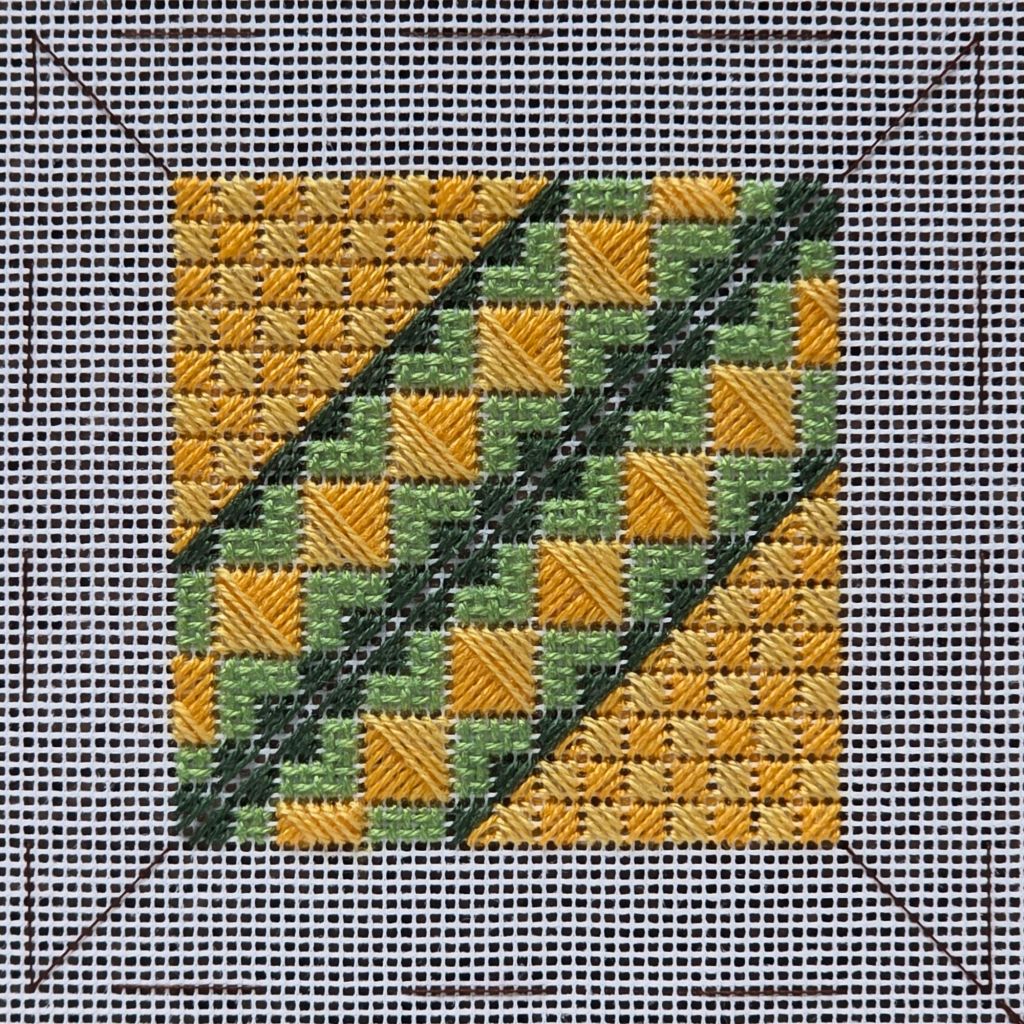
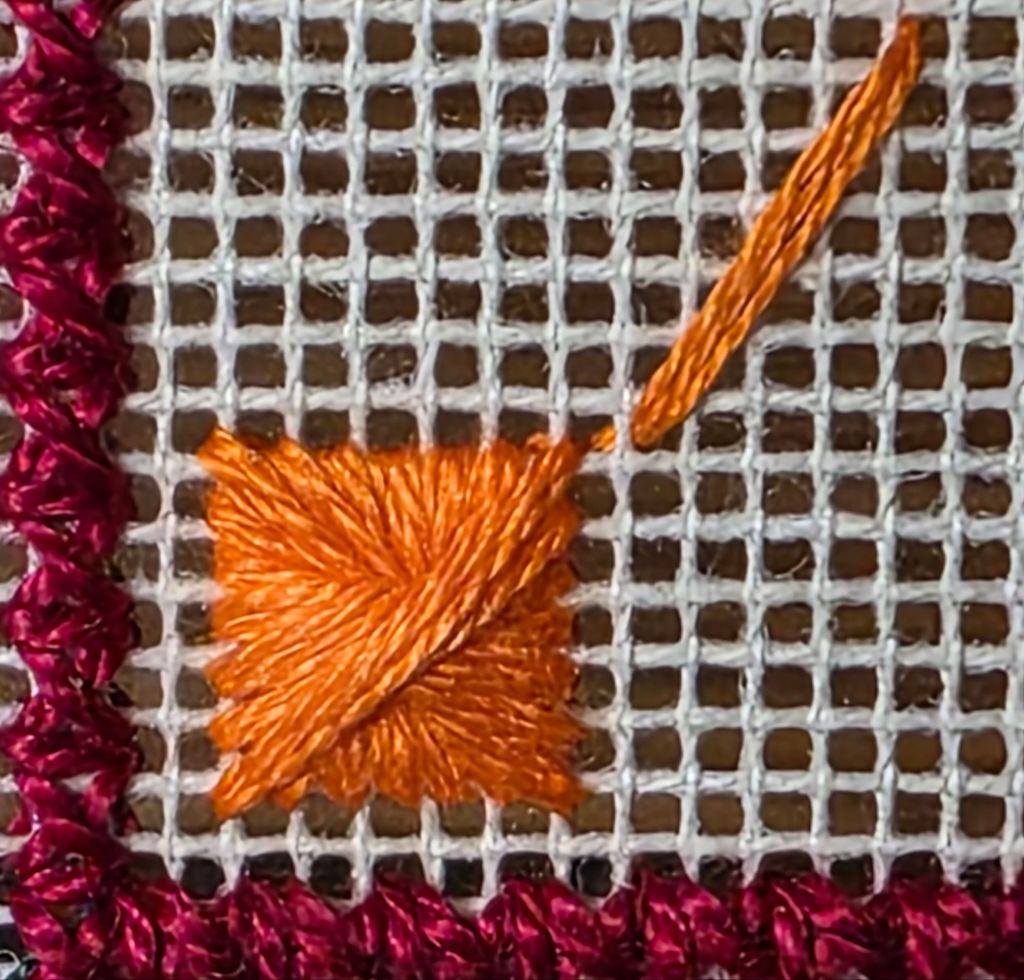
For this month, I am going to focus on the diagonal divider of the OB and the pockets of the OBT. The idea is to get less thread on the back in the dividing line. Marilyn figured out how to do that. I pretty much had to flip the canvas to catch the thread (left side of photo below) or else I wound up with a hot mess (right side of photo below).

The pockets will prevent the same type of folding on the OBT and what dividing lines there are, they are different (easier).

So, I need to finish these areas and get to next month’s areas.
Filed under: Ort Box
Best of luck to Patty as she approaches her 1-year anniversary as owner of Stitch Stash in Rehoboth Beach, DE. Buff, Kristen, and I had a wonderful time there although it wasn’t the same without Linda! Next time!!
Patty is a very nice young woman and has some lovely canvases, a good selection of threads and beads, and all the other needlepoint stuff (bags, trays, etc.).
I selected Impressions for The Folding Ort Box with A Twist by Marilyn Owen. It’s got pockets and this one I’ll do in 18 count. My first was on 14 count and is bigger than I want.


I am thrilled that I finally finished the Ort Box! At least 2 others from ANG Main Line Stitchers are mailing ours in for the special exhibit at Seminar.
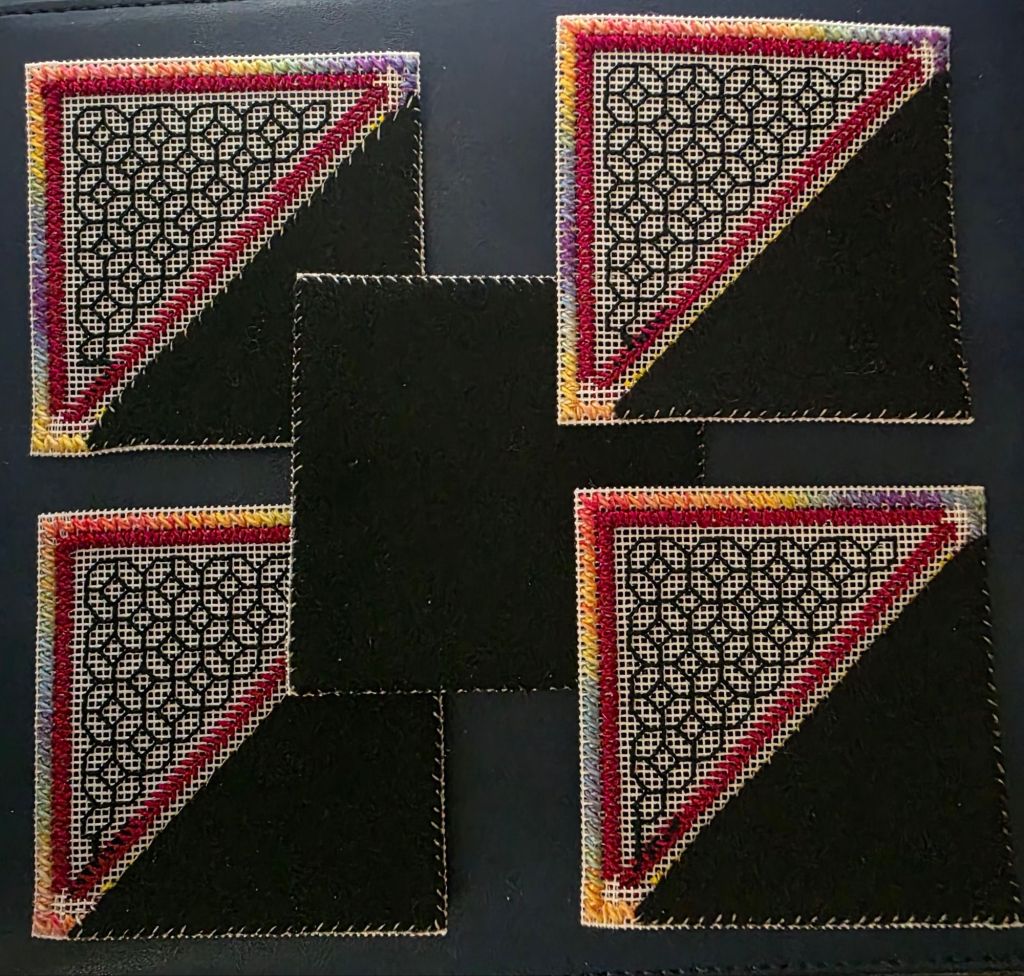
I must admit I had quite a time with the bottom. I used a suede of some sort but it was fraying & had to turn a small edge. The tough part was connecting it to the sides. The holes seemed to shift out of alignment but I did it! After that, I took a short cut & used felt with adhesive for the triangles. But, the binding stitching has gotten easier with each side edge probably because the lining isn’t sewed in like the bottom. I used 2 threads of Wildflowers, Firecracker (154), an overdyed red,white, and blue thread. And, it took all but 24 inches of the 36 yards! That’s a lot of binding!

Well, I am finally constructing the Ort Box (subject of previous logs). A couple of others in my chapter finished it too. And, we plan on sending them to Seminar in CA. We need to send them out by Aug 22 in order to get there in time. Did you participate? I’m curious to find out how many get sent. I’m sure someone will get a photo (I’m not going to seminar) – it’ll be cool to see them!
This binding stitch is new for me & it took some getting used to but I finally got the hang of it. It shifts slightly and so it is important to keep the proper holes aligned. It took me hours today to get just the bottom attached!

