Filed under: ANG Needle Pointer's Article, ANG New Jersey Needle Artists Chapter, Festival of Trees
After joining the Central Jersey Chapter today (or hanging out at the library), Bill and I enjoyed the 47th Annual Festival of Trees. They have some great trees decorated by community groups and individuals that are on display through December 29. Check days/hours open at
https://www.somersetcountyparks.org/environmental-education-center . It’s at 190 Lord Stirling Road in Basking Ridge, NJ.
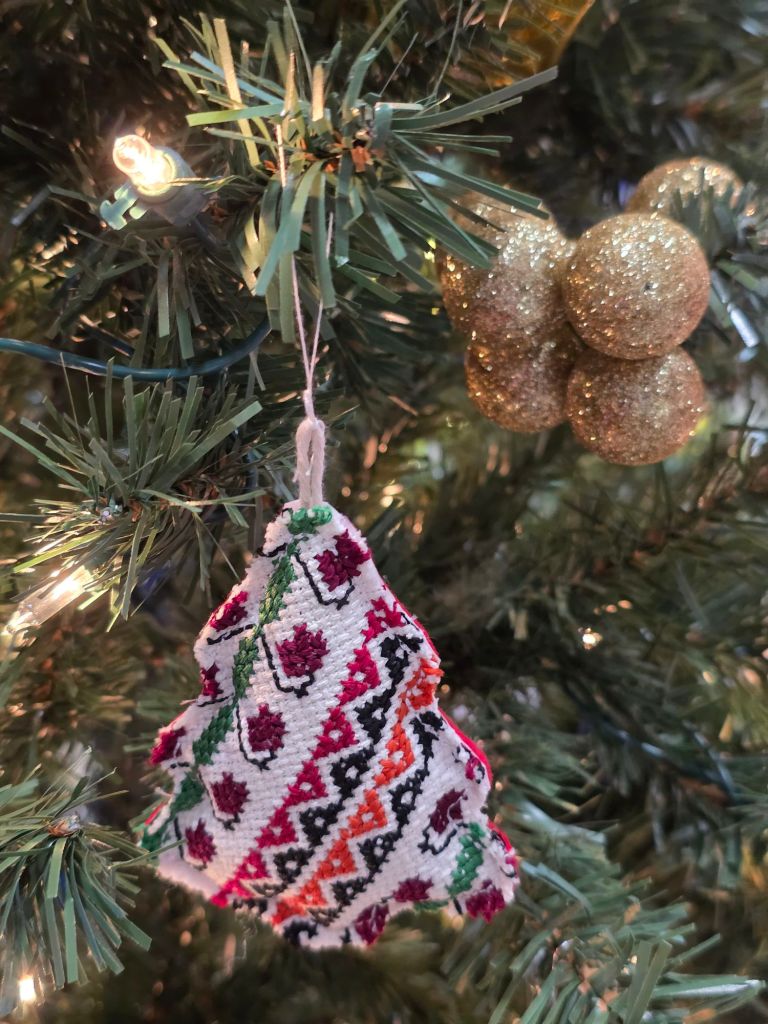
The New Jersey Needle Artists (NJNA) tree theme this year is “Stitched with Love”. Lots of lovely ornaments!

I was thrilled to see the 6th of Susan Portra’s Cabochon series, Faith. I do have the instructions but haven’t gotten to stitch it yet and am curious to see which member did. Just found out it’s Jacqui C’s. Lovely!

There are some silly trees.


And, elegant ones.
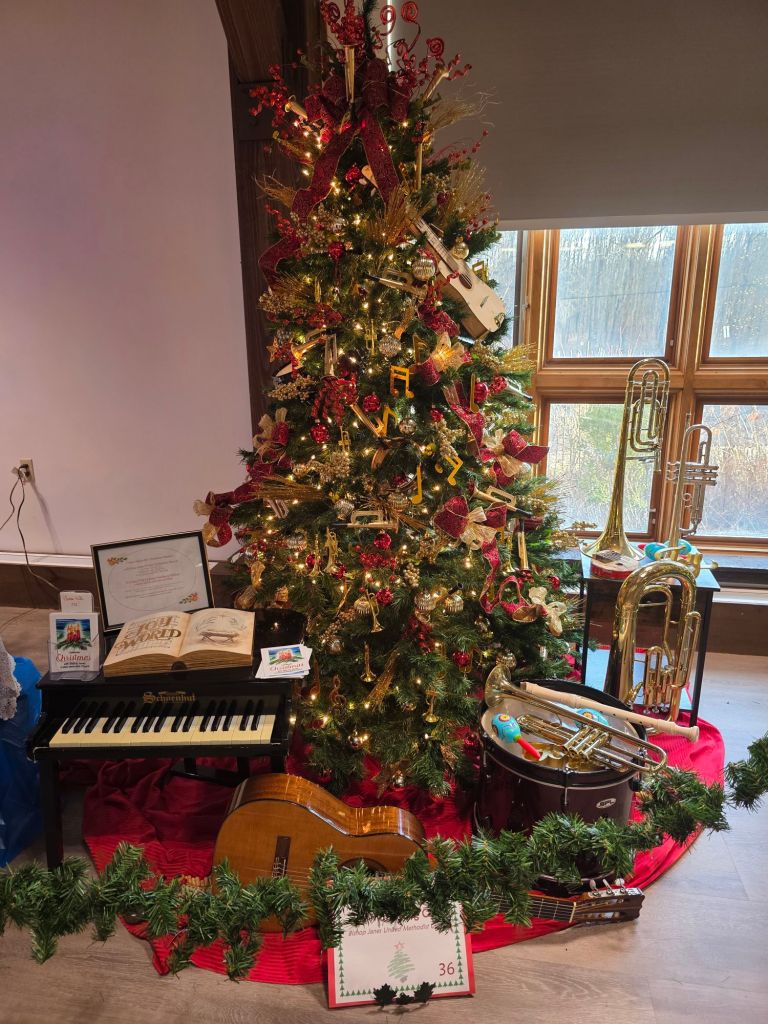
There are some wonderful crafts on display.


A very enjoyable day!
Filed under: ANG Needle Pointer's Timeless Treasures From the Archives, ANG New Jersey Needle Artists Chapter, Festival of Trees
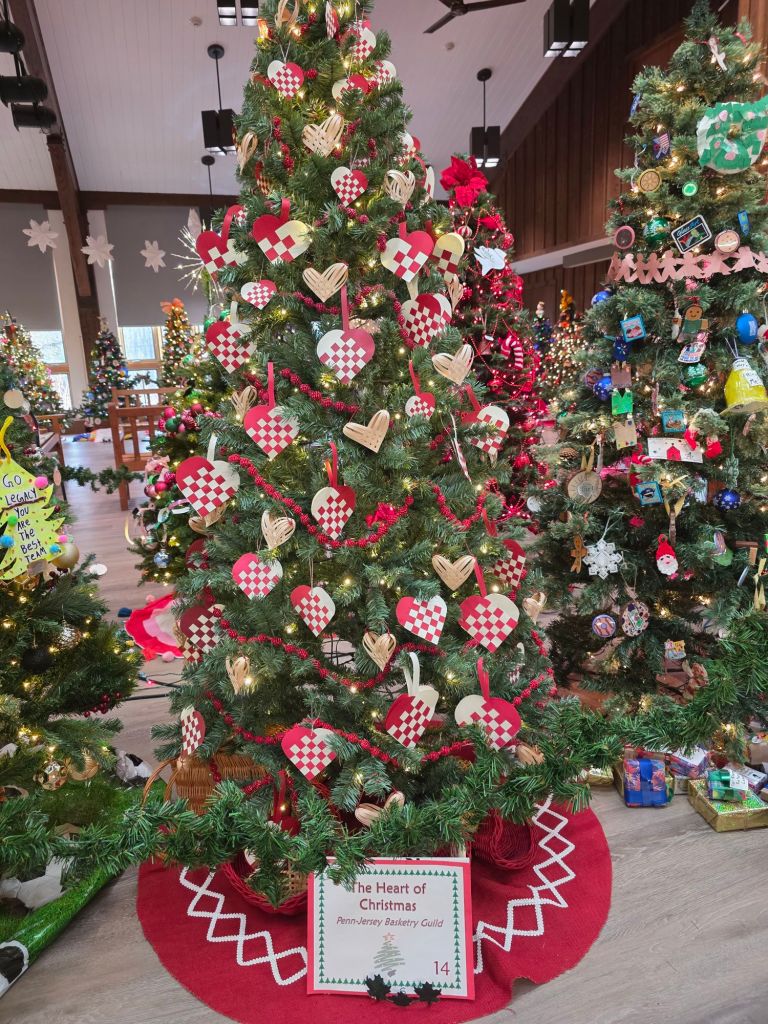
The 47th Annual Festival of Trees has been going on since the beginning of the month and continues through December 29. It is an indoor exhibit of decorated trees by various community groups and individuals. New Jersey Needle Artists (NJNA) tree theme this year is “Stitched with Love”. Check days/hours open at
https://www.somersetcountyparks.org/environmental-education-center . It’s at 190 Lord Stirling Road in Basking Ridge, NJ.
These are the heart ornaments that I contributed to the NJNA tree and shown unfinished in the September/October 2025 issue of Needle Pointers talking about hearts from past issues published originally in the early 2000s. They were designed by Michele Roberts. See also https://melitastitches4fun.com/2025/09/16/hearts-from-the-2000s-in-timeless-treasures-from-the-archives-in-the-september-october-2025-issue-of-needle-pointers-magazine/

I did the finishing which wasn’t easy because they were done on 10 count canvas.
Bill and are visiting the display after attending the ANG Central Jersey Chapter (CJC) Christmas luncheon on Saturday (Bill will hang at the nearby library). Then, dinner at a favorite NJ restaurant.
Such a lovely note and package arrived today. I love these anniversary gifts as they are extra useful as rulers or measuring tool. Quite an accomplishment- 35 years as a chapter.

Filed under: ANG New Jersey Needle Artists Chapter, Christmas Ornaments, Festival of Trees, General comments, Melita's Designs
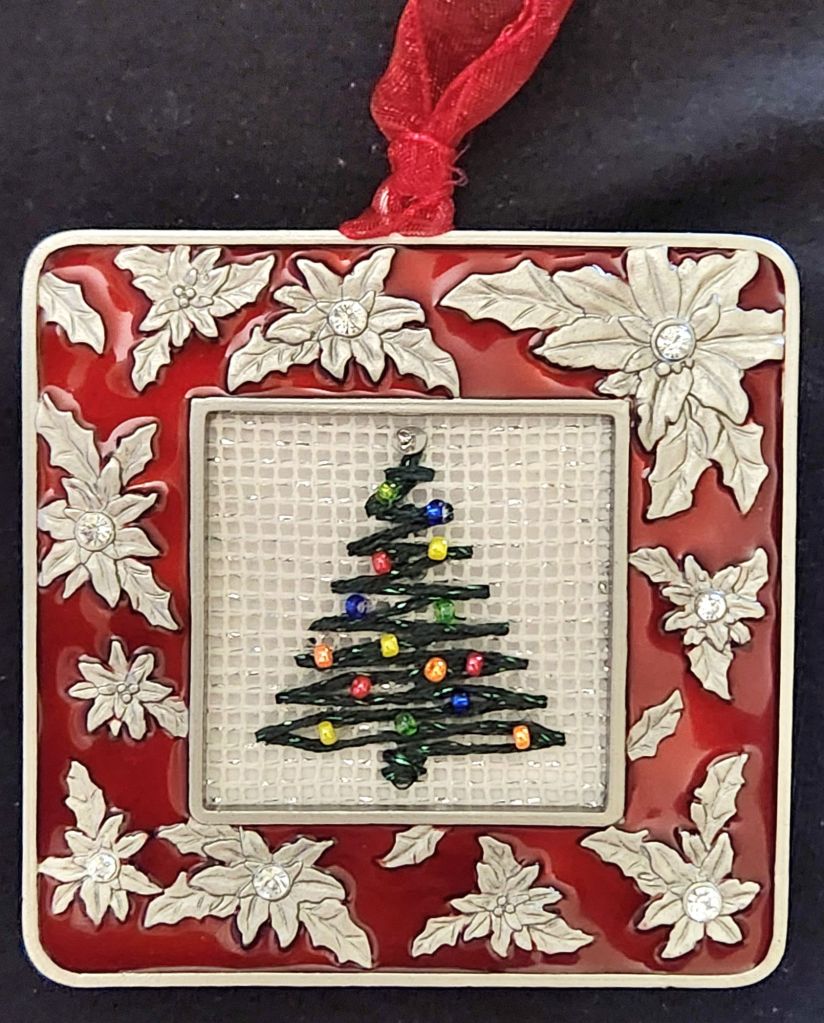
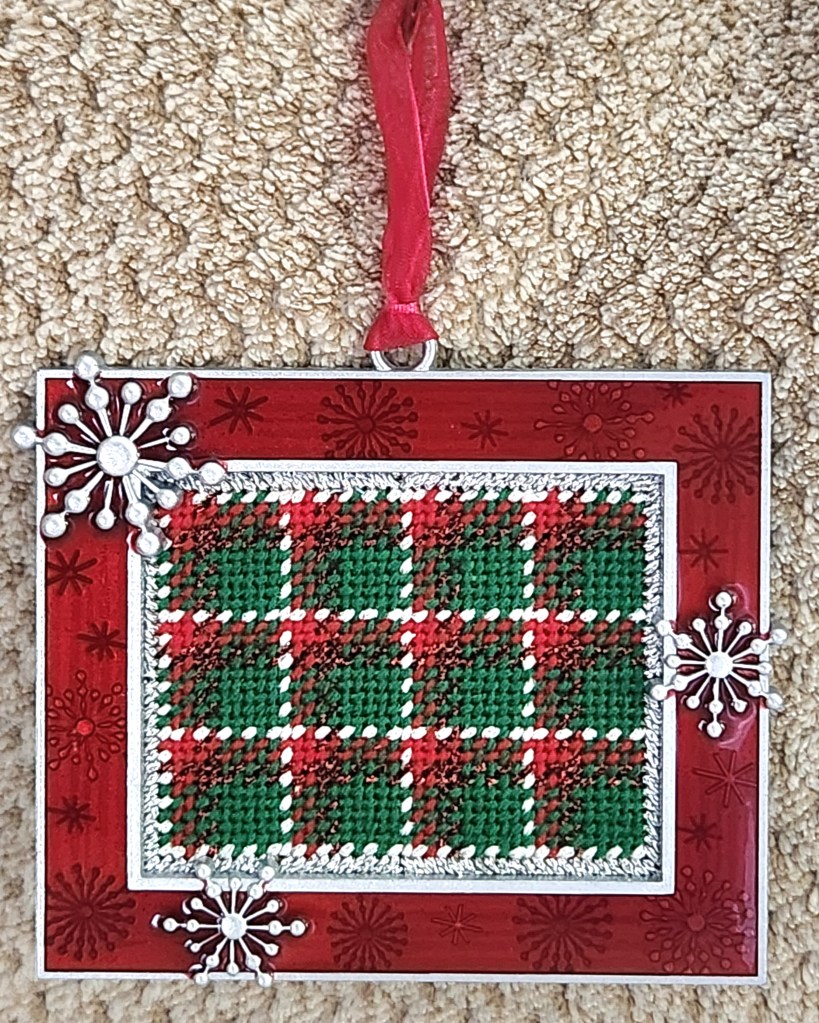
Sue C from New Jersey Needle Artists Chapter had this frame in her unwanted stash pile, and I knew that I would make a nice ornament for the chapter’s tree at the Festival of Trees held annually.
There will be 2 large rooms on display at the Environmental Education Center in Basking Ridge, NJ (190 Lord Stirling Rd). You can see them Friday, December 6, through Sunday, December 29 (except 24th and 25th).
So, I dubbed this ornament Festive Tree for the Festival of Trees. There is silver Kreinik #8 Braid in a diagonal gobelin stitch to secure the edges the size of the frame (doesn’t show). One length of green Silk Lame Braid for 18 count was used to form the base and criss-crossed upward to create the tree. There is a silver sequin and a bead for the tree top and 3 beads of 5 different colors (blue, green, red, yellow, and orange) making up the lights. The canvas has silver sparkle in it.
I delivered it, and the Christmas Plaid ornament I posted previously to Jacqui at the November of the Central Jersey Chapter (CJC) Saturday meeting/Stitch-in (every 3rd Saturday 10-3).
Filed under: ANG New Jersey Needle Artists Chapter, Ribbon Candy Ornaments
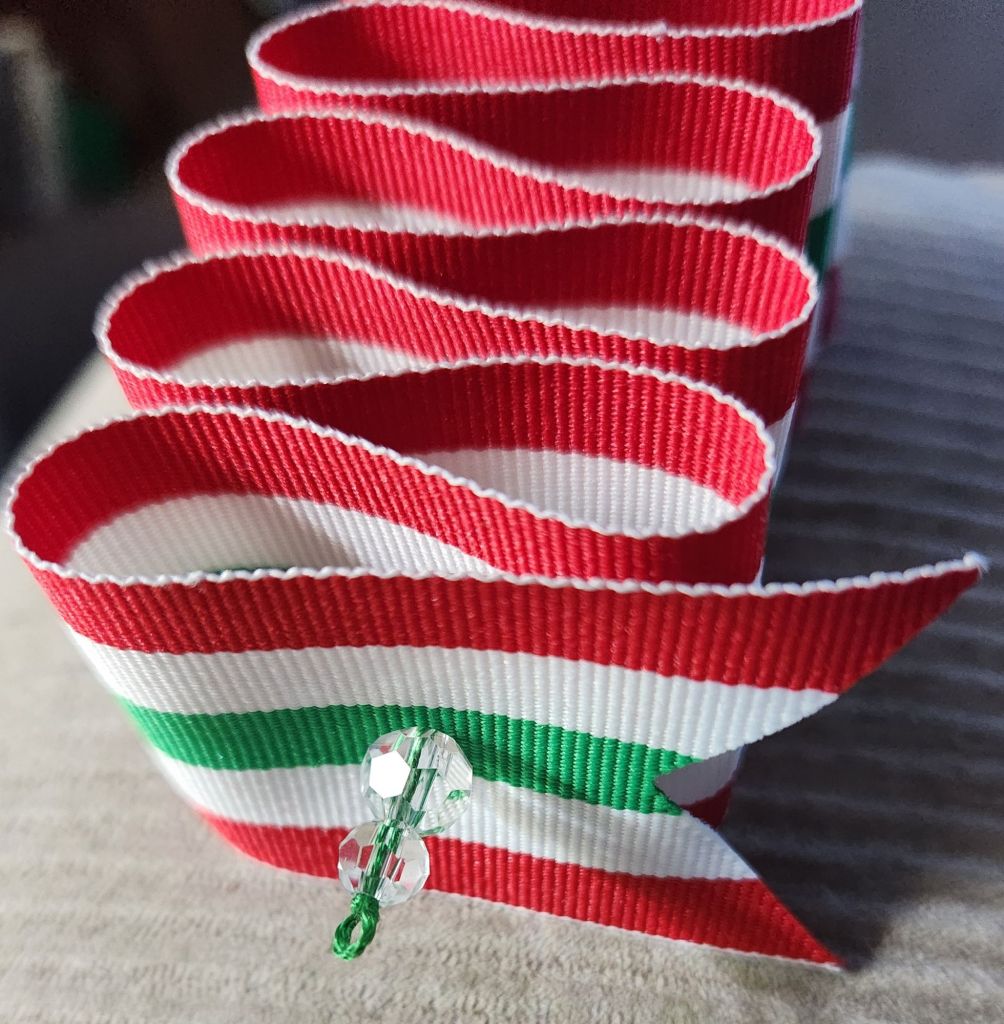
Nancy B from New Jersey Needle Artists Chapter put together lovely kits to make 3 Ribbon Candy Ornaments at this month’s meeting.
We were given 22″ lengths of Grosgrain ribbon with stripes printed on both sides in Christmas red, green, and both. Nancy said locating the ribbon was the hardest part. I did a search just now and can’t find these colors in stripes. She marked the end at 1″, 2″ increments, and 1″ from the end on each of our ribbons. That made it super easy for us!

We got 7 small and 7 large clear beads for each ornament (4 mm, 6 mm, or 8 mm), matching green and red floss, and a needle.
The instructions are from Martha Stewart, but Nancy walked us through it (in person and for Zoom people).
I revised how to make the loop on my second one, so no knot end would show. The knot you see holds the bead in place.

I tied it off inside the first fold.

Then, I tried to end with a knot, but it wasn’t as close to the bead as I wanted. So, I went back through the bead and tied off inside the last fold. The little green loop is a happy accident!
My third one worked up easily.
Place your loop right of both beads.

Make a knot right of the small bead at your preferred loop length.

Run both threads through ribbon and tie a knot with the short end. Pick up a bead with the long length.

Alternate a small and large bead as you progress. I ended with a knot close to the bead and still ran it through the last fold to knot again and cut.

My loops are a little long for this hanger, but all three are ready for our Christmas tree.

Lovely, fun, and quick. Thanks again, Nancy!
Filed under: ANG New Jersey Needle Artists Chapter, Tumbling Stripes by Marilyn Owen
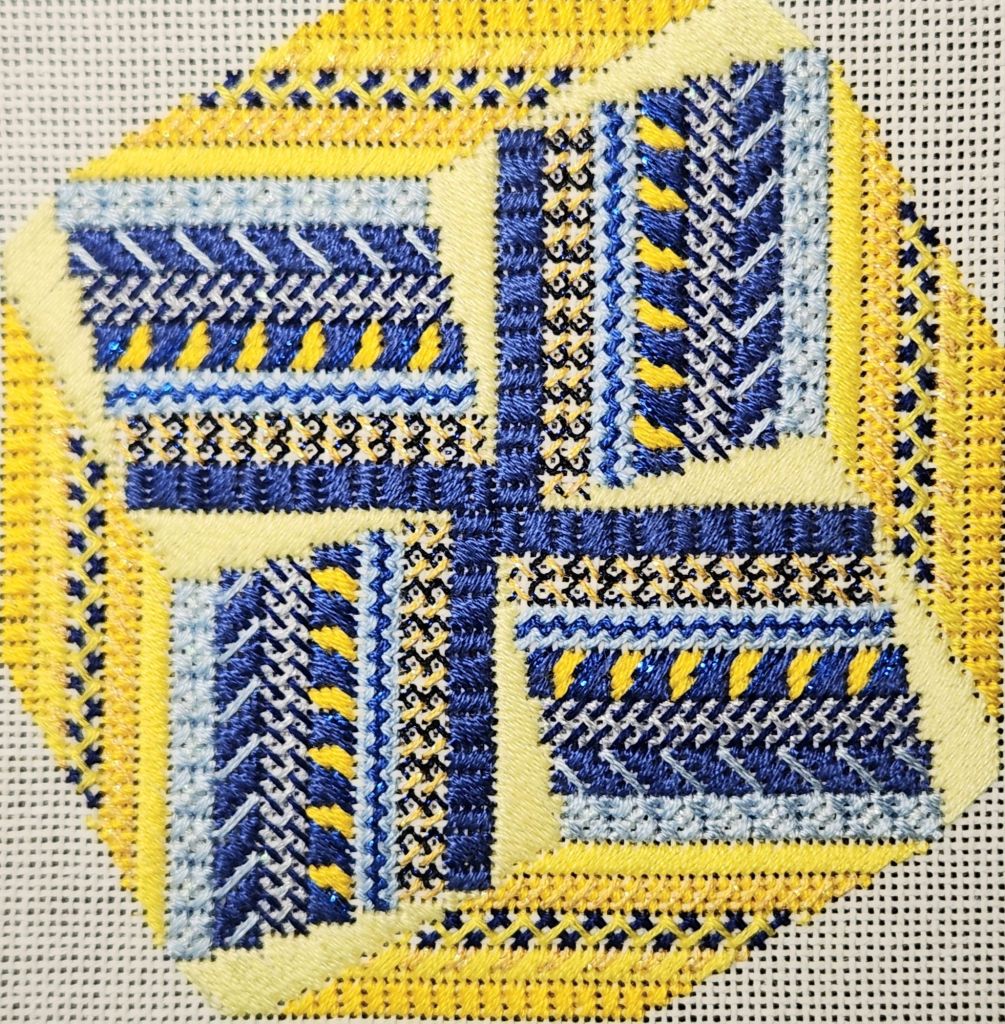
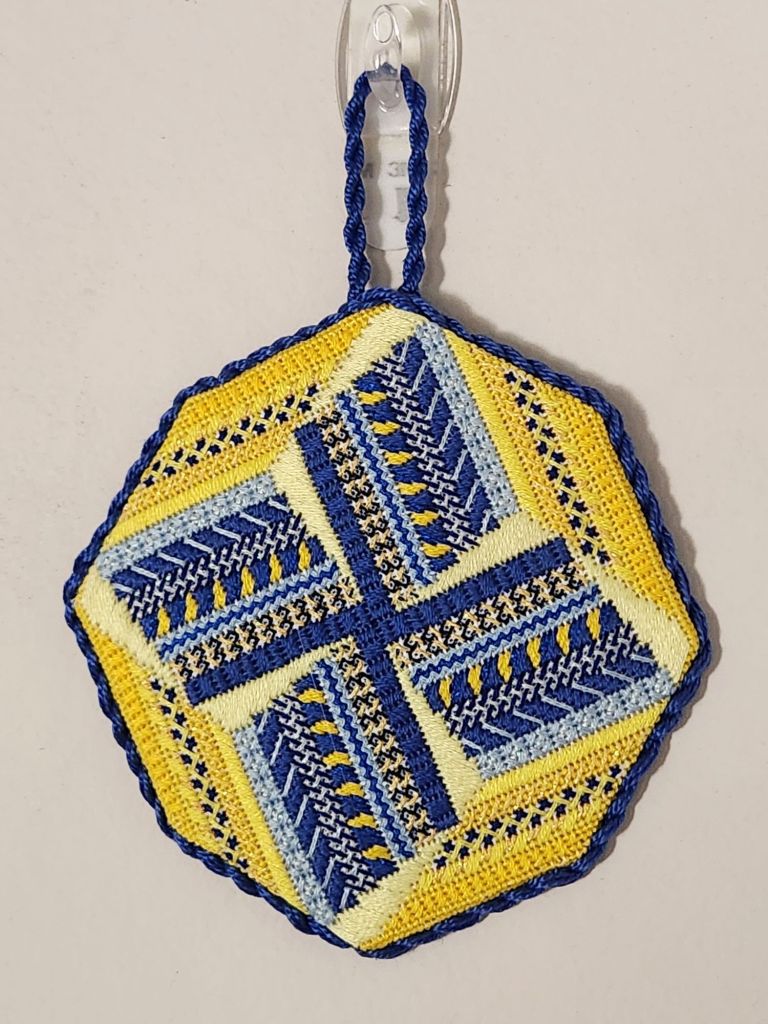
For April’s New Jersey Needle Artists’ chapter meeting, Jacqui continued Tumbling Stripes by Marilyn Owen by going over Stripes A-E (bottom 5 rows).
I see now that the top 7 rows are mostly blue with a touch of yellow and the bottom are yellow with a touch of blue.
I decreased to 2 strands of floss again because I am working on 24 count Congress Cloth.
Since I am finishing this into an ornament, I won’t be doing the 3 outer borders framing it into a square. Instead, I backed out a few of the light yellow fill in stitches and evened out the corners to create an octagon that will be easier to finish.
Then, I tent stitched around the outer edge to make finishing easier and retain the full design.
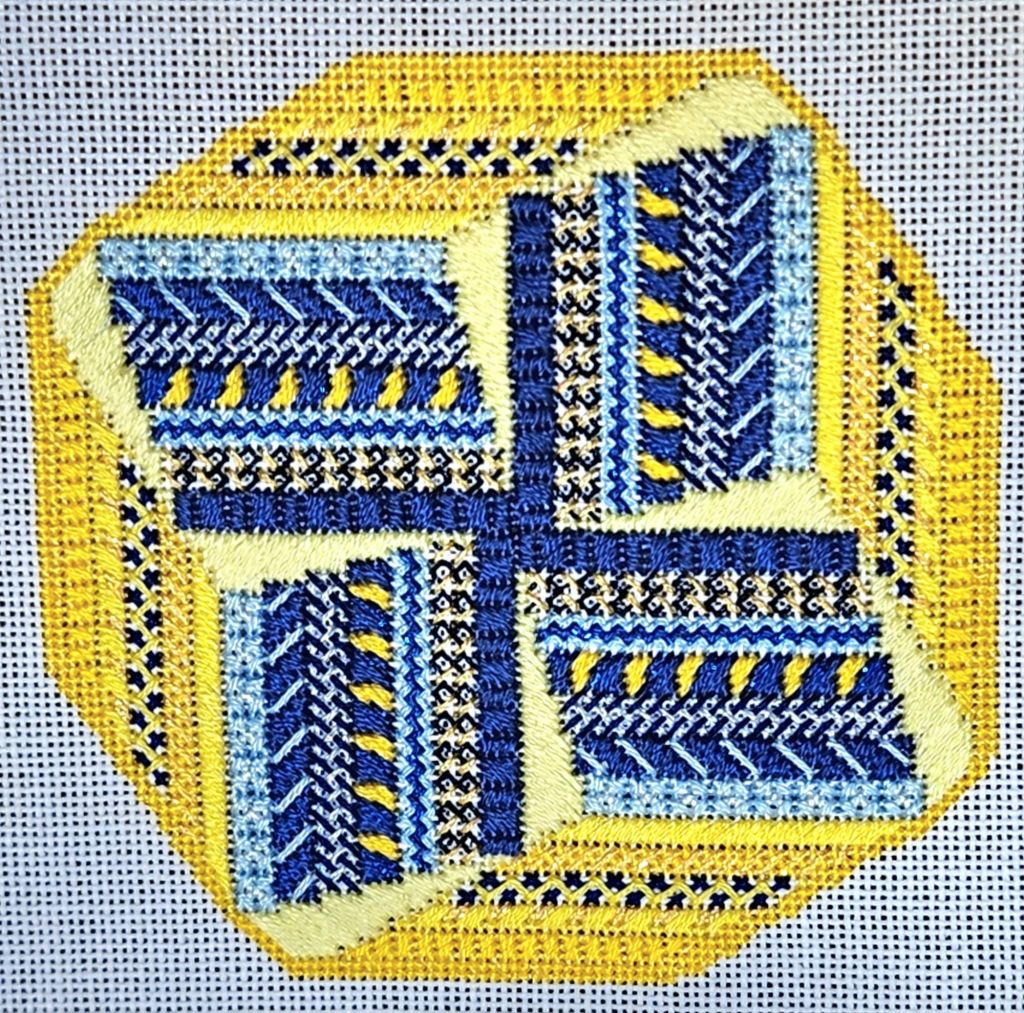
I got my finishing done ready for Show and Tell at this month’s New Jersey Needle Artists Chapter meeting Wednesday night! I’m attending in person. In fact, I am posting from the meeting room.
Filed under: ANG New Jersey Needle Artists Chapter, Embroidery Guild of America, General comments, Ruby Razzle Dazzle by Ann Strite-Kurz, Seminar 2023 - Boston, Threads, Understanding Color Relationships: Luster and Luminosity with Patricia Goaley
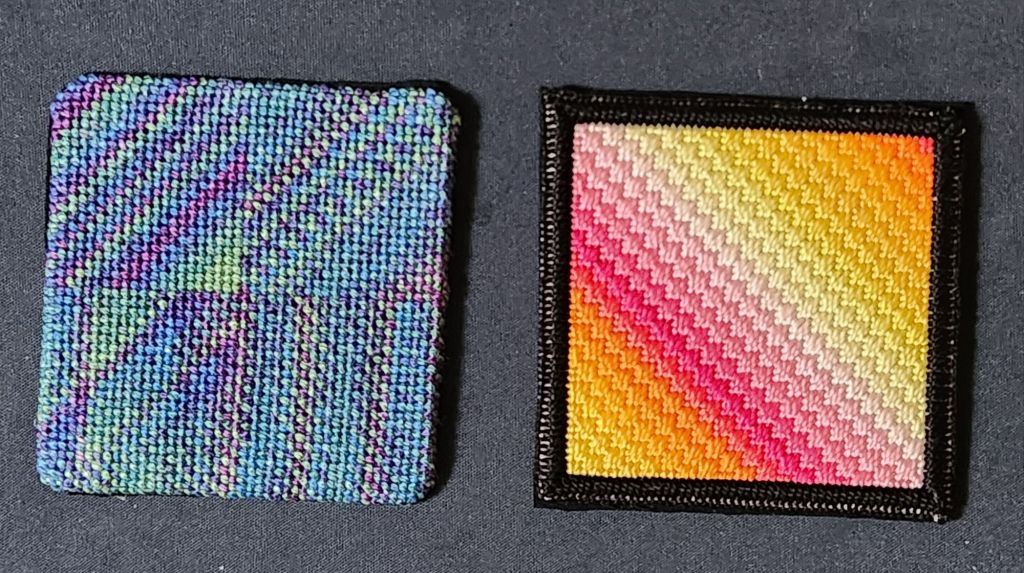
I’ve got a lot of small stuff to finish. I decided to get back into the swing of it with new coasters for us.
For Bill’s coaster (on the left), I folded over along the edges and tacked them into place with invisible thread. Details on how I stitched the 4 corners differently are at: https://melitastitches4fun.com/2024/03/02/manipulating-overdyed-threads/
For mine (on the right), I folded over along the edges and practiced the buttonhole stitch. I used black DMC Perle #8 and could have used #5 because some canvas is showing through. The design is from a class on Color and Luminosity with Pat Goaley during the EGA Seminar in Boston (more on that at https://melitastitches4fun.com/2023/09/03/ega-seminar-class-2-understanding-color-relationships-luster-and-luminosity-with-patricia-goaley/).
For both, I glued black ultrasuede on the bottom using Aleene’s Fabric Adhesive.
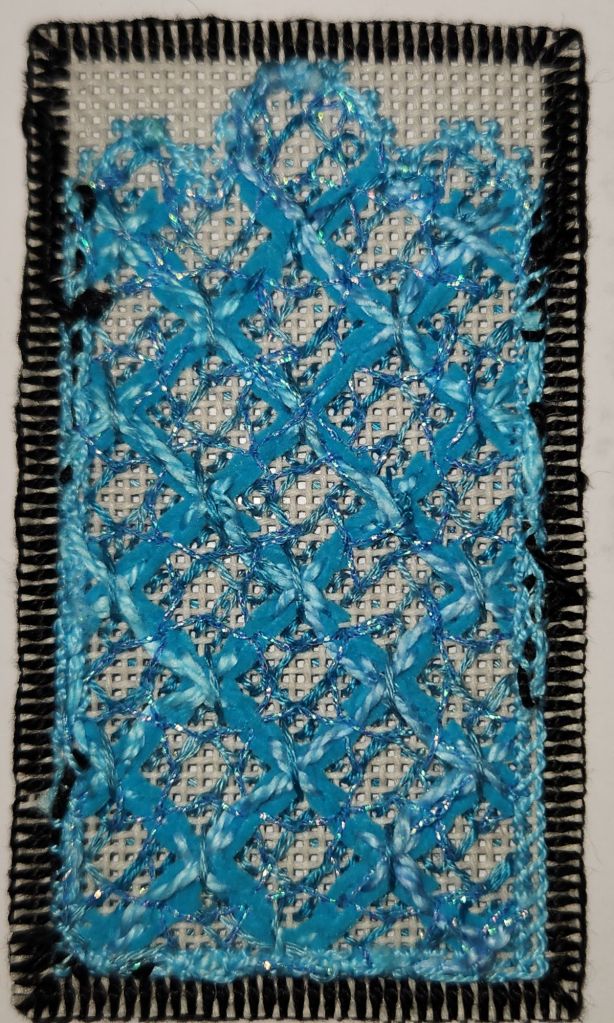
Next up is a blue sample from Razzle Dazzle by Ann Strite-Kurz that I made into a bookmark. More on this at: https://melitastitches4fun.com/2024/02/16/ruby-razzle-dazzle-by-ann-strite-kurz/
I used black DMC Perle #5 this time to make the buttonhole edging across 3 canvas threads. It has less white showing. I didn’t fold back the edges to make it a thinner, lighter finished piece (compared to the coasters that have the edges folded over). Then, I cut very slowly, carefully, and close to the stitching without cutting the threads. Here’s the back before covering it with a dark blue ultrasuede.
Again, I glued a piece of ultrasuede to the back (Aleene’s). I placed the glue all along the edges so that the glue touched only the DMC Perle buttonhole stitching. The width of three canvas threads accommodated a nice amount of glue.
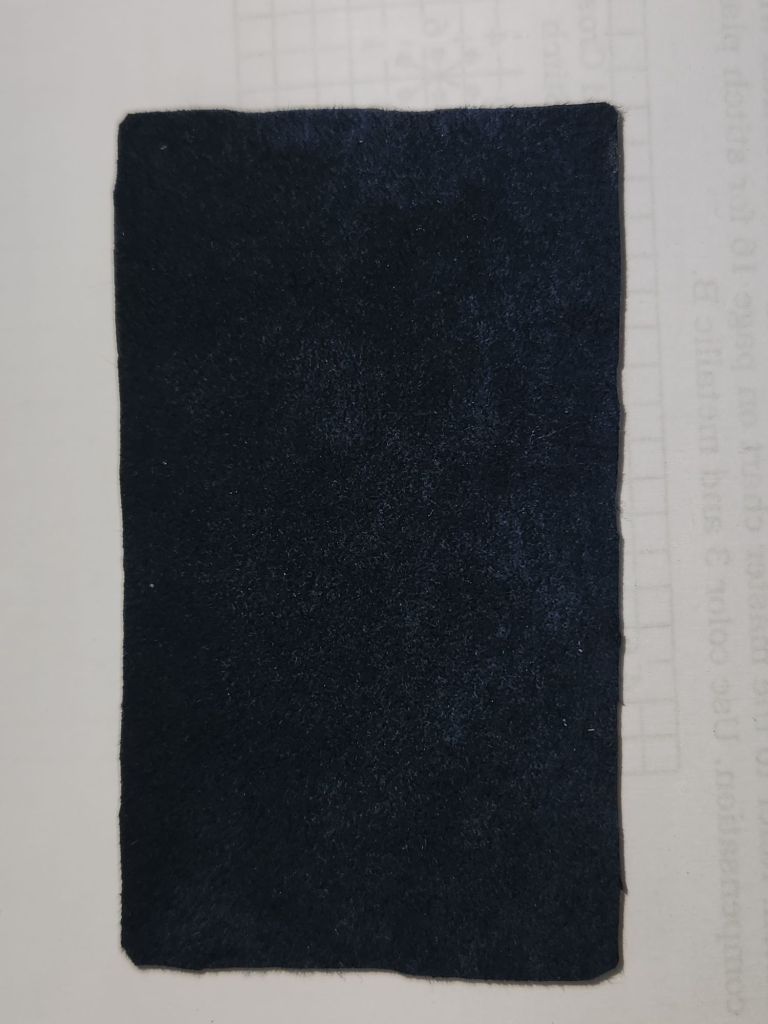
It’s thin enough for a bookmark. A pretty one too!
Filed under: ANG New Jersey Needle Artists Chapter, Tumbling Stripes by Marilyn Owen
In March, Jacqui from New Jersey Needle Artists continued Tumbling Stripes by Marilyn Owen by going over Stripes 5-7 (counting from the center out).
Initially, in Stripe 5, I thought I would use Kreinik #4 Braid on the smaller count Congress Cloth, but it was too thin. Luckily, I had the same color light blue 194 in #8 Braid. I did cut back on the number of strands from 3 to 2 for the dark blue floss (820). Working 2 needles, as Marilyn suggested, went well.
I stayed with the number of strands recommended for 18 count for Stripe 6.
Stripe 7 has Smyrna stitches using Kreinik #4 Braid in the same color as the surrounding floss (back to 194). So, the inner and outer stripes are solid, with the middle stripes containing all the tumbling movement.

All caught up for Wednesday night’s meeting!
Filed under: ANG New Jersey Needle Artists Chapter, Tumbling Stripes by Marilyn Owen
Last month, Jacqui from New Jersey Needle Artists continued Tumbling Stripes by Marilyn Owen by going over Stripes 1-4 (working from the center out).
Stripe 1 in blue floss (DMC 797) worked fine with 3 strands of floss. Two strands looked skimpy with just enough speckles of white showing through to make me go to 3 strands. Apparently, coverage on 24 count isn’t that much different from 18 count.
Then, I thought I would use the darker blue floss shown (DMC 820) and the Petite Sparkle Rays in Stripe 2. The dark blue 820 looks a lot darker in the photo but sure didn’t when I stitched with 2 and 3 strands up against 797 (no photos). I tried both because 3 was way too heavy, and 2 was still heavy. Then, the Petite Sparkle Rays was way too wide for the stitch on Congress Cloth.
So, I pulled my old favorite Bijoux MMT437 Sapphire (same value) and decided to use 2 strands and go even thinner. And, the Petite Silk Lame Braid SP11 was thin enough to work. So, this stripe may not have the same color contrast as the original, but it definitely contrasts with Stripe 1. I was hopeful that it would work with Stripe 3, and it did.
For Stripe 3, the blue Silk Lame Braid was the right color but was too heavy (For 13 count). So, I pulled out 2 silk and 1 rayon fibers (the same as what Petite Silk Lame Braid comes as). I can’t remember the teacher who told us you can thin down Silk Lame Braid, but it works. I decided that combining them together would too, and it did. I wouldn’t recommend this for larger pieces, though. Also, since I had to repeat the first and third rows in the same DMC floss and Herringbone is worked left to right, I used half of the long floss on the top row while the rest of the thread was parked out of the way.
For the 4th stripe, I stayed with 3 strands of floss and my makeshift Petite Silk Lame Braid.

I’m ready for our next session tonight!
Filed under: ANG New Jersey Needle Artists Chapter, Tumbling Stripes by Marilyn Owen
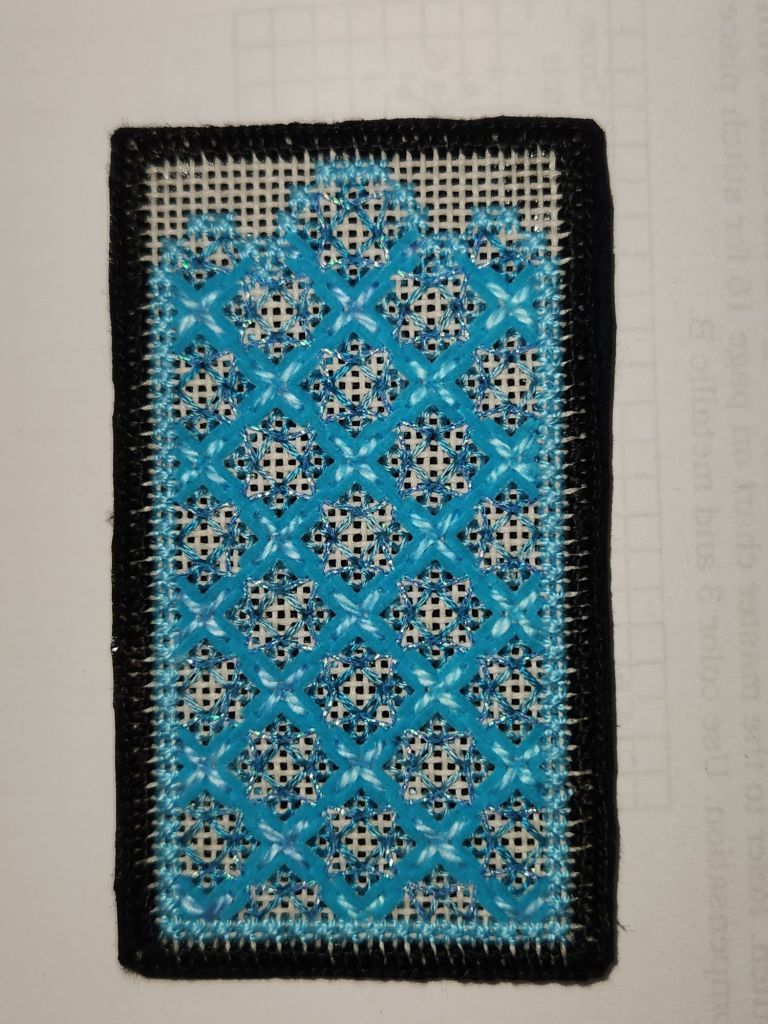
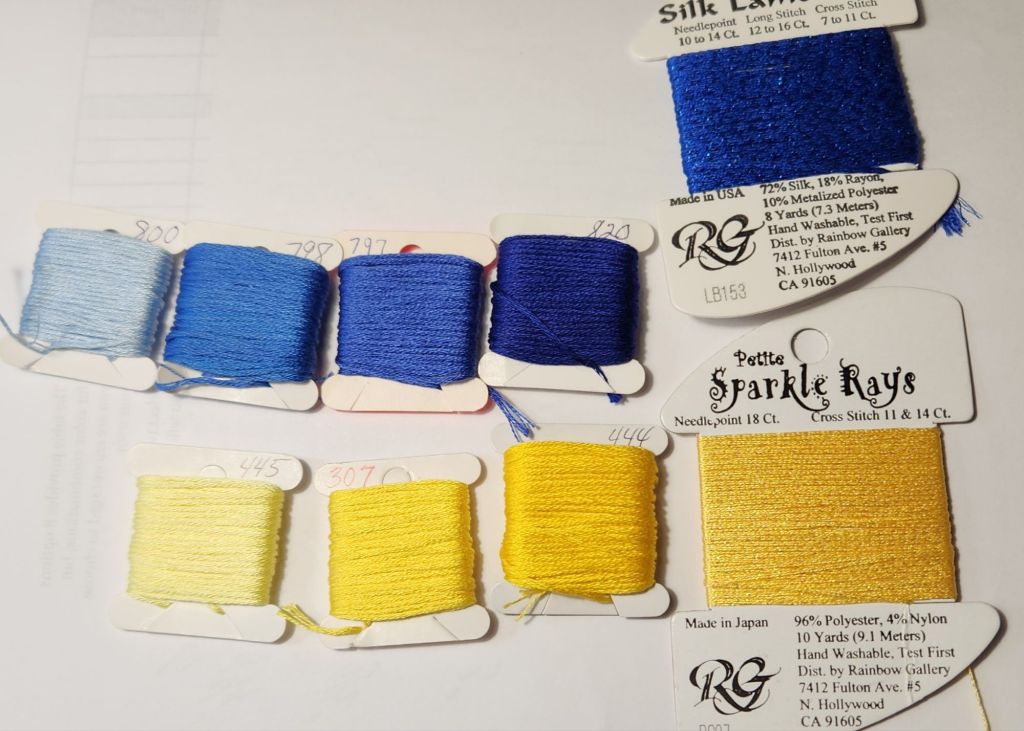
I ditched the threads I’d gathered for Tumbling Stripes in favor of DMC cotton floss. The first batch just didn’t look right to me when I went back to start the project, Tumbling Stripes by Marilyn Owen.
My floss has a better selection of light, medium, and dark yellows and blues. So, I matched the yellow Petite Sparkle Rays to 445, 307, and 444, and the blue Silk Lame Braid to 800, 797, and 820. I included yellow because Jacqui, who is leading this for the ANG New Jersey Needle Artists chapter, has a Zoom talk, Why You Need Yellow in Your Life, which we enjoyed a while ago.
Our assignment this month was to select threads and baste. Well, I don’t like basting. So, I stitched the blank faces of the cubes first. They are actually the last step before the borders, but they line up with the stripes. Since I am doing this as an ornament, I will have to round it out after the stripes are all completed with the same light yellow thread.
Because I am stitching on Congress Cloth, I am using one less strand than suggested for 18 count canvas. I am all ready for February’s meeting next Wednesday night (thanks, Cathryn for reading my blog and letting me know about the date change for February; I even updated the NJNA website but not my calendar).
