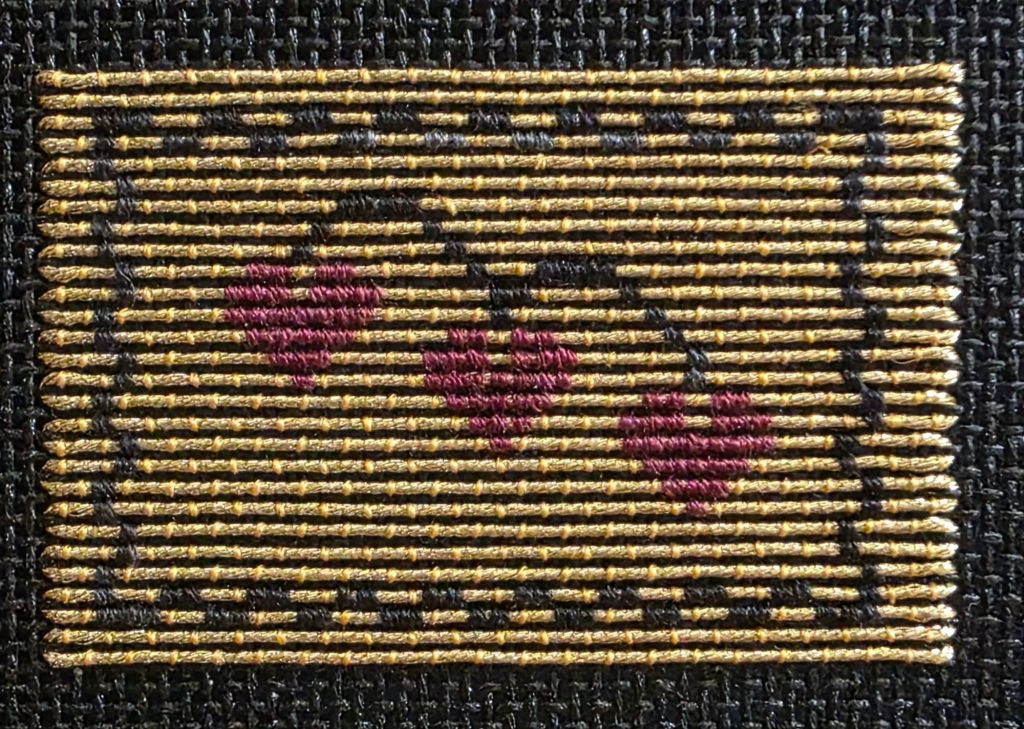
Filed under: Brandywine Chapter, Embroidery Guild of America, Lotus Blossom by Brenda Kocher, Or Nué Hearts by Brenda Kocher
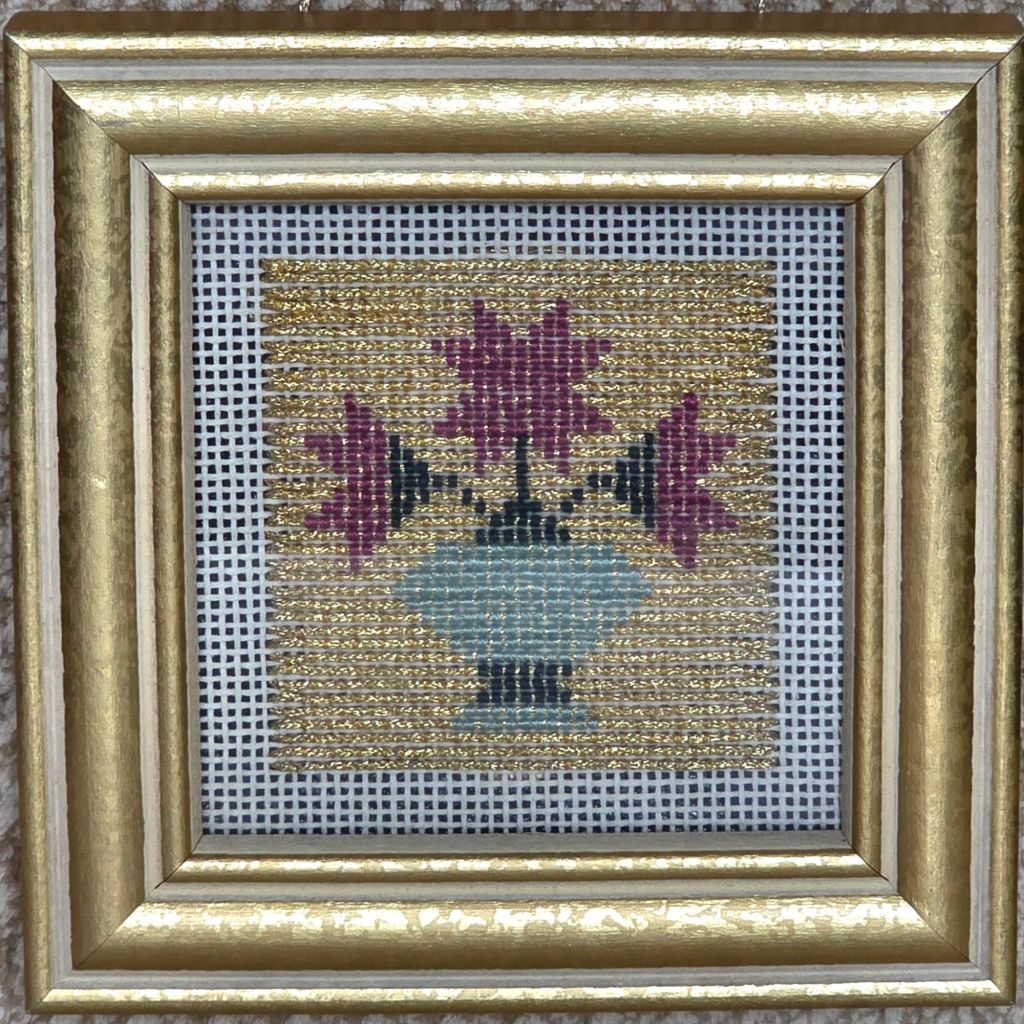
My Or Nué Hearts and Lotus Blossom by Brenda Kocher are all framed and ready for Tuesday at our EGA Brandywine Chapter Quarterly meeting.
I had enough thread and canvas space to make three pieces. The extra framed Heart is going to Olga, the woman who works the gate at the retirement community where we meet. Very nice lady.
The frames are from Michael’s. There are a few canvas threads left unstitched around the edge of the stitching so that it fits snuggly. It’s stitched on a black canvas and black really helps set off the gold.

It sparkles more in person.
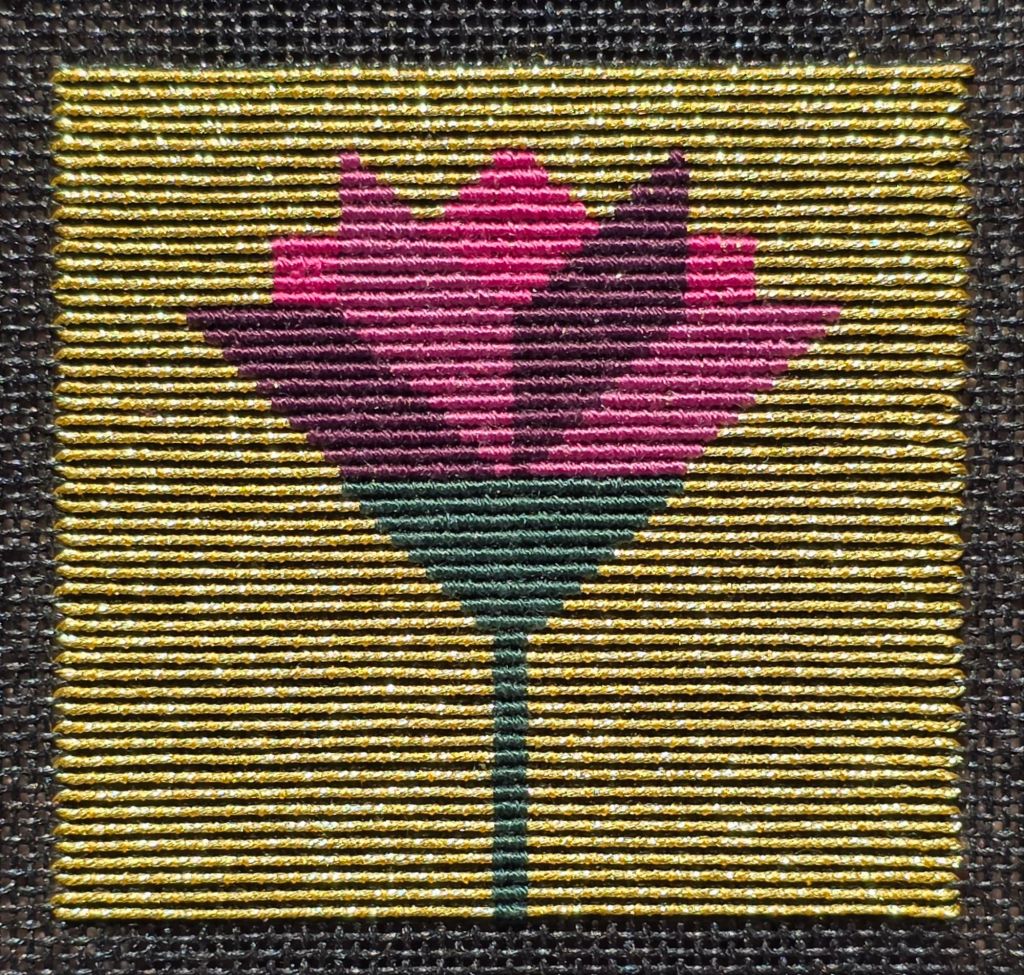
Filed under: Brandywine Chapter, Embroidery Guild of America, Lotus Blossom by Brenda Kocher
The challenge with this Or Nué Lotus Blossom is that lots of needles need to be working simultaneously. I don’t want to carry the gold Japanese Silk couching thread across the large center design. So, I have one one each side. There are 3 colors but the center lightest color repeats on the far left and right sides so that is 2 more needles. With the long (4.5 yards) strand of Radiance 13, that makes 8 needles to juggle. I brought my threads up in the hole of the next stitch, laid the Radiance, and then couched with the colored threads first.

Here it is done. I’ll look for a small frame at Michael’s.
Filed under: Brandywine Chapter, Embroidery Guild of America, Or Nué Hearts by Brenda Kocher
I led a class on Wednesday for my EGA Brandywine Chapter Class in Or Nué Hearts by Brenda Kocher. The chapter paid for the canvas (black or ecru) and the threads. By kitting them myself, we split up skeins and saved money. I also bought two large pieces of canvas at Nimble Needle in NJ, cut it, and taped them myself also saving the chapter money. Karen, the owner of Nimble Needle NJ is the only store in our area that gives a 10% discount to ANG and EGA members. A nice perk in addition to an opportunity to chat with Karen!

Since 6″ and 7″ bars are tough to find and because people wanted to learn lacing, we did that first. I wrote up instructions after rereading instructions from Kay Stanis. Even small bars like these took time away from the project but everyone enjoyed learning the technique. It’s handy if you don’t have the proper size bars and if the canvas becomes loose, you can tighten the lacing. Here it is in process.
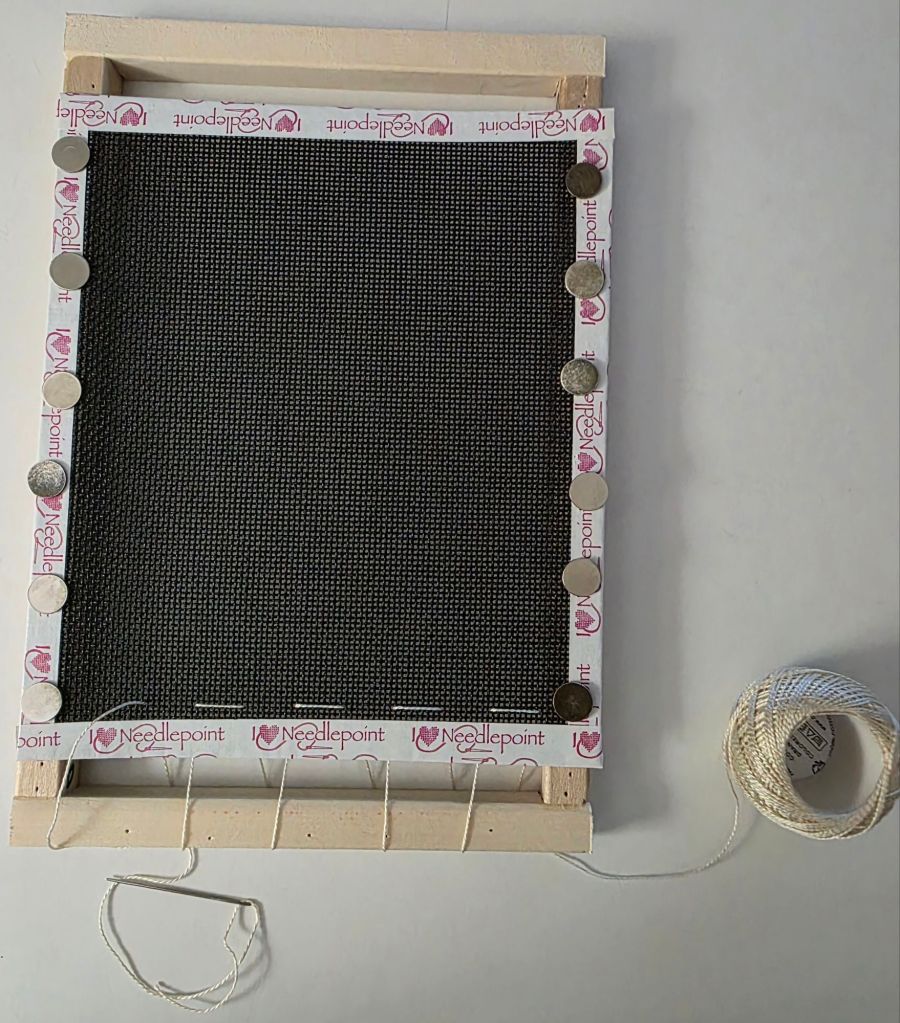
Rather than using Kreinik, I had everyone use Radiance 13 for the laid thread and we couched with Kreinik Japanese Silk Couching Thread. It went well – it took a couple of people two tries to get the hang of couching in the same hole but everyone was getting the hang of it. So, hopefully, there’ll be some finished pieces by our next meeting on July 14. Mine has been done so people could see it.
Since I had Brenda Kocher’s Lotus Blossom in my stash to do, I am getting started on that piece.
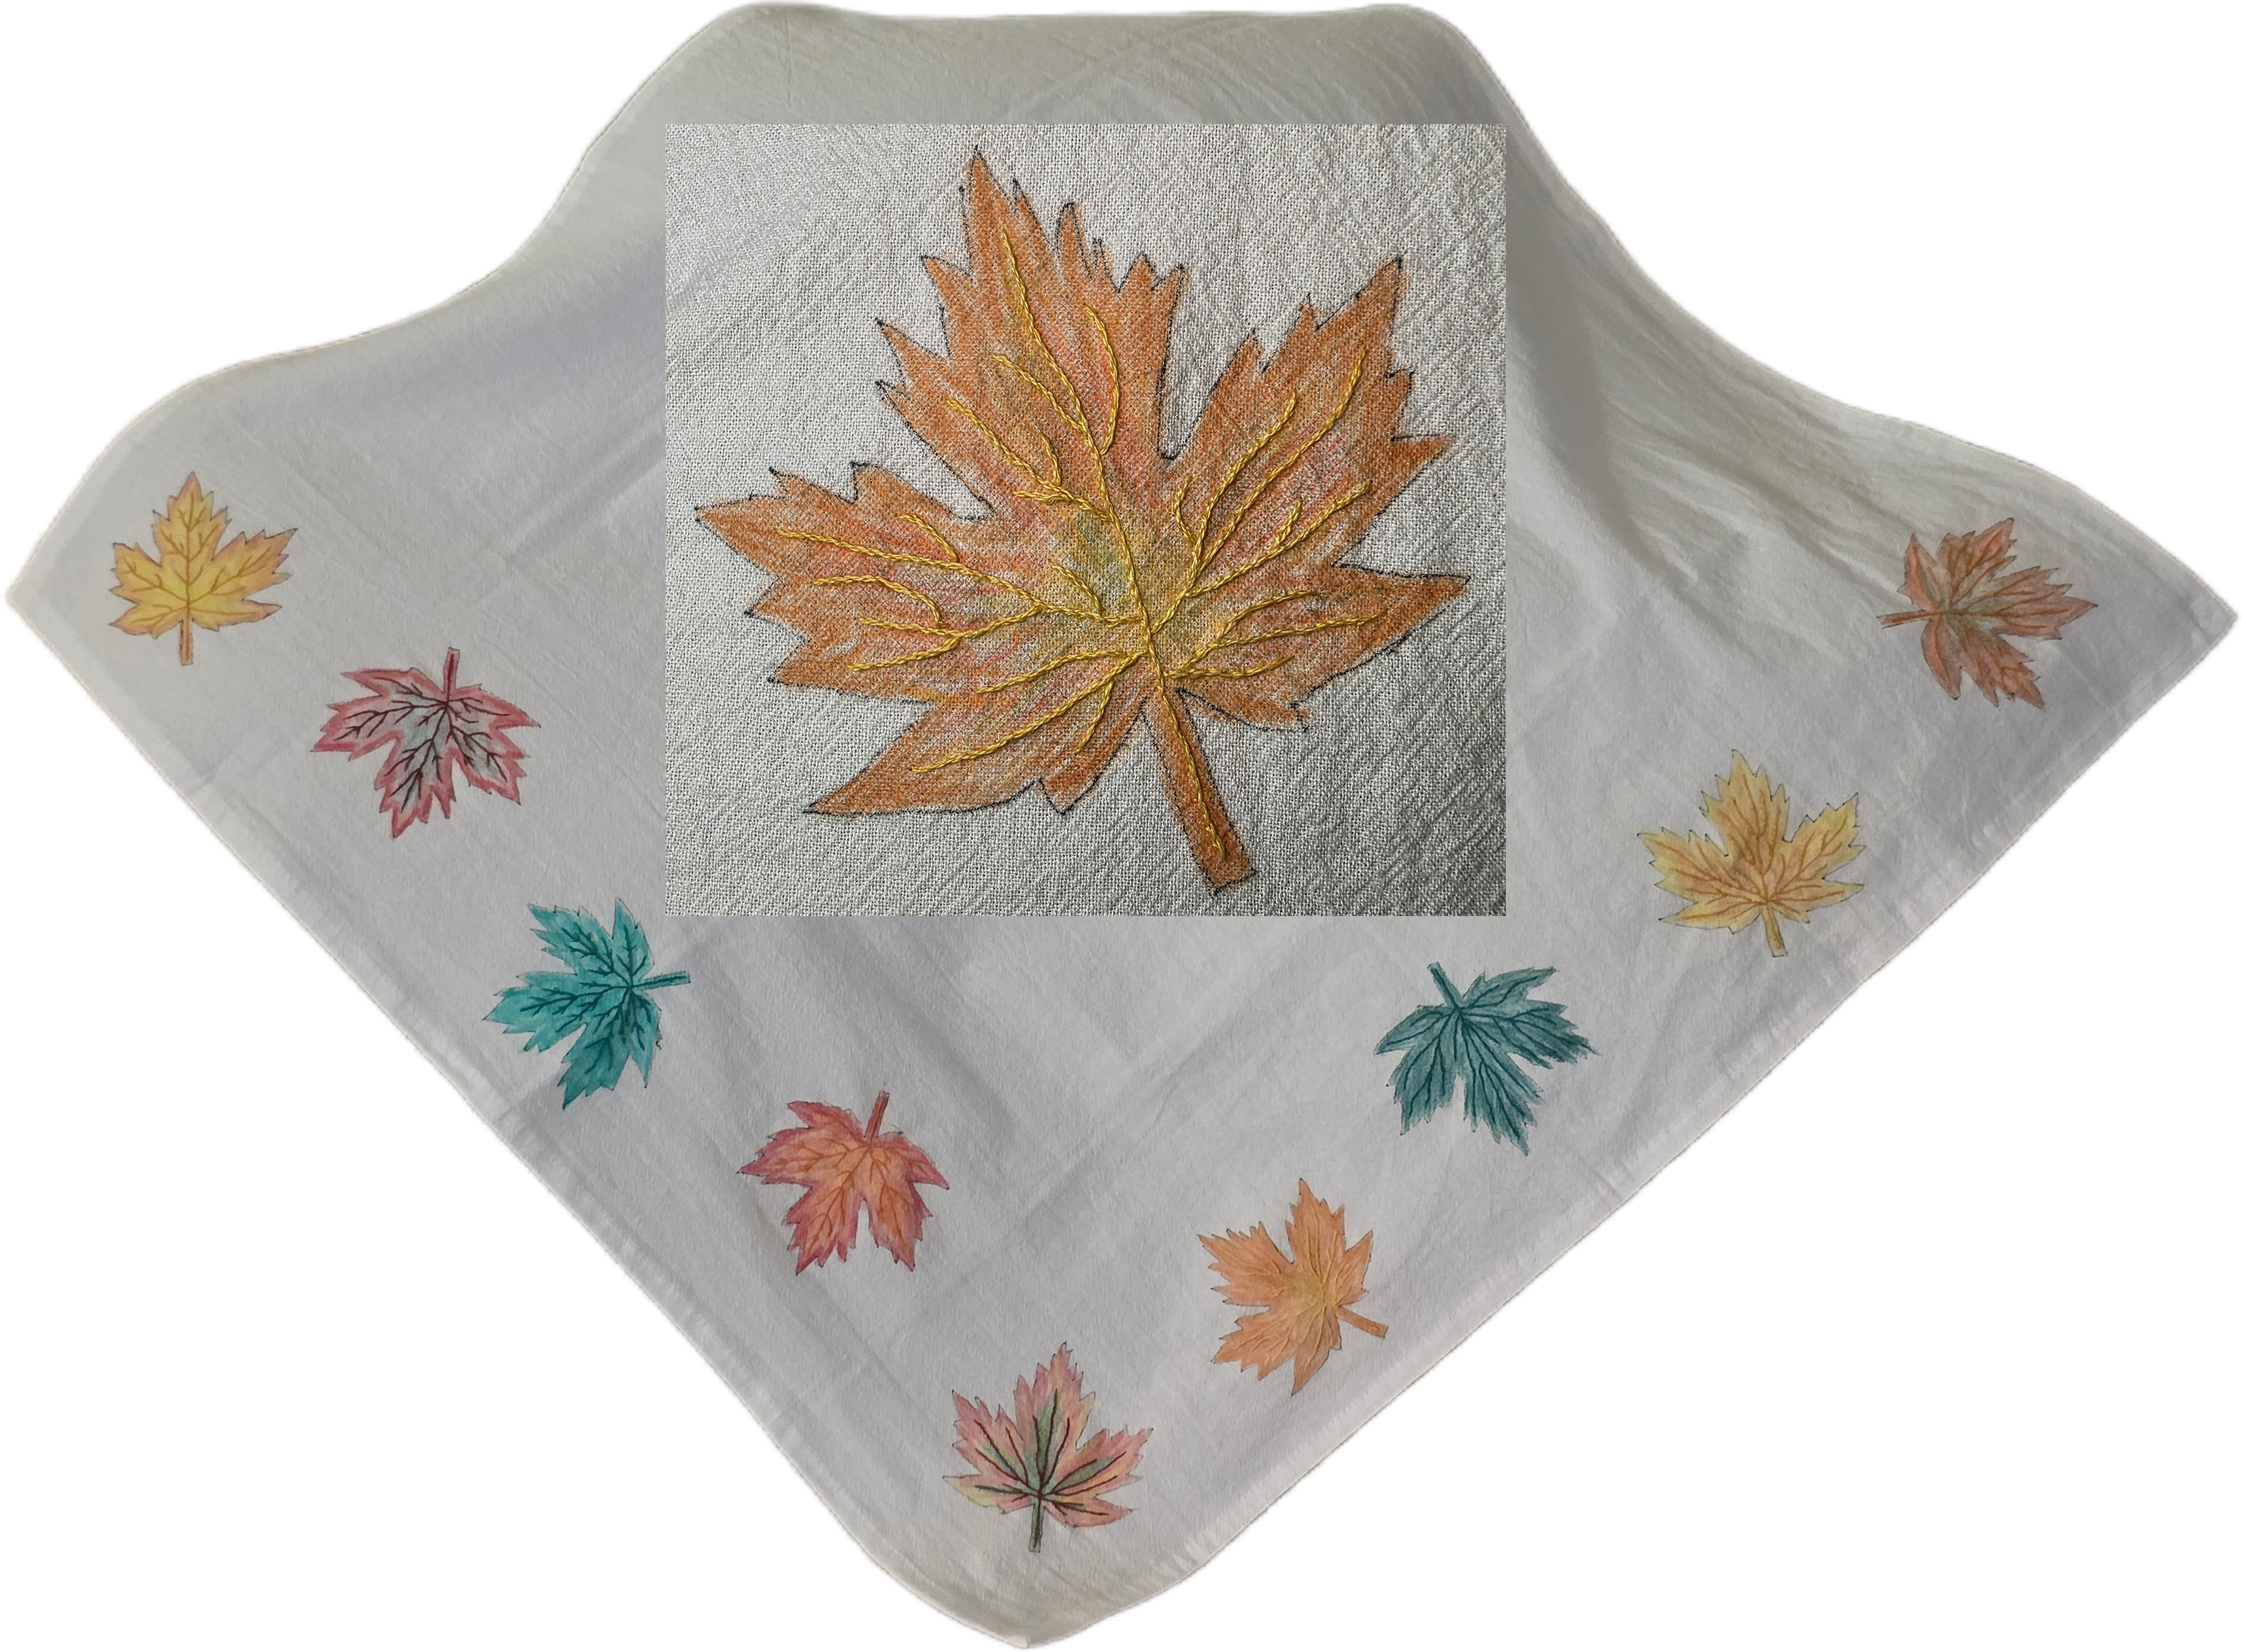
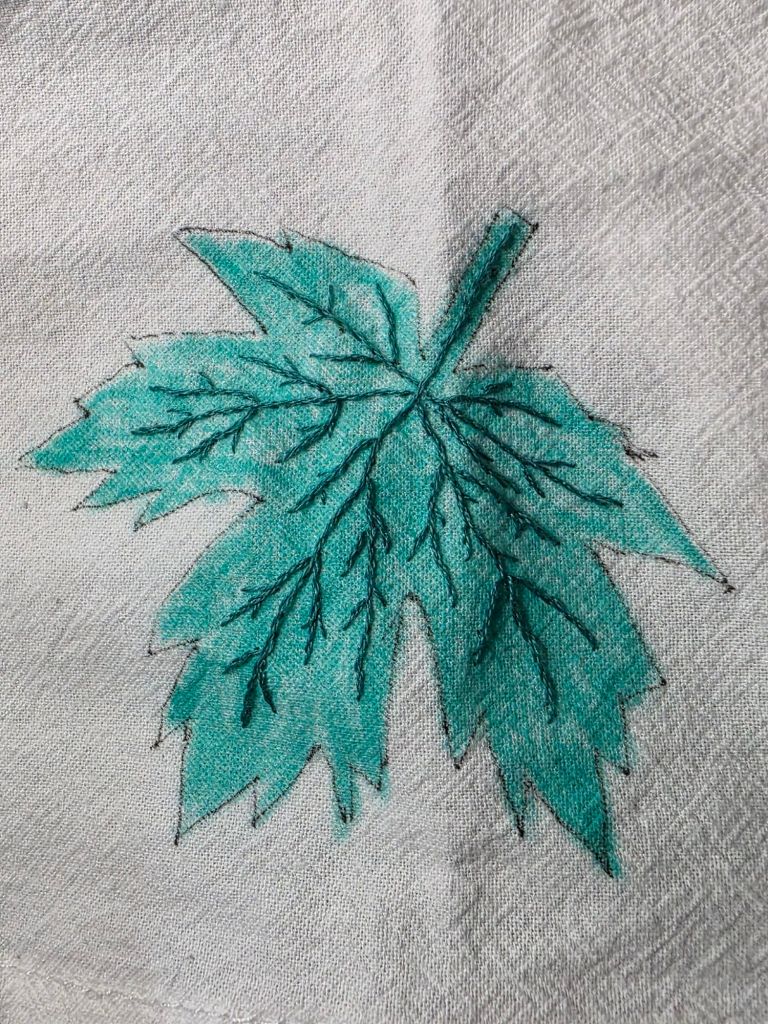
Filed under: Brandywine Chapter, Depression-era Crayon Art, Embroidery Guild of America
This is the finished 27″ sack cloth with one of the leaves enlarged in the center. Thanks again to Patrick B who led this excursion into Crayon Art or Crayon Tinting for the EGA Brandywine Chapter. It was popular in the 1930s and demonstrated the resilience of creativity throughout the Depression. This will serve as a towel hanging next to our basement sink. Heat set the crayon (a paper towel protected the iron). It is washable and may fade over time but that’s ok.
Today I lead lacing canvas onto bars and then a small Or Nue piece.
Filed under: Brandywine Chapter, Depression-era Crayon Art, Embroidery Guild of America
Crayon Art or Crayon Tinting was popular in the 1930s and demonstrated the resilience of creativity throughout the Depression. Who better to lead this practical and resourceful use of crayons (remaining from his 30+ year-old son’s Crayon box) than Patrick B of our EGA Brandywine Chapter.
Patrick provided everyone with a 27″ square sack cloth (nicely edged with a cloth hook in one corner). We selected patterns from coloring books or brought our own (which is what I did). We traced the design onto the cloth with a Micron pen, colored them with crayons, and heat-set them with an iron. A paper towel placed on top of the crayon protected the iron.

Then, we embellished the designs. I’m only going to stitch the veins. It’s a little more work on a towel than I would normally do and it’s too large for our kitchen. So, it’ll have to go in the basement next to the sink in the laundry room. We have a long golf towel there now.
I accidentally placed and colored 5 leaves along one side. It hangs like a diamond and I should have placed them differently. It wasn’t until I had left our meeting and was showing friends that I saw what I had done with the placement. And, there is one traced and uncolored leaf in a corner by itself. I’ll have to trace and color 3 more leaves! Since I don’t have any crayons (this is why I hate getting rid of stuff) and want to use the same colors, Patrick is lending me his crayons!
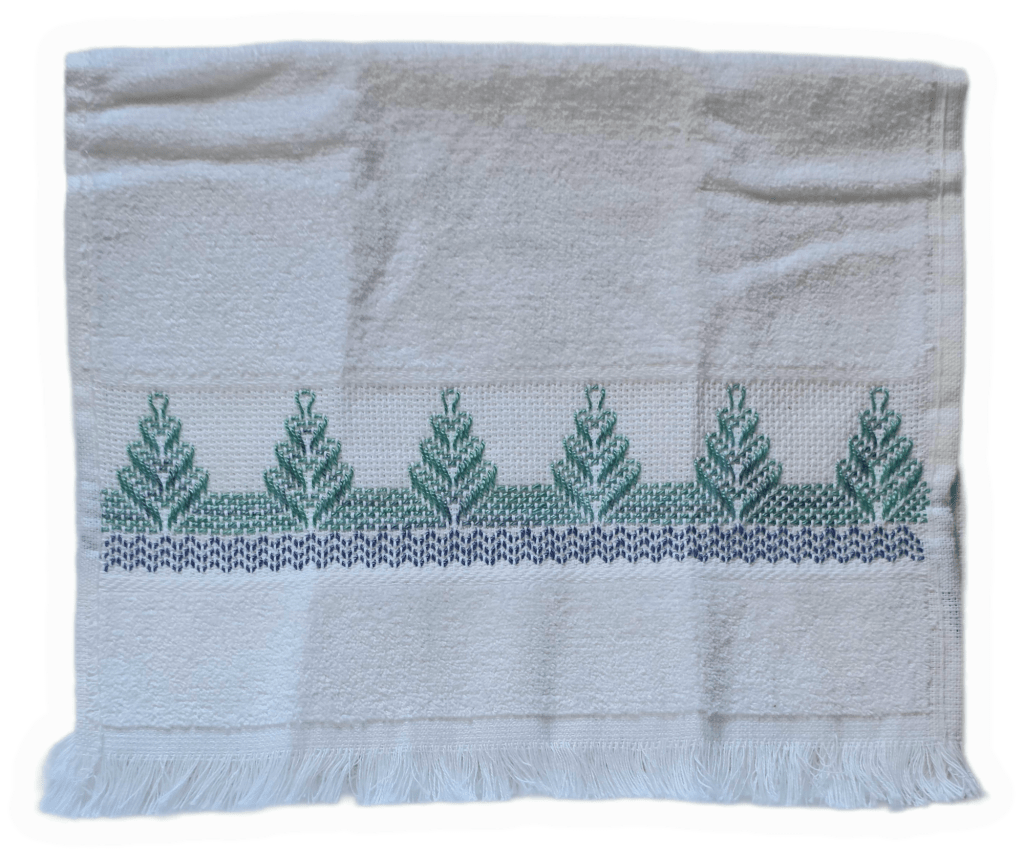
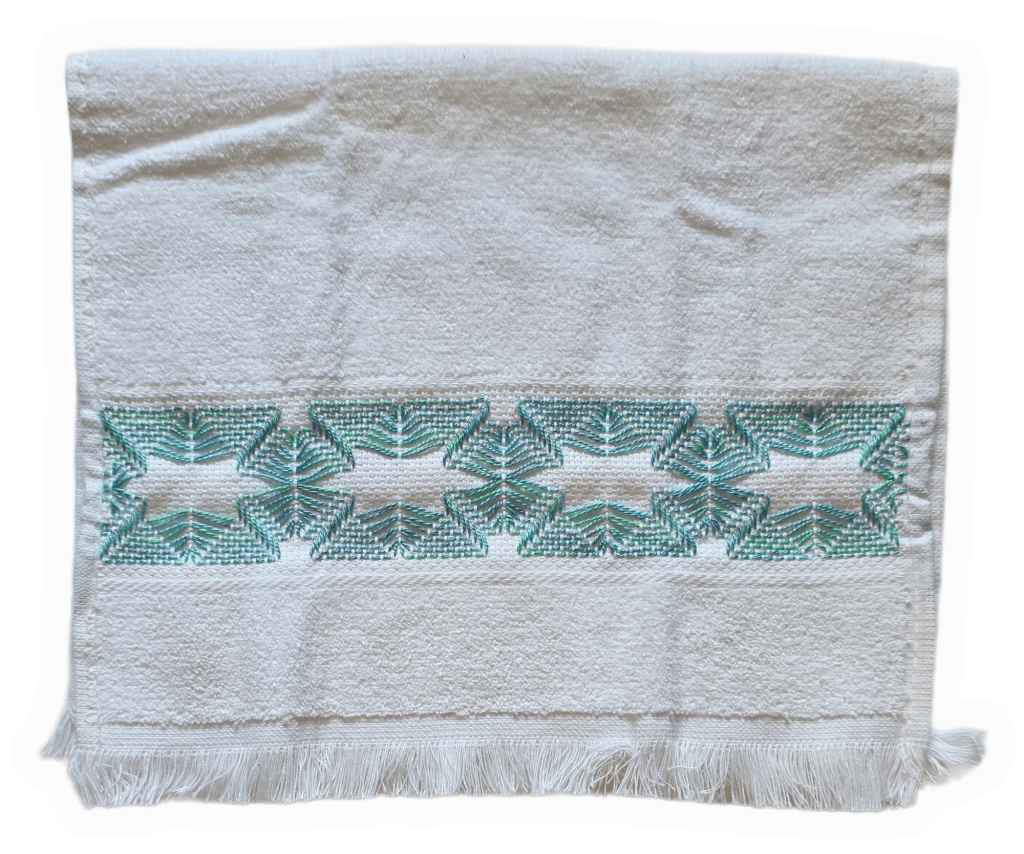
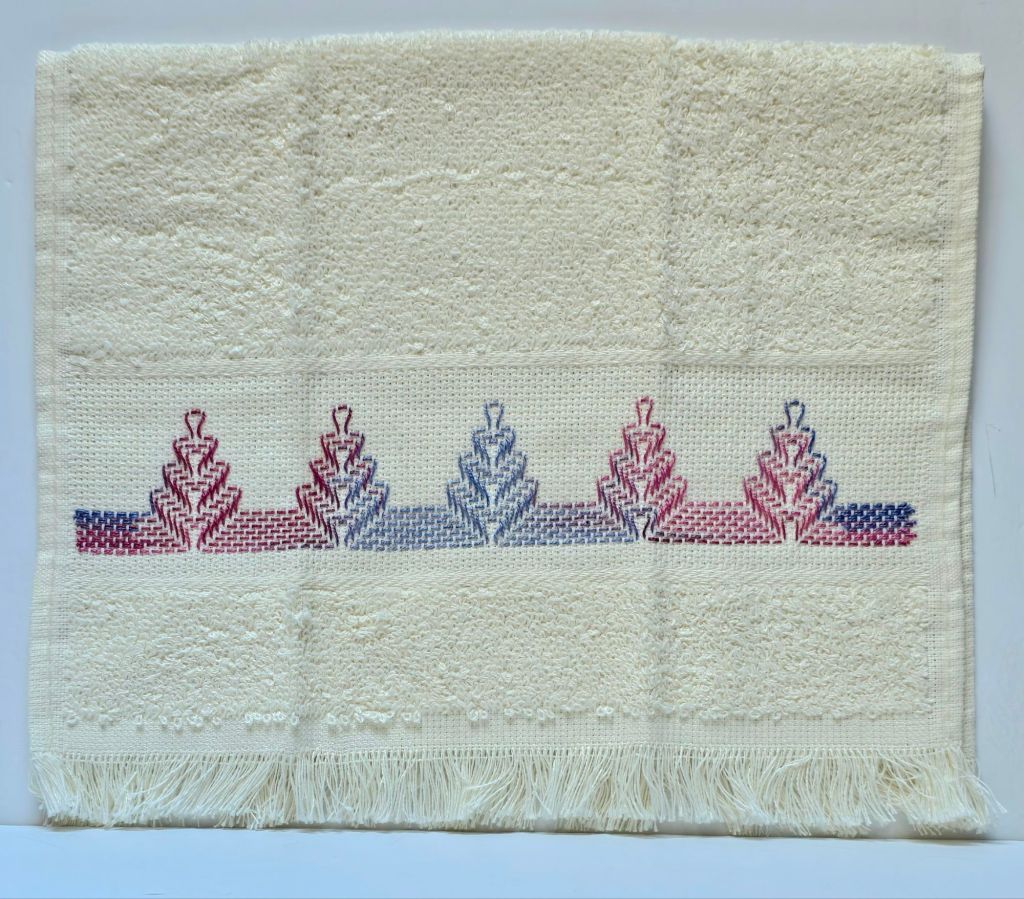
Filed under: Brandywine Chapter, Embroidery Guild of America, Huck Embroidery Towel
Before I can dive into the book Swedish Weaving Pattern by Kayerine Kennedy, I had to do the two free online patterns that I handed out to the EGA Brandywine Guild members. Some of us will be getting together on Thursday for a Stitch-In at Fireside Stitchery.
I did this pattern, Autumn Windbreak by Sue Meier, previosly using a red and blue Waterlilies but hadn’t left room for the bottom zigzag border. By counting better, the whole pattern just fits on the towel. To end the thread, I ran the needle and thread into the center of the edge where it’s folded for about an inch before bringing the needle out and cutting the thread. I like it better than running back through on the front. The pattern can be found on the Wayback Machine at https://web.archive.org/web/20090419090854if_/http://www.nordicneedle.com:80/newsletters/stash/10/autumn_windbreak_09_29.pdf
This second pattern, Broken Arrow, came from Swedish Weave Designs (.com). I hadn’t gotten it done prior to our April session but I can bring it to our May session when we do crayon transfer.
I used the variegated DMC Pearl #5 4030. This was tougher than I expected. For some reason, I had a heck of a hard time with the mirror image on the bottom even though I had the whole pattern printed. But, it’s a pretty pattern and is now our current decorative towel in our bathroom. Bill understands that it is not to be used!
I’ll swap out towels for some variety.
Filed under: Brandywine Chapter, Embroidery Guild of America, Huck Embroidery Towel
Maureen C has done a wonderful resurrection of the EGA Brandywine Chapter’s website. It was abandoned by a member who got ill and it took quite some time (a few years) before we could get it back and find someone capable of taking it over. So, I suggest chapters have multiple people capable of handling your website and who have access approval as back-up.
There is a list of upcoming and past programs for the EGA Brandywine Chapter under Prgrsms tab at https://share.google/srCSue0YtEEpS01aw. You can also see recent Show and Tell pieces under the What Members Are Making tab.
We did Huck Embroidery yesterday, crayon transfer in May, and Or Nue (a Brenda Kocher design similar to one I stitched previously) in June. More on that another time.
Thanks to Linda M from Main Line Stitchers chapter who donated her stash skeins of DMC Color Variations. I’m looking forward to seeing everyone’s towels.
Last night, Judy, Merril and I joined forces to cover Sashiko stitching at our Needlework and Fiber Guild of Media (we meet on the 2nd Tuesday of the month at 7 pm). From my research on the topic of Sashiko, it is a traditional Japanese stitching technique used for decorative and functional purposes, while Boro refers to the patched textiles resulting from repeated mending, embodying a history of resourcefulness and sustainability. So, a Zokin must be a type of Boro since it is a traditional Japanese cleaning cloth made from old clothes, towels or fabrics.
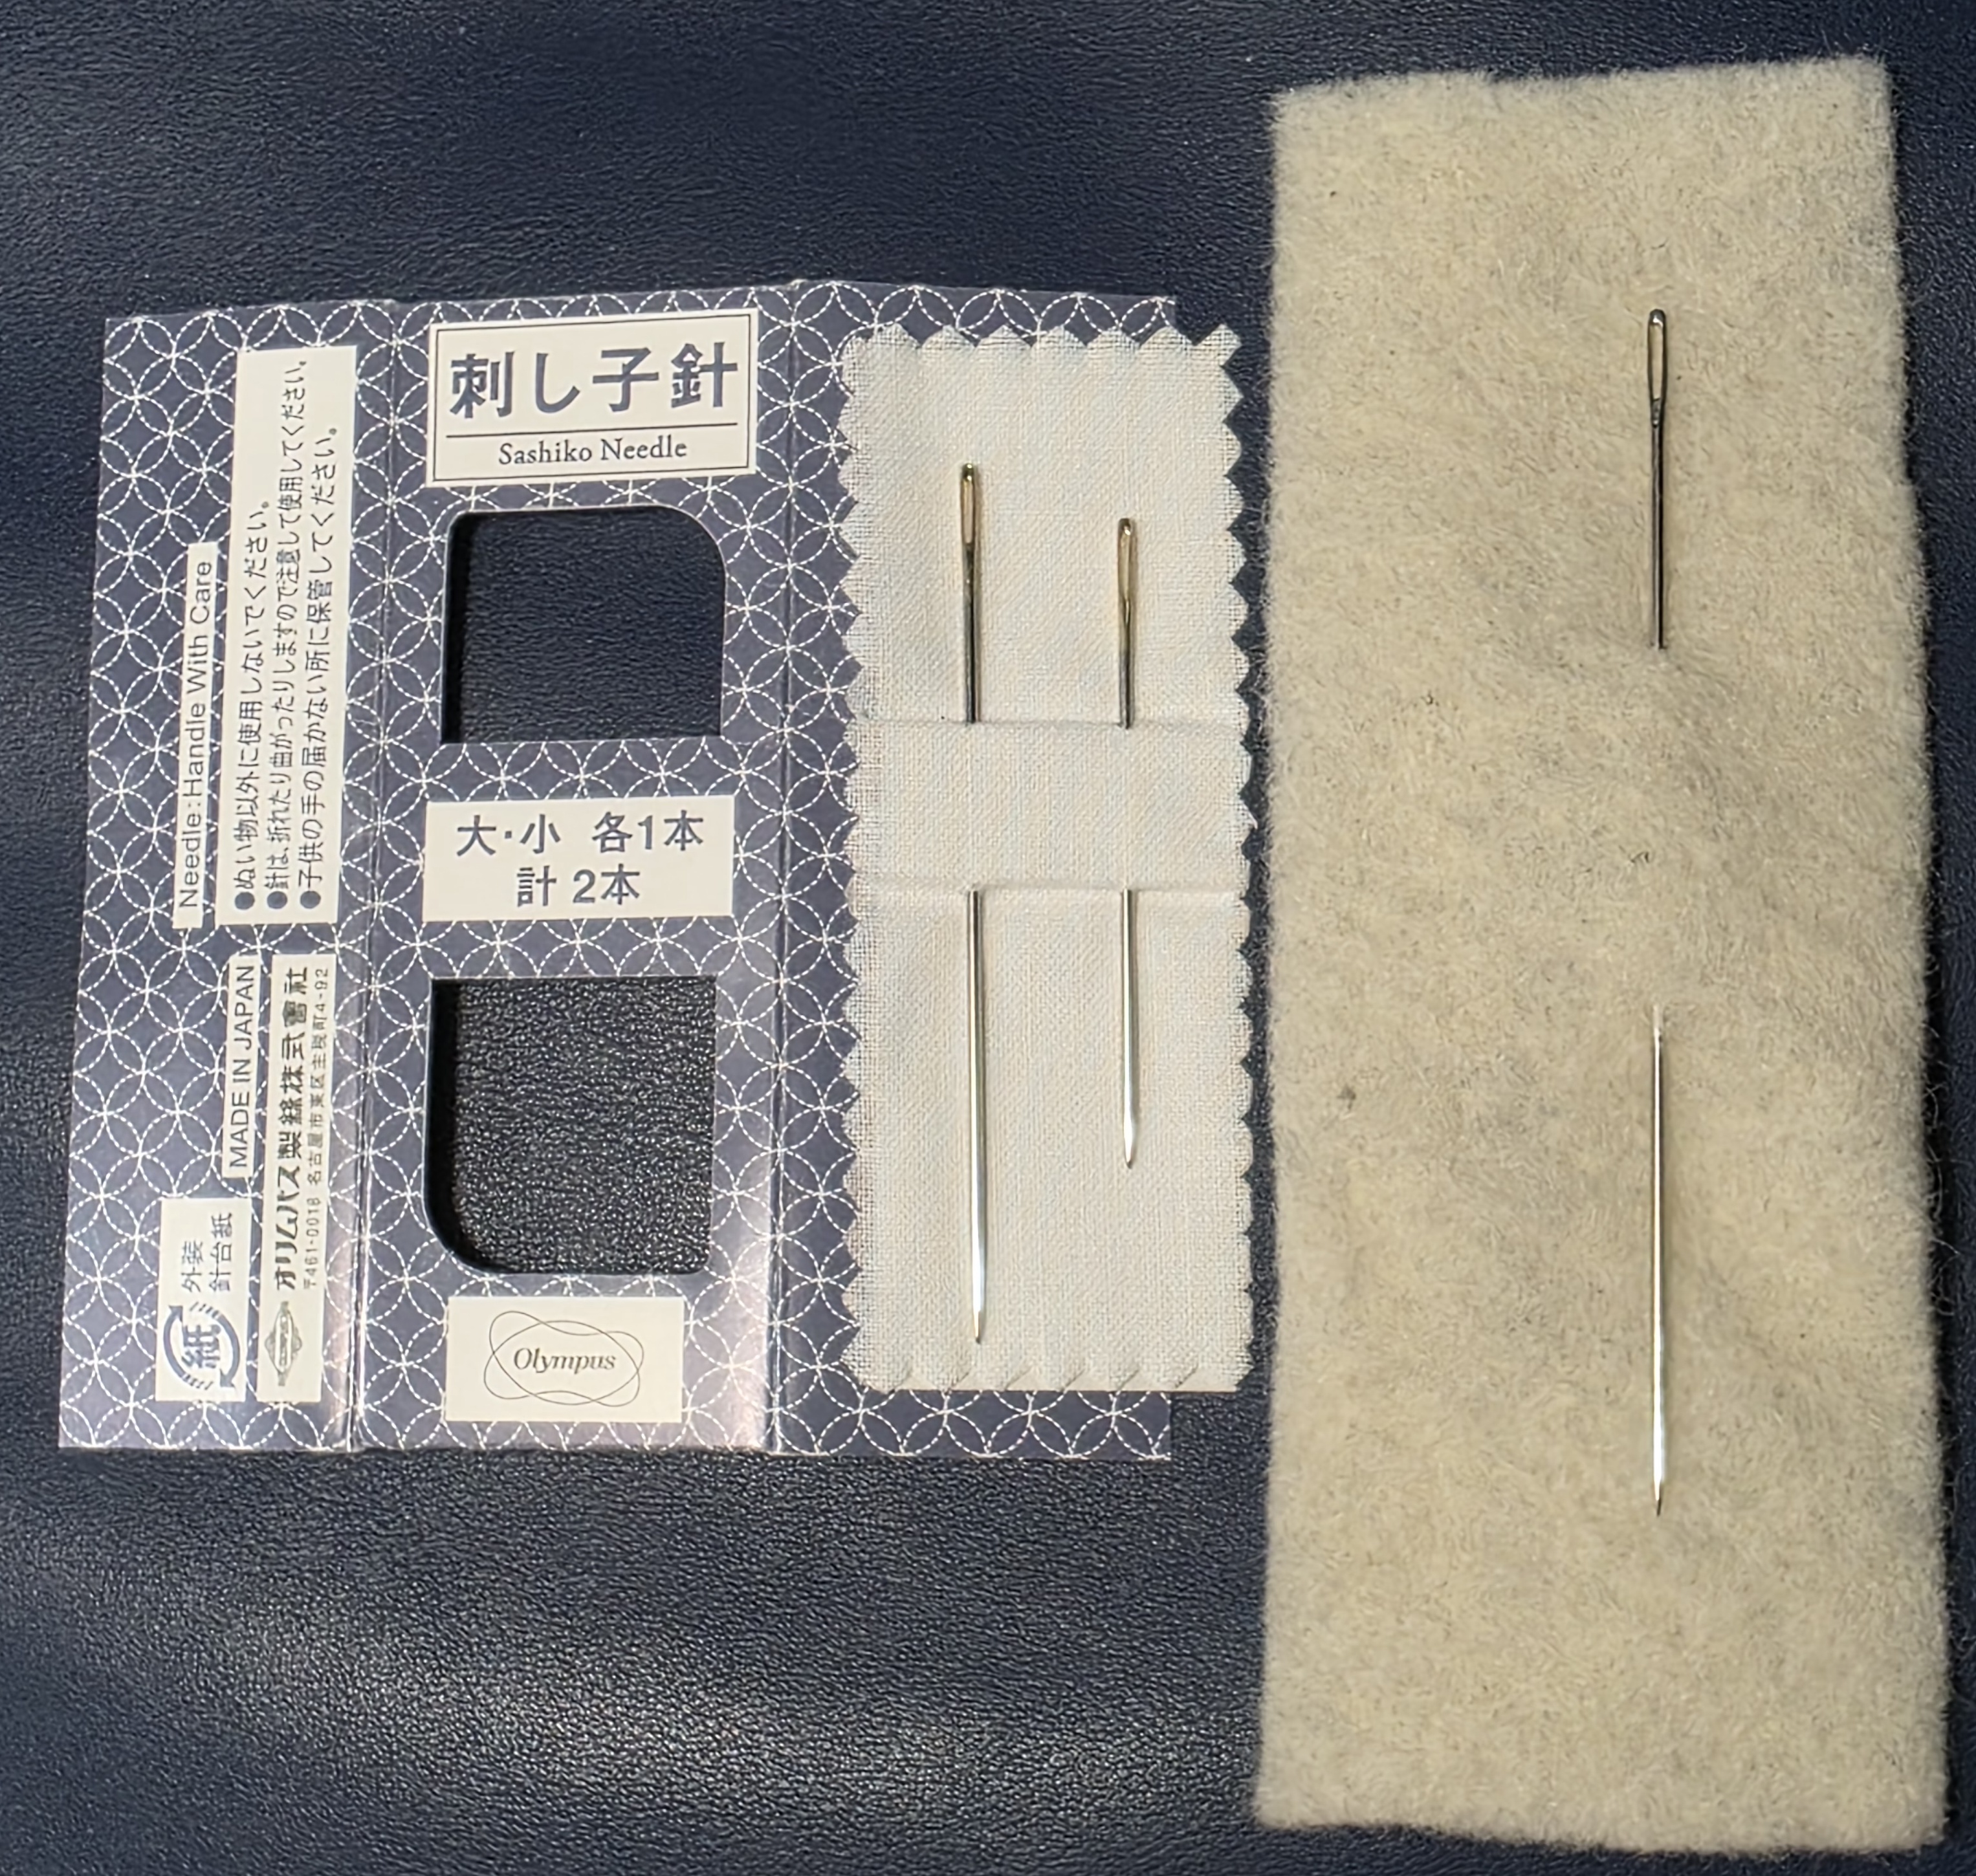
I showed my Zokin and discussed it previously (Zokins | Melitastitches4fun’s Blog). After Show & Tell, we dove into Sashiko. Merril had fabric swatches and threads. I brought threads too. The chapter purchased Sashiko needles for everyone. This is one large needle! Puts my 2 needles to shame.
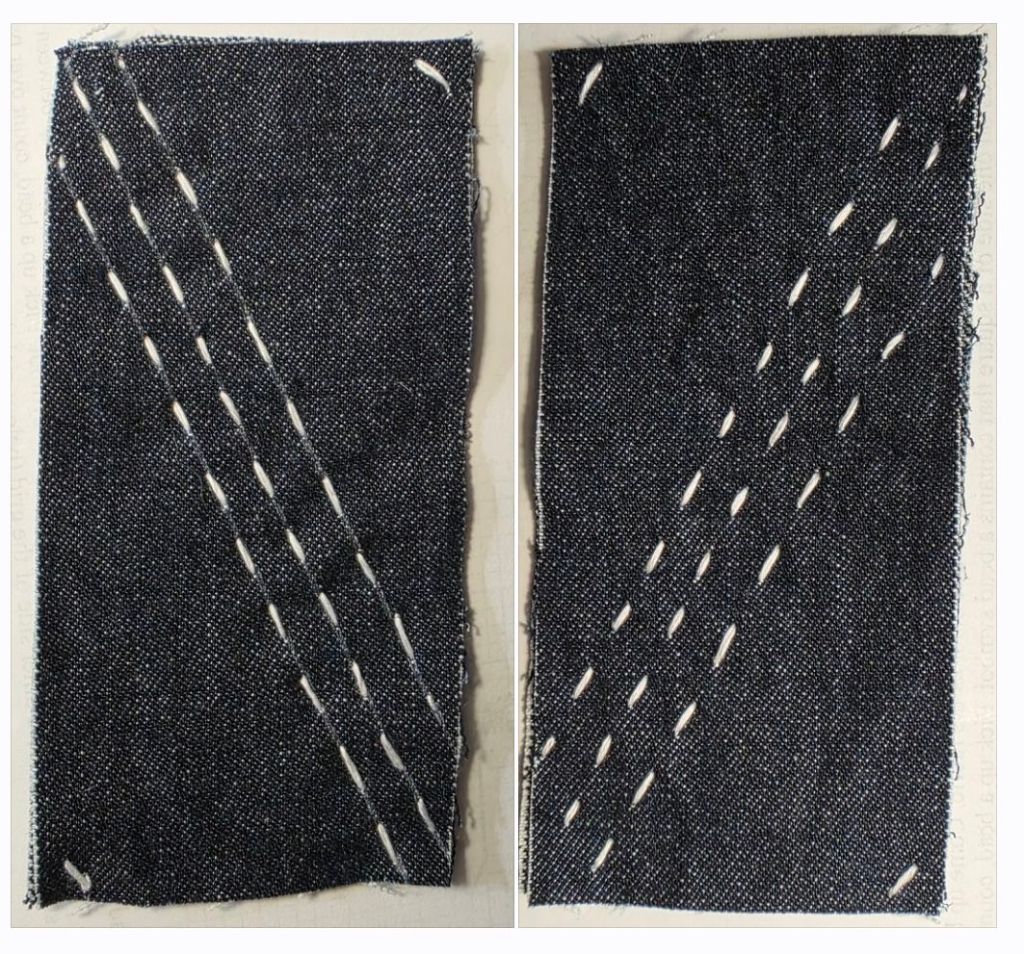
We each got 3 fabric swatches. Two decorative ones and a blue denim to make a needle book for the Sashiko needle. But, I have a box I store my needles in. So, I made a bookmark.
Merril came with rulers and fabric marking pens. We didn’t have a lot of time and I just did 3 parallel lines in the basic running stitch. It’s a reversible stitch. Without marking the stitch lengths, this was as even as I could get. I wasn’t going to get particular about it. Having loose edges with threads fraying makes this an art form that I don’t need to pursue although I do have a small notebook that I was thinking of covering with fabric.
Sue S and Kathy A got us primed for next month’s penny rug project by having us work on these hearts. The materials supplied were precut felt heart shapes, floss, batting, and a button. The buttonhole stitch allowed most of us to finish prior to lunch. I attached the loop to the batting before closing the two sides.

Unfortunately, I will miss next month’s project.
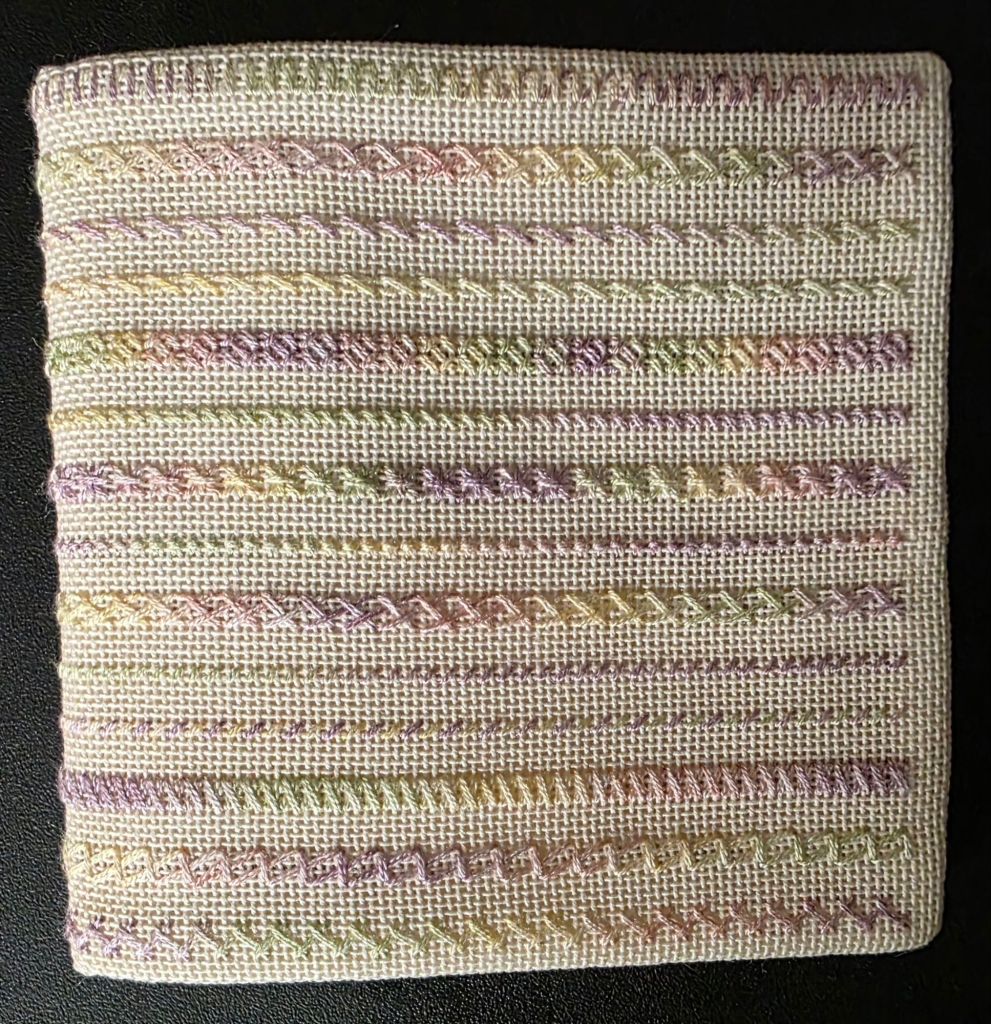
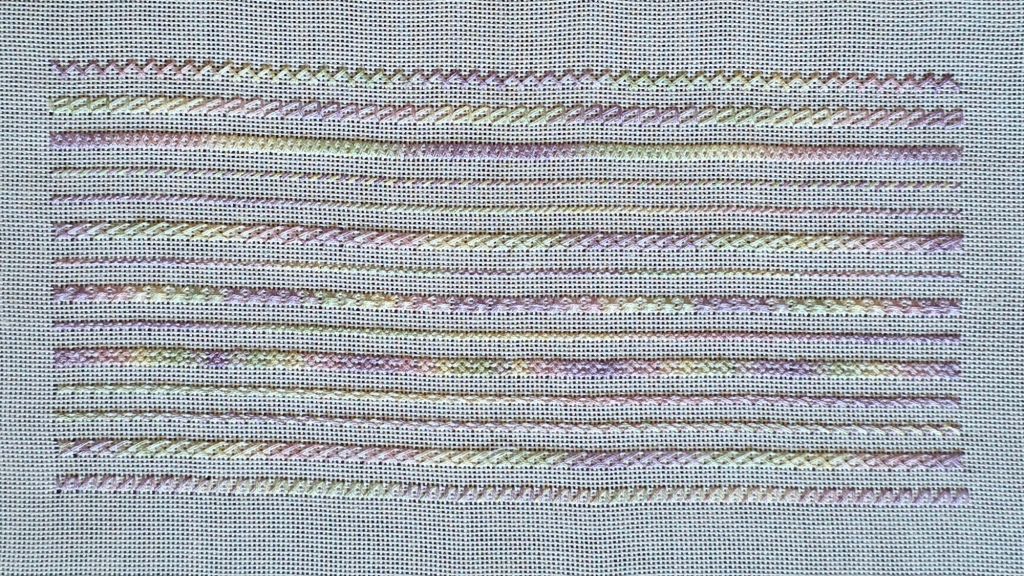
Filed under: Brandywine Chapter, Cross Stitch and Beyond by JoAnne Westerhaus, Embroidery Guild of America
I’d picked up Cross Stitch and Beyond by JoAnne Westerhaus (with some additional rows) off and on over the last couple of months.
EGA Brandywine Guild held our Quarterly meeting last Wednesday and I stitched rows 9 and 10 there and finished it during the baseball playoff games. I have stitched the Montenegrin stitch (row 13) before but have done it differently.
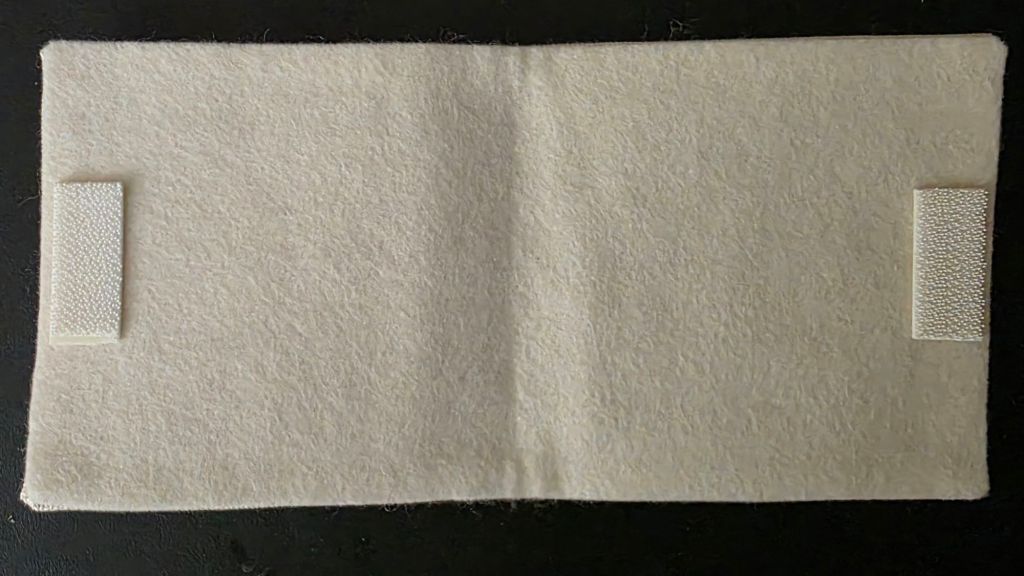
Then, I finished it into a thread bed. That is a place to lay to rest some working threads until you need them again while working on a project. Patrick made his into a thread bed and it looked like a great idea and useful.
I make up my finishing as I go and use what supplies I have on hand. This is just for me!
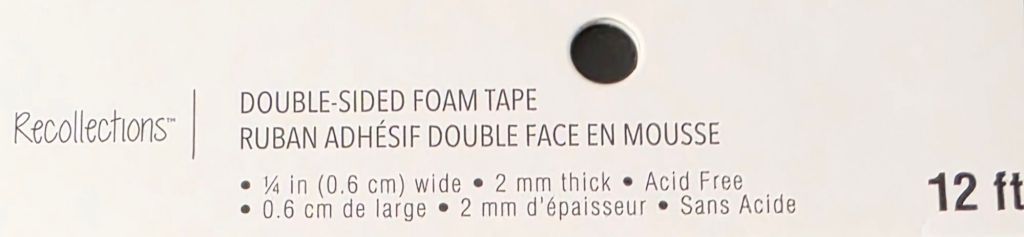
I didn’t want anything too thick. This peel and stick backing is super thin and been in my stash for years! I cut one large piece and had a strip left over that fit perfectly on the end. And, I added an edge of double sided foam tap that’s also been in my stash for years.
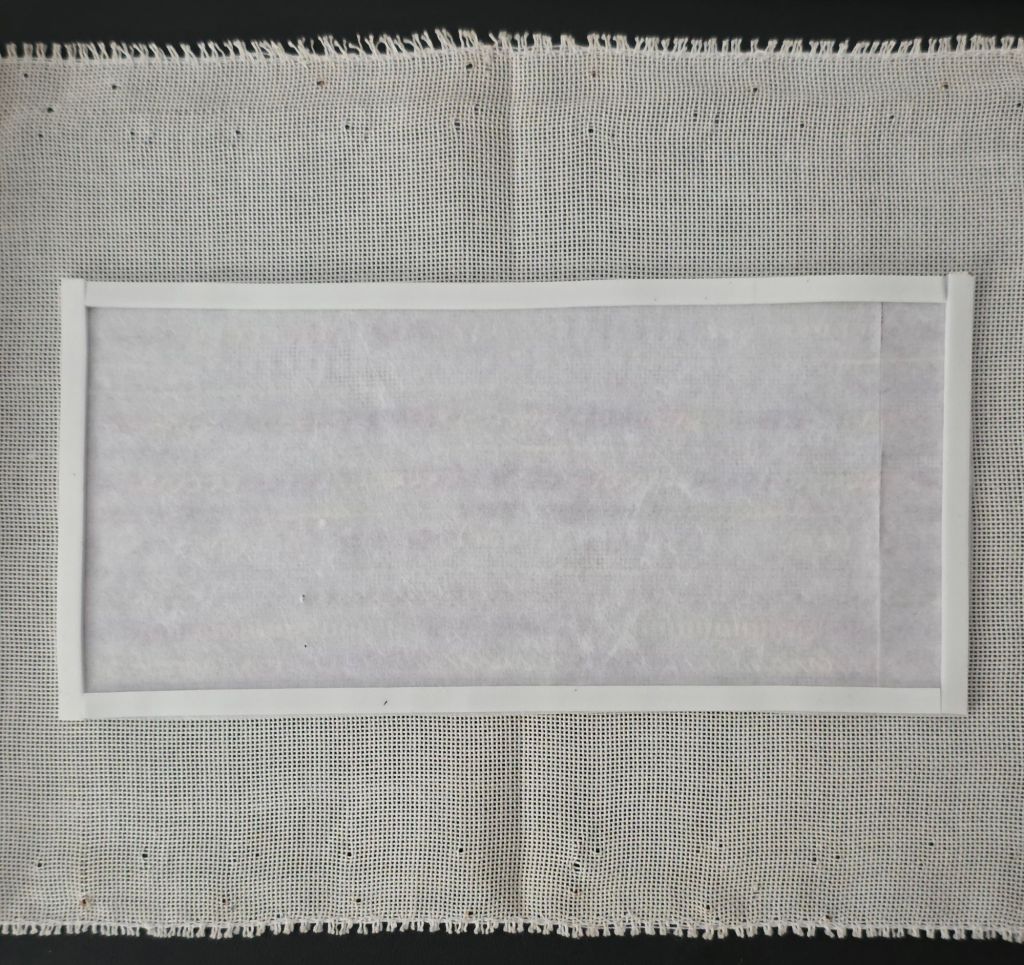
The Congress Cloth folded over and came together in the center. It was meant to be!

I trimmed, folded, and glued the ends in place with Aleen’s Super Fabric Adhesive.

I used this double stick fusible web (the last one in the package).

I cut the fusible web and felt to size and attached white Command Strips rather than Velcro because my Velcro squares were black. I wanted white and these link together really nicely whereas Velcro rips the one side apart. So, I’m glad I used what was available.
Is it possible the fusible interfacing is old and not working well? Also, I was not happy with the puckering in the fold area. Any recommendations for next time on how to not to get any puckering?

I sewed around the edge using Coats and Clark Quilting & Piecing 35 wt thread. While I was at it, I tacked the Command Strips in place using a really sharp leather needle and a thimble being very careful not to jab myself. It’s much better now.

Here are a couple of threads ready for bed. You can leave needles threaded because the lining is felt (not craft felt which isn’t good for needles).

Now they are tucked away for bedtime!