Filed under: Brandywine Chapter, Chatelaines, Embroidery Guild of America, General comments, Scissors, Tools
Patrick led us through making chatelaines today at Blue Santa Beads in Media. I needed a special tutorial from my neighbor, Susan, after she figured it out while Patrick helped others. There were 10 of us there. He did an excellent job of getting us through this project. Getting rings on is not easy. I had 2 different sets of instruction and they still don’t make sense!
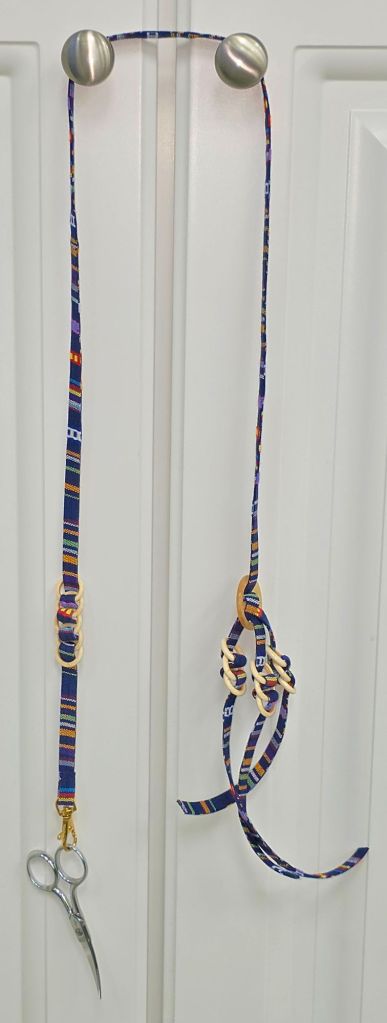
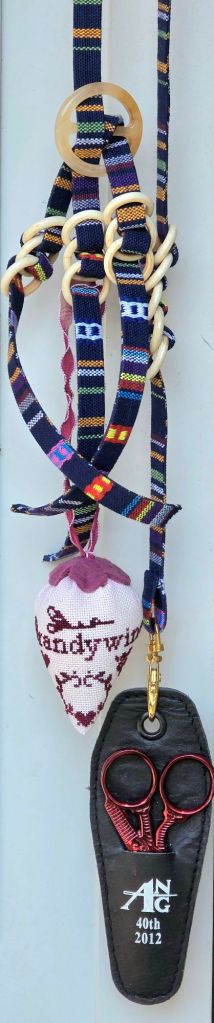
When I got home, I found scissors that have a protective leather sheath so that I won’t get stabbed when I wear it. It’s from ANG 2012 Seminar in Philadelphia celebrating the Guild’s 40th Ruby Anniversary. And, I placed the EGA Brandywine Guild strawberry on the other end. I can add 3 more tools. I haven’t decided what else to add.
I had cording and rings left over. It’s not long enough to hang around my neck. And, I don’t know what I’ll do with it yet. But, something will come along.

There was plenty of time to shop for beads for 2 other pieces that I’ll be posting about over the next few days.
Filed under: Brandywine Chapter, Embroidery Guild of America, Strawberry Pincushion
Today, in the rain, Patrick and I were pleased that 10 members of our EGA Brandywine Chapter joined us for today’s project.
Patrick created the design which was distributed last month. Several had finished stitching it while others were still working on it.
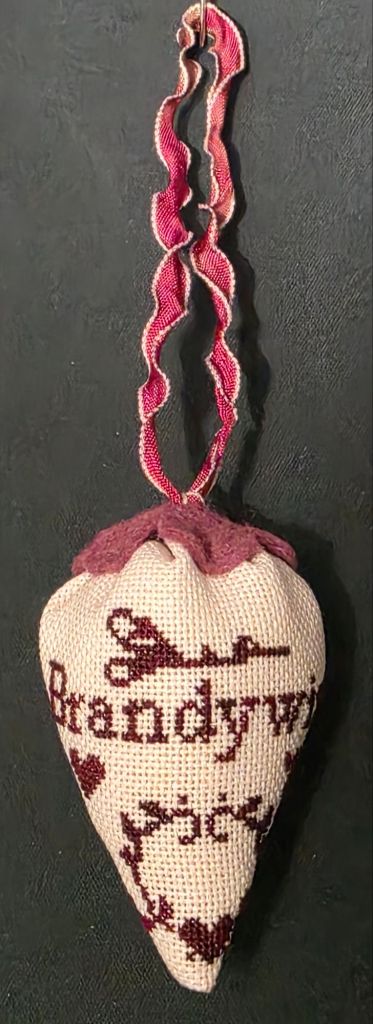
Mine was the smallest (about 2 and 3/8″ x 2 and 3/4″). I used Lugana (28 count in an Angel Blush that is slightly pink) and stitched over one canvas thread.
Patrick led us through making it into a strawberry. He and JoAnne had stuffing. We also could have used walnut shells she brought! Patrick had a variety of colored felt and ribbons. He also had buttons we could have used. Here’s mine. It turned out great!
Filed under: Brandywine Chapter, Embroidery Guild of America, Strawberry Pincushion
Patrick and I volunteered to be co-Presidents for one quarter of our EGA Brandywine Chapter’s year of meetings.
For April, we had a Zoom speaker, Toni Gerdes, speak on Additions to Stitching. I heard it recently through the ANG San Bernadino Chapter and enjoyed it again. There are several threads that I haven’t seen anywhere and a couple of ideas that I will try.
We handed out the motif Patrick designed, and I diagrammed. Then, in May, we will lead people through its assembly into a strawberry pincushion. For June, we go to Blue Santa Beads to make a Chataline.
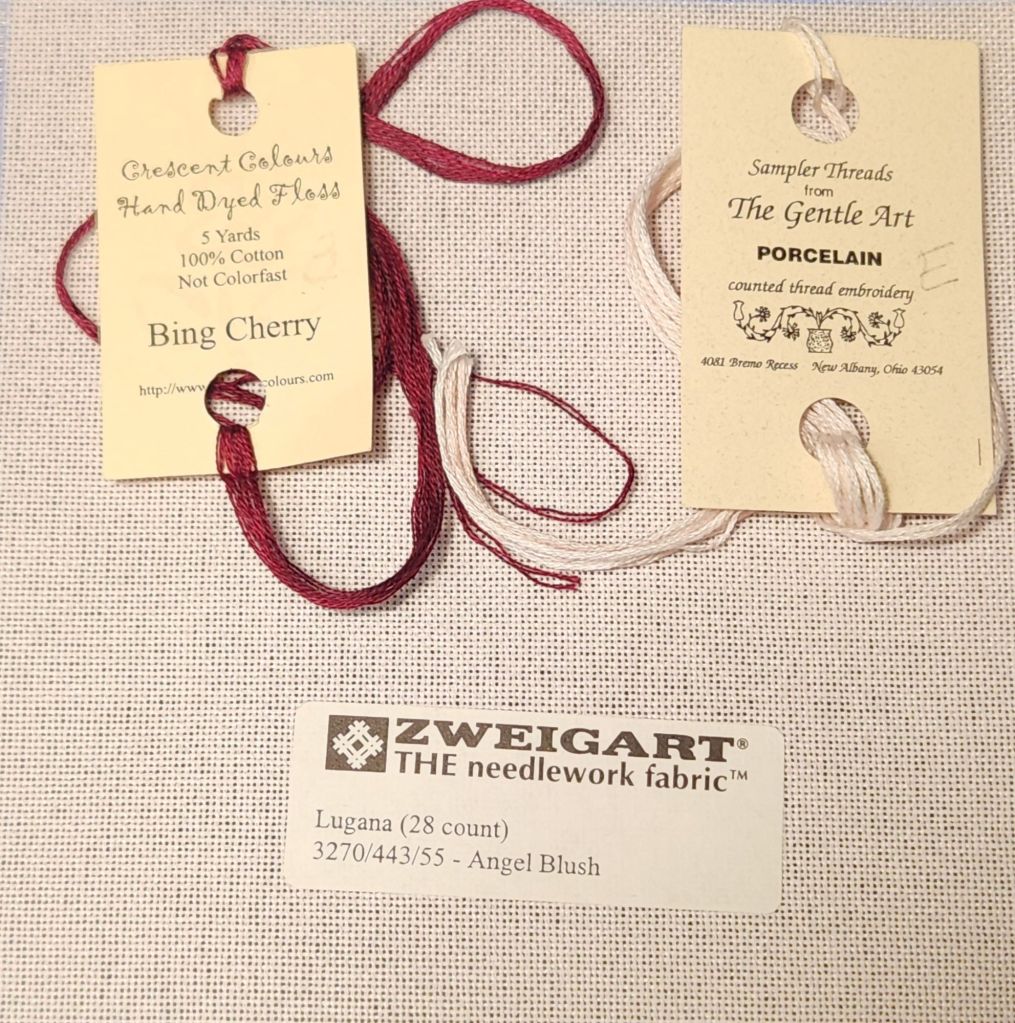
I had a piece of Lugana (28 count in an Angel Blush that is slightly pink) and stitched over one canvas thread for a small one (about 2 and 3/8″ x 2 and 3/4″). Patrick stitched over two canvas threads for a larger one (about 4″). My stash had Crescent Colours, Bing Cherry fot the motif, and I’ll use Sampler Threads from The Gentle Art, Porcelain for finishing.
It turned out great and was ready to show at my EGA Brandywine Guild Chapter Quarterly meeting yesterday.

Patrick, Karen, and I had plenty of ground fabrics in different counts (24 – 36) and colors for people to choose. People had fun selecting theirs. Tough choices!
Filed under: A Spring Sampler, Brandywine Chapter, Embroidery Guild of America, General comments, Needles, Tools
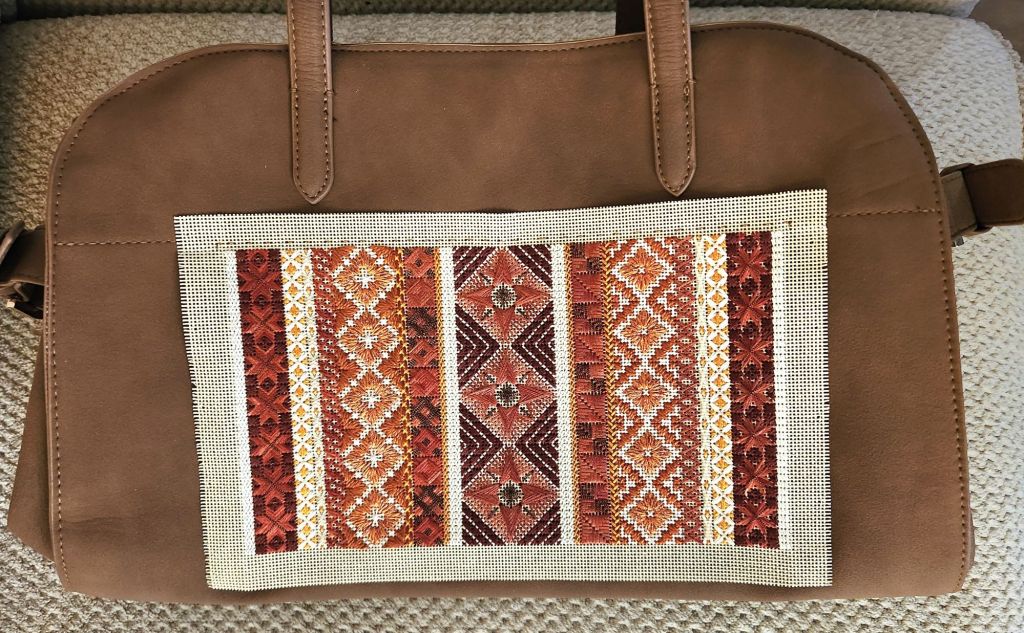
I found this bag at Target (https://www.target.com/p/solid-soft-satchel-handbag-a-new-day-8482-tan/-/A-91898942). It’s 10″ (H) x 15″ ![]() x 8″ (D) – perfect for the fall color skinny version of A Spring Sampler. Good price, too ($35). It will hold my battery pack, the Chapter’s eMeet speaker, Chapter business cards, travel tool kit, portable light, and curling iron. I am avoiding glue for this bag.
x 8″ (D) – perfect for the fall color skinny version of A Spring Sampler. Good price, too ($35). It will hold my battery pack, the Chapter’s eMeet speaker, Chapter business cards, travel tool kit, portable light, and curling iron. I am avoiding glue for this bag.
I needed the needle for leather from my Home Craft Repair kit of needles because the bag is made of polyurethane. I pinned the canvas in place and stitched through the inner lining, but it isn’t puckering too much, and I retained full access to the 2 cell phone pockets on the front inner side. Here’s the top edge attached.
The process of stitching the top in place made me think a thimble and a curved sharp needle would make the sides and bottom easier to stitch through the bag and hopefully not catch the lining. And, at this point, my hand needed a rest, and a trip to Joann’s was needed to get the sharp curved needles because I only have tapestry curved needles.
The curved sharp needles didn’t work well. Leverage was the problem. But, the package came with a small eye, very sharp straight needle. The real improvement came because of the Dritz thimble. What a difference that made.

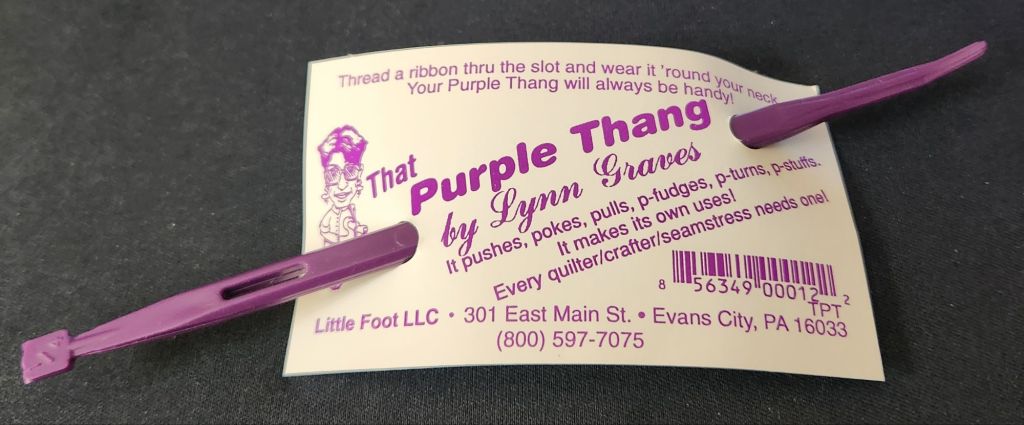
An aside: In order to find the thimble when I need it again, I am putting the thimble in my Stitch pen/tool cup on top of That Purple Thang by Lynn Graves which I have not used much (if ever). If I get rid of it, I’ll need it!
I was able to pull the lining away on the sides and bottom and push the needle through the front of the polyurethane, angle the needle back to the surface further along the canvas like a running stitch. I didn’t care how far. Some stitches are longer than others but the trim will cover it.
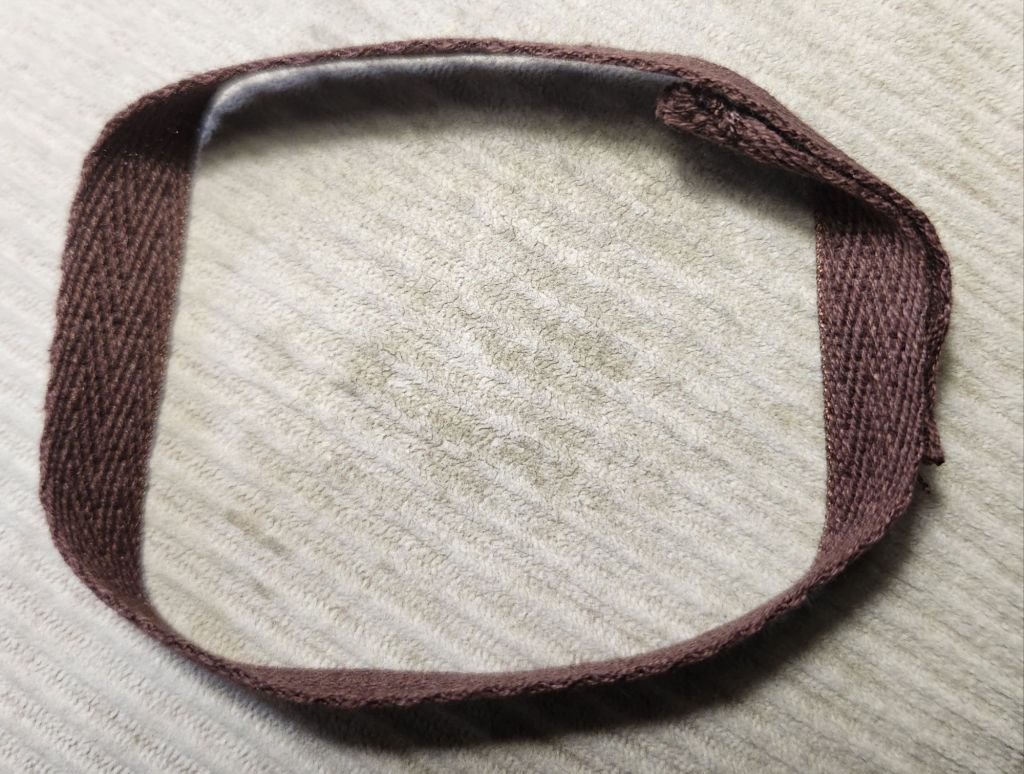
Once all 4 sides were attached, I cut the canvas down to 7 canvas threads wide and attached the trim. I found a 1/2″ wide dark brown flat trim at Joann’s. And, Mandarin Floss M833 was a perfect color match. I decided to catch the polyurethane and canvas periodically as I attached the trim down the center using 2 strands. I pulled out my mini pliers and that helped too.
When Bill and I were in the store looking at different trims, he placed this trim on the needlepoint and folded it around a corner. Before I started, I worked out how to do that on all 4 corners with a short length first. I had to cinch the ends together to stop them from fraying (no glue) and taper them to hide the ends easier.
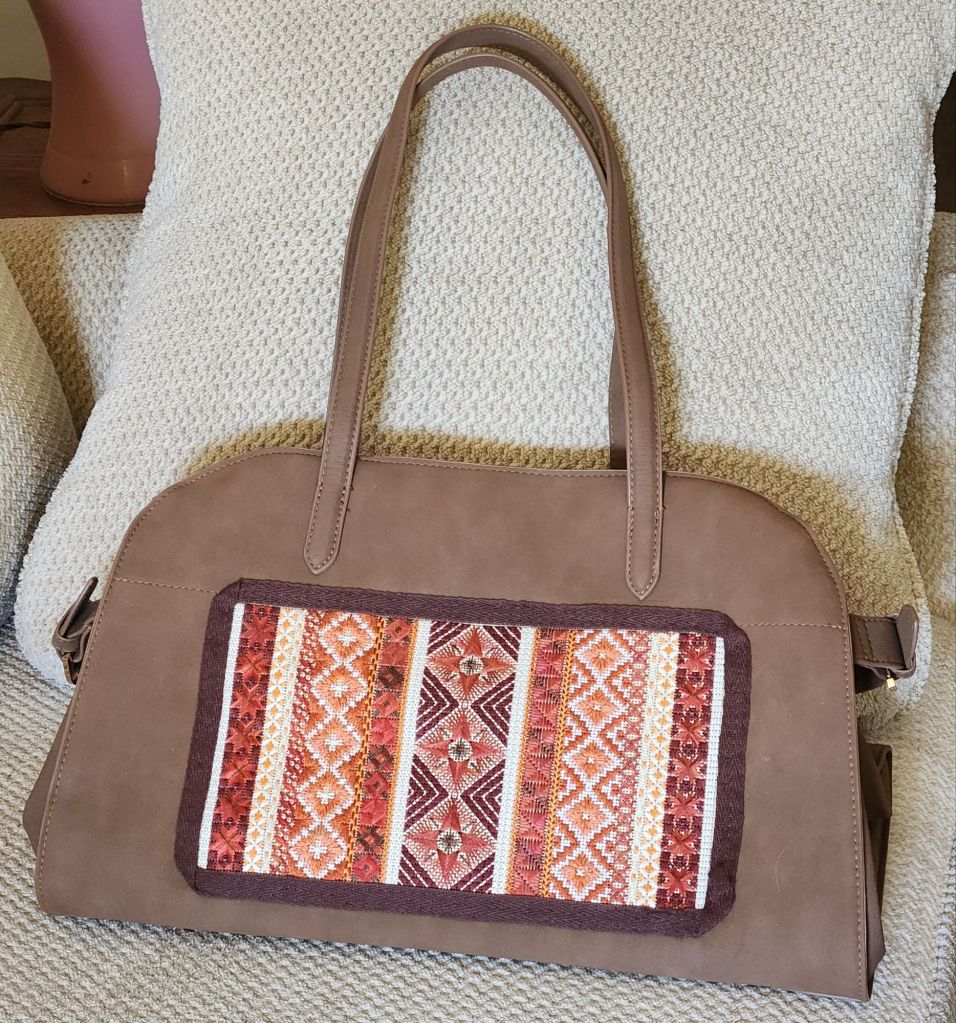
I went back around a second time with one strand to sew down the outer edge. It probably took me 12 hours altogether since starting this on Thursday. There was some cursing but no bleeding. I didn’t jab my fingers once! I was very careful. That leather needle would have hurt.
The most exciting part is that it’s even at 1.75″ above the bottom edge. It looks good and no glue!
Filed under: A Spring Sampler, Brandywine Chapter, Embroidery Guild of America
My skinny version of A Spring Sampler in a fall colorway is done! I started this with my EGA Brandywine Chapter in October 2023. I did this one less wide (5″) and with an overdyed thread that doesn’t have a lot of color change. So, I had to modify 2 bands to remain symmetrical. I also worked out the half motifs in case anyone was interested and less worried about symmetry. At least one other member was making it smaller.

Using an overdyed thread without much color change within the skein looks pretty. It reinforces my thought that contrast of values is very important.
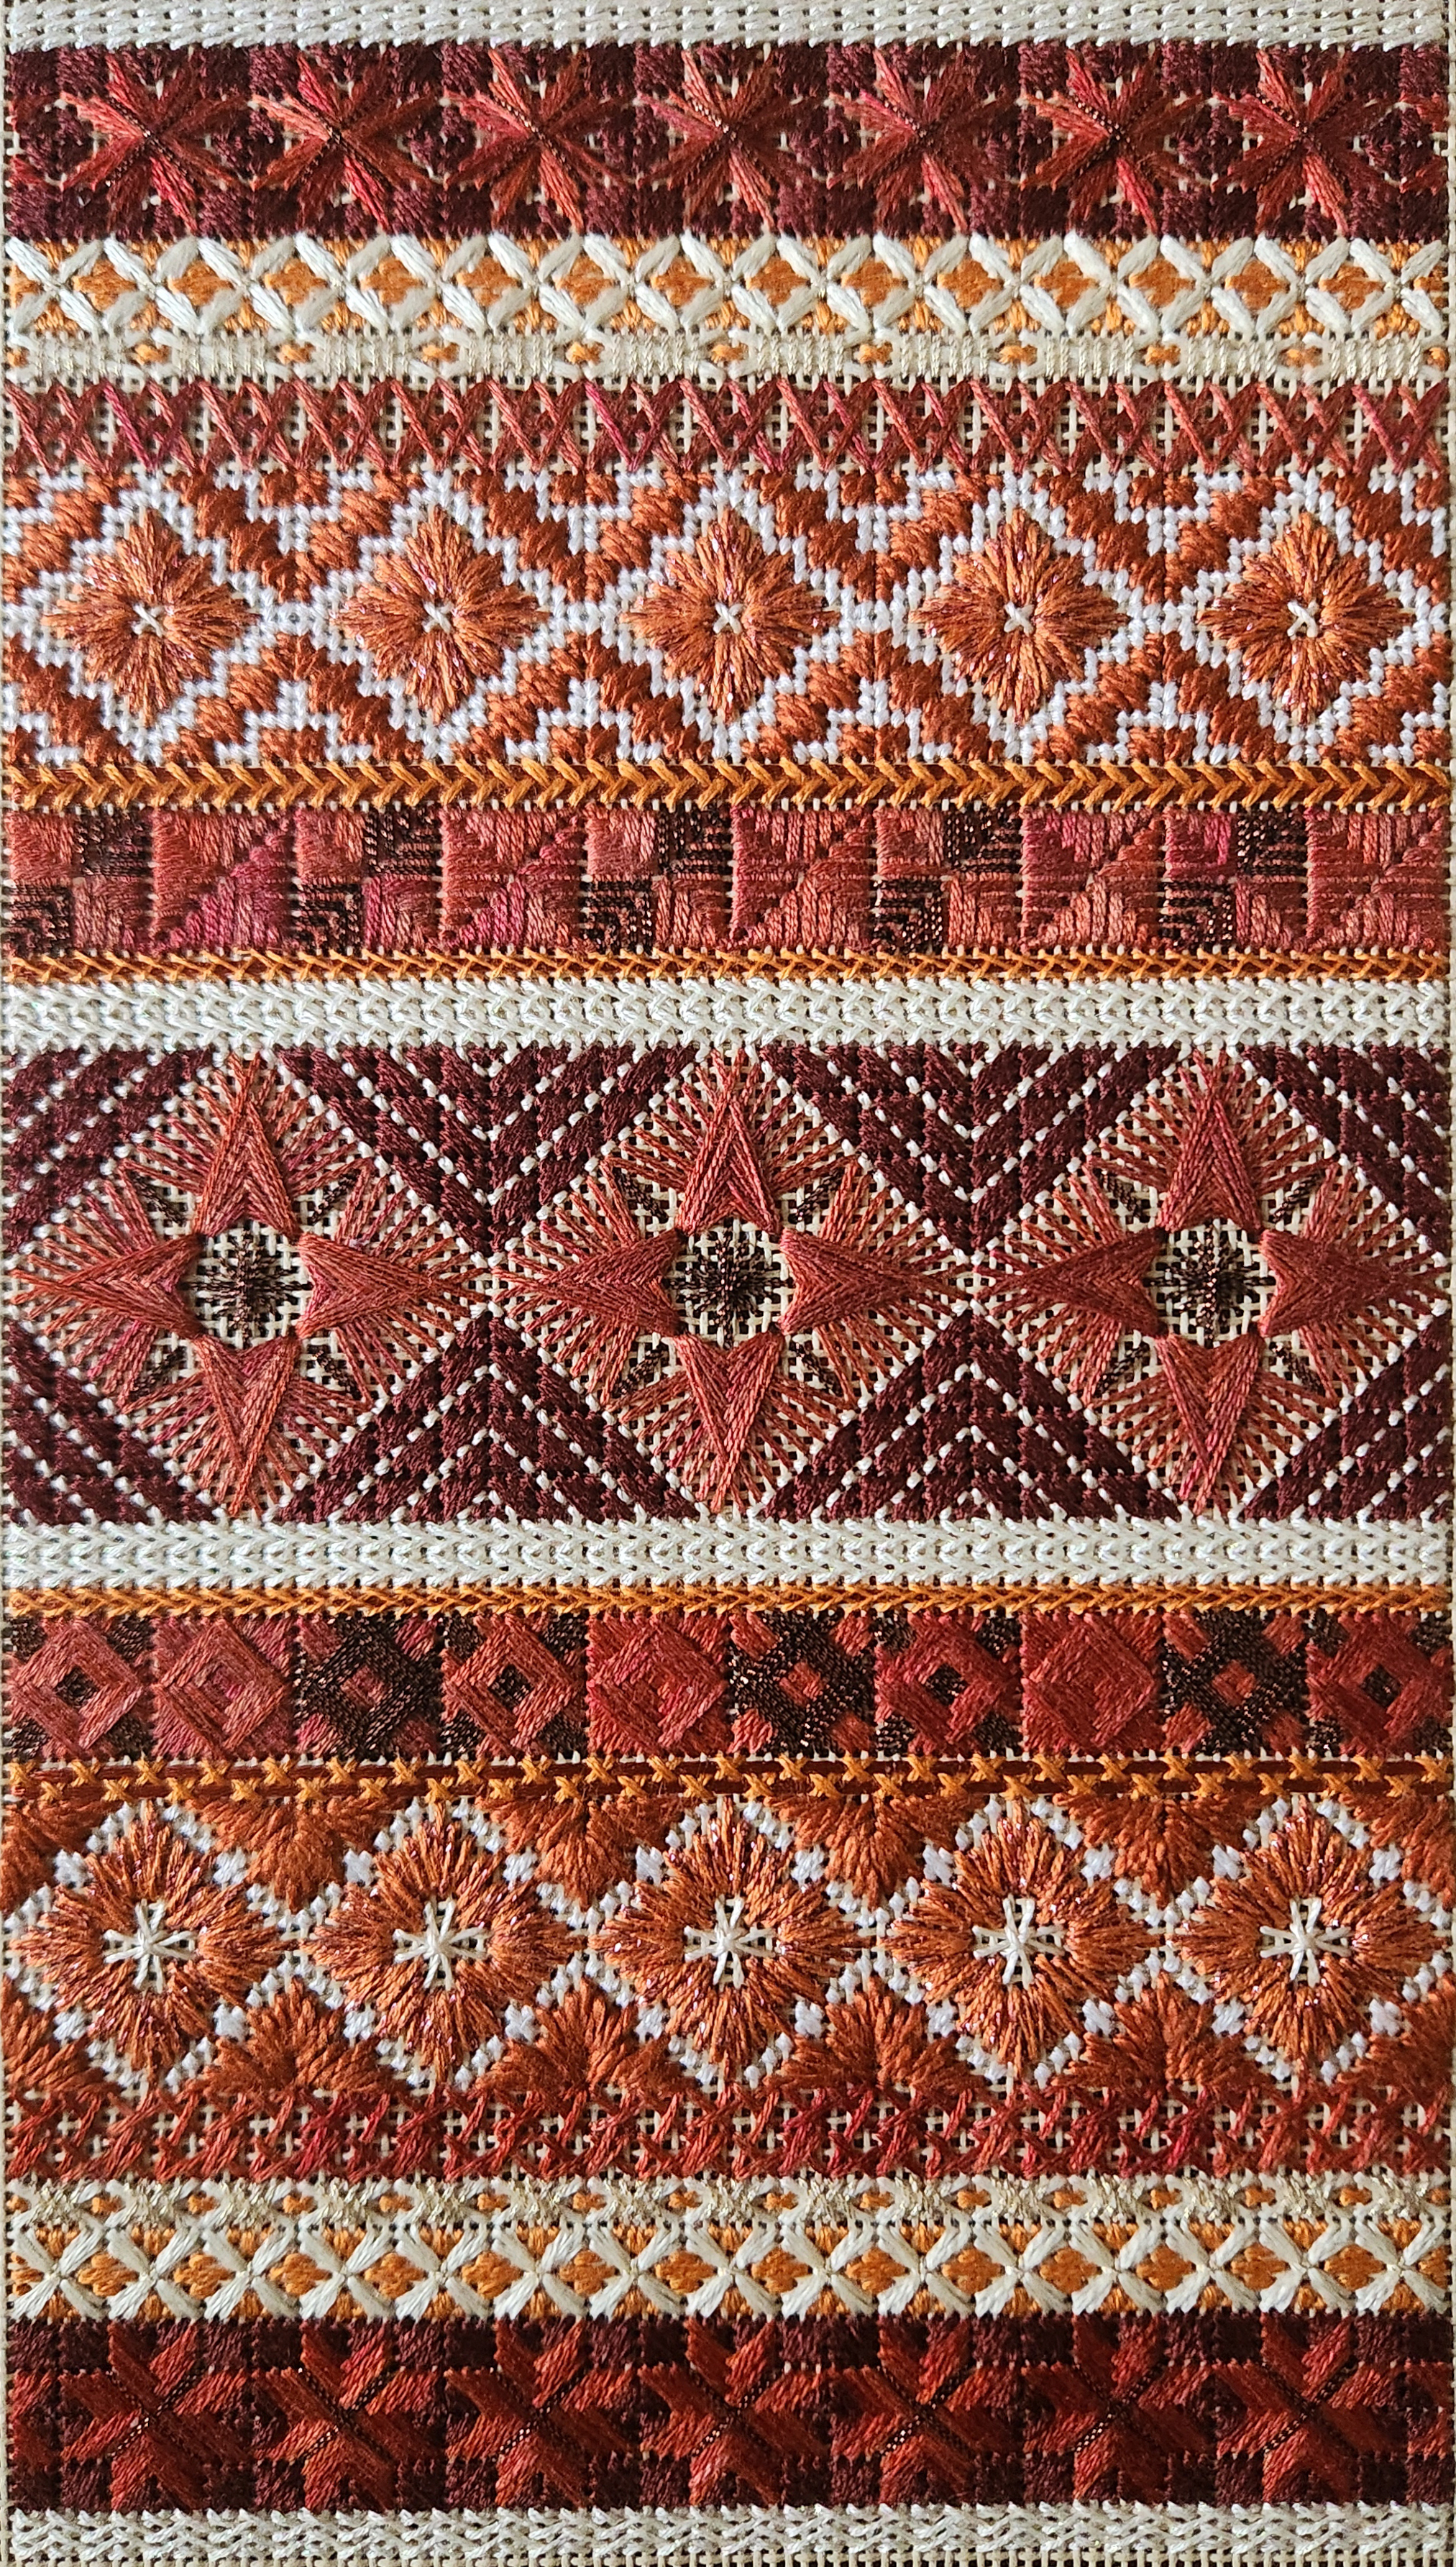
What should I do with this 5″ x 9″ stitched design? Your thoughts would be appreciated.
Filed under: Brandywine Chapter, Embroidery Guild of America, Roman Ruins by Joan Rinehart
My EGA Brandywine Chapter decided to try Casalguidoli embroidery, which turned out to be easy enough thanks to Joan Rinehart’s design, Roman Ruins, an EGA Petite Project. There is a Group Correspondence Course of a dragon that would be tougher because the width varies from head to tail.
Roman Ruins is good for beginners in this technique but takes more than “a few” hours to complete. I worked on it 3 nights for quite a few hours each night. But it’s not a difficult project (5″ x 7″). It’s diagrammed like a cross stitch pattern, which now that I’ve been away from large cross stitch pieces for some time, I got off count slightly but not significantly.

Then, it was decided to teach it on linen because one of the board members found this project, Casalguidi Flower by Becky Quine, on Etsy. So, I found a piece of Lugana 28 count (yellow) in my stash (the model was on blue), purchased the piece, and stitched it. One of the challenges was the padding under the column, but the rest of the embroidery stitches were even more challenging. I learned the curl stitch for stems and woven picot (attached and detached). For a first attempt with these types of stitches, it’s good.

I am glad the board agreed I could teach it on canvas because it’s so much easier on 18 count canvas. Then, people can stitch a project on canvas, linen, or just store the stitch away for reference. These stitches could all be done on canvas. We just did a 2″ sample to get the hang of it.
Roman Ruins uses a running stitch along the sides that isn’t used in Casalguidi Flower, doesn’t incorporate the typical four sided stitch seen in the background of Casalguidi Flower, and the columns in Roman Ruins are not padded but it is padded in Casalguidi Flower.
Further investigation on the technique from Mary Corbet’s website reveals that Roman Ruins is probably more accurately called a raised stem stitch. See needlenthread.com/raised-stem-stitch and needlenthread.com/casalguidi-stitch. Mary has great photos and instructions. Give it a go!
Filed under: Brandywine Chapter, Crewel Wreath by Lucy Edmison, Embroidery Guild of America, Petite Projects
A hot start to summer seems like a good time to post this.
Members of my EGA Brandywine chapter gathered to stitch The Crewel Wreath by Lucy Edmison in mid-March. Joann had gathered all the materials for the kits, which were given out free to members. And, I led folks through the EGA Petite Project, although they really didn’t need much guidance.
Joann supplied Appleton wool, which is the preferred wool for crewel. I used it and it worked ok but I am just not a fan of it or wool in general. In the 3 hours I got pretty far along but Barbara was almost done! I know it’s not a race. Barbara said she just allowed the stitching to flow and that is how you should let random placement progress. I used up almost all of the wool. So this one is a little fuller.
I am particularly happy with how the bow turned out. Joann shared how bows were made from “Sandy’s Finishing Touches” by Sandy Higgins. It took me 2 attempts to get the correct size. Joanne had given us plenty of ribbon.
My first wreath is on the left and my second on the right.
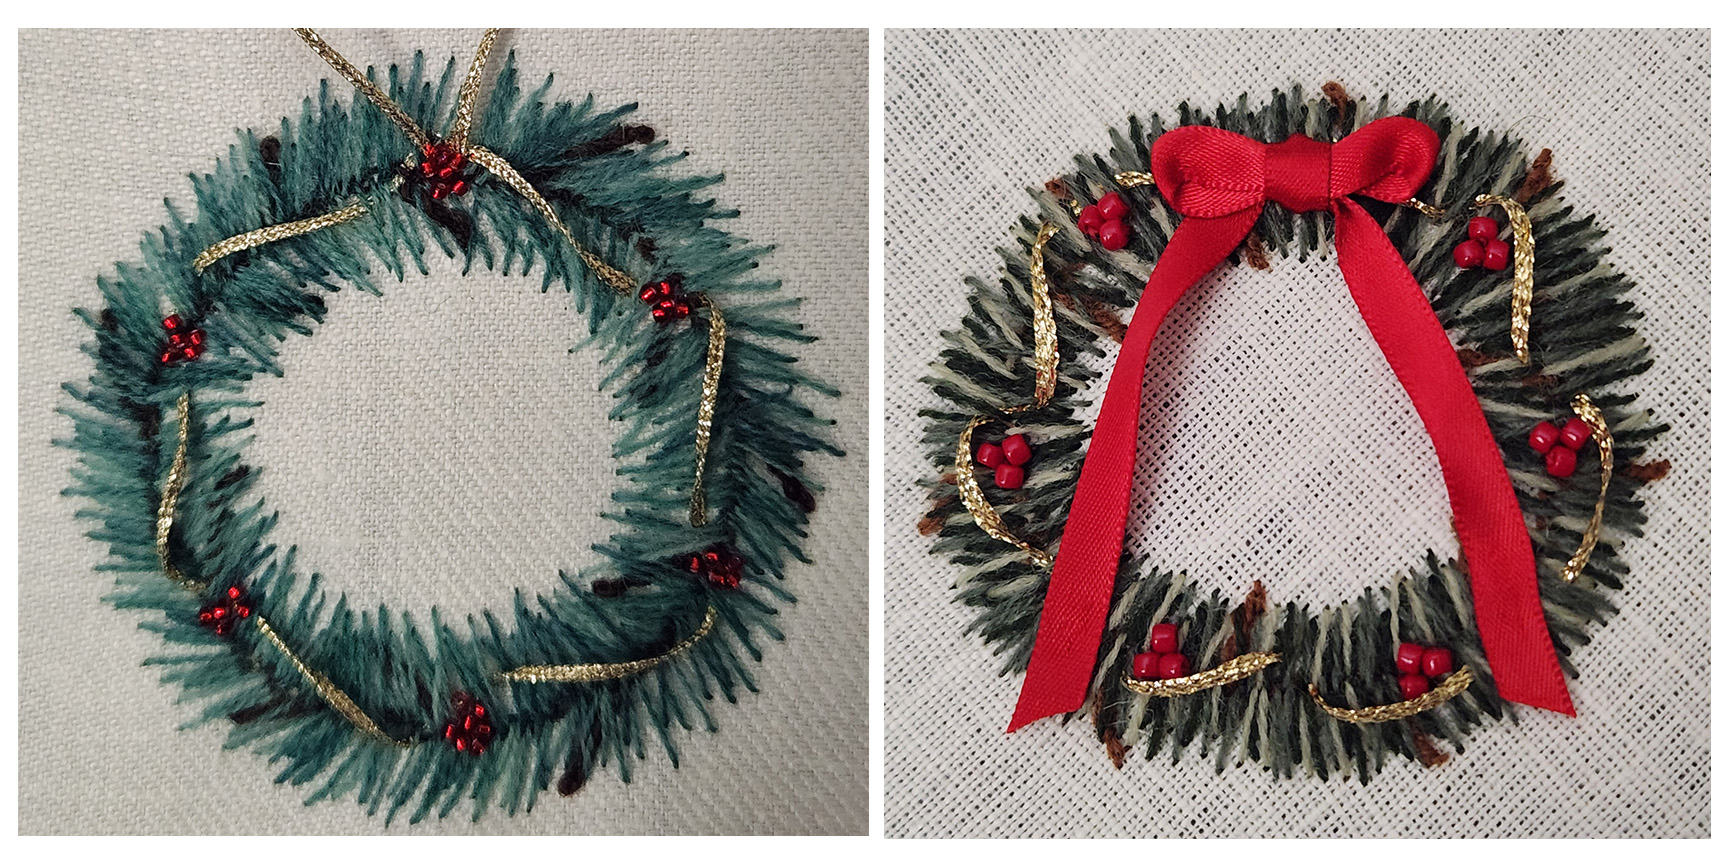
I did the finishing myself.

Crewel Wreath 1 was posted previously at https://melitastitches4fun.com/2023/12/03/post-dec-6-crewel-wreath-by-lucy-edmison-from-egas-website-for-the-brandywine-chapter/
Filed under: A Spring Sampler, Brandywine Chapter, Embroidery Guild of America
I had a Stitch-in Tuesday with my EGA Brandywine Chapter members. Patrick has been stitching on this project with regularity, and it’s coming along nicely.
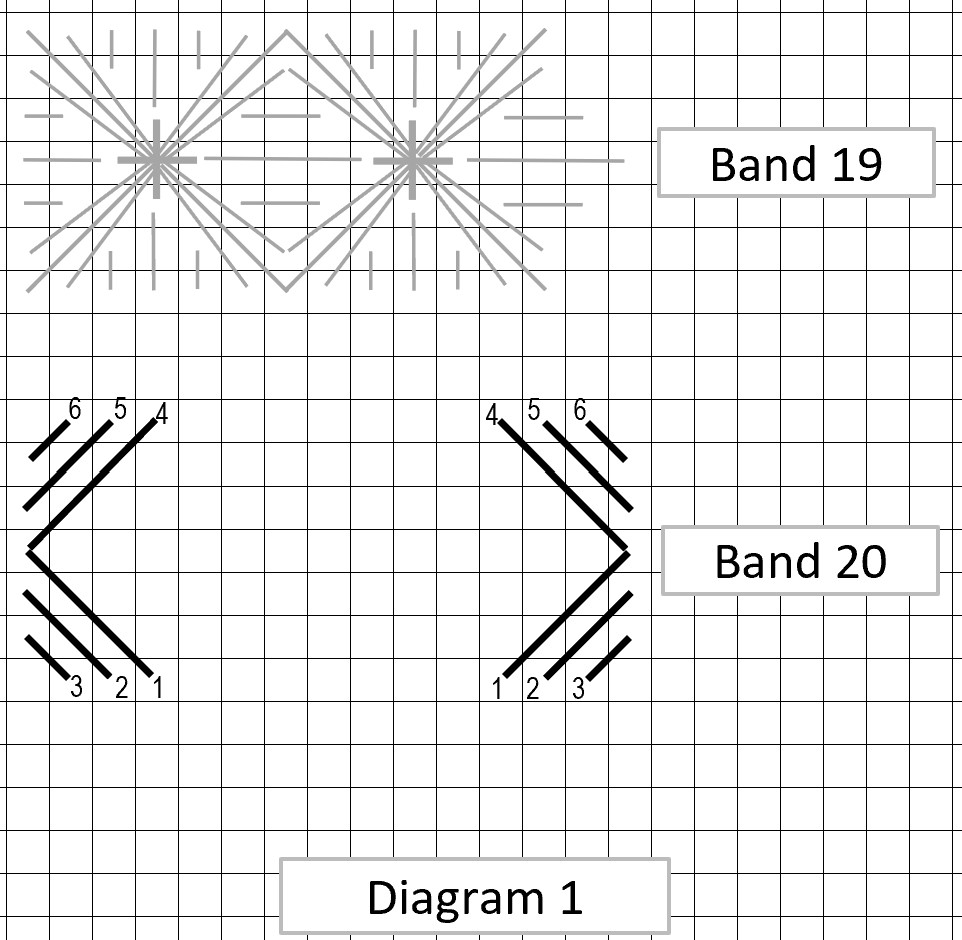
I can’t remember when I stitched Bands 5 and 17, but all Tuesday, I kept looking at them, thinking something wasn’t right. It wasn’t until I got home and finishing up the now bottom Band 18 that I realized I had used the wrong thread for Bands 5 (second from top) and 17 (second from bottom).

It really pays to start and end your threads carefully enough to be able to rip out without disrupting the adjoining area.

And, here are Bands 5 and 17 looking much better. Agreed?

Filed under: A Spring Sampler, Brandywine Chapter, Embroidery Guild of America
At the end of October, we had a 4-hour workshop for A Spring Sampler with members from my EGA Brandywine Chapter.
Since it had been a while since I designed and stitched the piece, I decided I better stitch along with them. So, I selected threads from my stash and decided to make it less wide than the original. The overdyed thread, Gloriana Cinnamon 151, has much less variation than I expected, but I am interested in finding out how it’ll look. So far, I like it.
Earlier today, we had a second workshop.

Brenda is coming along nicely on hers (https://brendasneedlepointstudio.blogspot.com/2024/01/spring-sampler-updated-1624.html). She’s got Bands 7 through 17 done in the original width. Unfortunately, Brenda couldn’t join us today, but I do hope we’ll both make it to our EGA Brandywine Quarterly meeting on January 18th (weather permitting).
Patrick’s using an overdyed thread with quite a few colors, and it’s turning out great. The holidays got in the way for others in the group. Hopefully, today, they got back on track.

Filed under: Beads, Brandywine Chapter, Embroidery Guild of America, General comments
Beaded Garden Wands were for sale at a store in Naples, NY earlier this month and knew I had 2 beads from a trip Bill and I had taken to Aruba! It seemed like a great idea to make my own and finally use those beads.
I found this 8″ screw at Home Depot. It was the only 8″ screw that was black – all others were silver. And, there no other black ones in the aisle! The silver ones were screws the complete length while this one is smooth on top.
So, while at the Blue Santa Beads making a Chatelaine with my EGA Brandywine Guild, I looked for beads. Most of the beads didn’t have a wide enough hole to work on the screw (including the 11 beads and the bicone in the next photo). But, I was undaunted and had an alternative in mind.
Today, after talking with the ANG Shenandoah Chapter about Festive Fireworks because they are stitching it as a chapter project, I had fun picking out the rest of the beads from my stash.
I used either beading cord or beading thread doubled. I wrapped around the screw using up almost the entire tube of Czech multi-colored beads! I also used the rest of the 6 mm round fluted purple beads that I used on Edward Scissorfish. There are drops of glue here and there. I bought 6 little bottles of Super NEW GLUE by Euro Tool. Have I mentioned how much I love that dropper bottle and the glue? It dries quickly and doesn’t clog.
However, it’s not like the ones in Naples. It’s not as bright. Bill’s right, we won’t be able to see it in the backyard. So, I placed it my little Lenox vase with 4 metal roses and we can see it in the living room. Perfect.
Today was and the next 3 days will be great for stitching thanks to the US Open.