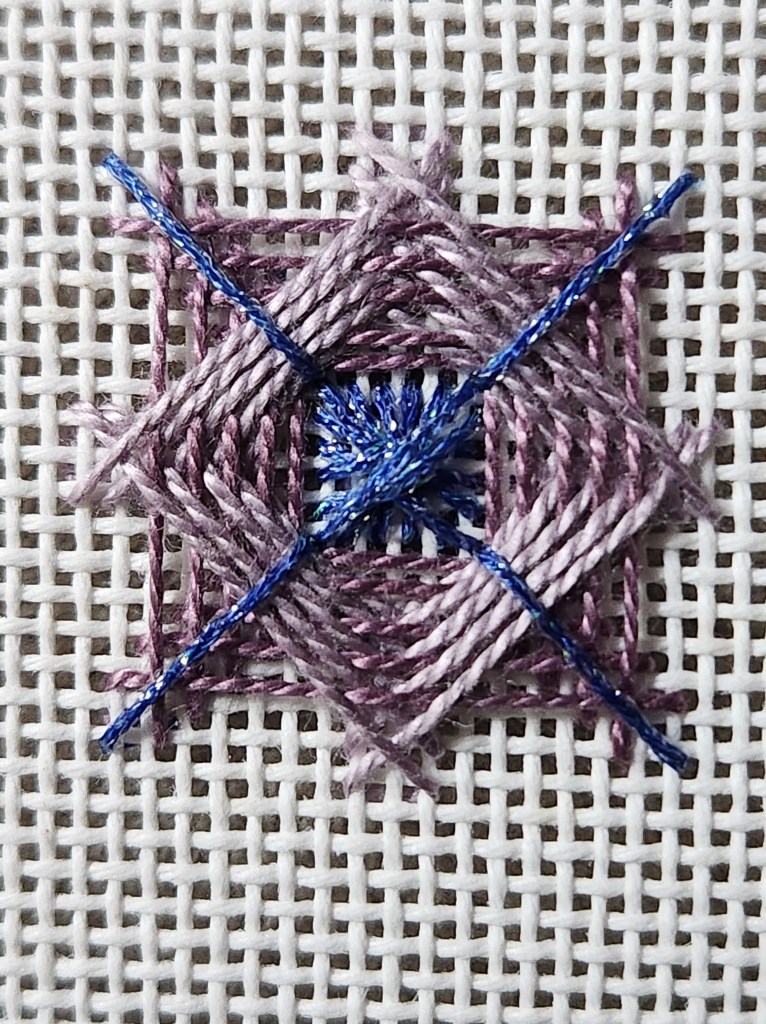
I found this stitch tossed in a bag of canvas scraps. Very pretty motif. I have no idea of the source. I’m not sure how I stitched it. Does anyone recognize it?
Colonial Knot: Hold the thread like a backwards C. Place needle under the thread at the top of the C, wrap thread over the thread and the needle forming a figure 8 and go down nearby (safer not to go down in the same hole because the knot won’t be pulled through the hole accidentally).
French Knot: Pull the thread down towards you, place the needle on top of the thread, wrap the thread once (some say it’s ok to wrap twice others say use a thicker thread) and go down nearby.
The Colonial Knot (left) is naturally bigger than the French Knot (right) because of the different ways they are wrapped.

Mary Corbett’s website has great YouTube videos.
Filed under: General comments, Needlework and Textile Guild of Media, Technique Issues
I gave a talk about picking stitches to the members of The Needlework and Fiber Guild of Media earlier this month and here are my takeaway thoughts. I covered a lot in 40 minutes, but since then, I added a couple of more thoughts. I want to know where to find these when I need them and will be adding to this periodically as I come across any gems.
The non-stitchers in the guild (they do all sorts of various crafts such as needle felting, sewing, knitting, quilting, spinning wool, bookbinding, etc) were asking if we’re going to do a group project based on what they learned! I think a simple landscape would work well. This is a very creative group without the types of classes I’ve taken. So, I did stress technique is important although without a desire to become a Master Craftsman or plans to enter into a juried exhibit, it really is about enjoying what you do. If people want to work needlepoint in hand (I used to until I found out about bars), that is entirely fine with me. I’ve told them why I don’t. Some of this is applicable regardless of the medium.
Key Tips and Technique Issues (in no particular order):
• Basketweave area allows for a place for your eyes to rest.
• Color of thread: Light threads appear further away compared to dark threads that appear closer.
• Size of stitches: Small stitches appear further away compared to large stitches that appear closer.
• Odd rule is that odd numbered motifs (1, 3, 5, etc) in a design are more pleasing to the eye.
• Different stitches and threads can create varied texture (bumpy, ridged, smooth, etc).
• Direction of a stitch creates a different effect (water on a lake is typically horizontal; river flowing down a hill with a gradual slope probably has stitches at angles of 30° or less; a waterfall with a steep slope probably has vertical stitches or are 60° or more).
• Area should allow for repeats of 3 units or more (6 wide allows for mosaic and cashmere stitches but not Scotch).
• Companion stitches help create depth by using a smaller stitch such as Serendipity for further away areas, Criss Cross Hungarian for middle ground, and the larger Woven Trellis Variation for the closest areas.


• Composite stitches combine different types of stitches such as straight and cross stitches.
• If a stitch is fancy, use a simple thread; if a thread is fancy, use a simple stitch.
• Stitch diagonal stitches first if they will be next to straight stitches.
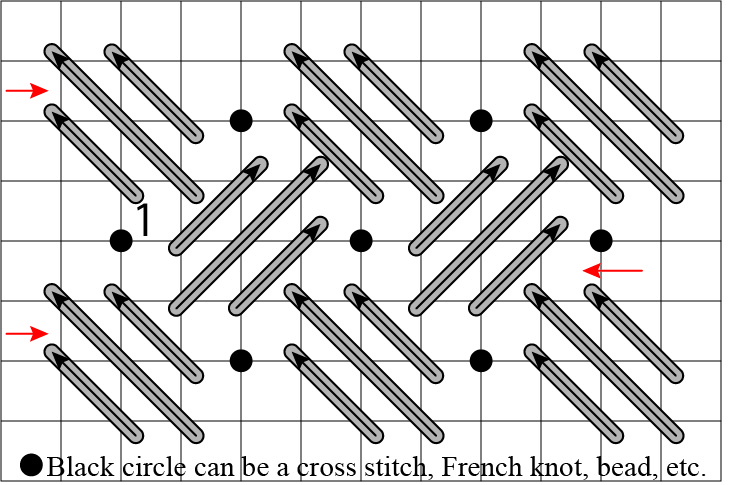
• Stitches are worked opposite of the direction you are moving (to get the proper pull). If a diagonal stitch is worked bottom left to upper right, then work towards the left. If a diagonal stitch is worked bottom right to upper left, then work towards the right.

• The direction of a stitch can be changed. In one color, the front of the canvas will look the same but done in two different colors or an overdyed thread, there will be differences.


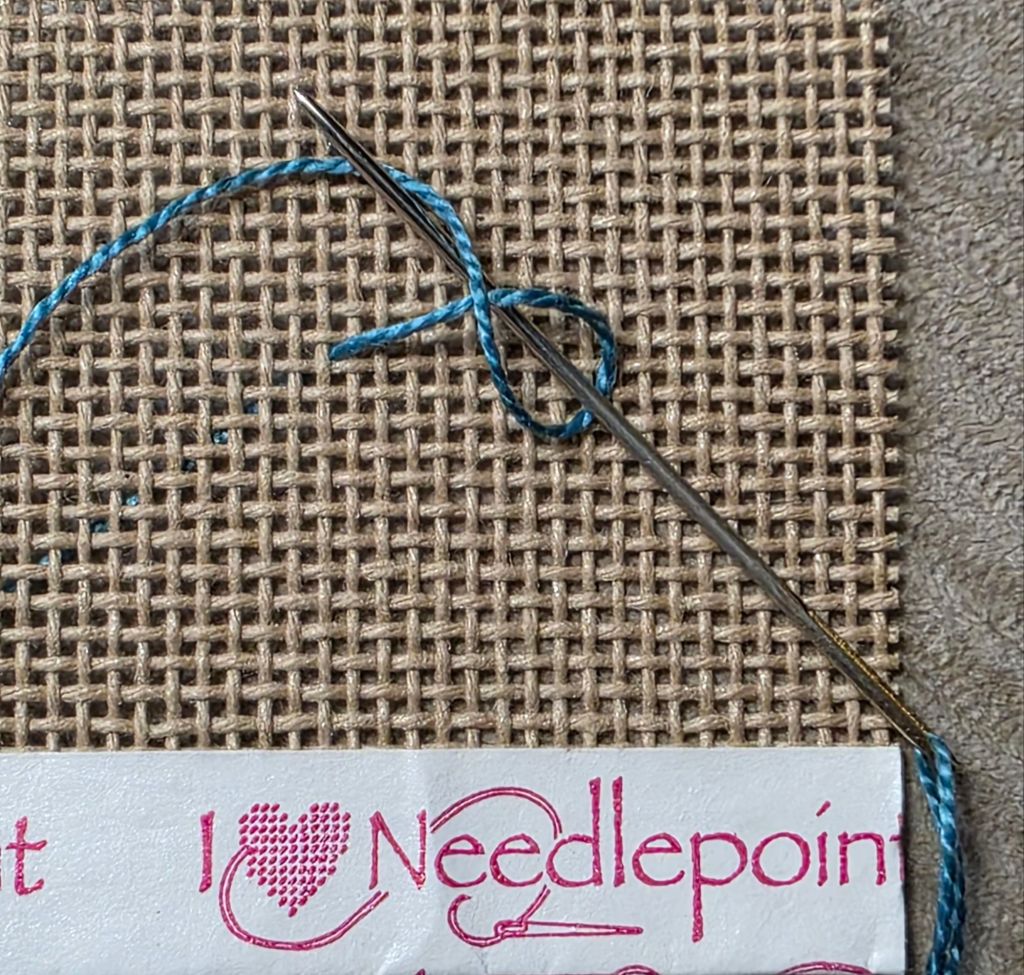
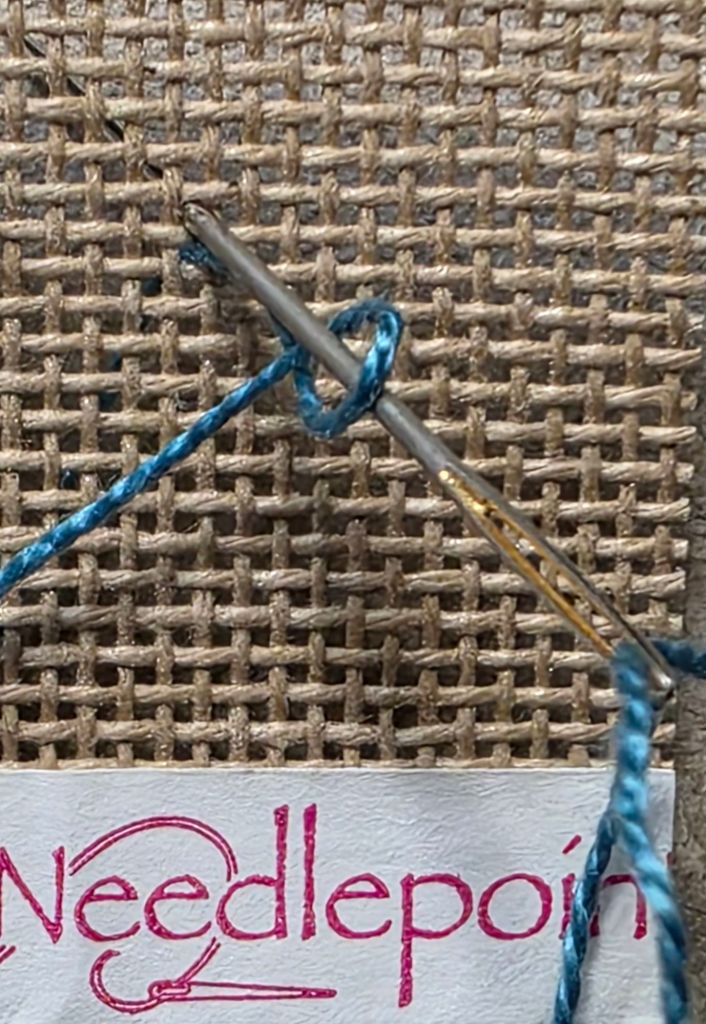
Did you know there are two ways to stitch Alternating Continental?

That link to ANG has changed since I diagrammed it (https://acrobat.adobe.com/id/urn:aaid:sc:VA6C2:3fba9f78-8199-4564-8b67-aec23e9a3779 and only ANG members have access to all previous Stitch of the Month projects).
Does it make a difference?

Yes. You can see the difference in carrying the thread below the hole (left) compared to not (right). Correct me if I’m wrong, but I believe the right side is more like how to work a blackwork pattern or a double running stitch.
Filed under: General comments, Painting Needlepoint Canvases with Fancywork Finishing, Technique Issues
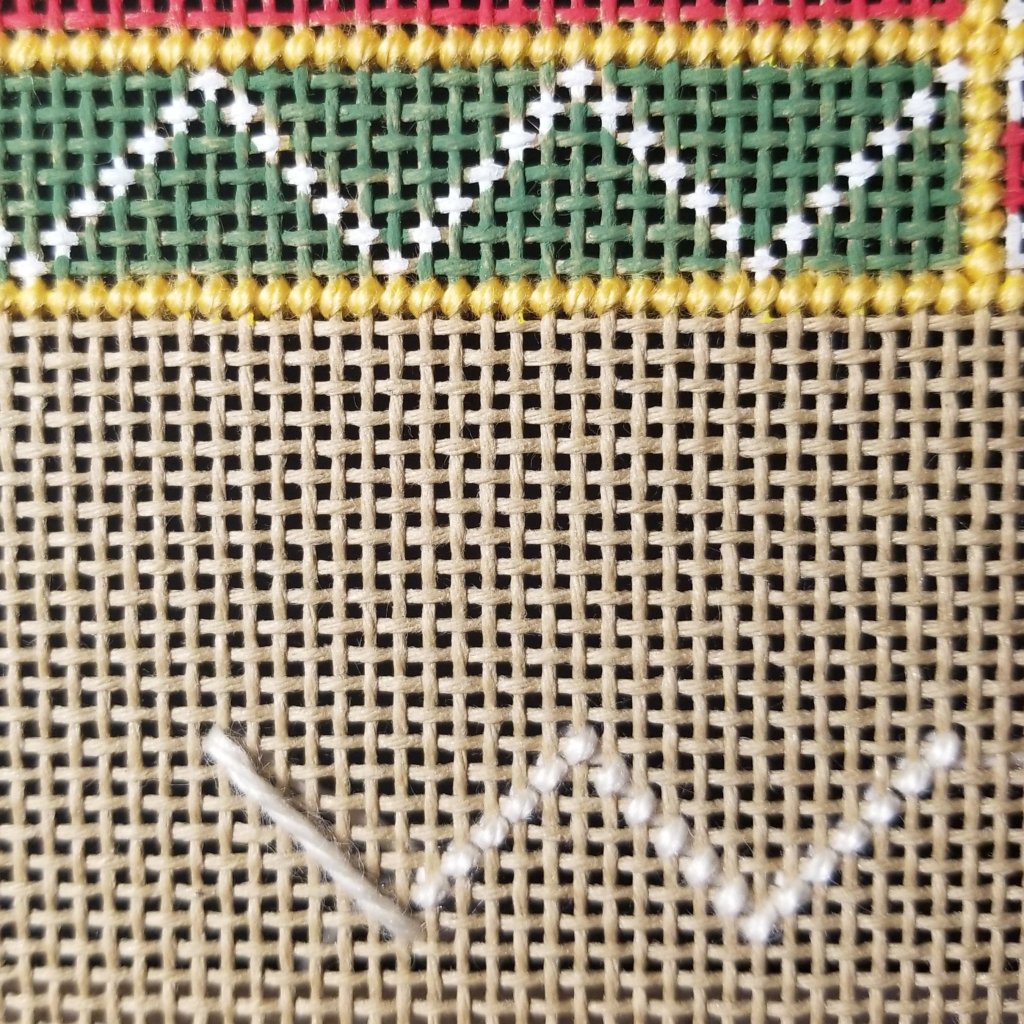
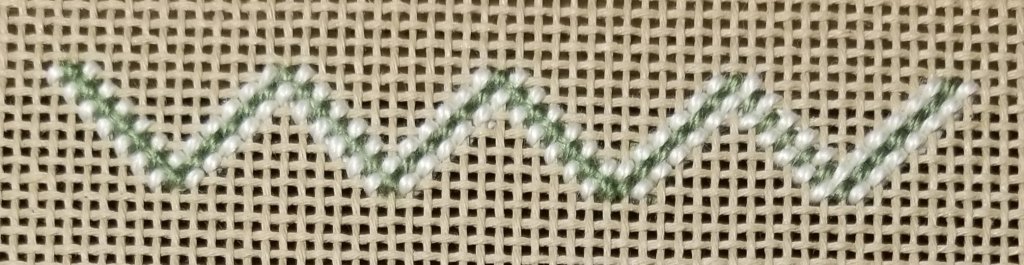
According to The Needlepoint Book by Jo Ippolito Christensen, a tent stitch is either a half cross, continental, or basketweave stitch depending on what direction you stitch it. They all look like a 1 x 1 diagonal stitch on the top of the canvas. The way I stitched the single row of the zig zag white line doesn’t appear to follow any one of these directions. So, I will just call it a tent stitch and you know I am referring to a 1 x 1 diagonal stitch going from the bottom left to the upper right.
There is an issue with a single line of tent stitch when you are moving on the diagonal of a V shape. On the right side of the V, the stitches form a connecting line. However, on the left side of the V, the stitches form something like a step ladder not touching one another. On occasion, I have laid a thread from upper left end of the V to the center of the V in the same color thread to form a connecting line on both sides of the V and make it a stronger visual. It’s like couching on the diagonal. I’m sure I learned it in a class and used it before (but can’t remember where).
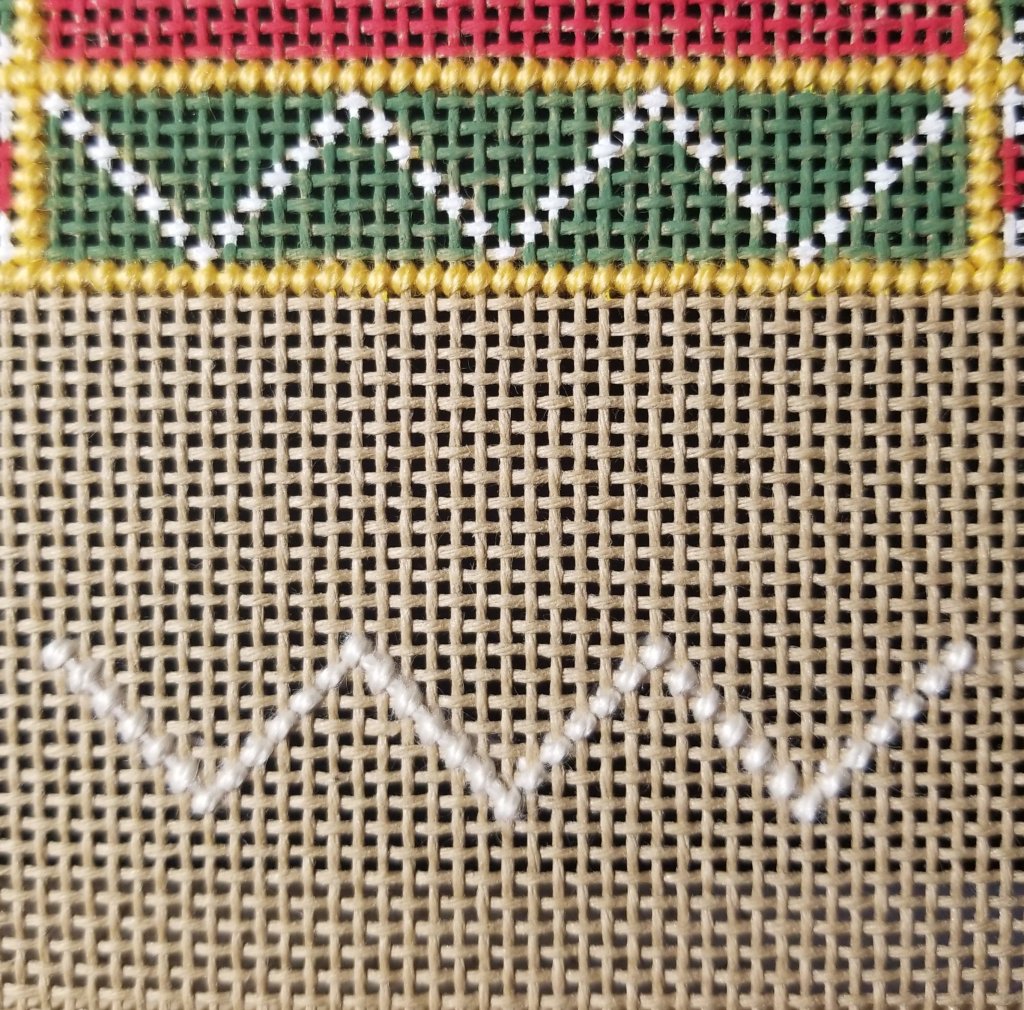
I decided to see if it would work for the coaster I painted. I stitched the first V with all tent stitches (right V). The second V (left V) has Silk & Ivory laid on the left diagonal line.
Once the tent stitches were placed on top, it resulted in a thicker line than the right side of the V. It may not be visible in the photo (center V) but you can feel it. The third V (left V) has one strand of Silk & Ivory laid on the left diagonal line. Silk & Ivory is a 3-ply thread not normally split into 3 strands but it can be.

Then, tent stitches were placed on top.
Once the green thread was added, it pinched the laid white into a very thin noticeable line.

The fourth V (on far left) has two strands of Silk & Ivory laid on the left diagonal line after I stitched the surrounding green thread first.
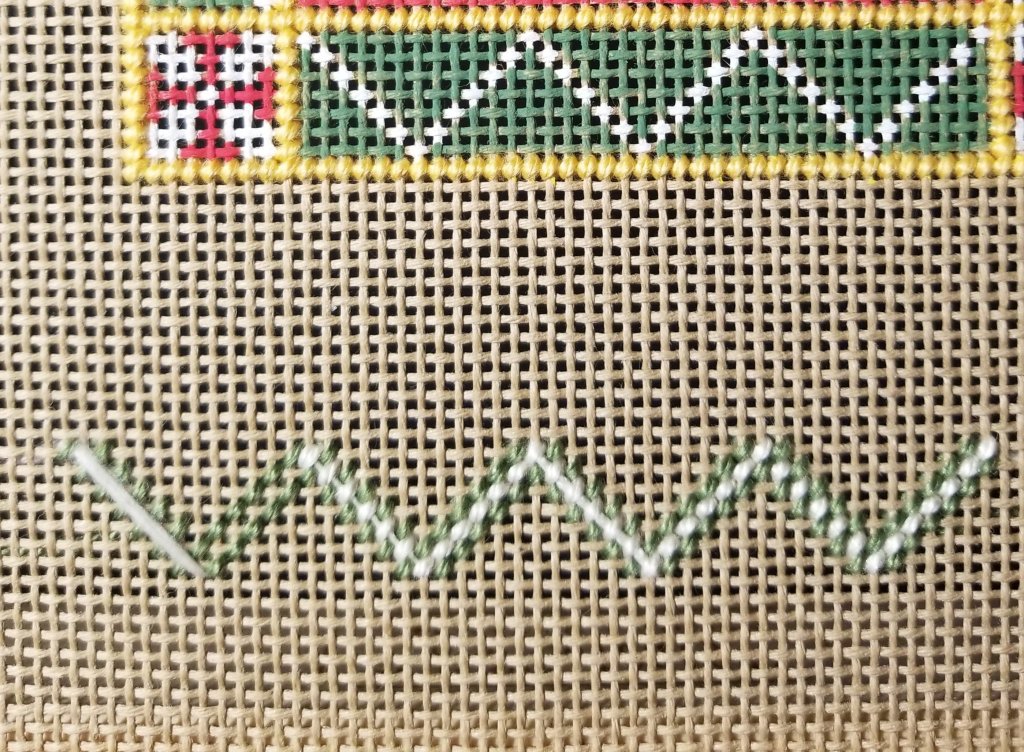
Then, I placed tent stitches placed on top. This was the end result of my experiment.
I’m glad I practiced because I decided that it didn’t work as well as I remembered. My husband likes the third V from the left. I will stick with far right V which has the tent stitches on the left side of the V without a laid thread allowing the eye to perceive it as a line even though it doesn’t actually connect as a continuous line.
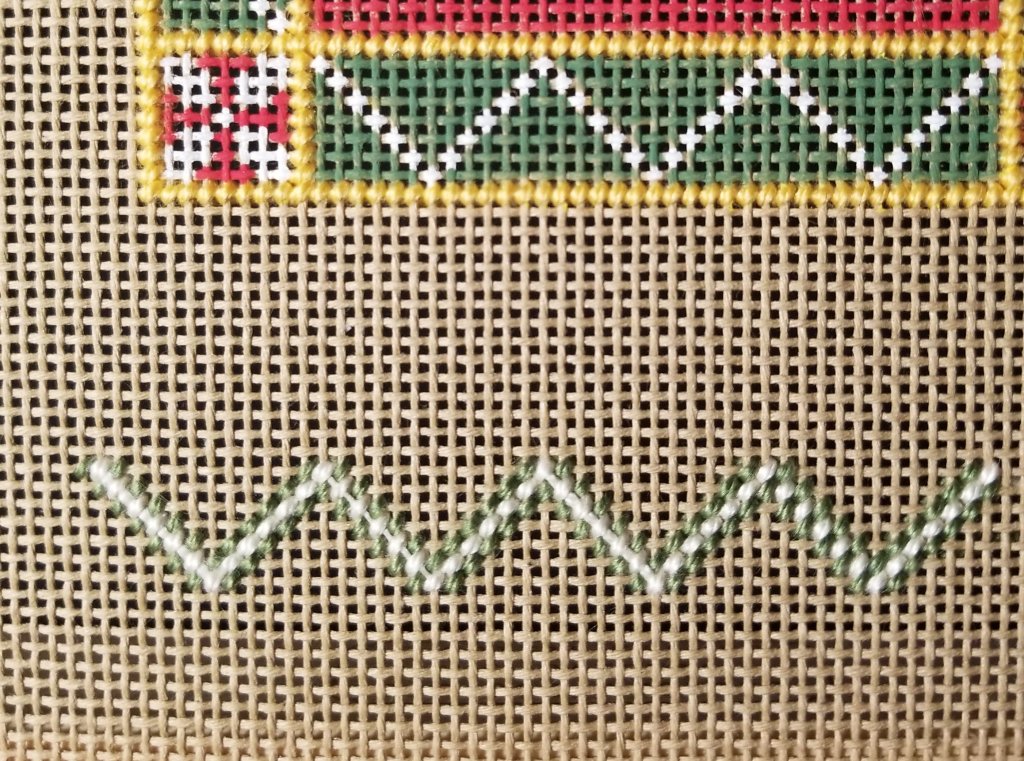
Then, it dawned on me that it might work better if the line were a darker thread surrounded by the white thread. So, I had to test my theory.
Again, my husband likes the third V from the left. I’m inclined to agree. And, I least like the V on the far right. So, my take away is the darker the thread worked better than the lighter. However, I will probably try this again on the 18 count canvas. I think it’ll work better with either color combination because the canvas threads will be closer together to begin with.
Did anyone stay with me through this discussion? What are your thoughts? Have you done or heard anything like this before?
Filed under: Gay Ann Roger's, Countess of Granrham, Gay Ann Roger's, Lady Edith, Gay Ann Roger's, Lady Mary, General comments, Other People's Designs, Technique Issues
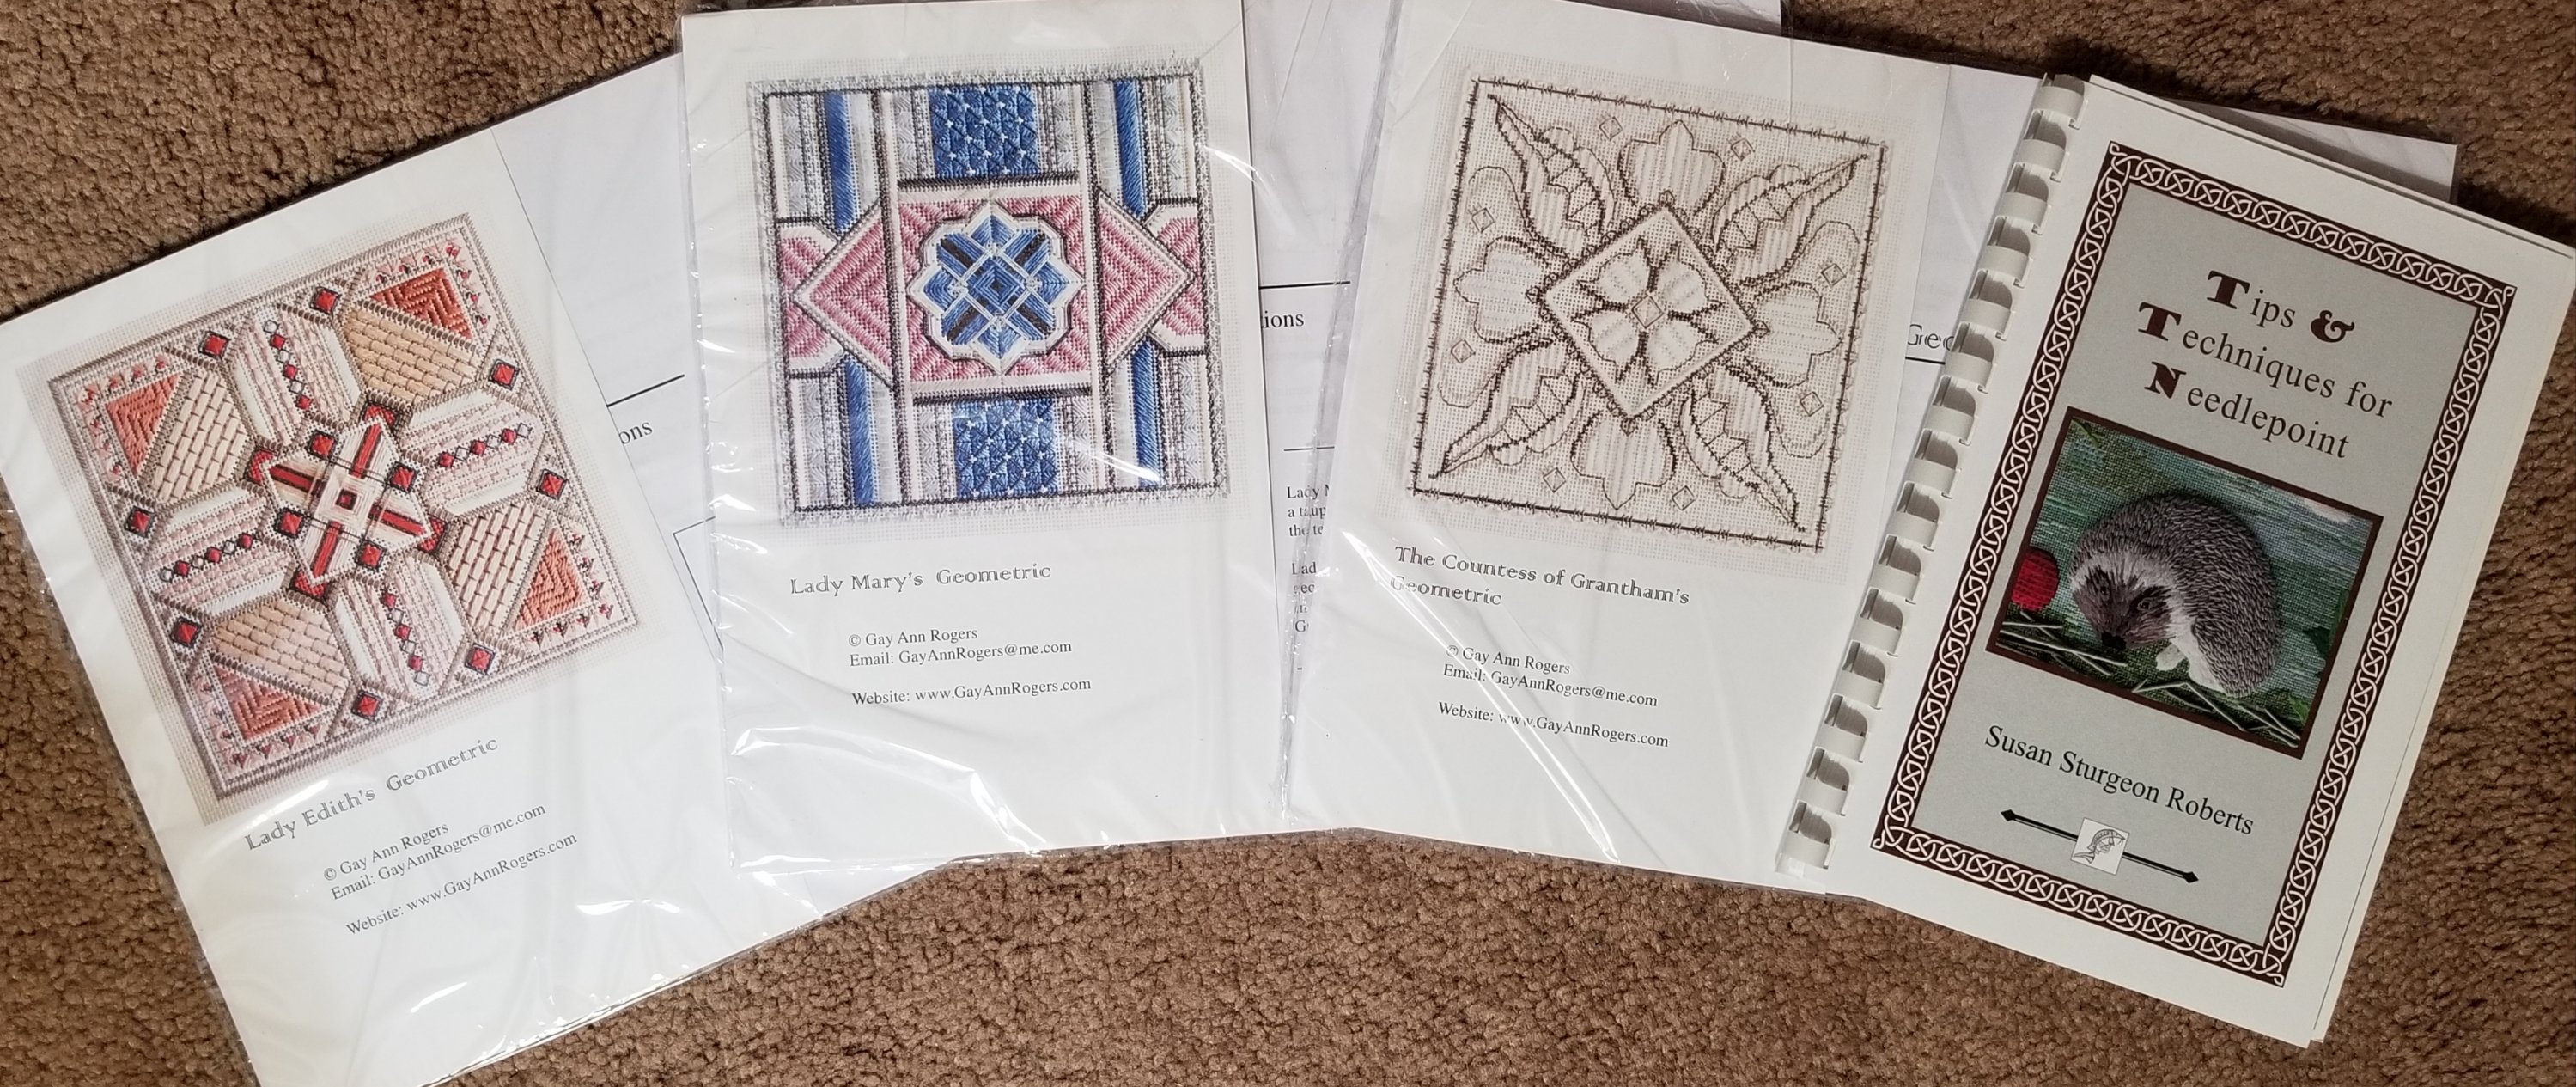
I asked Santa for Gay Ann Roger’s series of designs inspired by Downton Abbey including the Countess, Lady Mary, and Lady Edith. Hopefully, she adds a fourth based on the Dowager Countess.
And, I expect to learn a lot from Susan Sturgeon Roberts in her book, Tips & Techniques for Needlepoint. After some cooking, I will settle down with this.
Happy Holidays to all!
In reading over suggested materials from the EGA Master Craftsman Canvas bibliography, I have found a couple of interesting issues and will post about some of them. I’d love to get your input on these.
In Needlepoint and Beyond: 27 Lessons in Advanced Canvas Work by Edith Anderson Feisner, she says to always work into the stitches that have been previously done. That makes sense. It’s also been described as working from a clean hole into a dirty hole. That’s not always possible but an excellent tenet to follow.
Before I proceed, let me say she is using size 10 or 12 mesh interlock canvas and Colbert Persian wool in her examples. So, perhaps her next statement that I have some question about is not applicable to all fibers.
She says to catch just a tiny bit of the fiber as you work the stitch to lock the stitches together but do not split the fiber. Her reasoning is that, “This will prevent friction between stitching from building up and destroying the fibers.”
Do you think her finished pieces are being used as rugs or something being handled a lot? Because when would there be friction after you stitched and framed something?
I have always tried to keep the holes more “clean” by specifically avoiding catching the fiber from the previous stitch. I thought that was preferred. And, so, perhaps “it depends” on what you are stitching and for what purpose. In straight stitches like bargello, it might decrease the chance of seeing the bits of canvas on either side of the threads (sometimes referred to as teeth or dandruff). And, bargello patterns are often pillows or purses which would get wear.
Have you ever heard anyone recommend catching the fiber while stitching? And, if so, when, what fiber, and why.
Thanks in advance for your thoughts and comments.

Filed under: General comments, Needles, Technique Issues, Zokins
Last night, Judy, Merril and I joined forces to cover Sashiko stitching at our Needlework and Fiber Guild of Media (we meet on the 2nd Tuesday of the month at 7 pm). From my research on the topic of Sashiko, it is a traditional Japanese stitching technique used for decorative and functional purposes, while Boro refers to the patched textiles resulting from repeated mending, embodying a history of resourcefulness and sustainability. So, a Zokin must be a type of Boro since it is a traditional Japanese cleaning cloth made from old clothes, towels or fabrics.
I showed my Zokin and discussed it previously (Zokins | Melitastitches4fun’s Blog). After Show & Tell, we dove into Sashiko. Merril had fabric swatches and threads. I brought threads too. The chapter purchased Sashiko needles for everyone. This is one large needle! Puts my 2 needles to shame.
We each got 3 fabric swatches. Two decorative ones and a blue denim to make a needle book for the Sashiko needle. But, I have a box I store my needles in. So, I made a bookmark.
Merril came with rulers and fabric marking pens. We didn’t have a lot of time and I just did 3 parallel lines in the basic running stitch. It’s a reversible stitch. Without marking the stitch lengths, this was as even as I could get. I wasn’t going to get particular about it. Having loose edges with threads fraying makes this an art form that I don’t need to pursue although I do have a small notebook that I was thinking of covering with fabric.