Filed under: ANG Central Jersey Chapter, ANG Chapter Book Projects, ANG CyberPointer's Chapter, ANG Main Line Stitchers Chapter, Orchid Lady by Mary Knapp, Starburst by Patricia Hartman, Summer Fireworks by Ann-Marie Anderson-Mayes
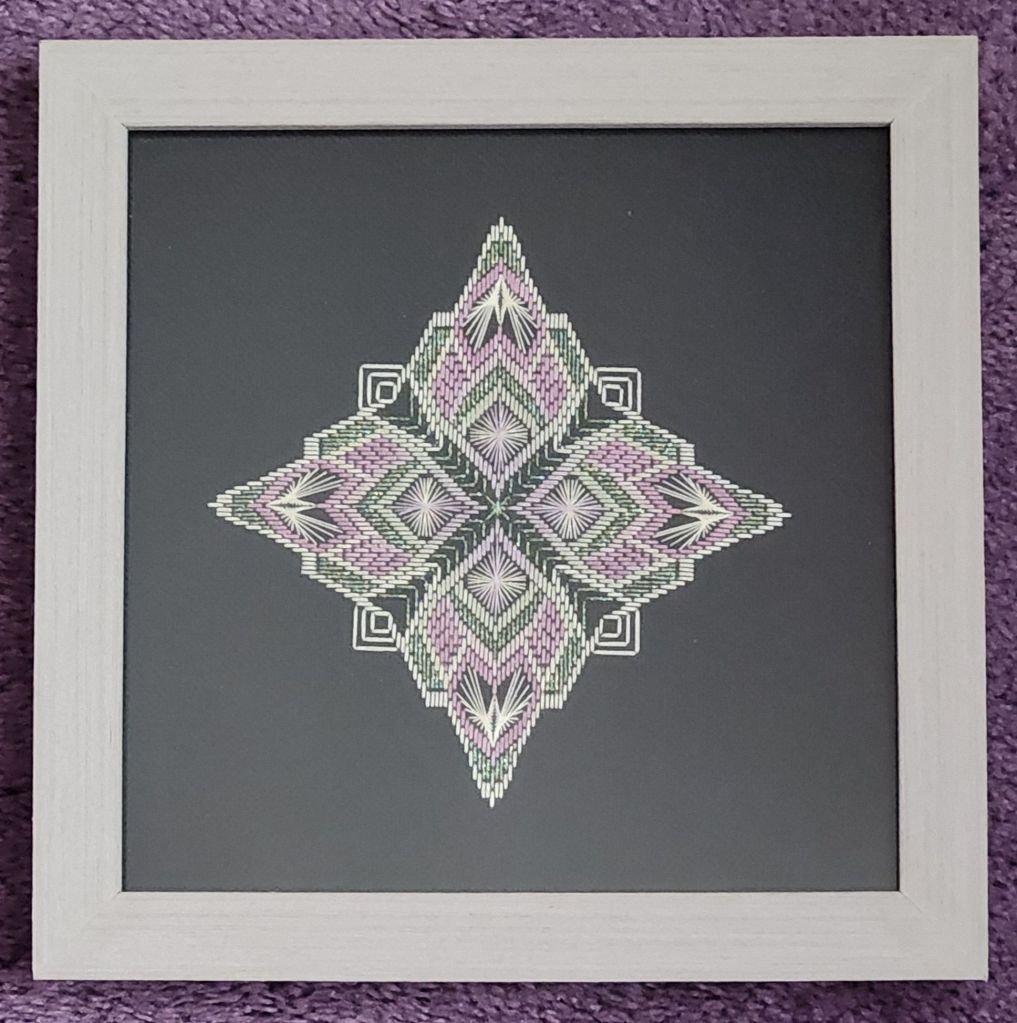
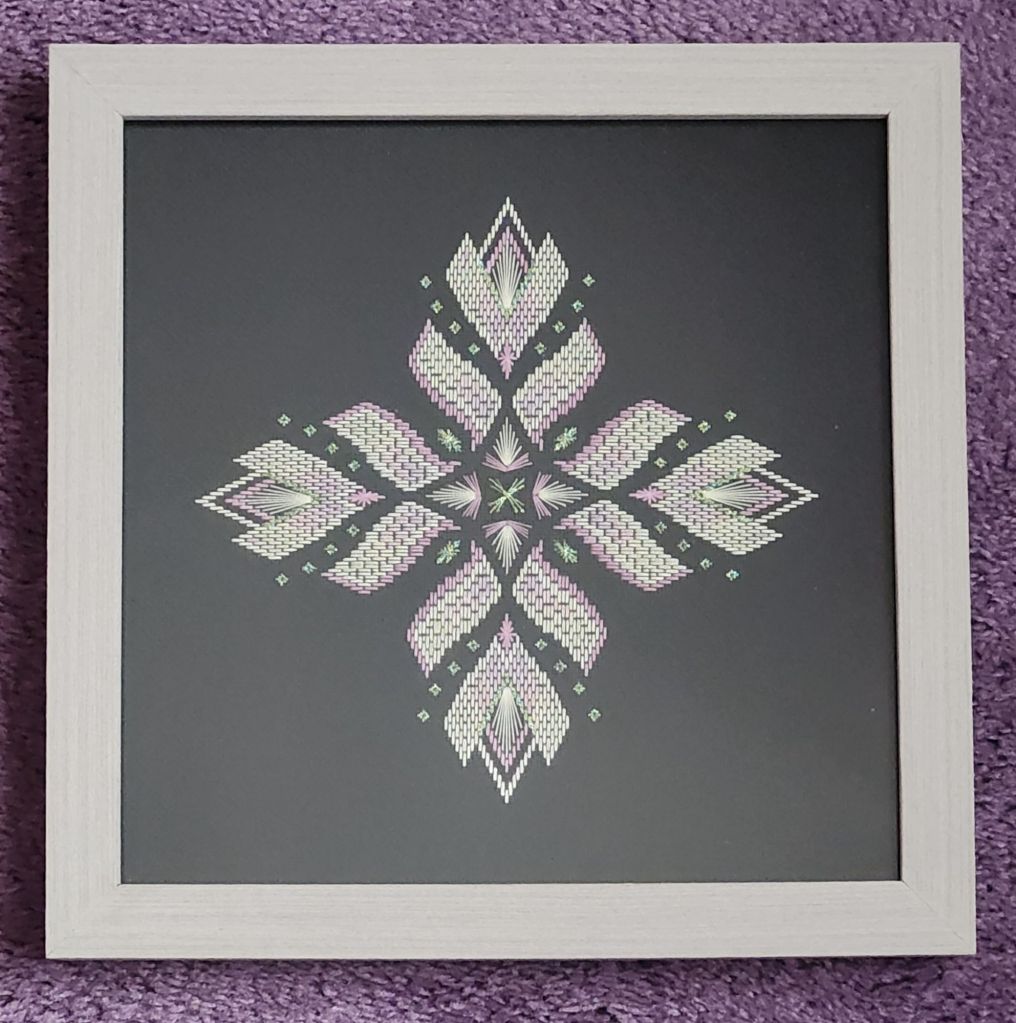
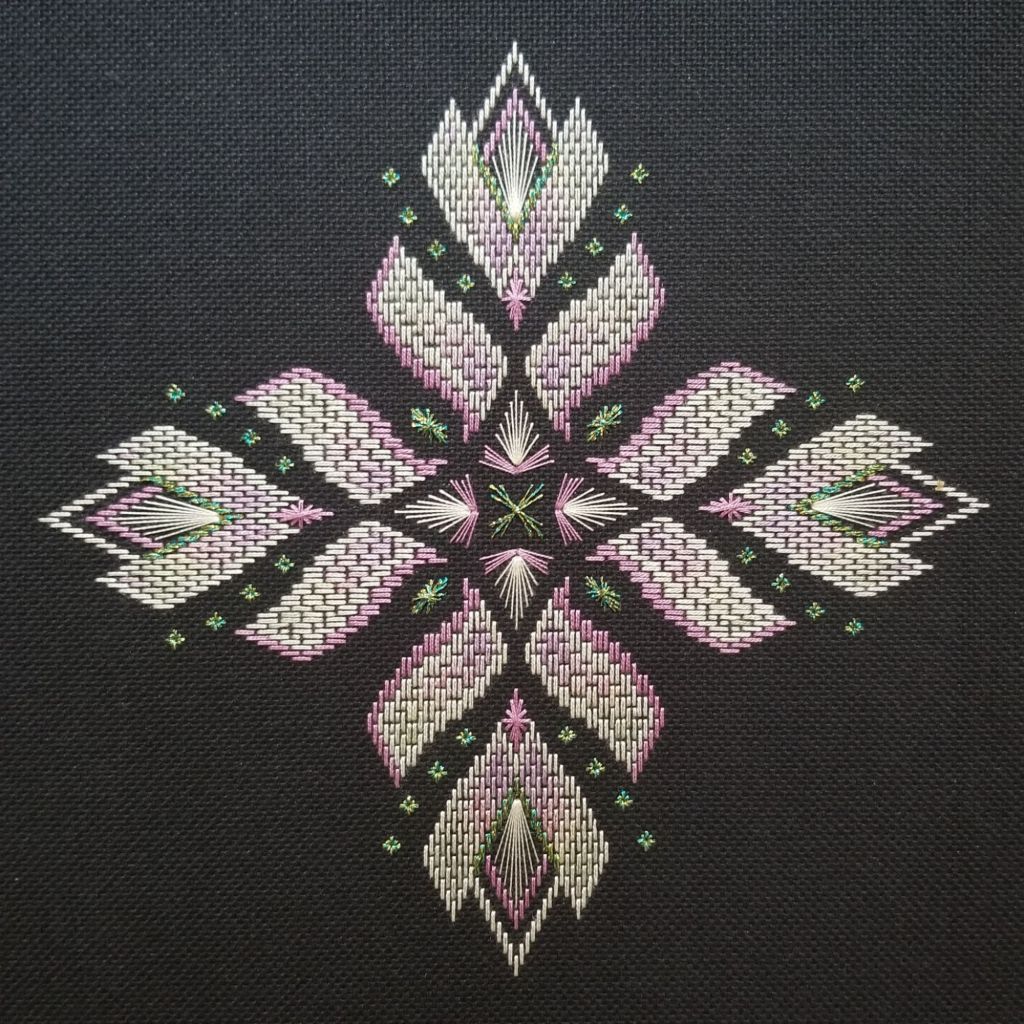
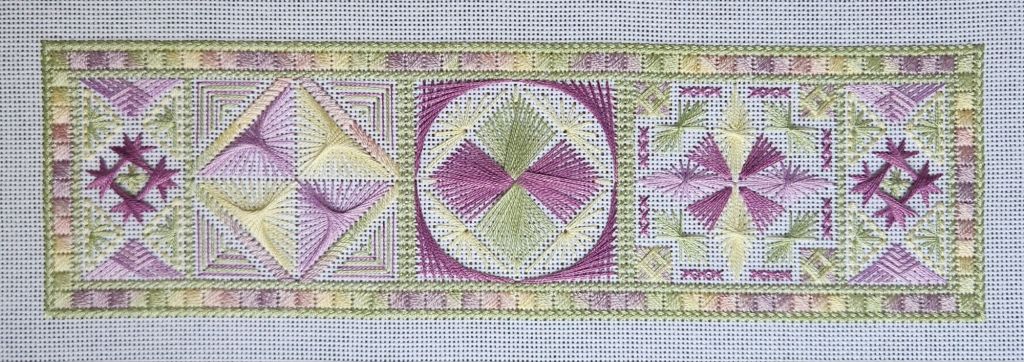
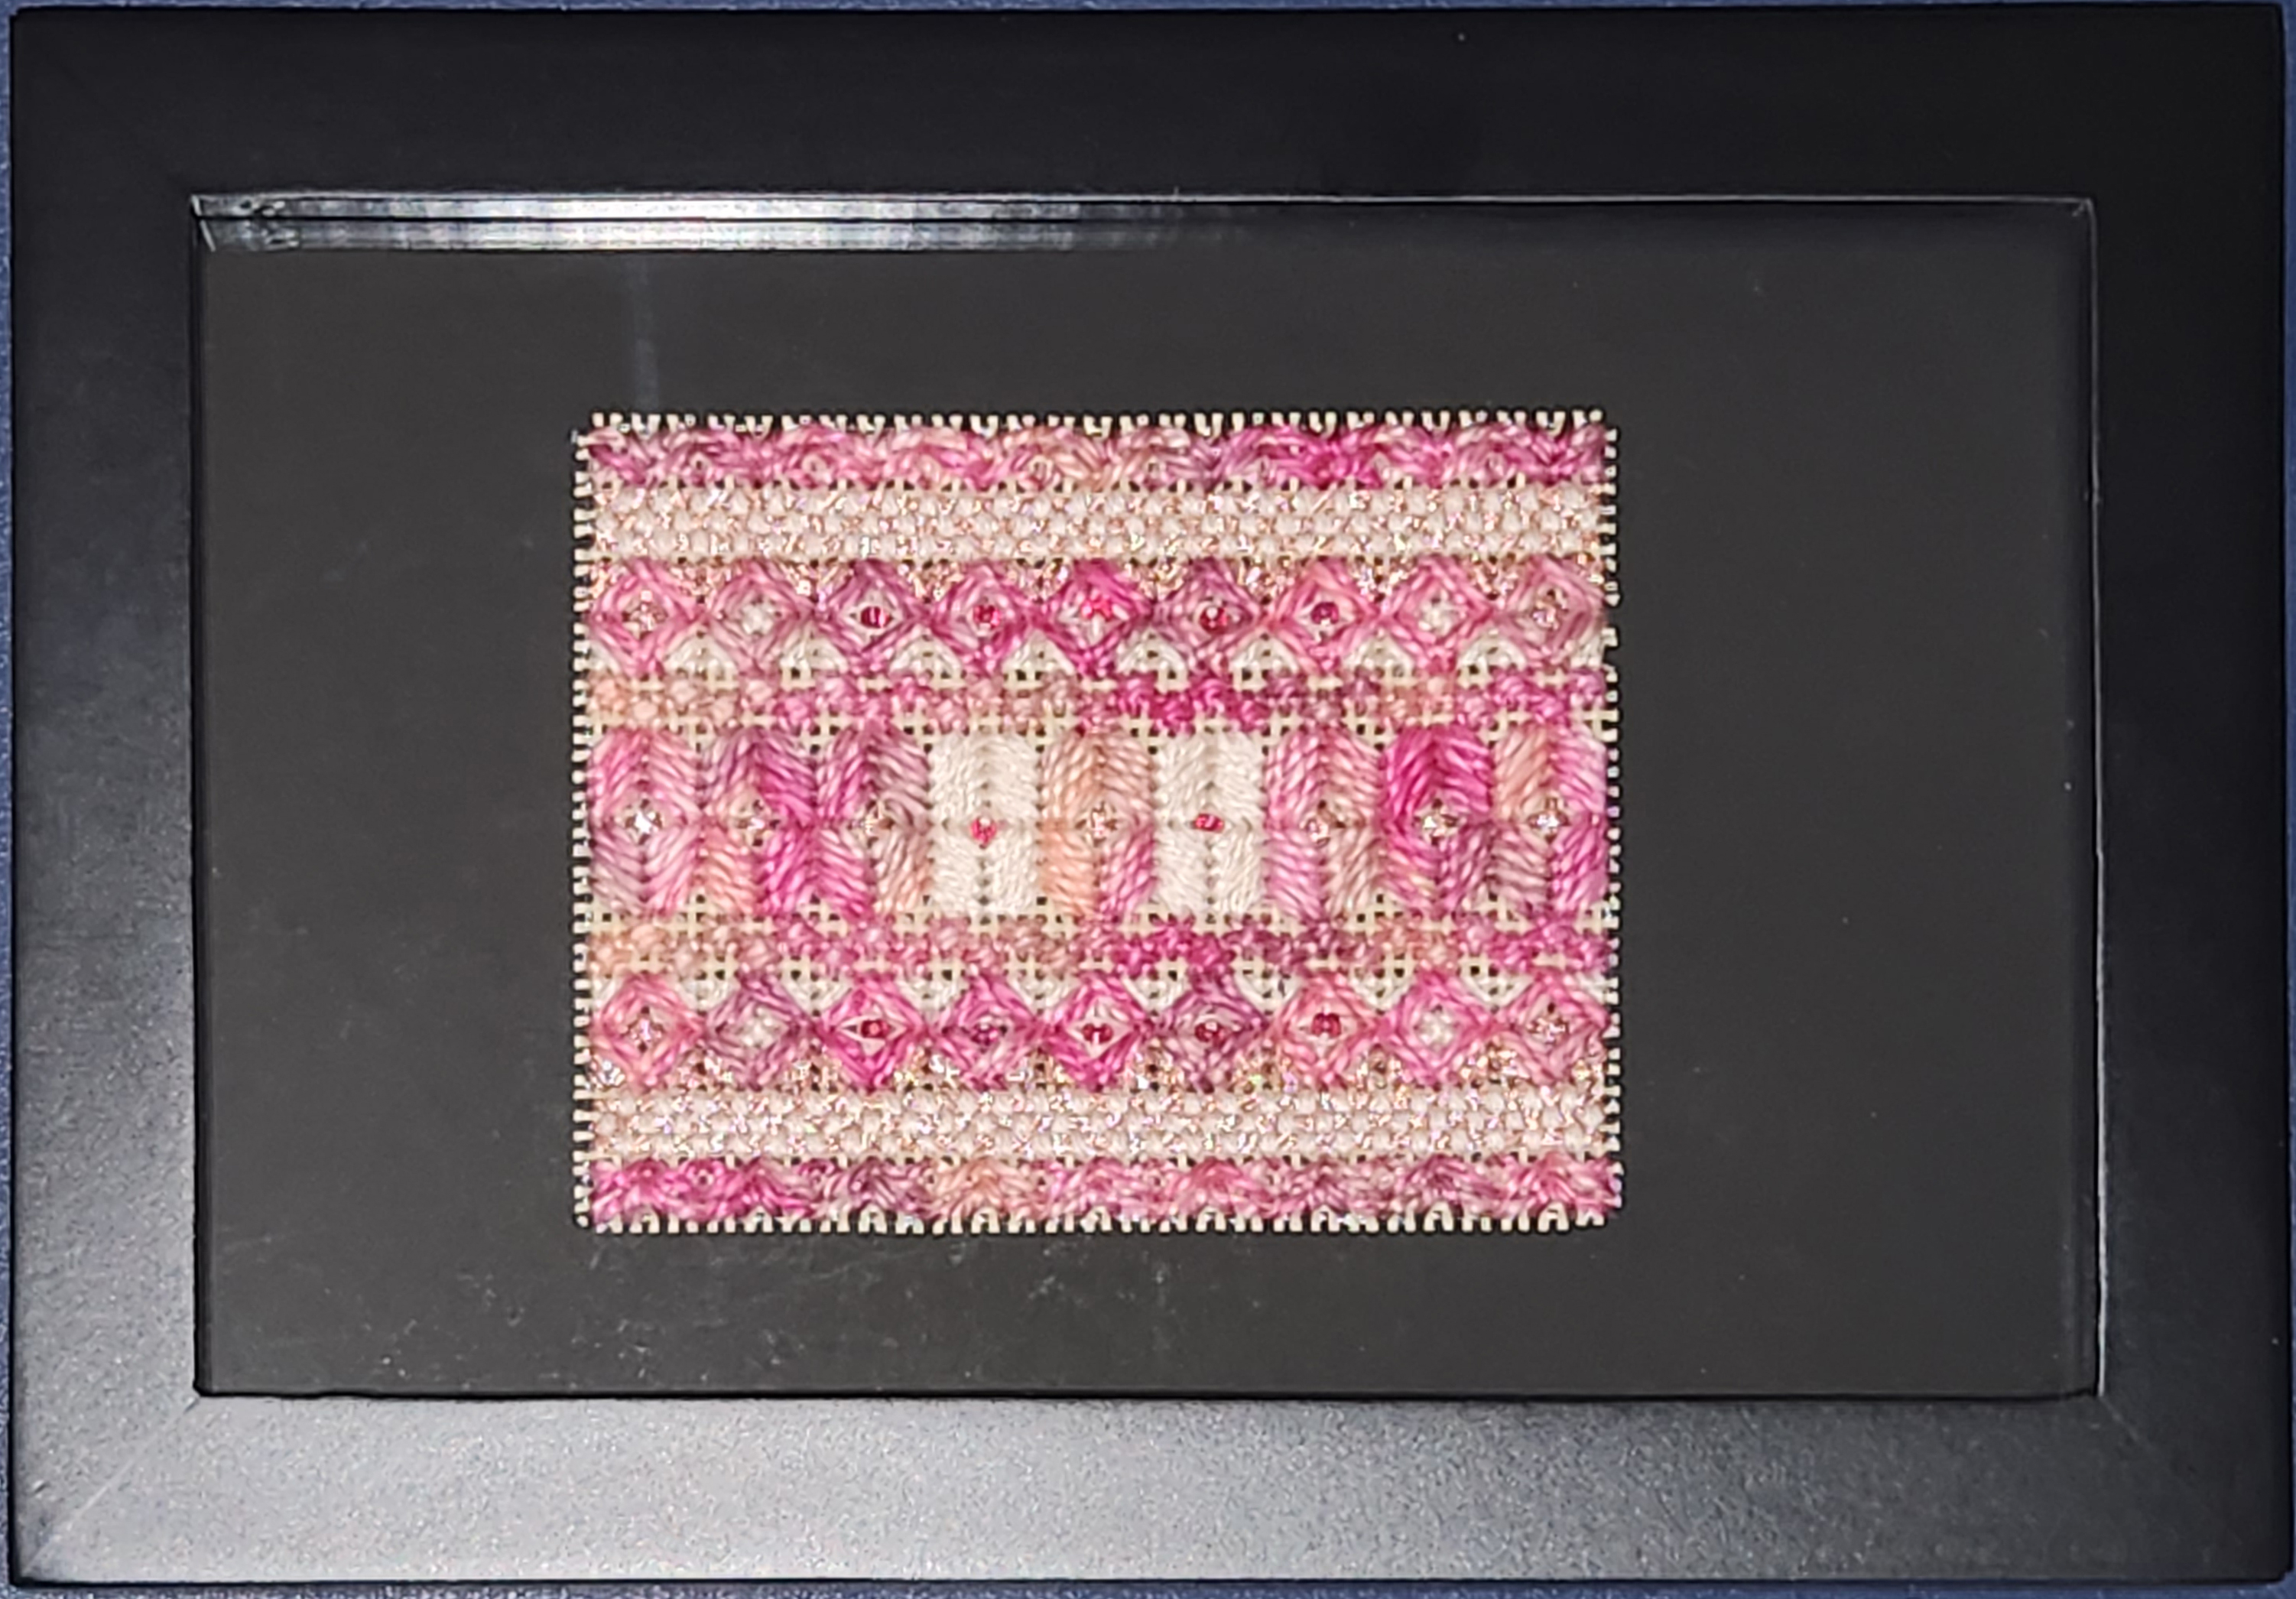
I realize I never posted Starburst by Patricia Hartman (from the 2013 Chapter Project Book that was an ANG Main Line Stitchers project) or Orchid Lady by Mary Knapp (an ANG Cyberpointers project from 2021) after they were framed at Repenning Fine Arts.
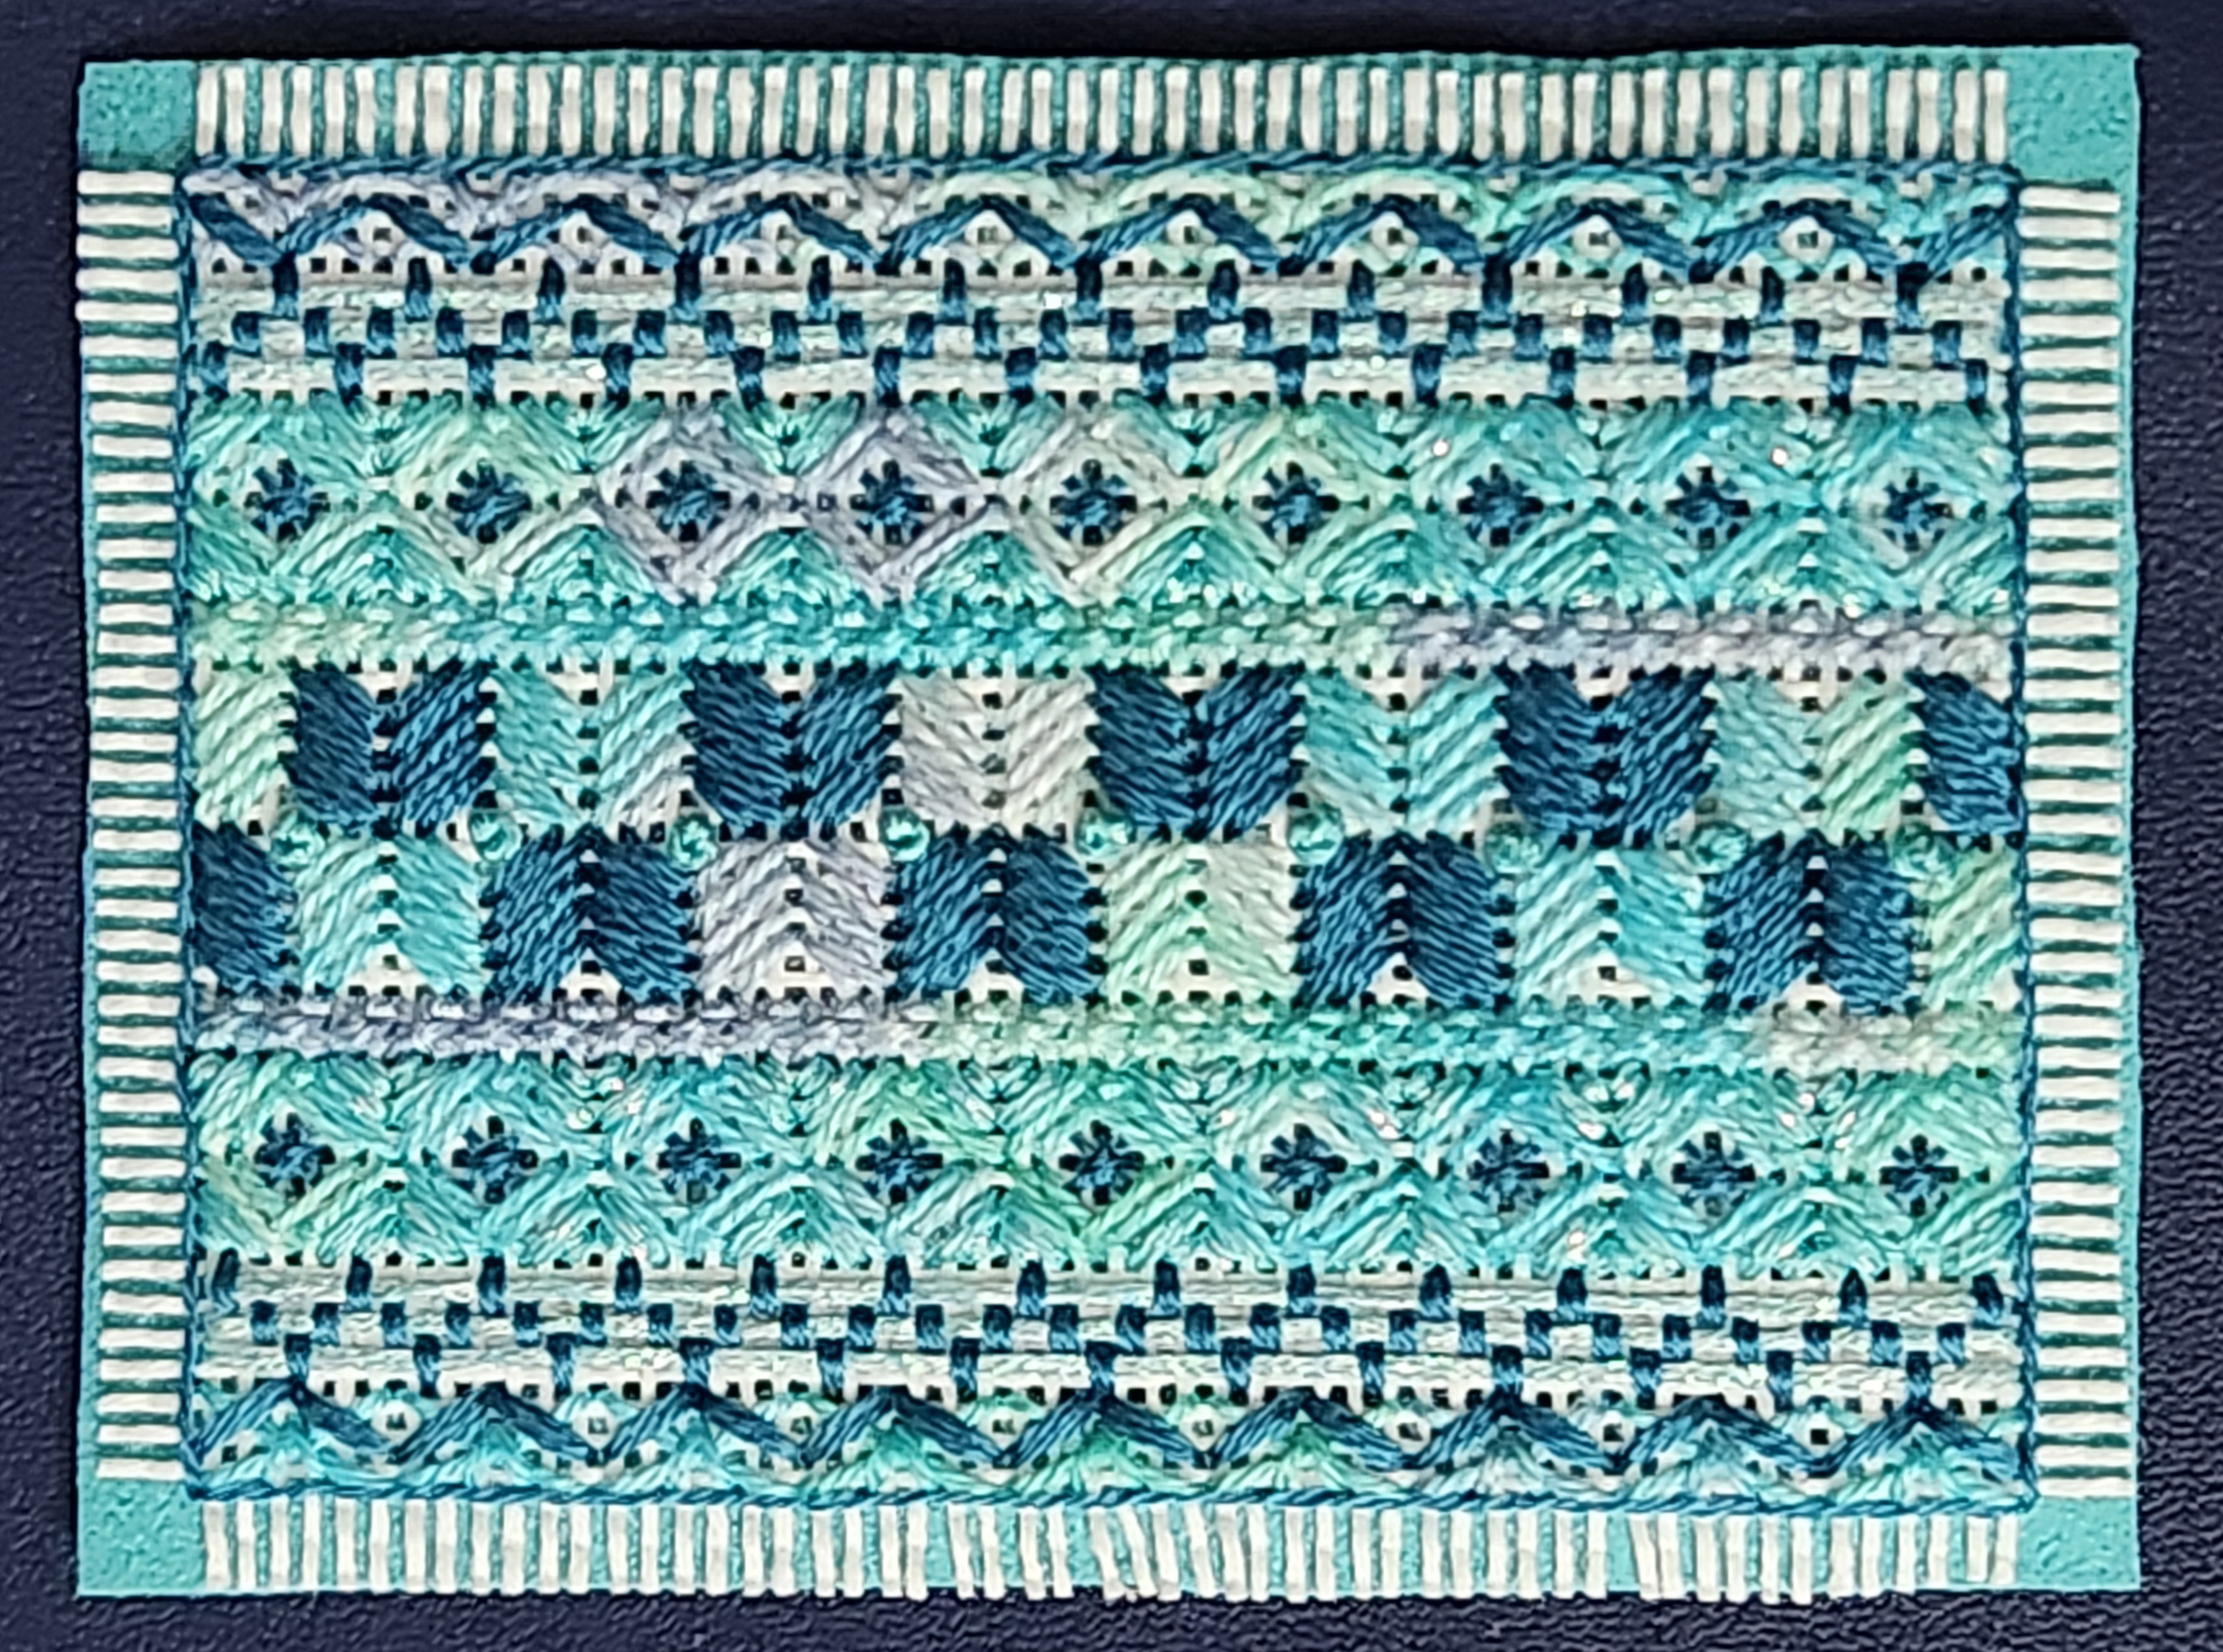
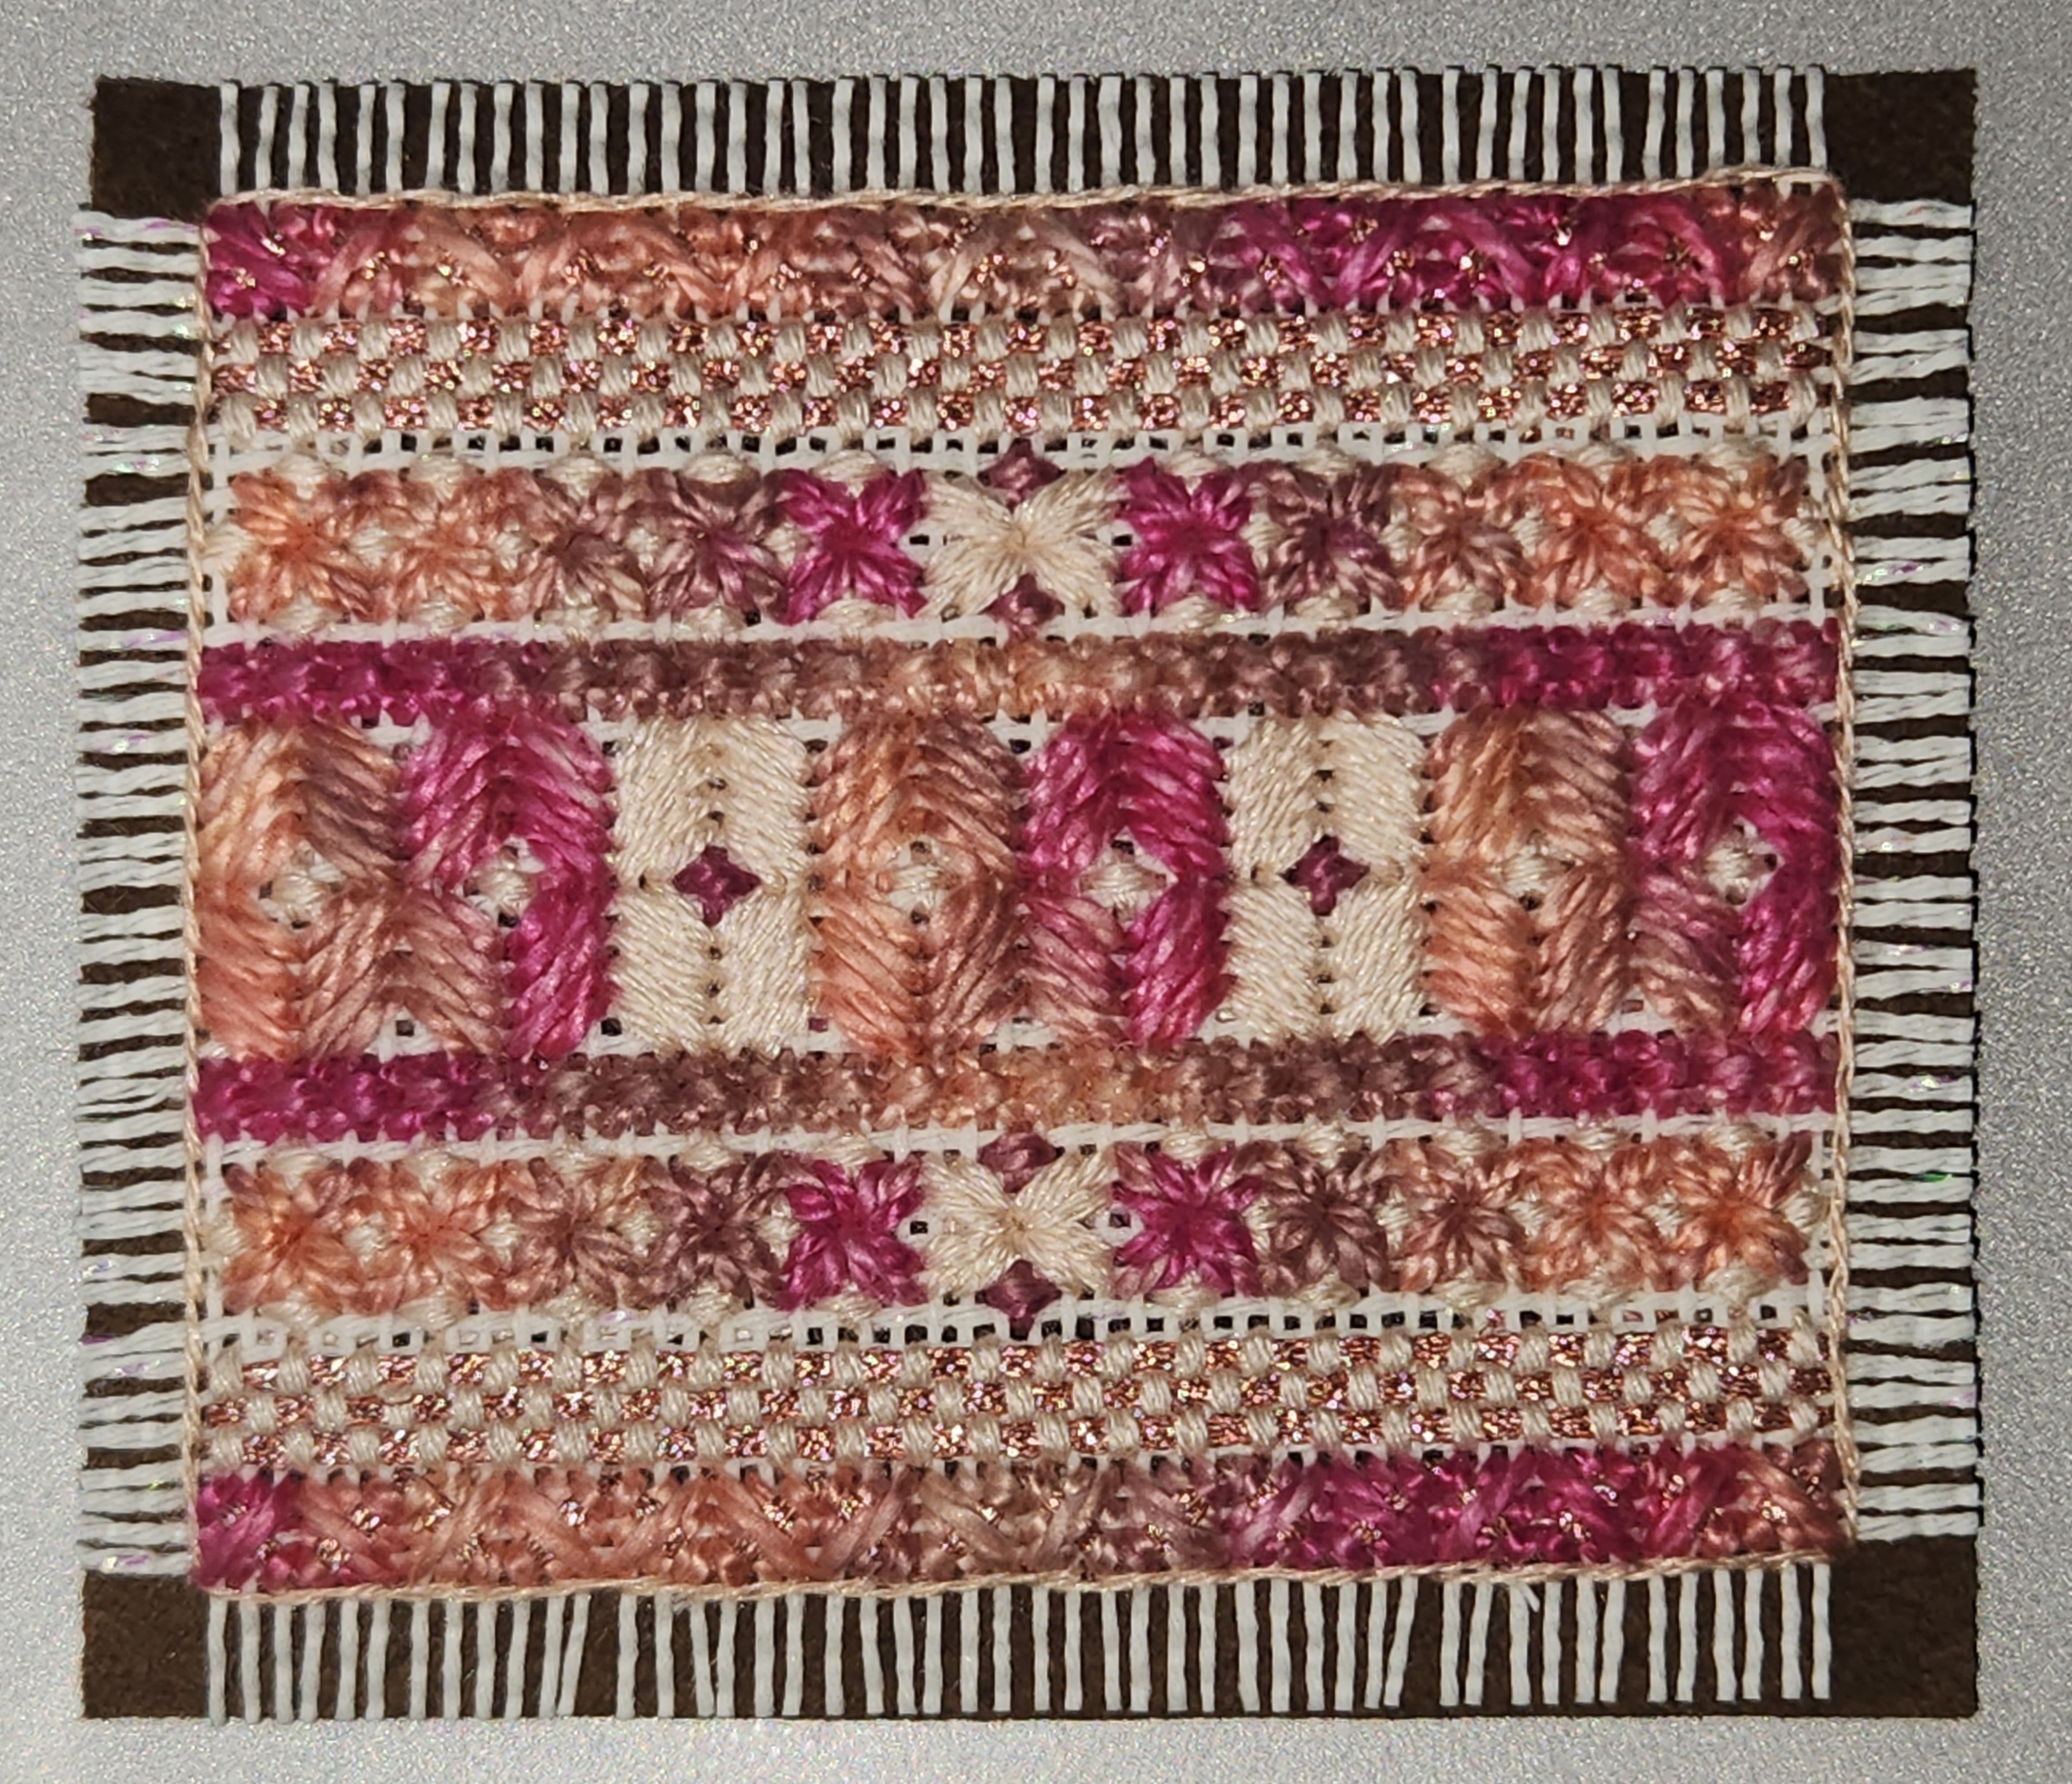
Both are counted projects completed with the same thread line called Beautiful Stitches from Ann-Marie Anderson-Mayes in Australia.
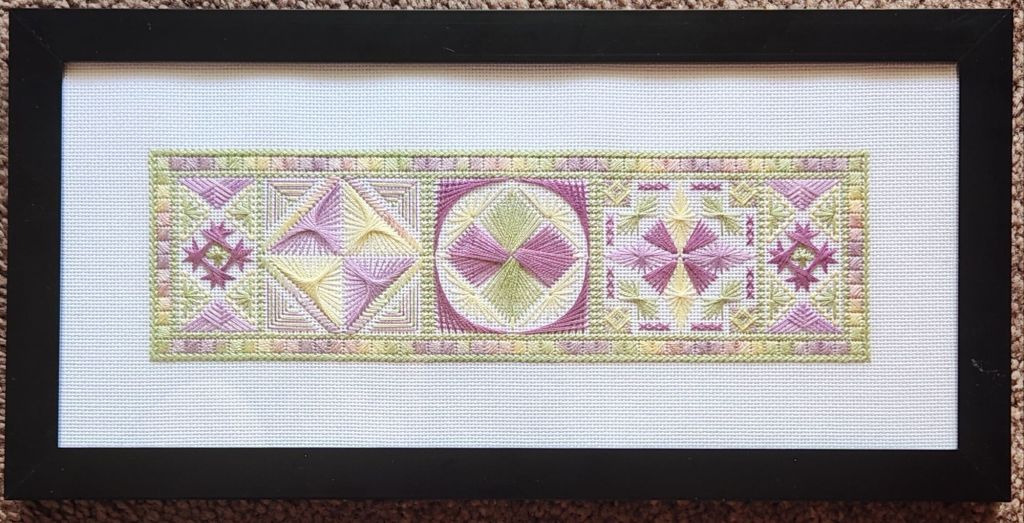
The ANG Central Jersey Chapter is doing Summer Fireworks by Ann-Marie Anderson-Mayes this year as one project, and I had enough threads left to complete it and match these other 2 pieces.
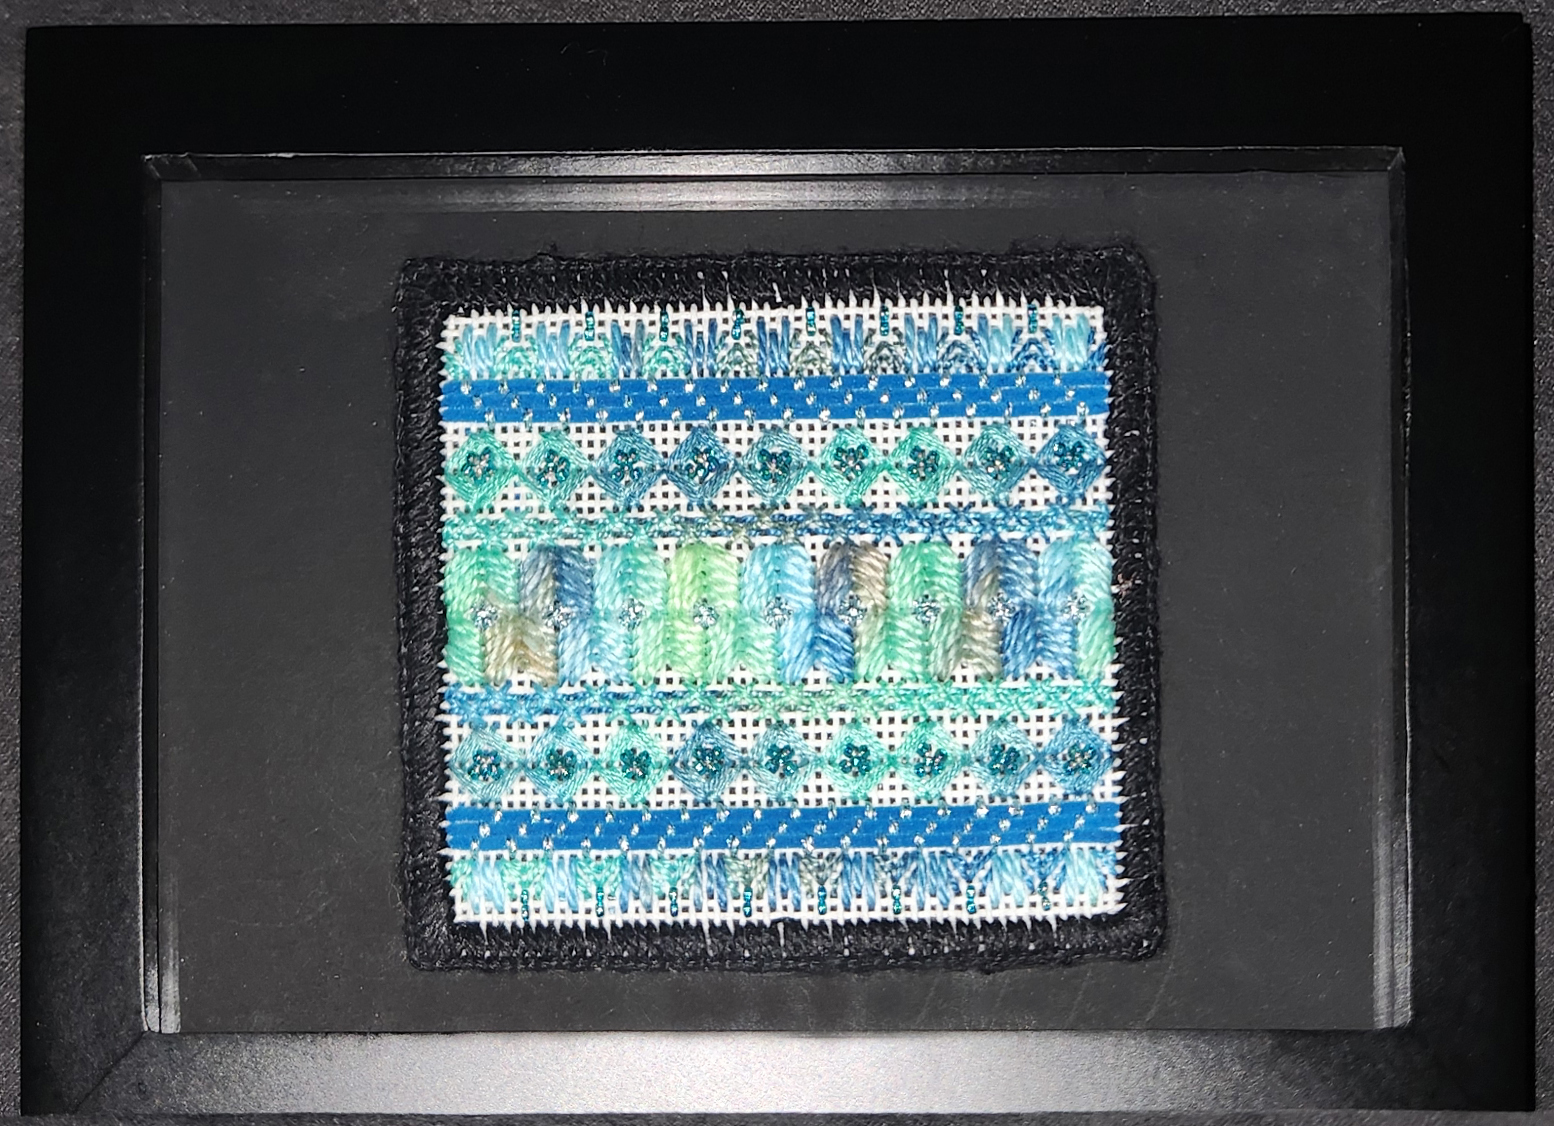
I didn’t use museum glass, and that makes photos difficult. Both were stitched on a black Congress Cloth and have a light gray frame.
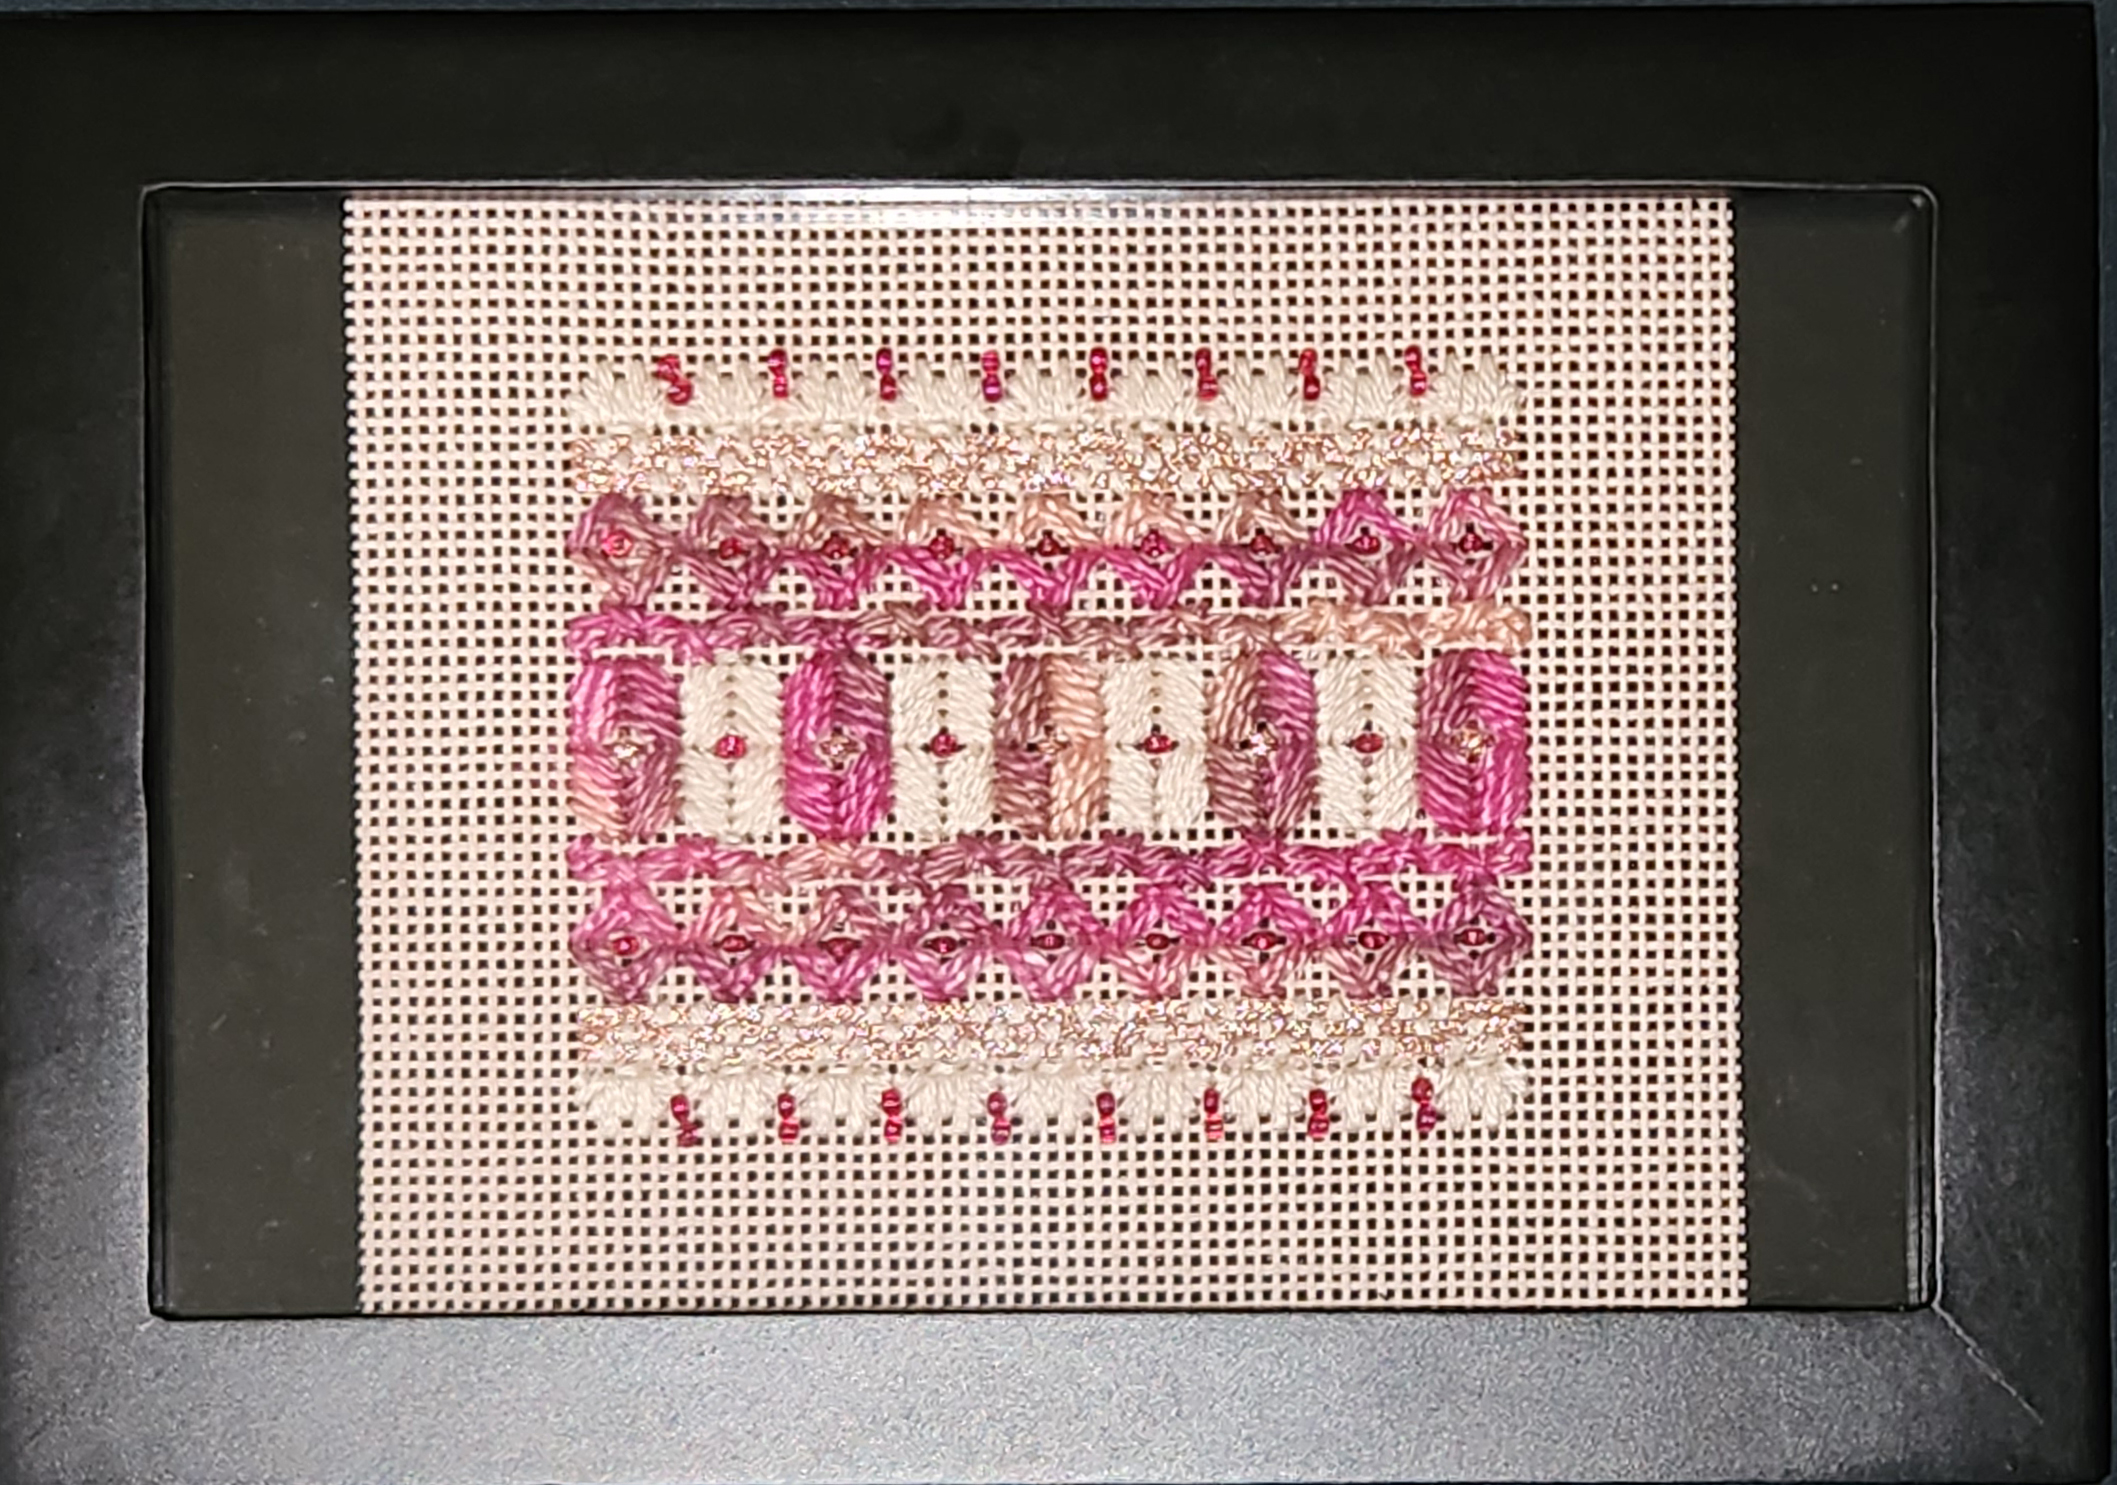
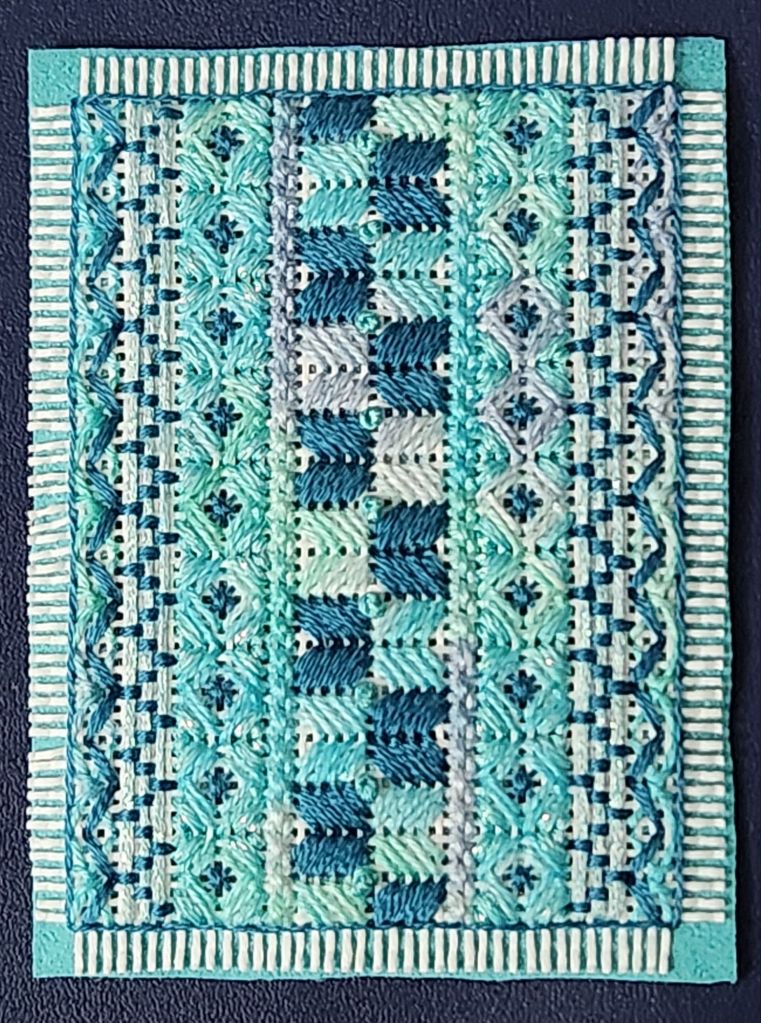
Summer Fireworks by Ann-Marie Anderson-Mayes was done on white Congress Cloth and placed in a 5″ x 11″ black frame (by me). I laced it to magazine board. Foam core would have been too thick. It came with plexiglass. I used it and still got a decent photo. The stitches are slightly raised but don’t look like they are getting squished.
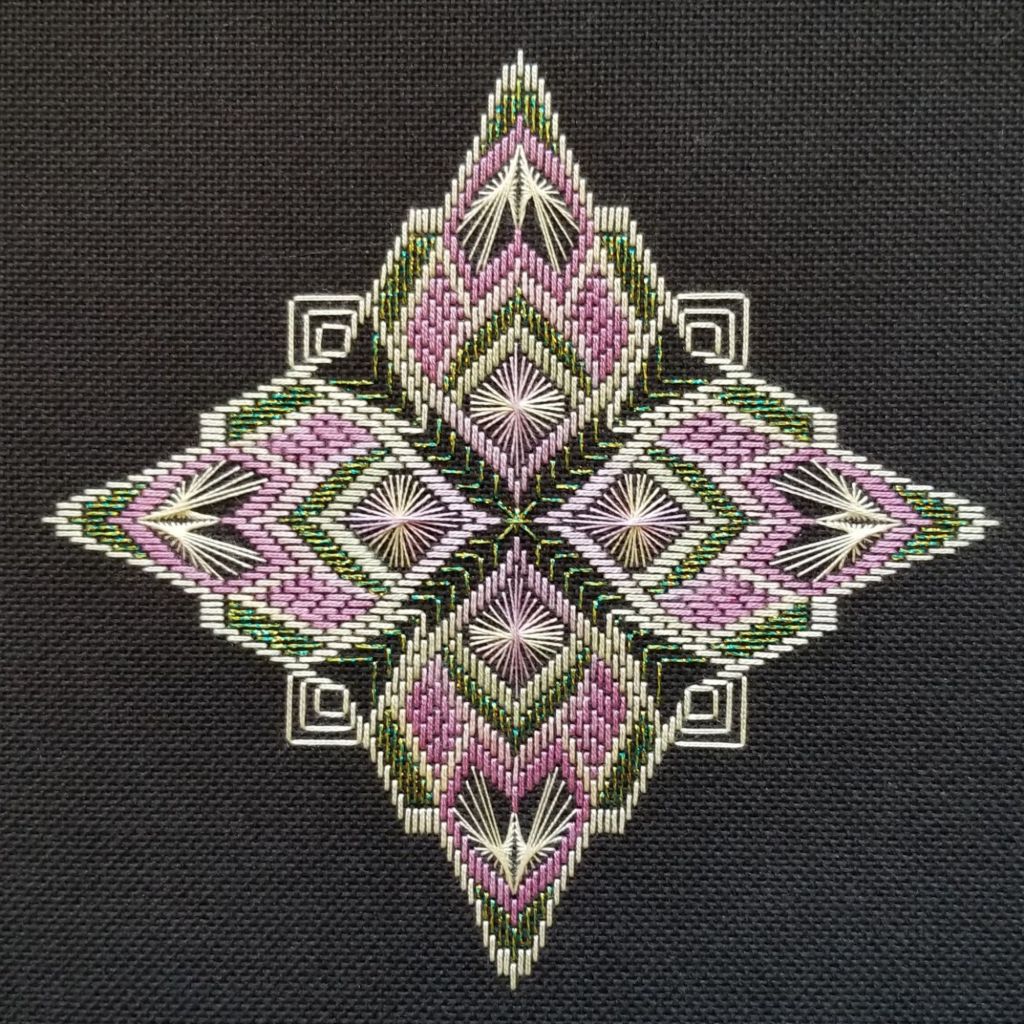
Since the photos are not showing the color on the first 2 as well, here they are before framing. Stitching on black makes a totally different look.
Goal #10 for 2025 is completed and framed.
I have a recent EGA Brandywine Guild project that is easy, portable, and would be perfect for the leftover threads! Ann-Marie also has a companion piece, Autumn Fireworks (also free instructions). That sounds like I am adding another project to the 2025 goals which is something that I was trying to avoid. We’ll see what happens.
Filed under: ANG CyberPointer's Chapter, Landscape Features: A Notebook Class by Gail Stafford
I used the distant trees/mountains on the right to explore 3 more stitches.
There is the Pine straw and mulch at the bottom of the tree on the left and around a tree on the right.
There are several grasses and grassy clumps. The tall grasses didn’t encroach enough on the right side. I think part of the problem is that I separated the threads, so most look laid, and 2 of the 3 greens are too close in color to each other. Plus, I kept rows too uniform and horizontal. Then, on the left side, I didn’t separate threads, angled more, and encroached more, and it looks better to me.
This was a very useful class. I still have areas to test more stitches at a later date.

Filed under: ANG CyberPointer's Chapter, Landscape Features: A Notebook Class by Gail Stafford
Lesson 3 of Gail Stafford’s Landscape Features class moved us through water, distant trees, and bushes. I tried out 3 water stitches, 6 stitches in the distant tree line on the left, 2 bushes on the left, a large bush, and 2 trees on the right.
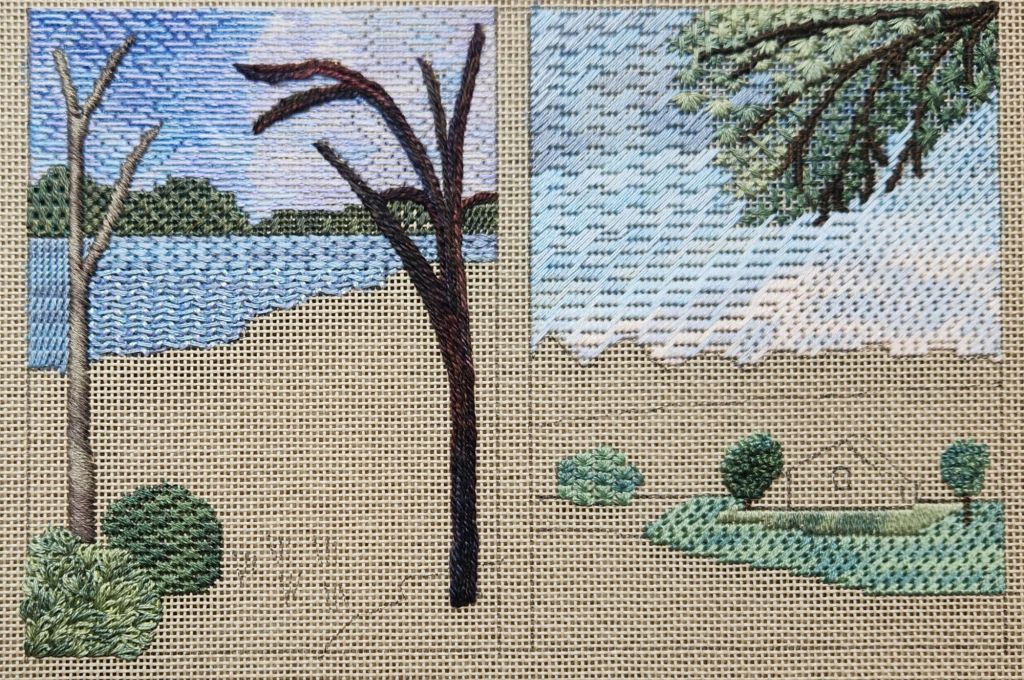
Two grasses are stitched on the right, but we will cover even more ground as grasses are up next in Lesson 4 (pun intended)! And I’ll probably do something in the distant mountain range on the right. I didn’t notice it until I posted this photo. I still have a lot of areas left!
Filed under: ANG CyberPointer's Chapter, Landscape Features: A Notebook Class by Gail Stafford
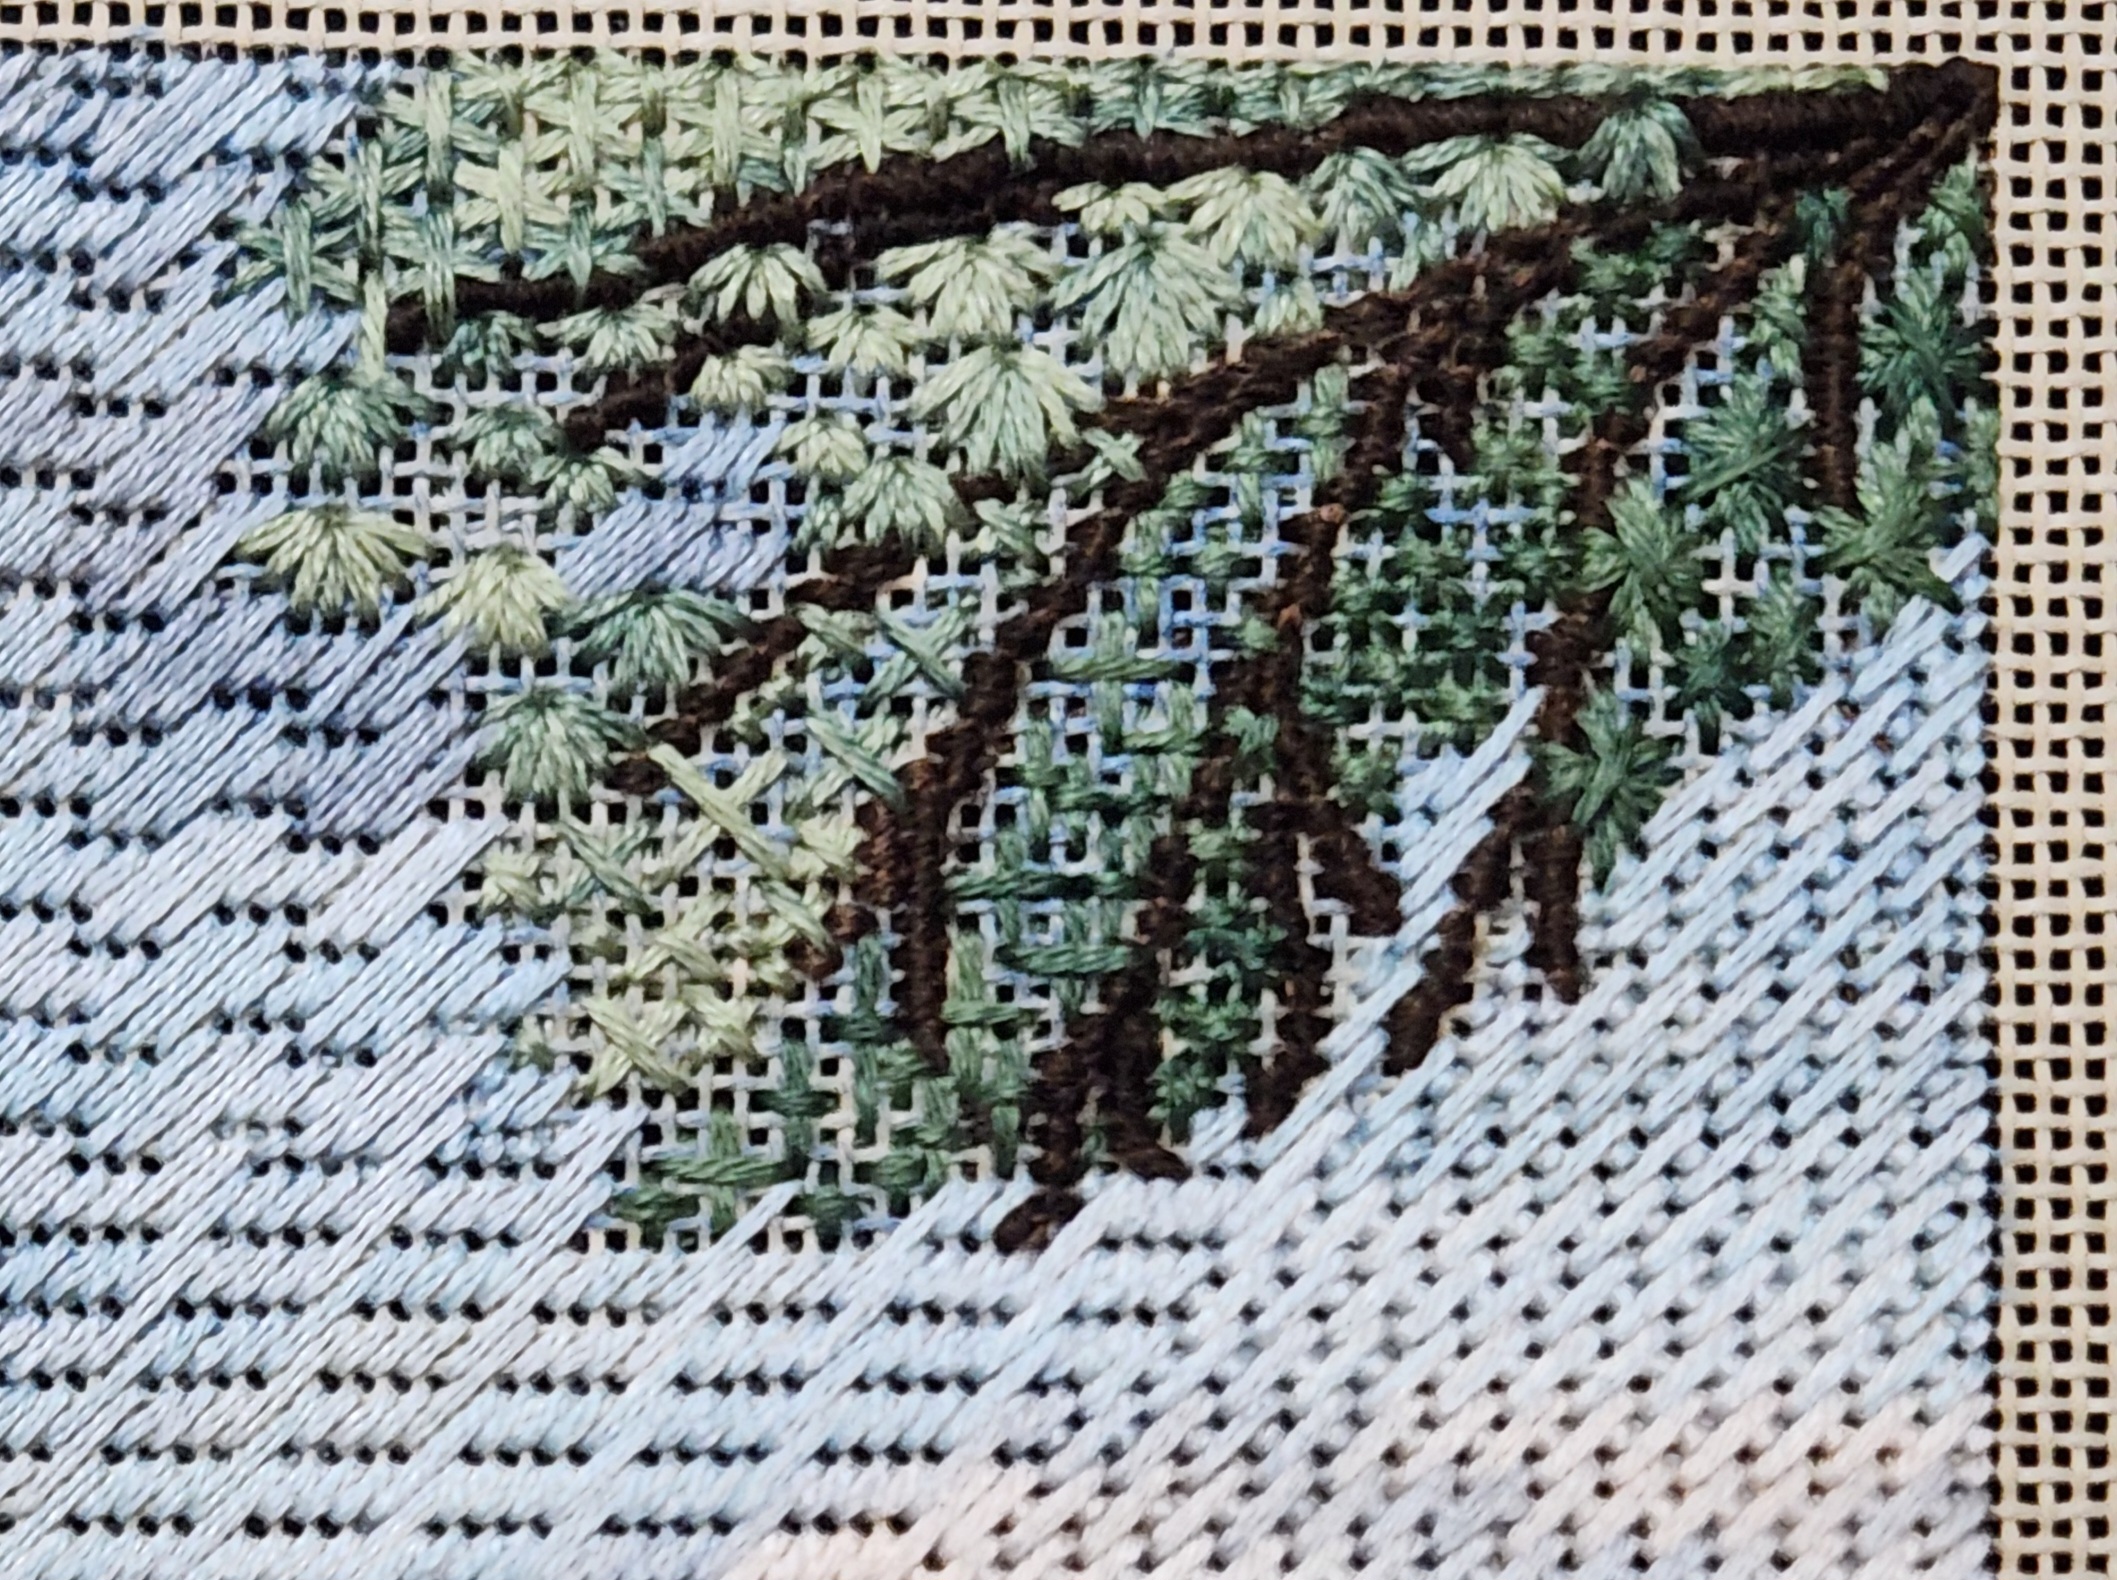
Lesson 2 for trees and leaves of Landscape Features by Gail Stafford is done.
The tree on the far left has padding thinning at the top ends and is covered in diagonal gobelin.
The branches on the far upper right are padded and covered with straight gobelin done horizontally for the branches bending down and vertically for the top branch that lies horizontally.
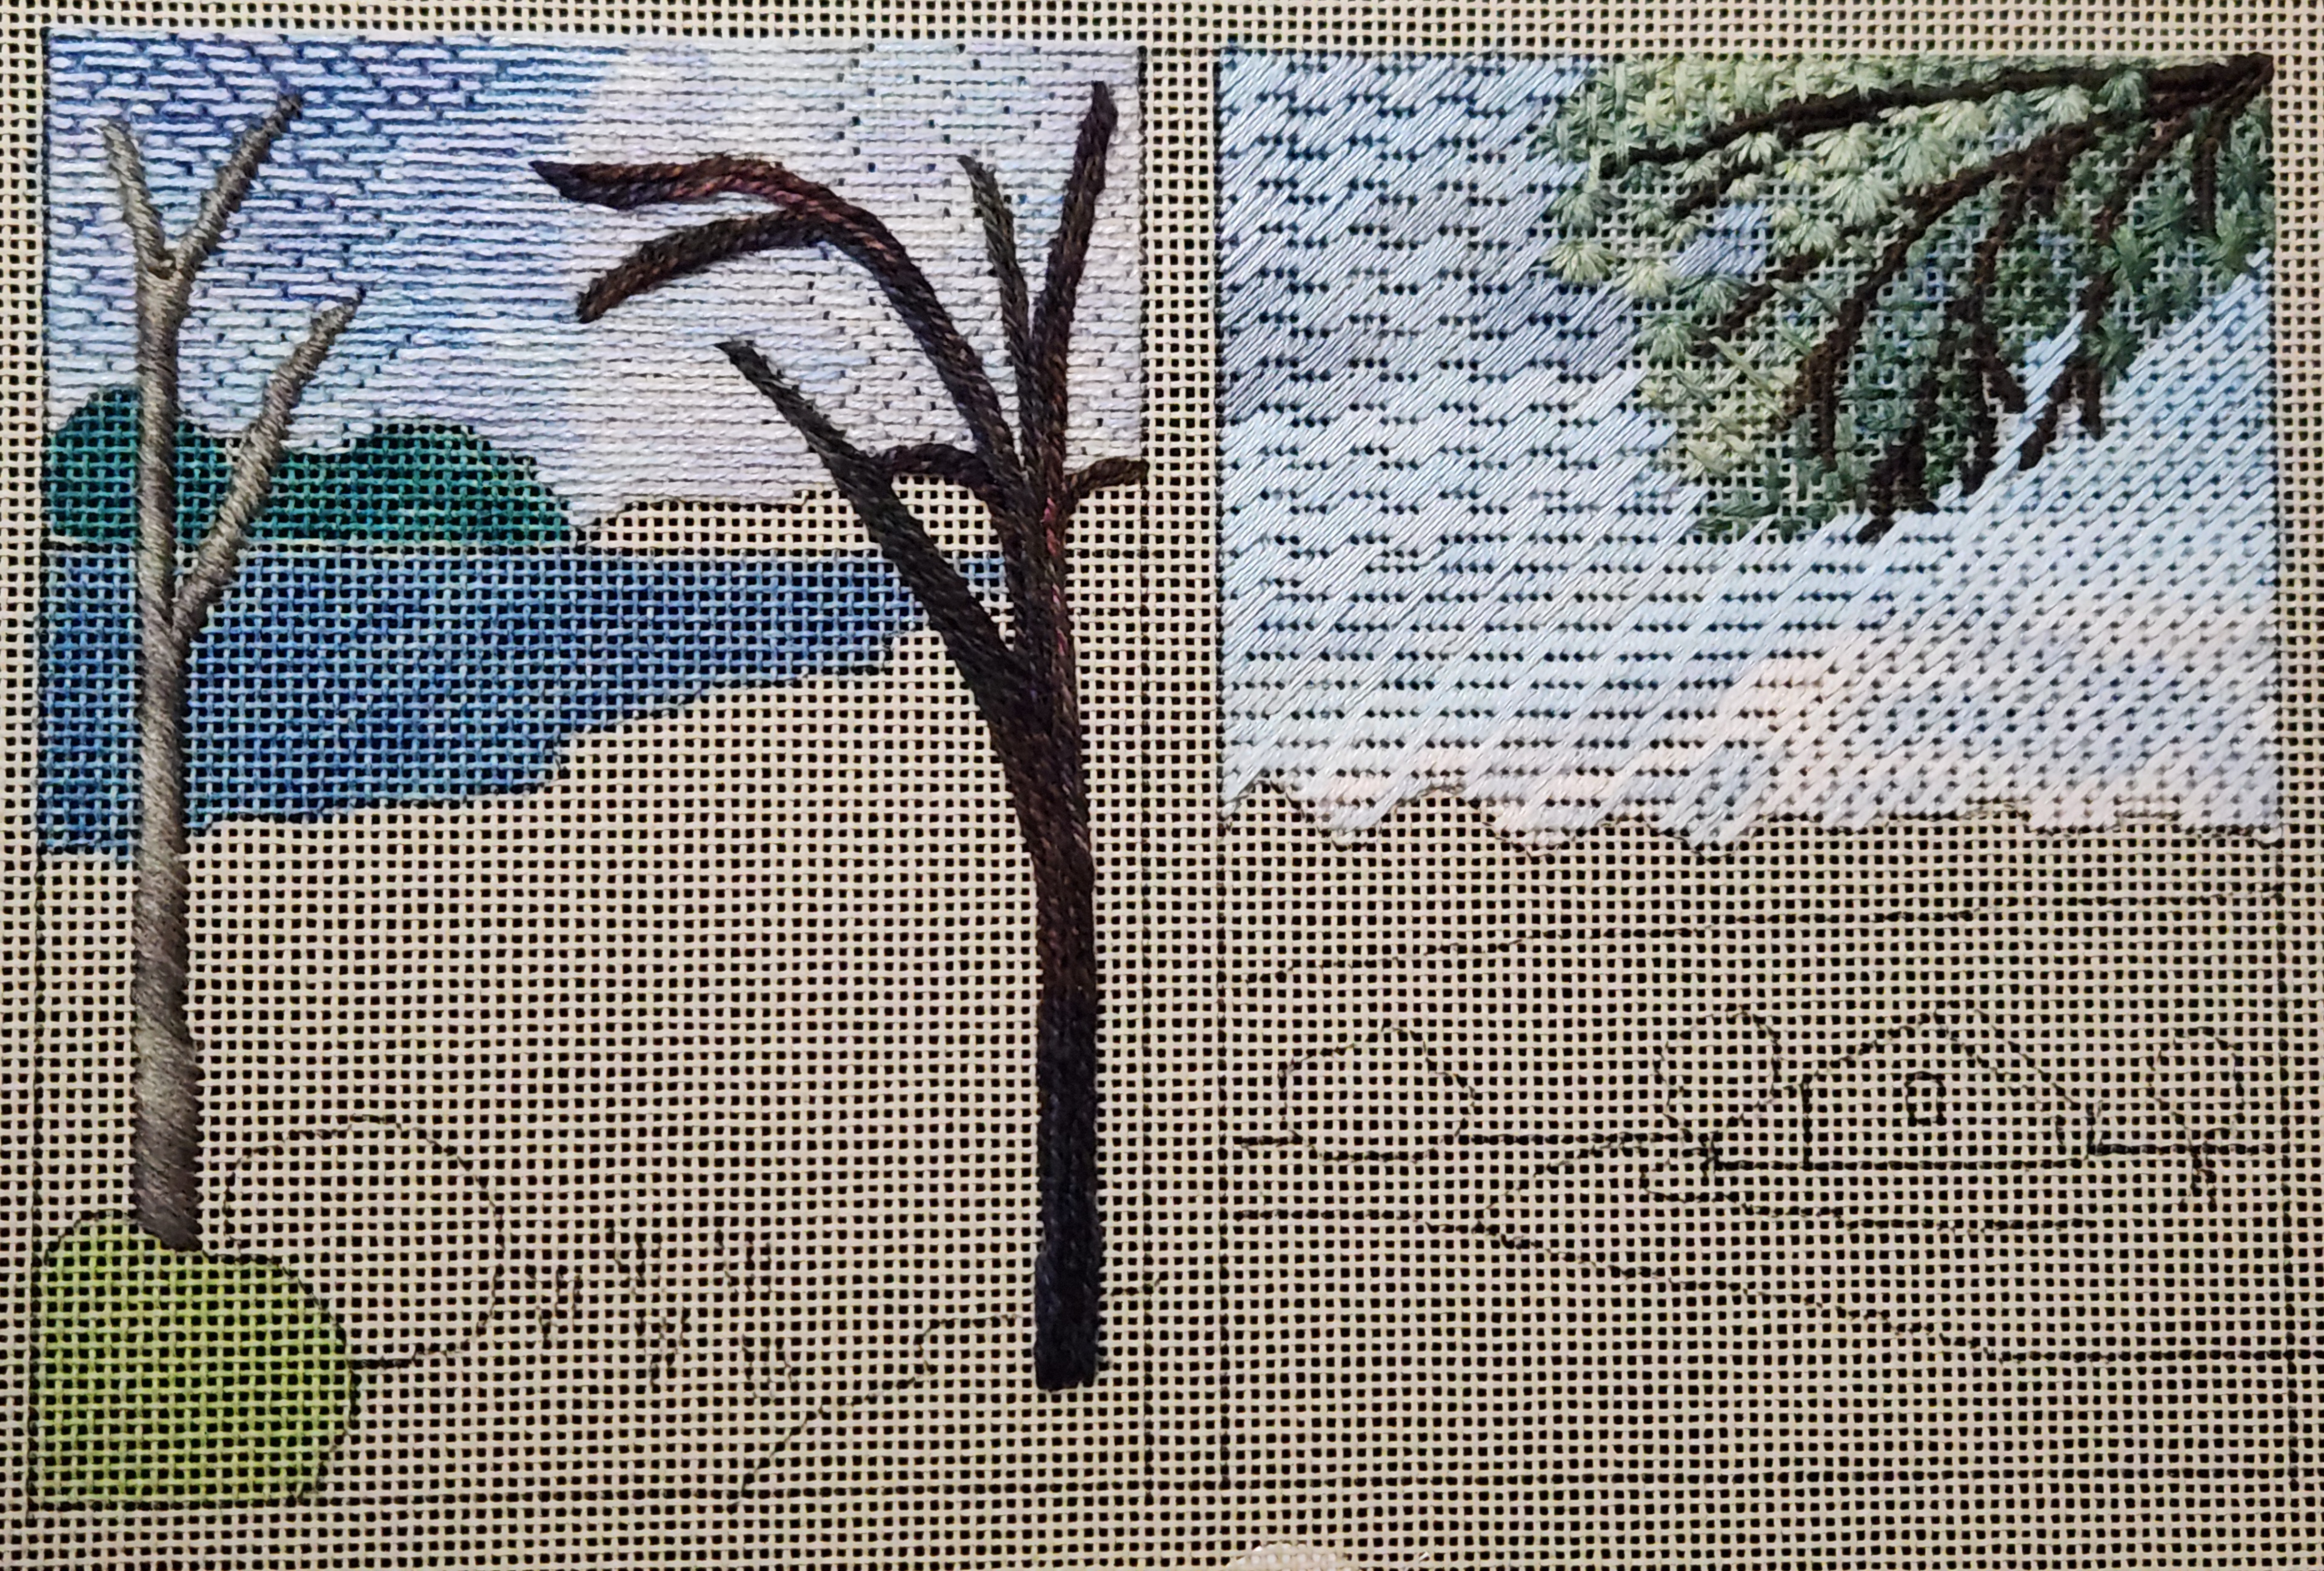
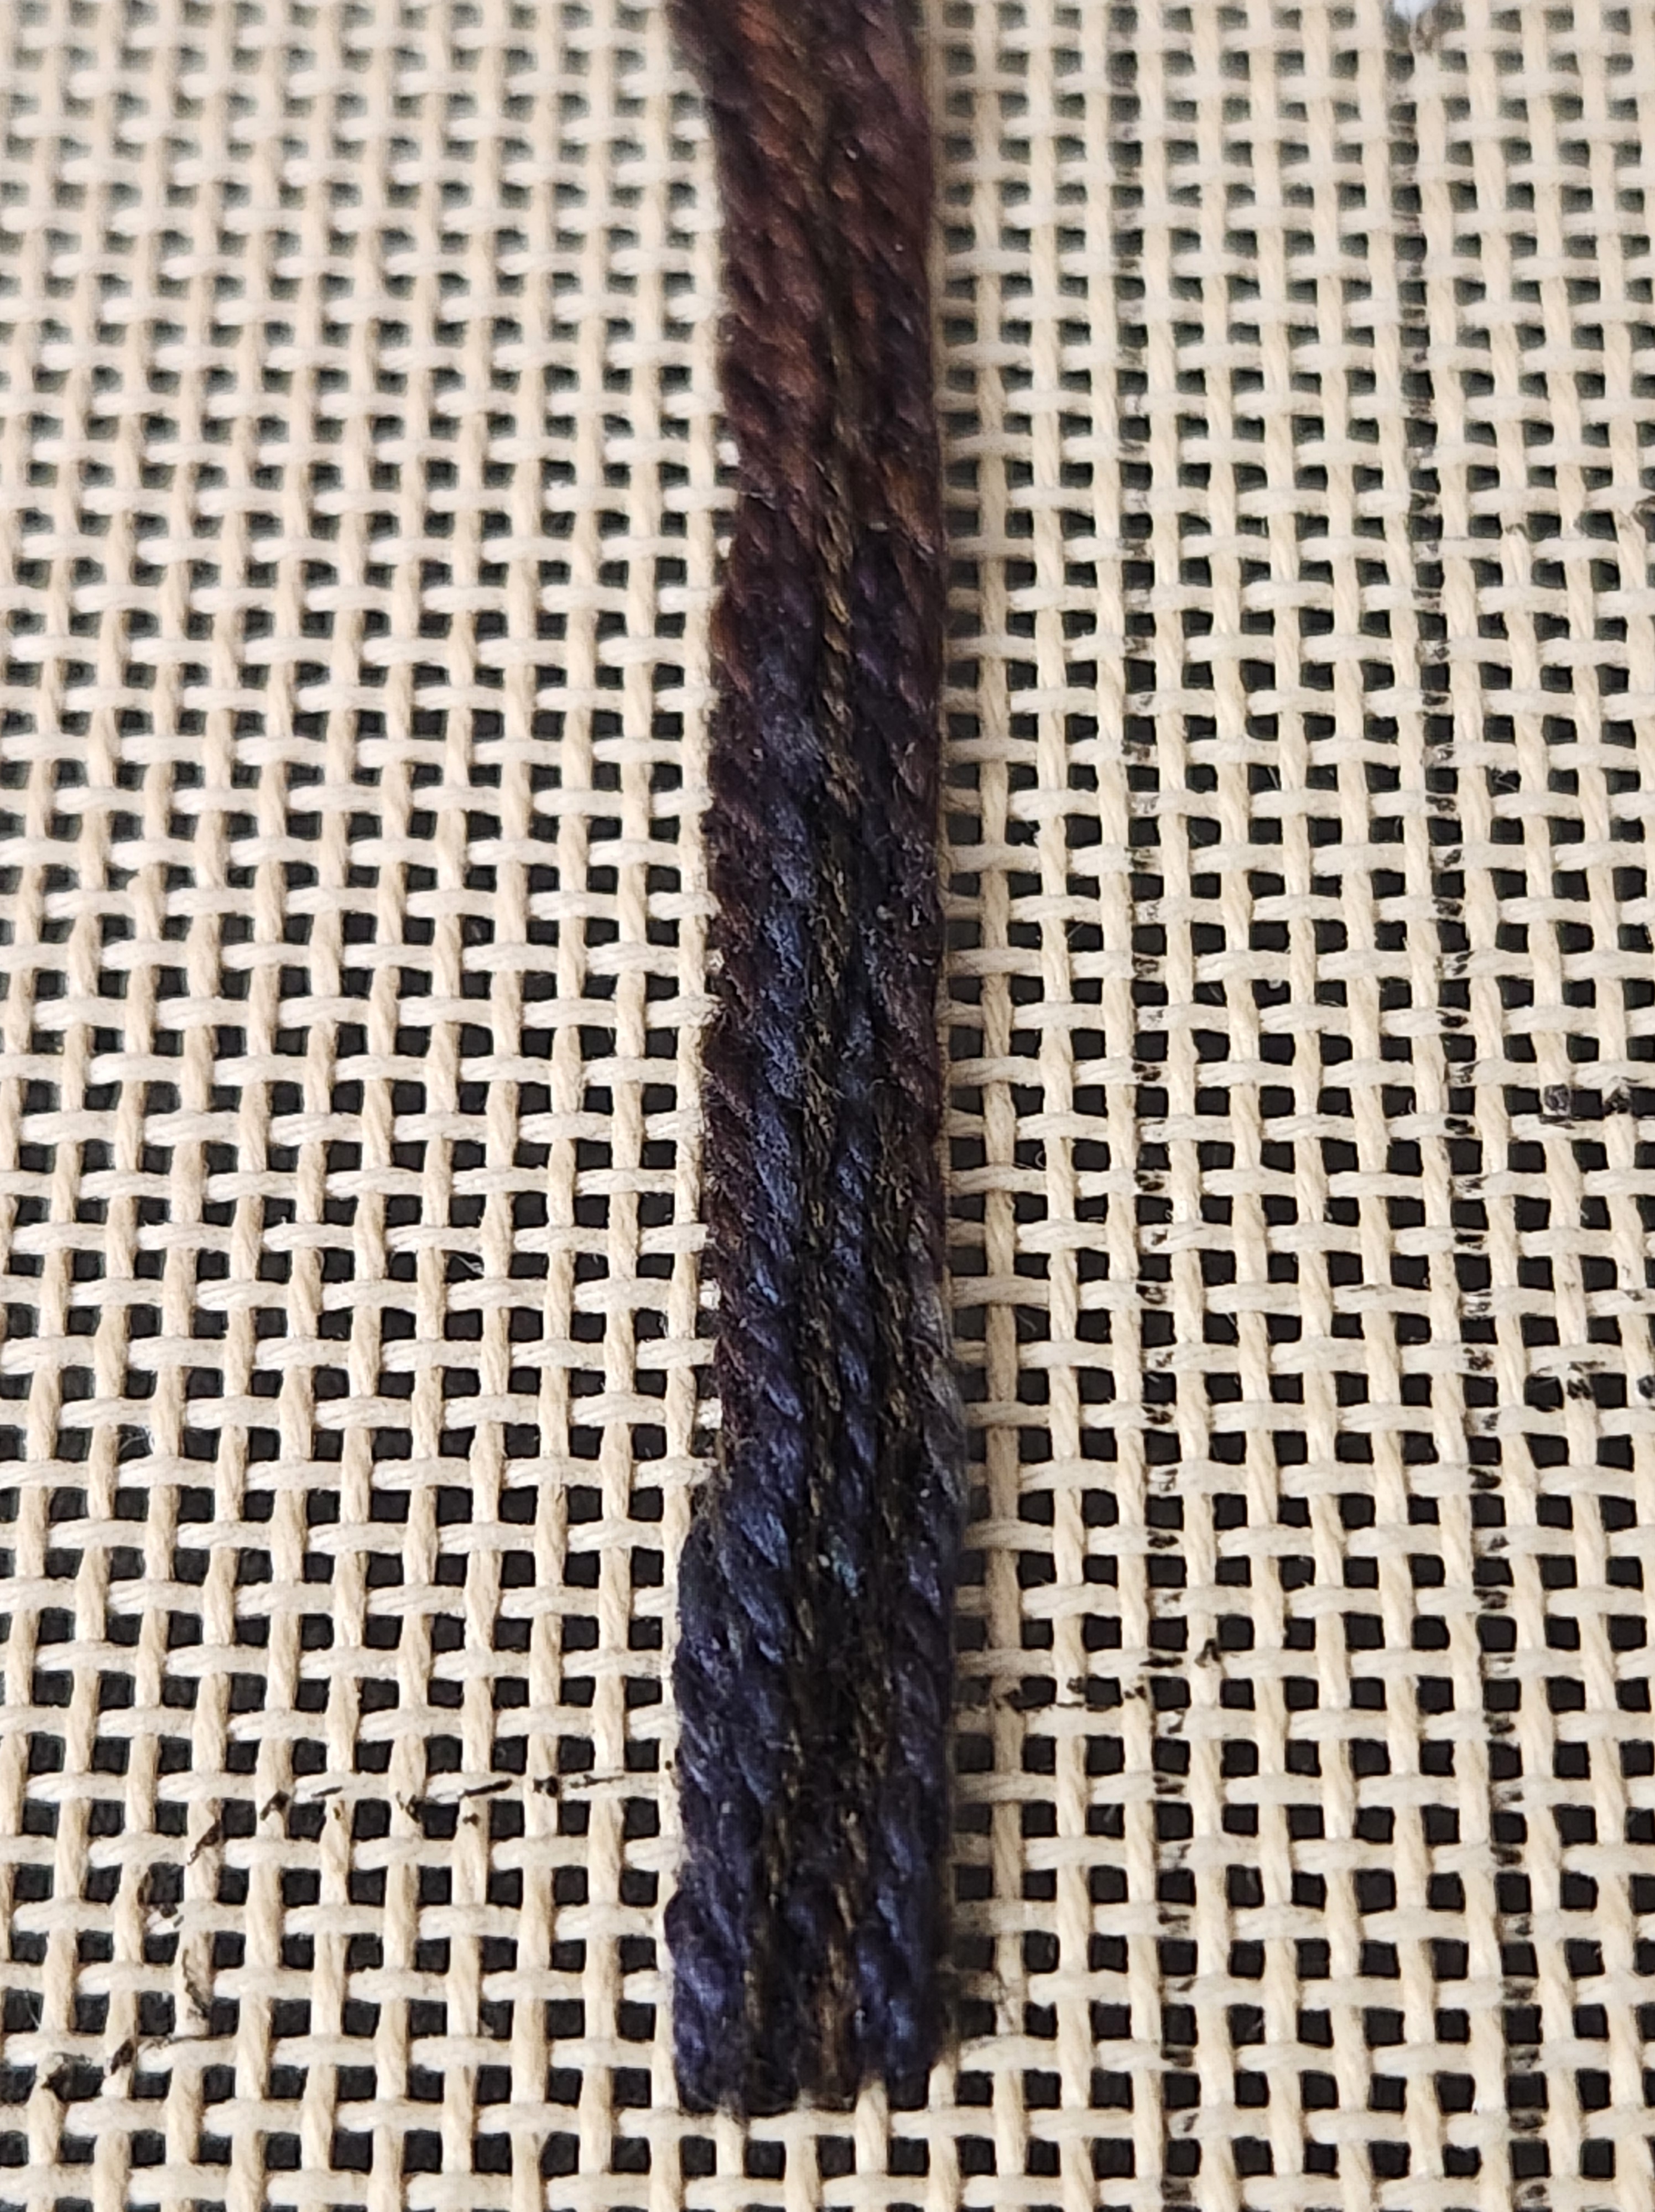
The center tree employed the outline stitch layered using Watercolours on the base and then Simply Wool too make it a well rounded trunk!
I did not add leaves to the line drawing on the left because I did not want to cover the sky. The leaves moving counter clockwise from the right are double layered cross, Smyrna, upright cross, cross/giant cross, large/small diamond ray, and Dutch stitch.
Filed under: ANG CyberPointer's Chapter, Landscape Features: A Notebook Class by Gail Stafford
The ANG Cyberpointers Chapter online workshop, Landscape Features: A Notebook Class Kit, with Gail Stafford, is only 4 weeks. So, I want to focus on this, although I am sure Gail will answer questions afterward.
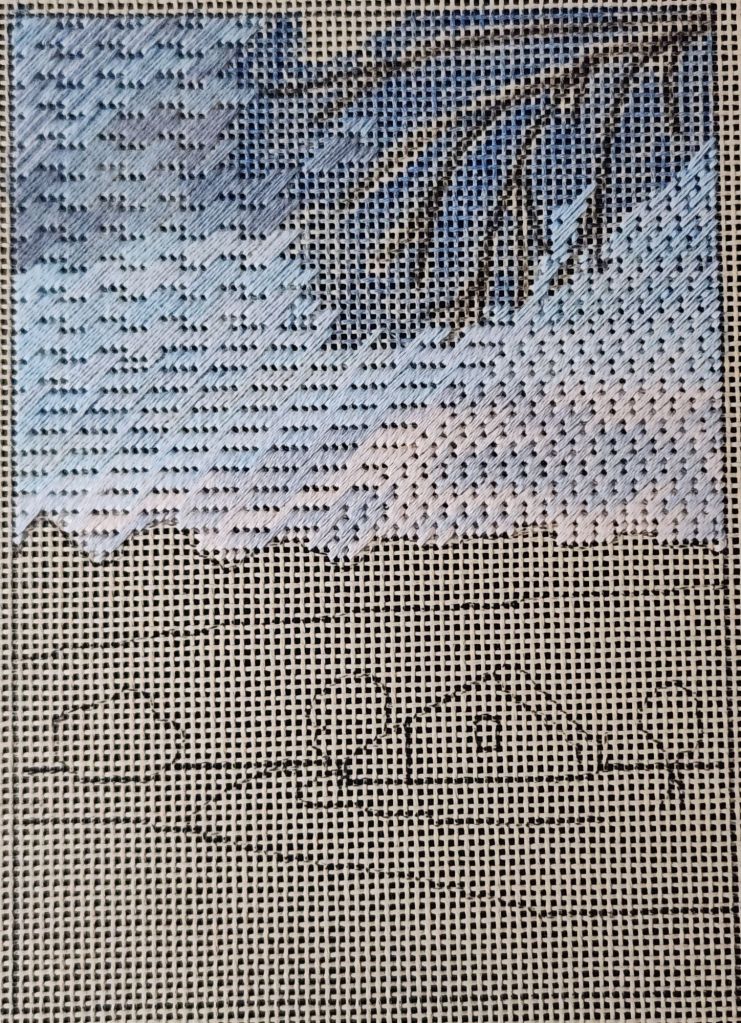
I left the bottom and a couple of areas unpainted.
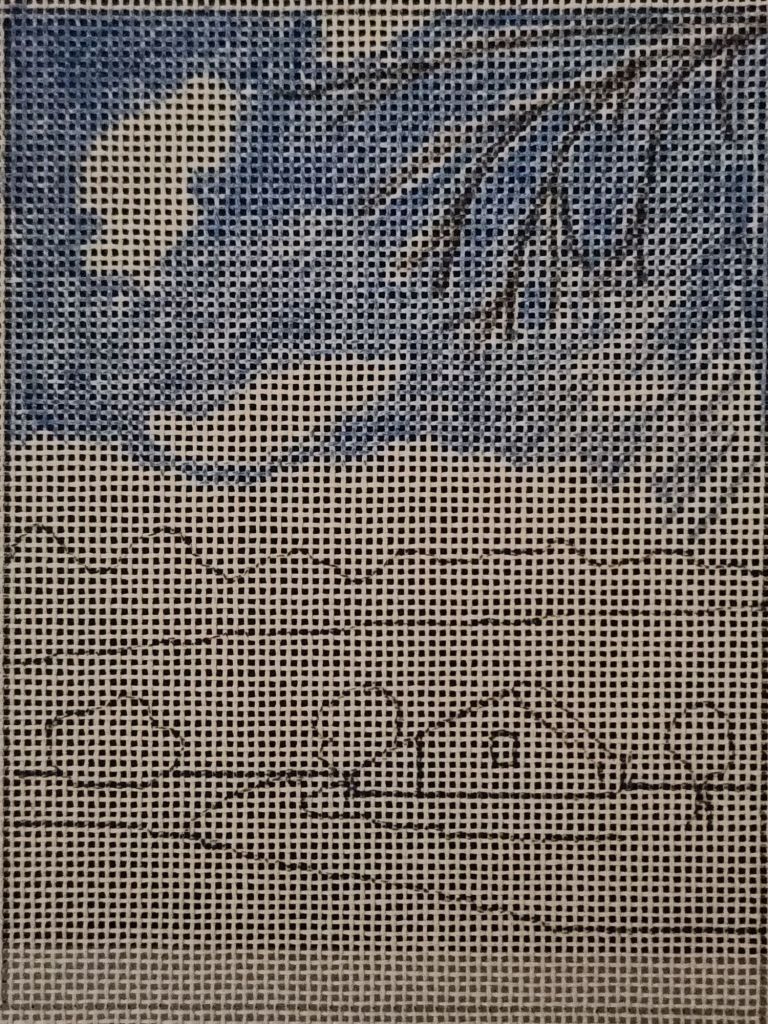
I tested more sky stitches and thread weights (3 strands along the bottom and 2 strands higher up). They all lie on the true diagonal.
Bottom right is Nobuko (smaller)
Bottom left is Diagonal Victorian Step (middle size).
Top left is Triple Nobuko (largest)
I used WDW 1161, 2109, and 1155 some areas 3 strands, some 2 strands, some combinations of 2 colors.
Not painting some areas didn’t make much of a difference even with 2 strands because the strands are laid on the diagonal.
My ranking for the order of the stitches that I like for a sky are Nobuko is best (there is no direction to the pattern), Triple Nobuko is second (I see columns formed by the holes where threads go in and out but I do like the horizontal flow of the pattern), and Diagonal Victorian Step is third (ridges and the holes are too evident).
The instructions for A Stash Sampler have been sent out to those who registered (registration remains open for the 5 days). The 5 stitched pieces that I made into two bookmarks and framed the others have been posted along with Day 1 discussions have been posted.
Jennie who tested the instructions made a fantastic snap tray in a festive red, white, and blue – a little larger than mine and squared up. Gretchen also tested the instructions and made a very bright, happy bookmark for a June birthday gift (with leftover threads from Beautiful Stitches) and a very elegant colorway for a hospice heart. Lovely. I’m so happy they adapted the instructions to make alternate shapes.
Filed under: ANG CyberPointer's Chapter, Landscape Features: A Notebook Class by Gail Stafford
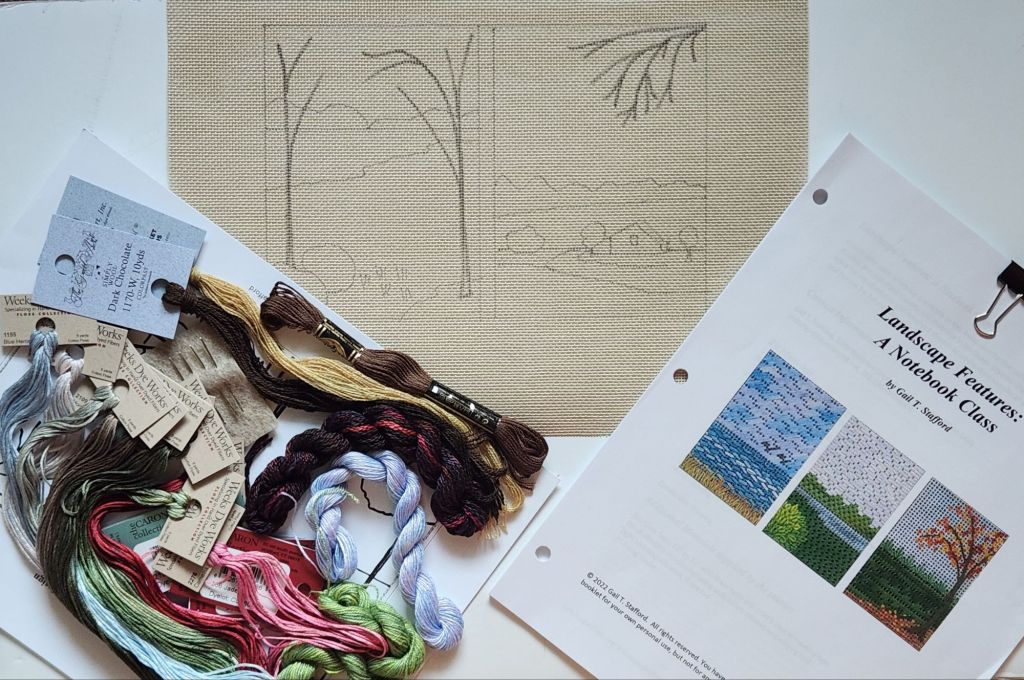
The kit for Gail Stafford’s Landscape Features: A Notebook Class arrived about a week and a half before class is scheduled to start on May 3. Gail held a Zoom class on Saturday to talk about how the online class works through through groups.io. Four lessons drop on the next 4 Fridays. Yes, I was double booked on Saturday! Linda and I found another room to join the Zoom call during our Stitch-in.
I got to see a few people I haven’t seen in a while and knew several people from other online classes (Mary and I have taken at least 4 online classes together), and Sharon from NJNA. There were a few new people to Cyberpointers, too.
This was the Workshop description from the host chapter, ANG Cyberpointers:
Create your own reference notebook in this class designed for the individual who wants to explore stitches and overdyed threads and their use in landscape designs. The focus of the course is to use a variety of stitches and overdyed threads to create stitch samples of sky, water, trees, leaves, and bushes for future reference. The kit includes a line drawn canvas with two landscape designs. This allows the participant to try sky stitches in the sky area, water stitches in the water area, and other stitches in appropriate locations. During the class, participants will paint portions of the canvas to prevent the canvas color from showing in certain areas and allow the stitcher to use threads that give less canvas coverage.
You can doodle stitch on these diagrams or create a mini landscape. As Gail said, once you buy the canvas, kit, and instructions, you can do whatever pleases you. I do have paints, but markers will work just as well and be easier.
Looks like fun. I am ready!
Beginning on May 2 for 5 days, I am leading the Cyberpointers meeting program, A Stash Sampler. Read all about it at https://www.cyberpointers.org/?p=9555
I finished the Ocean Breeze Sampler into a bookmark.
If you’re not a member of ANG, go to needlepoint.org and join National. Then, join a local chapter (find one listed by state under Chapters), Cyberpointers (Cyberpointers.org), or both.
Hope you join Cyberpointers for the program, discussions, or both.
Filed under: ANG CyberPointer's Chapter, ANG New Jersey Needle Artists Chapter, Tumbling Stripes by Marilyn Owen
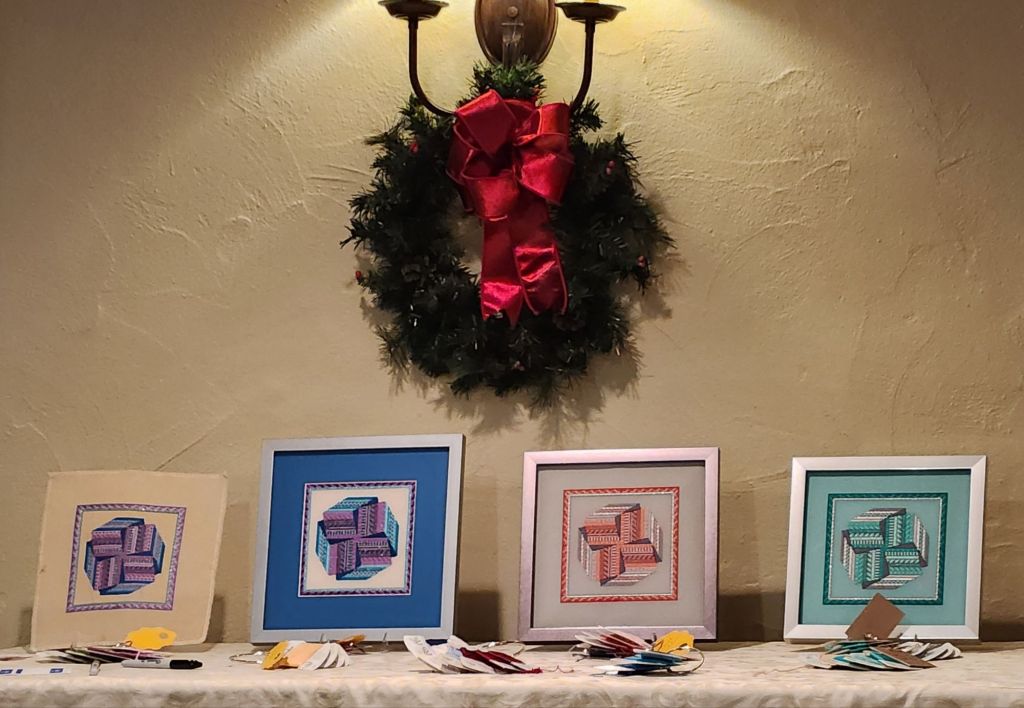
A few years ago, ANG Cyberpointers offered Tumbling Stripes by Marilyn Owen and has remained in my To Do pile since. Well, ANG New Jersey Needle Artists decided to kick off 2024 with that project. Several folks stitched different coloways, and we got to see them in person at yesterday’s Holiday Luncheon at The Grain House in Mendham, NJ. Jacqui will be leading us over the next few months.
Although the event lasted until 3:30 pm, Show & Tell and business was conducted in between courses so several people could leave a little early and beat the worst of the weather. Bill came up with me and hung out at the Library where the chapter meets (he’s familiar with the place) and got lunch across the street. We did encounter snow on leaving but then as we neared Philly, it turned to rain.
I especially enjoyed seeing that several folks finished Crescent Journey and a few more are getting them framed. I really am happy that so many NJNA members participated. We had 3 round tables of 10 per table. Very good to see and talk with everyone.
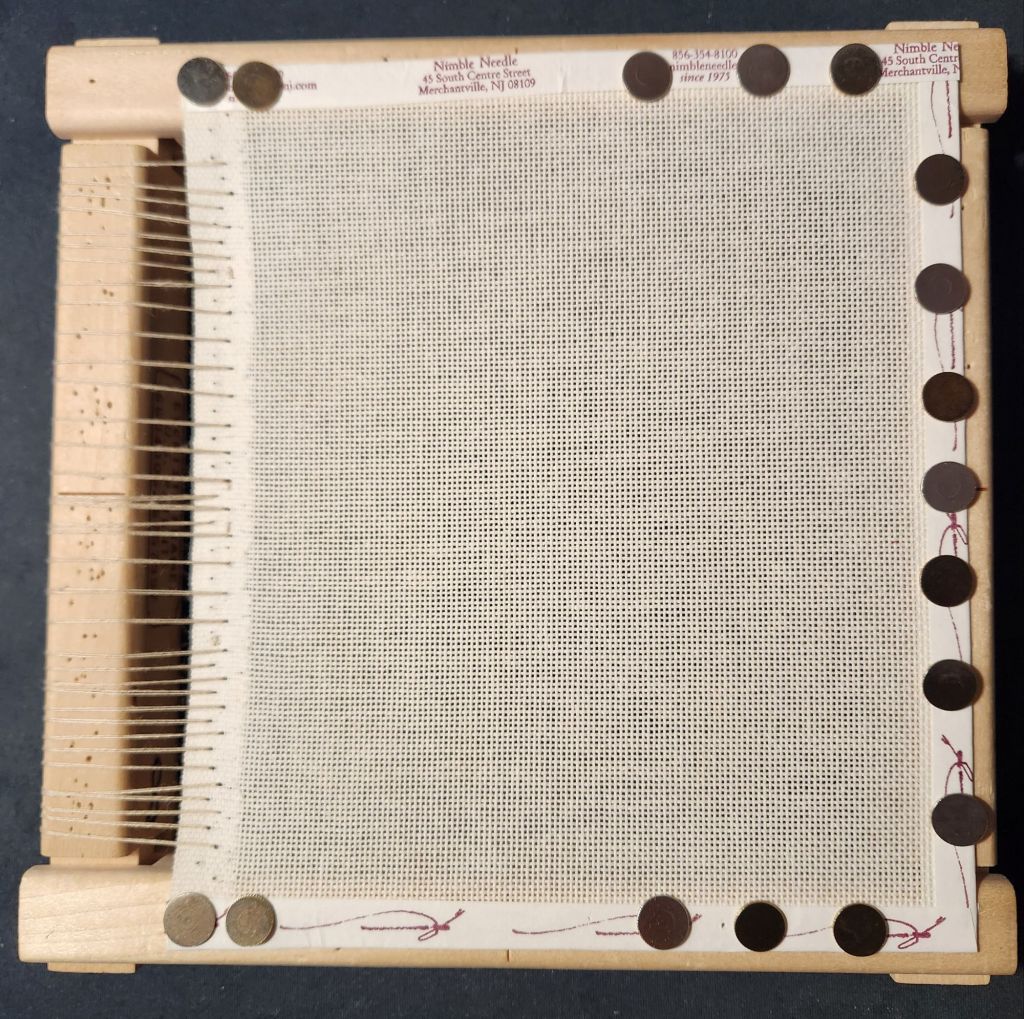
Our assignment for Tumbling Stripes is to gather threads and baste. The first thing that I did was review the Cyberpointers’ notes and their photos. I saw Gretchen from Cyberpointers stitched one as an ornament without the borders, which would be 86 canvas threads or almost 5″ on 18 count or 3.5″ on 24 count Congress Cloth. So, I went to my canvas stash and what should appear on the top of the pile, but a small piece of Congress Cloth just begging to be used. It measures 6.25″ x 7.25″. Away to my bars, I flew in a flash to find 8″ x 8″ Evertites awaiting a project. [My Christmas decorations are inspiring me!] You might think that’s not going to work, but you lose 1/2″ across the sides where you attach the canvas with tacks on Evertites. So, one side was fine. I don’t have 7″ Evertites and am not going to buy them. But, I can lace one side. That was something I learned from Kay Stanis in A Toast To Tiffany (an unfinished project). I didn’t note what thread to lace with. So, I doubled Londonderry Linen 80/3 which worked great.
Despite my references to the Jolly Old Elf, I didn’t want more Christmas ornaments. I wanted to think spring. I wanted to use yellow because Jacqui is leading this. She gave a great Zoom talk on the value of using yellow in designs.
So, I went dashing over to my threads. In a wink of an eye, I had pulled my coloway! Actually, that was more involved because:
1. I had to sort through a pile of threads. I wish I could be completely organized but it’s never going to happen.
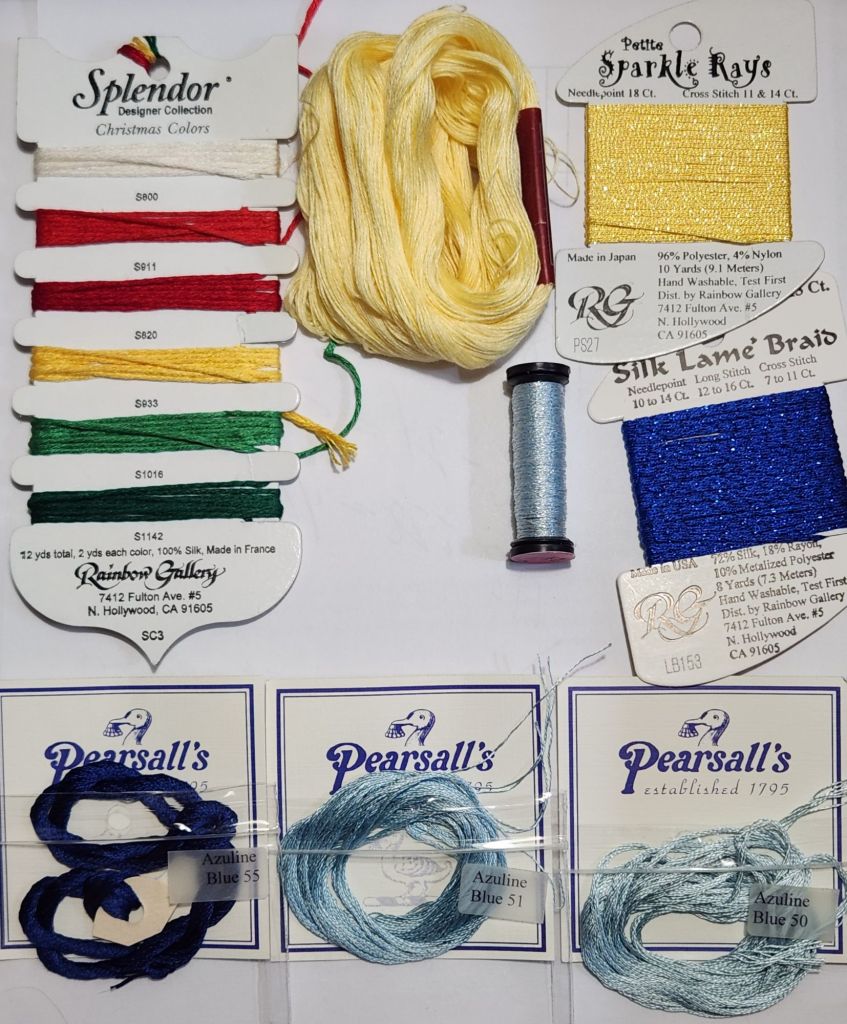
2. I don’t have a lot of yellow threads. So, I am borrowing the yellow Splendor from the Christmas Colors Designer Collection. And, I have to use DMC Floche, a cotton thread. That’s good a good sheen to it.
3. I needed 3 values of blue and found that in a bunch of threads called Pearsall’s by Tristan Brooks. It’s a discontinued line of silk threads. There are 3 values of Azuline Blue, although the light and medium are very close. The last time I used Pearsall’s, I found it difficult to handle. I’ll have to thin out the Silk Lame Braid in order to use it on Congress Cloth, but the color is great.
Pulling threads from stash is usually challenging, which makes spending time organizing them a waste of time – right! ? ! Do you find stash useful or a hindrance?
Filed under: ANG CyberPointer's Chapter, ANG New Jersey Needle Artists Chapter, Hearts of Gold by Michele Roberts
It took about 2 months to get back to finishing the other 2 Bargello ornaments from Hearts of Gold by Michele Roberts (an ANG Correspondence Course). It’s available under Distance Learning on ANG ‘s website. Michele’s are all done using only 4 gold threads so they are all color coordinated. Mine are all different colorways for seasonal display. Tedious work but I completed the finishing on them! This time I used a binding stitch.
I had pulled out my Kreinik Custom Corder. It’s loose but ok for the hanger. Since my threads were already cut, they weren’t long enough to go around the whole heart. Step 1 is to interlock the 2 threads. Step 2 is wind. Maybe I didn’t twist enough?

Step 3 is to remove from cord maker, bring both ends together, and allow them to twist together. It was tighter initially but then loosened during that process. Since even 2 lengths weren’t working, I abandoned the cord maker.
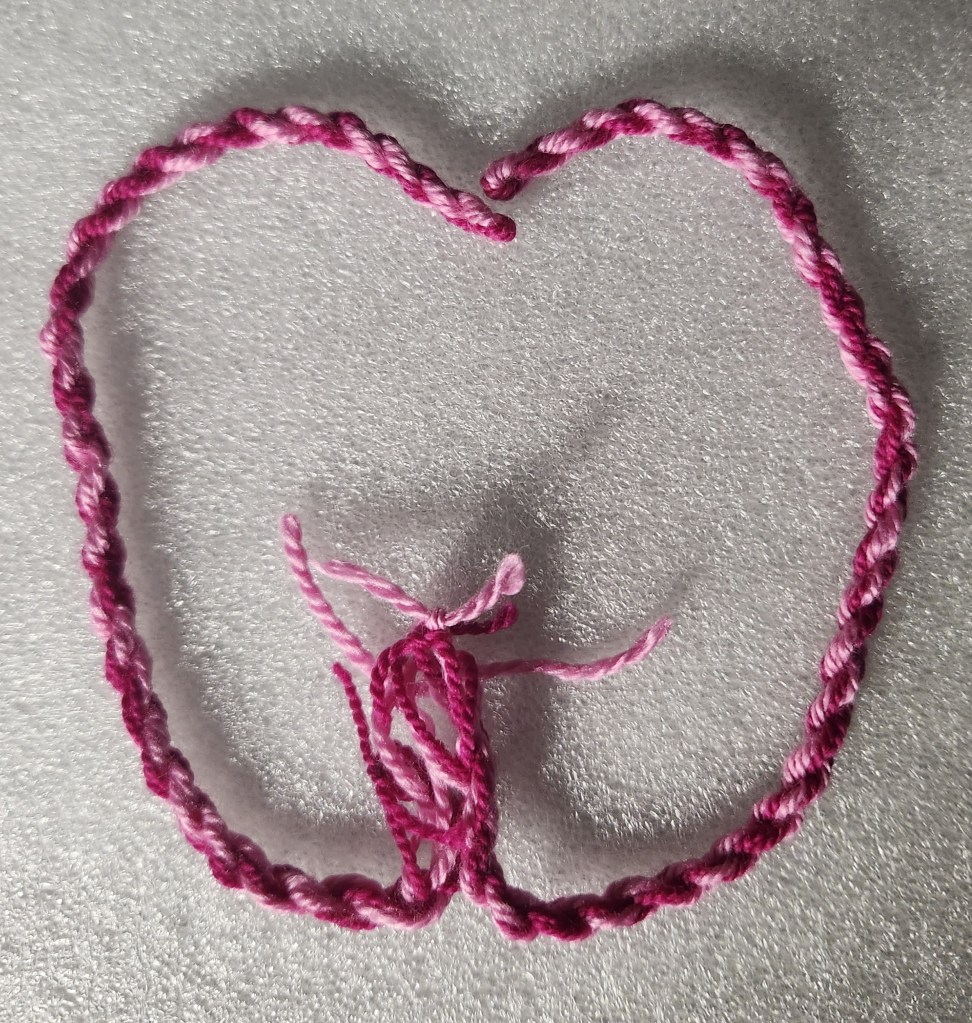
There was still a decent gap between the back and front due to a 5 mm soft foam core that I used. So, I went with a “binding” stitch and it took way longer than I am sure a professional finisher would take to do it. Bending the monocanvas back results in a less than desirable rounded shape. But, that stitch covered the gap and turned it back into a smooth heart shape. I prefer stitching over finishing but am happy with these.

