Filed under: ANG New Jersey Needle Artists Chapter, ANG Seminar 2019, Finishing Class with Kelly Starke, Thread and Stitch Manipulation with Cynthia Thomas
The church venue canceled (due to a congregation death) a few days before our finishing class with Kelly Starke, but Jacqui recovered by getting her craft room where she lives. Crisis averted, but organizing workshops takes resilience!
Since it was further away than the first place, I couldn’t hang with Rosie for the morning. I went armed with my Medusa Sea Jelly to keep me occupied. Although I didn’t sign up for the morning “round” class, Kelly asked me to sit in and listen since I was there anyway. So, I have plenty of Sea Jelly left to stitch for NJ Needle Fest.
Kelly has almost 70 videos on YouTube (not all on finishing)! I’ve seen the one she did for Layer of Leaves. It’s long at 3.5 hours but has some excellent tips. She goes over everything twice, finishing 2 ornaments in that time. Doing the finishing in 3 hours in person was more fun, and the time flew by. I peeked over people’s shoulders and took notes in the first session.
She had personal totes full of the tools we’d need! With 12 people in the class, she didn’t sit once. And, she had a helper, Robin. They were so organized and helpful. Kelly has “Mom” hearing! She didn’t miss anything.

Her handout has great pictures of each step. These are key points I want to remember:
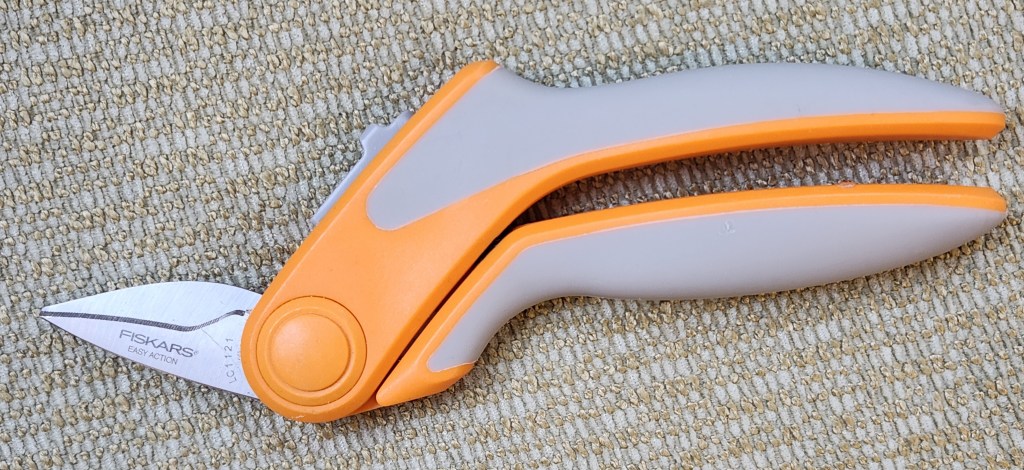
Cut up to edge in triangles (point into canvas) using short scissors, quilting nip scissors. I won’t mind adding another pair of scissors to my finishing bag. For an irregular shape, start at the indented areas.
Figuring out where to cut seems like the hardest decisions of the day because you can’t uncut! Here is my bell before an after (with the foam board in place) some trimming to reduce bulk near the top center.


A square seems the easiest. Interestingly, Kelly thinks light bulbs are one of the tougher shapes.
Trace outline on 1/8″ thick foam board. Use 1/8″ scrap to mark inside around shape to make the board 1/8″ smaller. No photo copying of the stitched piece is required to make outlines. That will save some time that I have spent copying and cutting paper.

Bevel edge on side of foam board touching the canvas/fabric. I did the bevel on the wrong side and had to recut it.
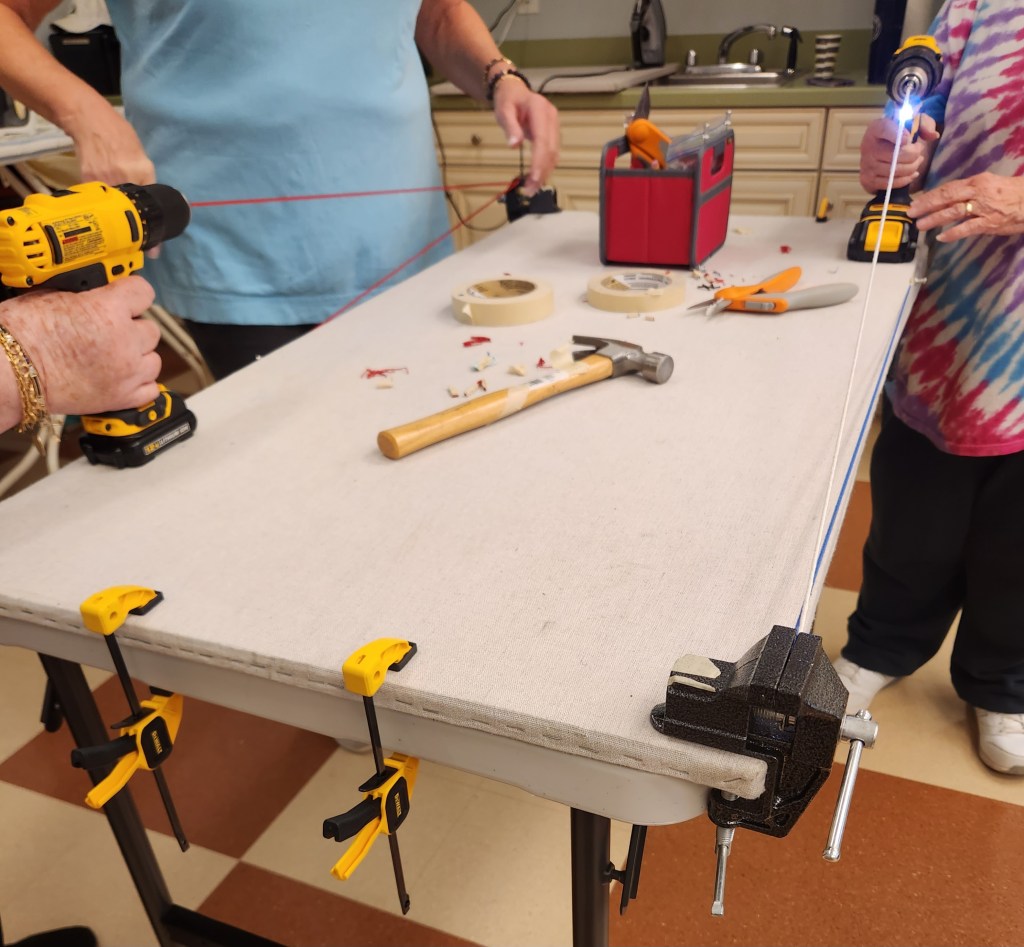
Making cord using an electric cordless drill (has to be able to turn right and left) is going to make a tighter cord than the Kreinik cord maker. That is a problem I have had. But, I doubt that I will get a drill. I will probably try twisting with the Kreinik cord maker much more than I’ve done previously. Later that night Sue commented that putting a weight in the middle of the cord serves to make the reverse twist when cording with Kreinik Cord Maker according to their instructions. However, Kelly has a video showing her twisting the cord by hand. I’ll probably try that too.
I used Silk Lame Braid 13 count. That and Kreinik can be used but have a greater tendency to break. So, Kelly used Pearl Cotton mostly. My cord turned out great!

I think I still have a glue gun in the basement – hot glue dries fast but it’s messy and I really don’t have a good workspace. I may stay with Aleene’s Super Fabric Adhesive (supposed to be fast drying and permanent) or try Fabri-Tac (Kelly used it for gluing cording in place).
The cording is cut to a point to prevent twisting where the loop starts wrapping around the edges (unless where you want the cord can’t accommodate a lot of cord in which case you make a separate cord for the loop and merge in a different area which is what I did for my bell).

To be safe, stitch loop in place to reinforce glued area (that spot gets the most stress on an ornament). I do think high heat might compromise the glue but Kelly has been doing this for 20 years. Gluing the cord is much faster than stitching it. Glue isn’t touching any needlepoint at any time. And, Kelly has a video if you prefer to stitch the cording in place.
I highly recommend getting her to come to your chapter for a finishing class on rounds followed by irregular shapes. Each class was 3 hours with a lunch break. Set up and clean up time made for a long but productive day.
My Bells of Scotch originated from the Thread and Stitch Manipulation 2019 Seminar Class with Cynthia Thomas. We were supposed to take a stitch, make it smaller, larger, turn it, and combine it in different configurations. There are partial Scotch stitches, 2 Elongated Scotch stitches at the top, and Scotch stitches not on the diagonal. If I were to do this again, I would make the clapper all gold. The gold surrounding the bottom center motif isn’t prominent enough. I love the fabric I found for the back. If there are any campanologists reading this post, please comment!


Addendum: Michael’s might have 1/8″ thick foam board, but you have to ask for it at the Framing Dept. I ordered some from Ebay.
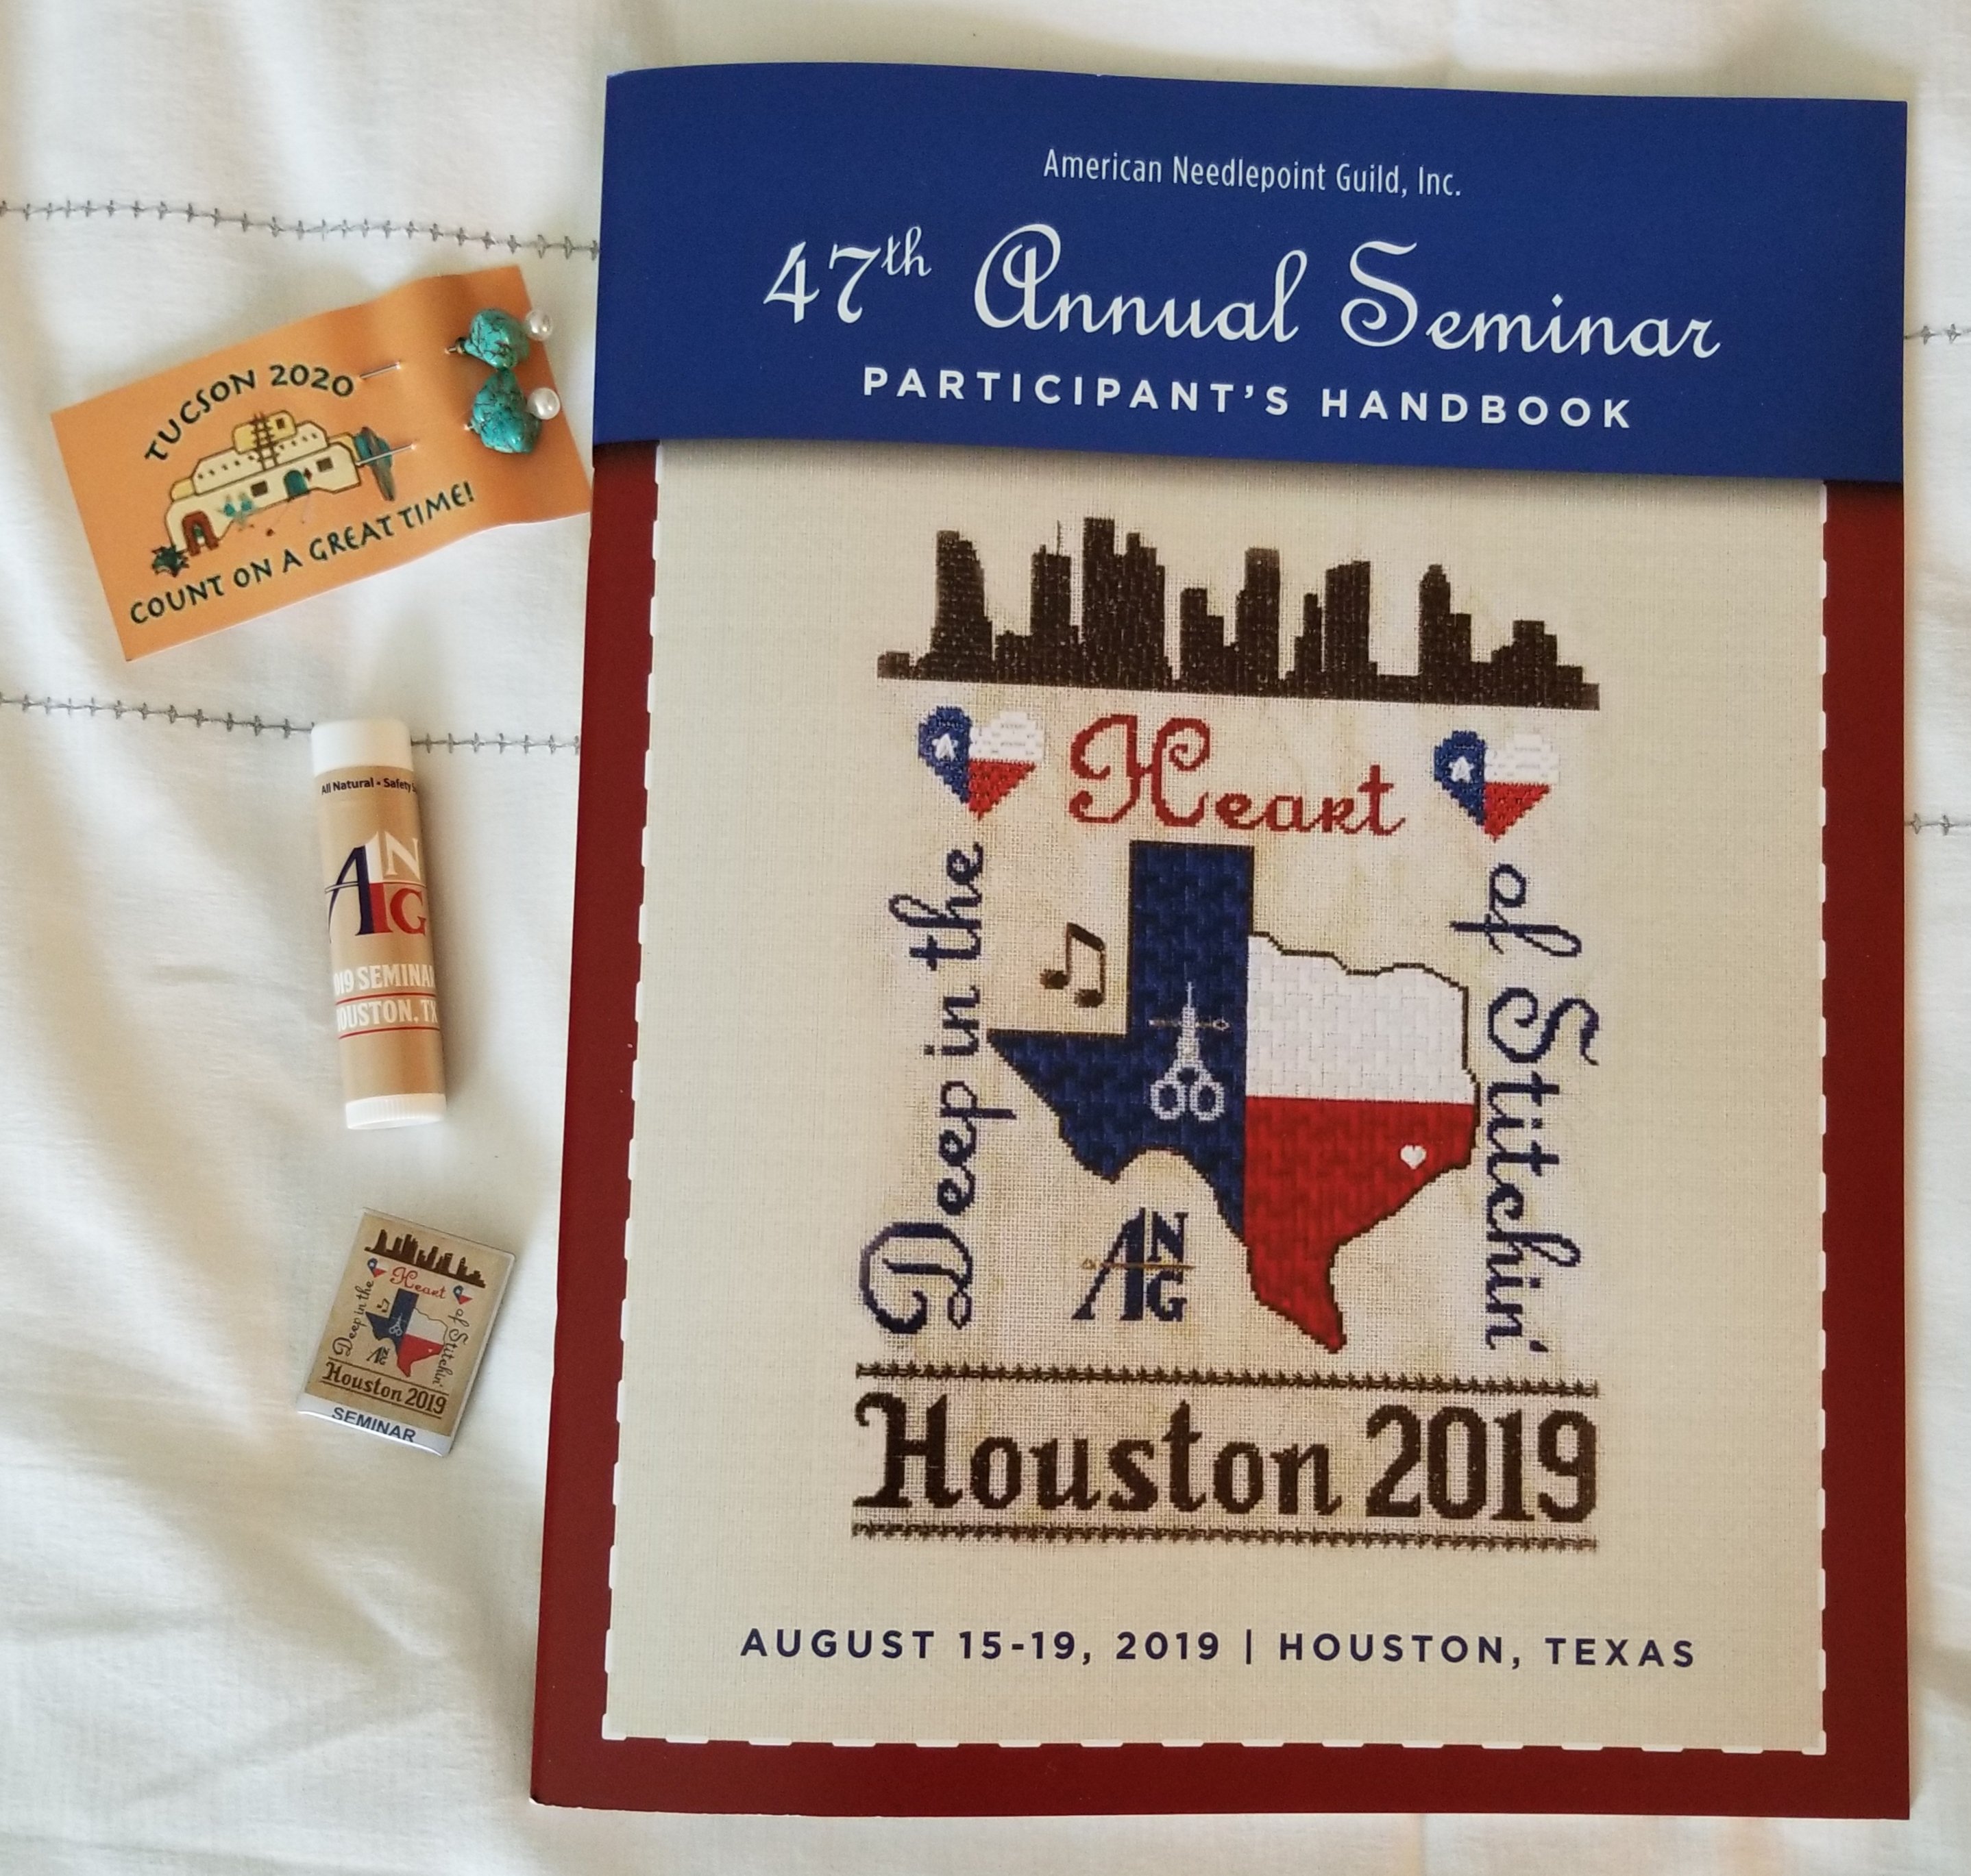
Tahitian Treat was my piece at the 2019 ANG Seminar Exhibit. It’s an original design in the Non-professional category. And, I am pleased to say that it got an Honorable Mention ribbon.
The scores were: 81 out of 100 (design=21 out of 25, color=19 out of 25, workmanship/technique=15 out of 20, suitability=17 out of 20, finishing=9 out of 10; Note: The First Place design only scored 90 out of 100, the lowest scores for a First Place design that I can remember).
As usual, I got the judges critique. So, I waited to post until the critique and piece returned to Philadelphia. All very positive except for twisting threads – my nemesis! Excerpts:
The more that one explores Tahitian Treat, the more that can be discovered! While you were basically starting with a 12” grid, your piece does not look like a checkerboard.
The way that you created a path around the outside of the design encourages movement of the eye. Yet, your paths had some resting places that were a good idea and nicely stitched. The palette of colors that you chose to work with by using Watercolours Tahiti seems to work well in adding to the movement and balance in your piece.
Your choices for the stitches are also successful. As the direction of the area in which you are stitching changes, so, too, does the direction of the stitches themselves. This in turn offers a cohesive look to your piece. This is especially effective in the yellow-green areas in the outer ‘path’ and the dark blue surrounding the central diamond area. The range of values used is equally effective.
The challenge of working with any twisted thread, e.g., pearl cotton, is the need to be diligent in maintaining the twist of the thread. Your eyelets are consistent in maintaining the same-sized opening in each execution. Your threads are well laid in the dark blue area surrounding the central diamond. You have also determined the right number of threads to have in your needle when using floss.
Your stitch, thread, and color choices all work well in achieving an overall successful design. Thank you for sharing Tahitian Treat with us and we hope that we will see more from you in the future.

Filed under: ANG Seminar 2019, Thread and Stitch Manipulation with Cynthia Thomas
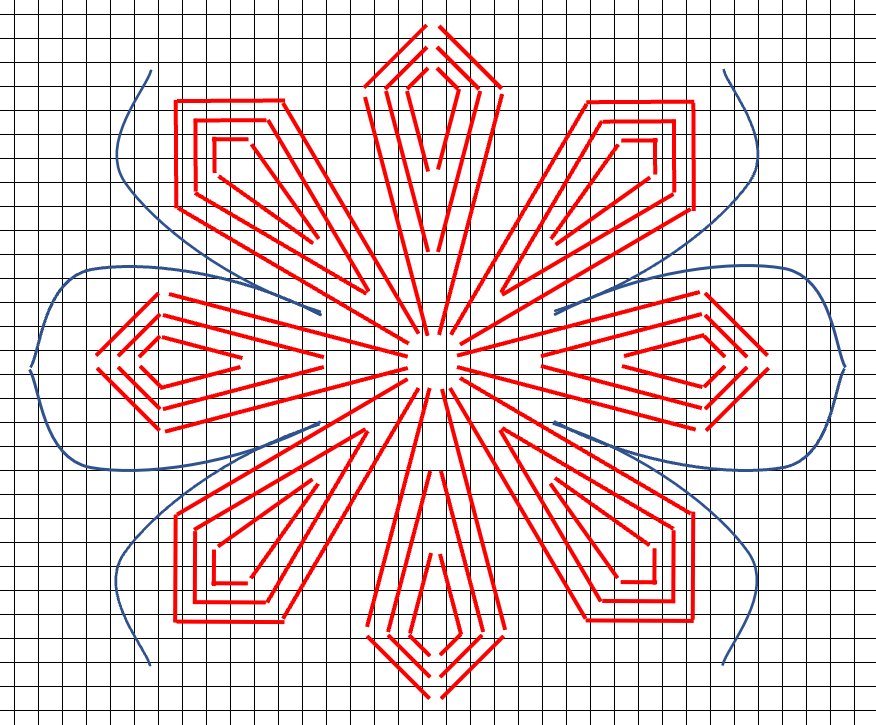
The Thread and Stitch Manipulation with Cynthia Thomas was a one day class. I decided to play with stitch patterns all day – some on paper and some on my computer. Lots of fun!
I learned how to make these diagrams in Excel from another of Cynthia’s classes 2 years ago!
Here’s a couple of my favorites:


Very comfortable stitching day! No tissue paper – all counted work.
I did not need to practice the trees because I just did the same technique for Gail Stafford’s, A Dusting of Snow. Kay adds a twist, figuratively and literally, with regards to the couched thread. And, the stitch for the leaves is one I understand.
So, I stitched the composite blue/green border you see on the left side. It’s a 6-step process and 5 steps are done. The 6th step for the beads will go on last.
At the end of class, Kay had us turn our glass ort container into a glass, filled with champagne, and we toasted our wonderful experience together! Many thanks to the pilot stitchers who donated the ort containers for our class and got Tiffany paper bags to decorate our classroom. Very nice touches.

Well, after a lovely evening last night at the Needlepoint Fiesta dinner, I didn’t want to stitch. But, I did read the instructions and really like the “Technique” sheets that Kay Stanis includes with the instructions for A Toast to Tiffany. They cover “Framing Up Canvas on Stretcher Bars” (well written so I could do this again if desired), “Beginning and Ending Stitchable Threads on Canvas” (learned an interesting French Method Adaptation and about a U stitch which seems better than L stitch), “Beginning and Ending Non-stitchable Threads” (all new for me having not done much goldwork), “Design Transfer” (very understandable and doable but tedious), “Diagonal Holding/Blending” (a very cool technique), and “Braids” (new, for me, info about beginning, ending, and couching braids).
We spent this morning doing the crescents of which I got 4 done. Kay suggested that instead of all S crescents on left and we alternate crescent directions and I like the pattern she shows as Z-S-Z-Z-S-Z (from top to bottom).
I spent about 35 minutes of lunch basting on top of tissue paper the bottom motifs. The tissue paper didn’t bother me as much maybe because I really had it solidly in place using several needles. Then, I used the afternoon to pad and satin stitch the petals followed by couching the gold around the petals.
We also discussed how to place the sequins on the borders but I don’t have the borders all basted and will put them on last anyway. The day was over fast. Tomorrow is the stitch for the trees and probably the borders.

The only pre-work required was to make a bead-cutting tray to keep the purls and beads under control.
My classmate, Linda, made mine! It’s a piece of foam core about 6” x 6” with a piece of felt and a matching cord! Lovely. Thanks again Linda!!

The instructions say we are getting a 13˝ X 16˝ congress cloth but that we should bring 14˝ X 16˝ bars. I asked about that thinking there was an error. But, no, we are lacing (2 sides with regular bars or 1 side with Evertites)! Nice to learn how to lace but prefer Evertites.
Also, nice to learn about transferring a design using tissue paper but prefer line drawings! Basting through the tissue paper is tedious and I didn’t get much done. Maybe homework tonight if I have the energy and eyes for it. But, I’d also like to find a different sky thread(s) and am not happy with my laying of the sky so far. We are thread blending 3 overdyed threads. I didn’t want streaks. So, I left areas to go back with a different thread. I may have to start all over at home.
The water went very well as did the tacking of the felt. My tacking stitch got cut accidentally when I was removing the tissue paper. Not a fan of the tissue paper!
Looking forward to the counted work we’ll be doing tomorrow!

This is what it’s like to do a run with me. I’m a planner!
Bill and I will pick up the car at 10:30 am, go out for breakfast, and see the Beer Can House when it opens at noon. Yes, a house made out of beer cans (google it)!
Back to the hotel at by 1 pm, leaving Linda, Kristen, and I four hours for “The Texas Run” driving from one store to the next:
We had such great luck finding what we needed and what we didn’t know we needed that we were back by 4 pm. No problems driving. And, I was able to register for Seminar!
I was going to put photos of each store here but I took videos instead of photos. Oops! Too many shoppers made photos difficult and weren’t doing each store justice anyway. Each had there own style. From one room with merchandise and even a table for stitchers (Stitches in Time) to a long skinny building with thread rooms off both sides, canvases everywhere, and a classroom at the back (Needle House where I bought the Texas magnet). These two are across the street from each other!
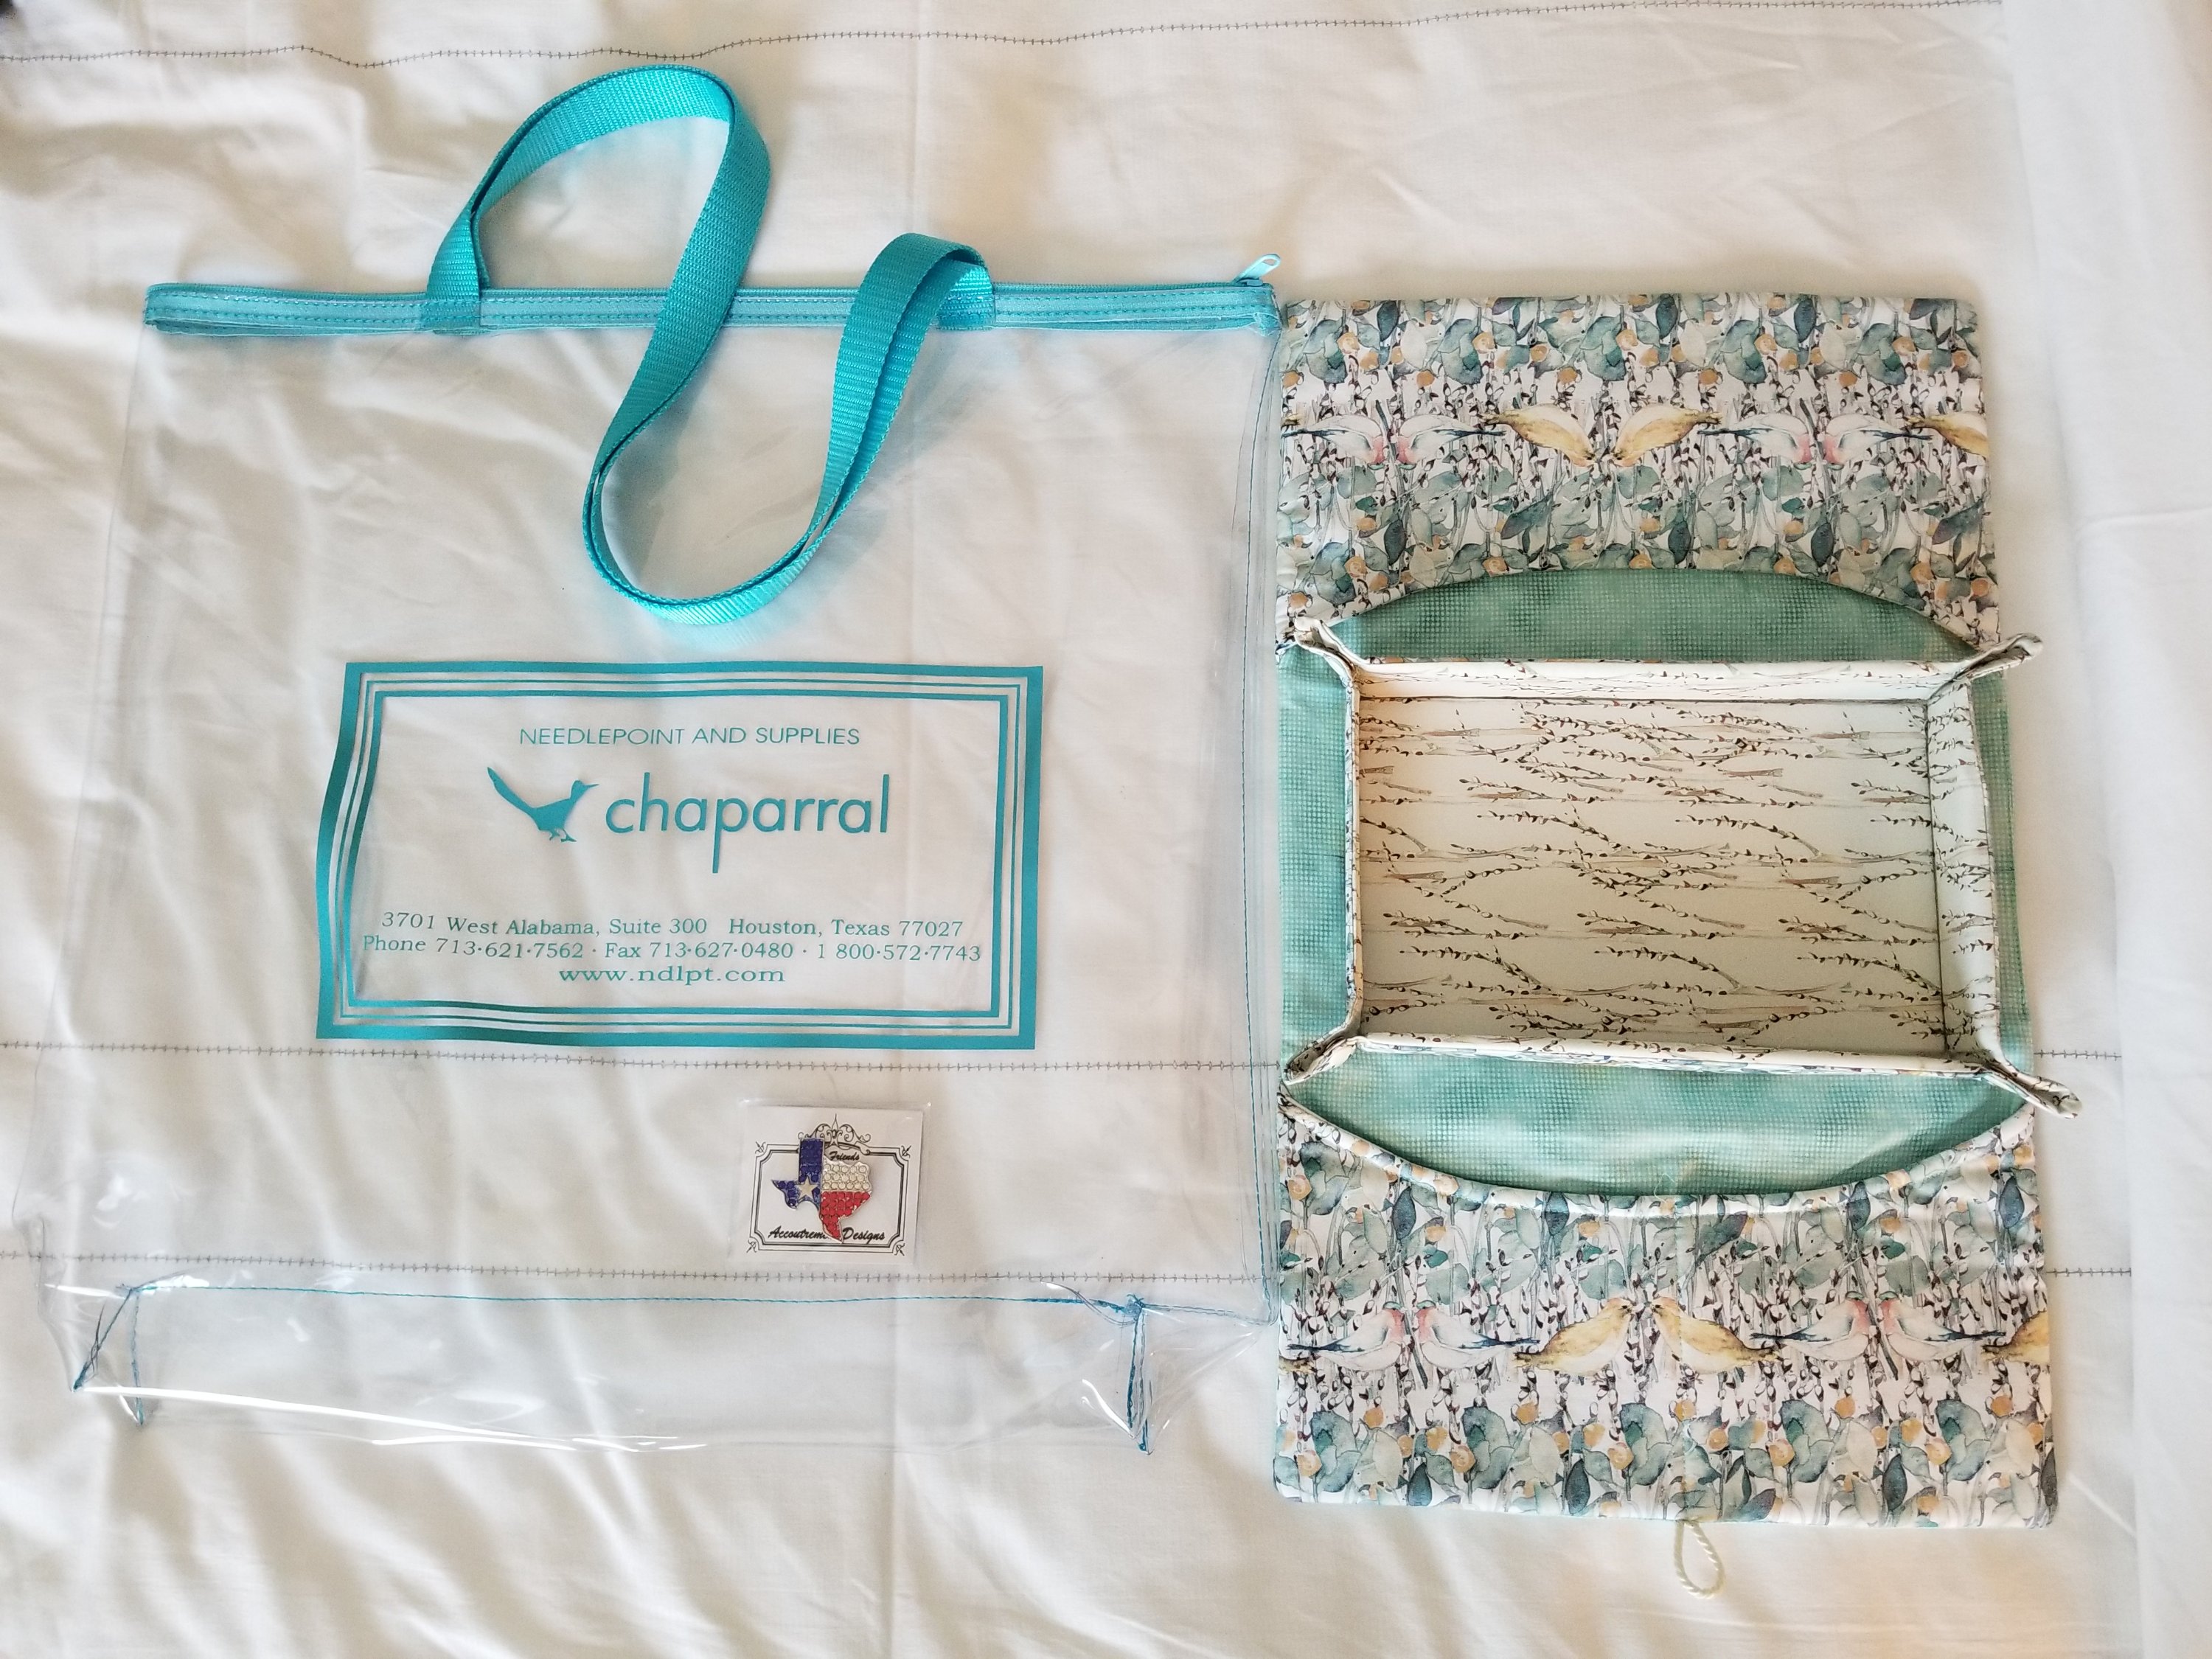
Chaparral had a U design within a square shaped area. Canvases everywhere, plenty of threads, and various supplies. I knew I needed a project bag for A Toast to Tiffany and found one there.
And, Chandail was in a large rectangular shaped space with plenty of canvases, lots of threads, supplies, and a large table with a good number of stitchers in for an afternoon. Linda pointed out the stitching station for my armchair as we walked in the door. A local woman makes them and other amazing project bags. I had to get it!
Linda and Kristen did well too! Good day. Houston is lucky to have such good stores to go to. And, I was lucky to have two wonderful women to shop with!
