This class offered an interesting approach to designing. And, Kurdy gave us so many interesting shapes in supplementary pages to the class that I could be playing with these for days. I do have a design started with some of the interesting and different shapes that I have not seen before. But, that’s all for another post.
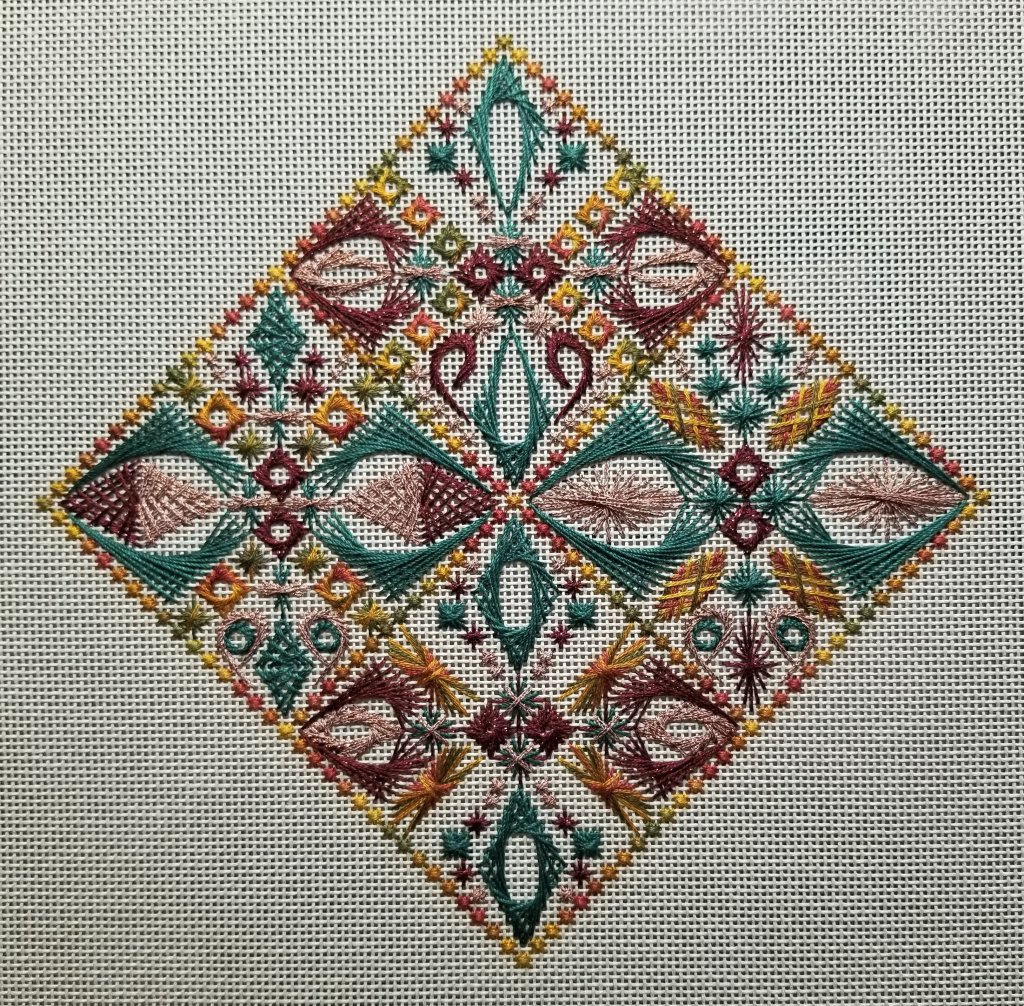
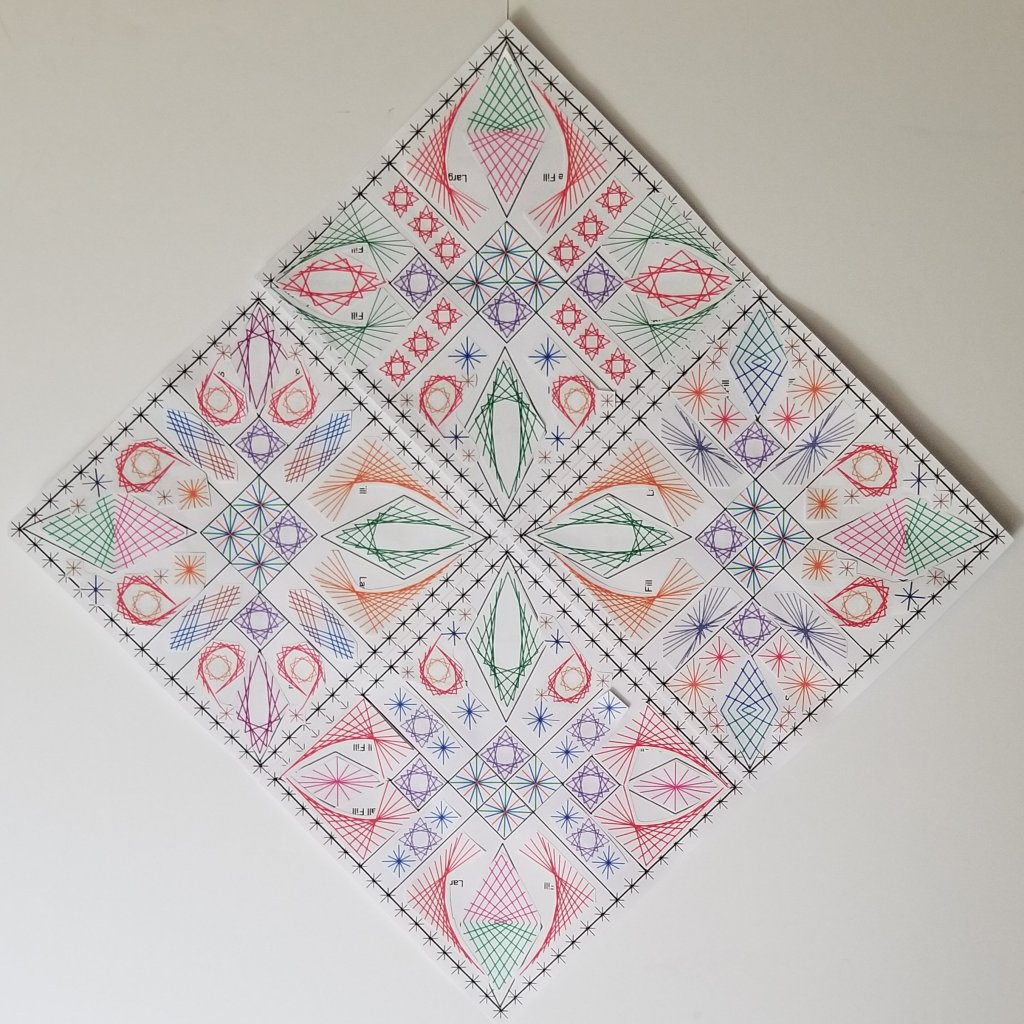
For now, I am sharing my finished geometric all beaded and completed. Certain motifs I like better than others. And, experimenting was a big part of the point of the class. Having all 4 quadrants be different appeals to me because it looks more interesting and is more fun to stitch. Colors balanced out well. Very good class!
The 4 mm crystal bicone beads seemed too bulky for some areas. So, I used 2 mm clear crystal bicones and small bugle beads from my stash. They don’t show up really well in the photos so I added close up for each area.


Large and small crescents surround some of the large and small points. I was able to use pin stitches to end the threads under the crescents which also keeps the last stitch taut and secure better than weaving on the back under threads (in my opinion).
The rest of the large and small points are surrounded by what Kurdy Biggs calls “fill stitches” including various sizes of Jessicas, Fleur-de-lis crescents, and Rhodes. The challenge here was that none of the combinations were explicitly diagrammed for you. Several options were shown and the basic stitches were diagrammed but I had to figure out what I wanted to fit together.
There a couple of Fleur-de-lis crescents and Sprat’s Heads that I had to adjust but it was easy enough to count out once you get started.
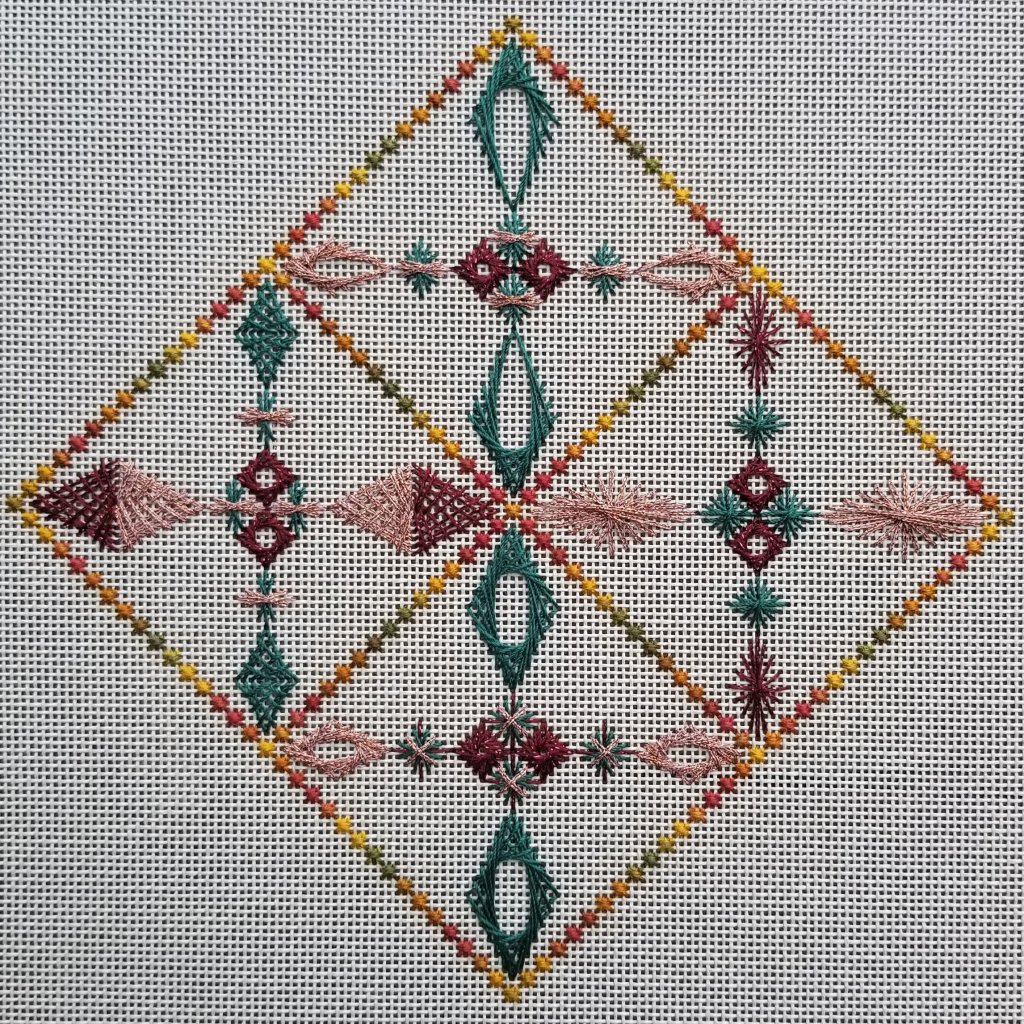
All the stitching is done leaving only green and red crystals to add. I left plenty of room in the north and south diamonds but less in the east and west areas but that’s fine. I didn’t want complete symmetry anyway.
Back in mid July, I stitched the Smyrna border and put it aside waiting for the next lesson. But, I didn’t get back to it until now. One more lesson gets posted October 1. So, I still have plenty of time to ask questions as I get back into this.
I carefully selected adequate lengths of the Gloriana so that the colors would be symmetrical as I worked each area of the border.
For the centers, I selected different Rhodes stitches and Jessicas. It was bothering me that there isn’t any Sparkle Braid in the right center area but I balanced out the right diamond area by adding more Sparkle Braid in the large points. Smaller Rhodes and Jessicas are in the small points off each center.
Our kit included 2 cards each of Elegance, Silk Lame Braid Petite, and Sparkle Braid in 3 different colors. The overdyed Gloriana and beads are also included. That’s all. Initially, I was going to add more threads. But, I decided to not complicate this small piece. It’s 5″ x 5″ along each border and as viewed in a diamond almost 7.5″ x 7.5″.
I’ve got 4 diamond quadrants and I don’t want complete symmetry. The top and bottom are quite symmetrical in color and shape so far but the left and right sides are different from the others. I did not plan the colors for these areas in advance. Once I finished the centers, I decided what to stitch with next for the large points. Once I saw them in place, I decided on the smaller points. There are only 3 colors to choose from because I am holding off on using the overdyed for a particular section.
I won’t be able to stitch on this at our Main Line Stitchers Stitch-in today because these stitches require too much counting. But, I have other projects that I can stitch!
Between coronavirus and heat, staying at home isn’t a problem. Thanks to AC and Kurdy Biggs, I got busy building a design.
The design in my previous post had too many small Fluer-de-lis crescents in the left quadrant. So, I replaced them with Rhodes stitches. And, I changed the six small diamond patterns. I like it much better now.

One of the points of this class is to show balance within a piece using color. Stitch choices don’t have to be this symmetrical. So, I designed another diamond. This time I did not turn two of the side diamonds causing two small and two large motifs to form at the very center. I do like the cluster of Fluer-de-lis crescents around the center. And, I like the focus of each diamond being the same. The top one is all partial Jessicas, right is Rhodes, bottom is full Jessicas, left is Sprats. Each diamond is therefore very symmetrical which I really do like!
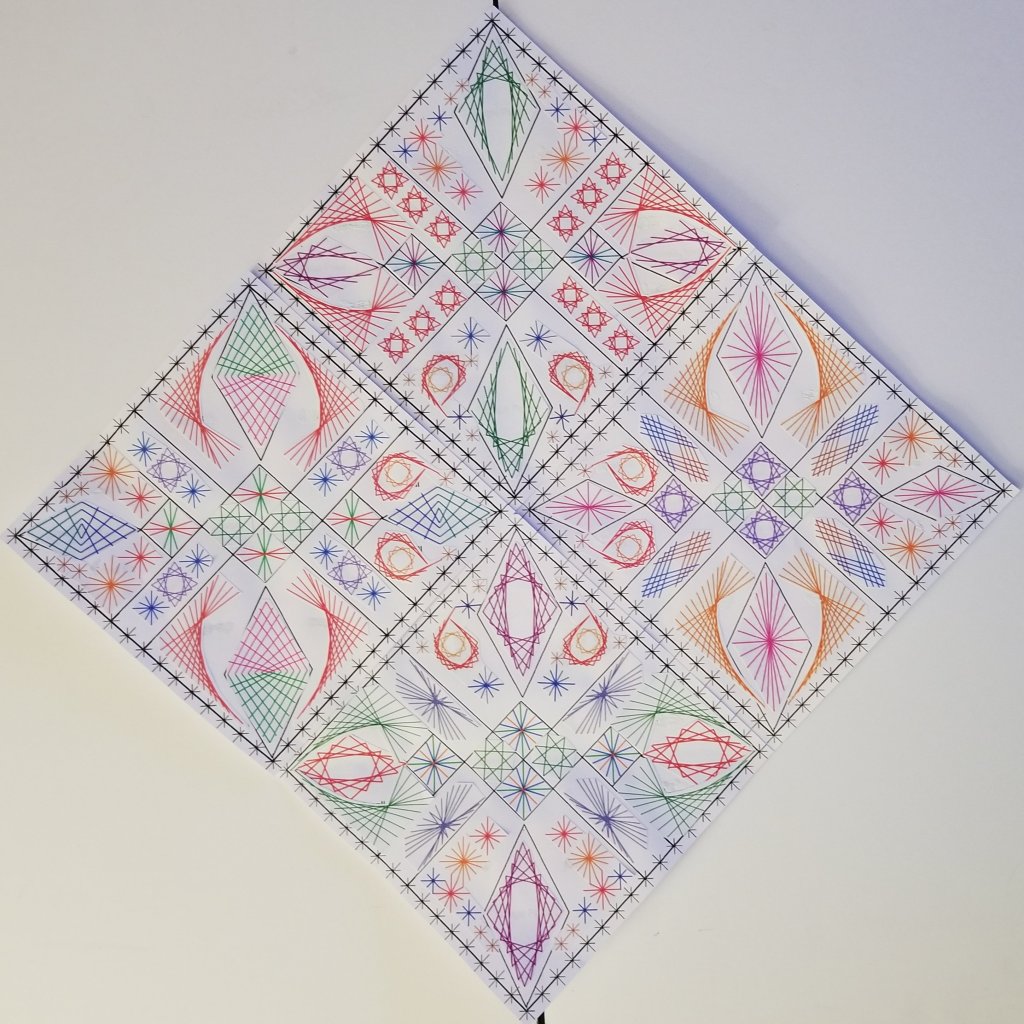
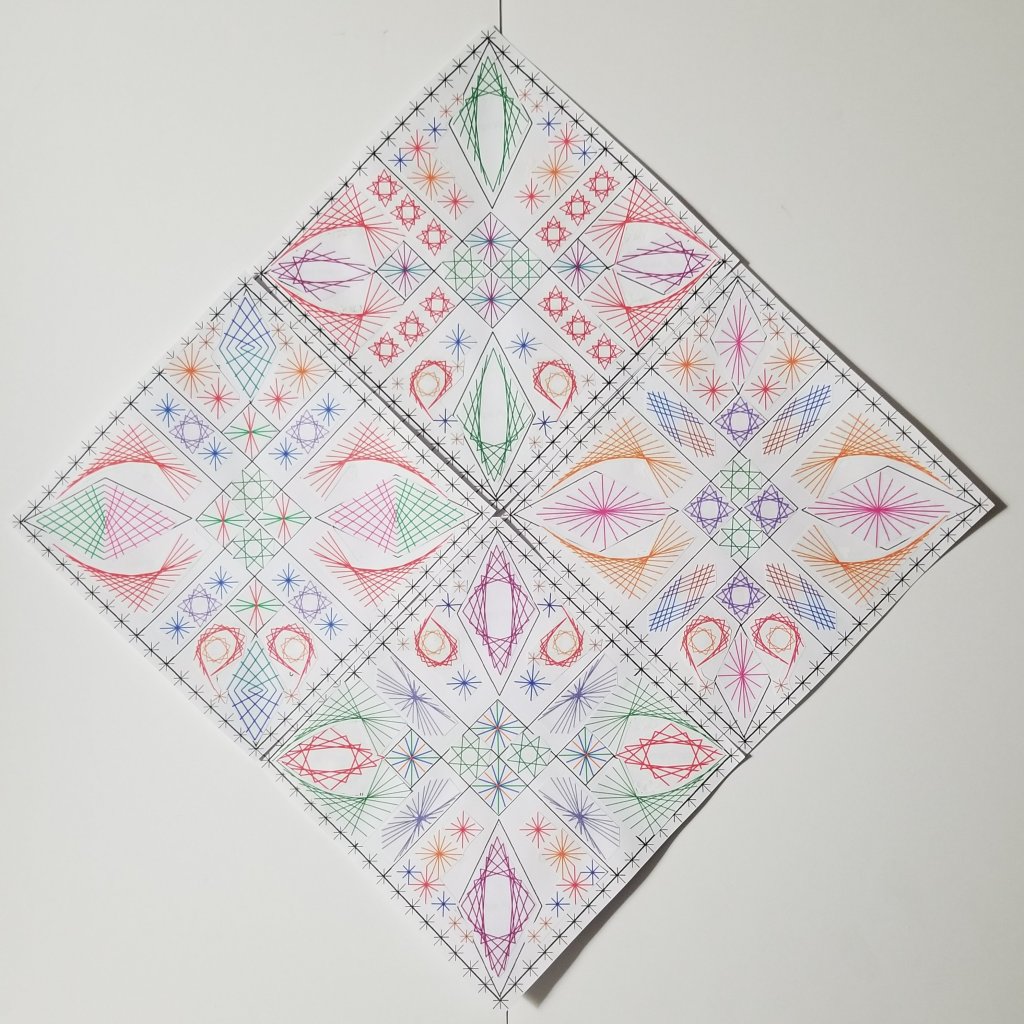
But, the rectangles do not align and the six small diamond patterns are all aligned horizontally. Neither aspect made me happy. So, I rotated the right and left diamonds. Now, I lost the cluster of Fluer-de-lis crescents around the center which I am ok with since I am trying to get a little less symmetrical with the stitches. However, there is a horizontal band of crescents. Maybe I better go outside for fresh air and stop sniffing the glue (just kidding)! The possibilities with these shapes are endless.
Lesson 2 is coming out August 1 or 2. So, I’ll wait before making any new designs until I read whatever is next.
Luckily, online classes are keeping me busy. Kurdy Biggs began Build Your Own Geometric with Lesson 1 on July 1. There will be weekly lessons for a month.
We were given a template to follow and shapes of about 2 dozen stitch patterns to cut out. Using a glue stick, we place stitches wherever we want. Fun!!
I made all the large and small points the same. I placed two designs in the six center motifs and did that the same in each diamond. Then, I decided to vary the rest of the large and small fills and rectangles from diamond to diamond.
Making the colors consistent while varying the stitches will add a cohesiveness and balance to the various motifs. Since this design is a little too much of the same in each smaller diamond, I will make another crack at the design.

Filed under: ANG Cyberworshop, ANG Main Line Stitchers Chapter, ANG Seminar 2020, Blanton's Bottle, Build Your Own Geometric-Kurdy Biggs, General comments, Interchange by Linda Reinmiller, Needle Me Canvas Contest
Many thanks to Meghan and Rebecca at Michael’s framing department in Pottstown. Meghan did a great job helping my husband and I select the mats and frames. They have a very clever device that displays an image on the computer of your piece in the mat and frame to see how it will look before finalizing. I really liked the shape of the mat for the diamond shape piece. I’m very happy with final pieces.