Filed under: Annette's Bouquet with Deborah Mitek, Embroidery Guild of America, Seminar 2021-Chicago
This 2-day class is Annette’s Bouquet with Deborah Mitek. Thankfully, the room is warmer.
Deborah puts together a lovely kit organized by flower and stems for specific flowers!
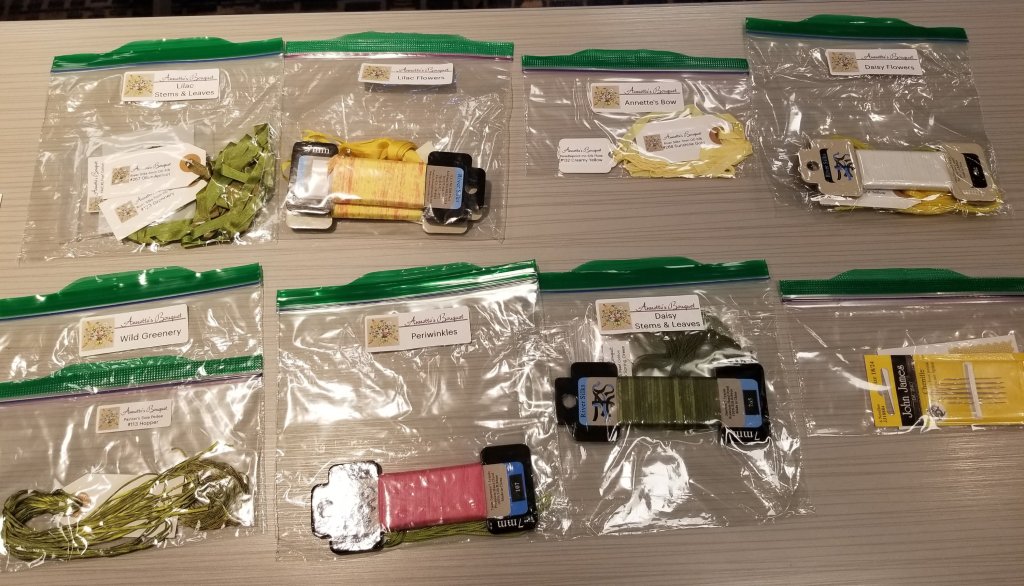
We discussed a good portion of the project but again the amount of stitching does not seem like a lot. I did get one Daisy done!

Filed under: Embroidery Guild of America, Rings on Her Fingers with Kay Stanis, Seminar 2021-Chicago
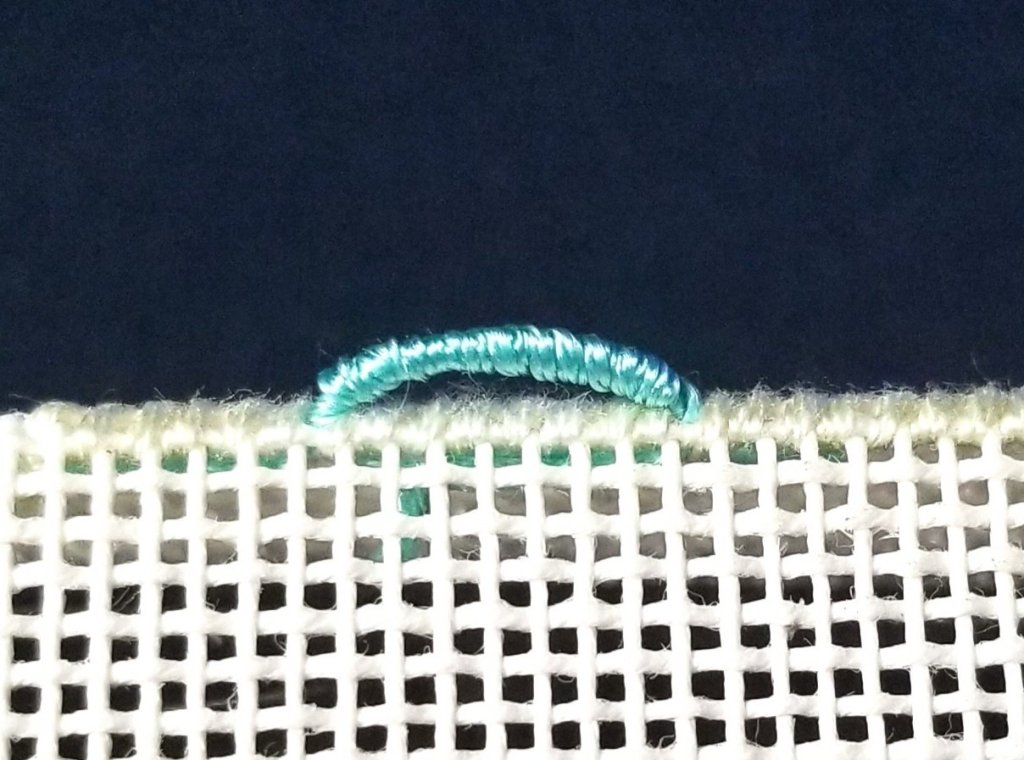
Day 3 was spent with Kay Stanis filling in for Allison Cole who couldn’t attend from Australia due to coronavirus although she did Zoom in to say Hello. The one-day class, Ring on Her Fingers, is an introduction to stumpwork. It’s supposed to be made into a ring but I’m going to place it on a canvas next to a butterfly with a stem and a few leaves. The kit came in a lovely in a nice small compact box.

I practiced the buttonhole stitch over cake wire (Australian cake wire is apparently thinner than here in the US) on the far left one and then finished 3 petals and started a fourth. There will be 5 petals.
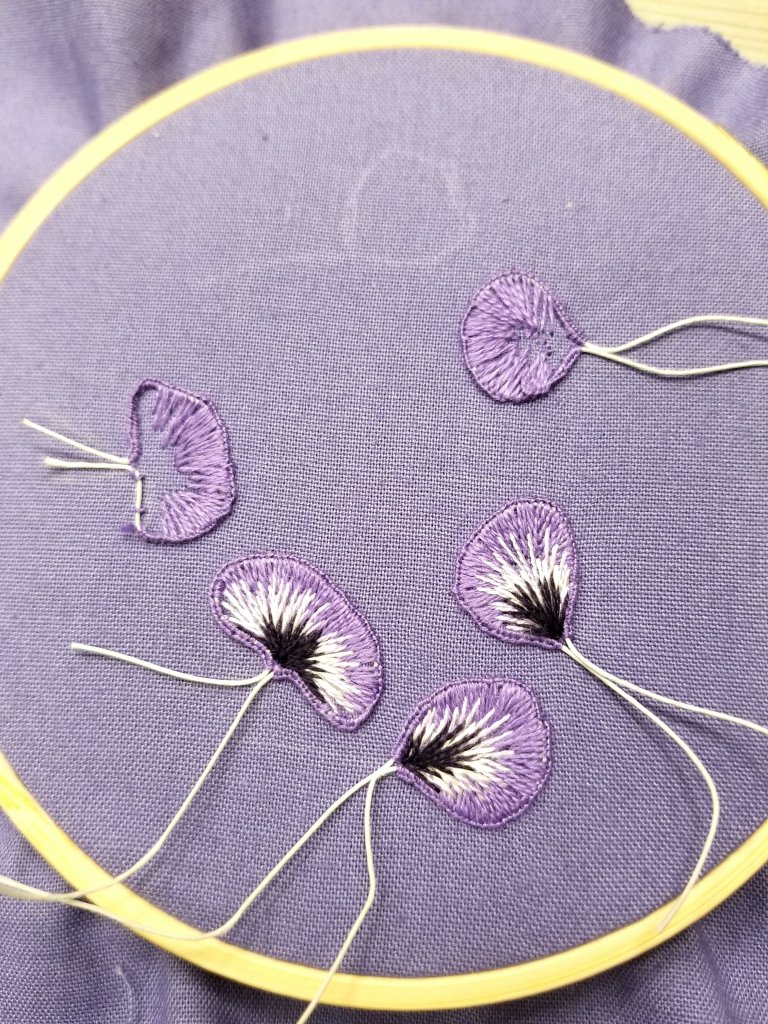
I’m not going to make it into a ring to wear. Instead, I am going to stitch a butterfly and place the flower next to and I still have to stitch the butterfly. I wanted to be sure what color flower I’d get. There were 5 options. I got the one I wanted. It will go in the guest bedroom with the other purple pieces!
Filed under: Embroidery Guild of America, Overdyed Thread Notebook Class with Gail Stafford, Seminar 2021-Chicago
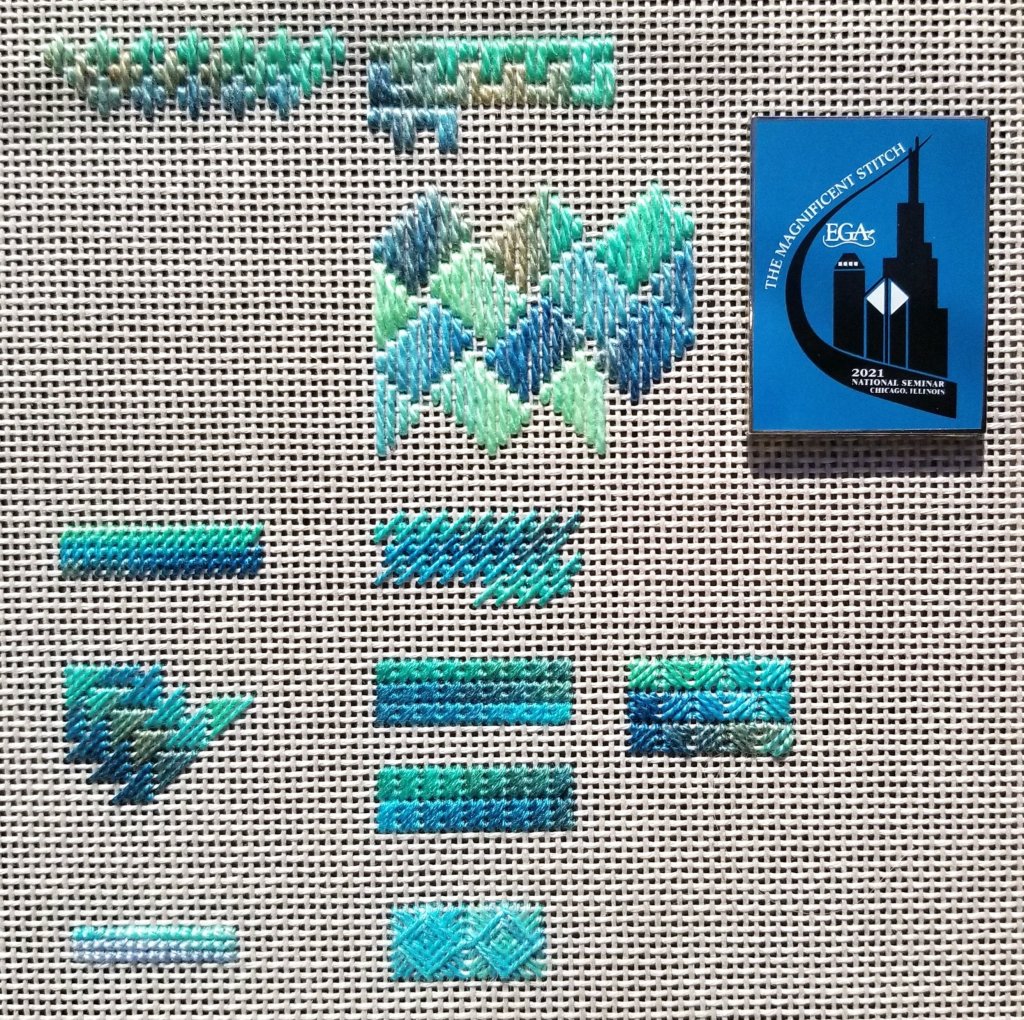
Today we stitched tied stitches, eyelets, and leaf stitches. We got 9 stitches in each day. I love the contrast with the solid colors. And, my favorite effect was the Giant Rice (1st column on the bottom left) with the dark solid DMC floss on the bottom and the overdyed thread on top.
I have plenty of thread left and half the canvas to work up a sampler. Maybe a bookmark.
It blows my mind how time flies in class. It should seem like time is frozen because it’s so cold in the hotel. I remembered that it was cold last time when we were here (2014) for ANG’s Seminar. And, I brought a heavier sweater. But, the cold seems to be getting in my bones this time combined with sitting on a chair that isn’t my comfy stitching chair and I am getting stiff and my back isn’t feeling great. Going to wear my long pants tomorrow. Enough about the cold! Got to get organized for my next class.

Filed under: Embroidery Guild of America, Overdyed Thread Notebook Class with Gail Stafford, Seminar 2021-Chicago
Five days of classes started yesterday with a 2-day class being taught by Gail Stafford on overdyed threads. It’s a notebook class and we are practicing with different weight threads and stitches to see how the overdyed colors move. My take away is that smaller stitches result in a more subtle color shift than the larger stitches. Got to get to Day 2 class!
Filed under: Canvas Master Craftsman Program, Embroidery Guild of America, Step 4
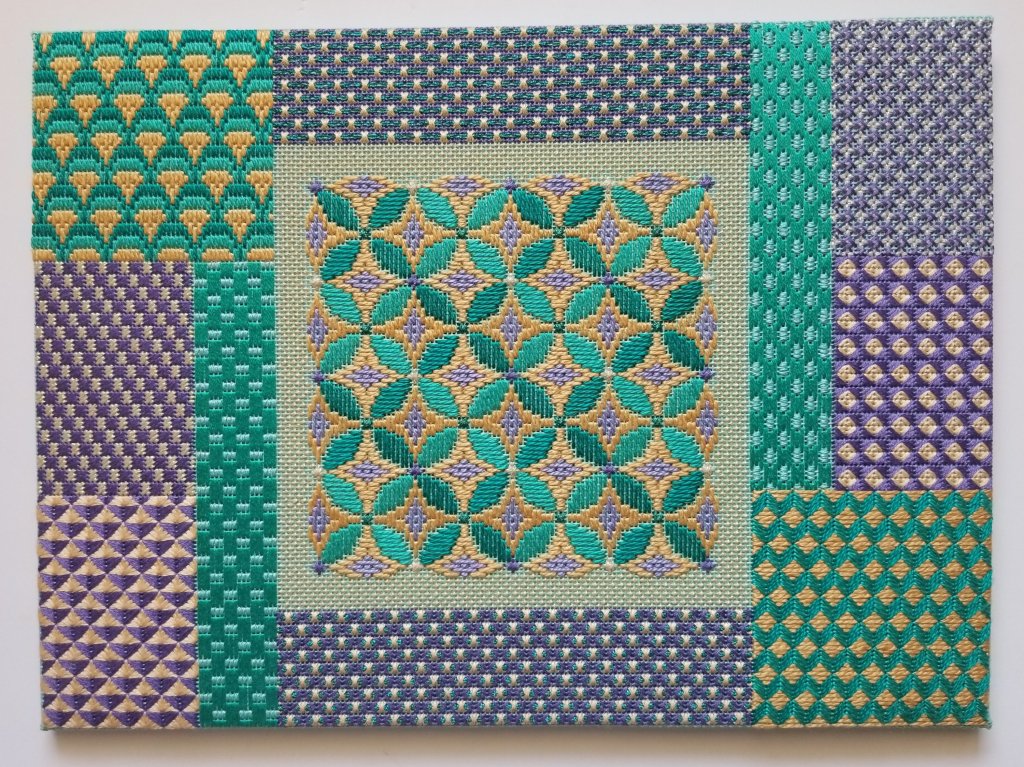
Step 4 of the Canvas Master Craftsman program had to incorporate 8 different bargello patterns but not into a “sampler”. So, I have 3 bowls, 3 abstract flowers, a background, and a border. It’s 252 x 180 canvas threads on 18-count canvas. I was surprised to see that it measured 14.5″ x 10.25″. Do stretcher bars actually stretch the canvas that much?
Step 4 passed with distinction and will be sent for display at EGA National Seminar in 2021 along with Steps 1, 2, and 3!
Any color combination was allowed. I selected a tetrad that are two sets of complements: yellow-orange (browns), yellow-green, blue-violet, and red-violet.
The left blossoms use 3 diamond patterns. For the bowl, I combined two of the same components used in the blossoms and overlapped them when joined side by side. The center bowl and blossoms are different but related diagonal patterns. And, the third group are both examples of mirrored bargello patterns.
I never thought I would finish the background which is a variation of Victorian Step from Decorative Backgrounds by June McKnight (page 53). Since this pattern has more smaller over 2 stitches than over 4 stitches, the stitches recede from the main design elements which consists of mainly larger over 4 stitches.
The border stitch was tricky to make it align evenly. I had to expand the pattern on the sides to make it fit. Four Way Bargello by Dorothy Kaestner is a great resource for bargello patterns. This is a variation of Mauve Ribbon Corners (page 110-111).
I really wish Liz Morrow was still with us. Her designs were instrumental in teaching me about different bargello patterns. Her last blog posting was 2 lovely Hearts for Hospice (http://lizartblog.blogspot.com/). Liz was a wonderful designer and teacher. She was another generous and supportive needlepoint mentor that I have been blessed to know. We are fortunate that her designs are still available at: https://www.lizartneedlepoint.com/#/. There are several bargello patterns I still want to stitch and under her needlepoint tab, I’ve always loved her Leaping Stag.

Filed under: Canvas Master Craftsman Program, Embroidery Guild of America, Step 1
Unlike my Step 2 piece which didn’t need blocking, Lisa did block the fish for me and I picked up earlier this week. I attached it with small nails to a foam board and laced it up. I’m using the same acid-free, 3/16” thick, white foam board (https://www.michaels.com/elmers-acid-free-foam-board-2-count/10390078.html) that I used for the previous step. Today, I laced up Step 3 too. No blocking was needed.
Since these pieces are not going to be judged, I didn’t want to mat and frame it. I ordered ultrasuede fabric to make the backs look nicer. They will be displayed in the Education area of EGA at the National Seminar in Chicago in September to advertise their Master Craftsman Canvas program. Bill and I are going to drive there for my first EGA Seminar. I have 3 classes which will be the subject of another post eventually.

Filed under: Brandywine Chapter, Embroidery Guild of America, Tree Ornament Vicky Witterschein
My EGA Brandywine Chapter hosted a class earlier tonight with Vicky Witterschein so she can gain experience towards her teaching certification with the National Academy of Needlearts (NAN).
Many thanks to her local needlepoint shop, The Edwardian Needle and Pam, for donating 20 kits to each of EGA’s 5 regions. It consists of 5″ x 5″ piece of 18 count canvas, Santa Fe Sage, 2 mm ribbon, Kreinik, pearls, needles, and beading thread.

Vicky led us through the stitches, had video demonstrations, and several of us finished the project during the 2-hour Zoom class. She is well on her to being an excellent teacher.
It could be done as a diamond like I did (2″ x 3″) or a Christmas Tree. Any ribbon thread will work, if I want to make up another. It’s great that the stitches work up easily into 2 different designs.

Filed under: Canvas Master Craftsman Program, Embroidery Guild of America, Step 3
Step 3 of the Canvas Master Craftsman program was diaper patterns and my piece passed with distinction again and will be sent for display at EGA National Seminar in 2021 along with Steps 1 and 2. The instructions were to use at least 4 diaper patterns and a split complementary color combination (I selected orange, blue-green, and blue-violet).
After studying the extremely thorough book, Diaper Patterns, by Ann Strite-Kurz, I decided to make this a diaper sampler by incorporating the eight basic pattern networks (square, diamond, brick, half-drop, triangle, hexagon, scale, and ogee) into a design. I should call this piece Baby Steps because it barely touches the surface of what diaper patterns can create. Diaper patterns create strong visual diagonals in both directions.
There isn’t much open canvas but the judges commented that they did not see any visible threads through the canvas. It has good balance, excellent choices of diaper patterns and color, and the color of the canvas enhances the design where there is exposed canvas. And, I did a “fantastic job of laying threads”.
On the eve of Thanksgiving, I am thankful I passed, appreciate the judges comments, and am looking forward to Step 4 and creating a bargello design! I hope you spend this Thanksgiving being especially safe.
Read all about the program at https://egausa.org/certifications/master-craftsman-program/.

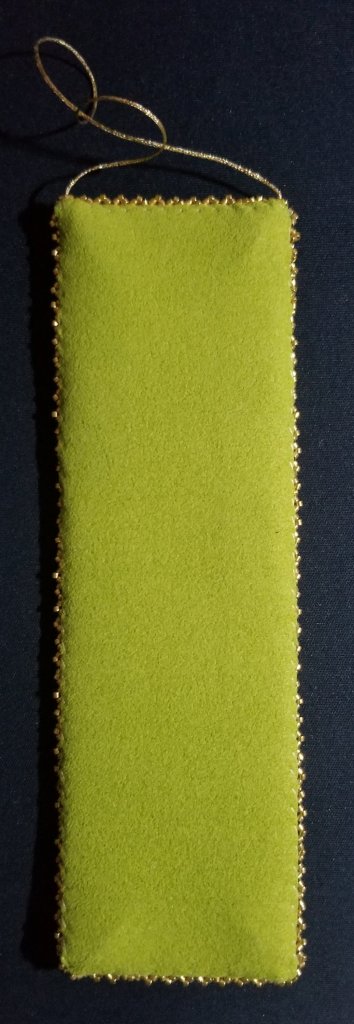
Back to The Flower Cuff with Orna Willis. Our second and final class was yesterday on Saturday. When last I posted about this, it was all stitched and beads within the design had been stitched. I neglected to mention that this is now the second teacher who recommends matching the beading thread to the canvas rather than the bead. Luckily, I had a tan in my stash. What do you do?
As Orna instructed, I trimmed the canvas excess, folded the edges leaving 2 canvas threads, mitered the corners (which I didn’t do for the recent EGA piece I finished). Then, I whip stitched the edges using a long enough thread to just need 2 lengths. Orna gave a tip for turning the corner which I have diagrammed.

And, since I will hang it, I attached a loop using Kreinik #16 Braid. I don’t like making cord from threads even though I have the tool. It looks ok to me!
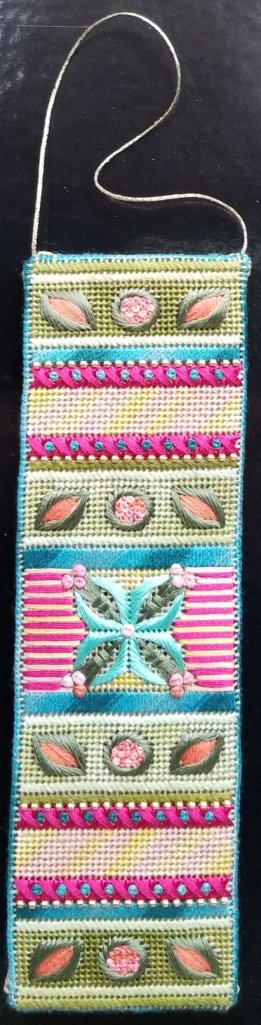
Next was the edge of Delica beads which worked up easily and looks fantastic! I love how they form little triangles. Orna showed us another step to make it more fringle-like.
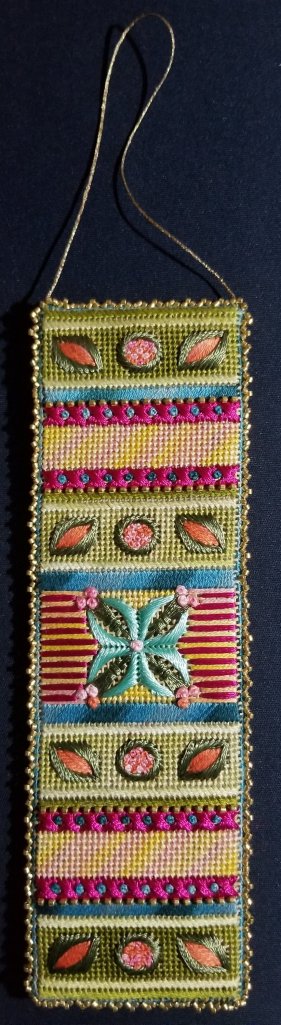

Orna also demonstrated how to make an edge of bullions using Neon Rays (her favorite thread). I gave it a try and it turned out nicely.
That left attaching the backing which I started during class. I love ultrasuede. It was getting pulled askew as I was stitching. I told Orna what was happening and once she suggested pinning it in place, I got whipping right along (whip stitch again; pun intended). The hardest part was cutting the last long side straight. And, here is the back done.
During the 3-hour class while we stitched, Orna pulled different colorways from her studio. Beautiful combinations. Thanks Orna for a great class and wonderful piece.
It’s been fun stitching the Flower Cuff by Orna Willis. Her color selections are fascinating to me. They aren’t ones that I would select on my own but I love how they work together.
This weekend, the design area grew by an inch on both ends repeating a previous motif of petals and a Jessica. I used darker portions of the green overdyed DMC floss for the background and stayed with the lighter portions for the gobelin rows.
My French Knots inside the Jessica are very small and tightly packed together. I felt the blue ones were my best. They called for 3 strands while the center flower used 6 strands. I like the contrast that provided. As with anything, the French Knots improved with practice.
The construction of the piece is next. I’m not going to make it into a bracelet though. I don’t wear them or a watch. So, I will make a flat ornament for hanging. Wait till you see where more Delica beads go!

