Woodlawn and Nelly’s Needlers are preparing for the 62nd Needlework Exhibit which is their 50th Anniversary exhibit. They’re trying to get participants from all 50 states! It’s a must see. I have my piece ready.
Read all about it at https://www.woodlawnpopeleighey.org/nwshow25
The Valley Forge Quilt Show will be held Friday October 18 (10 am – 5 pm) and Saturday October 19 (10 am – 4 pm) at the Good Shepherd Lutheran Church (132 E Valley Forge Rd, King of Prussia).
Donation of $10 requested. There will be over 200 quilts on display to marvel at. Plenty of shopping at a boutique, vendors, Grandma’s Attic, and a table full of treats.
If you can stop by, you won’t be disappointed. Do some early Christmas shopping, make an appointment in advance with a quilt appraiser (for a charge), and take a chance (or two) at a gift basket.
I’ll be there Saturday before my canvas painting class at Fireside Stitchery with Stephanie, the designer of Spellbound Stitchery.

I wanted the search terms to pick up fix, repair, mend, torn, or ripped, which accounts for the title.
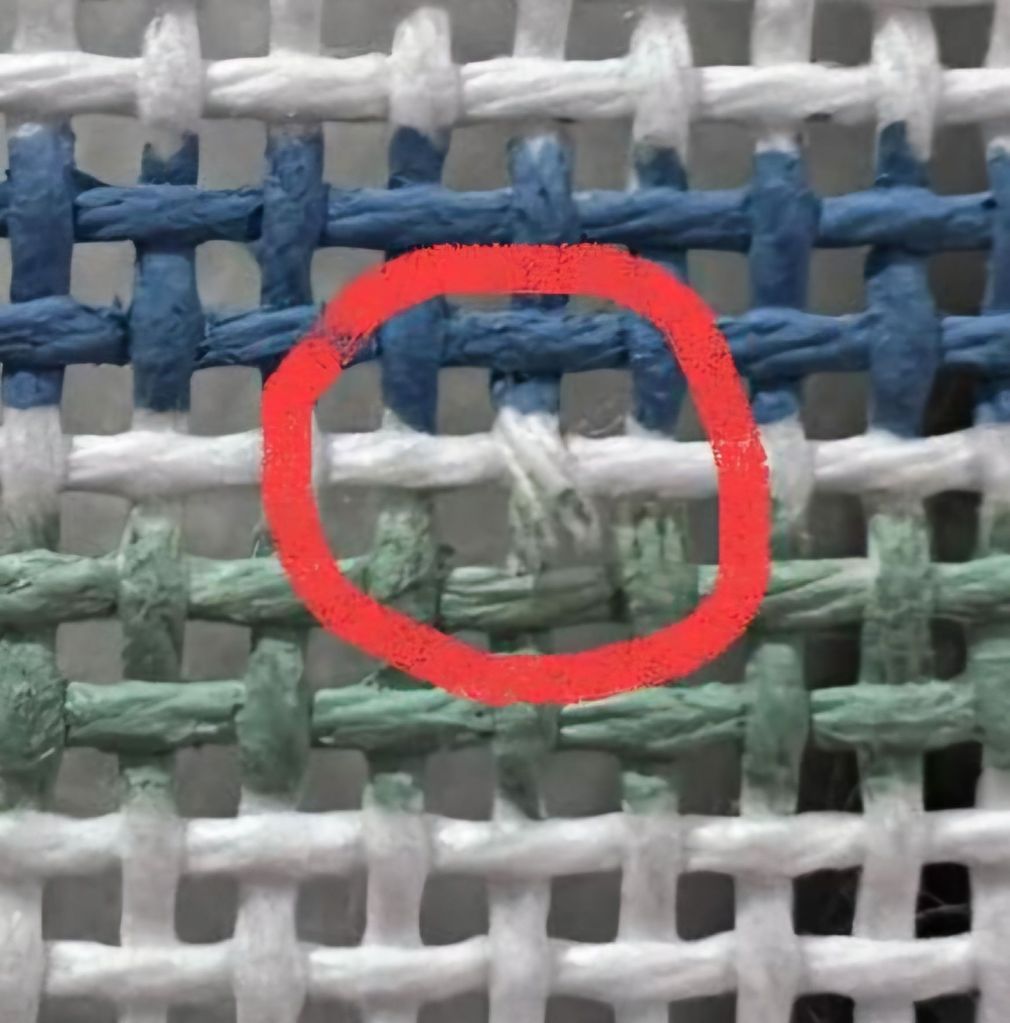
Katie C on Needlepoint Nation shared that one of her canvases has a small tear. She asked for any tips on how to fix this spot.
She got such good responses that I need to save them. I just hope I never need to try these.
Felice F said, “You might consider cutting a small square of canvas and placing it underneath so when you stitch the area, you stitch through both canvases.”
Michael J said, “For tiny spots like this, you can use a piece of dental floss. At least an inch away start an away knot or waste knot with the dental floss in same line that is broken. Weave in and out. Go past your affected area about 1 inch. Your dental floss will become your new thread. Finish off by burying your tail and end with waste knot that will be covered.”
Susan K P said, “Many years ago, in a class, the instructor had us cut the canvas on purpose. She then had us pull a single thread from the selvage, and weave it in about two/three threads below and above the cut…… making sure we ended up on the reverse side. Snip it with scissors and stitch. This is the same method to repair cuts on linen or other fabrics like that. It is simple, easy, and quick. No need to to cut and attach a square to your canvas or pay someone to repair it. Same thing can be done to a damaged, yet stitched, canvas or fabric. It is also the method used to repair hardanger that has been cut incorrectly.
But what ever method you do….. please don’t use glue on that expensive canvas with the expensive fibers. Unless you have access to a “restoration” type product, the chemicals in the glue can damage the canvas and can cause the fiber colors to change.”
Thanks to those who shared their knowledge. Do you have any more suggestions?
Had it been in the middle of a large area and not doing a tent stitch for a pillow, I think I probably would have selected a Smyrna, Scotch, or Rhodes to cover that one small rip.
Filed under: General comments, Needlework and Textile Guild of Media, Technique Issues
I gave a talk about picking stitches to the members of The Needlework and Fiber Guild of Media earlier this month and here are my takeaway thoughts. I covered a lot in 40 minutes, but since then, I added a couple of more thoughts. I want to know where to find these when I need them and will be adding to this periodically as I come across any gems.
The non-stitchers in the guild (they do all sorts of various crafts such as needle felting, sewing, knitting, quilting, spinning wool, bookbinding, etc) were asking if we’re going to do a group project based on what they learned! I think a simple landscape would work well. This is a very creative group without the types of classes I’ve taken. So, I did stress technique is important although without a desire to become a Master Craftsman or plans to enter into a juried exhibit, it really is about enjoying what you do. If people want to work needlepoint in hand (I used to until I found out about bars), that is entirely fine with me. I’ve told them why I don’t. Some of this is applicable regardless of the medium.
Key Tips and Technique Issues (in no particular order):
• Basketweave area allows for a place for your eyes to rest.
• Color of thread: Light threads appear further away compared to dark threads that appear closer.
• Size of stitches: Small stitches appear further away compared to large stitches that appear closer.
• Odd rule is that odd numbered motifs (1, 3, 5, etc) in a design are more pleasing to the eye.
• Different stitches and threads can create varied texture (bumpy, ridged, smooth, etc).
• Direction of a stitch creates a different effect (water on a lake is typically horizontal; river flowing down a hill with a gradual slope probably has stitches at angles of 30° or less; a waterfall with a steep slope probably has vertical stitches or are 60° or more).
• Area should allow for repeats of 3 units or more (6 wide allows for mosaic and cashmere stitches but not Scotch).
• Companion stitches help create depth by using a smaller stitch such as Serendipity for further away areas, Criss Cross Hungarian for middle ground, and the larger Woven Trellis Variation for the closest areas.


• Composite stitches combine different types of stitches such as straight and cross stitches.
• If a stitch is fancy, use a simple thread; if a thread is fancy, use a simple stitch.
• Stitch diagonal stitches first if they will be next to straight stitches.
• Stitches are worked opposite of the direction you are moving (to get the proper pull). If a diagonal stitch is worked bottom left to upper right, then work towards the left. If a diagonal stitch is worked bottom right to upper left, then work towards the right.

• The direction of a stitch can be changed. In one color, the front of the canvas will look the same but done in two different colors or an overdyed thread, there will be differences.


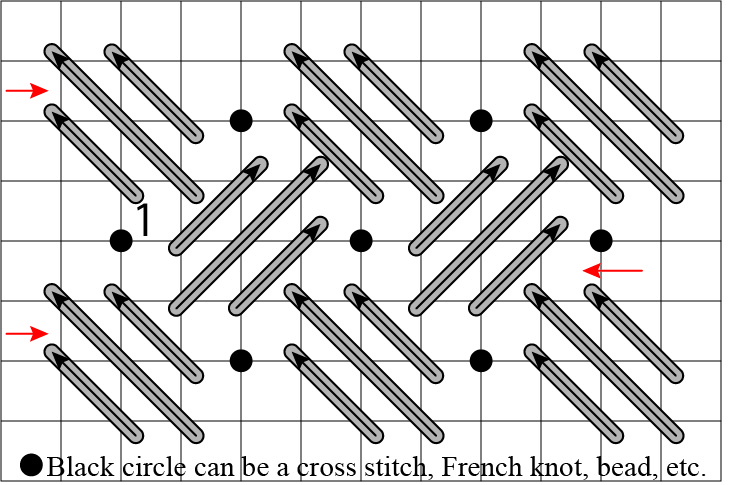
Did you know there are two ways to stitch Alternating Continental?

That link to ANG has changed since I diagrammed it (https://acrobat.adobe.com/id/urn:aaid:sc:VA6C2:3fba9f78-8199-4564-8b67-aec23e9a3779 and only ANG members have access to all previous Stitch of the Month projects).
Does it make a difference?

Yes. You can see the difference in carrying the thread below the hole (left) compared to not (right). Correct me if I’m wrong, but I believe the right side is more like how to work a blackwork pattern or a double running stitch.
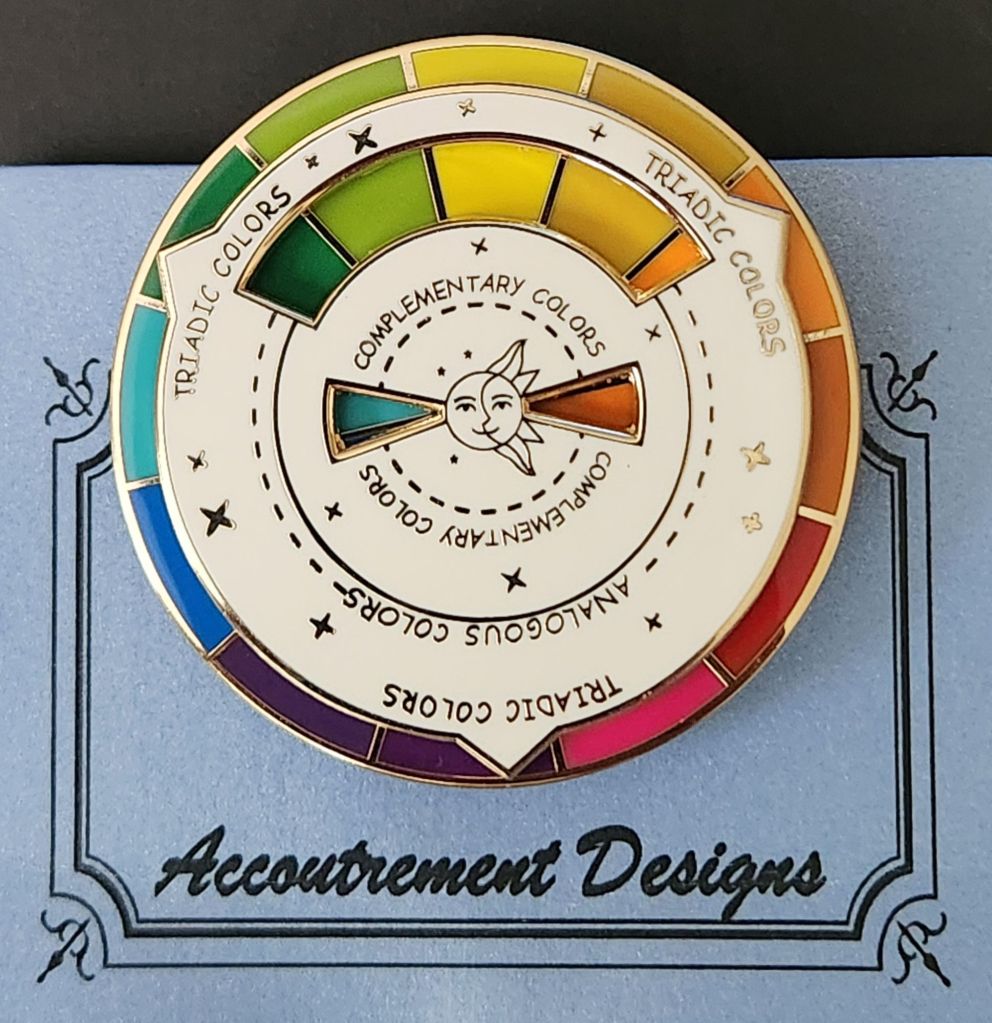
Look at this amazing magnet. The white to part actually turns! It’s 2″ across and so strong. Accoutrement Designs has excellent magnets. Such good quality. Birthday gift to myself.
I’m using my new mug, Taking it one STITCH at a time, from Linda to help me get organized. This is only one of a few gifts for my birthday, which is one of the big ones as far as birthdays go! Thanks to Linda for thinking of me and for the fun new projects (subjects of future posts).
The mug clears up some table space next to where I stitch. The tall wooden holder outgrew my needs and would periodically tip over. But it’s great for holding my skinny tools and scissors. So, I put the wooden holder inside the mug and added the stuff that had been laying flat.
One of my goals is to get organized. It’s tough to get my mind around this, but taking one area at a time is like taking one stitch at a time – right!?! The rest of the table space still needs to be organized, so I am posting only the mug! But, I am going back to my table space now.

Filed under: ANG New Jersey Needle Artists Chapter, Embroidery Guild of America, General comments, Ruby Razzle Dazzle by Ann Strite-Kurz, Seminar 2023 - Boston, Threads, Understanding Color Relationships: Luster and Luminosity with Patricia Goaley
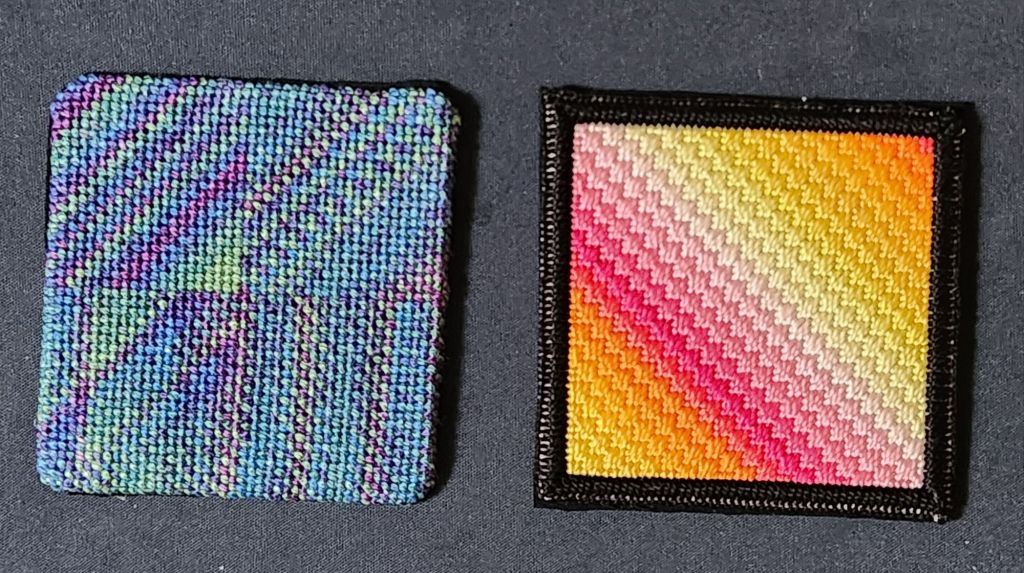
I’ve got a lot of small stuff to finish. I decided to get back into the swing of it with new coasters for us.
For Bill’s coaster (on the left), I folded over along the edges and tacked them into place with invisible thread. Details on how I stitched the 4 corners differently are at: https://melitastitches4fun.com/2024/03/02/manipulating-overdyed-threads/
For mine (on the right), I folded over along the edges and practiced the buttonhole stitch. I used black DMC Perle #8 and could have used #5 because some canvas is showing through. The design is from a class on Color and Luminosity with Pat Goaley during the EGA Seminar in Boston (more on that at https://melitastitches4fun.com/2023/09/03/ega-seminar-class-2-understanding-color-relationships-luster-and-luminosity-with-patricia-goaley/).
For both, I glued black ultrasuede on the bottom using Aleene’s Fabric Adhesive.
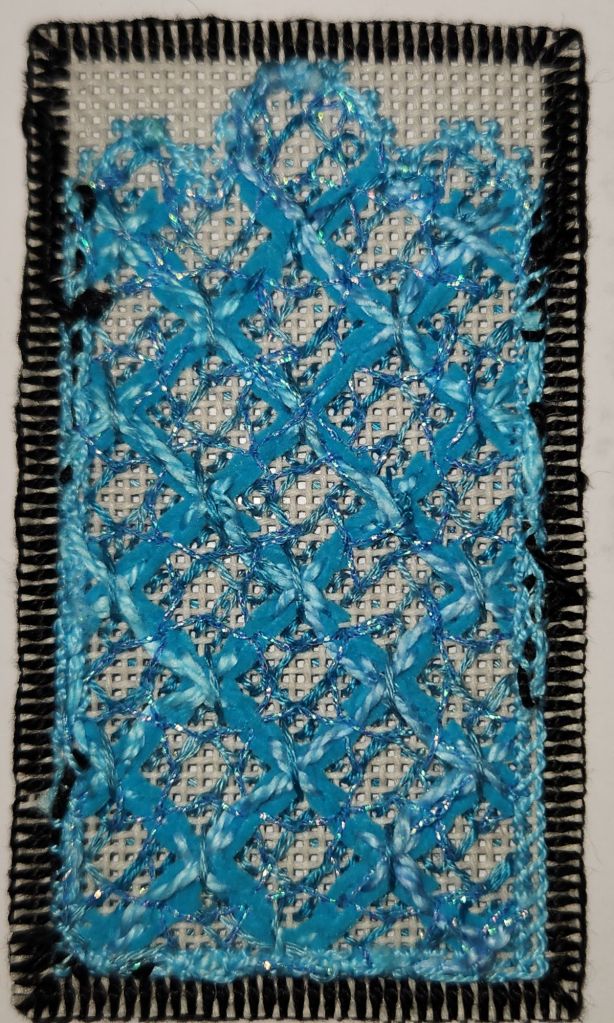
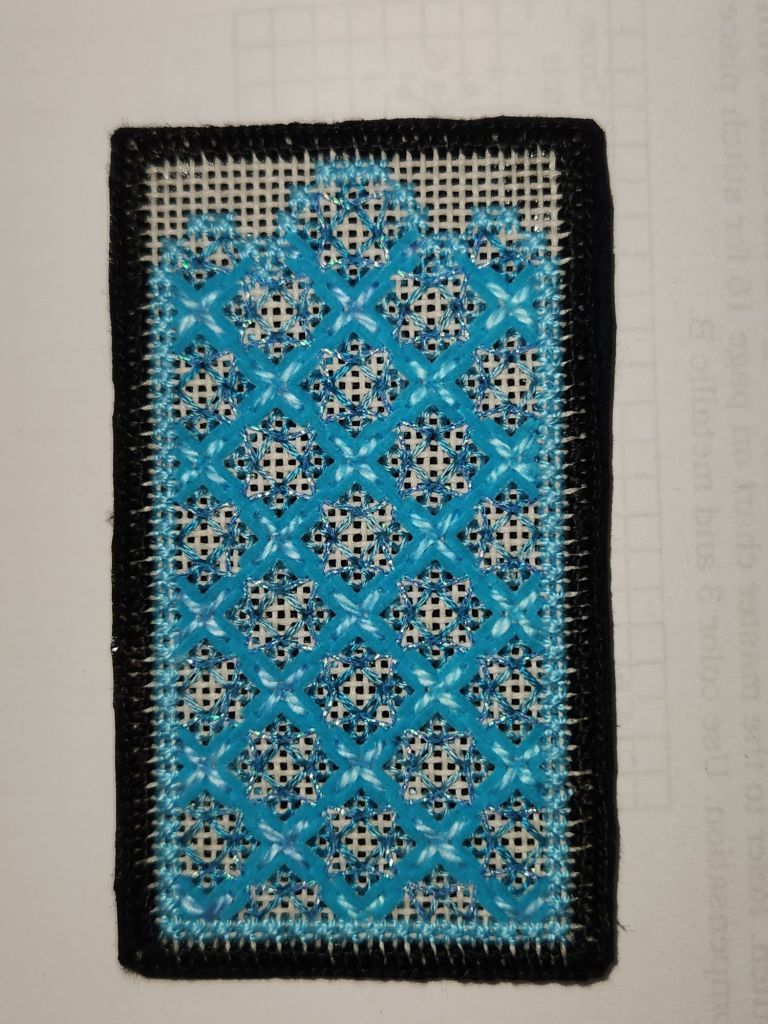
Next up is a blue sample from Razzle Dazzle by Ann Strite-Kurz that I made into a bookmark. More on this at: https://melitastitches4fun.com/2024/02/16/ruby-razzle-dazzle-by-ann-strite-kurz/
I used black DMC Perle #5 this time to make the buttonhole edging across 3 canvas threads. It has less white showing. I didn’t fold back the edges to make it a thinner, lighter finished piece (compared to the coasters that have the edges folded over). Then, I cut very slowly, carefully, and close to the stitching without cutting the threads. Here’s the back before covering it with a dark blue ultrasuede.
Again, I glued a piece of ultrasuede to the back (Aleene’s). I placed the glue all along the edges so that the glue touched only the DMC Perle buttonhole stitching. The width of three canvas threads accommodated a nice amount of glue.
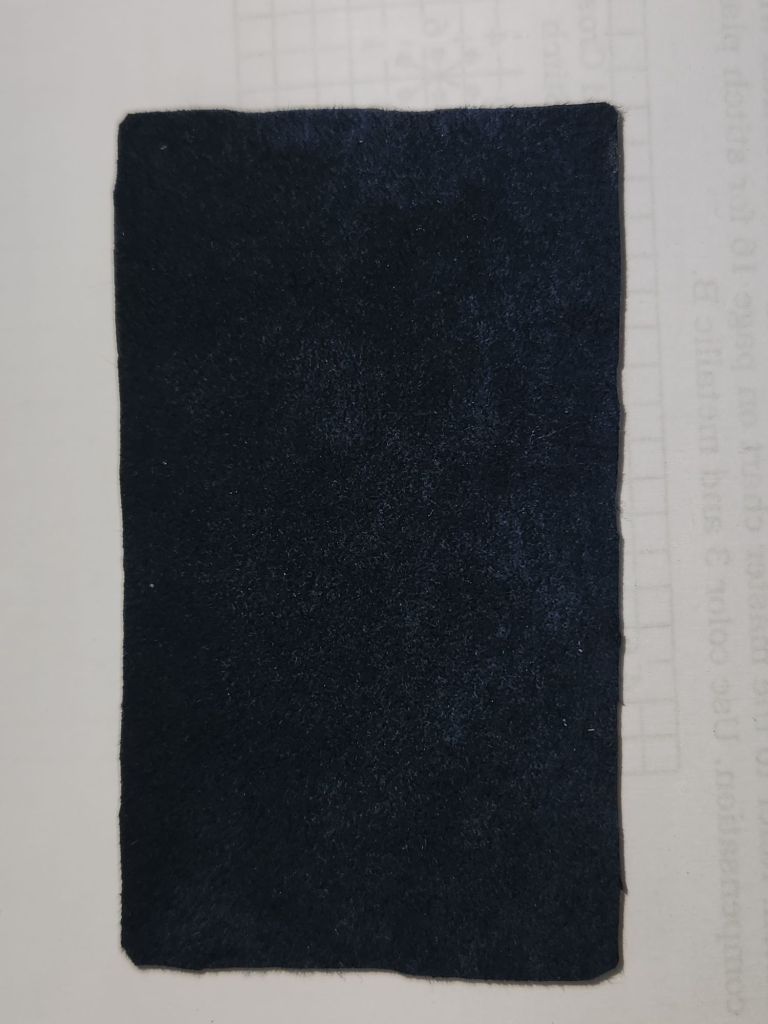
It’s thin enough for a bookmark. A pretty one too!
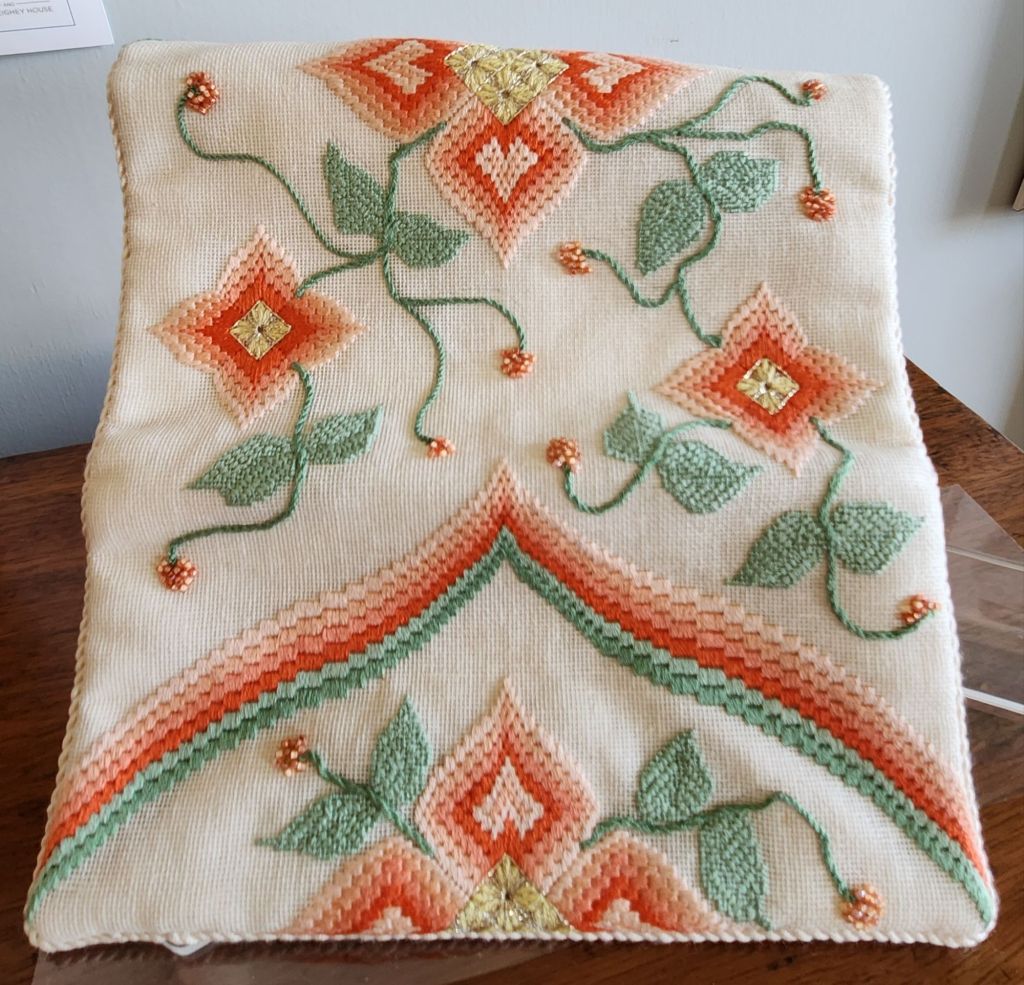
Bill and I visited the Woodlawn & Pope Leighey House for the 61st Annual Needlework Show. It was a sunny day yesterday. It was great for driving, but it caused glare issues with the photos. Glass on pieces is allowed at Woodlawn.
If I knew the designers or if they were mentioned in the docent’s notes, I will provide that information.
I already discussed several pieces in my previous post (https://melitastitches4fun.com/2024/03/07/fireside-sampler-at-woodlawns-61st-annual-needlework-exhibit-2024/), and they did not disappoint, especially Deborah Merrick-Wilson’s goldwork (original designs, so I won’t show photos).
It was nice to see my piece framed! I’d forgotten I had selected one with gold and silver to go with the mirror and candles. Mine was slightly below eye level, and you could get a good look at it. It received a ribbon for 3rd place in the original design multi-stitch category.

Many of the canvaswork pieces I enjoyed seeing were either from New Jersey Needle Artists Chapter members or Colonial West Jersey EGA members. I don’t want to leave anyone out, but in August, NJNA will be reviewing all the pieces, and I don’t want to spoil the meeting by showing them all here. I will share 2 photos here.
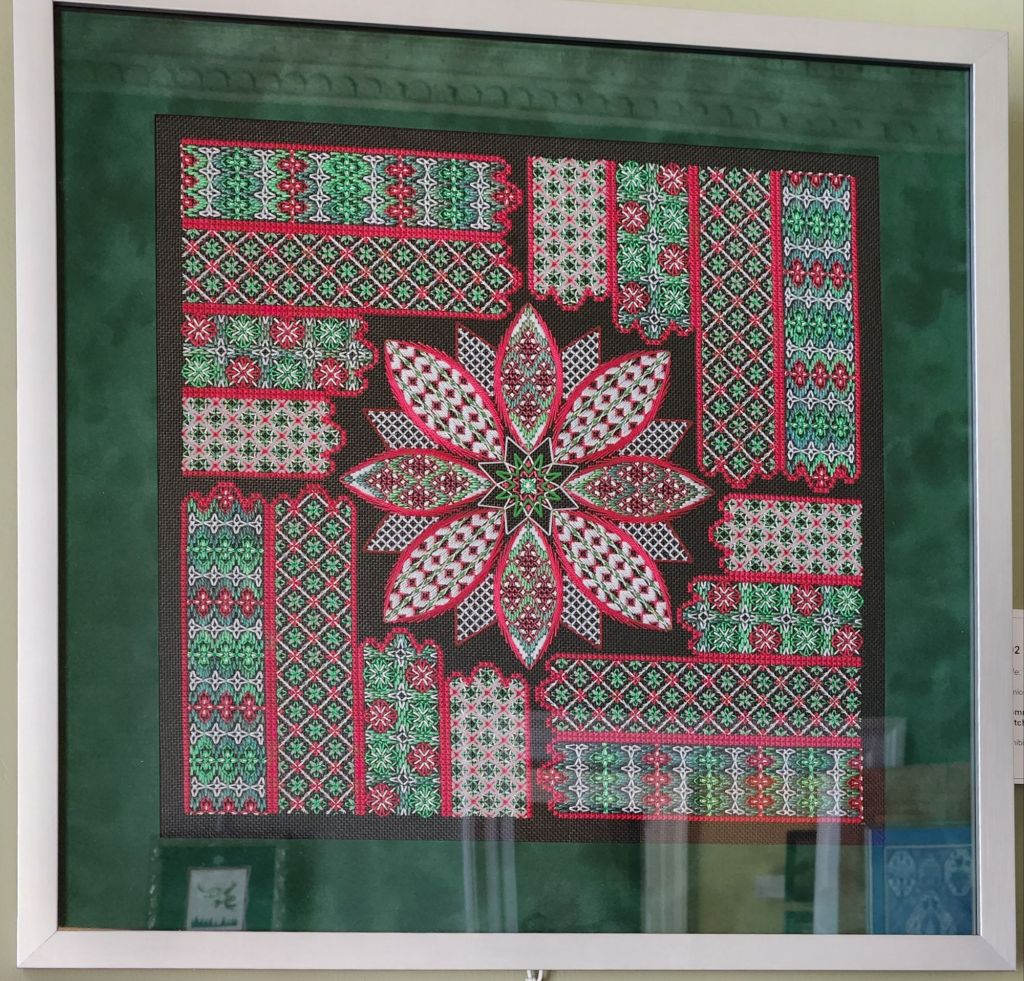
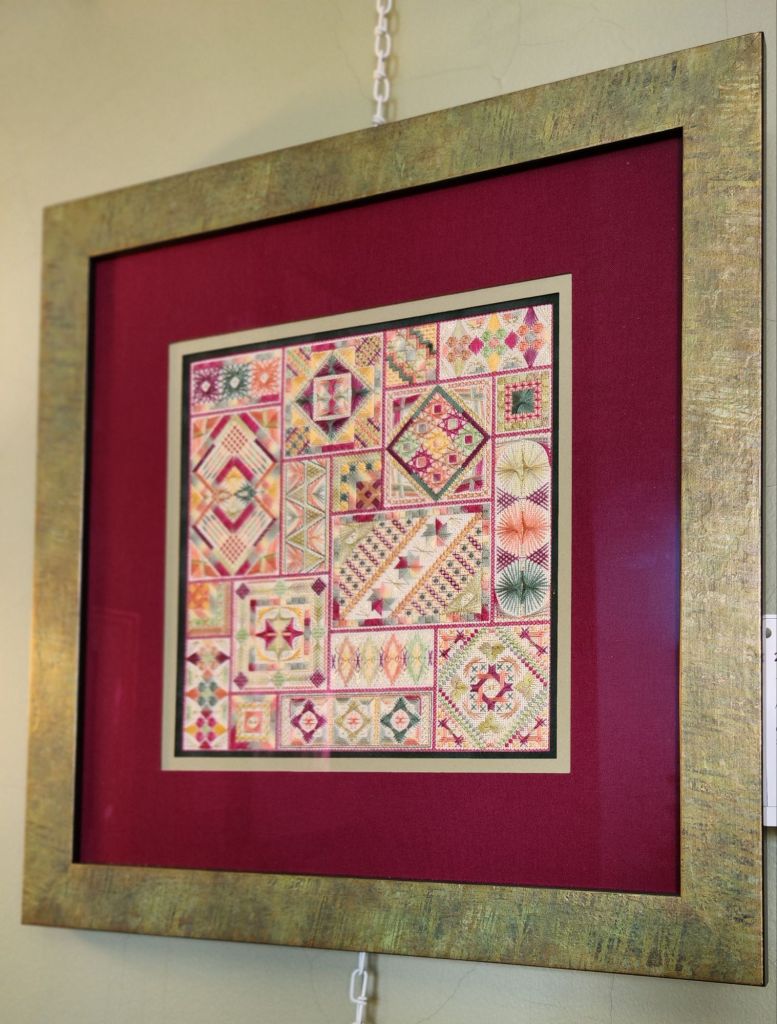
Diane Burgess knocked it out of the park with her choices for Razzle Dazzle by Ann Strite-Kurz. Ann visited the exhibit, and she enjoyed seeing it in person. I learned that Ann chose the original stained glass colors because the original design was adapted from a scarf pattern in the Smithsonian Christmas catalogue that was inspired by cathedrals.
Bill and I both voted for Ellen Briggs’ (also from NJNA) Swan Song as our People’s Choice. Pam Miller of Edwardian Needle gave stitch suggestions and lace from her own wedding gown. It’s so beautiful and interesting.

Pam also helped Amy Bretan with a Bride and Groom, but the lace came from a dear friend of Amy’s. She akso went very colorful with Pyramids of the Oasis by Wendy Moore.
Too many pieces were up to high. All of Sue Chadwick’s especially Raffie, the adorable giraffe, by Kurdy Biggs were way too high to appreciate the complicated stitches. But, it’s a stunning piece and nicely framed.
Rosy Lunde’s Africana by Lorene Salt and Confetti by Ann-Marie Anderson-Mayes are great and the framing is too. Very colorful designs with deep colored mats and wood would allow displaying these together possible without overwhelming each other.
Barbara Levy (NJNA) has to have stitched the largest kimono I have ever seen! It’s a counted design called Kimono Revisted by John Wadell. Amazing!
Cathryn Curia’s colorway for Northern Lights would look wonderful in our bedroom!
Linda Mosch has a couple of lovely samplers as well as a crewel embroidery piece, Jacobean Fantasy.
Linda Pleyer’s Designer Handbags and Black Party Dress are stunning.
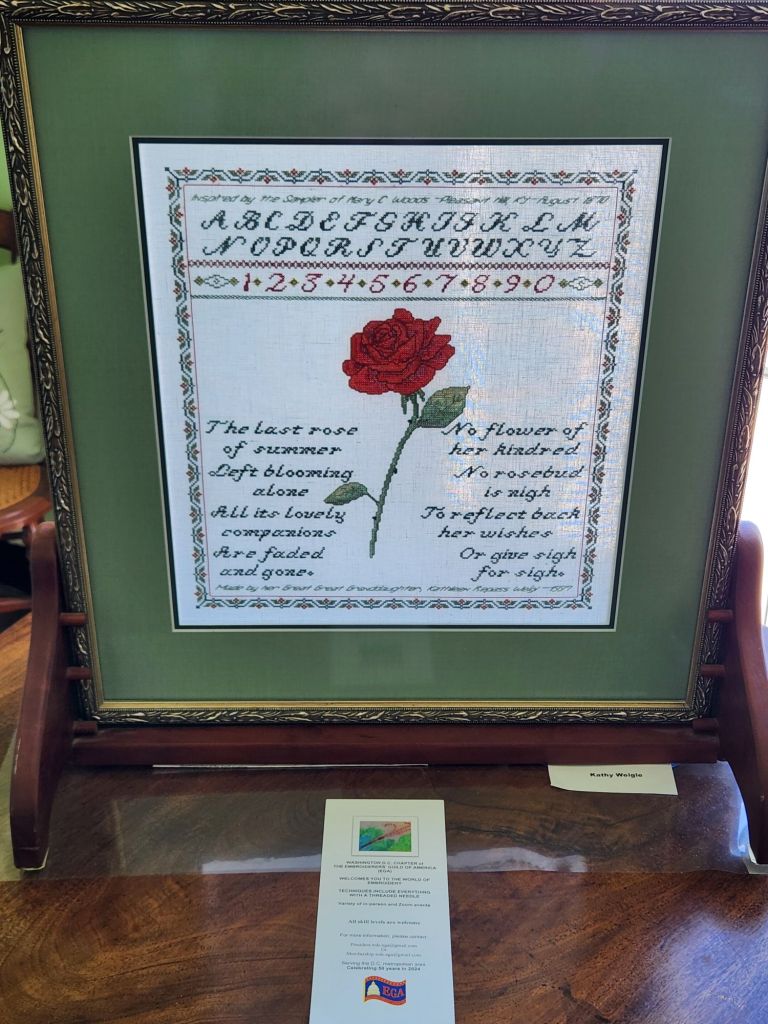
The EGA Colonial West Jersey (CWJ) members had a variety of pieces on display. There were quite a few impressive cross stitch pieces, including Nancyanne Carkeek’s Sunflower Bee.
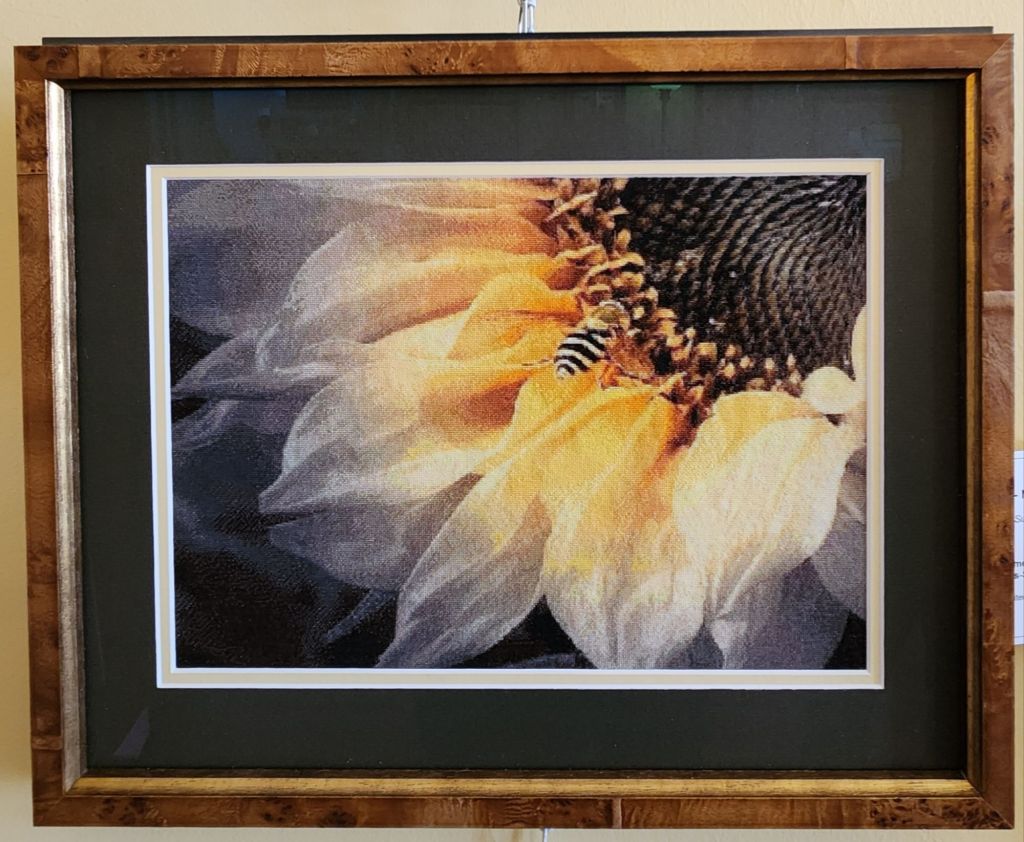
Here’s a close-up. The shading is amazing.

Louise Wilson is a prolific stitcher also from CWJ. She had 8 pieces, including 3 versions of an EGA Petite Project, Landscape Series by Karen Wojahn. I got photos of her fall and spring version, but not winter. Love them.


Patti Tidemann, current President of CWJ, stitched a wonderful piece by Carole Lake, Anasazi Dream. Carole passed away earlier this year, and it’s wonderful to see one of her lovely pieces here.
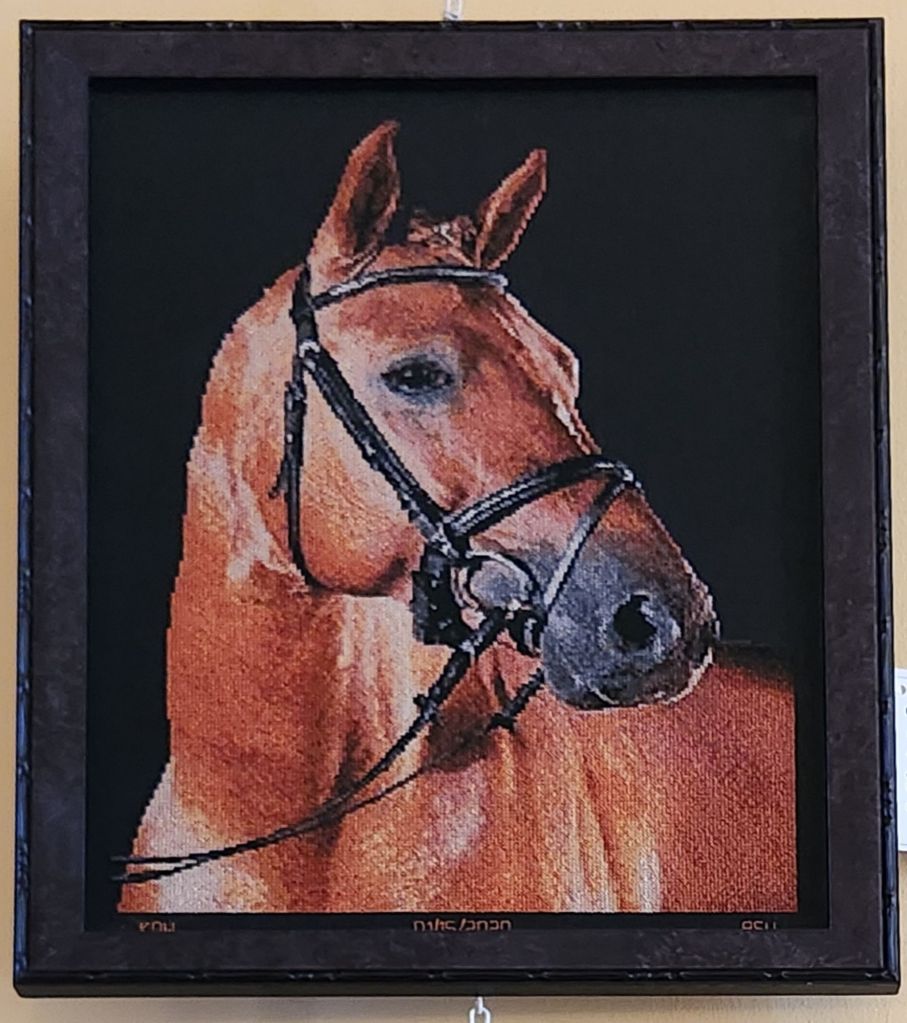
There were several other large cross stitch pieces worth mentioning including Barb Meier’s Bathtime (designed by Heaven and Earth), Meghan Benson’s Autumn Trails (designed by Charles White), Kim Smith’s Seashell Wreath designed by Janlynn/Nancy Rossi), Elizabeth ONeal’s Cross Stitch Tiles, and Ronald Walker’s Portrait of a Horse which could have jumped off the canvas. The shading on each piece was incredible.
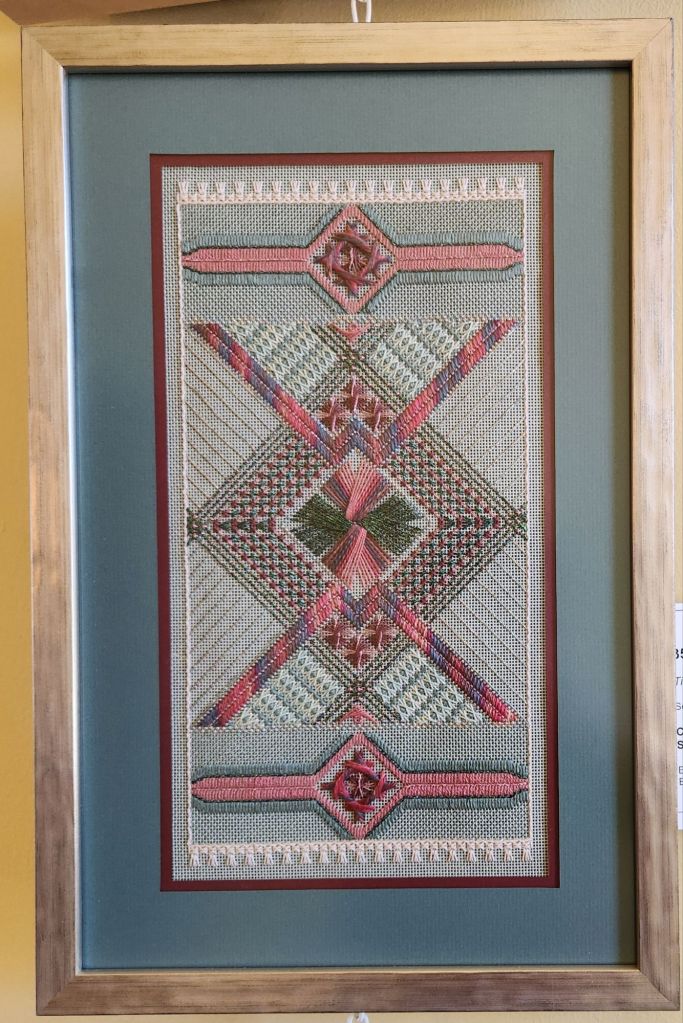
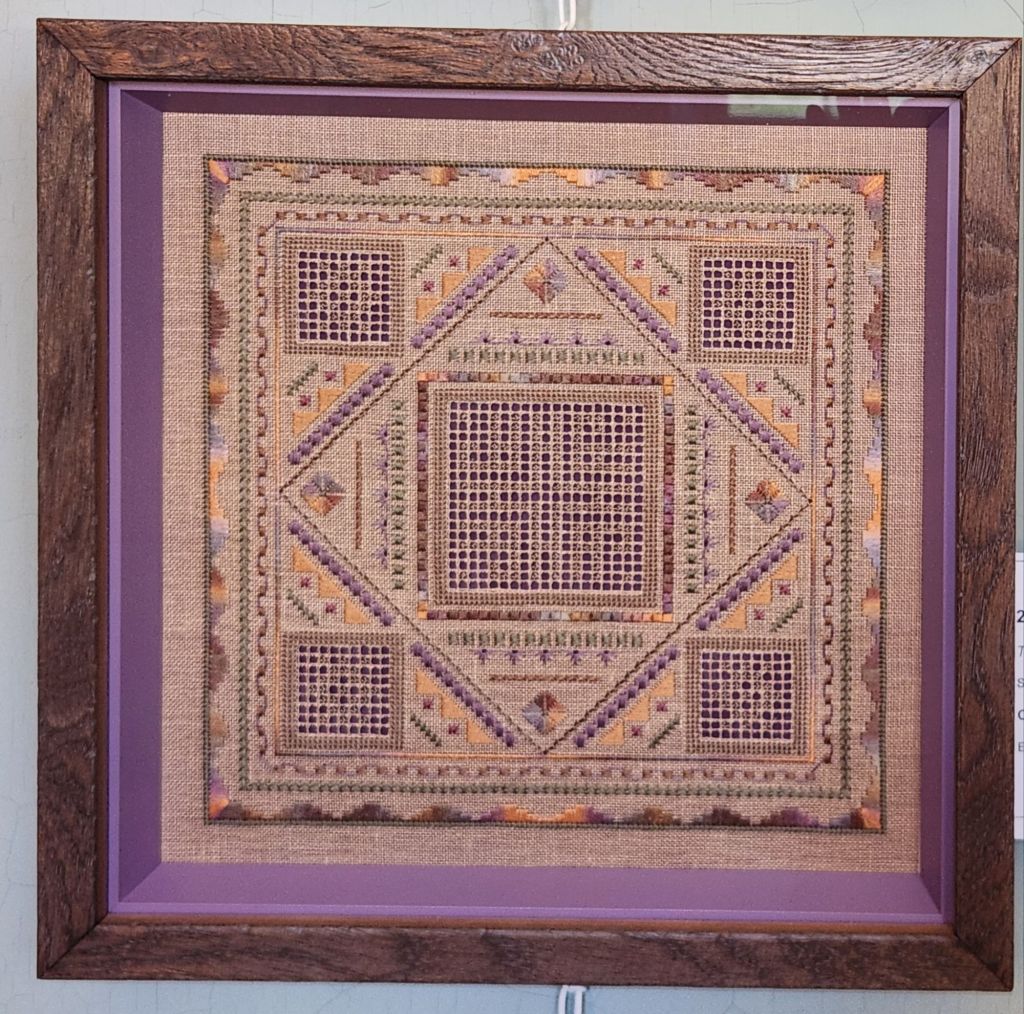
Several people I run into at the EGA Mid-Atlantic Regional meetings (hopefully, I’ll see them April 6 in King of Prussia), including Judy Herrick and Donna LaBranch who exhibited too. Here is Desert Strands by Judy. That is pulled work. She also did a lovely Ukrainian whitework tray.
Donna always has great pieces on exhibit. My favorites were her Little Red Rooster that was a heavily beaded surface embroidery and original design (so I won’t show a photo). Her Loudoun Sampler Guild Mystery Sampler has lots of interesting motifs.

Christin Louden stitched a lovely Kurdy Biggs Rescent Angel. It makes a perfect stand-up figure.

It looks like the eastcoast stitchers are quite taken with Ann-Marie Anderson-Mayes of Beautiful Stitches (several designs were shown). Here’s Versailles, which will be one of the pieces Ann-Marie will be offering to NJNA members after the ANG 2024 KC Seminar. Sherri Gordon with the EGA Mollies chapter (who have stitched my Overdyed Spools and A Spring Sampler) exhibited hers.
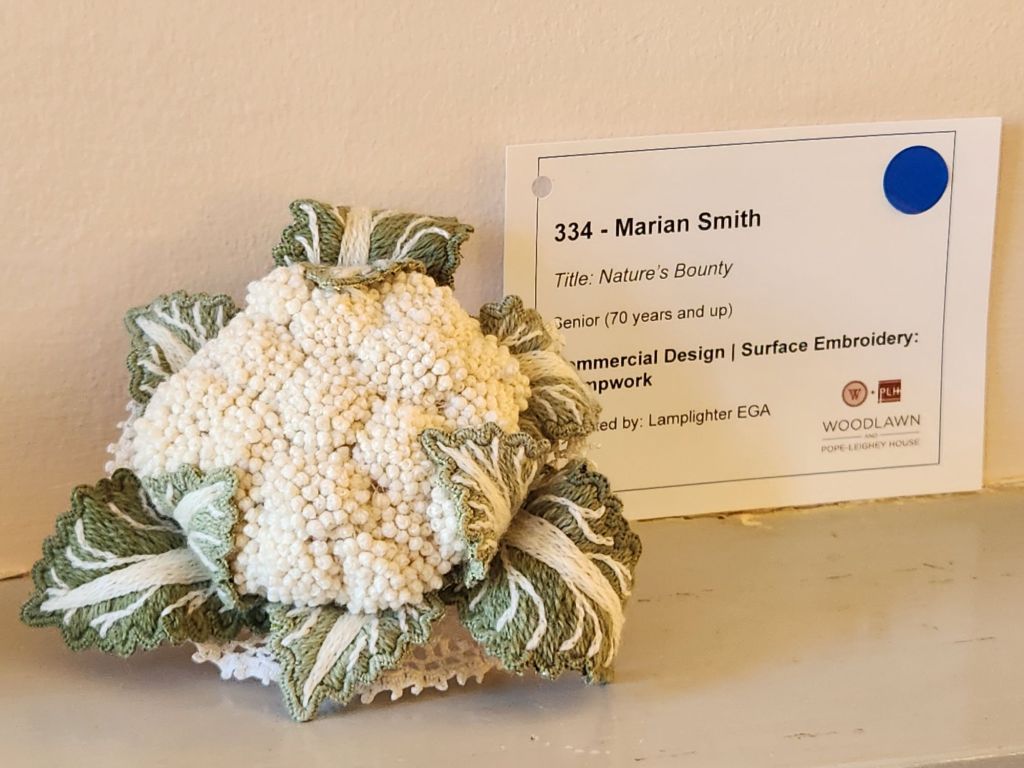
I was really taken by the head of cauliflower done by Marian Smith! It was stitched in shaded wool on cotton homespun and uses wire to hold the shapes of leaves.
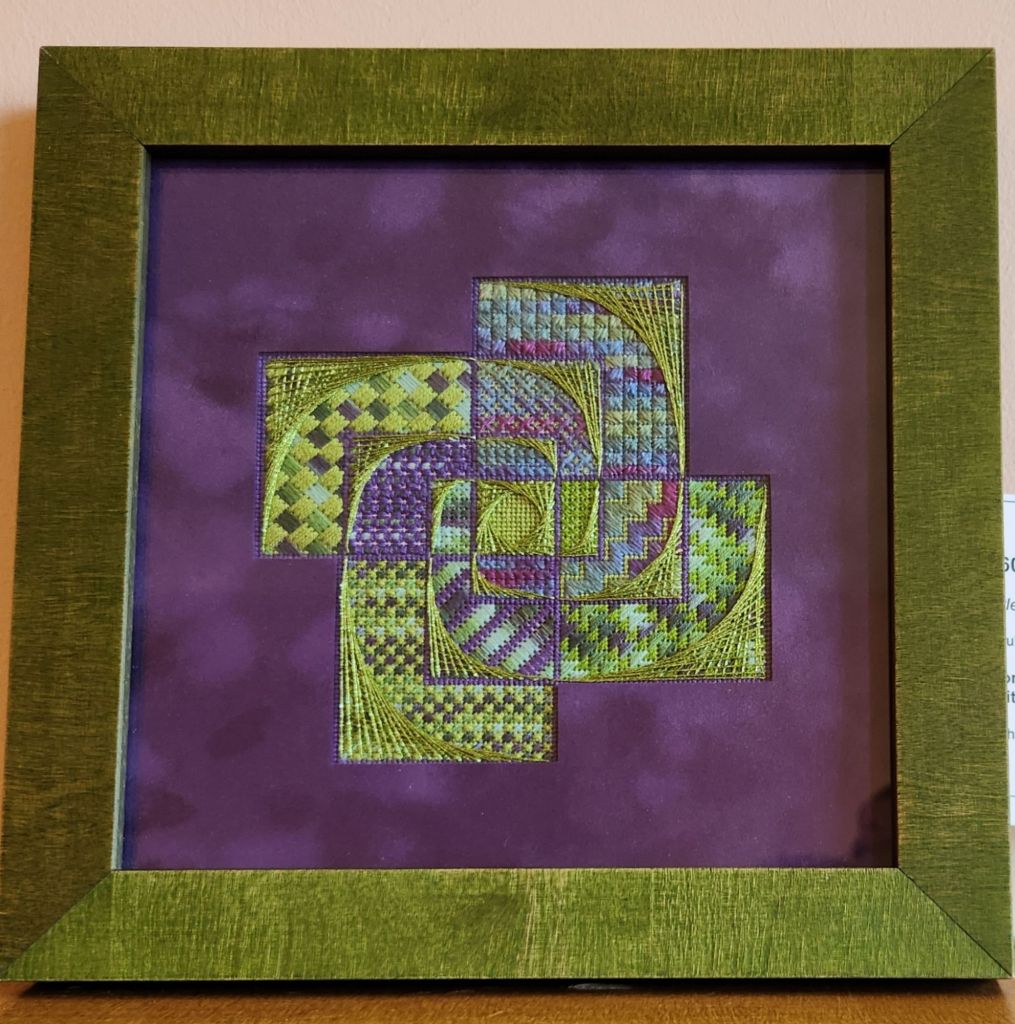
My ANG Main Line Stitchers chapter is going to be doing Fibonacci Swirls by Olivia Hartshorn from the ANG Needle Pointers magazine (March-April 2022 issue). Beth Peternell’s color choice is fantastic and beautifully framed.
I saw Pat Mazu’s purse/jewelry roll that she designed for her journeyman level Master Teacher Program and named it Flowers on a Trailing Vine. Pat taught it 3 times, once in the Potomac/Washington DC area. I bought one a couple of years ago and use it for my paper piecing project (that I need to get back to doing). Lovely design! Pat remembers Sandra Erb from several of her classes and is delighted to see another one finished.
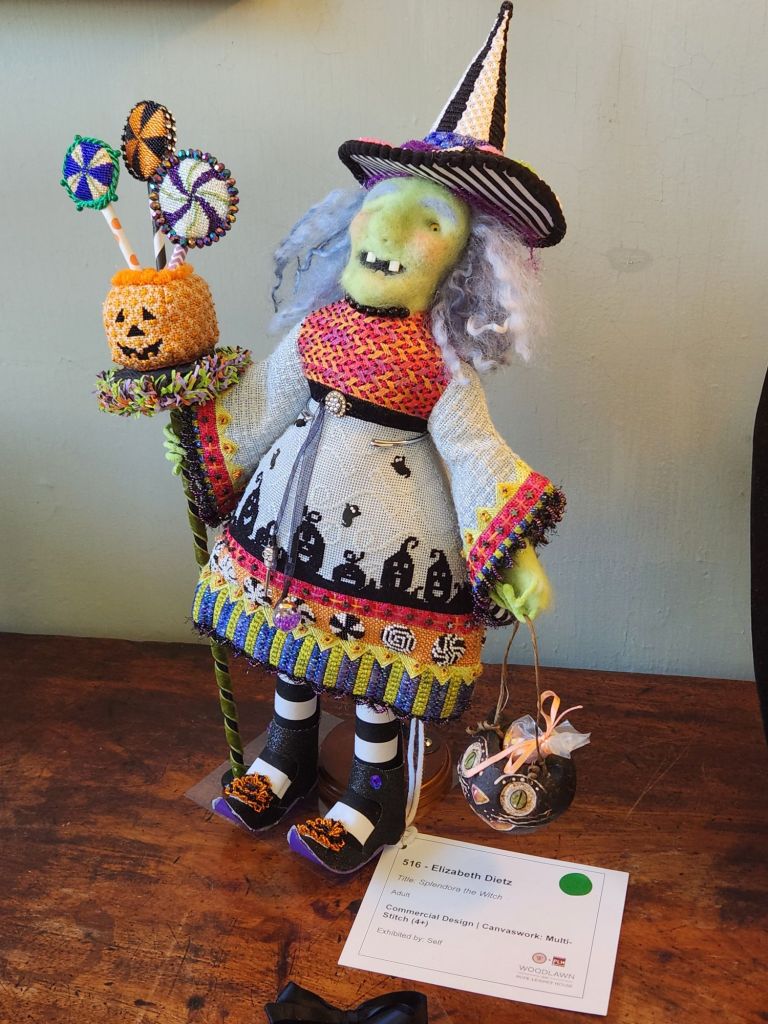
A few people in our area have been doing the needle felting projects by Brenda Stofft. Elizabeth Dietz made a great Splendora the Witch. The detail and finishing is mind-boggling on these 3D characters. Cleo of Busy Lizzy helped with the finishing.
An always amazing category is the miniatures (32 count or less). Besides Norma Campbell’s The Majesty which you can see got a Director’s Award and is posted on Woodlawn’s website, there were other notable miniatures including Arlene Cohen’s Summer Rose, Sharon Fullerton’s Cardinal Crystal Jar, and Alison Kearney’s Rose Window (designed by Mary Hickmott).

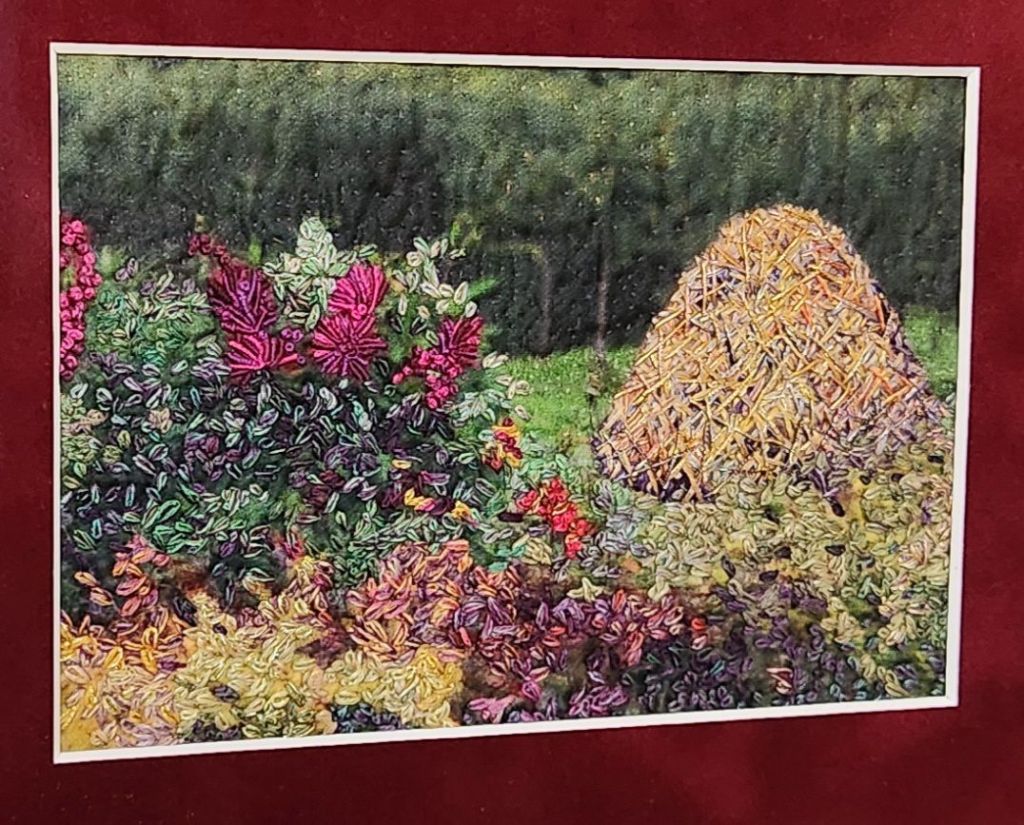
Haystacks of Giverny by Katheine Diuguid was an online EGA class. It is interesting that Julianne Otto’s is more yellow (top photo) and Regina Thek incorporated more red tones in the Haystack (bottom photo).

This year, Norma Hiller stitched Safari by Terry Dryden and one of Gail Stafford’s lovely landscapes, Fog in the Mountains. I am looking forward to an online landscape class in May with Gail offered through ANG Cyberpointers.

In the non-judged areas, the EGA Washington DC chapter displayed some lovely pieces of all types.

There were antique tools collected by Nelly’s Needlers displayed as well. They did a wonderful job with the displays. All the birds were in the Hall. I like the theme approach. And, they serve as docents keeping a watchful eye and offering comments about some pieces from the notes they have on all the pieces.

Most of the beadwork and mixed media embroidery pieces are original designs and so I won’t show them. There were some really great pieces.
Another nice exhibit, although I wish they had opened one of the two unused rooms upstairs in order to lower many of the pieces. It’s especially great seeing pieces from people I know. There are still a few days to get there!

Filed under: A Spring Sampler, Brandywine Chapter, Embroidery Guild of America, General comments, Needles, Tools
I found this bag at Target (https://www.target.com/p/solid-soft-satchel-handbag-a-new-day-8482-tan/-/A-91898942). It’s 10″ (H) x 15″ x 8″ (D) – perfect for the fall color skinny version of A Spring Sampler. Good price, too ($35). It will hold my battery pack, the Chapter’s eMeet speaker, Chapter business cards, travel tool kit, portable light, and curling iron. I am avoiding glue for this bag.
I needed the needle for leather from my Home Craft Repair kit of needles because the bag is made of polyurethane. I pinned the canvas in place and stitched through the inner lining, but it isn’t puckering too much, and I retained full access to the 2 cell phone pockets on the front inner side. Here’s the top edge attached.
The process of stitching the top in place made me think a thimble and a curved sharp needle would make the sides and bottom easier to stitch through the bag and hopefully not catch the lining. And, at this point, my hand needed a rest, and a trip to Joann’s was needed to get the sharp curved needles because I only have tapestry curved needles.
The curved sharp needles didn’t work well. Leverage was the problem. But, the package came with a small eye, very sharp straight needle. The real improvement came because of the Dritz thimble. What a difference that made.
An aside: In order to find the thimble when I need it again, I am putting the thimble in my Stitch pen/tool cup on top of That Purple Thang by Lynn Graves which I have not used much (if ever). If I get rid of it, I’ll need it!
I was able to pull the lining away on the sides and bottom and push the needle through the front of the polyurethane, angle the needle back to the surface further along the canvas like a running stitch. I didn’t care how far. Some stitches are longer than others but the trim will cover it.
Once all 4 sides were attached, I cut the canvas down to 7 canvas threads wide and attached the trim. I found a 1/2″ wide dark brown flat trim at Joann’s. And, Mandarin Floss M833 was a perfect color match. I decided to catch the polyurethane and canvas periodically as I attached the trim down the center using 2 strands. I pulled out my mini pliers and that helped too.
When Bill and I were in the store looking at different trims, he placed this trim on the needlepoint and folded it around a corner. Before I started, I worked out how to do that on all 4 corners with a short length first. I had to cinch the ends together to stop them from fraying (no glue) and taper them to hide the ends easier.
I went back around a second time with one strand to sew down the outer edge. It probably took me 12 hours altogether since starting this on Thursday. There was some cursing but no bleeding. I didn’t jab my fingers once! I was very careful. That leather needle would have hurt.
The most exciting part is that it’s even at 1.75″ above the bottom edge. It looks good and no glue!