Filed under: ANG Central Jersey Chapter, ANG Seminar 2025, Christmas Ball Canvas
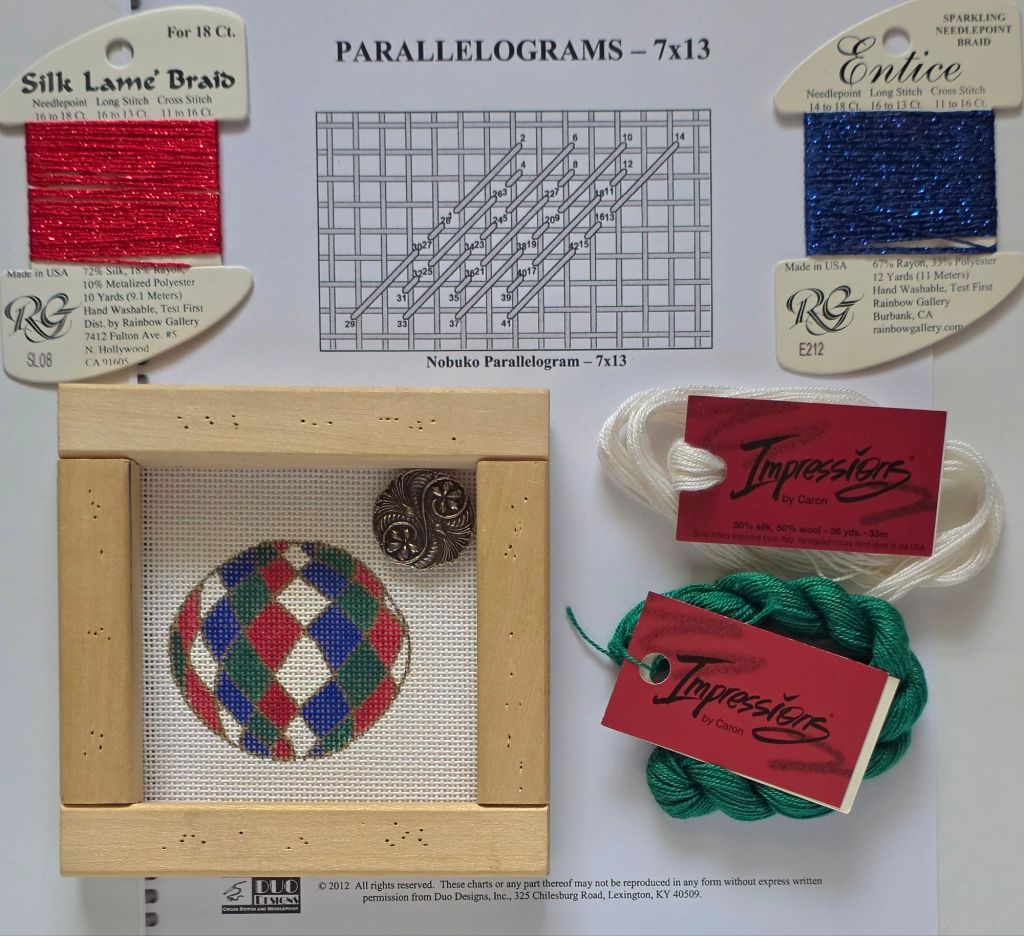
The ANG Streetcar Chapter had at table at Expo this summer and I picked up this little ornament. It’s marked CB6 (maybe CBK Needlepoint Collections). I have to work ‘in the well’ because the canvas measures 4.5″x5″. I could lace it to larger size bars but this should be fine.
Needing a small piece to work on at the ANG Central Jersey Chapter meeting on Saturday, I pulled threads from my stash including 2 sparkly threads and 2 non-sparkly threads for contrast. I’ll pull a gold for outling later.
Then, I went to my Sandy Arthur book for a parallelogram stitch that would work. Most were for larger areas but Nobuko should work in all the areas and will compensate easily.
Looks like a good project for Saturday!
Filed under: ANG Central Jersey Chapter, Winter Lights by Jennifer Jennifer Riefenberg
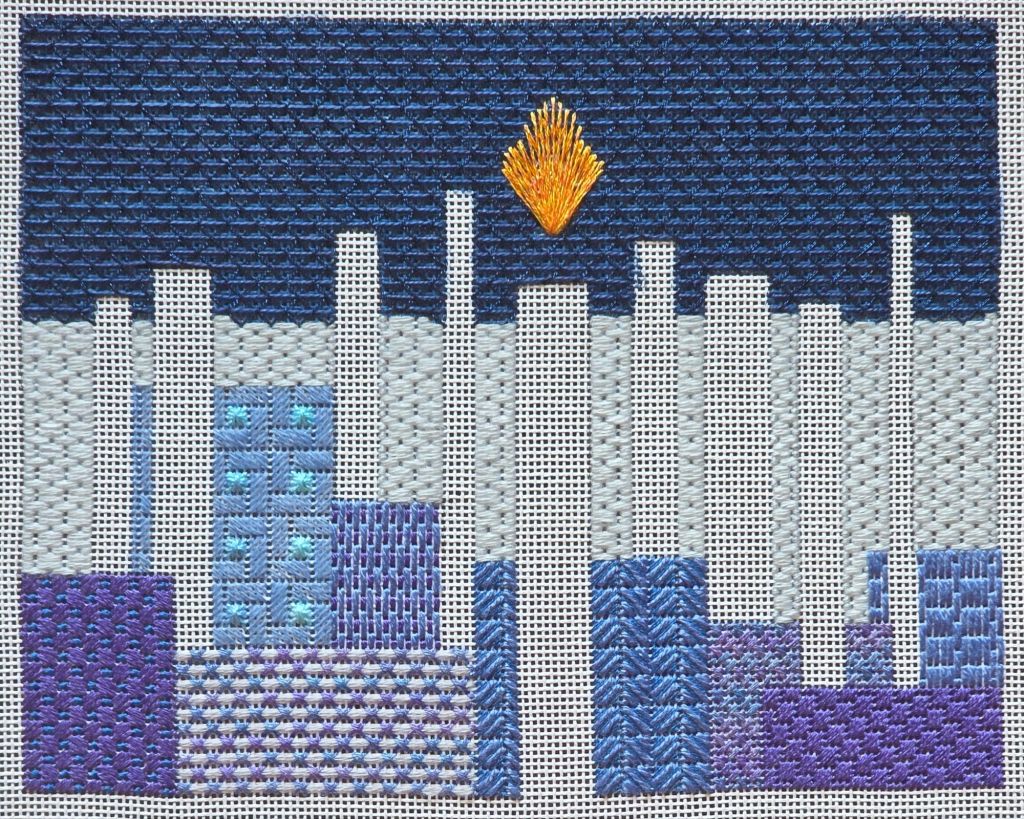
Jennifer Riefenberg put together a lovely design in Winter Lights. I am glad I left the candles and flames for last.
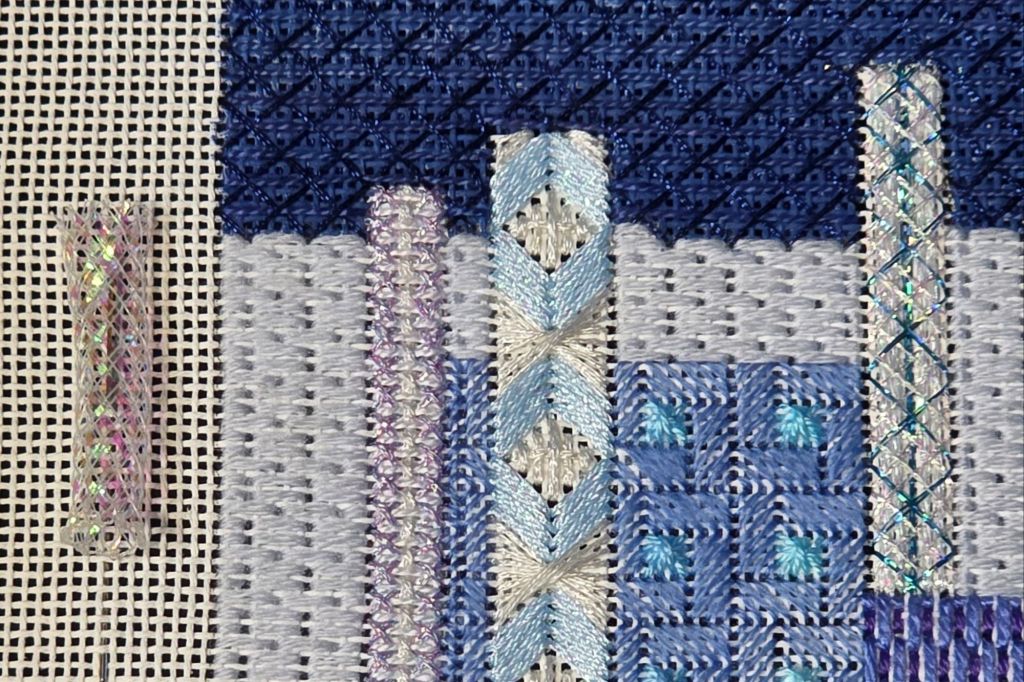
Once I got 3 magnets positioned on the canvas properly for Candle 1, I was able to park needles/threads alternating from the laid foundation thread to either one of two cross stitches. It took some concentration.
I learned how to compensate a Rhodes fan on Candle 2.
Candle 3 (on the right) is my design because I trimmed, burnt, and over trimmed the piece of mesh tubing Jennifer provided (what’s left is shown in the border of the canvas on the left). And, truth be told, I tried using it but I didn’t like the mesh anyway (did I burn it accidentally but subconsciously on purpose). So I improvised and mimicked the crosses of the mesh and love it. I placed 4 strands of Sulky Holoshimmer 6017 vertically in the center and placed 2 long strands of Tiara T117 on each side. Then, I criss-crossed twice with Petite Treasure Braid PB10 and once with 2 strands of Sulky Holoshimmer 6017.
The little dimples make Candle 4 interesting.
I also love the center Candle 5 even though it took 2 tries to get correct. I was off one canvas thread in the 5th of the 10 paths.
Jennifer is correct to suggest laying, couching, laying, etc across Candle 6 so you can see the holes as you stitch. That’s probably true whenever couching.
Offset crosses in Candle 7 were something new to try.
I figured out how to compensate a Waffle Stitch for Candle 8.
And, oblique crosses finished up Candle 9.
The outlining of the candles and flames were stitched as the Phillies went up in flames exiting the playoffs with little offense and a ridiculous blunder. Finishing this lovely design was the highlight the day!

Filed under: ANG Central Jersey Chapter, Winter Lights by Jennifer Jennifer Riefenberg
The ANG Central Jersey Chapter (CJC) is hosting a Zoom class (this past Thursday and next Thursday) with Jennifer Riefenberg for Winter Lights.
I picked up the kit in August-wow that was only last month-seems longer. It’s 7.5″ x 6″ design area. I pulled it out to read through the instructions. Seems straightforward although I was curious to hear her suggested order of stitching. She teaches in a different order than they are written. And, I’m not following either way. I’m leaving the candles for last.
There are lots of threads, mostly partial skeins (Bella Lusso, Wildflowers, Gloriana, Kreiniks, Needlepoint Inc Silk, Pepper Pot Silk, Petite Silk Lame Braid, Petite Sparkle Rays, and Sparkle Rays). But, we did get full skeins/spools of DMC Floss, Bijoux, Accentuate, and more Bella Lusso. The new thread for me is Sulky Holoshimmer. And, I have not added mesh tubing to a piece before.

The canvas has a few pencil lines marking various areas. I’m glad there isn’t a lot of pencil because it can show. But, I needed to define these areas better so I basted the candle outlines to be ready for Thursday. Then, I decided to stitch on it and got on a roll.
Basting did help me compensate Area 2. Area 1 should have extended left by 2 canvas threads but it’s easily compensated.
I wanted to get to easy stitching areas where counting won’t be needed because I joined the chapter for stitching at the September meeting in Colonia, NJ on Saturday. The areas each seemed to work up quickly and I left myself 2 areas for the stitch-in which I got done.
Finishing the blue on blue for the sky had to wait for my lamp at home and the Eagles game on Sunday. I only had 21″ left of Wildflowers which was used in the sky. Talk about close! So was that Eagle win. I might just get this done in 2 weeks!
Only someone who knows this design would see the one block where I added an extra thread to get full coverage for that block. One open block was bothering me. And, as everyone knows, once you purchase the piece, it’s up to you to be happy with it.
What I may have to redo is that center flame. Two things are bothering me. It’s not symmetrical which is what Jennifer charted and I didn’t get correct. But, her chart covers up completely the lovely iridescent gold ribbon in the center. I’m not going to do anything unless or until I get more of that particular Petite Silk Lame Braid. It IS possible for me to live with a flickering irregular flame! So, we’ll see how it looks with the rest of the flames.
Filed under: 2024 Summer Stitch Camp, ANG Central Jersey Chapter, Making Coasters, Serendipity - Stitching Club with Ellen Johnson
Sharon B, the President of ANG Central Jersey Chapter, requested that I demonstrate how I make a coaster with the cork bottom at the May meeting today.
Last month, members were given pre-cut round Craftex and cork with a self-adhesive side. They were given 18 count canvas but no particular design. Three members were ready to finish theirs and a half-dozen more listened and watched.
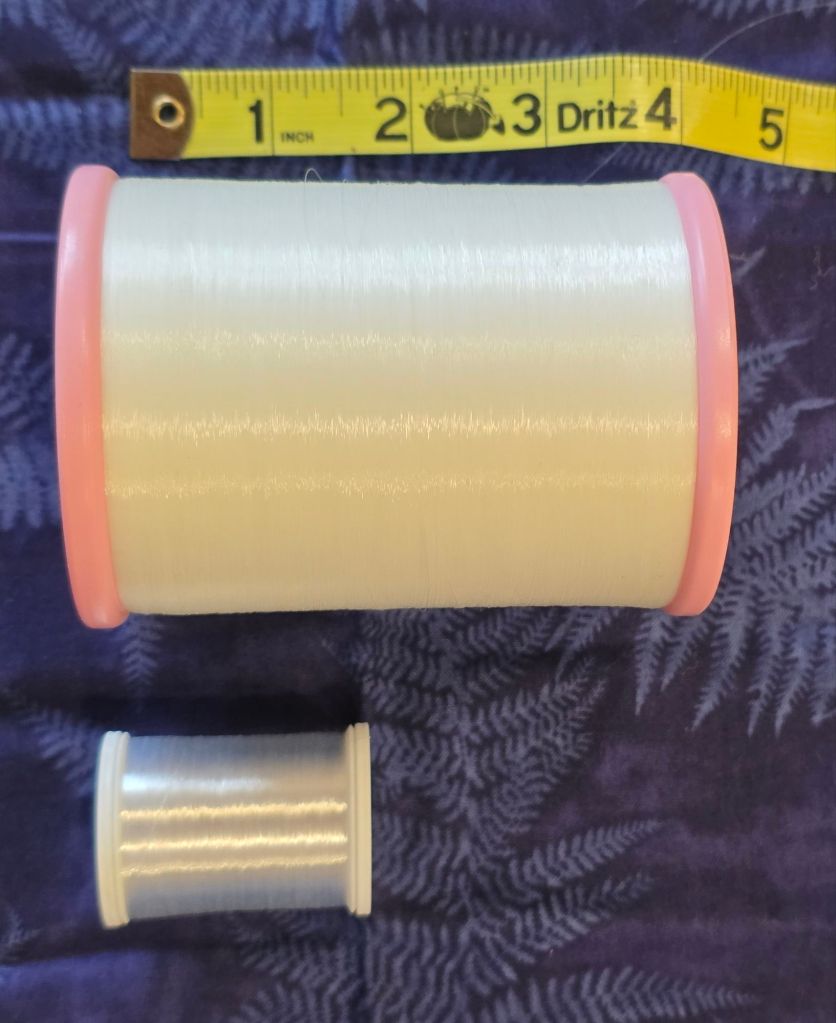
Besides the stitched piece and the piece of cork and Craftex that Sharon provided, scissors to cut canvas and any thread to attach the canvas to the Craftex is all that is needed (it won’t show). I brought a spool of white outdoor 100% poly thread by Coats & Clark. I also brought my lifetime spool of invisible thread but Janice M brought her spool of invisible thread that is big enough to be a lifetime supply for everyone in the chapter! I have never seen a spool so large.
I brought my Kreinik cord maker to add a cord between the top and bottom layers (which is optional but I like to do it). The threads typically match the one used in your design. I talked about attaching the cording by stitching and with glue. You need three times the circumference plus extra for starting and ending. Stitching is technically preferred but it is only a coaster! I brought the best glue I’ve found to date, Super NEW GLUE” by Euro Tool. My fingers even got stuck together – almost. It’s great glue.
The process is almost the same as I described here: https://melitastitches4fun.com/2024/05/04/compensation-coaster/
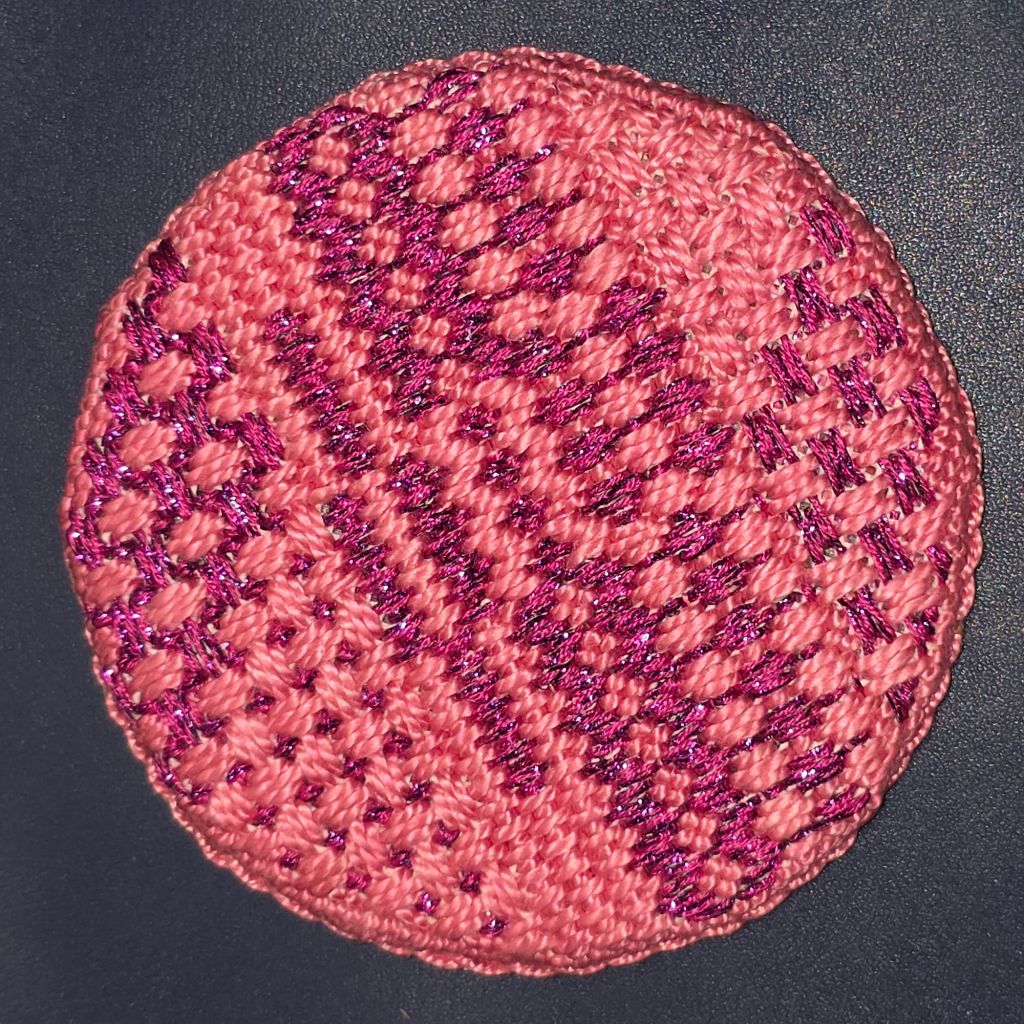
As I told them, I almost never do finishing the same way twice. I demonstrated a round using my pink coaster (https://melitastitches4fun.com/2024/07/14/2024-summer-stitch-camp/).
This time, I tacked the Craftex on the back of the needlepoint with invisible thread in 5 places. Then, I used 2 strands of the outdoor thread and laced each tab to the Craftex crossing to the opposite side as I moved around to various tabs. I glued the last half dozen tabs. I wanted to show how quick and firm the glue dried.
I only showed how to cut the blue square (https://melitastitches4fun.com/2024/07/18/summer-stitch-camp-square-coaster/) and I finished it later that night.
That’s when I remembered one way I avoid a knot on the cording which would create an unwanted bump which isn’t good for a coaster that needs to be flat. I put a piece of Scotch tape on the end with the knot and cut through the tape. It worked great on my thicker blue cord.
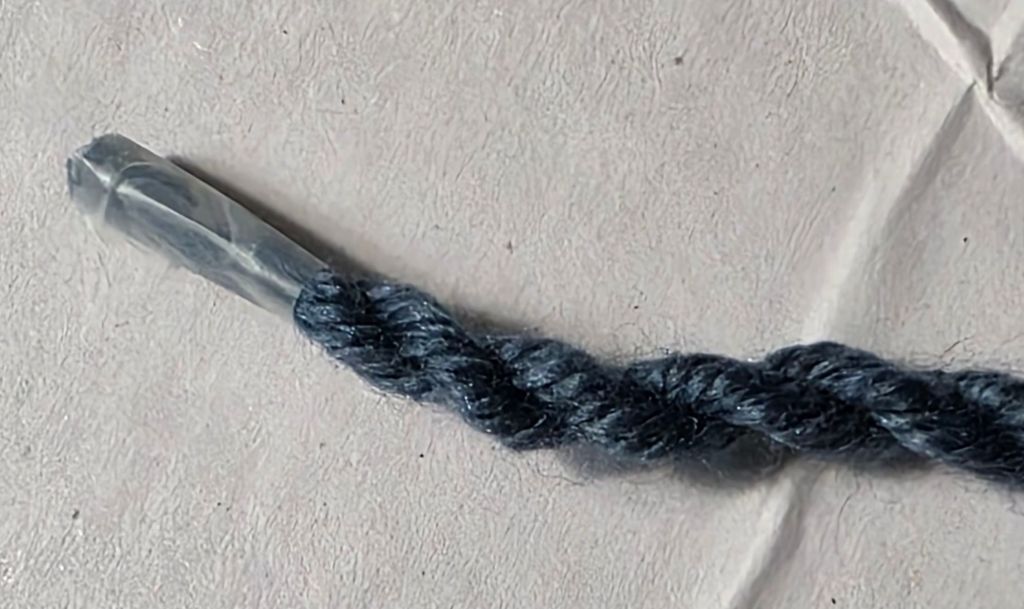
And, I was able to nudge the 2 cords together so you almost can’t see it. Can you see where the ends overlap?
Here’s where.

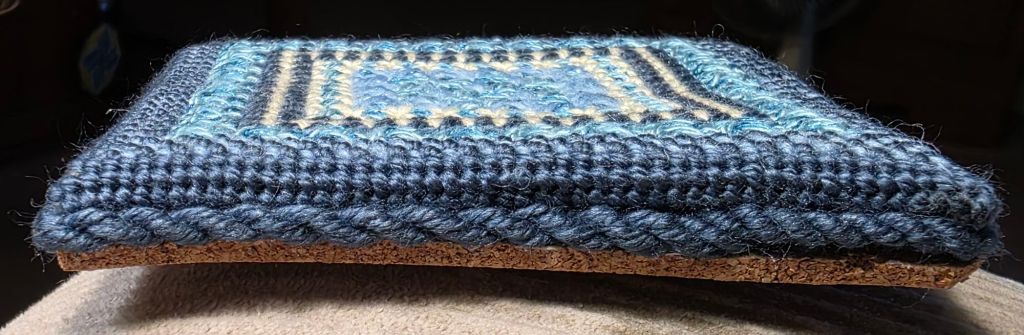
The corners kind of stuck out but since I cut the cork to shape, it worked out just fine. I just traced the shape and then cut the cork.
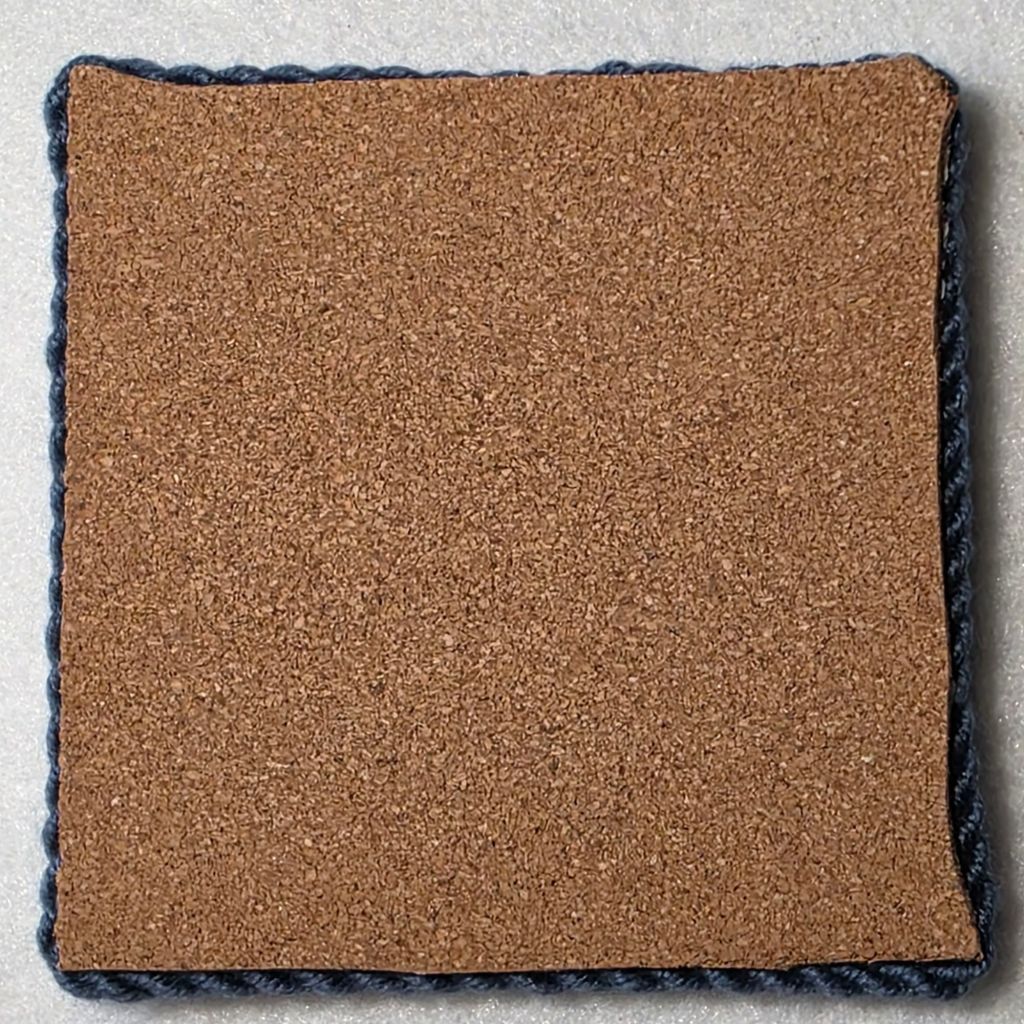
I used glue to attach the cording along each edge and at the corners. It looks great!
Mine will be the pink one and the blue one will be Bill’s.
Filed under: ANG Central Jersey Chapter, ANG Chapter Book Projects, ANG CyberPointer's Chapter, ANG Main Line Stitchers Chapter, Orchid Lady by Mary Knapp, Starburst by Patricia Hartman, Summer Fireworks by Ann-Marie Anderson-Mayes
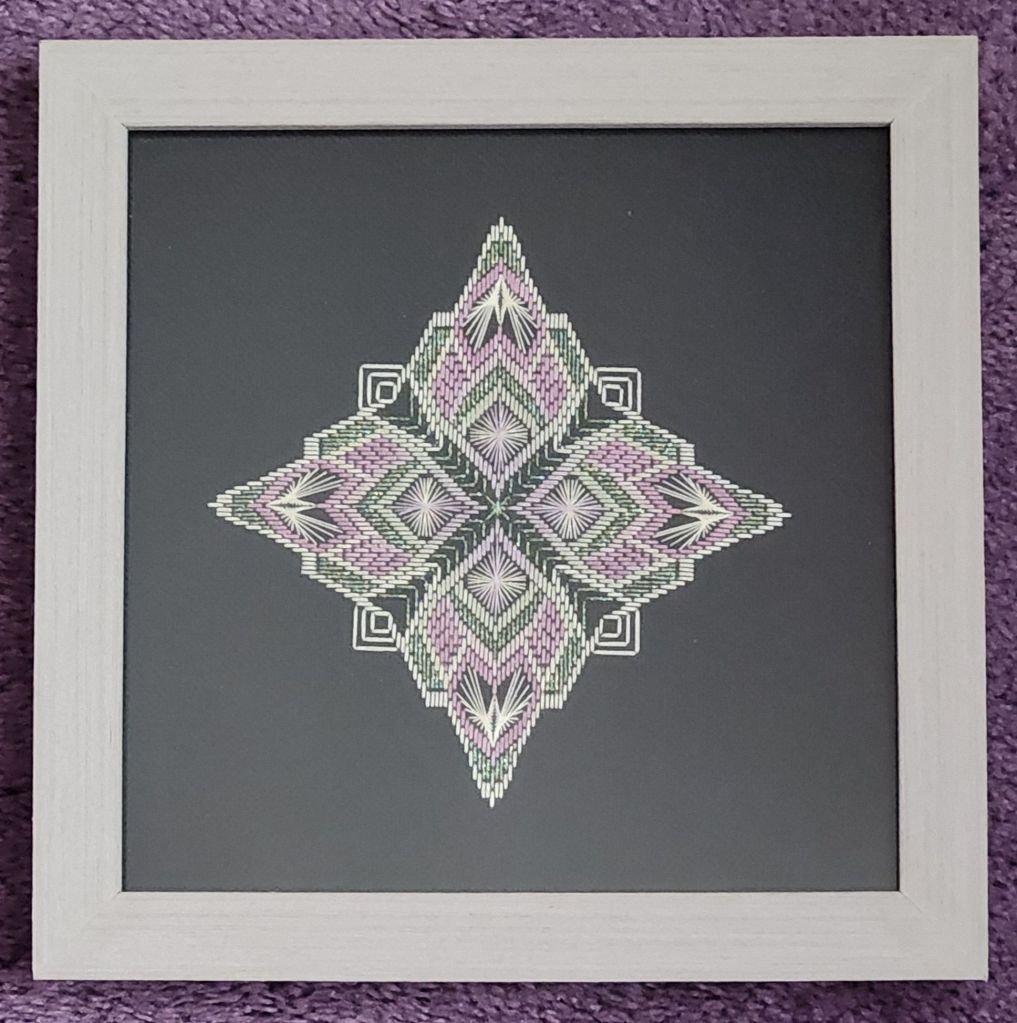
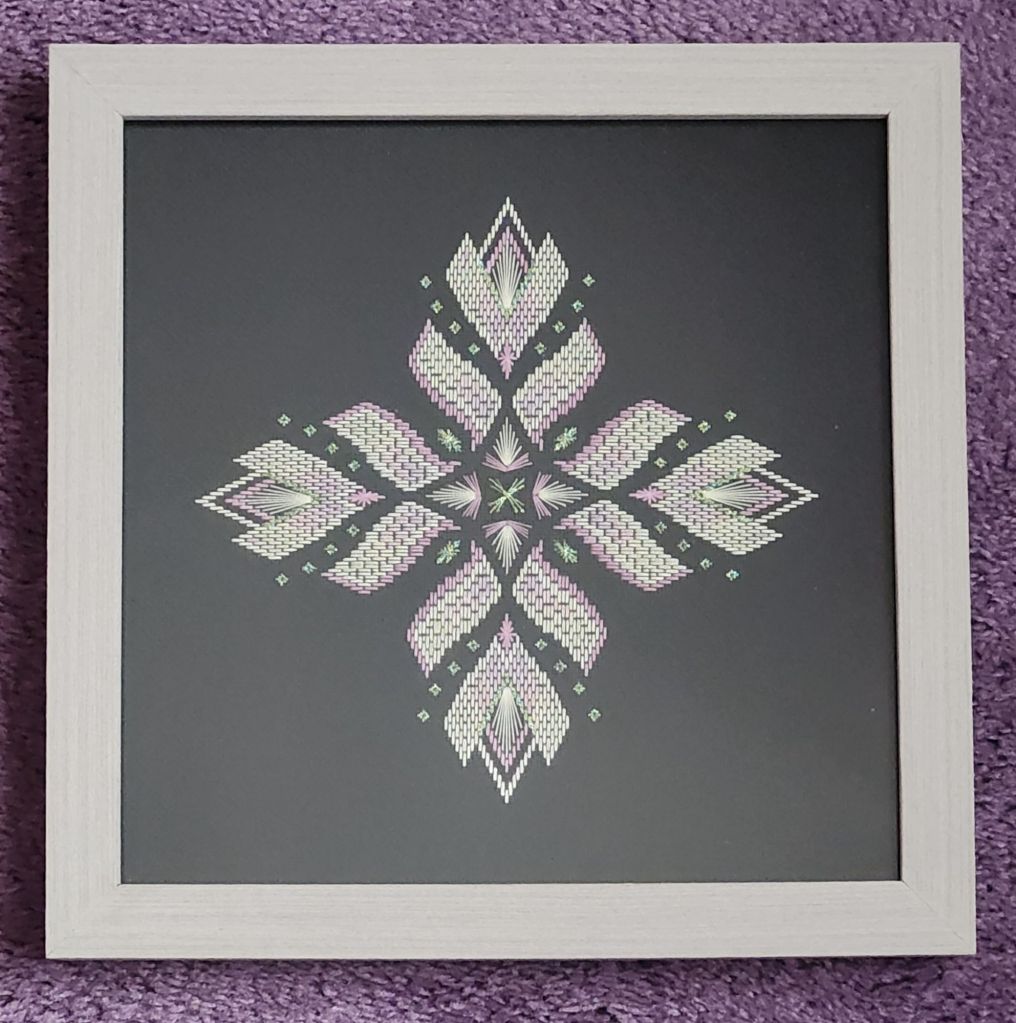
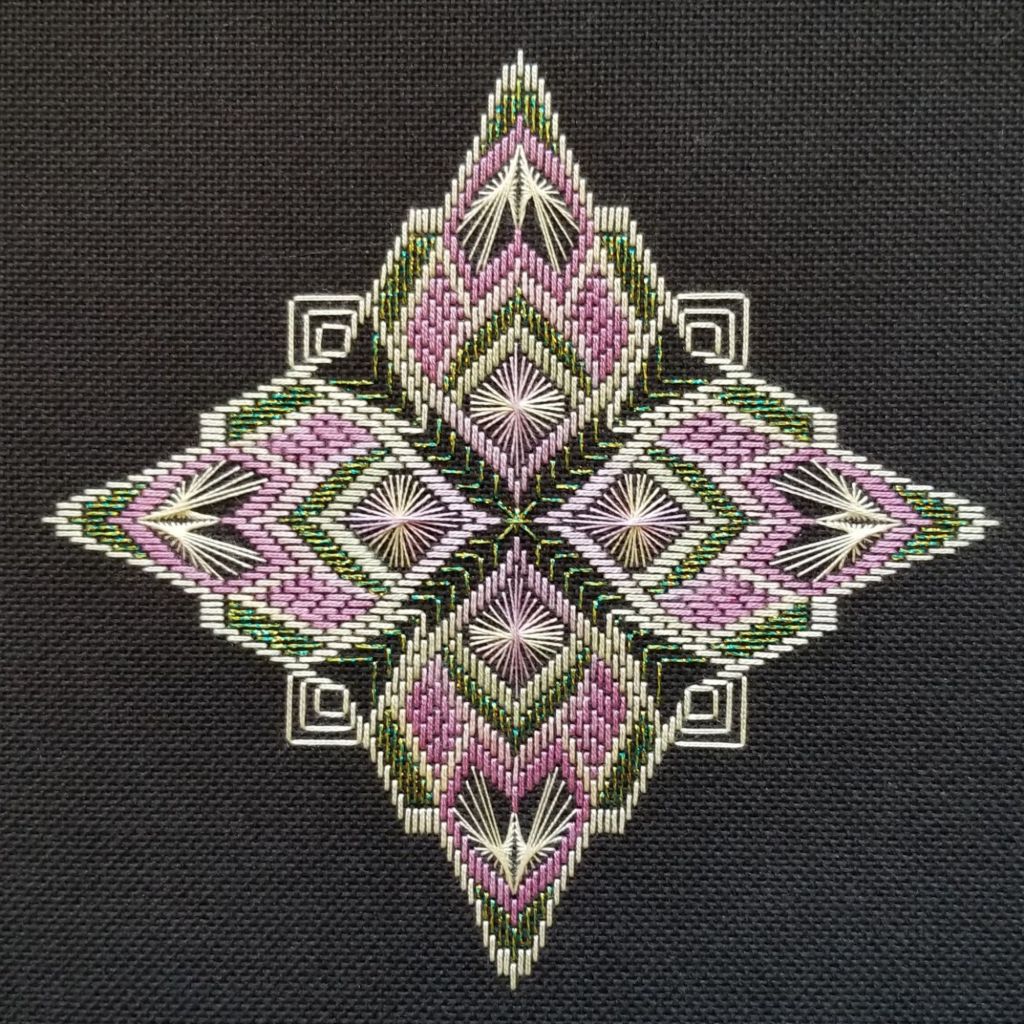
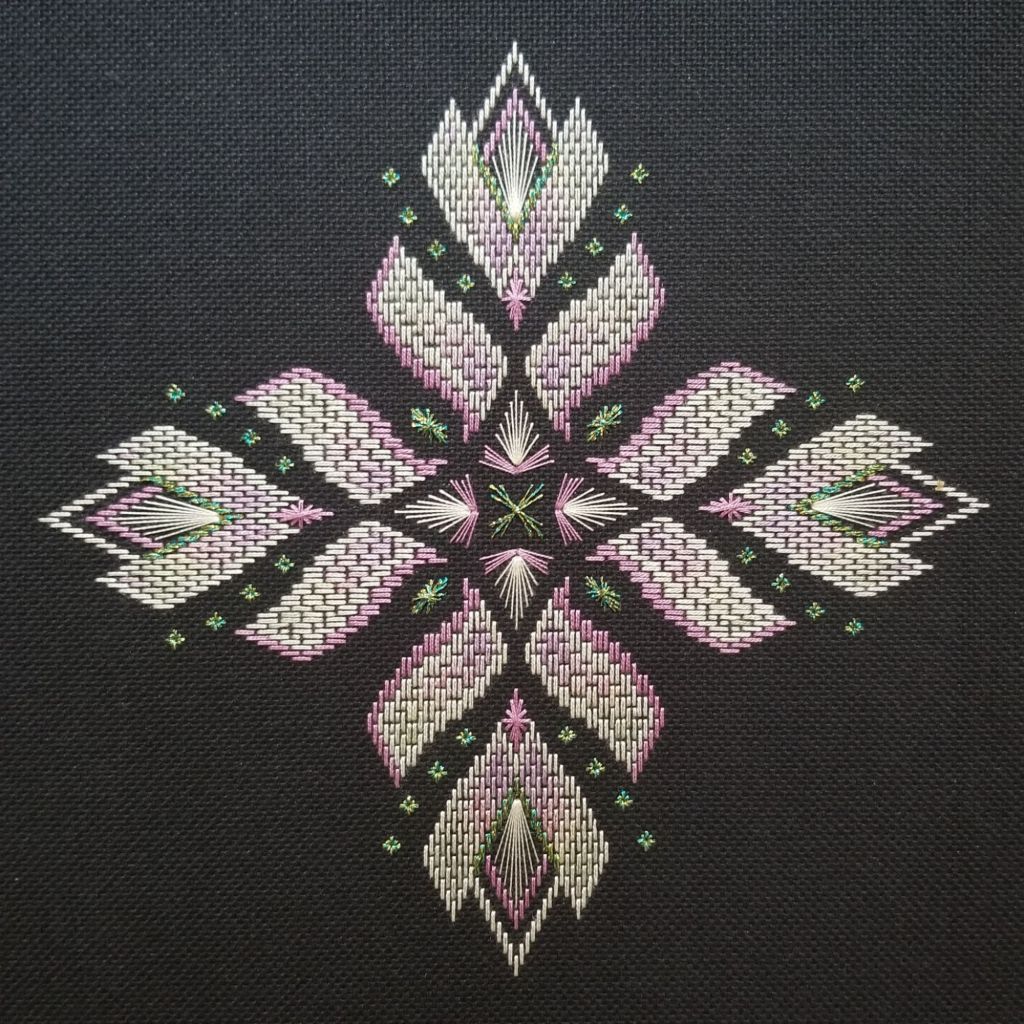
I realize I never posted Starburst by Patricia Hartman (from the 2013 Chapter Project Book that was an ANG Main Line Stitchers project) or Orchid Lady by Mary Knapp (an ANG Cyberpointers project from 2021) after they were framed at Repenning Fine Arts.
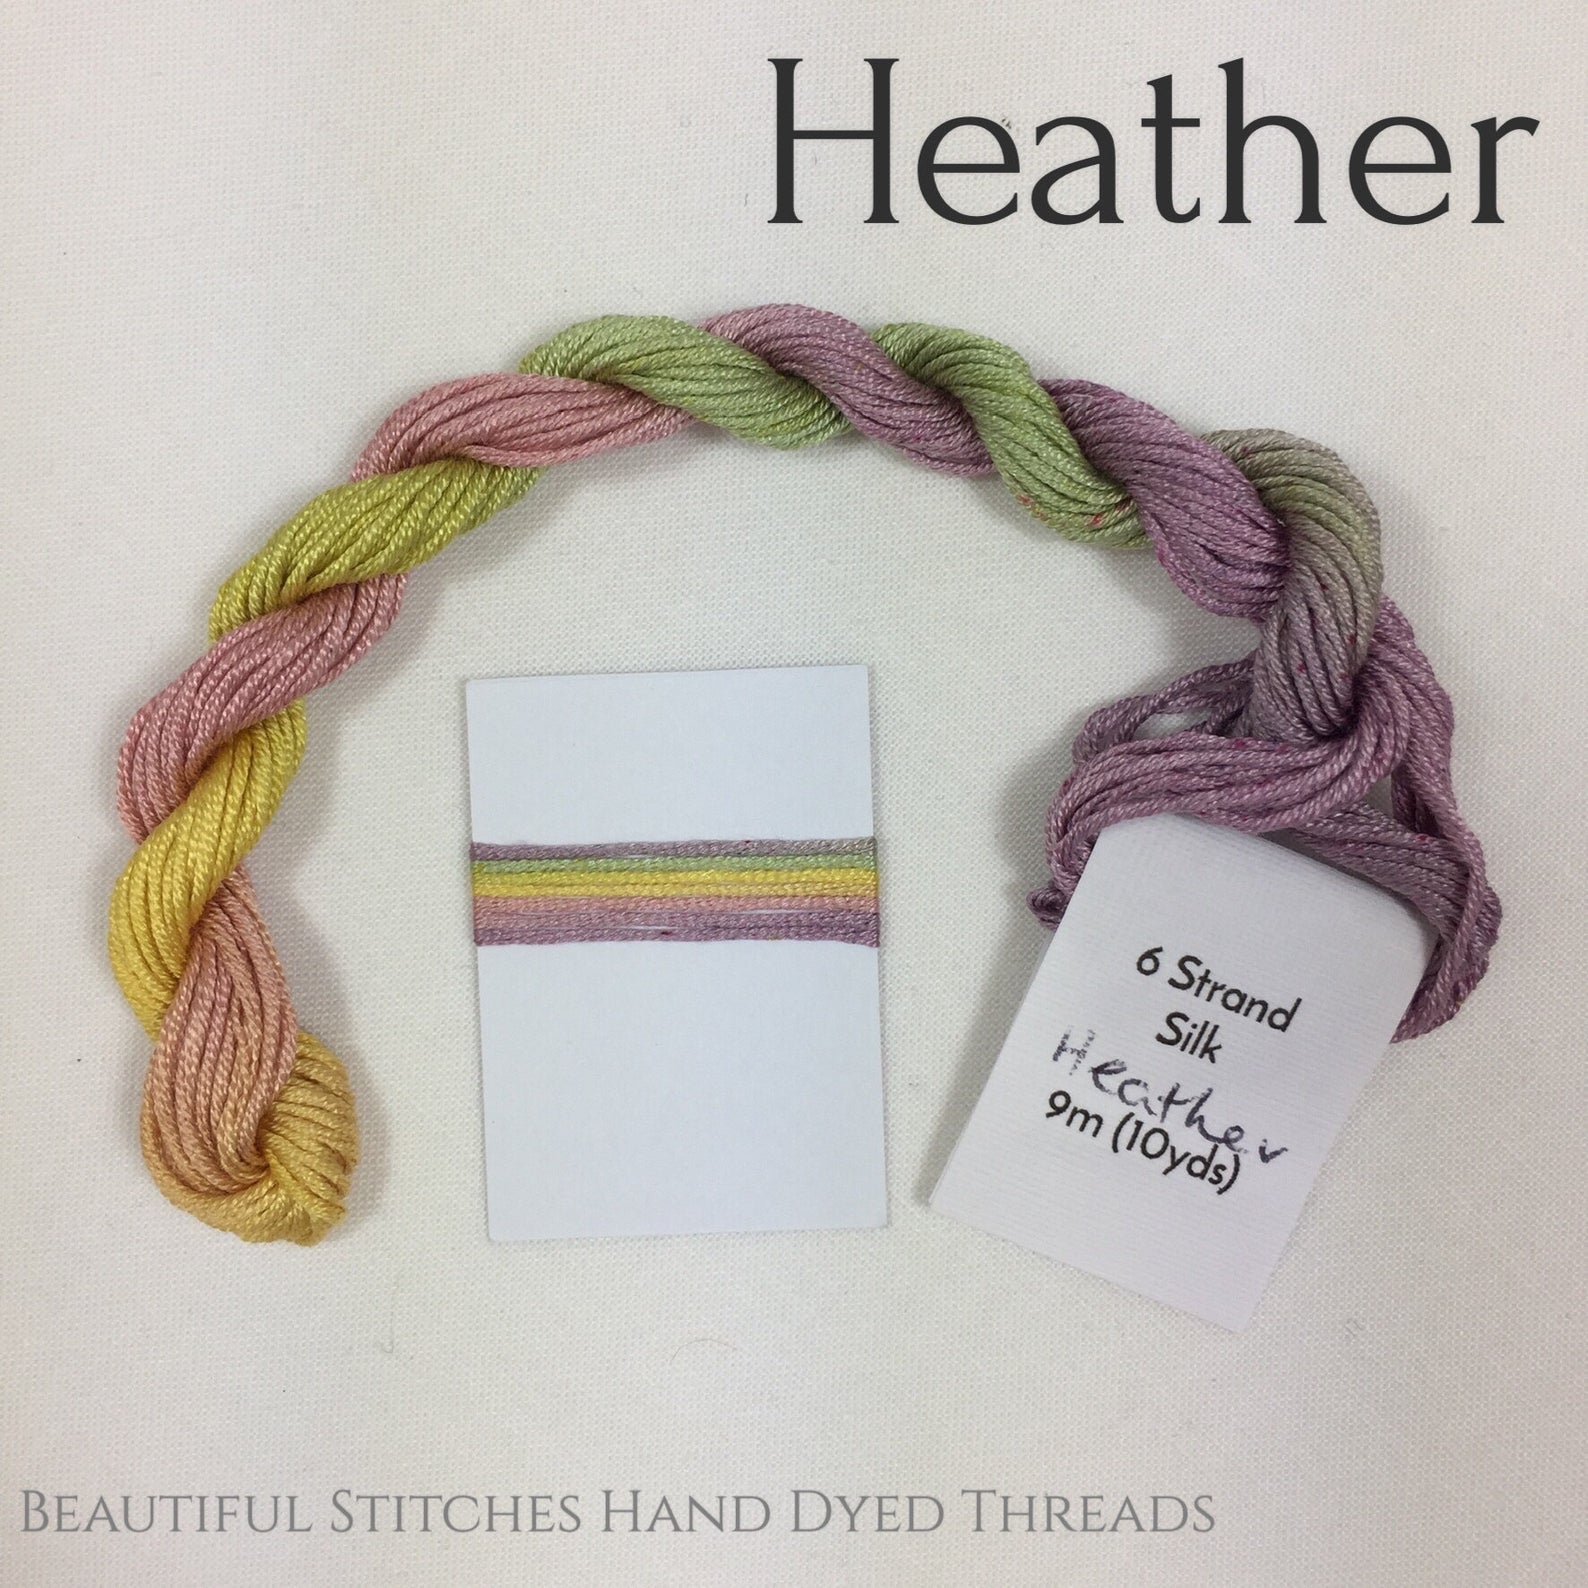
Both are counted projects completed with the same thread line called Beautiful Stitches from Ann-Marie Anderson-Mayes in Australia.
The ANG Central Jersey Chapter is doing Summer Fireworks by Ann-Marie Anderson-Mayes this year as one project, and I had enough threads left to complete it and match these other 2 pieces.
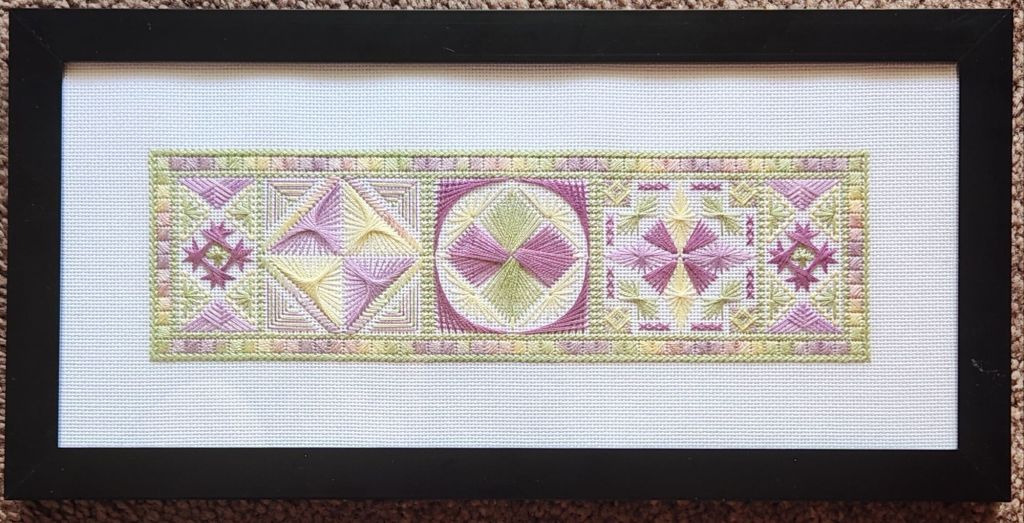
I didn’t use museum glass, and that makes photos difficult. Both were stitched on a black Congress Cloth and have a light gray frame.
Summer Fireworks by Ann-Marie Anderson-Mayes was done on white Congress Cloth and placed in a 5″ x 11″ black frame (by me). I laced it to magazine board. Foam core would have been too thick. It came with plexiglass. I used it and still got a decent photo. The stitches are slightly raised but don’t look like they are getting squished.
Since the photos are not showing the color on the first 2 as well, here they are before framing. Stitching on black makes a totally different look.
Goal #10 for 2025 is completed and framed.
I have a recent EGA Brandywine Guild project that is easy, portable, and would be perfect for the leftover threads! Ann-Marie also has a companion piece, Autumn Fireworks (also free instructions). That sounds like I am adding another project to the 2025 goals which is something that I was trying to avoid. We’ll see what happens.
Filed under: ANG Central Jersey Chapter, Summer Fireworks by Ann-Marie Anderson-Mayes
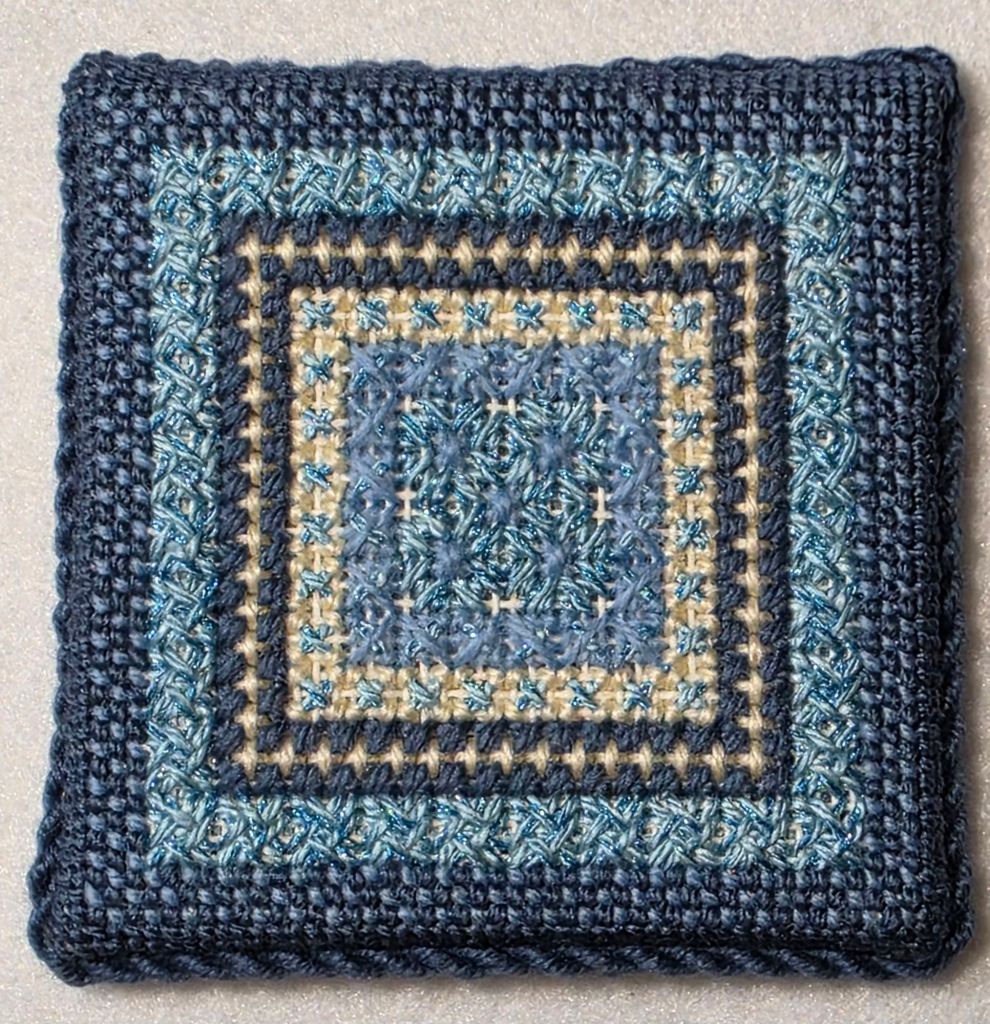
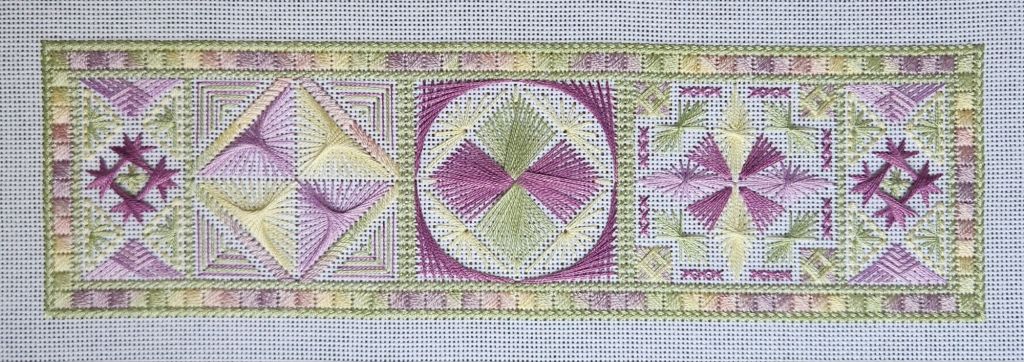
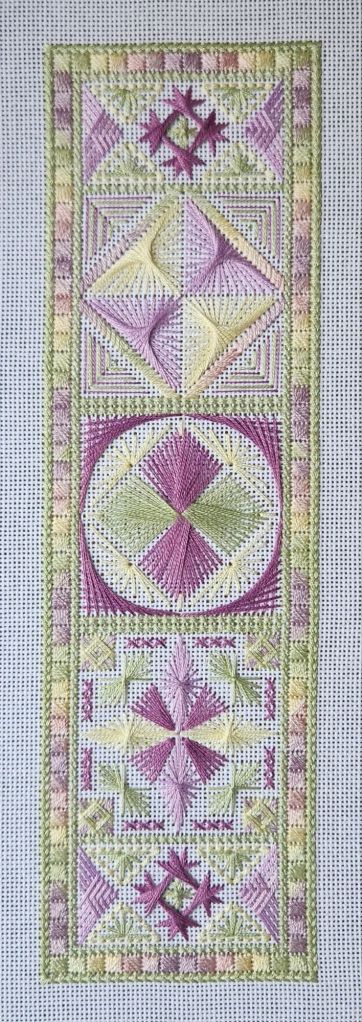
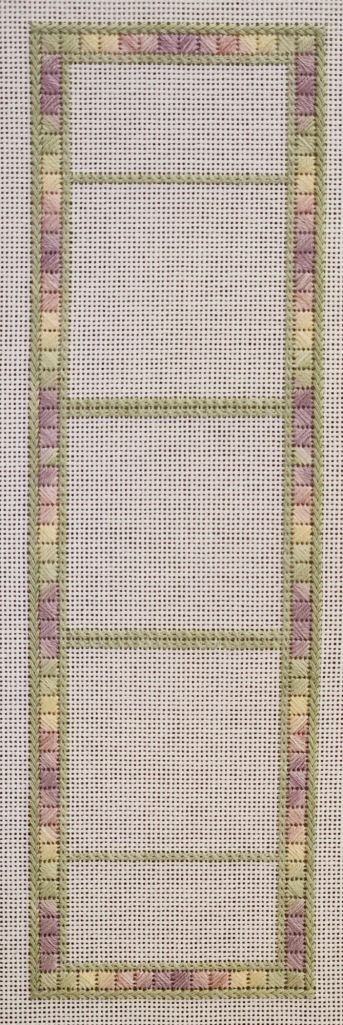
I finished the top square and the center square crescents while enjoying a pre-meeting stitching session with Sue and Rosie.
Later, during the ANG New Jersey Needle Artists Chapter monthly meeting, I started on the bottom square. The following day, after I got home while watching the Phillies, I finished the bottom square.
The center Double Fan Doubled (DVD) looked tough, and it was. It was fully demonstrated in a video. There are detailed instructions and several diagrams. So, I needed quiet and concentration. The TV was off and it still took three tries over several hours, getting threads to lay flat, going under, over, under over. When I was done the first time, I realized one arm was off! Can you find it? It’s glaringly wrong to me. Oh, well. I cut it out in no time.

The second time was wrong after two rounds (no photo). The third time was the charm and a thing of beauty. The threads are laid flatter, too.
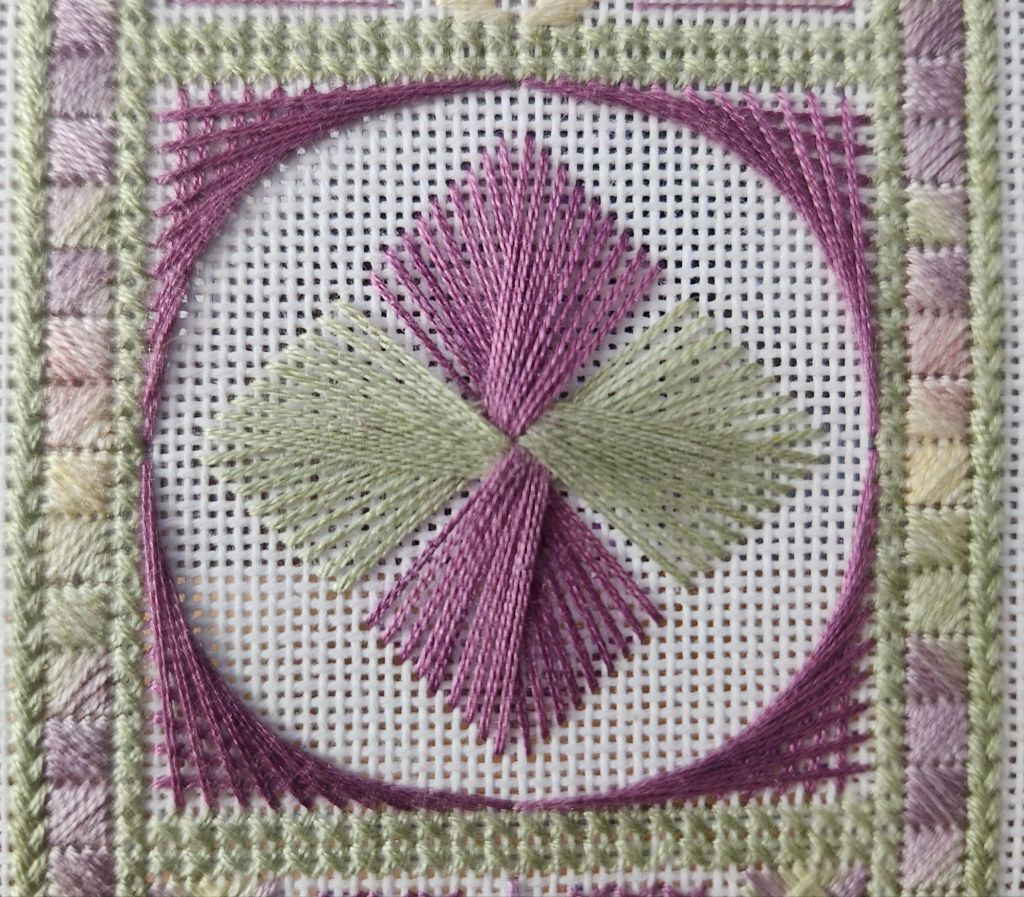
The last of the yellow in the center went in the next day because the DFD did me in!
Goal #10 for 2025 is completed.
Filed under: ANG Central Jersey Chapter, Summer Fireworks by Ann-Marie Anderson-Mayes
After doing the rewarding but more difficult finishing recently, I pulled out Summer Fireworks by Ann-Marie Anderson-Mayes. The Walnetto in the outer rectangles was the fun new stitch pattern for me. It was a tad challenging because it called for 2 strands, and getting them to lay flat was tricky.
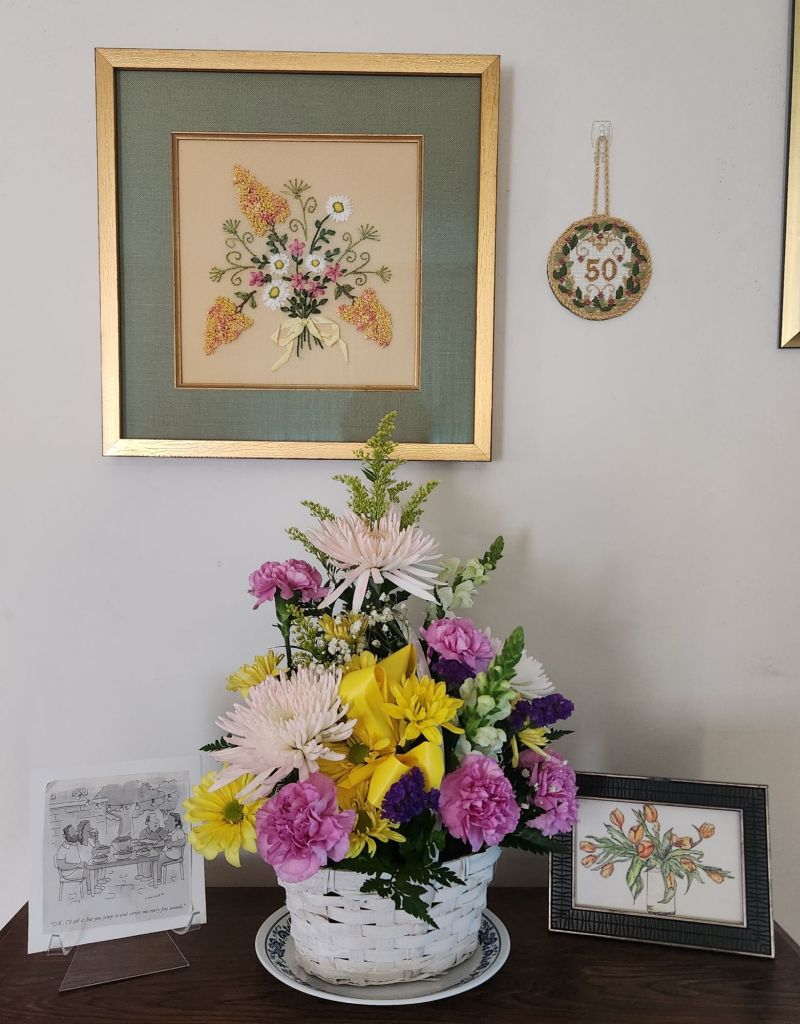
It’s so light, and in this colorway, it looks more like a spring bouquet to me. So, working on it now is appropriate. We’re enjoying several spring bouquets, including a ribbonwork one, a painted one, and a fresh one.
I’m heading to NJ on Wednesday to return the 22 pieces submitted to Woodlawn Needlework Exhibit from other members from the ANG New Jersey Needle Artists (NJNA) Chapter. Jacqui C will be discussing beading as the program topic. And, I will take this to stitch on. Rosie offered to be my hostess for the trip. Looking forward to seeing everyone.
Summer Fireworks is an ANG Central Jersey Chapter project, but several members are in both chapters. The April CJC meeting was canceled due to Easter. I’ll see them in May and have been asked to demonstrate finishing a coaster. It’s so interesting to be in multiple chapters and see the differences between the chapters.
Filed under: ANG Central Jersey Chapter, Summer Fireworks by Ann-Marie Anderson-Mayes
The ANG Central Jersey Chapter (CJC) meet and stitch on the 3rd Saturday of every month (from 10 am – 3 pm). Since I last joined them at the November 2024 meeting, I have picked up Summer Fireworks by Ann-Marie Anderson-Mayes occasionally when a small, easier piece was what I wanted to do.
In January, it was all I could do thanks to a good old-fashioned head cold that I got from my husband after holding it at bay for 2 weeks. We went through two batches of homemade chicken noodle soup.
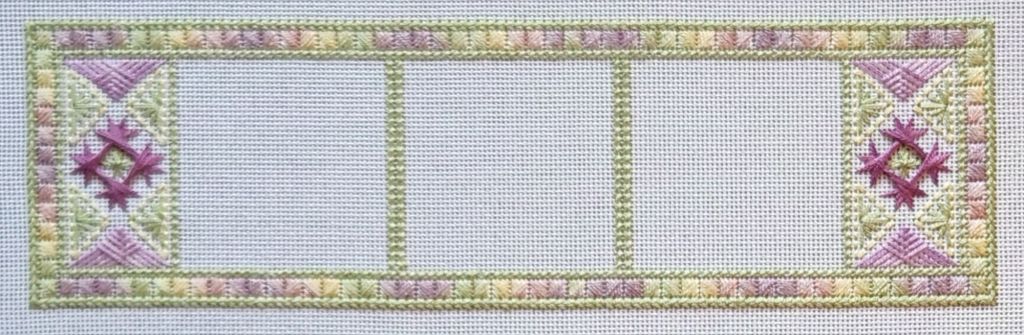
I hadn’t noticed it, but Rosie L is correct, Ann-Marie’s hand dyed skeins match perfectly when folded in half if you cut at the knot. There is no need to search for the repeating color, allowing colors to line up perfectly in the Scotch stitch border.
I didn’t make it to the CJC January meeting, but I did work on it an EGA Brandywine Chapter gathering yesterday where I started the outside Van Dyke border and finished it the next day during an Ellen of Serendipity’s 3-hour Zoom class on thread and stitch choices for snow scenes.
Filed under: ANG Central Jersey Chapter, Summer Fireworks by Ann-Marie Anderson-Mayes
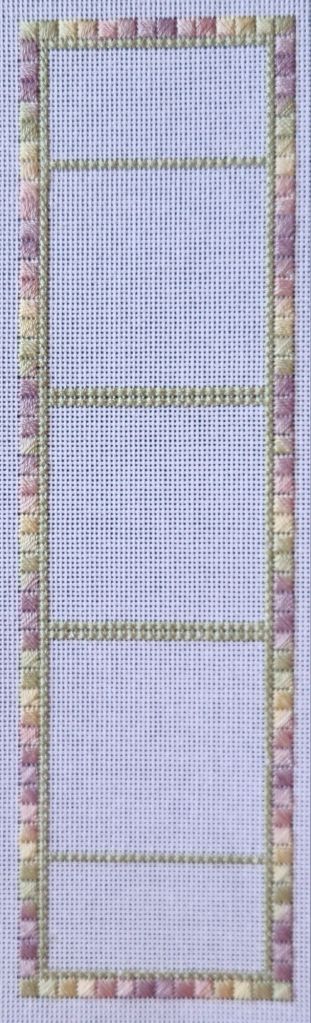
I started Summer Fireworks by Ann-Marie Anderson-Mayes at today’s Saturday meeting/Stitch-in at ANG Central Jersey Chapter (CJC). They meet on the 3rd Saturday of every month (from 10 am – 3 pm; I try to make it quarterly).
The chapter provided the Congress Cloth and threads, but I had enough of the lovely threads Ann-Marie sells on BeautifulStitches (.com.au) leftover from two previous projects based on Heather. A few people started stitching it last month in different colorways. It’s one of several free designs available on her website.
I do find black tougher to stitch on but it would look fantastic on black too.
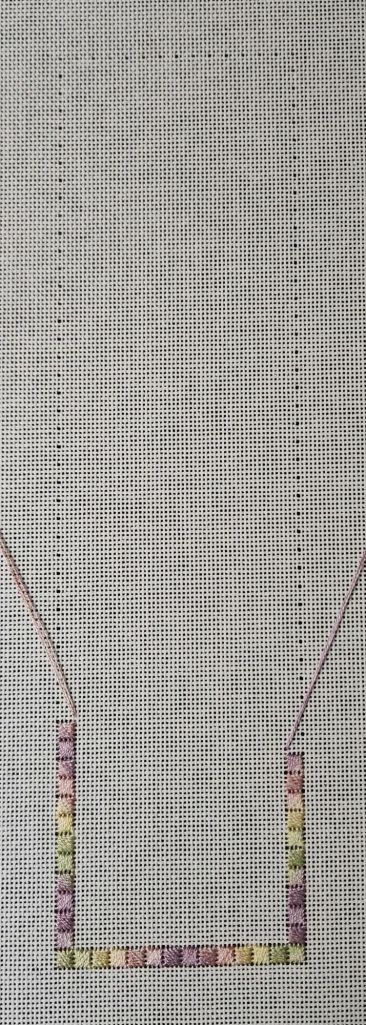
As I read the instructions, I commented that the outermost border, a Van Dyke stitch, looked like it would be difficult to count. Sue C said she started with the Scotch stitch border before the Van Dyke border and said it was easy to avoid counting errors. An advantage of having others get started first on a project. So, I marked off the Scotch stitches with the needle (see the outline of enlarged holes). I prefer that to spend time basting. And, on Congress Cloth, it’s easy to see the holes (just don’t count wrong since it can be tough to make the hole small again).
We’re using 3 strands for each Scotch stitch. So, I am creating a mirror image working up each side. Here’s my progress for the day.
Filed under: ANG Central Jersey Chapter, General comments, Needles, Sashiko Mini Sampler Kit by Miniature Rhino
Before I started a new project, I decided to put away all the threads that I had been throwing in a grocery store bag for quite some time! I’m very glad that’s done. There is more stuff to clean up (and will probably wind up with more threads to put away), but I am making progress.
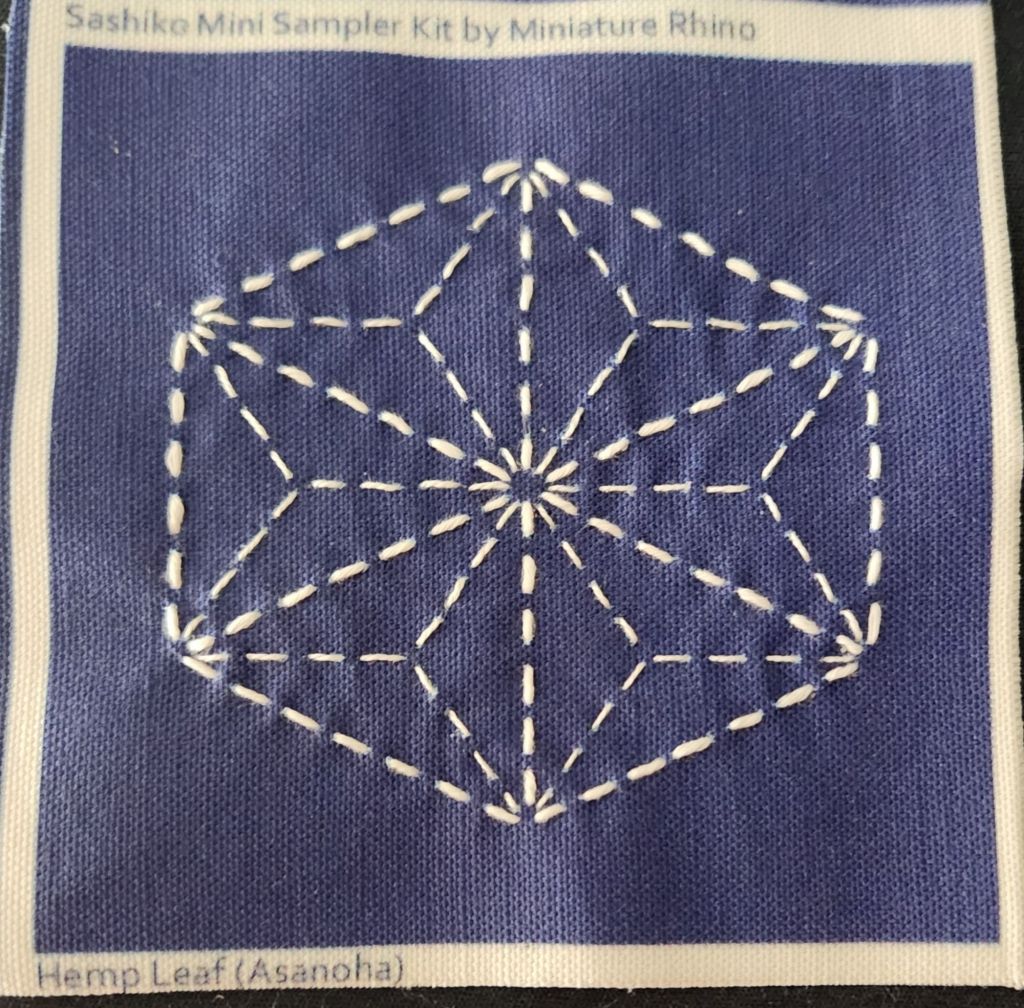
One of the items that I came across was this Sashiko Mini Sampler Kit by Miniature Rhino. It was in the welcome gift bag from the Central Jersey Chapter (CJC). It’s a recent addition to my stash, but it looked like it’d work up quickly once I get started and rather than find a place to store it, I decided to stitch it. There were no instructions. So, I watched a couple of YouTube videos on Sashiko. There are books too.
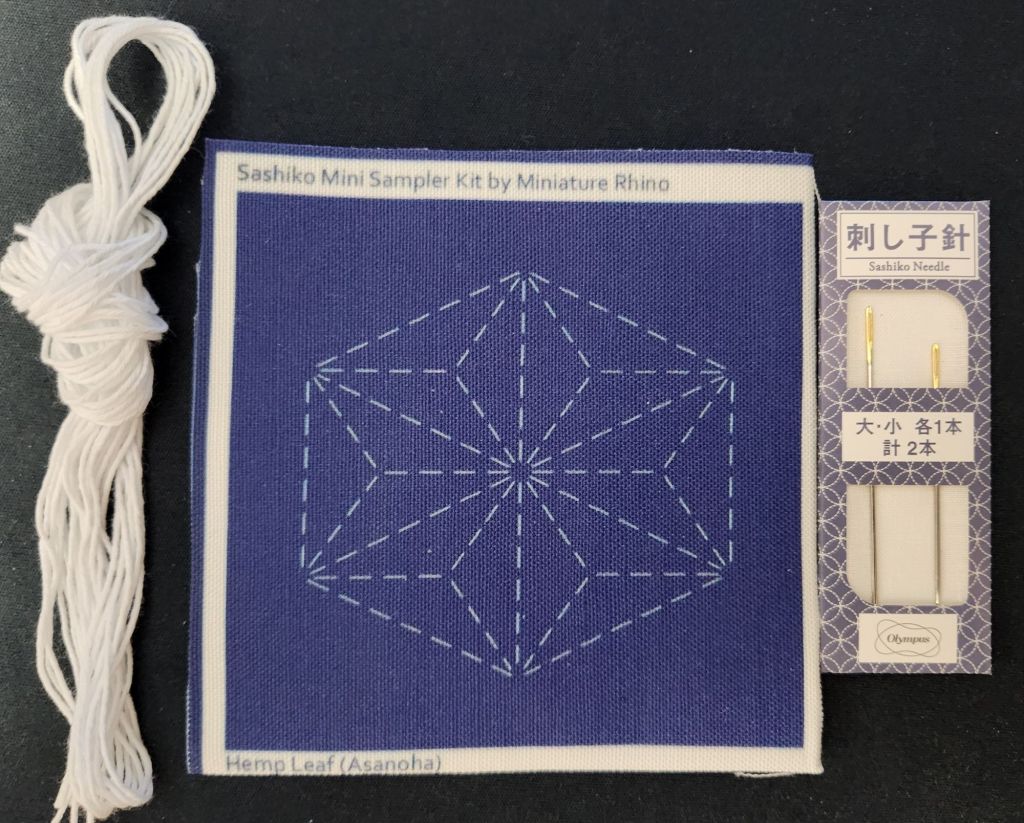
The thread gets used as supplied. I tried to separate it into 3 strands because it looked too thick, but it shred. Then, I checked with Jacqui C, who had taught an EGA online course a couple of years ago. It’s the right thread and is to be used as supplied. Jacqui thought DMC Perle #12 might work better for this fabric. The ANG NJNA and CJC Chapters are lucky to have Jacqui in both chapters.
The needles are sharp with a decent size eye. I am excited to use another type of needle. These are longer with a sharp point because Sashiko is done in hand, and generally speaking, you try and scoop a few stitches at a time. I don’t have a palm pad or thimble making multiple stitches difficult. So, I scooped one stitch at a time, mostly keeping the needle on the top as I stitched. The other option is to go with the poke and stab method. This is not a forgiving fabric. So, be sure of where your needle goes.
I decided to try both threads, the supplied thread, and DMC Perle #12. The #12 Perle was thinner, and I could scoop 3 stitches. But, the poke and stab method is more accurate. It probably takes practice to get accurate with the scoop method.
This will make a good Show and Tell piece for the February 13th meeting of the Needlework and Textile Guild of Media. It is from 7-8:30 pm at the Media Arts Council in Media, PA. I did a little reading on its origin. According to wiki, “Sashiko (刺し子, lit. ‘little stabs’) is a type of traditional Japanese embroidery or stitching used for the decorative and/or functional reinforcement of cloth and clothing.”
I have no functional use for this piece, so I need to find a decorative use. According to the meaning of Japanese patterns at Polina Couture (.com), “Literally, Asanoha (麻の葉) means “hemp leaves”. This star or hexagon motif evokes this hardy plant, which grows straight and fast. And so it symbolizes a good growth, vigor and resistance. And by extension, it augurs prosperity.” I went down a rabbit hole online and learned, “Hemp is defined as any part of the cannabis sativa plant with no more than 0.3% of tetrahydrocannabinol (THC), the mind-altering substance in marijuana.”
None of that helped me decide what to do with this. Hopefully, a use will reveal itself!