Filed under: Beads, Brandywine Chapter, Embroidery Guild of America, General comments
Beaded Garden Wands were for sale at a store in Naples, NY earlier this month and knew I had 2 beads from a trip Bill and I had taken to Aruba! It seemed like a great idea to make my own and finally use those beads.
I found this 8″ screw at Home Depot. It was the only 8″ screw that was black – all others were silver. And, there no other black ones in the aisle! The silver ones were screws the complete length while this one is smooth on top.

So, while at the Blue Santa Beads making a Chatelaine with my EGA Brandywine Guild, I looked for beads. Most of the beads didn’t have a wide enough hole to work on the screw (including the 11 beads and the bicone in the next photo). But, I was undaunted and had an alternative in mind.

Today, after talking with the ANG Shenandoah Chapter about Festive Fireworks because they are stitching it as a chapter project, I had fun picking out the rest of the beads from my stash.

I used either beading cord or beading thread doubled. I wrapped around the screw using up almost the entire tube of Czech multi-colored beads! I also used the rest of the 6 mm round fluted purple beads that I used on Edward Scissorfish. There are drops of glue here and there. I bought 6 little bottles of Super NEW GLUE by Euro Tool. Have I mentioned how much I love that dropper bottle and the glue? It dries quickly and doesn’t clog.

However, it’s not like the ones in Naples. It’s not as bright. Bill’s right, we won’t be able to see it in the backyard. So, I placed it my little Lenox vase with 4 metal roses and we can see it in the living room. Perfect.

Today was and the next 3 days will be great for stitching thanks to the US Open.
Filed under: Brandywine Chapter, Chatelaines, Embroidery Guild of America, General comments, Scissors, Tools
Patrick led us through making chatelaines today at Blue Santa Beads in Media. I needed a special tutorial from my neighbor, Susan, after she figured it out while Patrick helped others. There were 10 of us there. He did an excellent job of getting us through this project. Getting rings on is not easy. I had 2 different sets of instruction and they still don’t make sense!
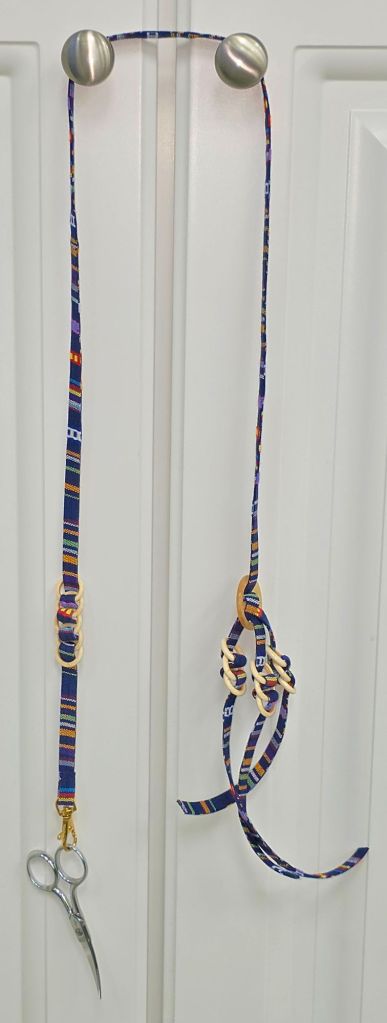
When I got home, I found scissors that have a protective leather sheath so that I won’t get stabbed when I wear it. It’s from ANG 2012 Seminar in Philadelphia celebrating the Guild’s 40th Ruby Anniversary. And, I placed the EGA Brandywine Guild strawberry on the other end. I can add 3 more tools. I haven’t decided what else to add.
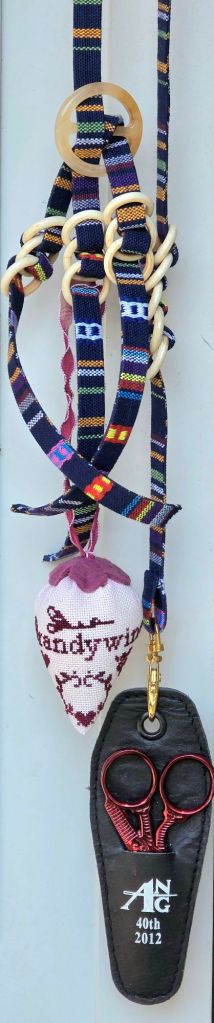
I had cording and rings left over. It’s not long enough to hang around my neck. And, I don’t know what I’ll do with it yet. But, something will come along.

There was plenty of time to shop for beads for 2 other pieces that I’ll be posting about over the next few days.
Filed under: Brandywine Chapter, Embroidery Guild of America, Strawberry Pincushion
Today, in the rain, Patrick and I were pleased that 10 members of our EGA Brandywine Chapter joined us for today’s project.
Patrick created the design which was distributed last month. Several had finished stitching it while others were still working on it.
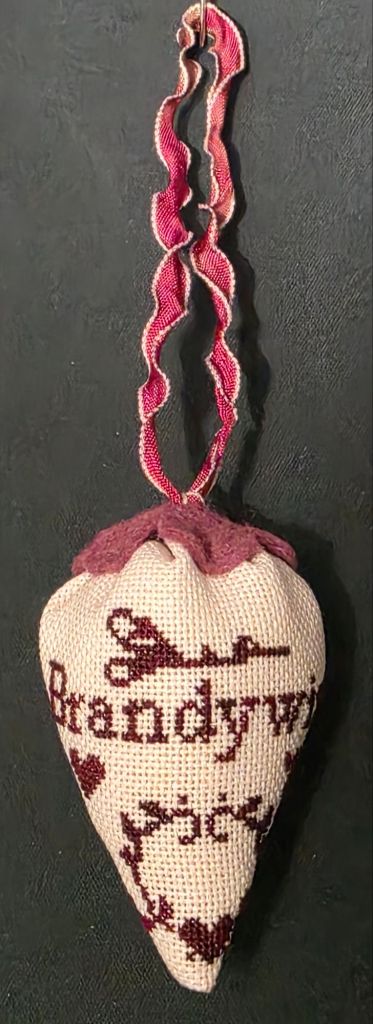
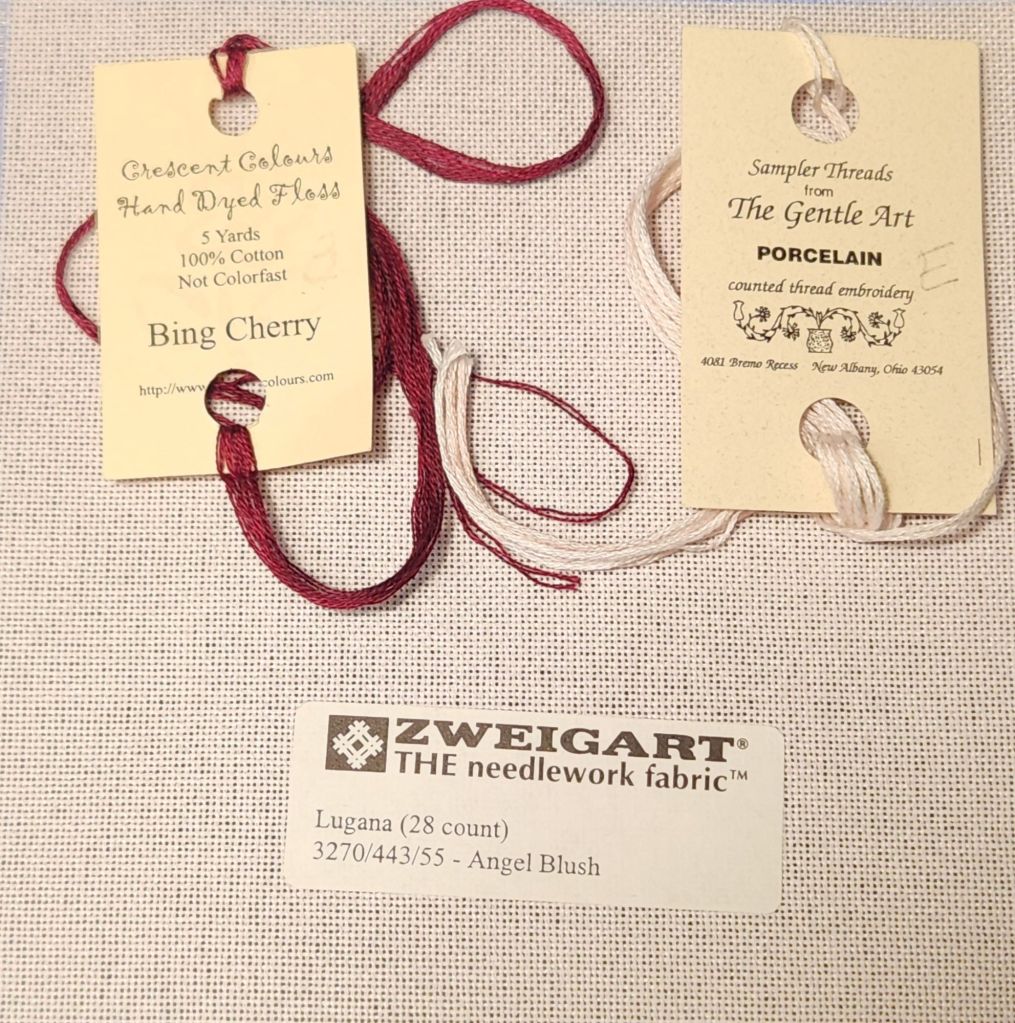
Mine was the smallest (about 2 and 3/8″ x 2 and 3/4″). I used Lugana (28 count in an Angel Blush that is slightly pink) and stitched over one canvas thread.
Patrick led us through making it into a strawberry. He and JoAnne had stuffing. We also could have used walnut shells she brought! Patrick had a variety of colored felt and ribbons. He also had buttons we could have used. Here’s mine. It turned out great!
Filed under: Brandywine Chapter, Embroidery Guild of America, Strawberry Pincushion
Patrick and I volunteered to be co-Presidents for one quarter of our EGA Brandywine Chapter’s year of meetings.
For April, we had a Zoom speaker, Toni Gerdes, speak on Additions to Stitching. I heard it recently through the ANG San Bernadino Chapter and enjoyed it again. There are several threads that I haven’t seen anywhere and a couple of ideas that I will try.
We handed out the motif Patrick designed, and I diagrammed. Then, in May, we will lead people through its assembly into a strawberry pincushion. For June, we go to Blue Santa Beads to make a Chataline.
I had a piece of Lugana (28 count in an Angel Blush that is slightly pink) and stitched over one canvas thread for a small one (about 2 and 3/8″ x 2 and 3/4″). Patrick stitched over two canvas threads for a larger one (about 4″). My stash had Crescent Colours, Bing Cherry fot the motif, and I’ll use Sampler Threads from The Gentle Art, Porcelain for finishing.
It turned out great and was ready to show at my EGA Brandywine Guild Chapter Quarterly meeting yesterday.

Patrick, Karen, and I had plenty of ground fabrics in different counts (24 – 36) and colors for people to choose. People had fun selecting theirs. Tough choices!
Textile Artist has a Stitch Club you can subscribe to but their newsletter is free of charge. A recent edition had an interesting article on basic photography for fiber artwork. You can access it at: https://www.textileartist.org/how-to-photograph-textile-art
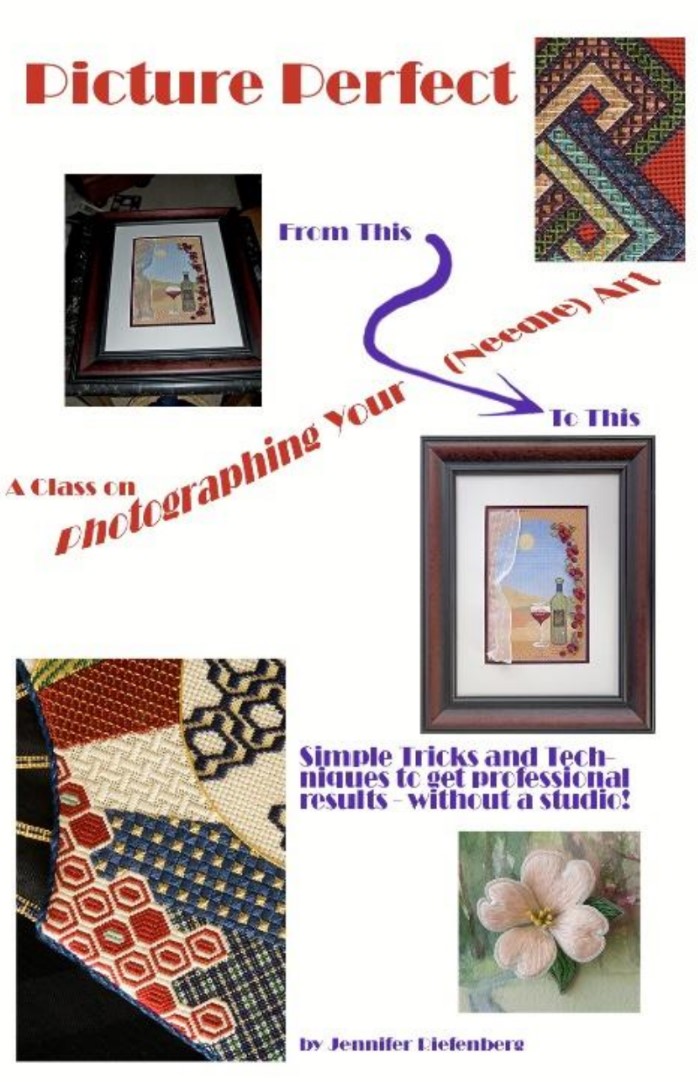
In 2022, I took a photography class from Jennifer Riefenberg at the ANG Seminar and heard it again recently in a Zoom class How to Improve Photos of your Needle Art through the EGA Fiber Forum. It was my suggestion they invite her because you have to be juried into the Fiber Forum to be a full member by submitting photos of your original work. I am a Friend of Fiber Forum because have I not wanted to go through the process (maybe at some point). I picked up new tips I had not heard the first time. So, contact Jennifer if you are interested in a Zoom talk/workshop for your group. And, watch https://needleart.org/assembly/ for the photographs she took of this year’s National Academy of Needlearts Exemplary winners. There were some stunning pieces.
Filed under: A Spring Sampler, Brandywine Chapter, Embroidery Guild of America, General comments, Needles, Tools
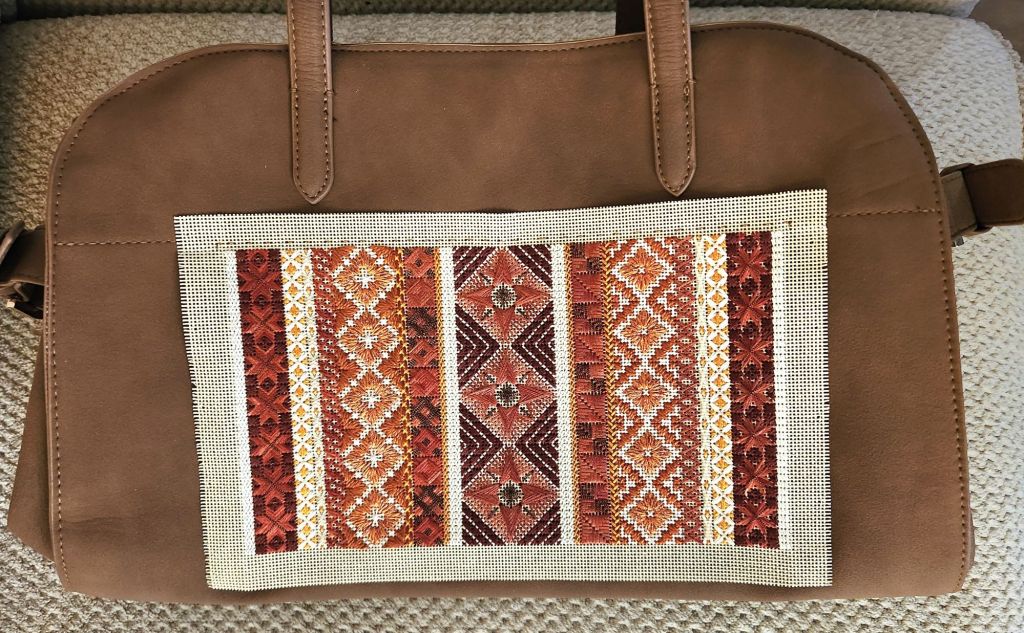
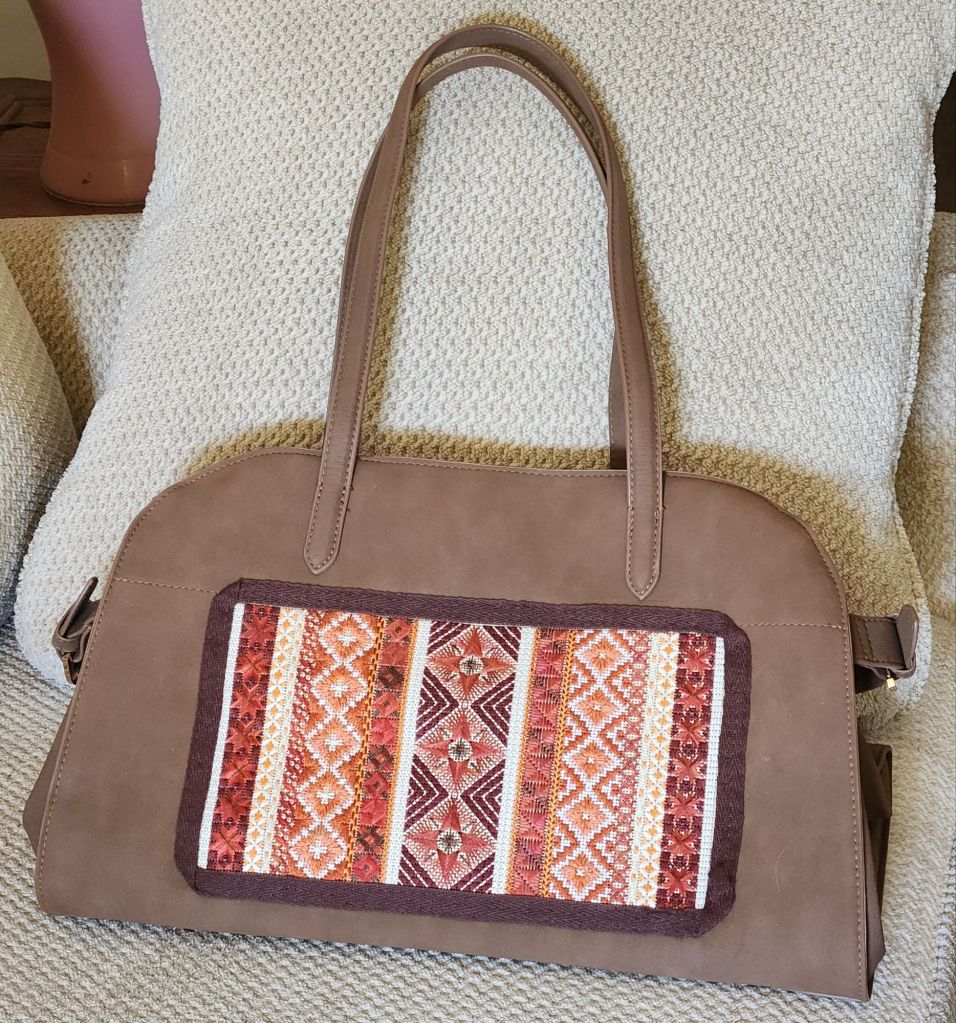
I found this bag at Target (https://www.target.com/p/solid-soft-satchel-handbag-a-new-day-8482-tan/-/A-91898942). It’s 10″ (H) x 15″ ![]() x 8″ (D) – perfect for the fall color skinny version of A Spring Sampler. Good price, too ($35). It will hold my battery pack, the Chapter’s eMeet speaker, Chapter business cards, travel tool kit, portable light, and curling iron. I am avoiding glue for this bag.
x 8″ (D) – perfect for the fall color skinny version of A Spring Sampler. Good price, too ($35). It will hold my battery pack, the Chapter’s eMeet speaker, Chapter business cards, travel tool kit, portable light, and curling iron. I am avoiding glue for this bag.
I needed the needle for leather from my Home Craft Repair kit of needles because the bag is made of polyurethane. I pinned the canvas in place and stitched through the inner lining, but it isn’t puckering too much, and I retained full access to the 2 cell phone pockets on the front inner side. Here’s the top edge attached.
The process of stitching the top in place made me think a thimble and a curved sharp needle would make the sides and bottom easier to stitch through the bag and hopefully not catch the lining. And, at this point, my hand needed a rest, and a trip to Joann’s was needed to get the sharp curved needles because I only have tapestry curved needles.
The curved sharp needles didn’t work well. Leverage was the problem. But, the package came with a small eye, very sharp straight needle. The real improvement came because of the Dritz thimble. What a difference that made.

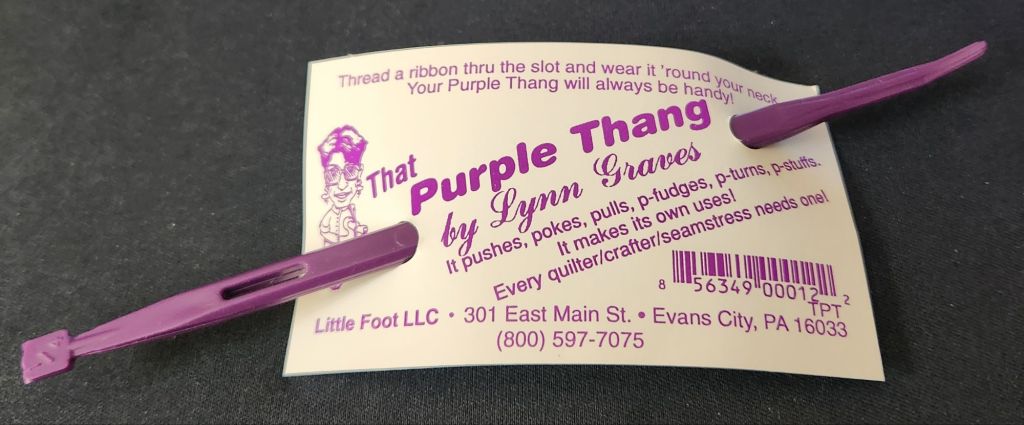
An aside: In order to find the thimble when I need it again, I am putting the thimble in my Stitch pen/tool cup on top of That Purple Thang by Lynn Graves which I have not used much (if ever). If I get rid of it, I’ll need it!
I was able to pull the lining away on the sides and bottom and push the needle through the front of the polyurethane, angle the needle back to the surface further along the canvas like a running stitch. I didn’t care how far. Some stitches are longer than others but the trim will cover it.
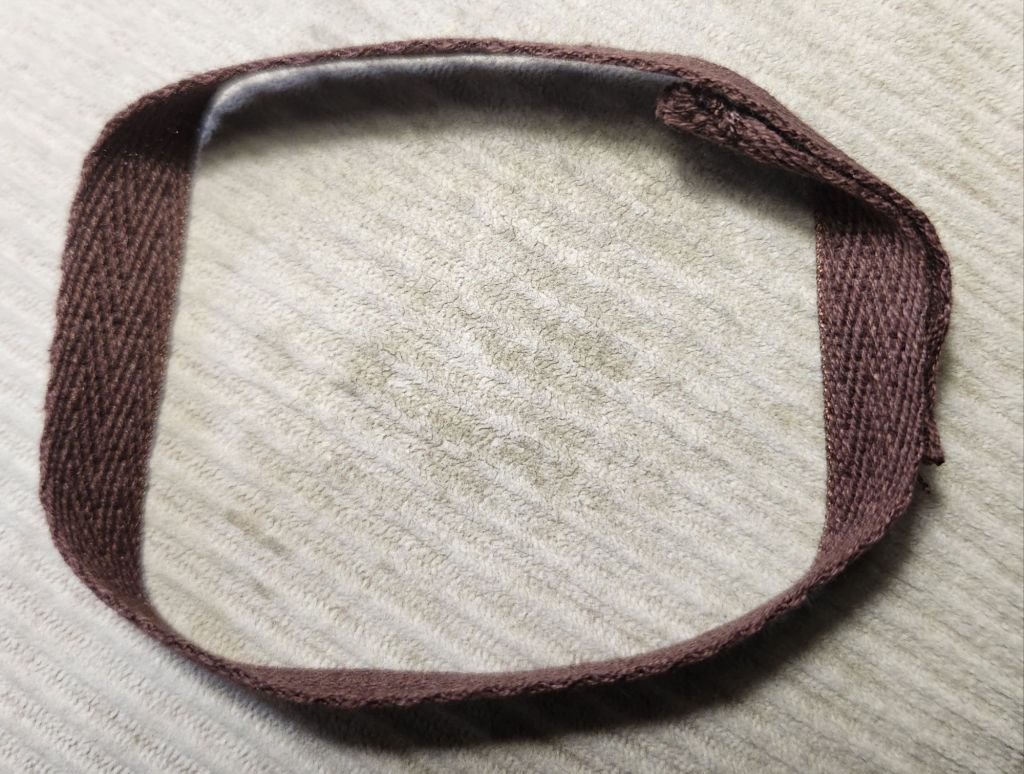
Once all 4 sides were attached, I cut the canvas down to 7 canvas threads wide and attached the trim. I found a 1/2″ wide dark brown flat trim at Joann’s. And, Mandarin Floss M833 was a perfect color match. I decided to catch the polyurethane and canvas periodically as I attached the trim down the center using 2 strands. I pulled out my mini pliers and that helped too.
When Bill and I were in the store looking at different trims, he placed this trim on the needlepoint and folded it around a corner. Before I started, I worked out how to do that on all 4 corners with a short length first. I had to cinch the ends together to stop them from fraying (no glue) and taper them to hide the ends easier.
I went back around a second time with one strand to sew down the outer edge. It probably took me 12 hours altogether since starting this on Thursday. There was some cursing but no bleeding. I didn’t jab my fingers once! I was very careful. That leather needle would have hurt.
The most exciting part is that it’s even at 1.75″ above the bottom edge. It looks good and no glue!
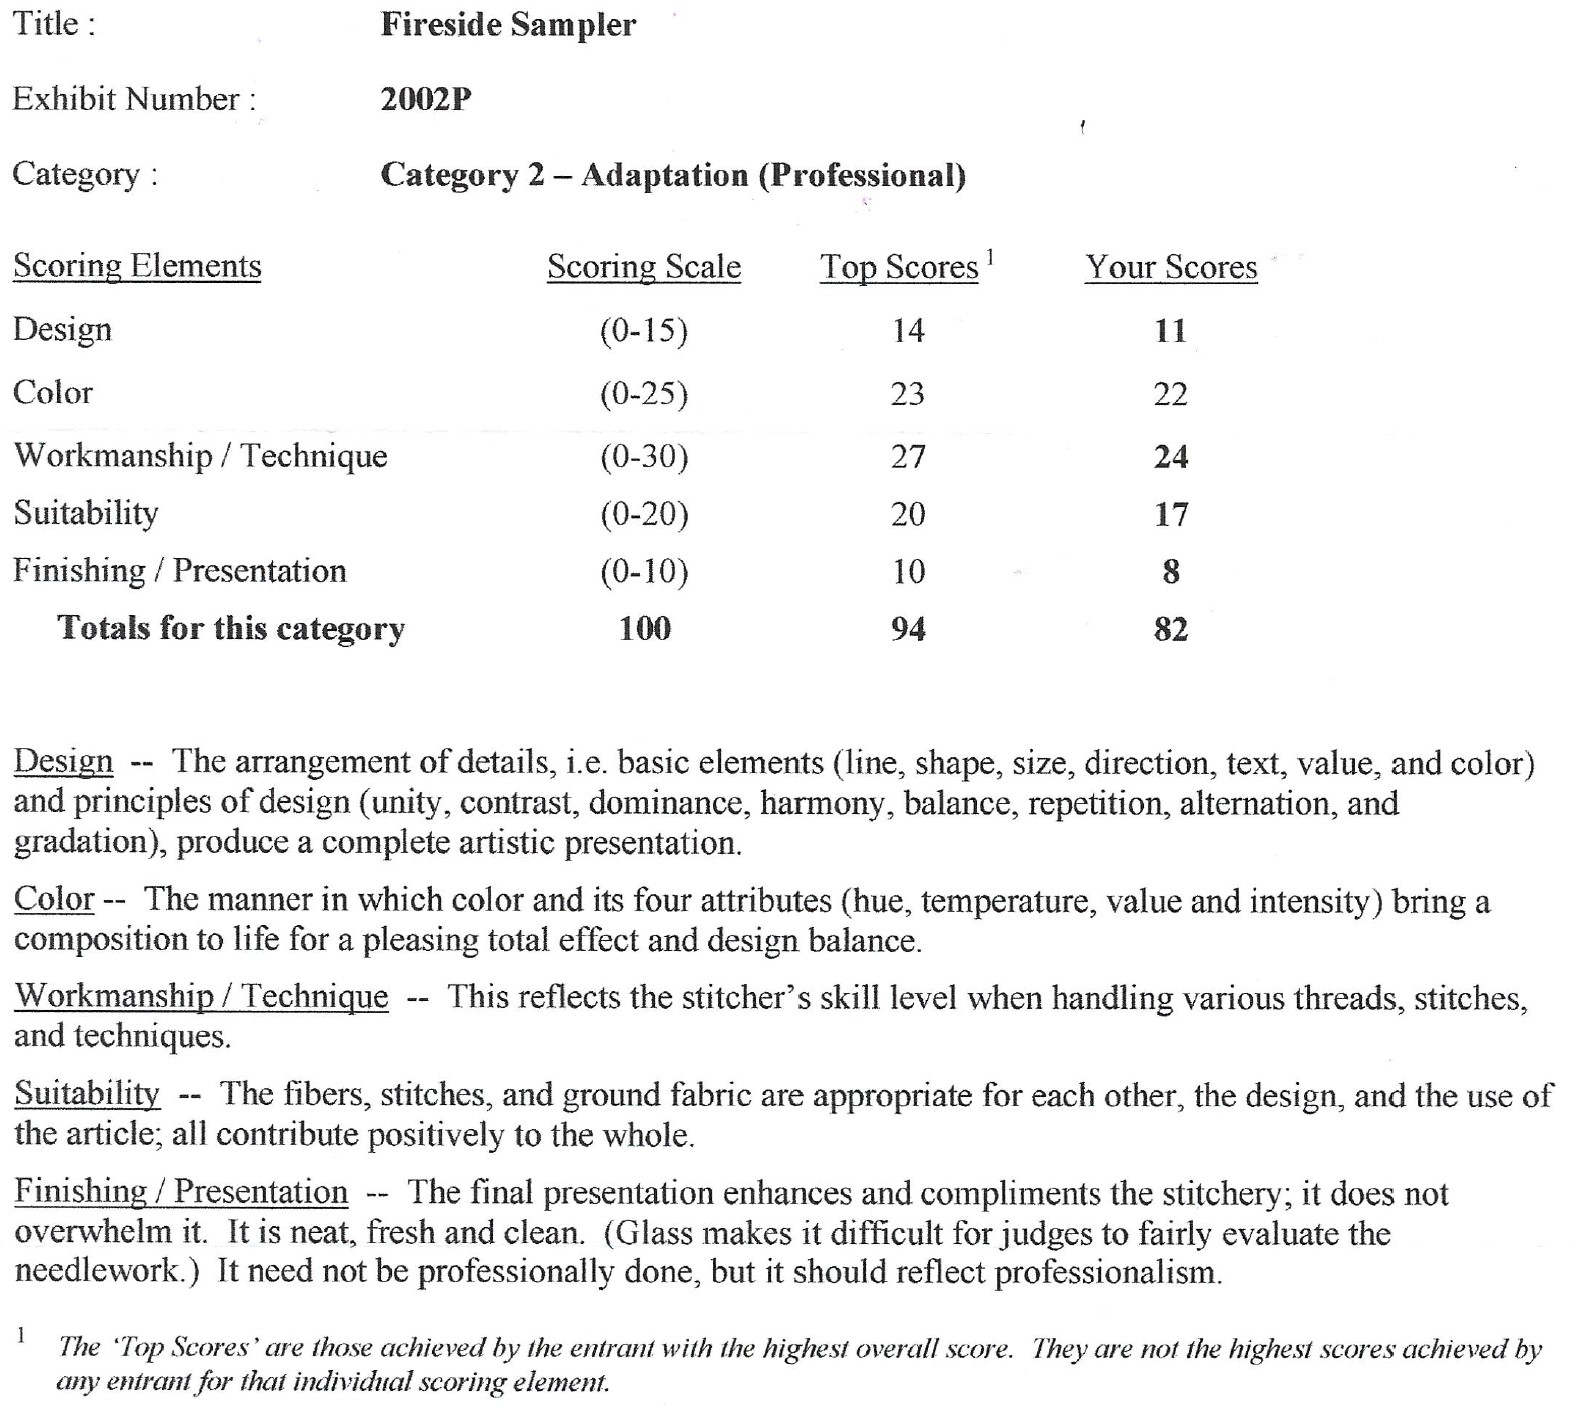
Filed under: Canvas Master Craftsman Program, Embroidery Guild of America, Fireside Stitchery, Needlepoint Shops, Step 6
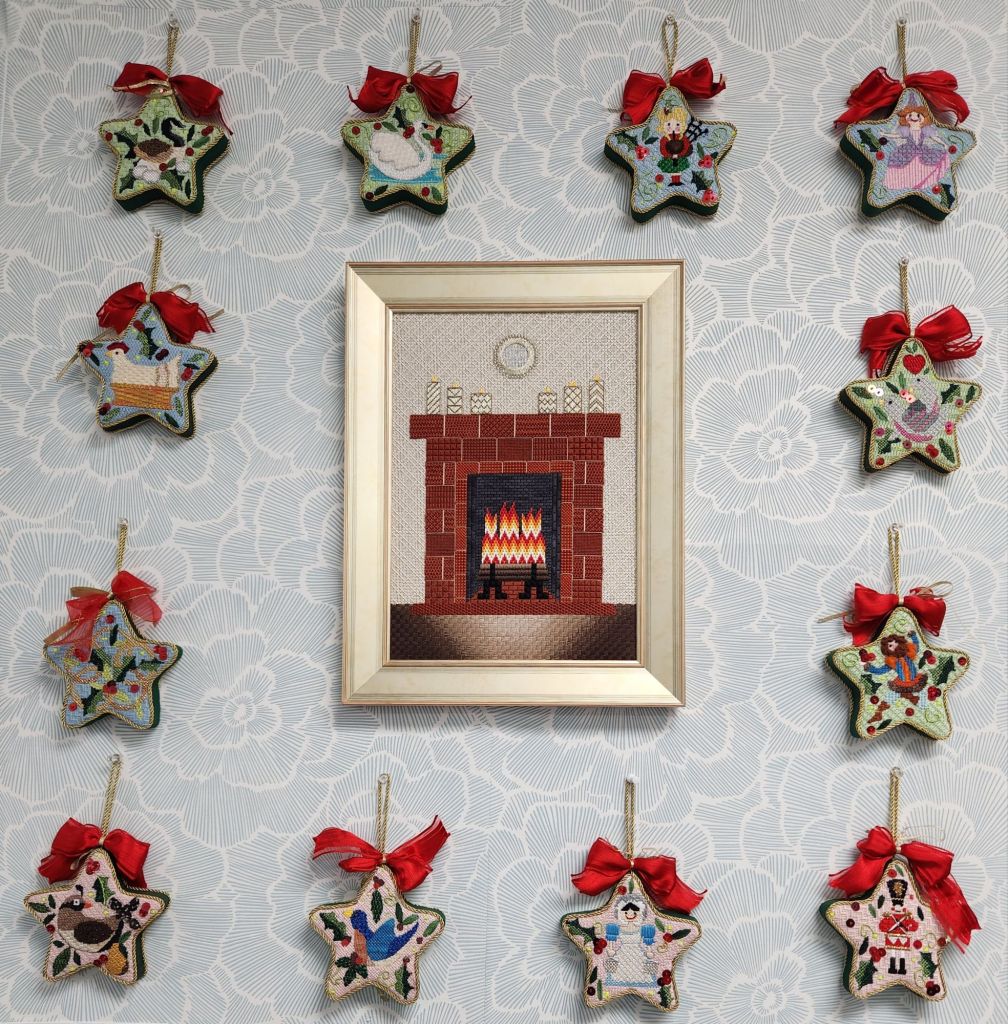
I love where they decided to place my Fireside Sampler inside Fireside Stitchery! It’s inside the front desk area displayed with a lovely set of ornaments. Lynn wants to get a fireplace, but in the meantime . . .
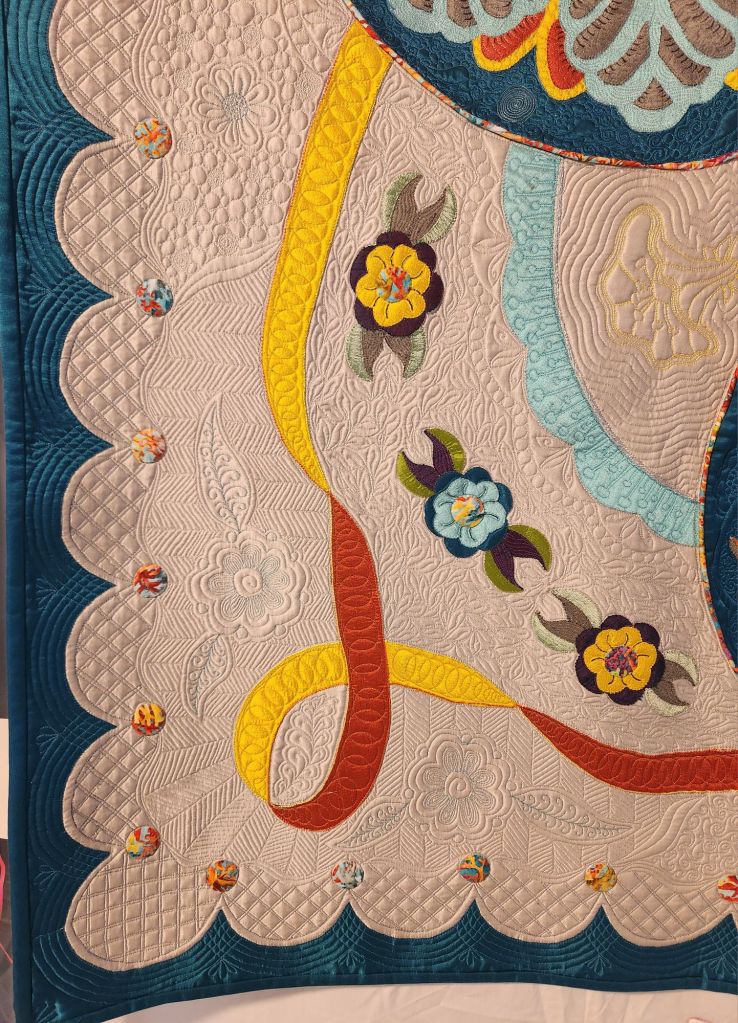
I got to see it hanging today after visiting the Valley Forge Quilt Show which was spectacular as always. I didn’t ask for permission to post any of the quilts, but I think i can post a part of Becky’s quilt to show off her talents, particularly noting the machine quilting she did herself. Stunning. Such a talented group of quilters. Very inspirational. And, they are excellent bakers as well. I got a few goodies!
Stephanie, of Spellbound Stitchery (.com), designed and taught a painting class at Fireside Stitchery today. She’s a lovely young woman, and I wish her all the best as she grows her line of canvases.

In just 2 hours, we painted our Philly Pretzel designed by Stephanie. It is small at 2.25″ square.
I didn’t count right to start off! I got the center marked without issue but then must have double counted the center when I marked off the 40 x 40 area.
Stephanie said to go slow as we counted out the border, and I should have gone slower. Stephanie found my error & I covered the spots with white and repainted them in the proper brown. Cute little design.
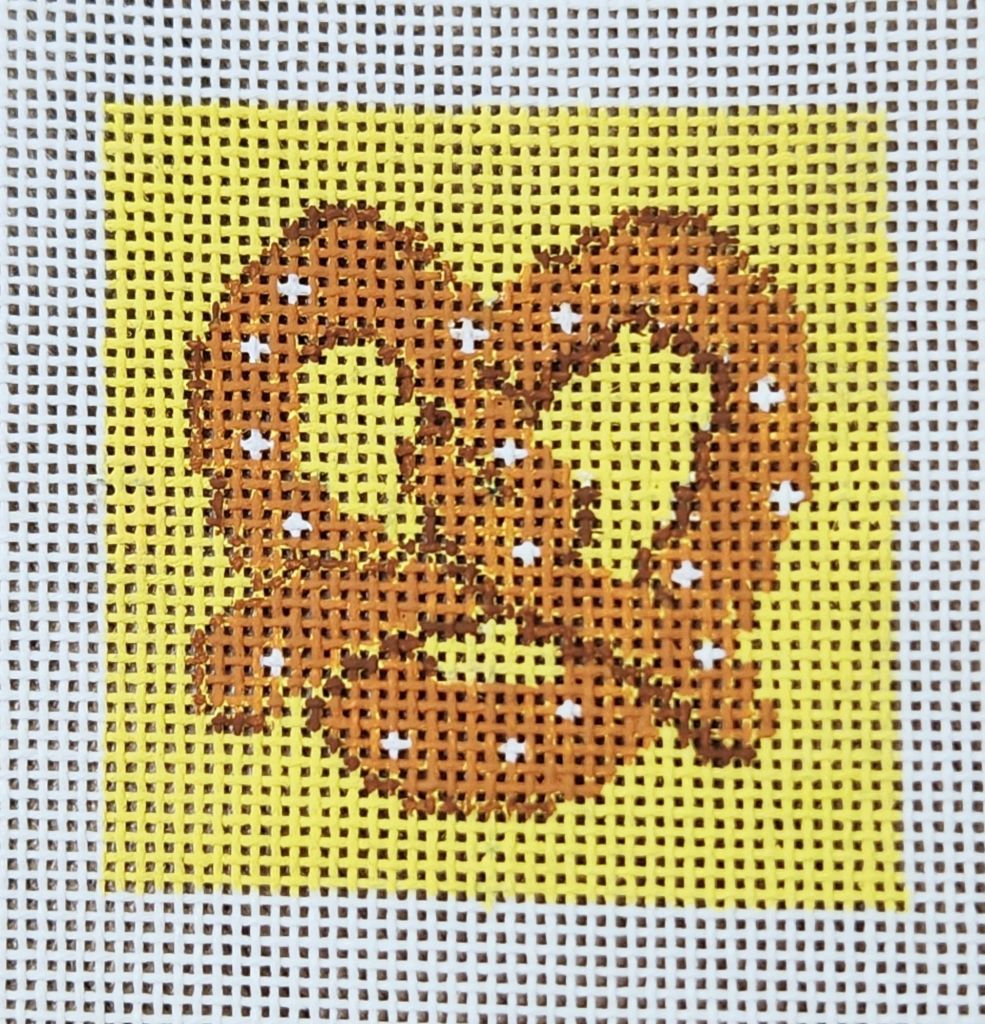
I’d like to paint a second one at home in a quiet setting. There were 2 tables of 8 at each table! I can see where my painting is less than professional, but it gets stitched over anyway. So, that makes me think I should just stitch it from the cross-stitch grid provided. But her tips on painting from a grid make sense, and class was fun. Two of my ANG Main Line Stitchers chapter members were in the afternoon class, at least one member in the morning class, and one past member came over to say hello.
For the 2024 ANG Seminar exhibit in the Original Design category, I sent in my Fireside Sampler created for Step 6 of the EGA Master Craftsman in Canvas. But the ANG judges moved it to from the Original Design category to the Adaptation category because my artist statement included a photo and description of how I revised my 20-year old design. The second one is considered an adaptation of the first one. Had the original design not been mentioned, it would have remained in the Original Design category.
It is my second year being in the professional category. It did not get a ribbon from the ANG Seminar judges (it had gotten a 3rd place ribbon from Woodlawn judges). It scored well enough.
The score that is particularly confusing is for Workmanship/Technique because I lost 6 points while the critique has no negative comments regarding this area. It states: “The brick work in the fireplace surround shows immaculate thread control. This indicates a full understanding of the stitches chosen, thread pull while working each area, and control of stitch tension. The inner fireplace bricks and andirons are also finely worked, and the satin stitches creating the logs are even in both tension and thread twist maintenance. The long stitches used for mortar between individual bricks are well controlled. There are no loose or sagging stitches in this area.” So, why did I lose 6 points? It makes no sense.
There was no comment on why Finishing/Presentation lost 2 points. I’m just curious.
I can agree that the size ratio of the mirror is small compared to the size of the candles. I’ll also agree that the flames are very intense and a slight change in temperature of the flames would have added a more realistic appearance to the design. However, I can’t see that because the bottom flame row is very symmetrical, it detracts from the effort taken to add interest in the top row.
I was really pleased to see the judge felt it was a well-written artist’s statement and helped them understand just how much thought went into improving upon the original work and the efforts taken to create depth perspective on a flat surface.
And, I was happy to read, “I commend your thread blending efforts on the rug . . the result is worth the time and effort. Well done.” Again, a positive for Workmanship/Technique.
Once again, here is my Fireside Sampler.
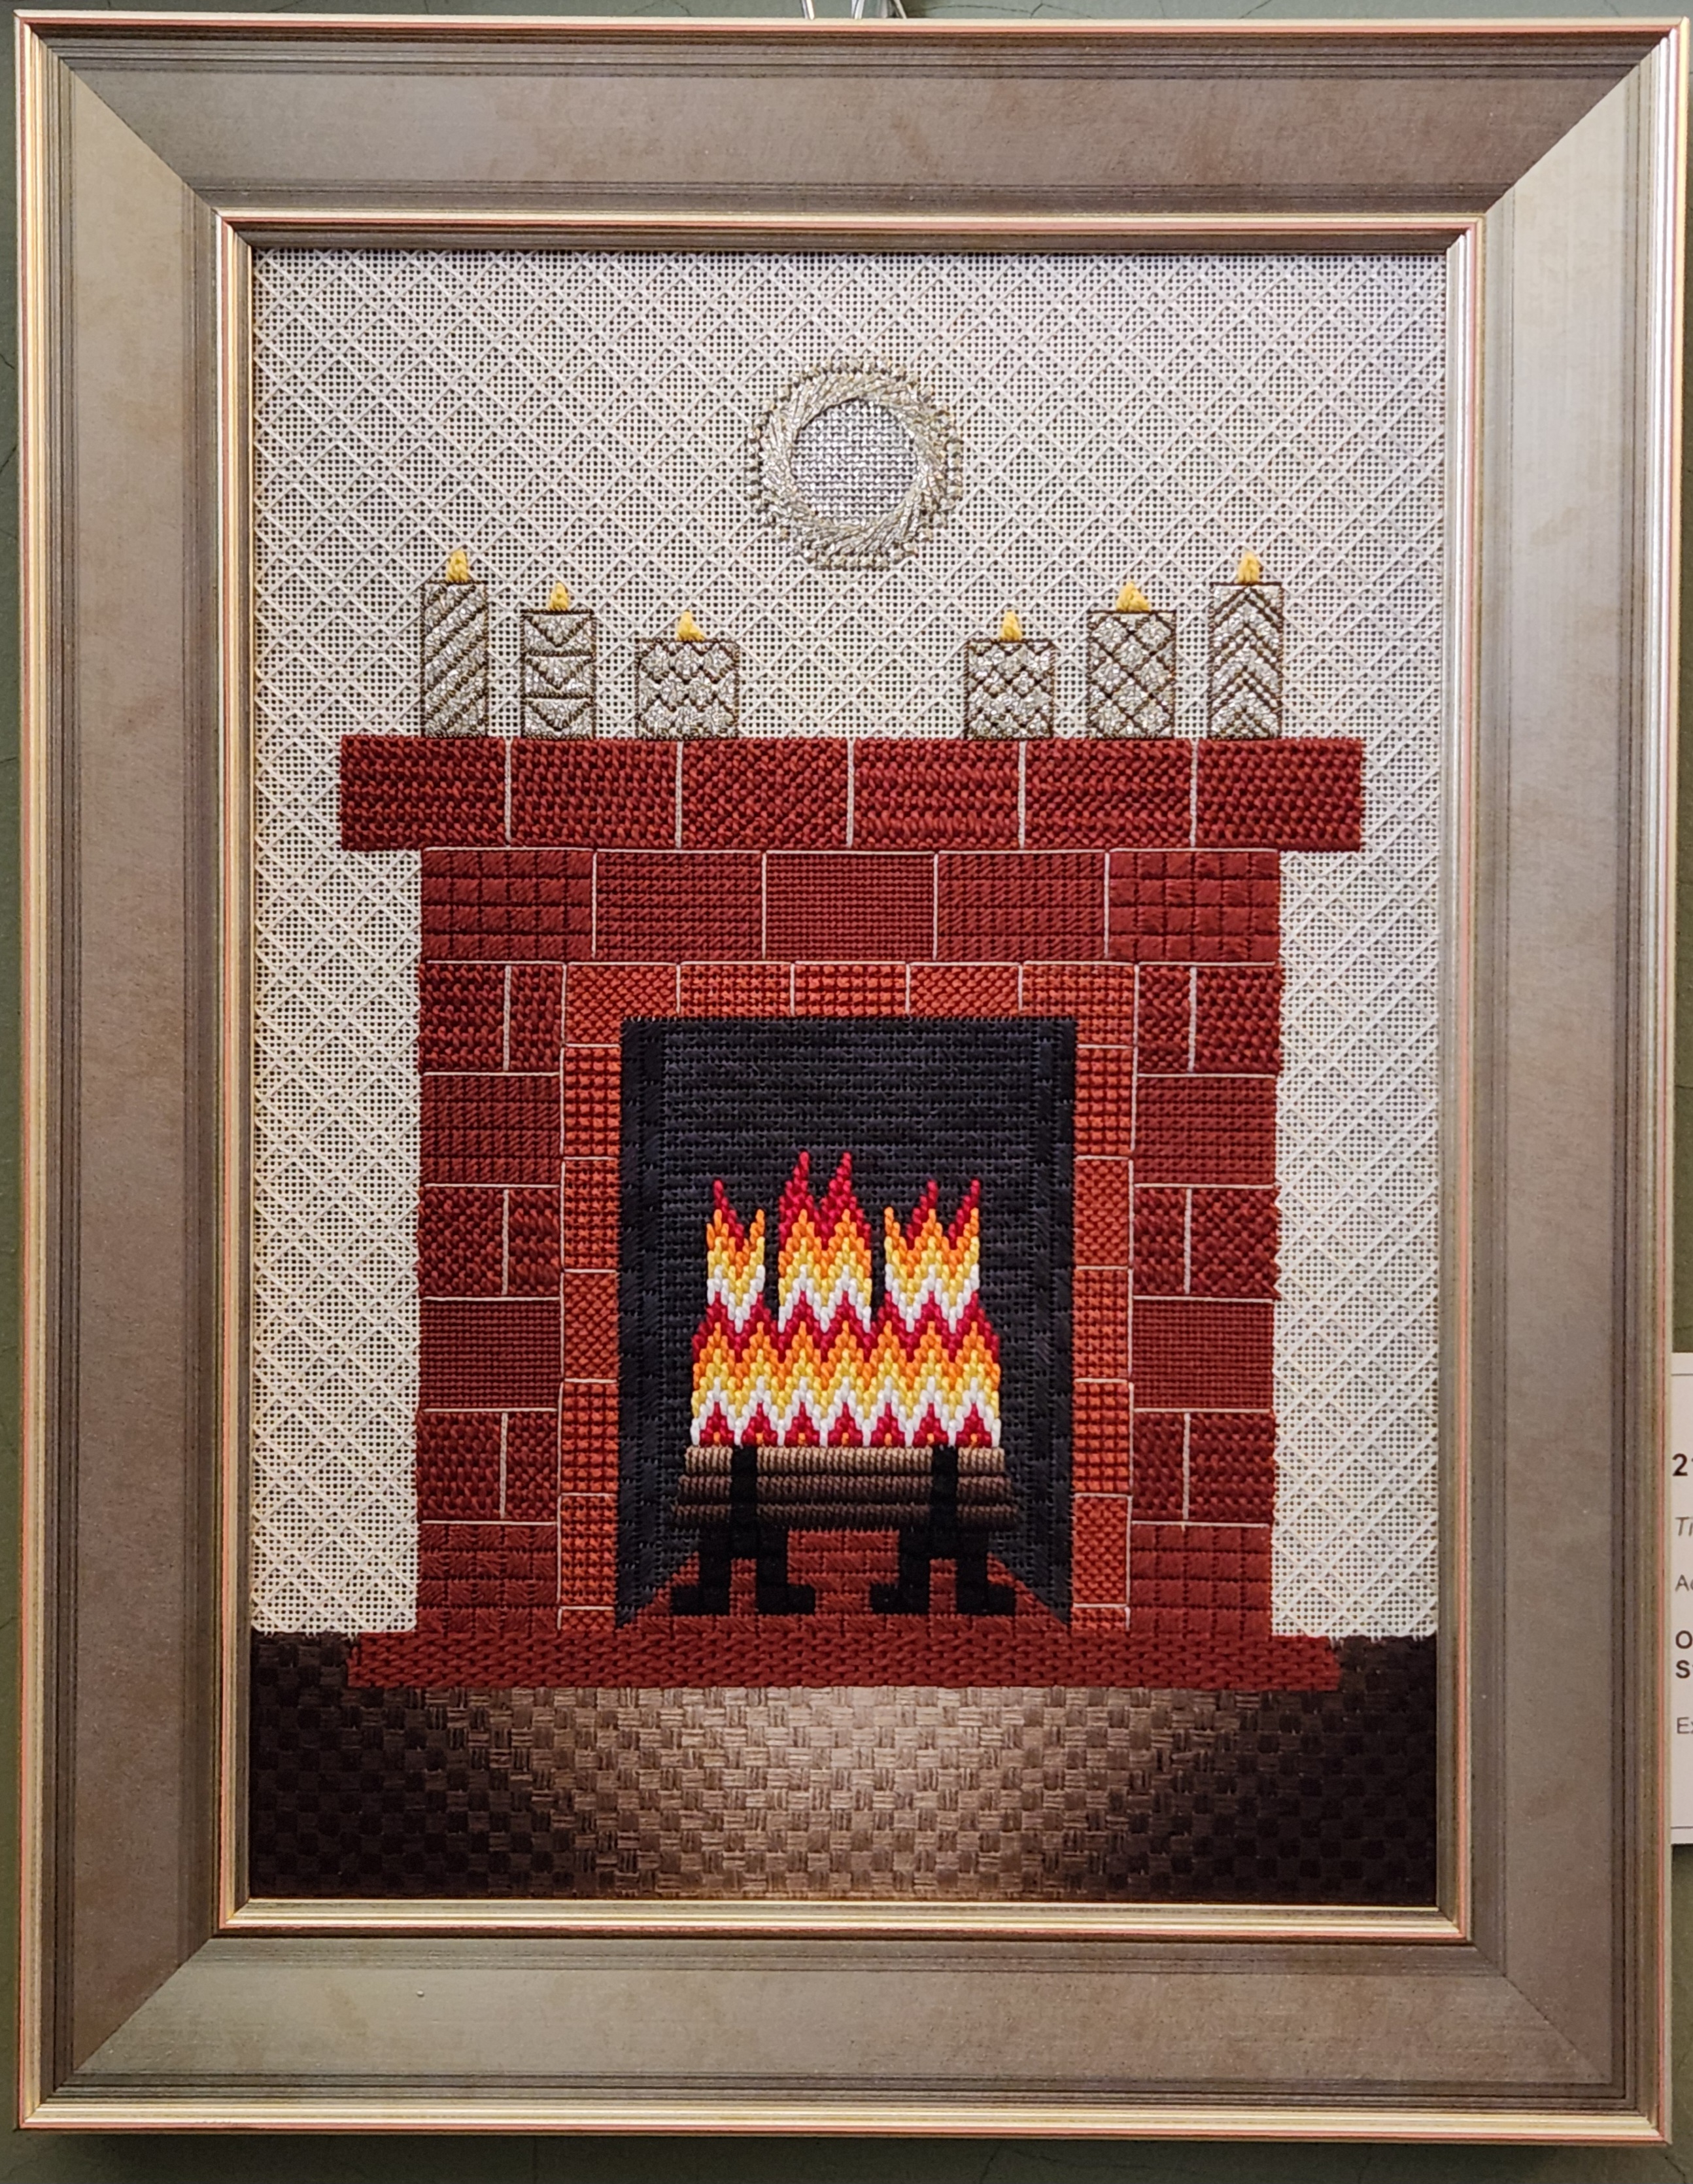
Lynn from Fireside Stitchery has asked to display this in her store. She wanted a fireplace in her store! I just hope nobody wants instructions. It would take a lot of effort. I left it at the store after I discussed this at our Main Line Stitchers chapter meeting.
Filed under: A Spring Sampler, Brandywine Chapter, Embroidery Guild of America
My skinny version of A Spring Sampler in a fall colorway is done! I started this with my EGA Brandywine Chapter in October 2023. I did this one less wide (5″) and with an overdyed thread that doesn’t have a lot of color change. So, I had to modify 2 bands to remain symmetrical. I also worked out the half motifs in case anyone was interested and less worried about symmetry. At least one other member was making it smaller.

Using an overdyed thread without much color change within the skein looks pretty. It reinforces my thought that contrast of values is very important.
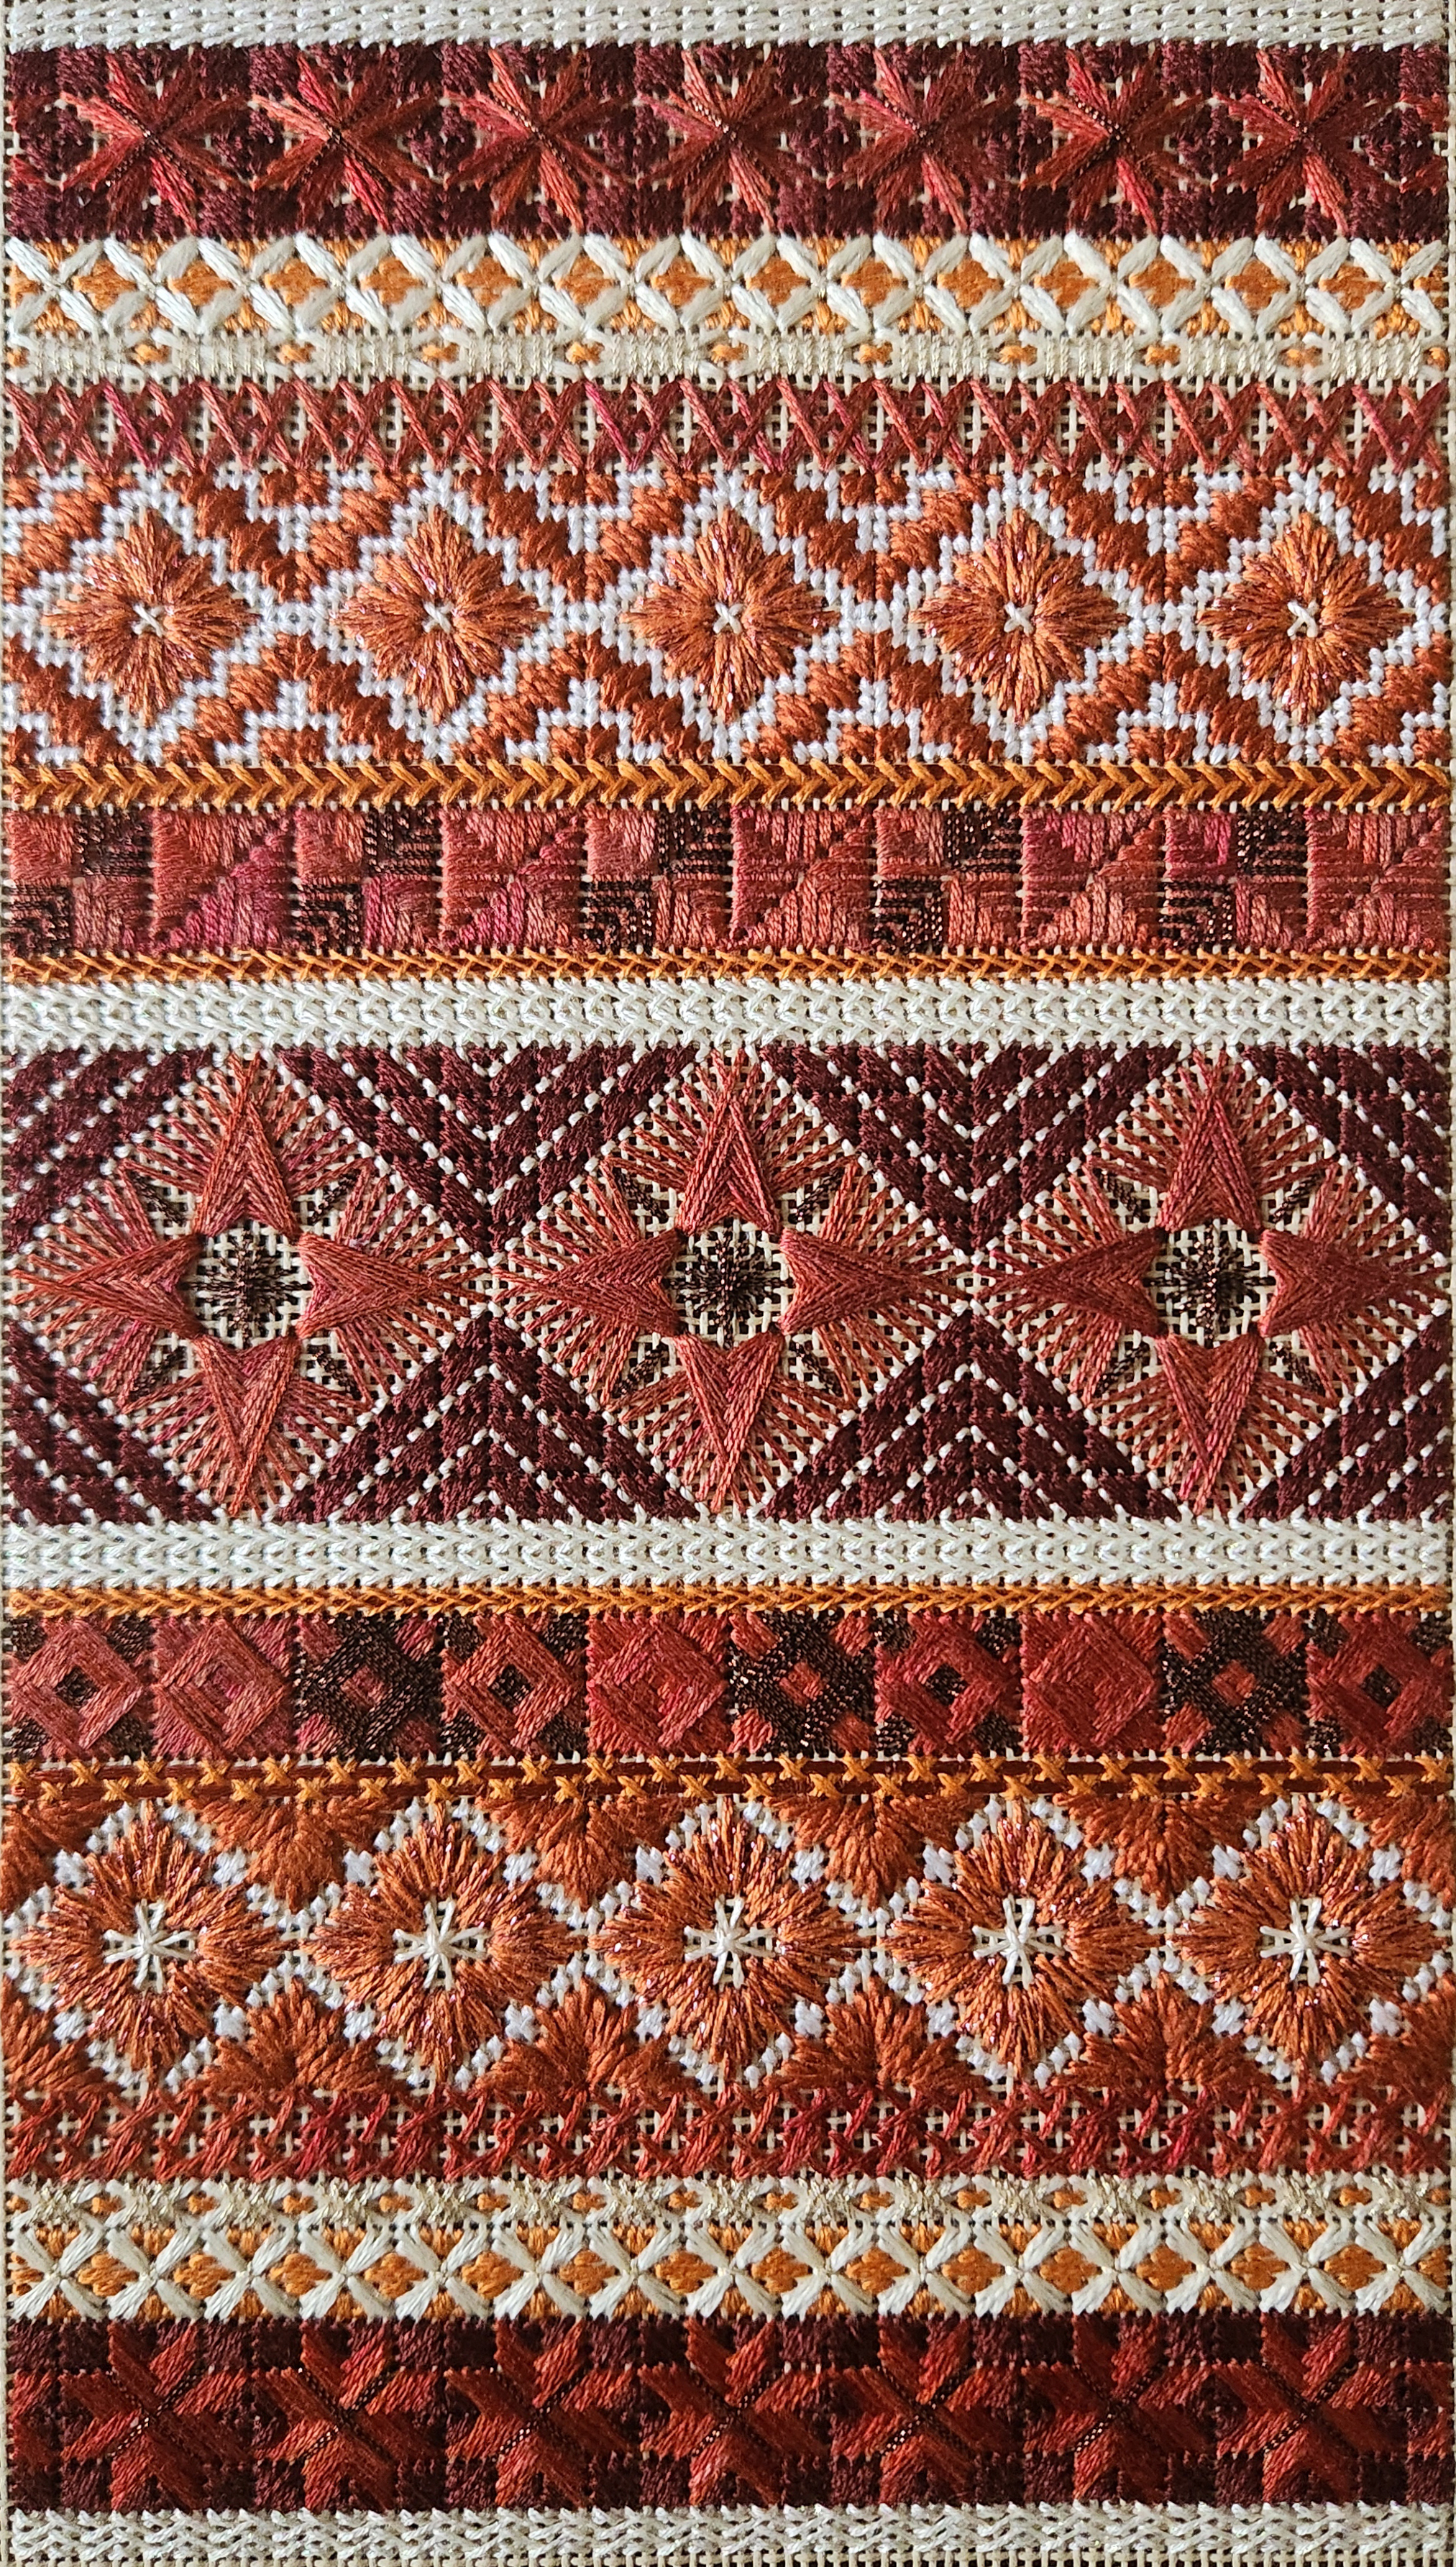
What should I do with this 5″ x 9″ stitched design? Your thoughts would be appreciated.

Filed under: Brandywine Chapter, Embroidery Guild of America, General comments, Tools
A few years ago, Patrick made and gave me a lovely porcupine quill laying tool. On Wednesday, he gave everyone at our Blue Santa Bead EGA Brandywine Guild outing a porcupine quill for us to make our own. Several of us found toppers to adorn them as he had done. I looked through almost all the drawers in the store and found several beads for my second quill. I didn’t have time to make it then.
I used the smallest black bead wire (No. 2) to attach the small bicone on top of the large black bead. I tied the bead wire off just below the large black bead.
The decorative black bead and the white one below it fit snugly on the end but I used the Super NEW GLUE to really secure them.
Patrick’s gift to me is on top and my new one is on the bottom.