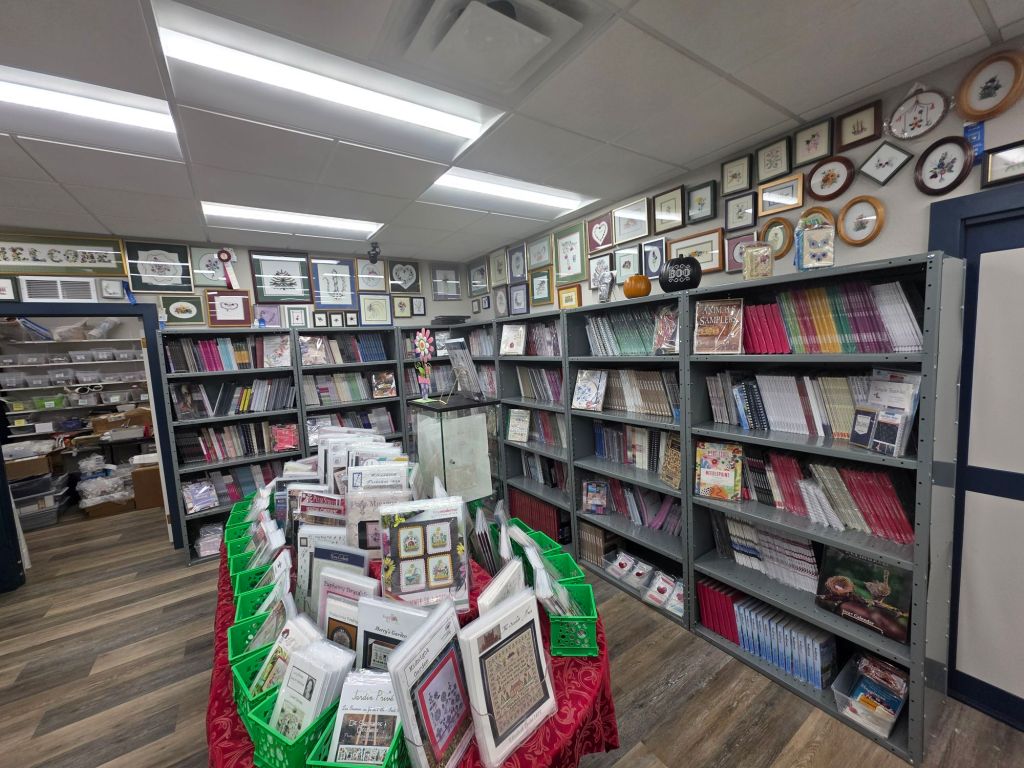
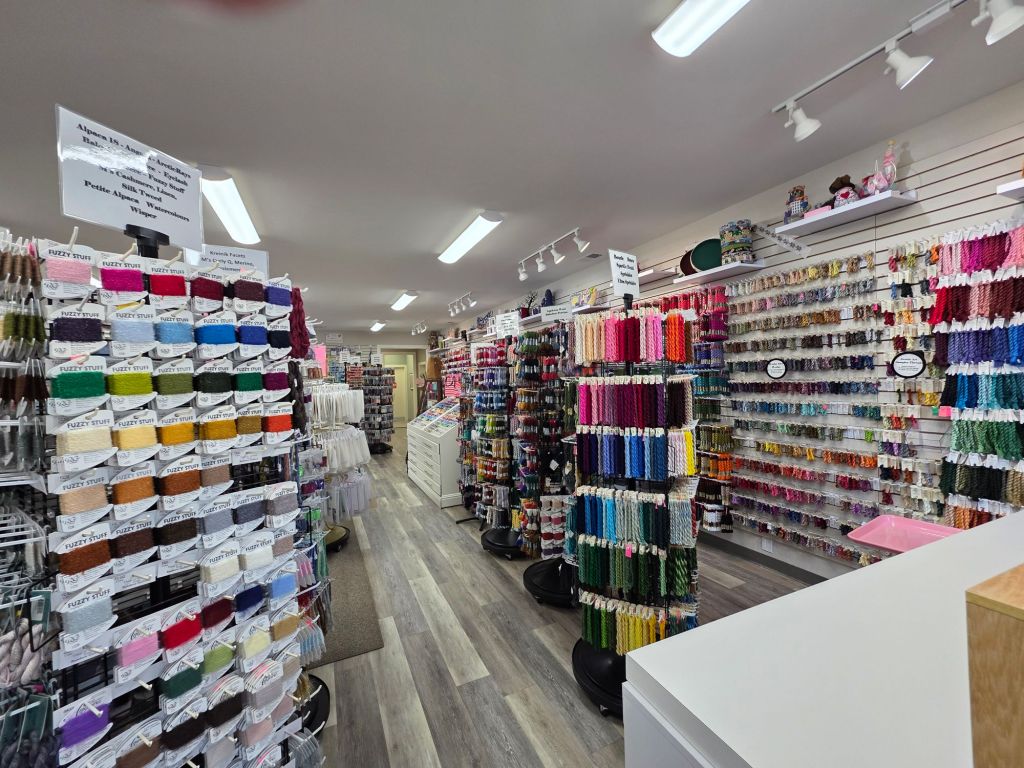
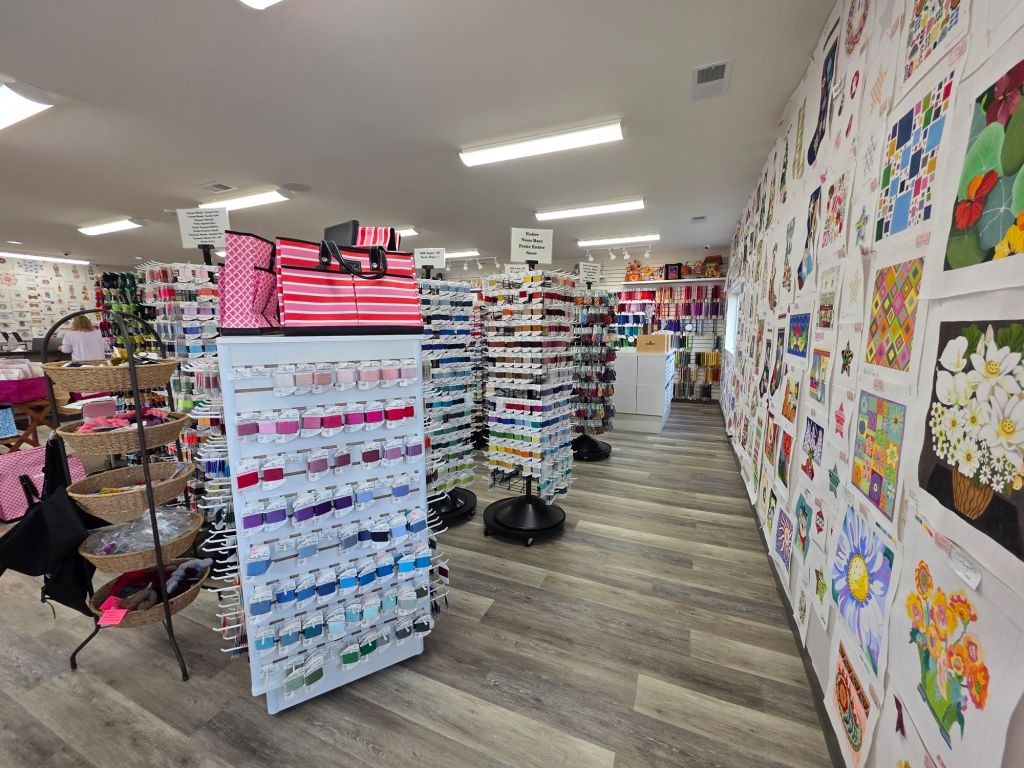
If you get a chance to visit A Stitching Shop in Denver, CO, you will be amazed by the selection of threads. Good lighting throughout the store. First down one long aisle:

Then down the next long aisle:

You can see a room over on the left with more threads.
They had the Japan Silver, Silk Lame Braid, and one of the Neon Rays+ I needed but not the white or red Neon Rays+. But, more about that another time.

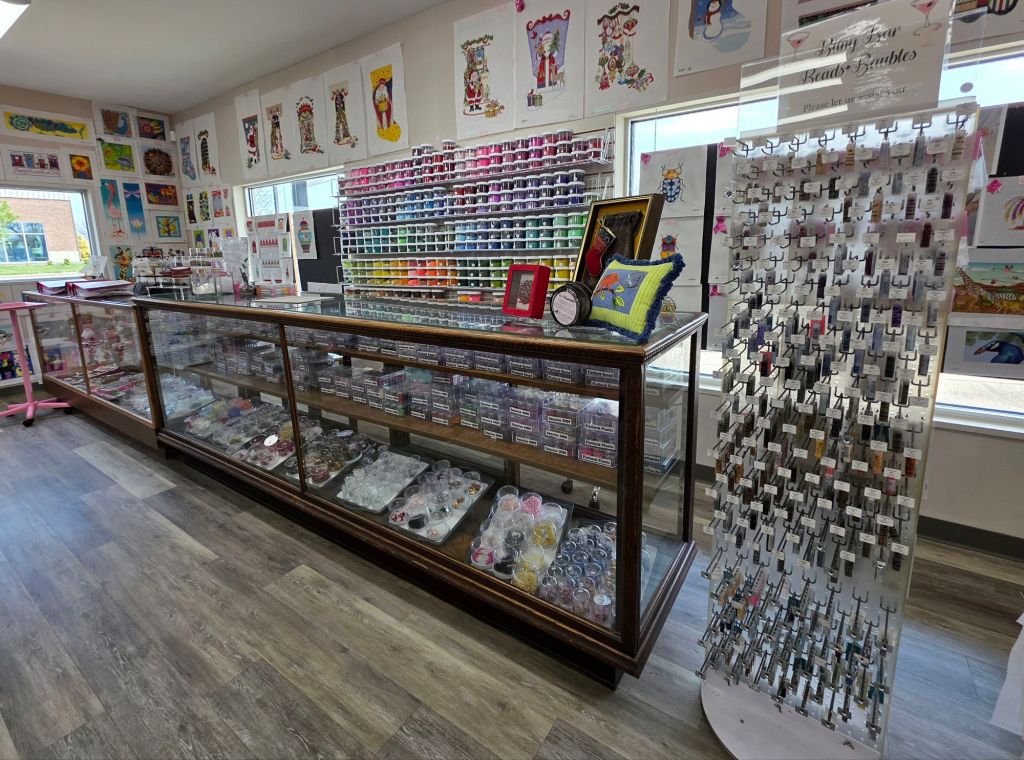
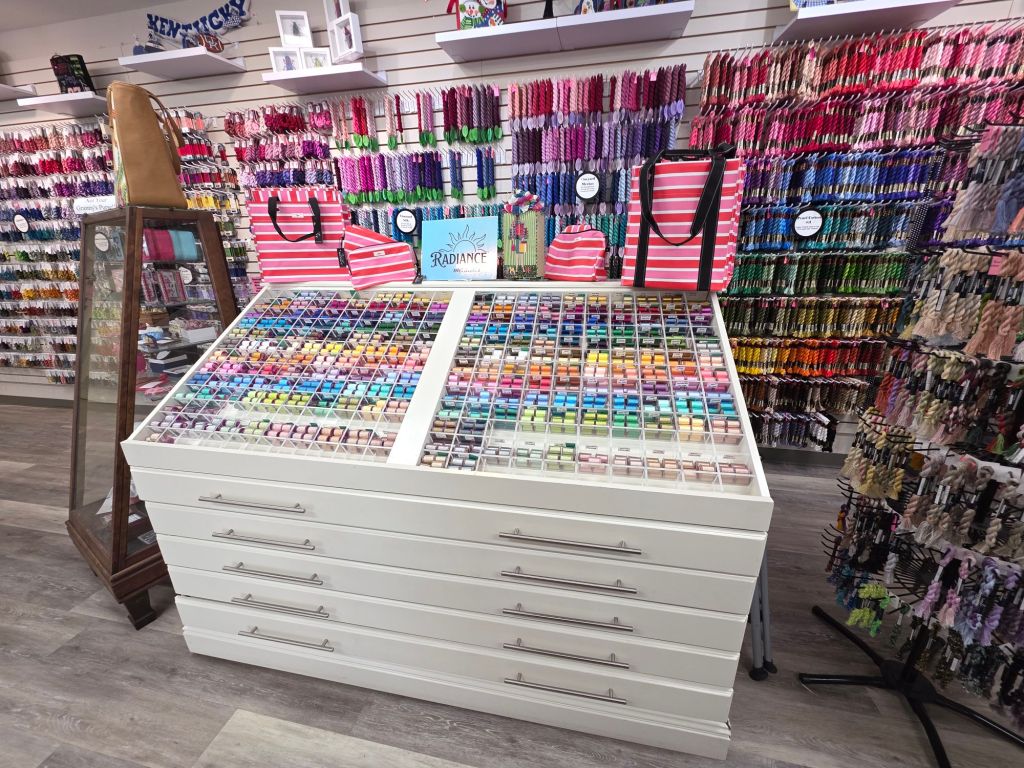
Beads, sequins, Sundance Metallic Accents, and charms are available.

And, bins of charted instructions organized by designer (canvaswork in these and cross stitch elsewhere).
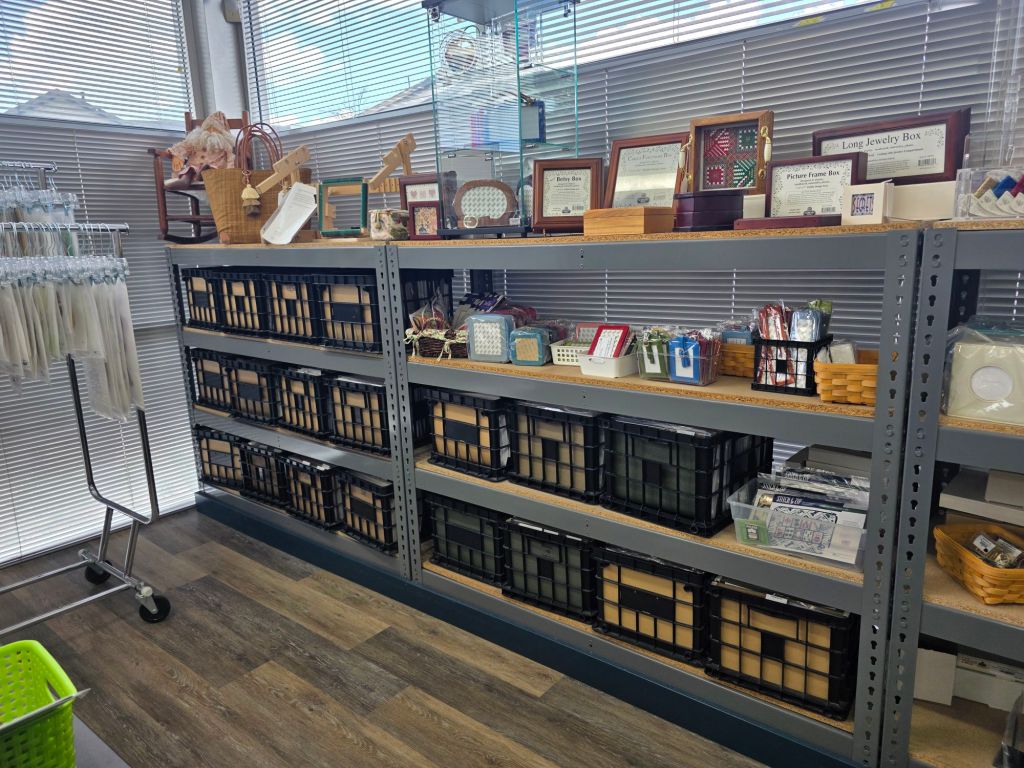
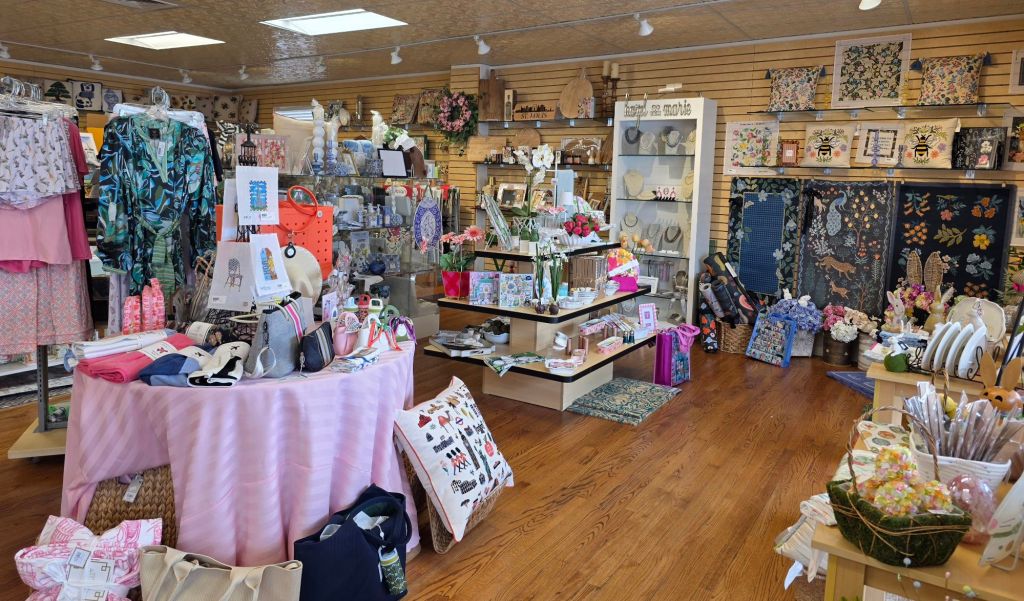
Painted canvases are available as well. It’s nice to see a store represent counted and painted canvases.

And, so many books!
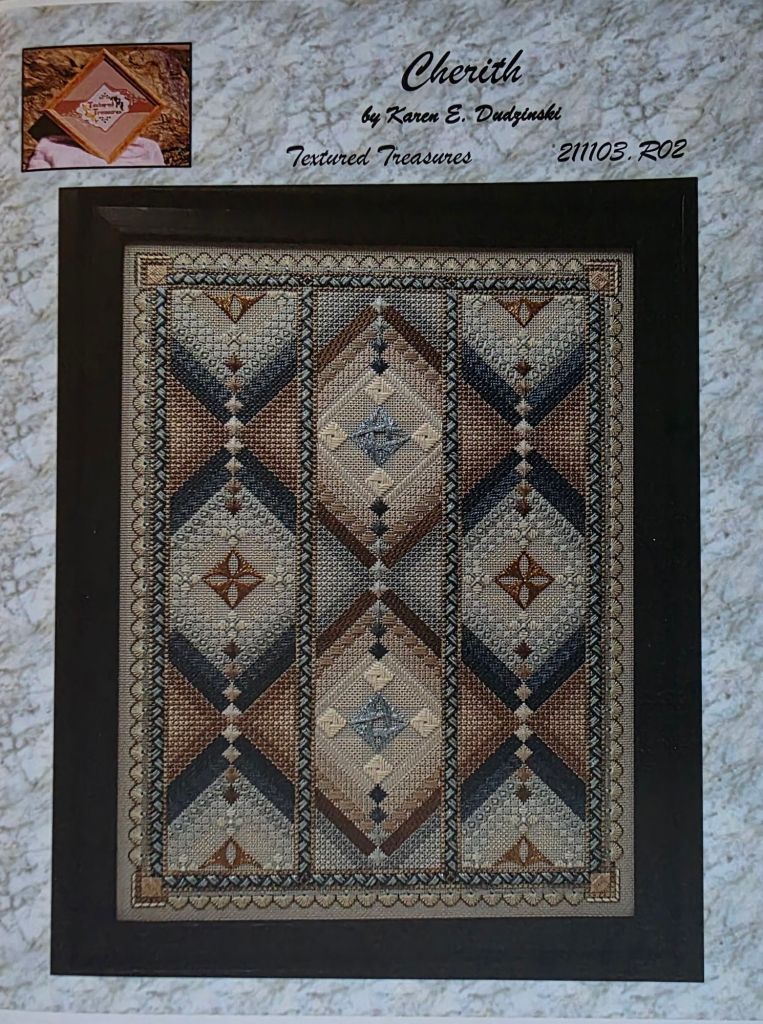
A few ANG Seminar atendees were shopping in the store. Some I knew. Some I met for the first time. One lady was shopping for threads for Cherith by Karen Dudzinski of Textured Treasures. It was a great find that I wouldn’t have even looked for and I got the last copy of the instructions but more about that another time.
Apparently, there may be drivers willing to take people to and from the Seminar on Expo day. Since I have already visited, I didn’t need to inquire about the logistics. Uber worked well for me today.
After having met Meredith Willett at the Welcome Banquet at the National Academy of Needlearts Assembly, I learned that some of her family has a distillery. She had mentioned that her favorite is Noah’s Mill. Wouldn’t luck have it that when we were driving from Maker’s Mark to Louisville, we passed right by the Willett Distillery and was in time to buy a bottle!
Eventually, we made it to Lexington and visited M’s Canvashouse. Meredith wasn’t there but I had a nice chat with several employees and met Joyce Marshall, the newest teacher/designer who keeps getting First Place Awards in Original Professional category at ANG (well deserved)!
It’s a lovely store. The largest selection of beads and sequins of any needlepoint store that I have seen.
Lots and lots of threads.
And, painted canvases.
And, a display case of Radiance.
I bought a painted canvas but will wait to share more about that another time.
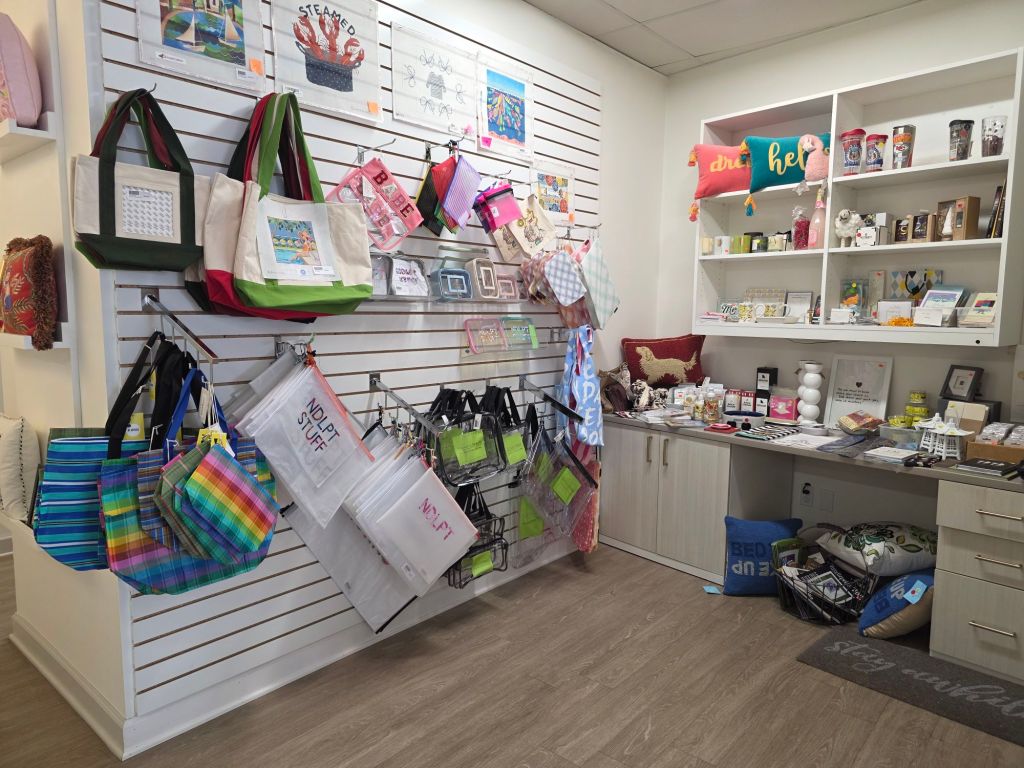
Not too far from the Needlepoint Clubhouse is the Sign of the Arrow in Ladue, MO also very close to St. Louis. It’s a totally different vibe probably because it’s 1/3 gift shop and 2/3 needlepoint store. It’s a non-profit supporting local charities.
All painted canvases, a good amount of threads, and books (I was tempted by Brenda Hart’s book), and accessories (cute project bags). I didn’t think they have classes but they do. Cynthia Thomas will be there in May teaching two Whimsy and Grace’s pumpkins. They are known for belt finishing.
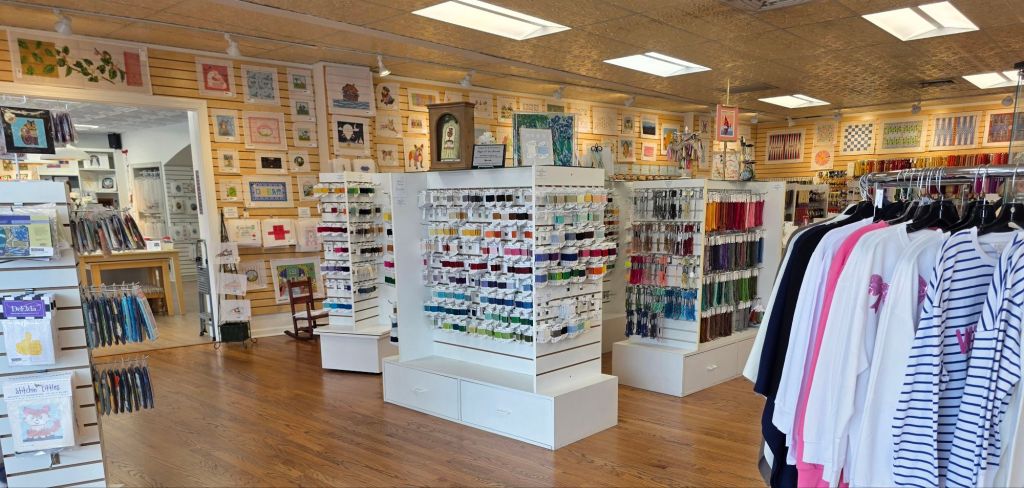
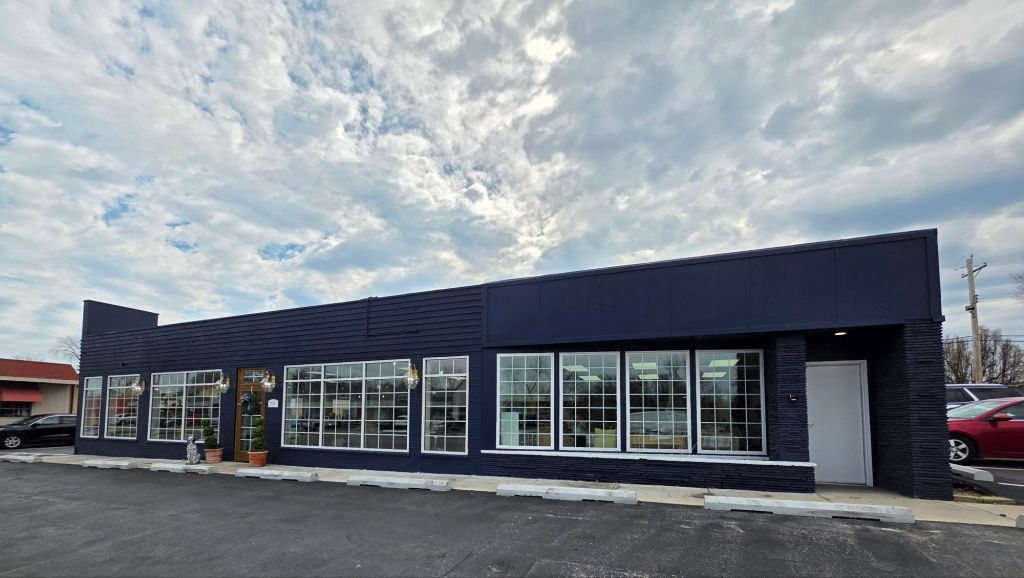
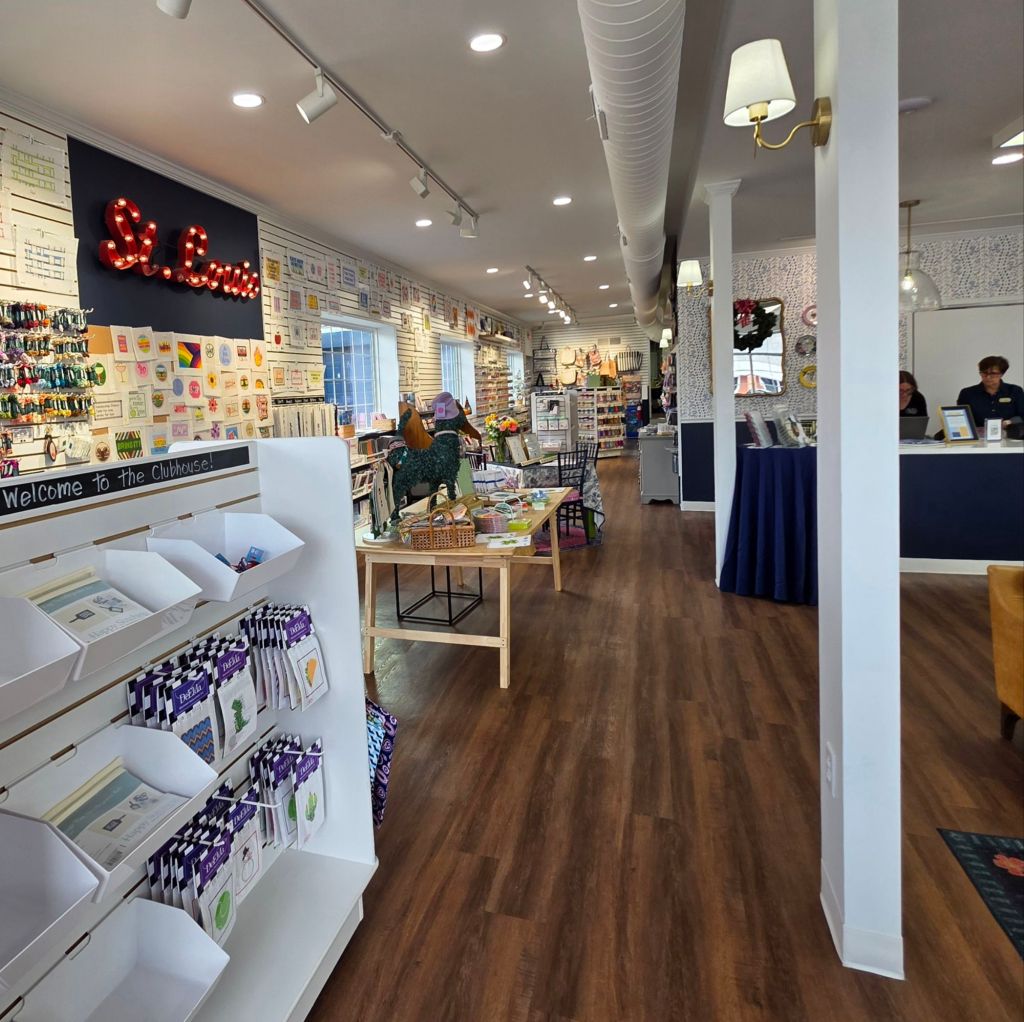
Our first destination, the National Blues Museum was closed due to technical difficulties. Bummer. So, on to The Needlepoint Clubhouse. They’ve been in business for 6 years in an old location and about one year in the new location in Rock Hill, MO – close to St. Louis. Their outdoor store sign is still in the works! Look at the sky – love it. Weather is wonderful 50s in the am 70s in the pm and a nice breeze!
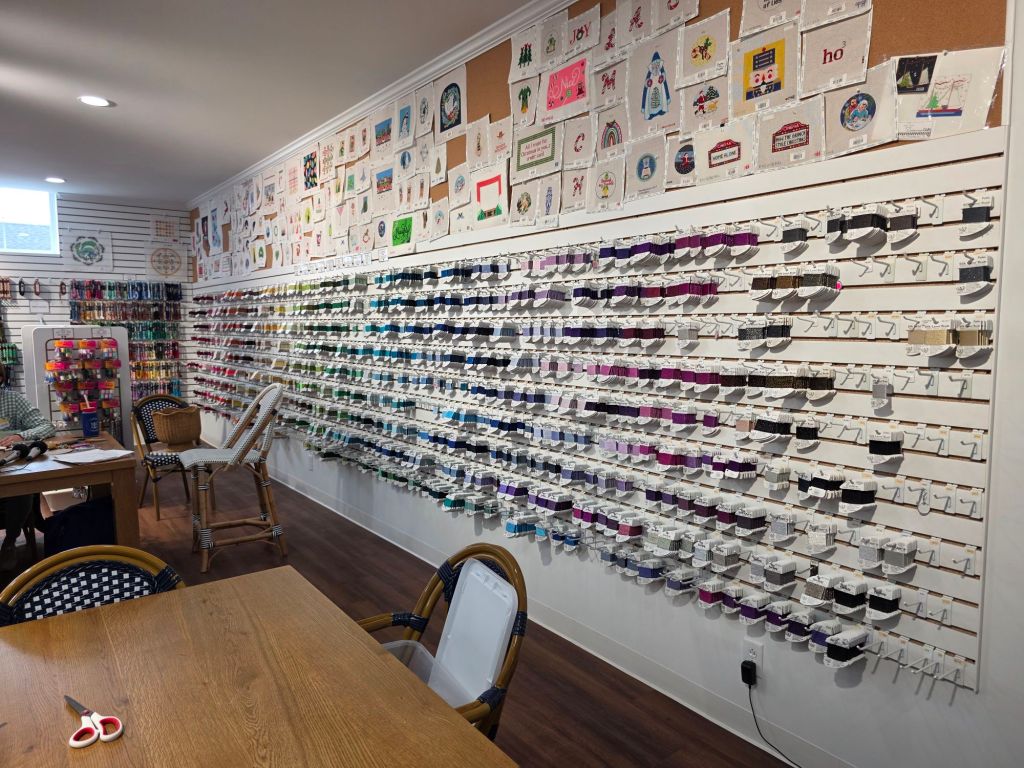
What an amazing store! Here’s a view down both sides of the store. There are areas in the middle that you can’t see. It’s huge. About 5 tables, a couple of comfy chairs, beverages, and candy.
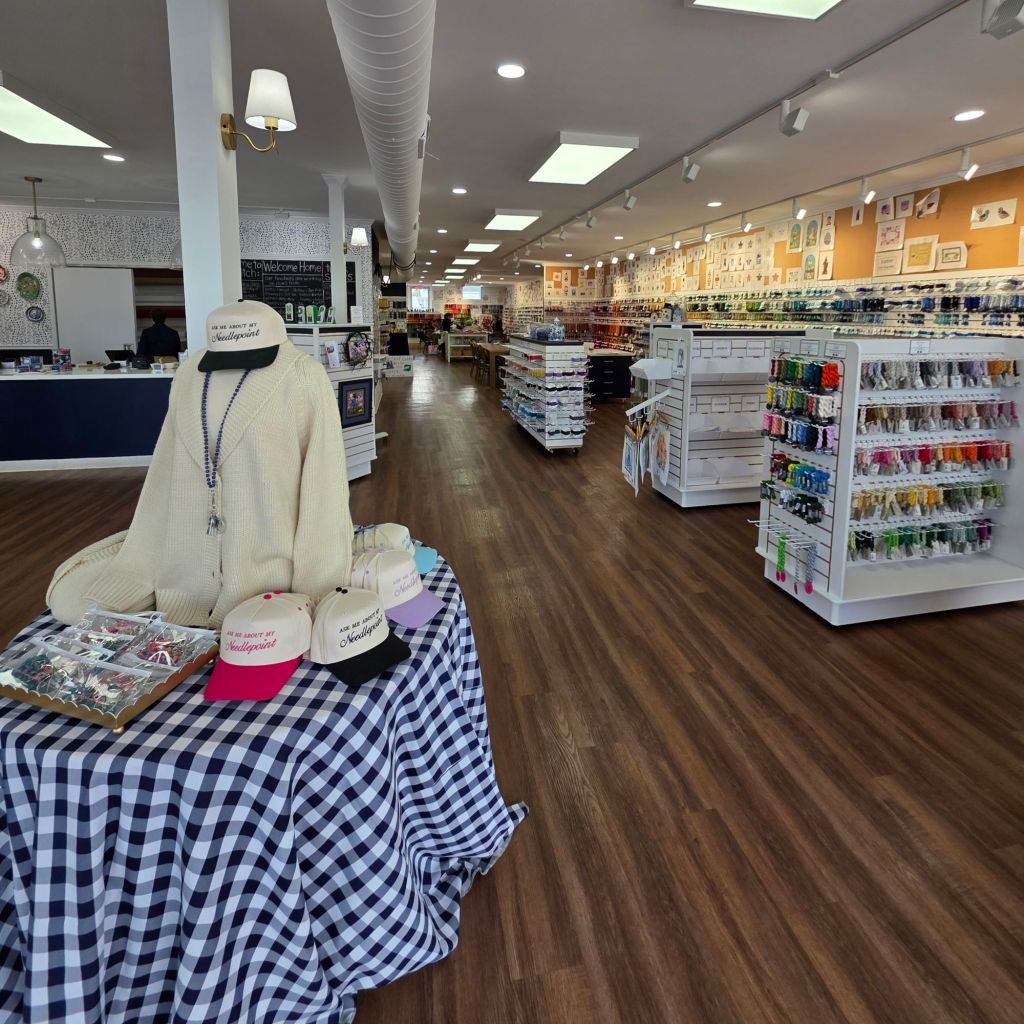
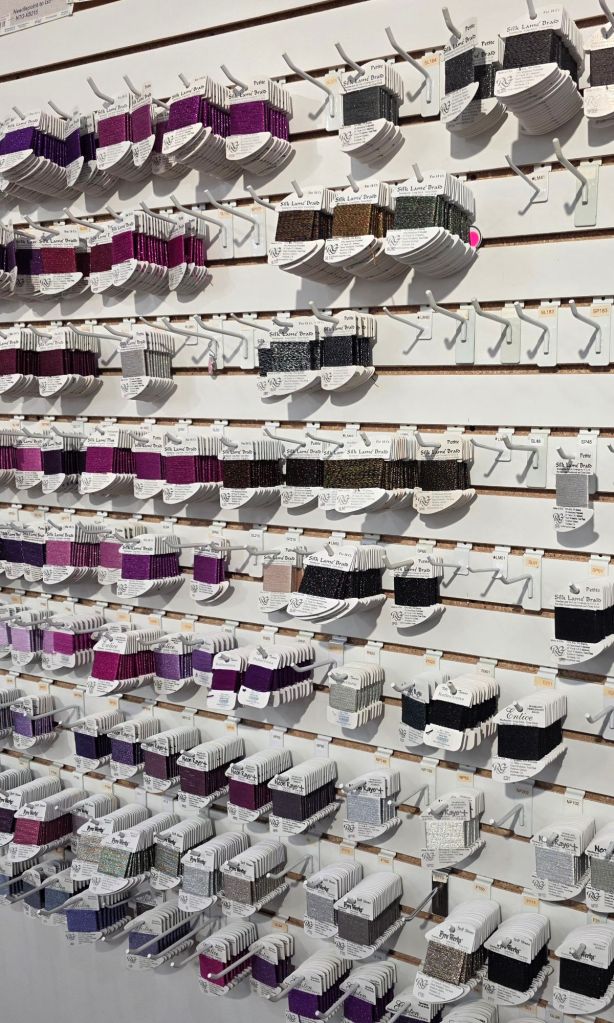
The main thing of note is the Rainbow Wall!
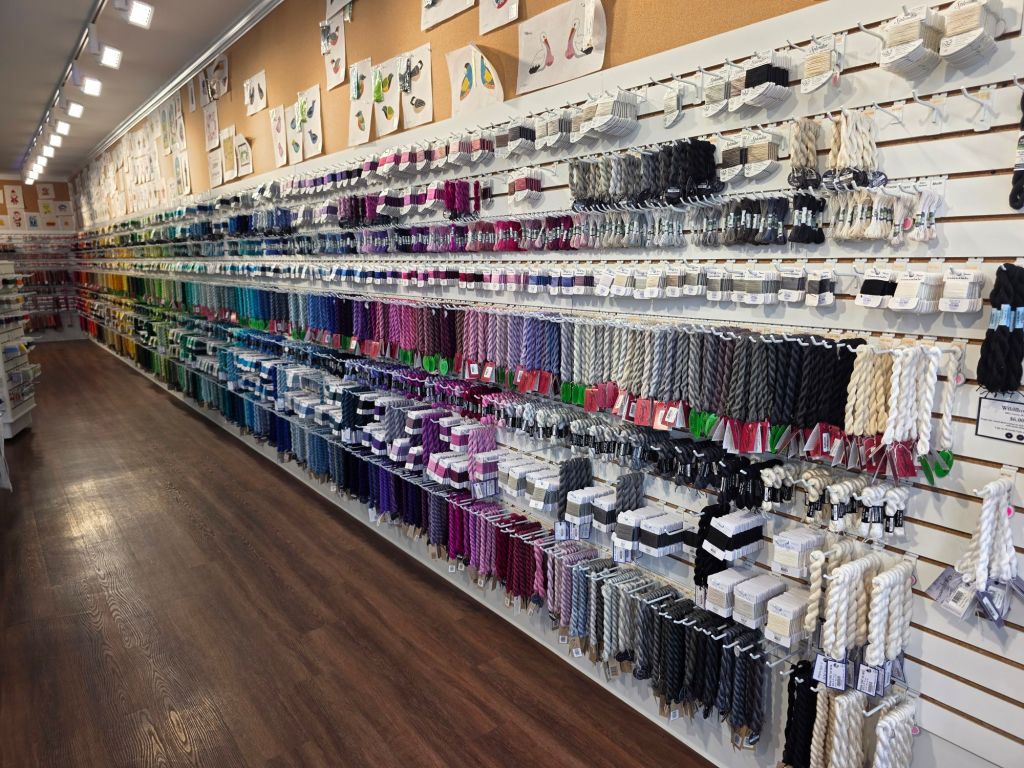
About a dozen threads are intermingling arranged by color! I love it but not everyone would.
In April, there are two 3-hour sessions that “Take a Tour of the Rainbow Wall” for $60 to explore the threads and learn to create dimensions and achieve special accents.
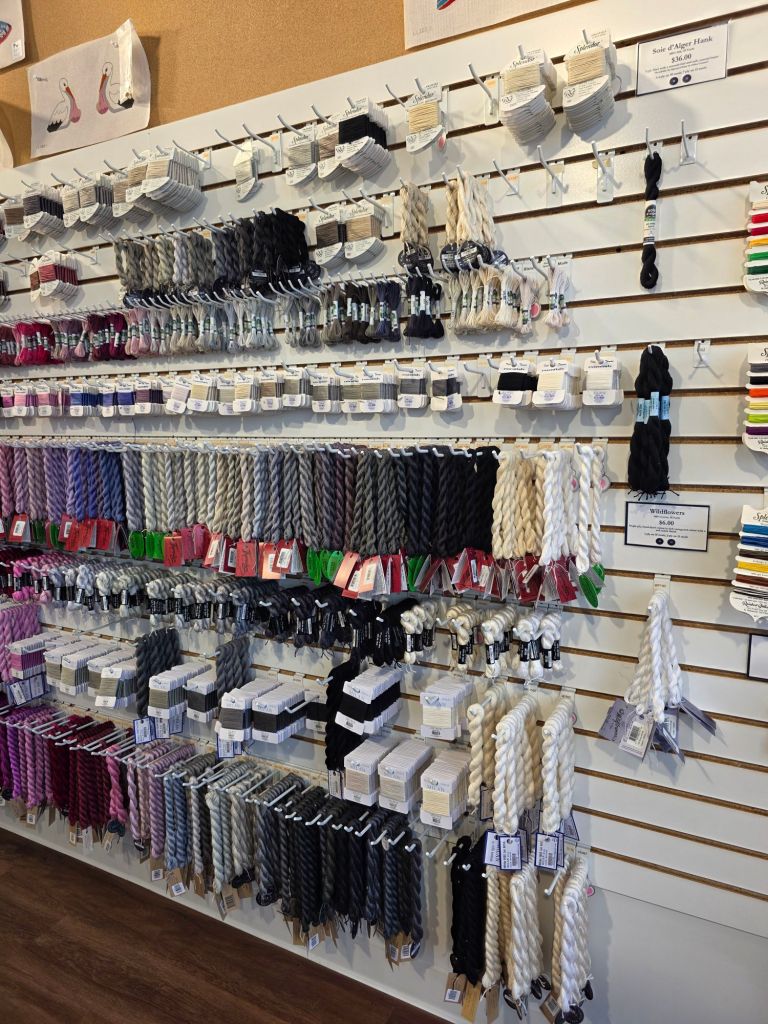
After that – still on the right wall is the Sparkle Rainbow Wall!
There are some gaps in colors but lots of people are stitching now and thread suppliers are not keeping pace. Someone told the bar shortage exists because the new stitchers don’t know to reuse them!
There are over 50 thread lines (not sure of the total count as the owner, Julie Cross, wasn’t present). Most lines are complete – only a few partial.
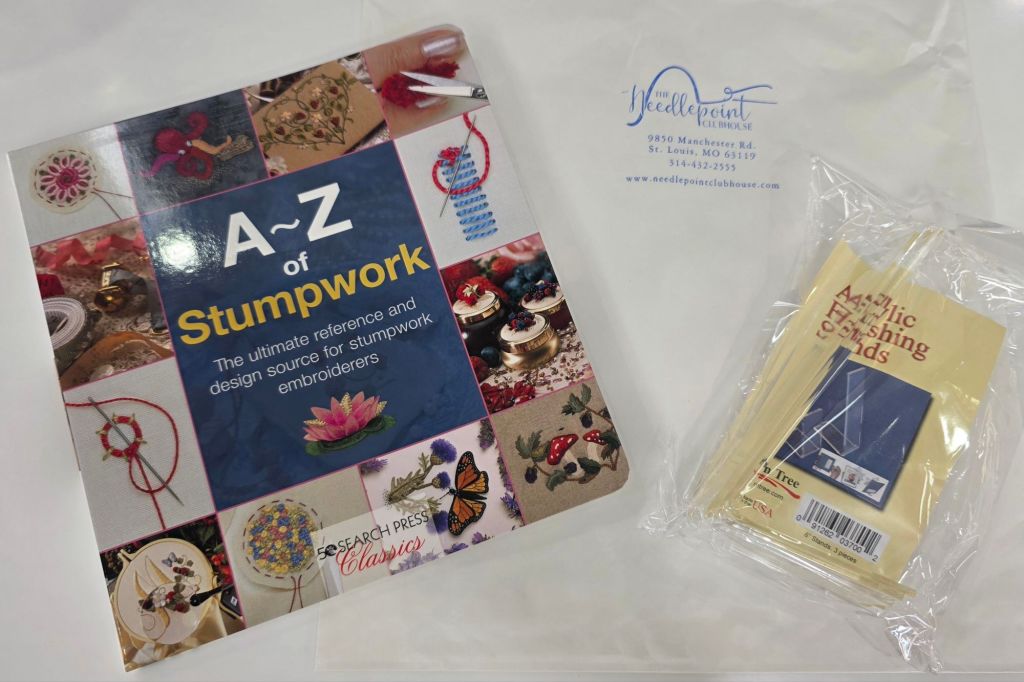
It was all painted canvases. No counted designs. There were stitch books and various supplies. I have a project waiting to be finished as a stand up so the 6″ acrylic stand is perfect. And, the one A to Z books they were selling, on Stumpwork, I didn’t have already. But, I do now!
They have lots going on.
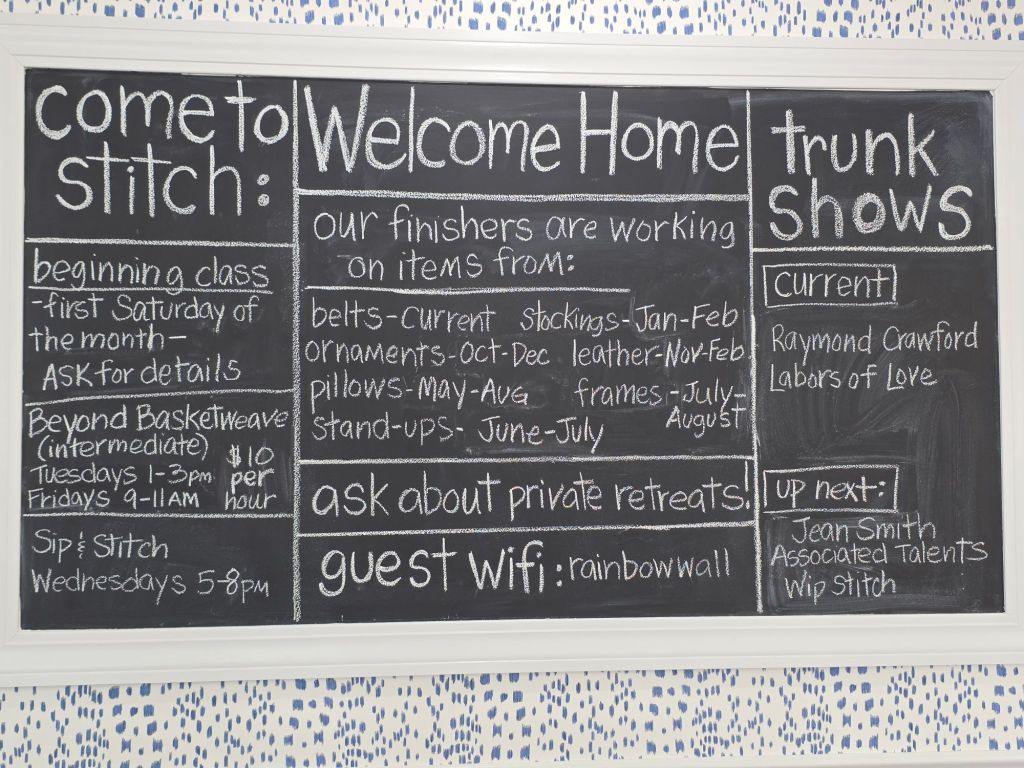
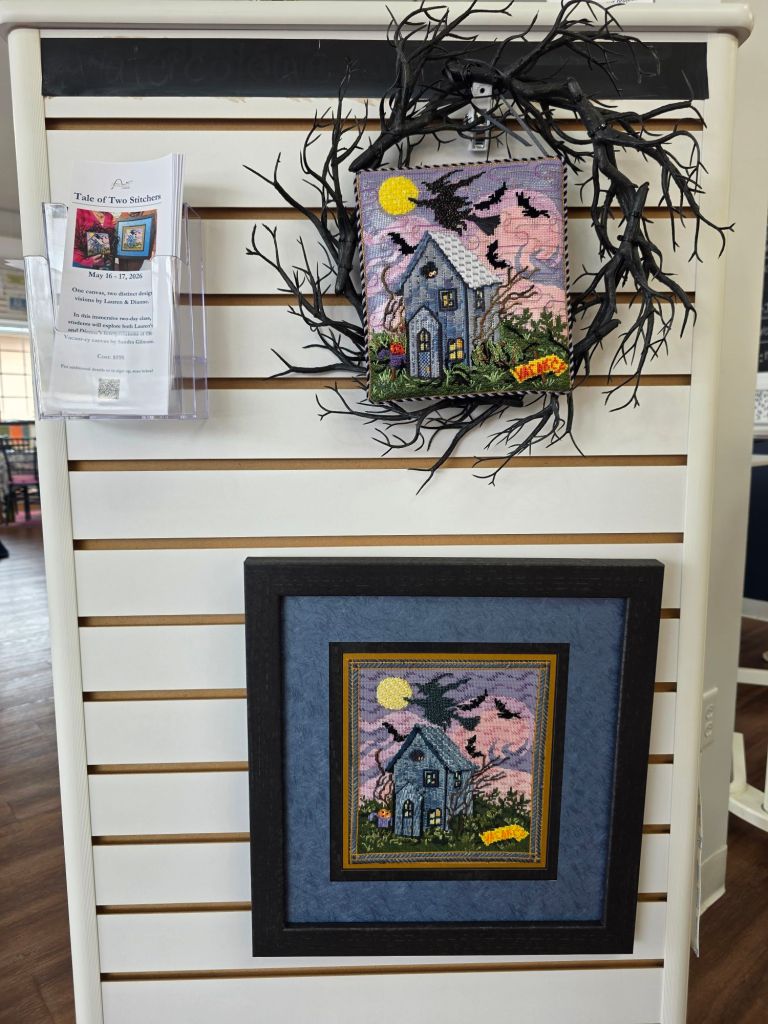
Tale of Two Stitchers is a 2-day class in May that explores one Sandra Gilmore canvas and two distinct design visions by Lauren & Dianne.
Ruth at Bedecked and Beadazzled just provided the fastest ever order. It started yesterday with an email reply to my query (from 1:25 pm) about whether 18″ Evertites were indeed in stock. Within half an hour, I got a reply they were. Then, since shipping was pricey (UPS shipping rates), I decided to make the most of that and order a few sizes especially since Evertites are getting harder to find (no local store carries them anymore). A second query (at 2:30 pm) to ask what other sizes were available was returned in less than 5 minutes indicating pretty much all sizes are in stock! So, in went my order.
Her receipt email followed immediately and said among other things, “We are filling orders as fast as possible.” but when I thanked her for her prompt replies, I also let her know there was no rush especially since this is Thanksgiving week. So, . . .
When, what to my wondering eyes should appear (the following day at 4 pm),
But a 24″ box, and eight lovely bars (safely wrapped in tissue paper), . . .
Even though her email ended with “P.S. Sometimes miracles happen and things ship immediately. ;-)”, I think that it is amazing service from her and UPS. I know Bedecked and Beadazzled is only a little over 2 hours away (from Philadelphia) in Maryland but that’s deserves a shout out.
Happy Holidays to all and especially Ruth and her helpers!!
Filed under: General comments, House of Embroidery (H of E), Needlepoint Shops, Radiance Metallics by The Meredith Collection, Threads, Threads Too Needlepoint
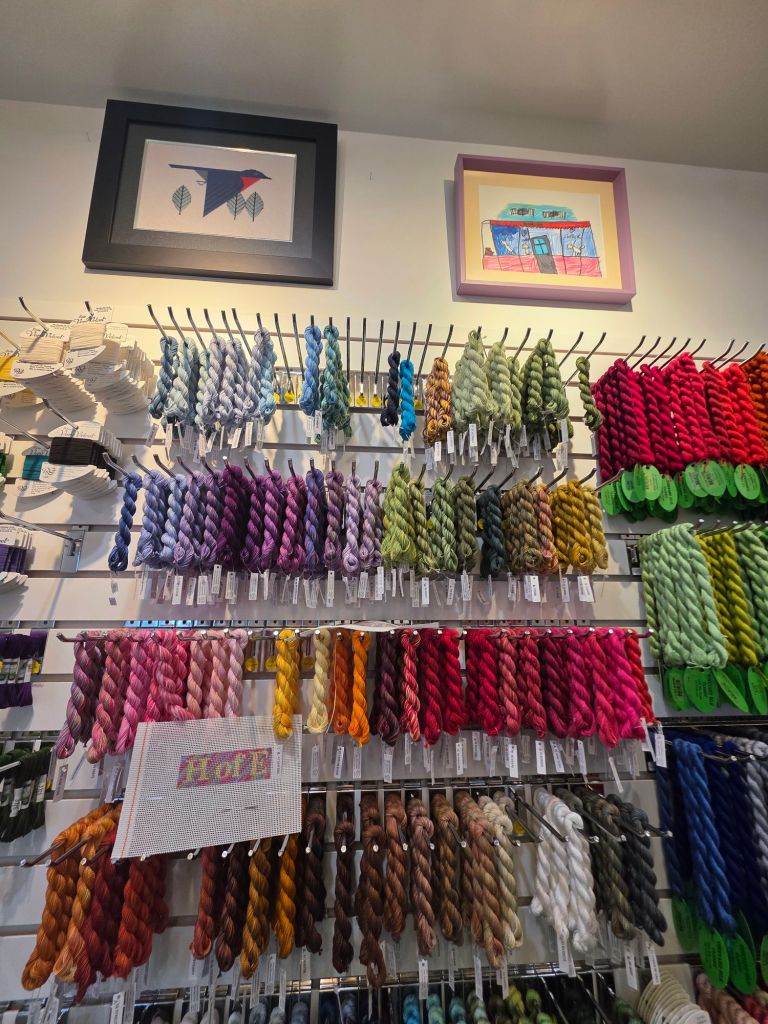
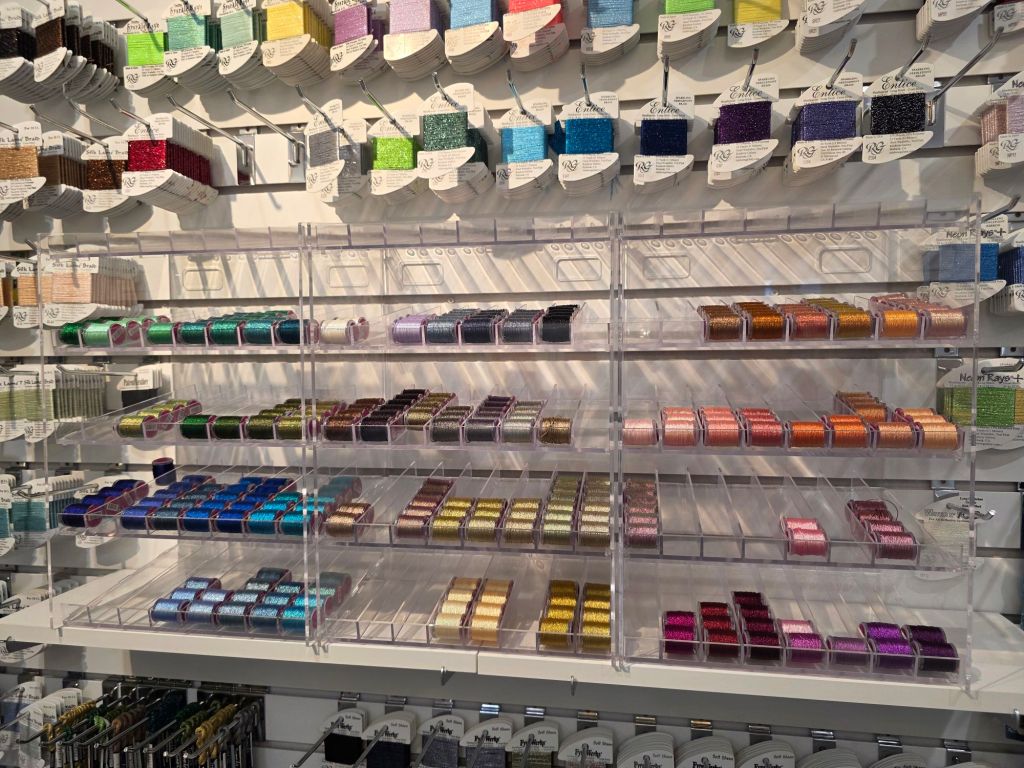
Bill and I met Linda P and Cynthia S from ANG New Jersey Needle Artists at Threads Too Needlepoint in Fair Haven, NJ to get books for redistribution from Nanette Costa’s library. Over half of the 60+ books have been claimed by either members of my EGA Brandywine Guild or ANG Main Line Stitchers Chapter. I will take the rest as an opportunity to visit a couple of other nearby chapters!
Threads Too Needlepoint is a bright colorful store with lots of canvases, finishing accessories, and a variety of threads including couple of unique threads: an overdyed Perle cotton #5 by House of Embroidery (H of E) and Radiance Metallics by The Meredith Collection. I resisted both not having a specific project for them.
It was a HOT day in Philadelphia and a tad cooler at the shore especially in the shade sitting at a favorite Seaside Park bar in the breeze sipping on a cool refreshment (Bill and I). Crabs at our favorite restaurant, Bum Rogers, capped off a lovely day.
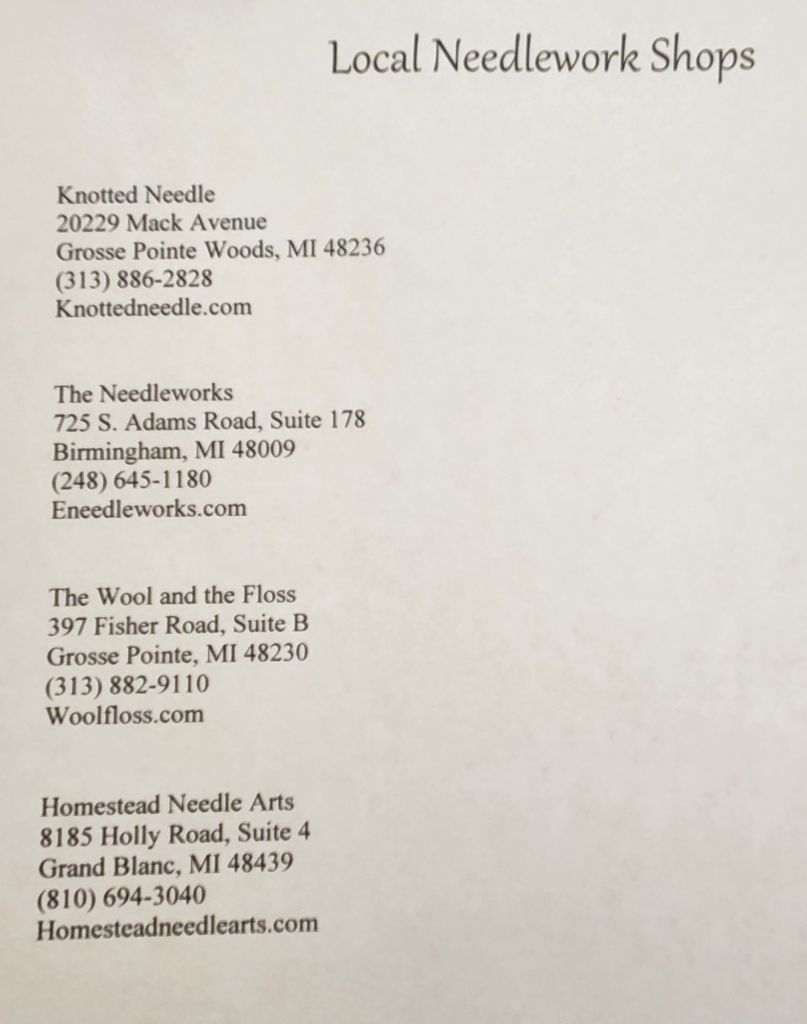
Filed under: 2025, Knotted Needle, National Academy of Needlearts (NAN), Needlepoint Shops, The Wool and the Floss
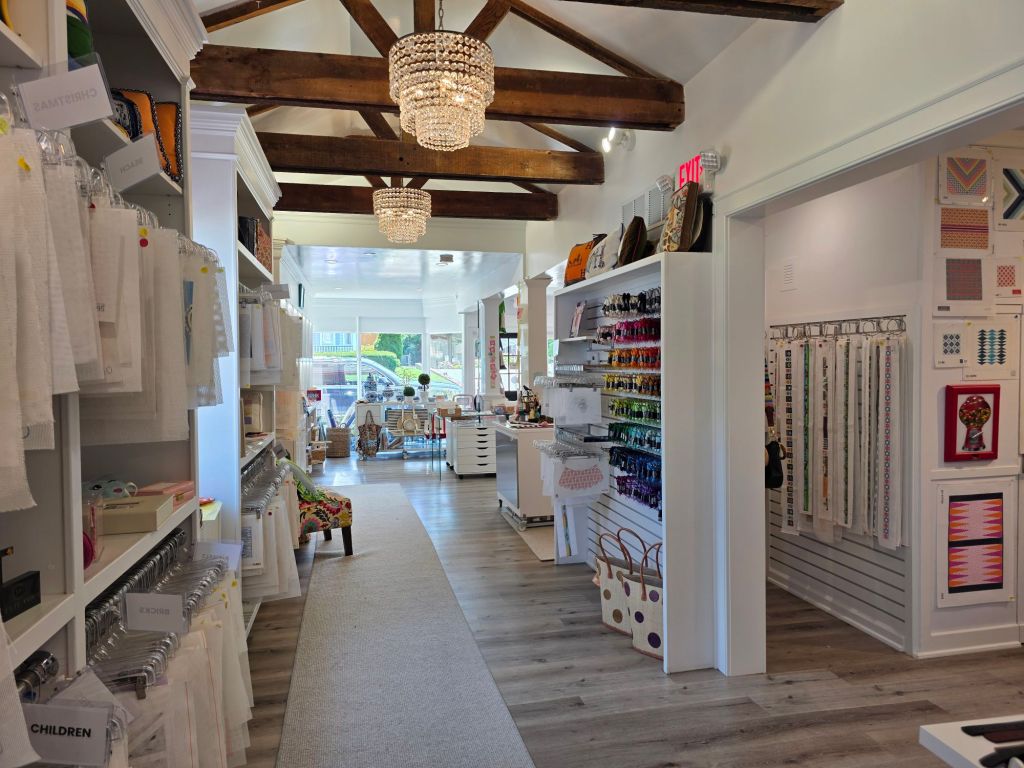
Yesterday, we really enjoyed the tour of the Motown Museum, and I really enjoyed the two needlepoint stores we visited afterward.
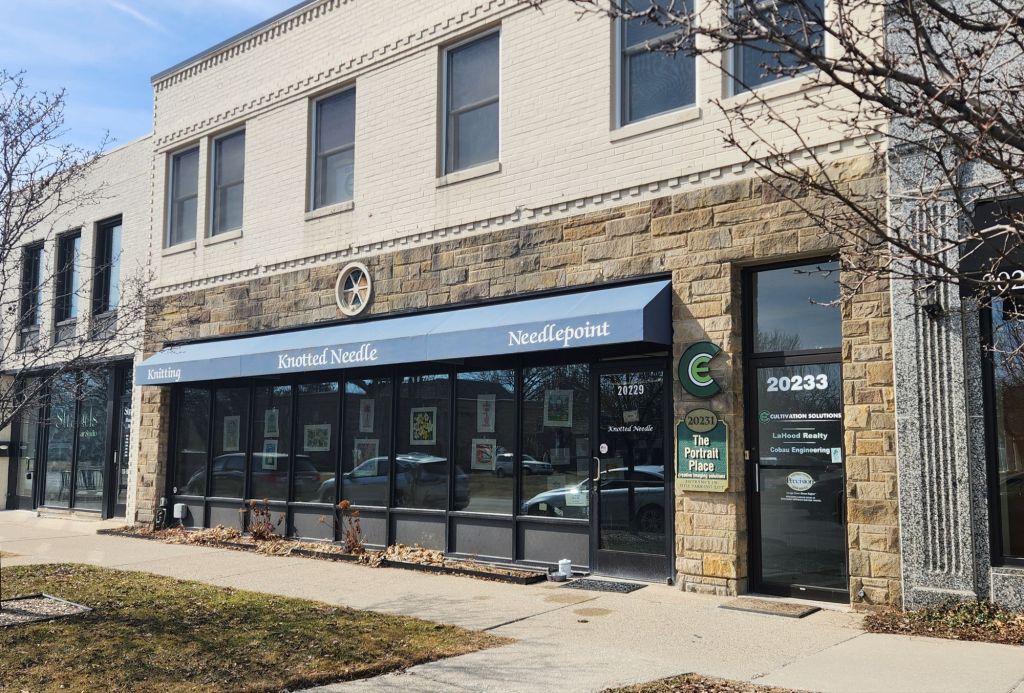
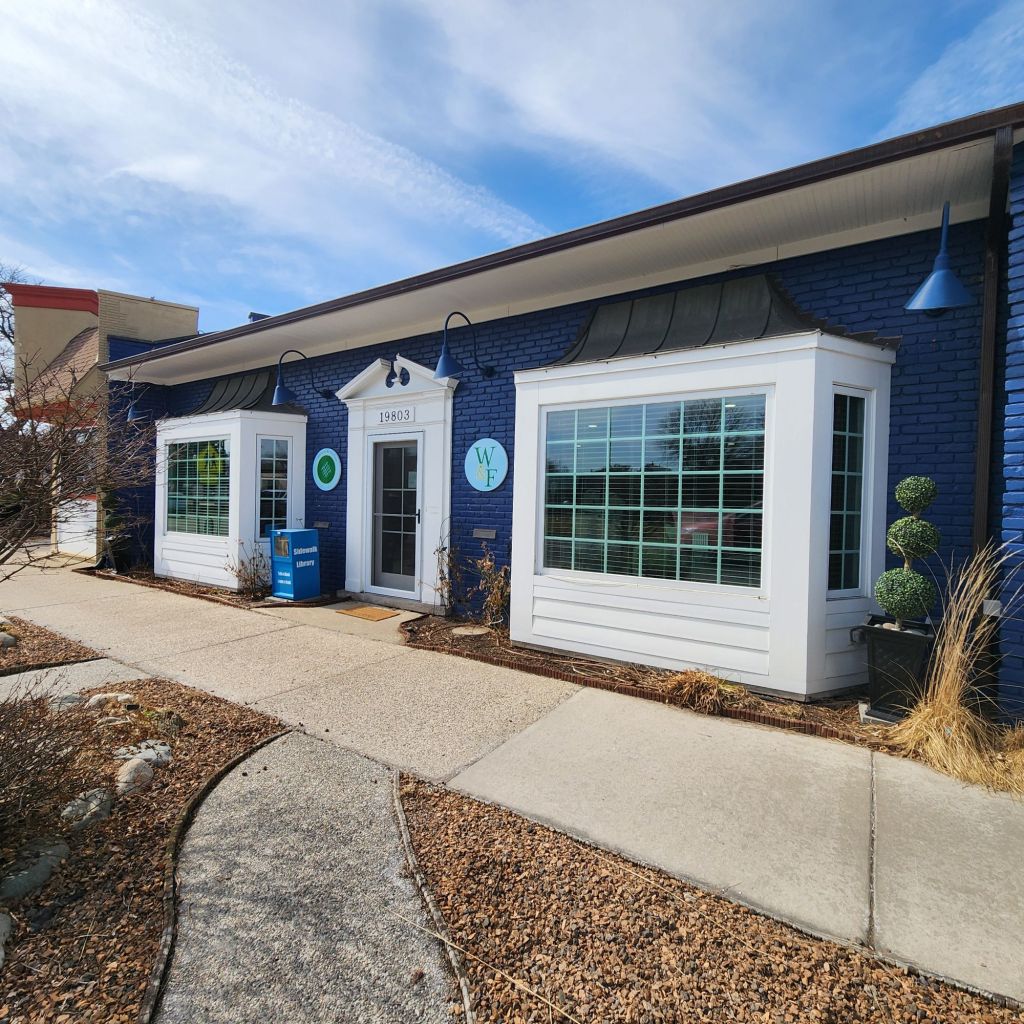
We stopped at the Knotted Needle first and then a half mile down the road to The Wool and the Floss. We’ll be going to The Needleworks (5 min from the Somerset Inn) as part of Dawn Donnelly’s class to buy our threads. And, Homestead Needle Arts is too far northwest.
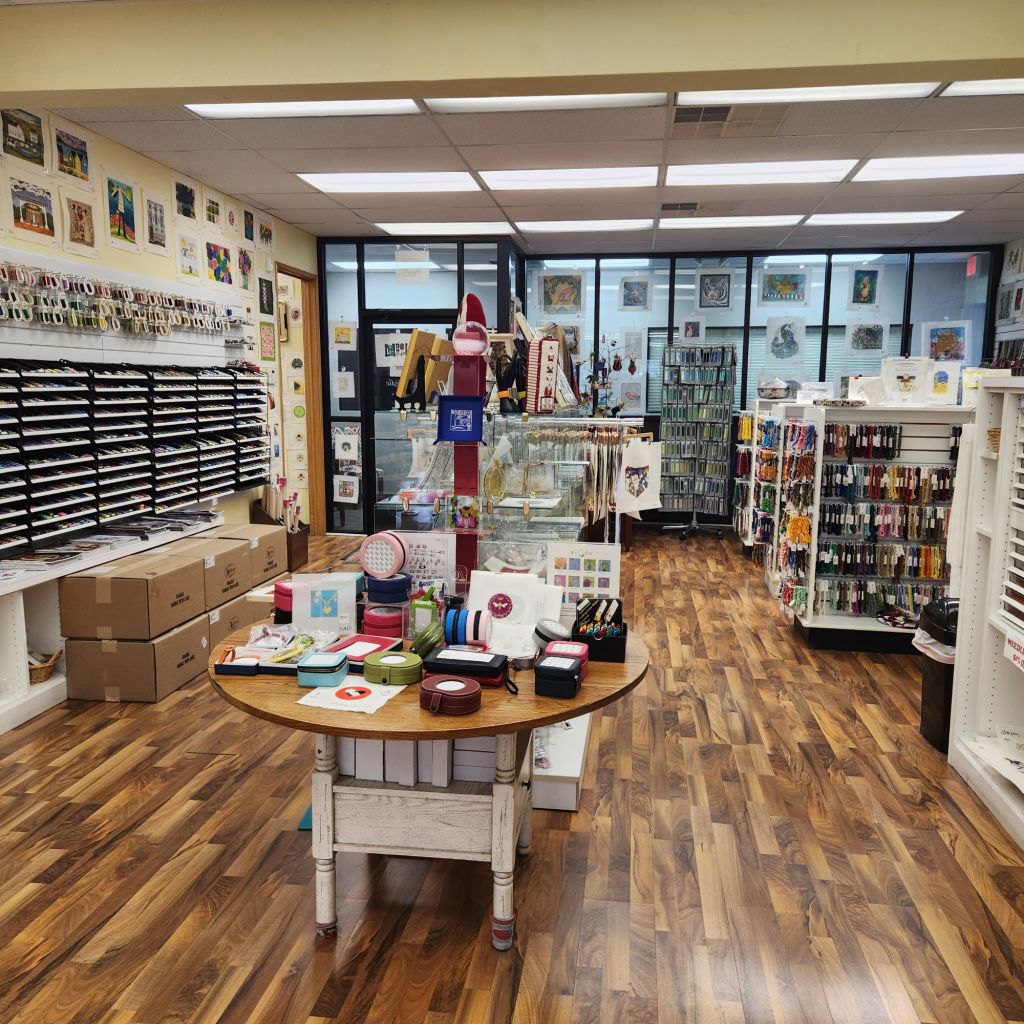
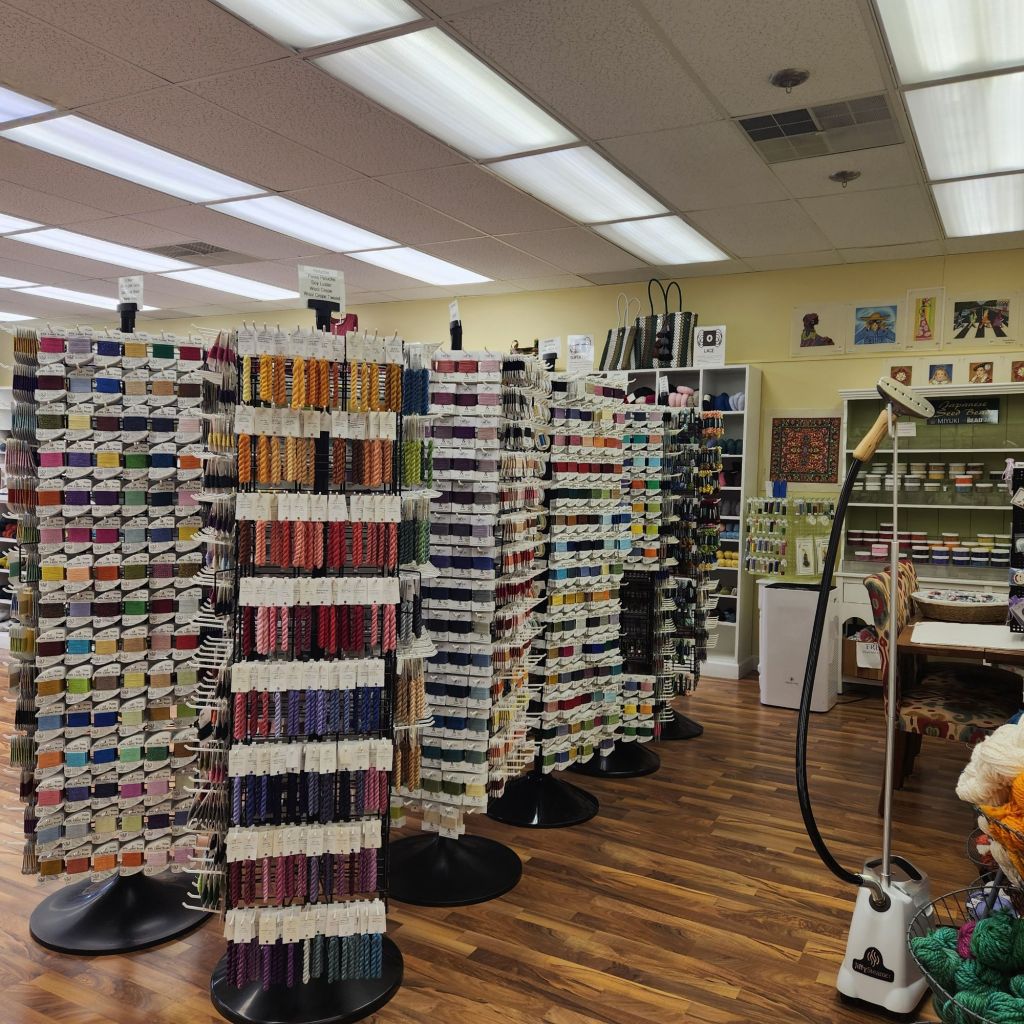
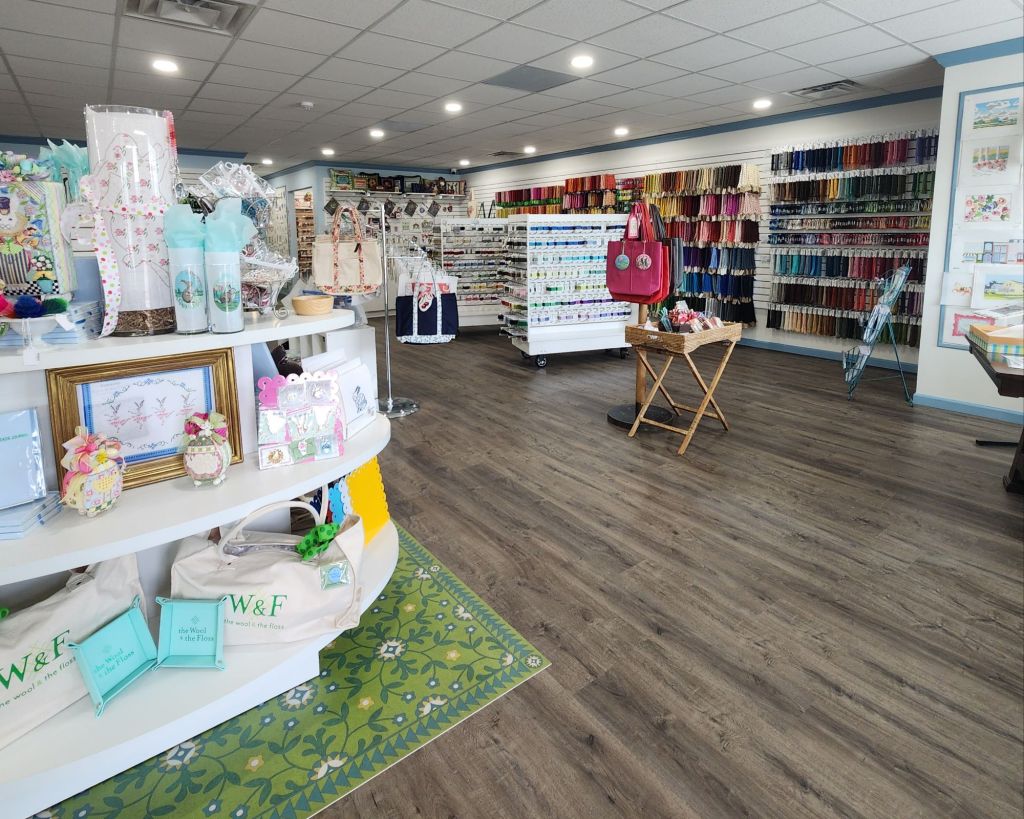
Becky, the owner of Knotted Needle showed me around her store. The rooms are huge and filled with all sorts of goodies! She’s getting ready to display the new Radiance Metallics, adding to her 135 lines of threads. These photos don’t show the yarns for knitting, tables up front for casual stitchers to sit around, or the back room with more goodies and 2 more tables for classes! There is a finisher, the Finishing Fairy, Amanda Metes teaching there this weekend, and Julia Snyder in July.
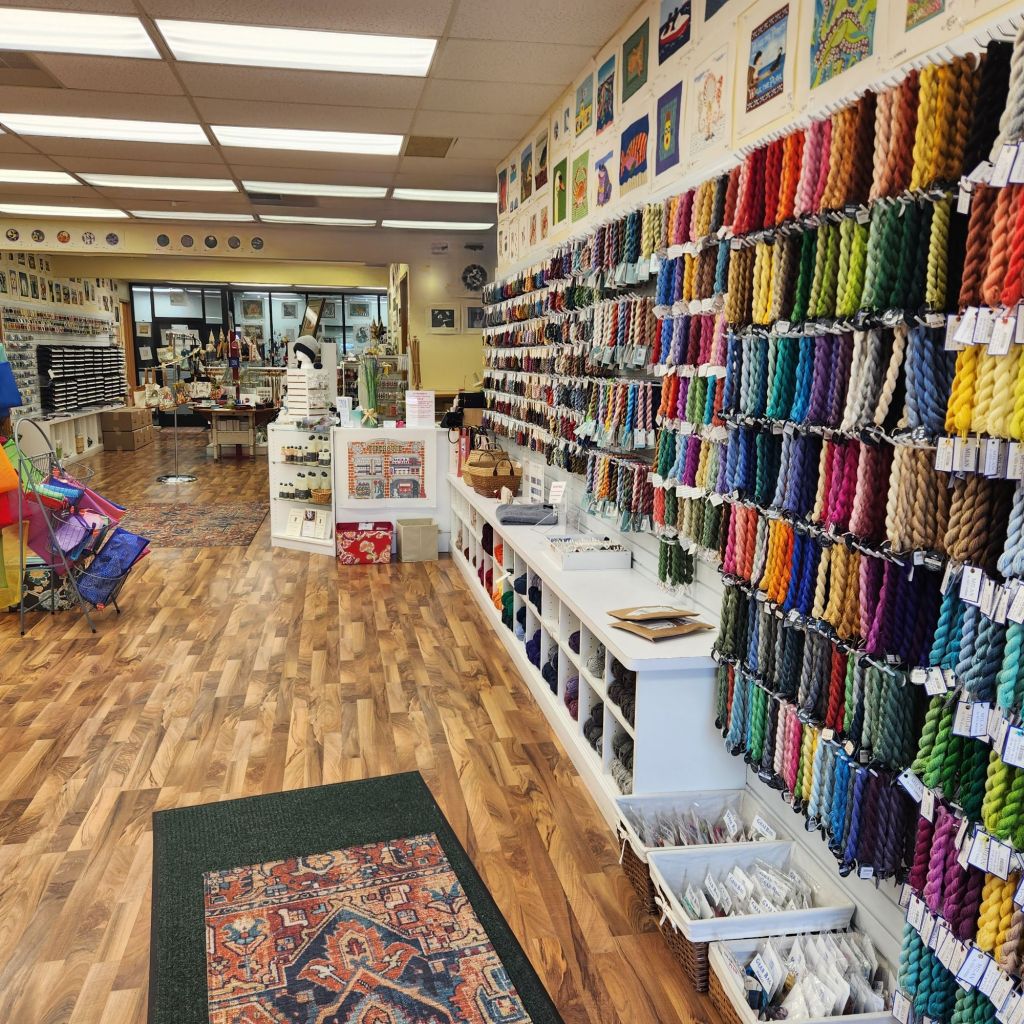
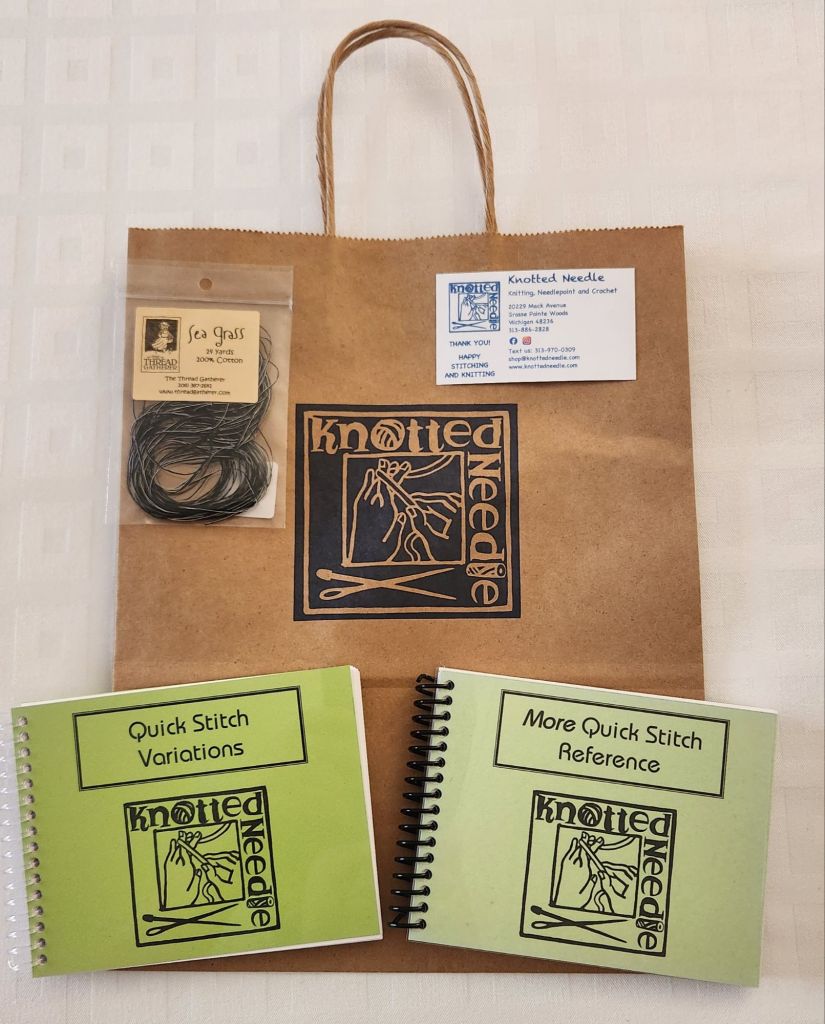
I couldn’t resist the 2 books (more details another time), and I will definitely use The Thread Gatherer, Sea Grass, Tuxedo for my class piece. The thread stock listed online is accurate to the quantity available when you order it. A nice feature.
The women at The Wool and the Floss were all busy getting busy for their grand opening Saturday. They moved recently to this cute store. I hope to fit those embellishments onto my design too. And, I had to have a tiny laying tool!
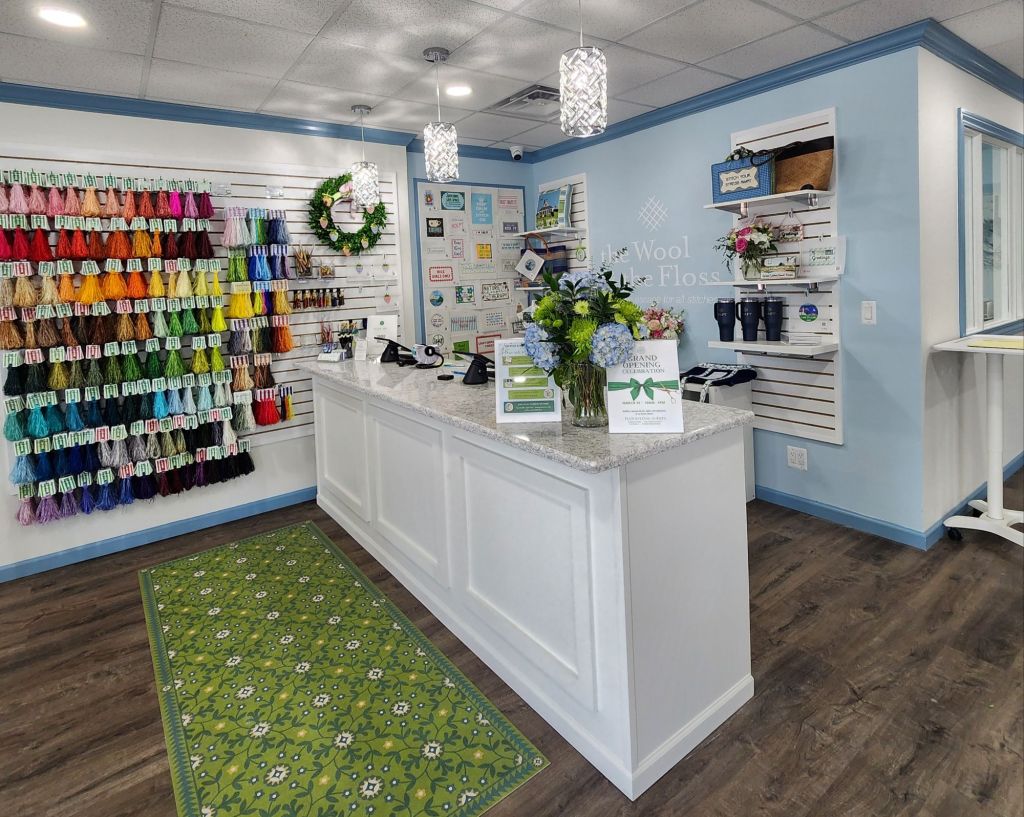
The area is lucky to have both stores!
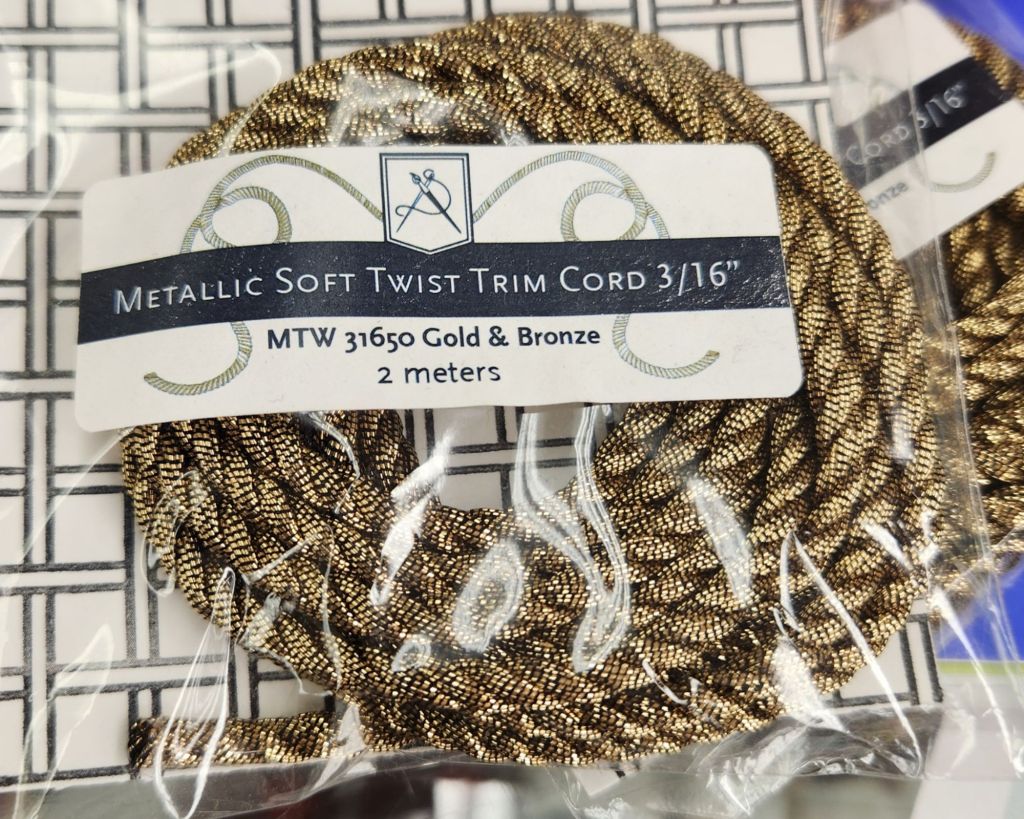
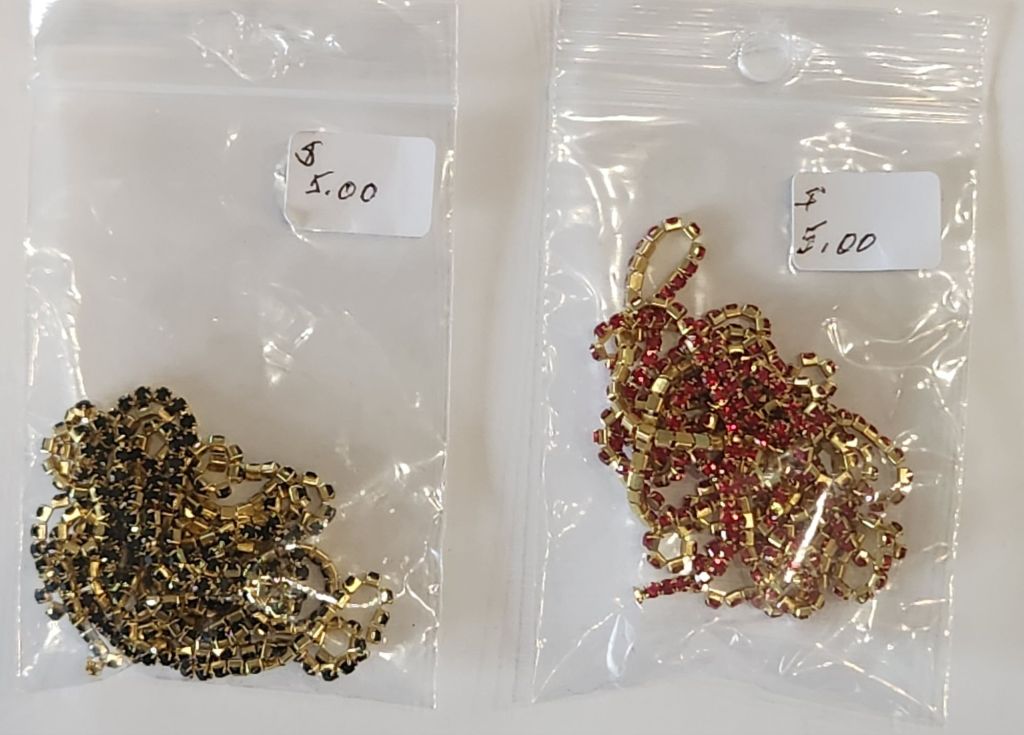
This thread will make great cording for finishing. I have it in red for my heart. Fireside Stitchery carries the thread as well.
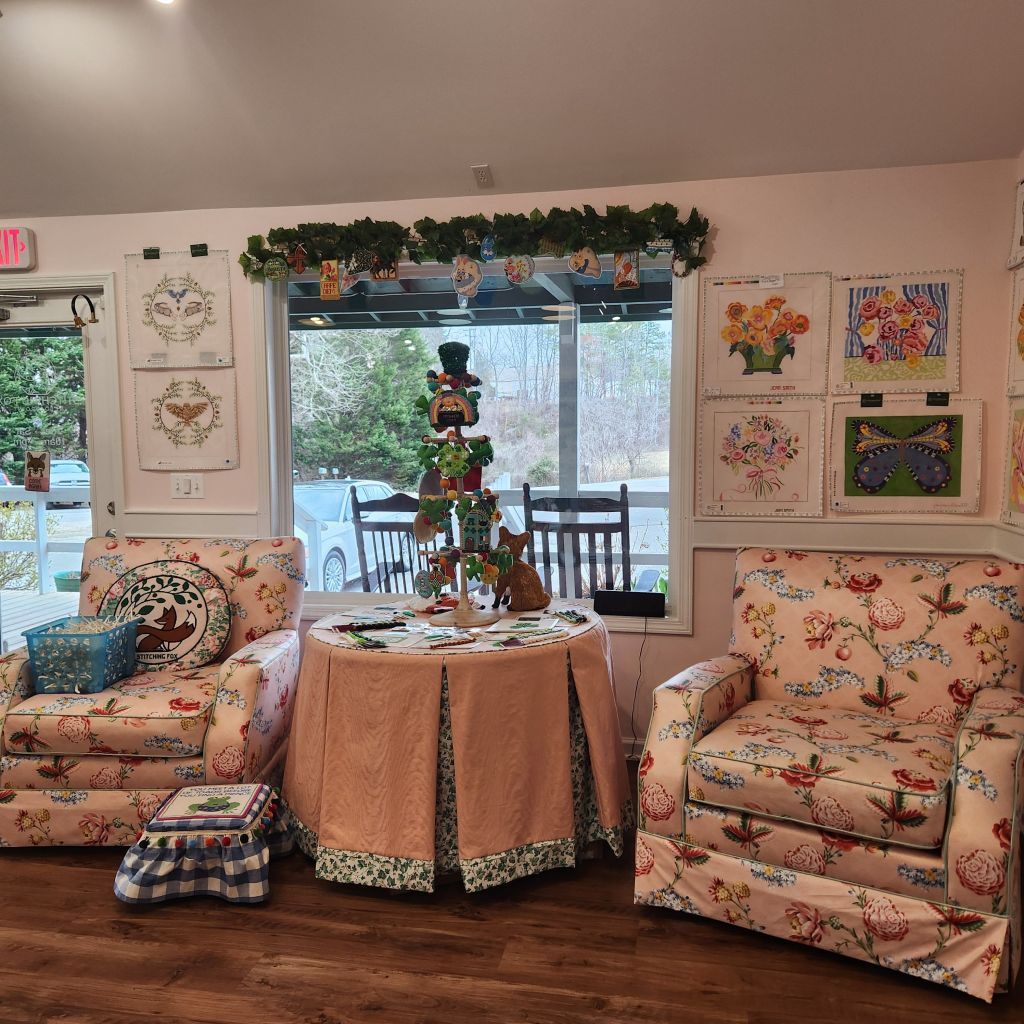
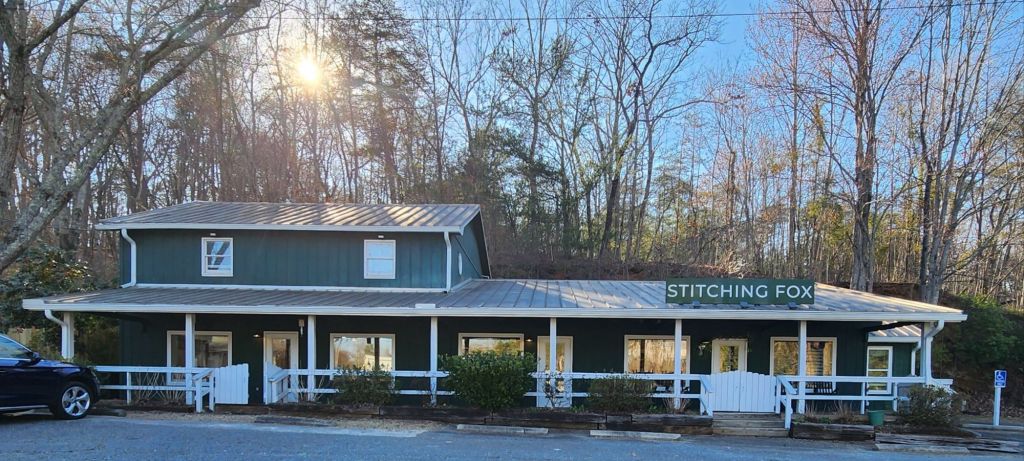
Just over the border from North Carolina lies a lovely store, Stitching Fox owned by Kathryn, who gave me a tour of the store. She’s been growing and learning along with her clients since she fulfilled her dream of opening a needlepoint store in 2020. She’s bound to succeed!
I bet a few significant others have enjoyed these chairs! Bill was golfing, or he’d have been there.
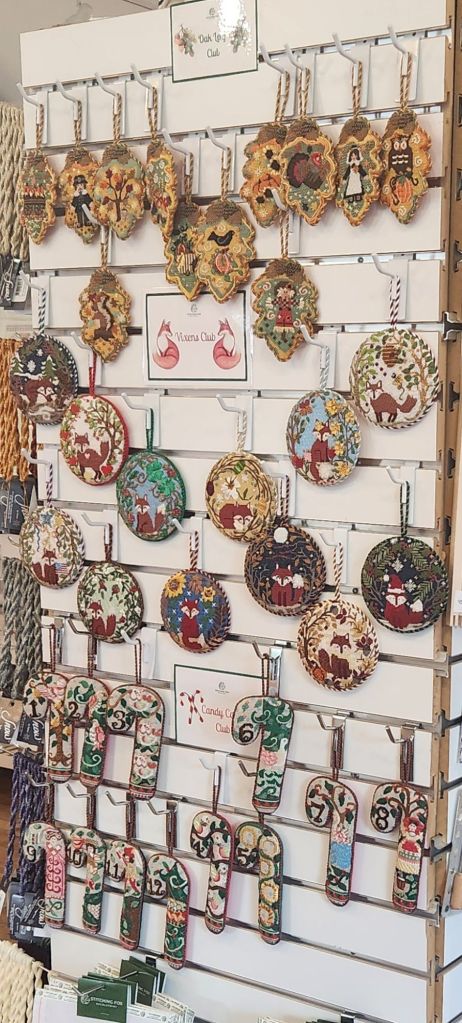
She has several monthly clubs for Fall Leaves, Foxes, and Candy Canes.

There are trunk shows and 30% off clearance items so she can bring home new items from Market.
Mary Pat is one of her right hand gals along with Vicki G, who teaches on Saturday and writes stitch guides for the store. This place may be the Southern Fireside Stitchery! Friendly people and really well stocked thread lines, especially for the most popular threads with 12″ deep pegs.
And there will be a good number of classes in 2025 with Kelly Clark (canvas embellishment), Brenda Stofft (sessions for Baby Santa and Baby Bunnies & Cart), Kate Dickerson & Elaine Aidonis (canvas embellishment), and Cynthia Thomas (Halloween Hat canvas, 2 sessions of BYO canvas embellishment & Help I’m Stuck, and a 1-day retreat for an anything is fair game day). She has great lighting and plenty of space. You can’t even see the 4th table at the far end and around the corner.
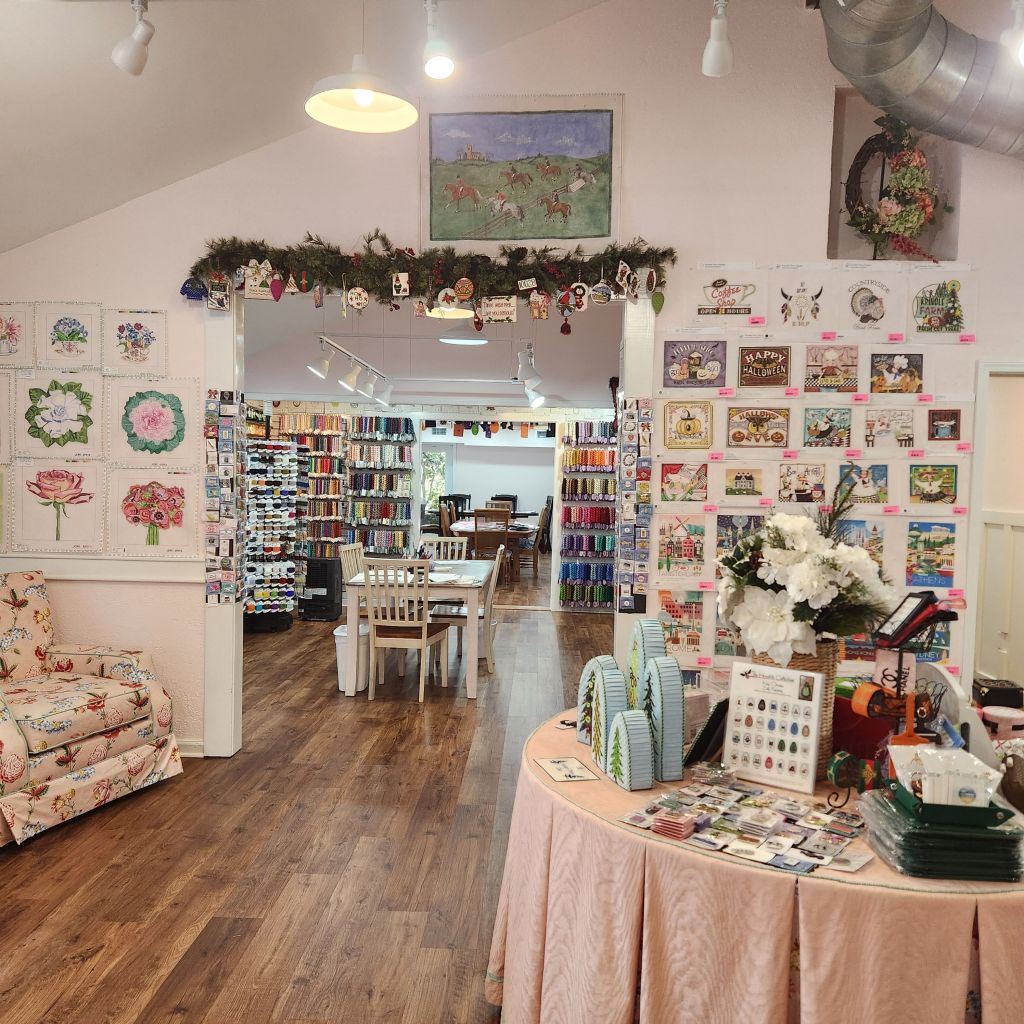
Stitching Fox has a nice selection of threads (about 50 thread lines), some miscellaneous items such as Access Commodites Double Twist Gimp, rhinestone chains, and a rack with leftover threads from past classes.
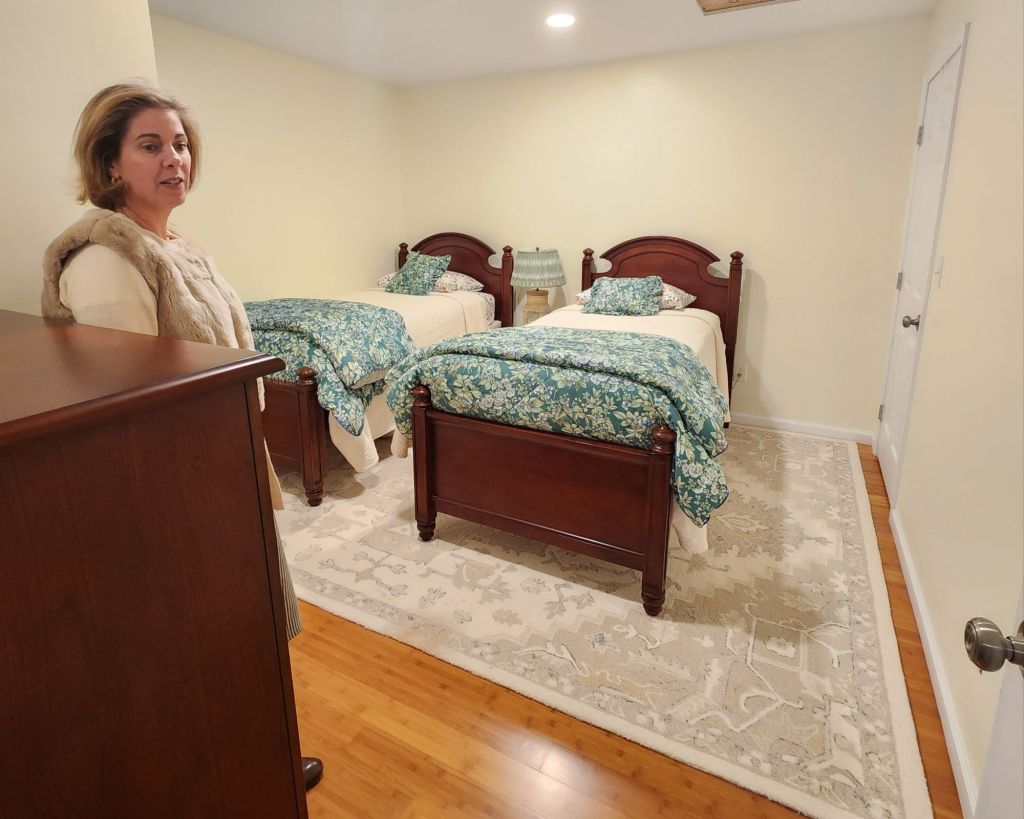
Then, I was blown away by the suite upstairs. See the link to Book Your Stay on her website! You can book the 2 bedrooms/1 bath/kitchen/living room by the night. How cool is that! The teachers get to stay there when they teach. No wonder Brenda will be there 6 days and Cynthia will be there 8 days. It certainly would make a great escape trip for 3 or 4 people to stay.
I did get her store’s magnet that looks just like her store! Accoutrement Designs has fantastic magnets.

The thread and book that I picked up will be subjects for another time.
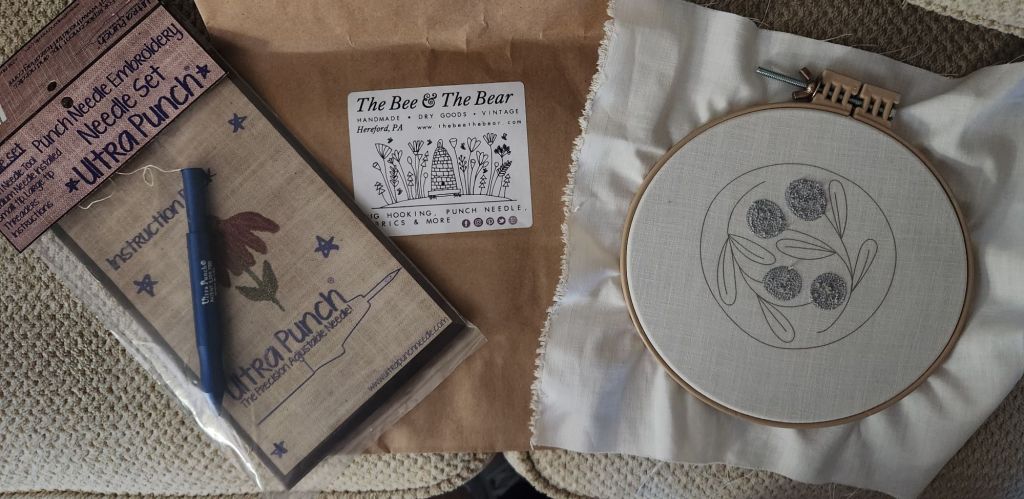
Filed under: General comments, Needlepoint Shops, Punch Needle, The Bee & The Bear - Punch Needle
I have (or had) 3 punch needle projects that I tried without success. They were not where I expected them to be. I was going to take them to my class. Damn, Bill was right – he said I wouldn’t be able to find them! Is it possible that I gave up on them and put them in an Ebay auction at Fireside Stitchery?
Here’s a photo of the one I picked up in 2013 at Liberty Cottage, a Folk Art Stitchery store – close to Expressions in NeedleArt in Canandaigua, NY. I know this thanks to my post https://melitastitches4fun.com/2013/07/17/needlepoint-visit-to-rochester-canandaigua-ny/. I’m happy to say both stores are still operating. I don’t get there too often but they are well worth the visit if you’re in the area (30 minutes southeast of Rochester).
I signed up for this class as soon as I saw “Punch Needle with Embroidery Floss for Beginners” would be at Mainline School Night(.org). The teacher is Katie Kriner, Author, Fibert Artist, Shop Owner of The Bee & The Bear, which I see is in Hereford, PA (about 1 hour 20 minutes north of Philadelphia-kind of between Allentown and Reading). From the photos, I would describe it as a Folk Art Stitchery store, too.
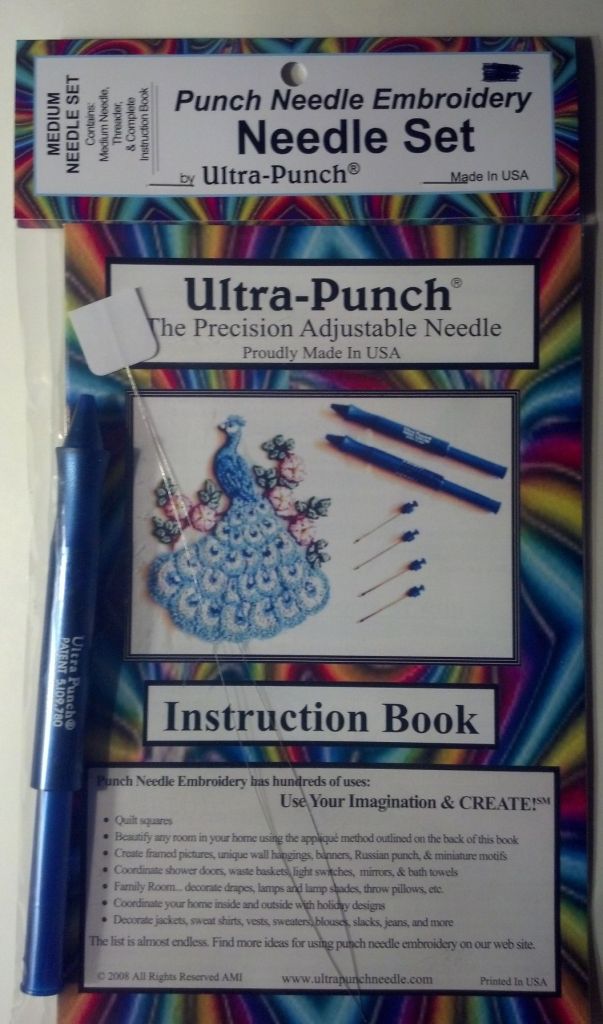
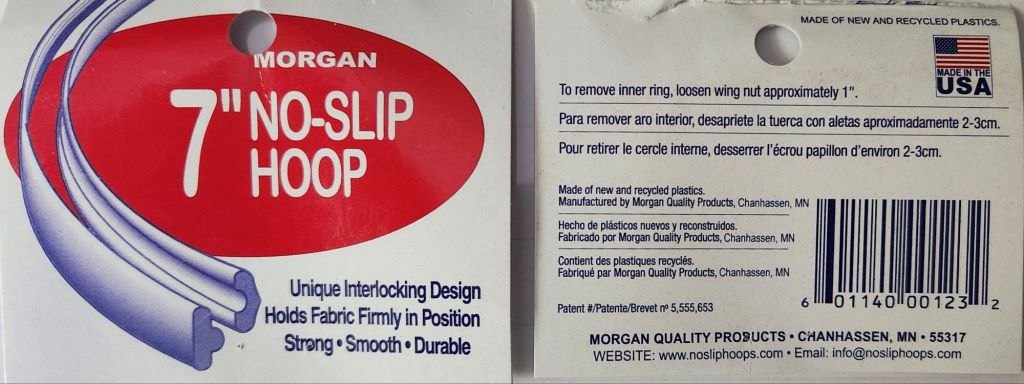
Class description: Learn to punch an intricate floral 4” embroidery hoop; choosing between various different flower colors. Leave with instruction and knowledge to punch and the tools to create your own future pieces. Class materials include an ultra punch punch needle, 7” Morgan interlocking hoop for punching, wooden display hoop, backing fabric, and floss to complete the piece.
The class was in the Creutzburg Center – 260 Gulph Creek Road (in Harford Park) Radnor, PA 19087. They hold a variety of classes there. The parking lot was full. It’s a great venue.
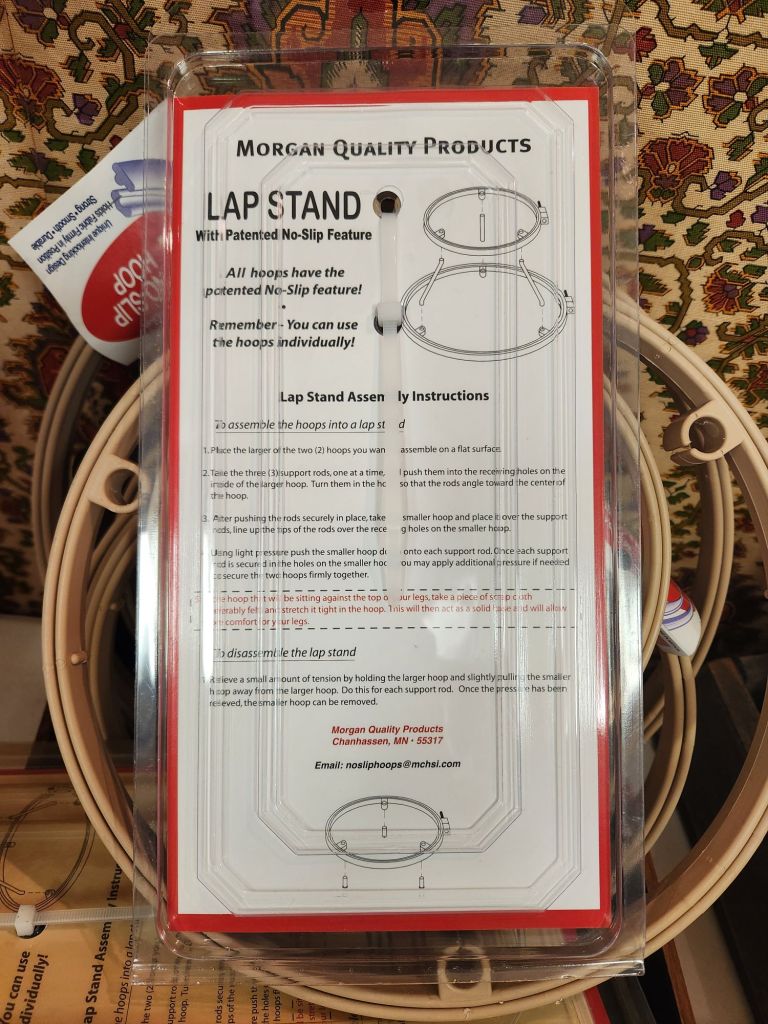
The Morgan hoop as a single hoop is fantastic. You can get the fabric really tight because of a ridge inside the one hoop (interlocking design). You can get a pair of 5″/7″ or 7″/10″ and make a lap stand. I’m surprised that nobody in EGA has ever mentioned these.

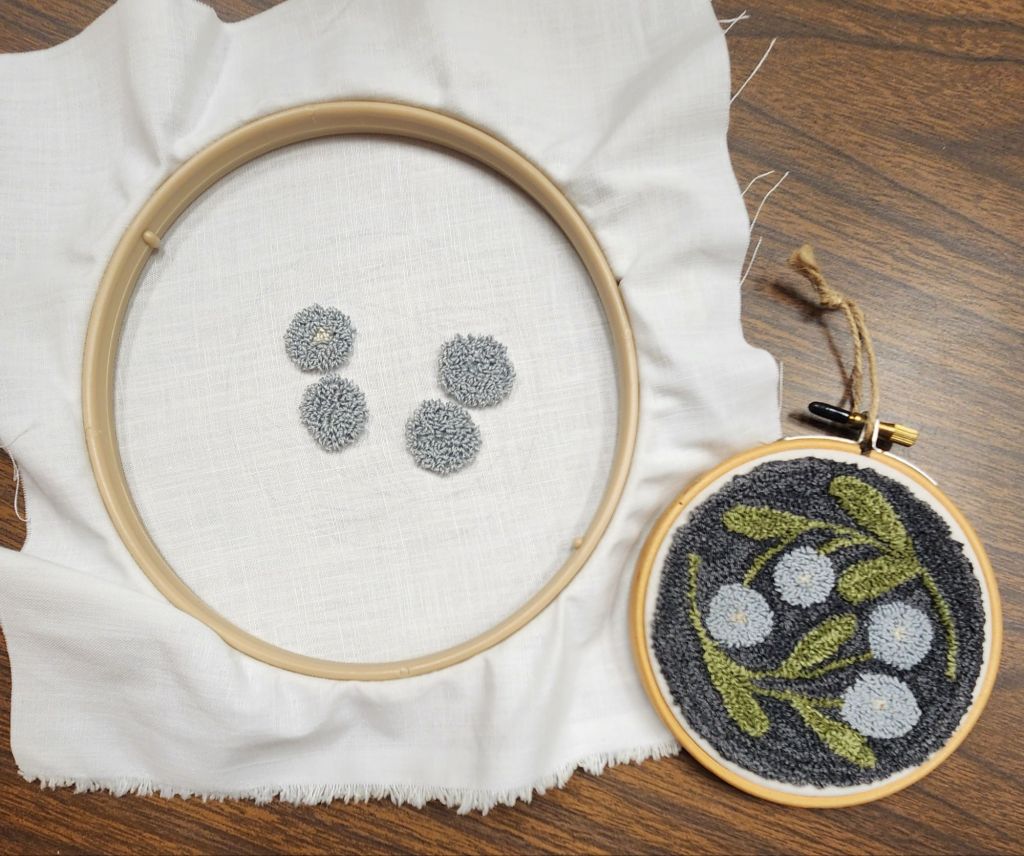
The ultra punch needle is the same as the one I can’t find. Perhaps I didn’t thread the needle properly. Or, perhaps I didn’t understand that you punch on the design side and that is actually the back.
This is what I got done during class (left side) and what it should end up looking like (teacher’s sample on the right).
It was a small class of 8 people and 2 hours went quickly. Katie is a mother of 2-year old twins (boy and a girl). Very nice woman. She brought some of everything from her store to entice us! I can always make a road trip to Hereford, especially if we visit our friend near Jim Thorpe.
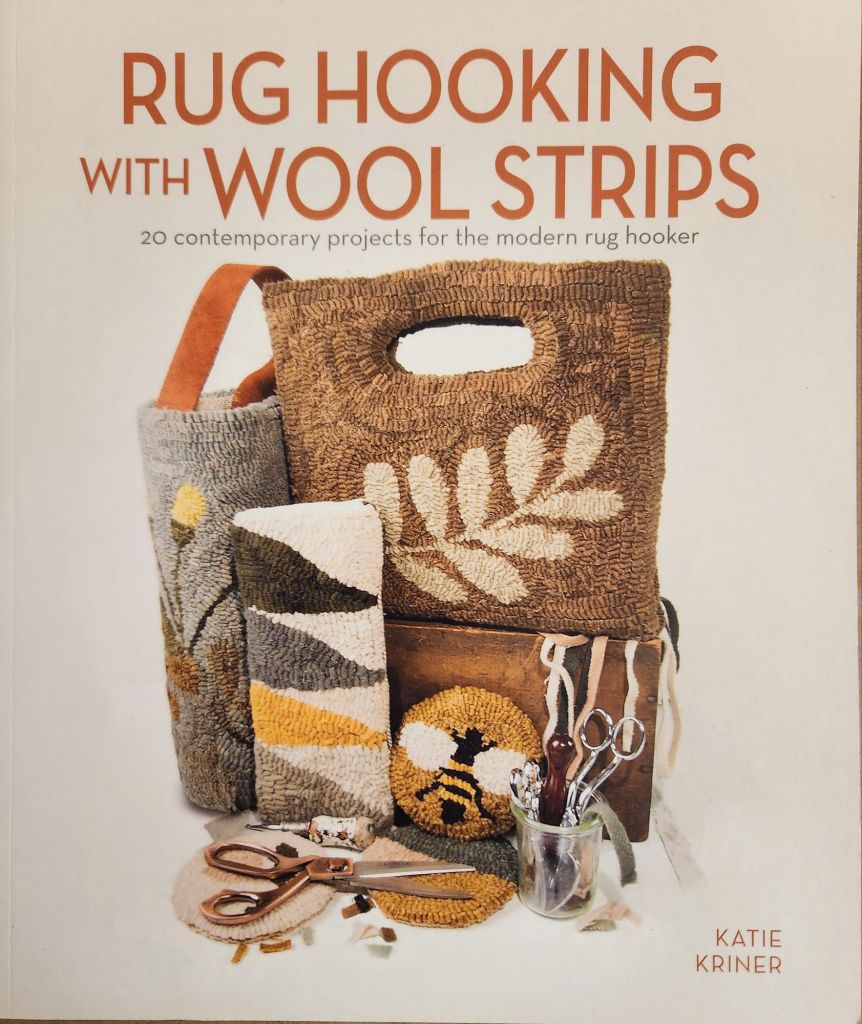
Katie wrote a book during covid. She sells it at her store, on her website, or Amazon. She has an Etsy store. I’ll probably try her rug hooking class. It uses a different tool and yarn.
As I was finishing this post, I realized that the punch needle that I purchased should be in my infrequently used “tool” drawer in the basement cabinet. I was looking for a project. I wondered why I’d buy a peacock to punch. It was there! Now, I can punch with 2 different colors without switching threads. It’s a process to thread the punch needle. I still don’t know where those 2 little punch needle projects are hiding. Katie’s ultra punch needle came with 2 threaders, 2 springs, and 3 needles (small, medium, and large). So, I am set with equipment.
Filed under: Canvas Master Craftsman Program, Embroidery Guild of America, Fireside Stitchery, Needlepoint Shops, Step 6
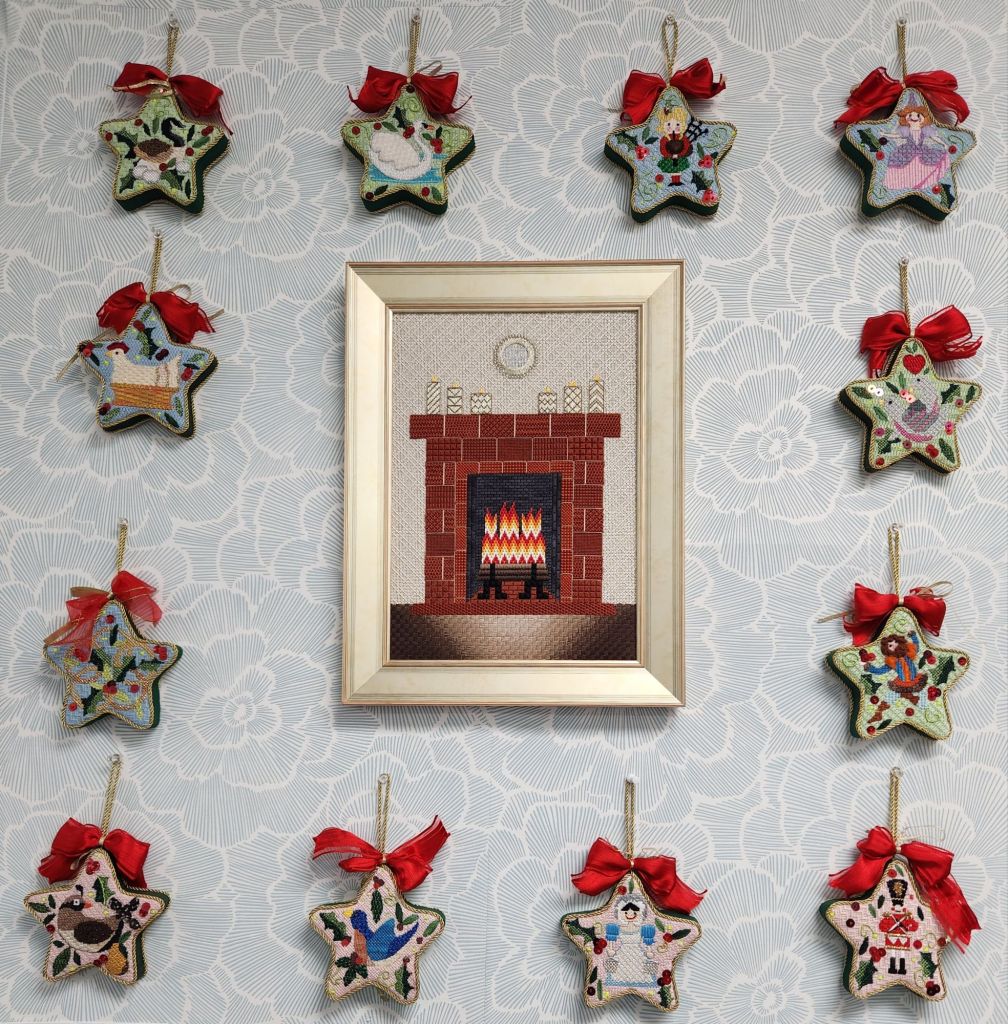
I love where they decided to place my Fireside Sampler inside Fireside Stitchery! It’s inside the front desk area displayed with a lovely set of ornaments. Lynn wants to get a fireplace, but in the meantime . . .
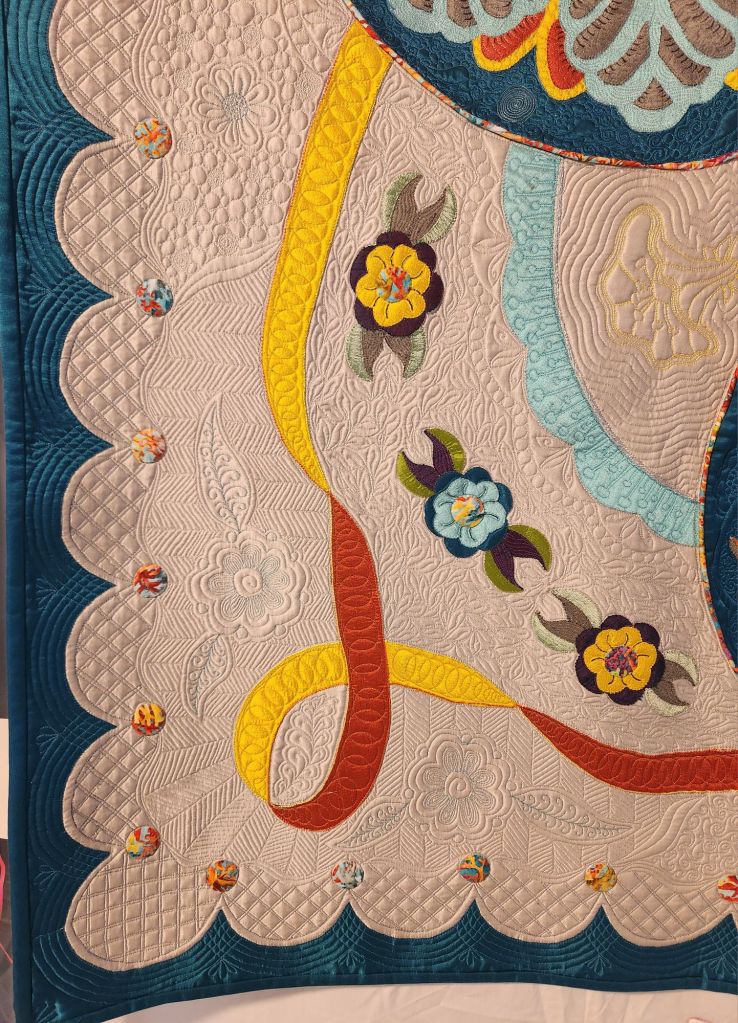
I got to see it hanging today after visiting the Valley Forge Quilt Show which was spectacular as always. I didn’t ask for permission to post any of the quilts, but I think i can post a part of Becky’s quilt to show off her talents, particularly noting the machine quilting she did herself. Stunning. Such a talented group of quilters. Very inspirational. And, they are excellent bakers as well. I got a few goodies!
Stephanie, of Spellbound Stitchery (.com), designed and taught a painting class at Fireside Stitchery today. She’s a lovely young woman, and I wish her all the best as she grows her line of canvases.

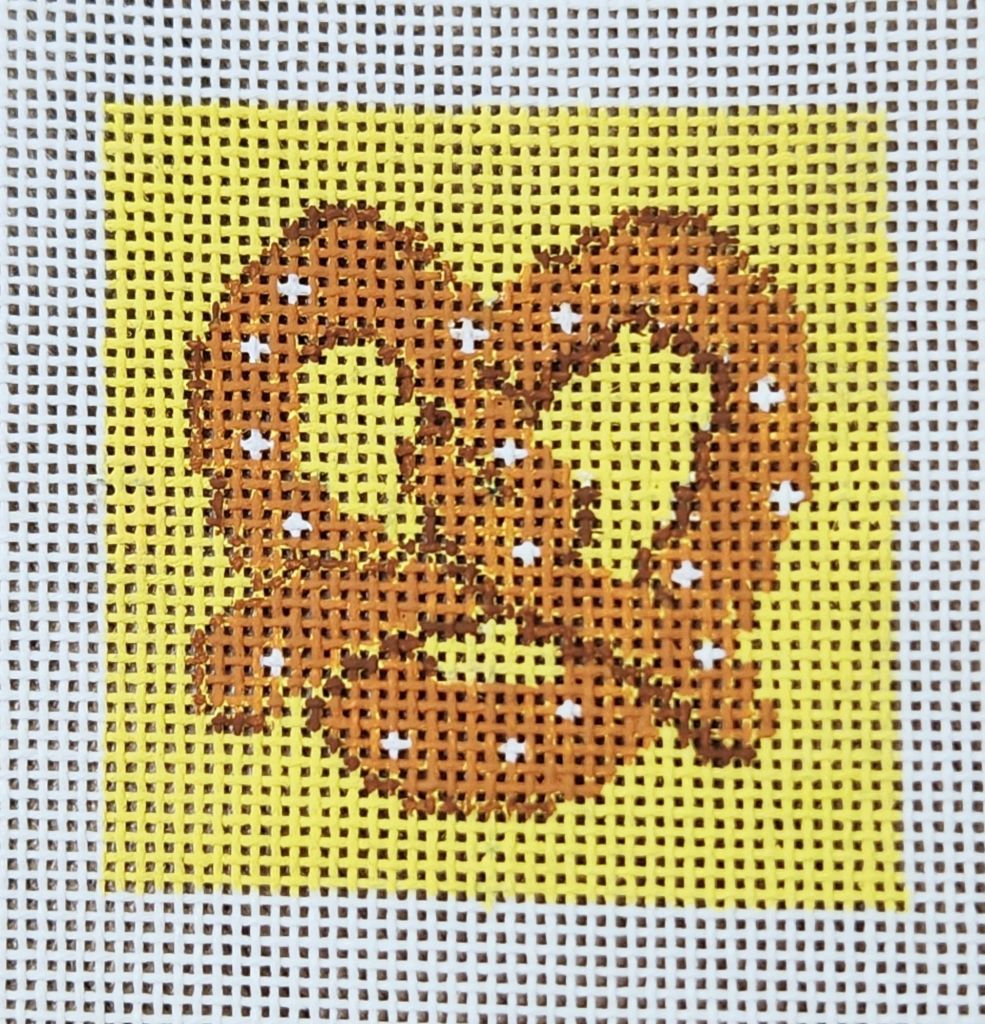
In just 2 hours, we painted our Philly Pretzel designed by Stephanie. It is small at 2.25″ square.
I didn’t count right to start off! I got the center marked without issue but then must have double counted the center when I marked off the 40 x 40 area.
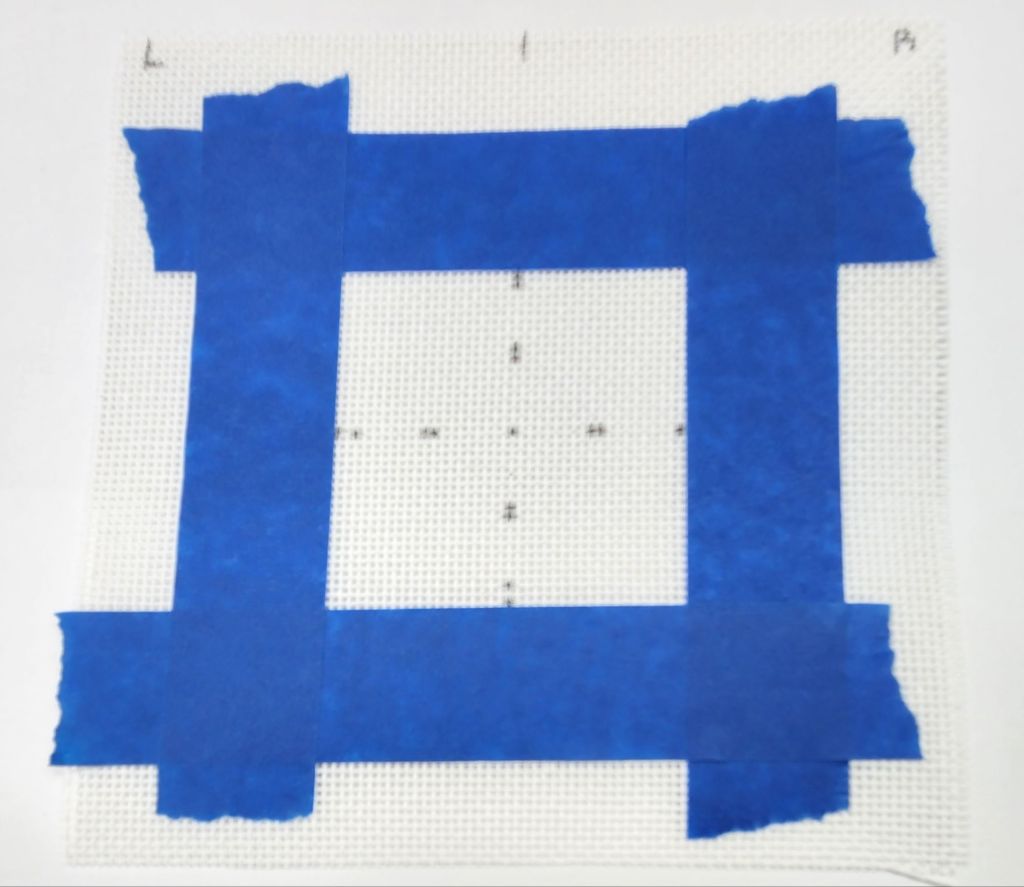
Stephanie said to go slow as we counted out the border, and I should have gone slower. Stephanie found my error & I covered the spots with white and repainted them in the proper brown. Cute little design.
I’d like to paint a second one at home in a quiet setting. There were 2 tables of 8 at each table! I can see where my painting is less than professional, but it gets stitched over anyway. So, that makes me think I should just stitch it from the cross-stitch grid provided. But her tips on painting from a grid make sense, and class was fun. Two of my ANG Main Line Stitchers chapter members were in the afternoon class, at least one member in the morning class, and one past member came over to say hello.
