Filed under: Brandywine Chapter, Embroidery Guild of America, General comments, Needles, Tools, Zokins
Lots to share about my EGA Brandywine Guild meeting earlier this week!
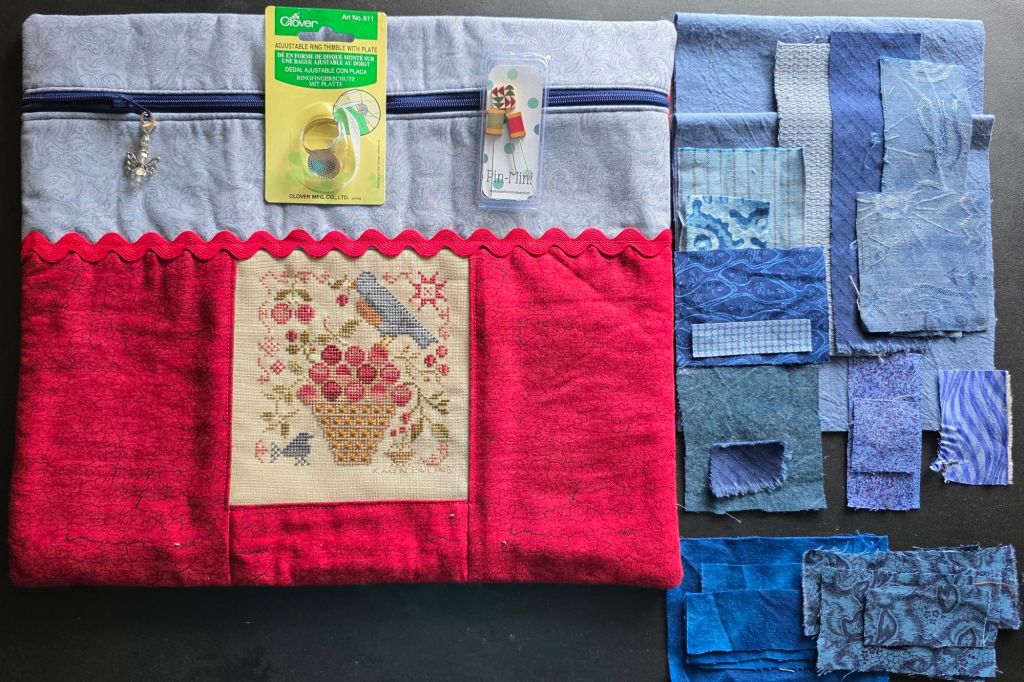
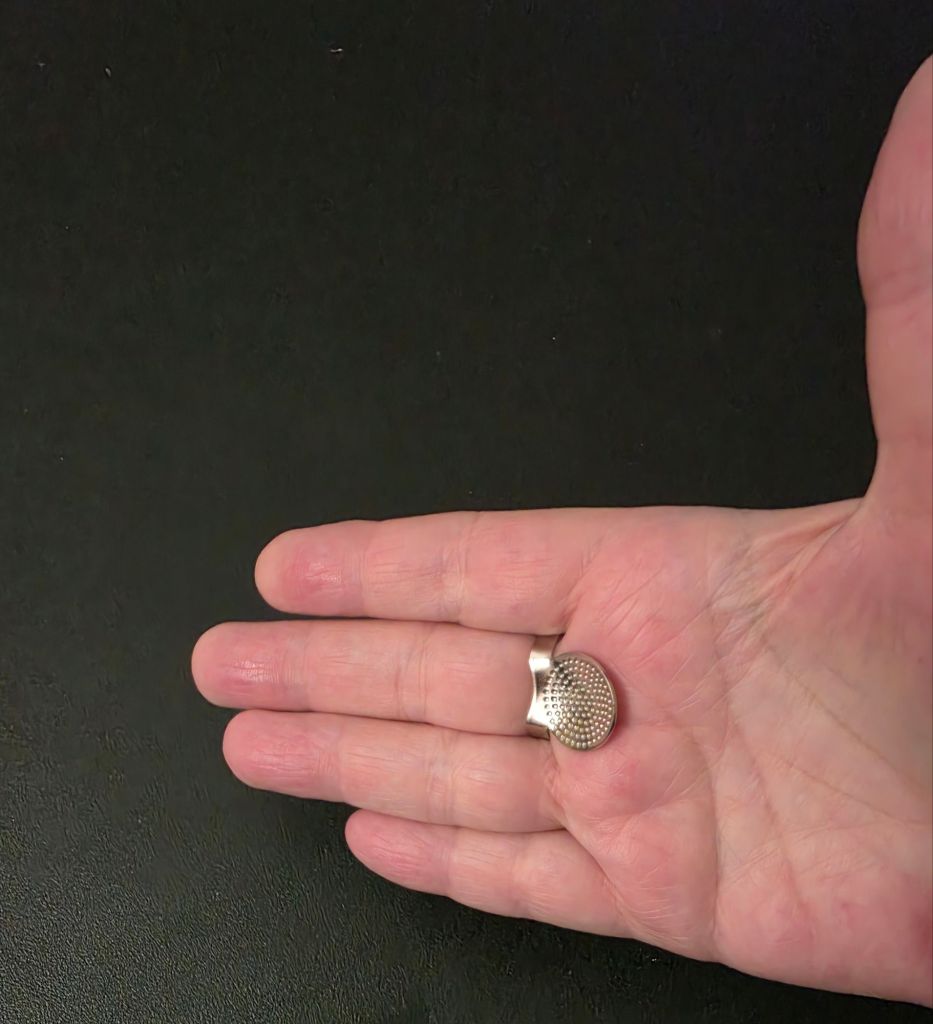
Kathy A and Karen S had prepared pieces of blue cloth and scraps of various fabrics for us to select. The right side of photo are the pieces I took. There were 12 of us. There could have 12 more and still had fabric left over! They also purchased a Clover adjustable ring thimble with plate for everyone. A new tool. It feels comfortable. Looking forward to trying it.
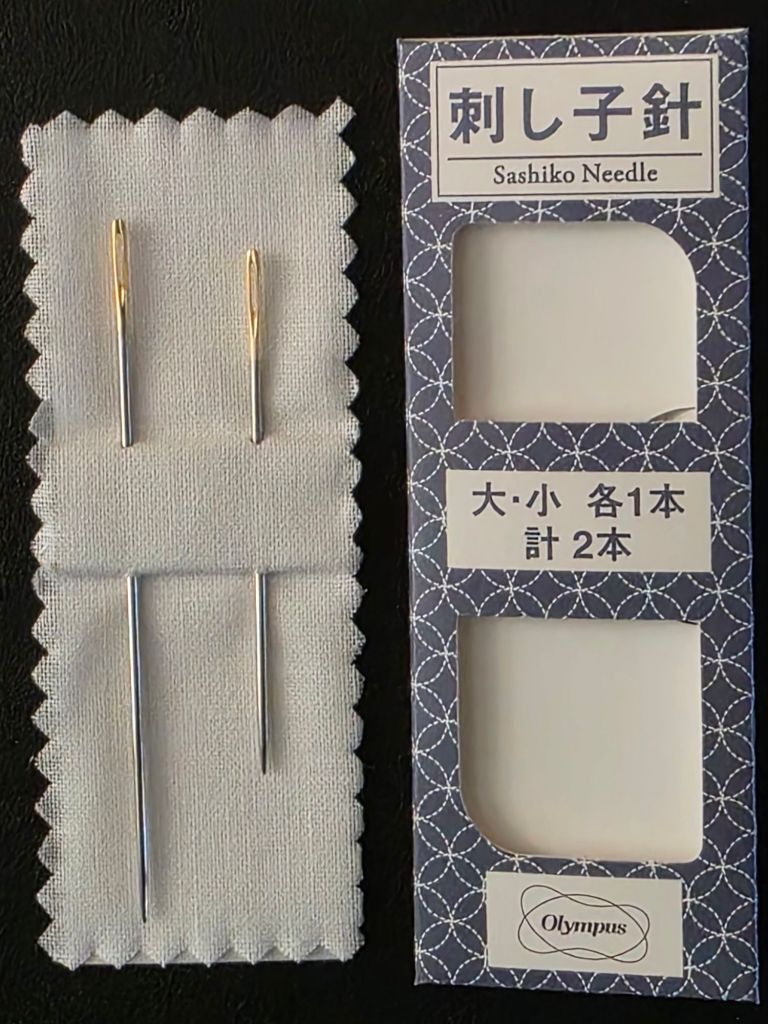
You stitch boro like you stitch Sashiko. So, I can use my Sashiko needles! I have a 2 pack. They have large eye for easy threading. The shorter (almost 1″) needles are for smaller, decorative designs while the longer needles (a little over 1.5″) are for straight stitches and basting. So, I will use the long one.
And, we got to share in the two opportunity baskets that Sue S, our Chapter’s MAR Rep won at the EGA-MAR Regional Seminar in Gettysburg! One of the baskets was from the EGA Molly Pitcher Stitchers Chapter in Carlisle, PA who are celebrating their 40th anniversary as a chapter. Congratulations and thank you for your generous contribution – it was a huge basket! Between the two baskets everyone got multiple gems. Not pictured are three red kitchen towels that I took.
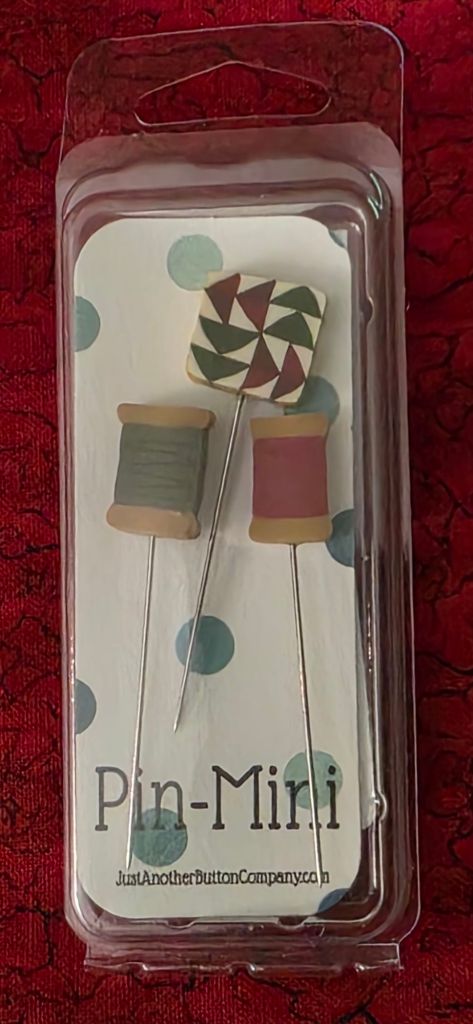
I wanted and needed the project bag for the blue fabrics since I had intended to work with my fabrics and still will. Karen R from Molly Pitcher Stitchers stitched a lovely design and finished in coordinating colors. The Mollies have stitched two of my designs, Overdyed Spools and A Spring Sampler. I visited them after Overdyed Spools was posted as a Petite Project. So, I really appreciate having something of theirs. The counting pins are cute and came from them too! These will be perfect to carry in my travel tool bag.
Here’s the arrangement of my fabrics ready to stitch into place. I used all the straight pins I own!
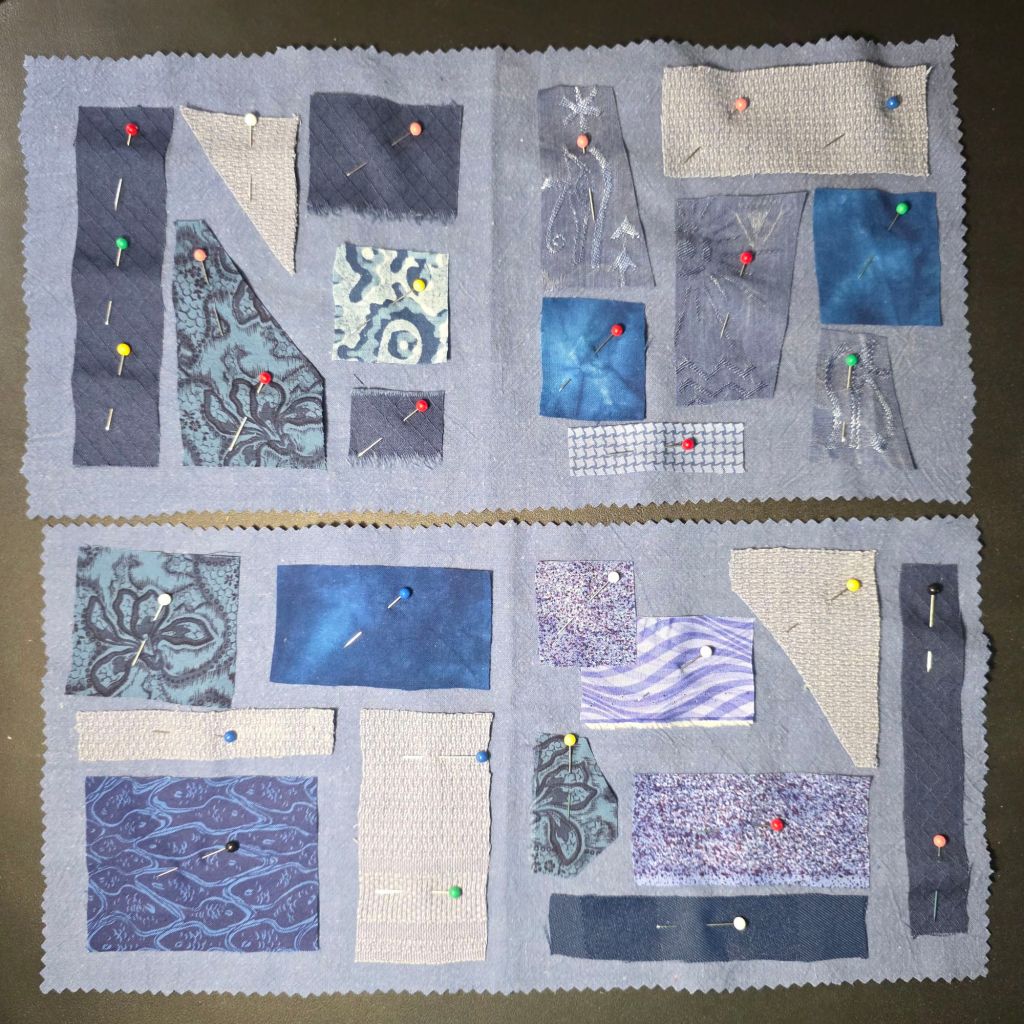
We have until September to stitch the small pieces onto the larger ones when we finish them into a cloth booklet (back to back with pages).
There may be alot of controversy over AI (Google in Chrome browser) but it’s sure easy and quick to get answers!
While handling Soie d’Alger right after Splendor in a project, I realized that Soie d’Alger is softer. They are both 100% silk. So, why the difference? Here’s what AI Overview provided:
The perception of Soie d’Alger being softer than Splendor is mainly due to differences in their manufacturing processes and fiber characteristics.
Soie d’Alger
Spun Silk: Soie d’Alger is a stranded spun silk made from “strusas,” a high-quality spun silk.
7 Plies: It is composed of seven easily divisible plies.
Softer Twist: Soie d’Alger has a slightly softer twist compared to cotton, which gives it a better “spread” when stitched and makes it feel softer.
Natural Sheen: It possesses a natural, soft sheen, unlike the chemically produced sheen of mercerized cotton.
Versatile: It’s suitable for various embroidery stitches and is known for its beautiful satin stitch and long and short stitch.
Splendor
Spun Silk: Splendor is also a spun silk, with 12 plies, according to Rainbow Gallery.
Tighter Twist: The twist of each individual strand in Splendor is tighter than many other silks, making it easier to handle and potentially less prone to snagging.
Handles like Cotton Floss: Due to its tighter twist, it handles more like cotton floss, which some stitchers find easier to work with.
In essence, Soie d’Alger’s softer twist and inherent softness contribute to its luxurious feel, making it particularly appealing for needlework where a delicate and elegant finish is desired. Splendor, while still a high-quality silk, has a tighter twist that can make it feel slightly firmer to some users.
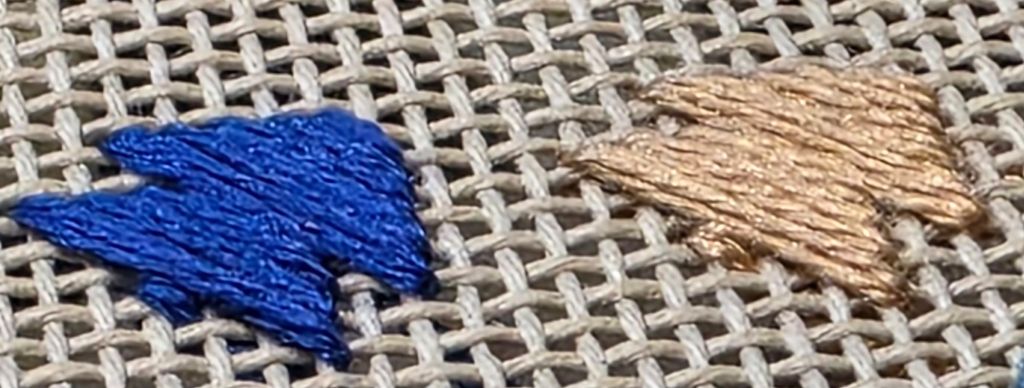
Very interesting and it called for a test.
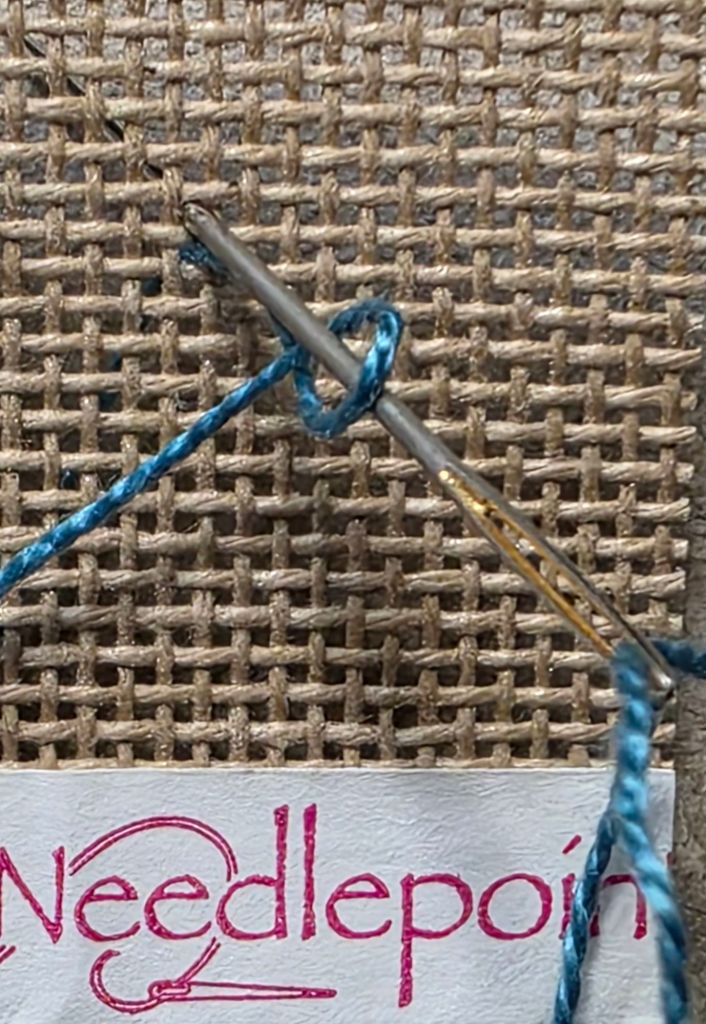
Using 4 strands of each, I stitched diagonal stitches over 1, 2, 3, 4, 5, and 6 canvas threads. Coverage is excellent for both but it did seem like Soie d’alger (tan) was more difficult to lay the threads and have them stay there. They have some loft to them that Splendor (blue) does not. Splendor held snug to the canvas with each stitch.
Using 3 strands of each, I found the Soie d’Alger easier to lay, stayed flatter than 4 strands, and coverage was still fantastic. It was a little harder to get the 3 strands of Splendor to cover but I did. The 3 strands of Soie d’Alger laid like 4 strands of Splendor.
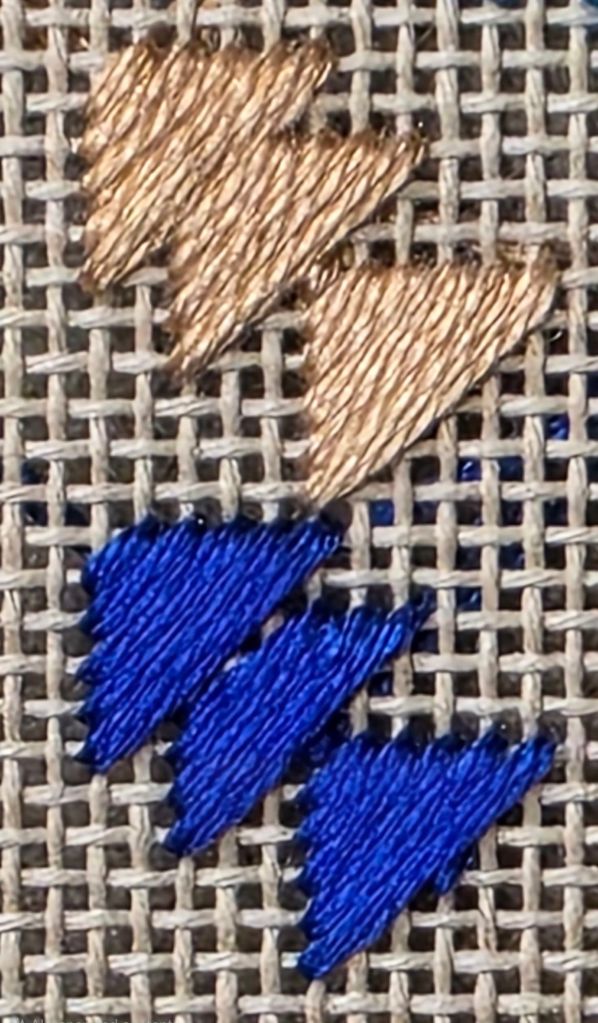
Very interesting indeed!
Filed under: Brandywine Chapter, Casalguidi Flower by Becky Quine, Embroidery Guild of America, Finishing, General comments
A lovely white lacquered tissue box from The Container Store is perfect for Casalguidi Flower by Becky Quine.
I posted about this design previously at https://melitastitches4fun.com/2024/07/25/roman-ruins-by-joan-rinehart-and-casalguidi-flower-by-becky-quine-for-ega-brandywine-chapter/
Since I have enough coasters, I thought about a tissue box for small designs/stitch samples. I initially bought a clear acrylic one but the tissue box didn’t fit. Crazy! Then, I decided clear wasn’t a good idea anyway. This one is white and 5″ wide x 6″ high, it fits a box of tissues, perfect size for small stitched pieces/samples, and is functional.
I finished it as a flat ornament wrapping the excess fabric on the back over a piece of magazine board and piece of wool felt. It is attached to the box with sticky back velcro.
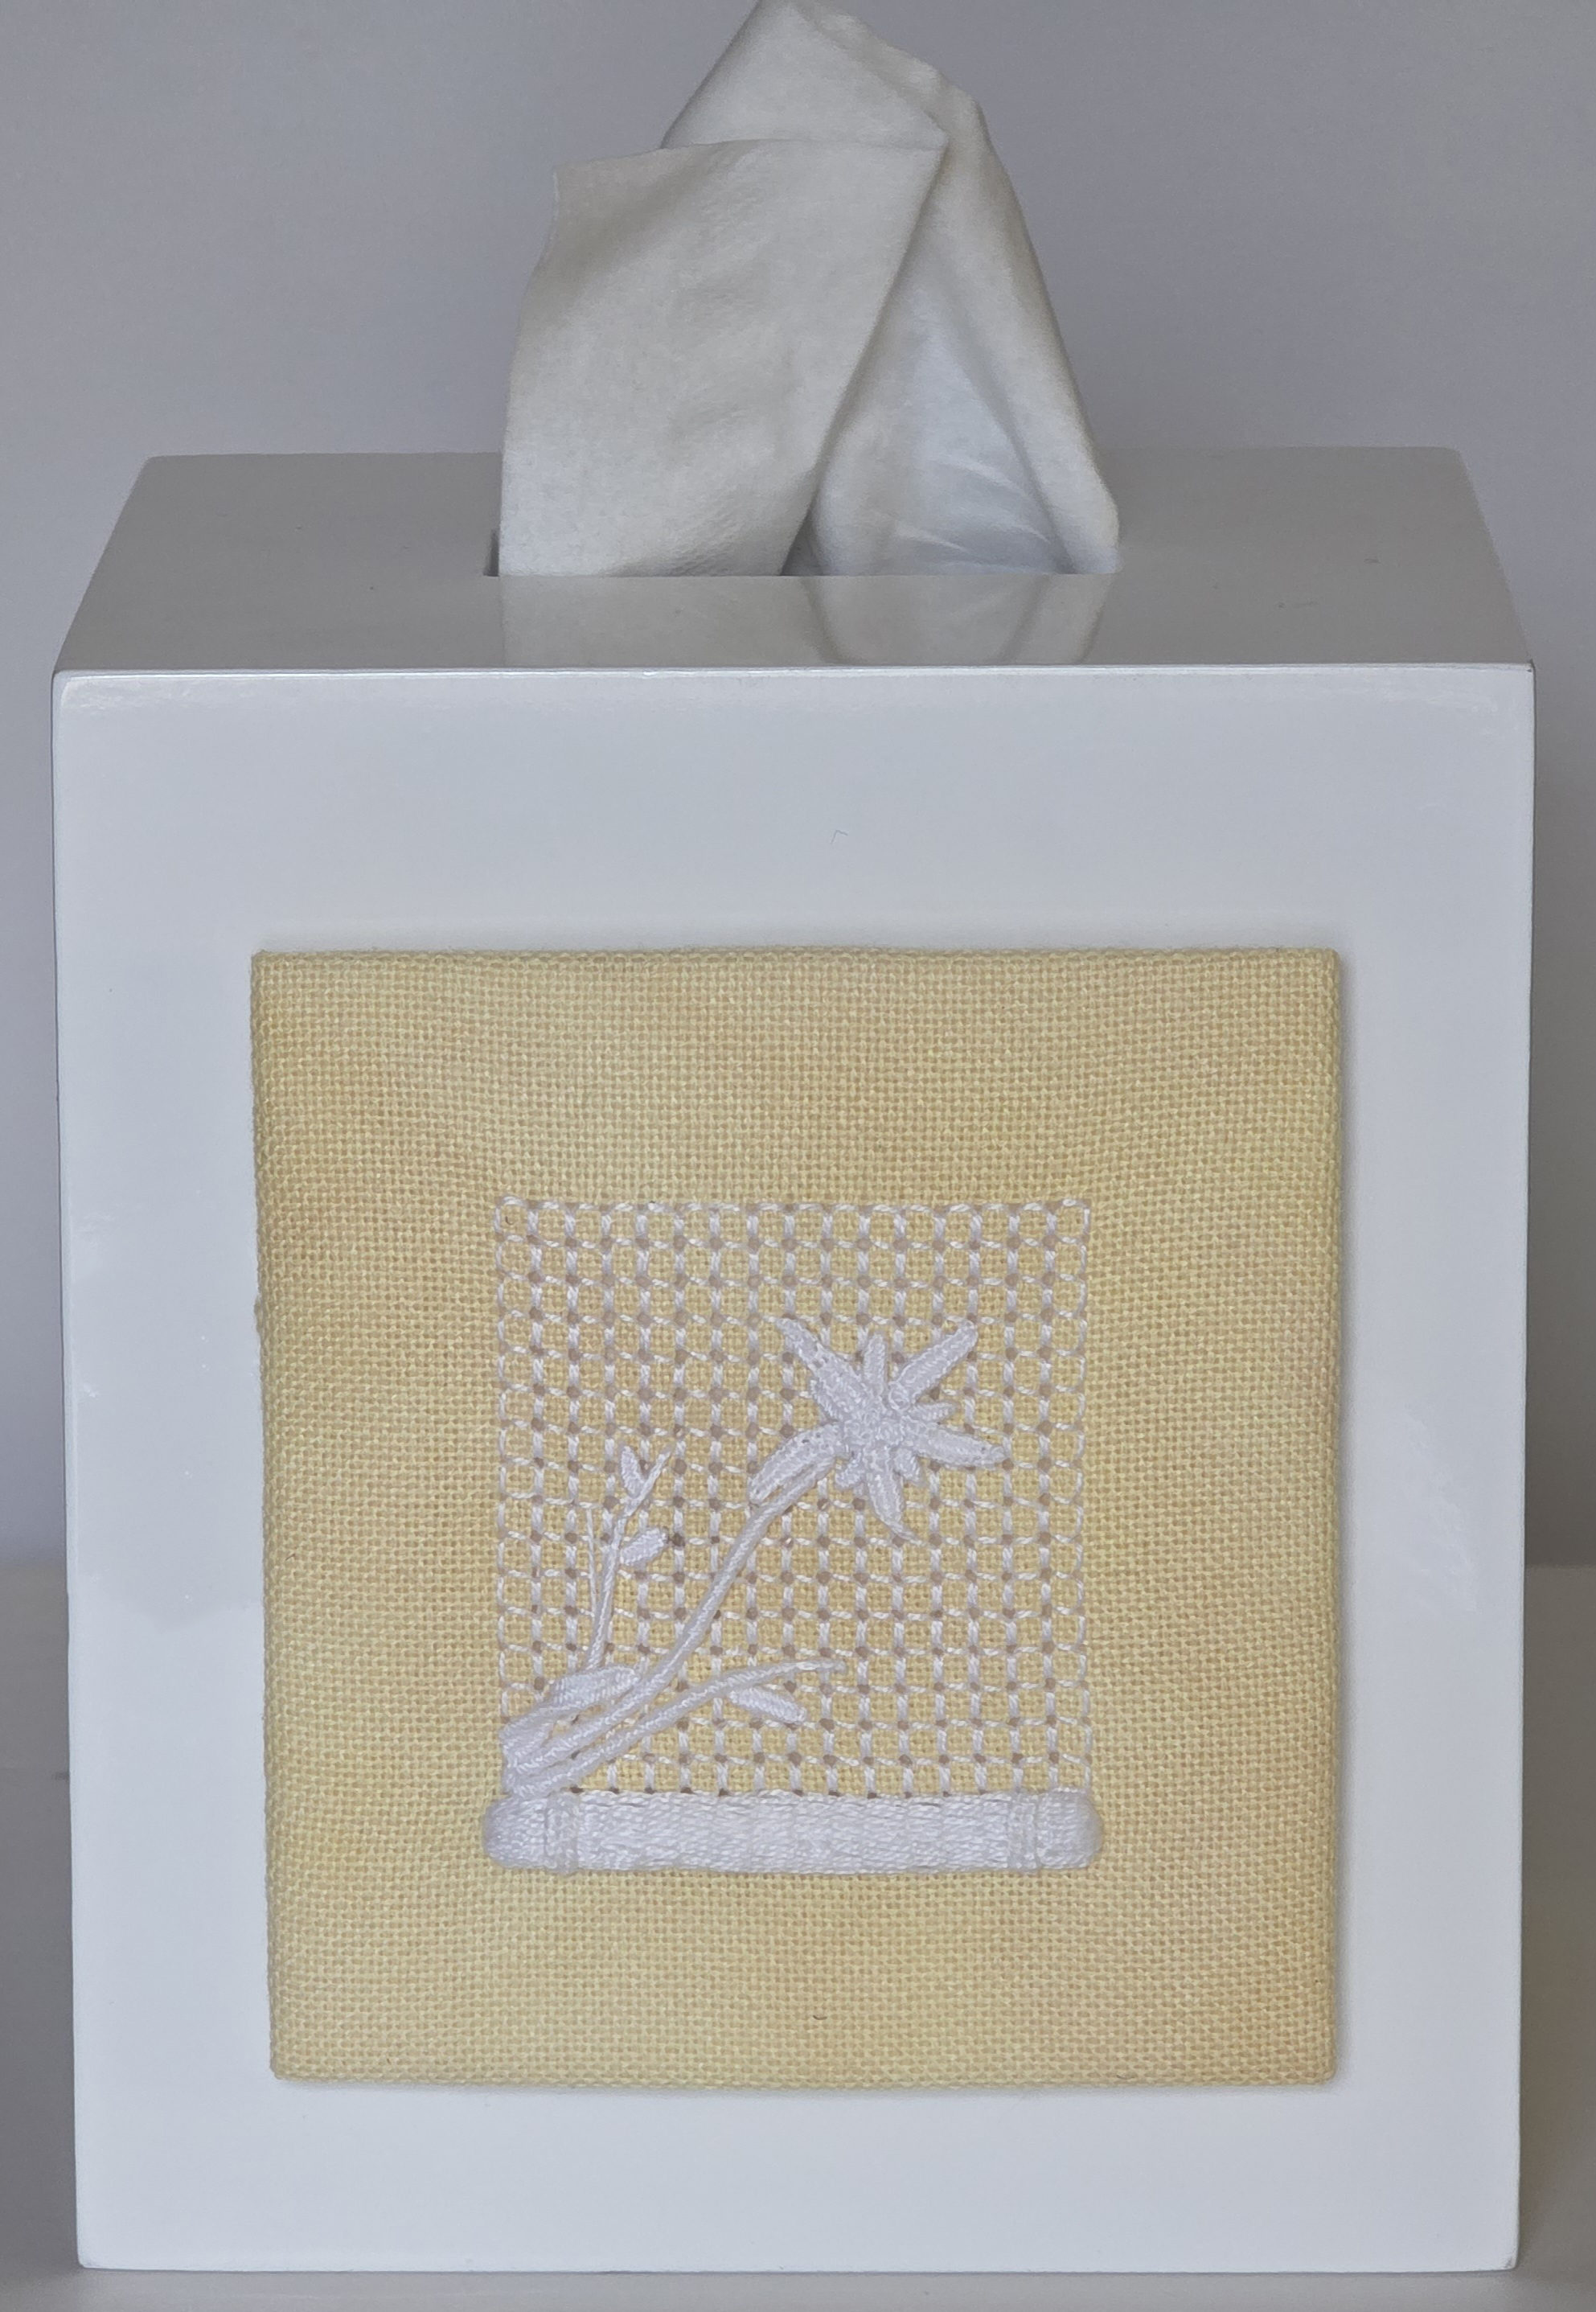
It’s near other yellow decorations in our bedroom. Love it!!
There are 3 more sides that can be decorated. And, I bought 3 more tissue boxes. Eventually, one will be in our bathroom (blues), extra bedroom (purples), and the other in the living room (whatever goes with brown/beige).
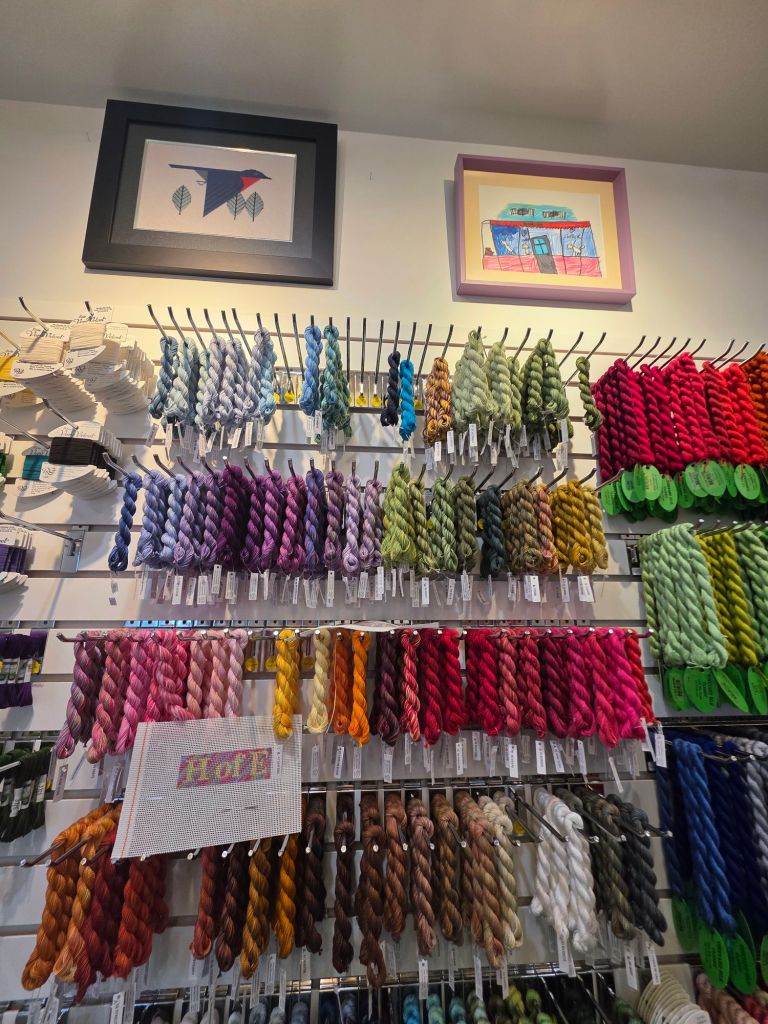
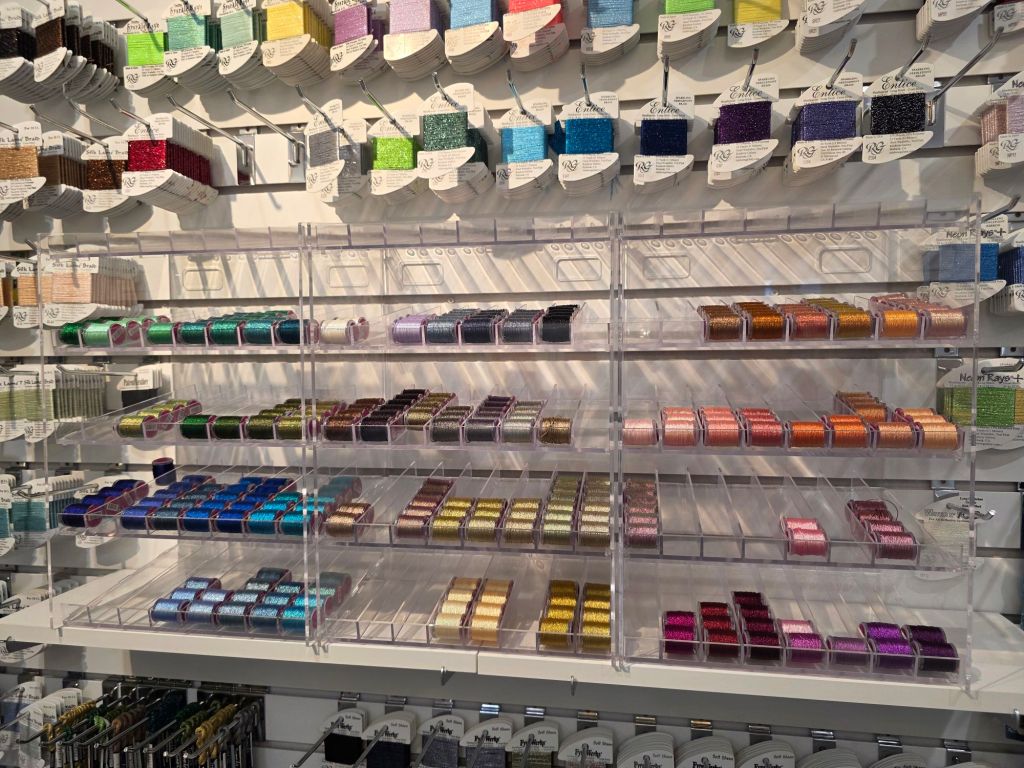
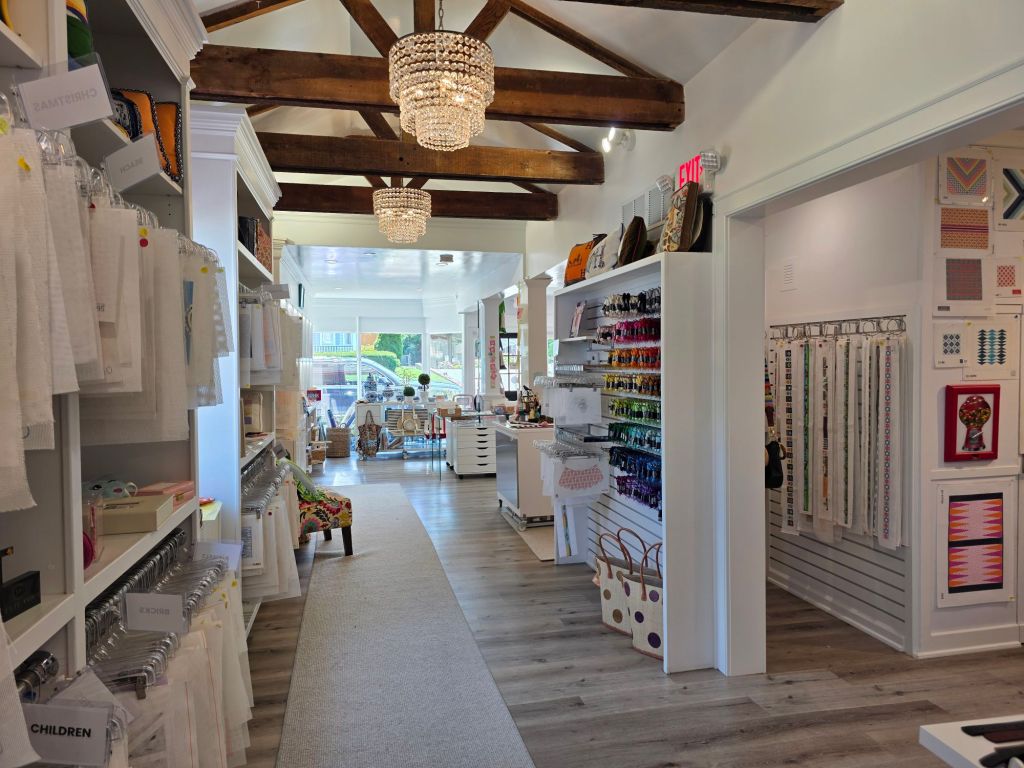
Filed under: General comments, House of Embroidery (H of E), Needlepoint Shops, Radiance Metallics by The Meredith Collection, Threads, Threads Too Needlepoint
Bill and I met Linda P and Cynthia S from ANG New Jersey Needle Artists at Threads Too Needlepoint in Fair Haven, NJ to get books for redistribution from Nanette Costa’s library. Over half of the 60+ books have been claimed by either members of my EGA Brandywine Guild or ANG Main Line Stitchers Chapter. I will take the rest as an opportunity to visit a couple of other nearby chapters!
Threads Too Needlepoint is a bright colorful store with lots of canvases, finishing accessories, and a variety of threads including couple of unique threads: an overdyed Perle cotton #5 by House of Embroidery (H of E) and Radiance Metallics by The Meredith Collection. I resisted both not having a specific project for them.
It was a HOT day in Philadelphia and a tad cooler at the shore especially in the shade sitting at a favorite Seaside Park bar in the breeze sipping on a cool refreshment (Bill and I). Crabs at our favorite restaurant, Bum Rogers, capped off a lovely day.
Colonial Knot: Hold the thread like a backwards C. Place needle under the thread at the top of the C, wrap thread over the thread and the needle forming a figure 8 and go down nearby (safer not to go down in the same hole because the knot won’t be pulled through the hole accidentally).
French Knot: Pull the thread down towards you, place the needle on top of the thread, wrap the thread once (some say it’s ok to wrap twice others say use a thicker thread) and go down nearby.
The Colonial Knot (left) is naturally bigger than the French Knot (right) because of the different ways they are wrapped.

Mary Corbett’s website has great YouTube videos.
Filed under: Brandywine Chapter, Embroidery Guild of America, General comments, Tools
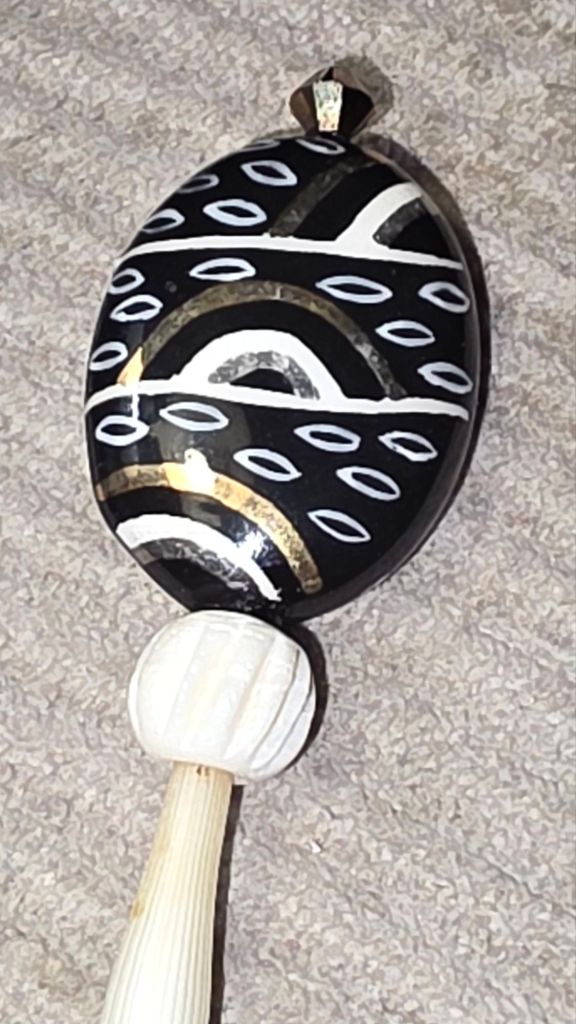
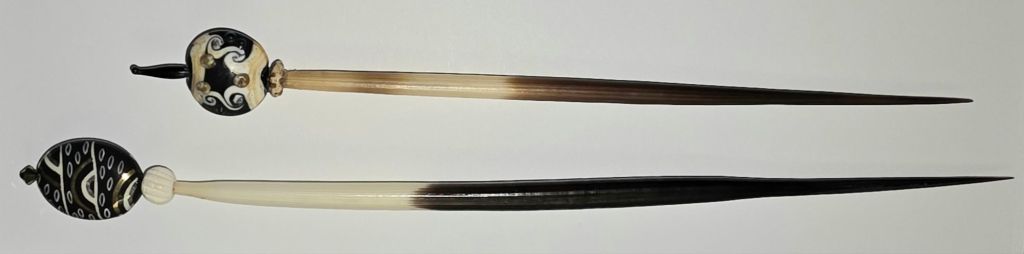
A few years ago, Patrick made and gave me a lovely porcupine quill laying tool. On Wednesday, he gave everyone at our Blue Santa Bead EGA Brandywine Guild outing a porcupine quill for us to make our own. Several of us found toppers to adorn them as he had done. I looked through almost all the drawers in the store and found several beads for my second quill. I didn’t have time to make it then.
I used the smallest black bead wire (No. 2) to attach the small bicone on top of the large black bead. I tied the bead wire off just below the large black bead.
The decorative black bead and the white one below it fit snugly on the end but I used the Super NEW GLUE to really secure them.
Patrick’s gift to me is on top and my new one is on the bottom.
Filed under: Beads, Brandywine Chapter, Embroidery Guild of America, General comments
Beaded Garden Wands were for sale at a store in Naples, NY earlier this month and knew I had 2 beads from a trip Bill and I had taken to Aruba! It seemed like a great idea to make my own and finally use those beads.
I found this 8″ screw at Home Depot. It was the only 8″ screw that was black – all others were silver. And, there no other black ones in the aisle! The silver ones were screws the complete length while this one is smooth on top.

So, while at the Blue Santa Beads making a Chatelaine with my EGA Brandywine Guild, I looked for beads. Most of the beads didn’t have a wide enough hole to work on the screw (including the 11 beads and the bicone in the next photo). But, I was undaunted and had an alternative in mind.

Today, after talking with the ANG Shenandoah Chapter about Festive Fireworks because they are stitching it as a chapter project, I had fun picking out the rest of the beads from my stash.

I used either beading cord or beading thread doubled. I wrapped around the screw using up almost the entire tube of Czech multi-colored beads! I also used the rest of the 6 mm round fluted purple beads that I used on Edward Scissorfish. There are drops of glue here and there. I bought 6 little bottles of Super NEW GLUE by Euro Tool. Have I mentioned how much I love that dropper bottle and the glue? It dries quickly and doesn’t clog.

However, it’s not like the ones in Naples. It’s not as bright. Bill’s right, we won’t be able to see it in the backyard. So, I placed it my little Lenox vase with 4 metal roses and we can see it in the living room. Perfect.

Today was and the next 3 days will be great for stitching thanks to the US Open.
Filed under: Brandywine Chapter, Chatelaines, Embroidery Guild of America, General comments, Scissors, Tools
Patrick led us through making chatelaines today at Blue Santa Beads in Media. I needed a special tutorial from my neighbor, Susan, after she figured it out while Patrick helped others. There were 10 of us there. He did an excellent job of getting us through this project. Getting rings on is not easy. I had 2 different sets of instruction and they still don’t make sense!
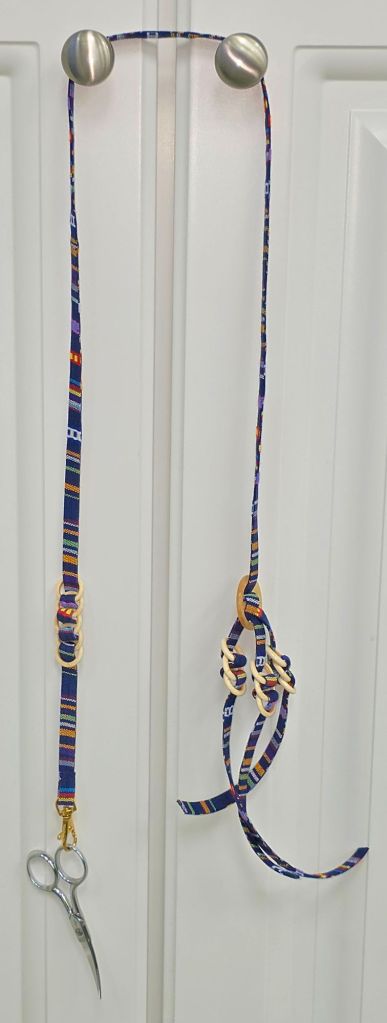
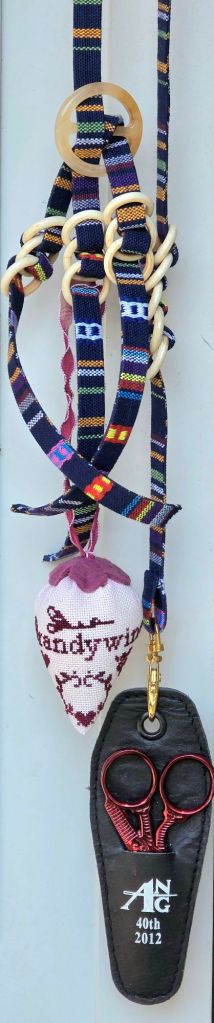
When I got home, I found scissors that have a protective leather sheath so that I won’t get stabbed when I wear it. It’s from ANG 2012 Seminar in Philadelphia celebrating the Guild’s 40th Ruby Anniversary. And, I placed the EGA Brandywine Guild strawberry on the other end. I can add 3 more tools. I haven’t decided what else to add.
I had cording and rings left over. It’s not long enough to hang around my neck. And, I don’t know what I’ll do with it yet. But, something will come along.

There was plenty of time to shop for beads for 2 other pieces that I’ll be posting about over the next few days.
Filed under: General comments, Painting Needlepoint Canvases with Fancywork Finishing
In 2020, I took a painting class with Nancy of Fancywork Finishing on Zoom. I think she may have retired since her website is not active. I painted and stitched a similar original design on 13 count (https://melitastitches4fun.com/2020/11/05/painting-needlepoint-canvases-with-fancywork-finishing/) and on 18 count (https://melitastitches4fun.com/2020/12/02/second-coaster-stitched/). I wanted to find red leather coasters. So, I put them away until I found them.
In September 2024, at KC Needlepoint, I finally found leather self finishing coasters with 4″ square openings. The red wasn’t the same red so I went with a very dark blue. But, when I got home, I couldn’t find the stitched pieces.
Finally, I found them last week while looking for something else! But, the stitched pieces were 3 and 15/16 x 3 and 7/8 on the 18 count canvas and 4 and 1/8 square on 13 count. So, I had to find the proper yellow and add a row on two sides of the 18 count canvas. I lost the outer yellow border on the 13 count canvas. Oh well!
Boy, that was tougher than I expected. Getting the paper off on the first coaster took tweezers to get it out from under the edges. The second one I nudged better and slower so the paper came off in one piece.
I had to cut right up to the stitching on the 13 count canvas and use one tool to lift the edge and a second to shove the canvas underneath. I was afraid the stitching would unravel, but it was fine. I lost most over the outer yellow border, but that’s ok. Both are on and not going anywhere!
So, here are the finished coasters. I had not included this on my list of 2025 goals because I didn’t know that I’d find them. Bill picked the one on the right on 18 count for his.
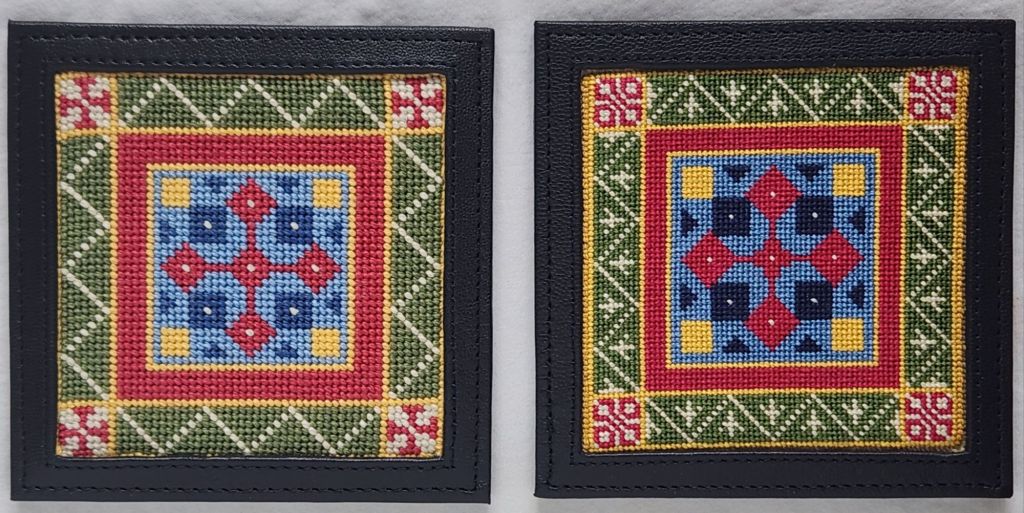
We’ve got enough coasters now! So, I’m thinking that I will find an acrylic tissue box that I can insert 4 sides. Does anyone have any sources?

Filed under: General comments, Threads
Maybe it’s too well known that I was looking for Rhapsody! But, thanks to Kristen and the great Ebay deal she found that I couldn’t pass up, I now have enough Rhapsody to keep making another set of these ornaments in a variety of colorways!
Eventually, I will need more cabochons. I bought more rimsets because some were bent. The 10 mm (also sized 45 ss whatever that means) pointed rimsets in silver were not available so I got them in 40 ss hoping they would work but they do not. So, I will have to find slightly smaller cabochons. But, that should be easier than finding Rhapsody or rimsets!
Luckily, I was able to unbend the existing silver rimsets and got extra gold 10 mm rimsets. I remembered seeing a jewelry tool for enlarging rings and found a pen to substitute allowing me to reshape to round with a little the help of jewelry pliers.
It’s funny that as much as I love overdyed threads I know one woman in my ANG Main Line Stitchers chapter who hates them! On which side of the thread aisle do you gravitate towards? Overdyed or not and can you explain why? I’m intrigued by the combination of colors and seeing how the color shifts.