Yeah – I got the borders all stitched! Except for turning corners, it turned out fine. I must have restitched a few of them 6 times trying to get the reverse to work. If I got one right it was by accident. I finally gave up & moved on. The only thing that I can think was wrong was if I was stitching the rows left to right & I should have been going right to left. I’ll know & most you will know but the average person won’t. And, it’ll still open & close just fine.
Can you tell which is the right side & which is the wrong side? You can’t tell from the blackwork!

When you fold the edge you will leave a row of holes empty. That’s the best way I can describe it. And, this is the best picture I can get.

Maybe someone at our meeting will be able to show me what I was doing wrong. I expect I’ll do another Ort Box with 18 count at some point. I have some canvases left. About 12 of us ended up working on it. I missed last month’s meeting but I heard that at least one has applied the lining. And, she was helping another to understand the instructions. I’m anxious to see one of us finish a box! I bought the lining at a Jo-Ann’s Fabric Store. I got a red.

As you may recall, not long ago I showed Sky 23 from Stitch Landscape by Little Shoppe Canvas Company. My one negative was that the diagrams do blur a tad when you open to the 2x size on iPad but not so horrible that you can’t look at it. Elaine from Little Shoppe Canvas Company commented that an upgrade was coming – it came.
But, when I went to upgrade on my iPad, I got a message that I needed iOS5 or greater to upgrade. Well, I’d just bought this iPad in Sept 2011, so back to the Apple store to find out what was going on. I found the oldest clerk in the store to help me. And, he was patient, helpful, & explained that I am supposed to plug the iPad into my computer & the upgrade will practically occur by itself. Yeah, sure. I was not optimistic but I went home to try. I never knew that I was supposed to plug this into the computer – you don’t get manuals any more!
Well, messages automatically came up all right – but it told me that in order to upgrade the iPad, I had to upgrade iTunes version to 10.2 or greater. You got to be kidding me! Can’t they ever just STOP upgrading I lamented to myself, knew “they” wouldn’t, & bit the bullet.
So, I bravely went to apple.com, looked at the support tab, & then downloads. Amazingly, I located the right thing & it worked!! It took hours to do it it’s thing – it must have needed a ton of updates because as little as I use iTunes, I recall ignoring those annoying pop-ups telling me an upgrade was available. But, this latest upgrade went much smoother. Maybe “they” are listening to us computer light weights & making it easy for us to stay in the game.
So, back to the iPad for its update & it worked as easy as the Apple clerk had said. Then, to the app updates on my iPad for Stitch Landscape & it worked!! And, the diagrams at 2X are clearer. I only wish the pictures showed the improvement because even though they weren’t bad before it was worth the effort!! So, thanks to Elaine for her update & Apple for making updates easier. And, I’ll probably still ignore updates until I am forced to download.
Before 
After 
I went to Rittenhouse Needlepoint to get more Arctic Rays (AR2) & Fuzzy Stuff (FZ15) but they were out of FZ15, a very bleached white. It was fortuitous because I prefer the more natural FZ26. And, they had an antique white (FZ27) with Fuzzy Stuff (AR3) that I think will be nice as the 2 background trees keeping the whitest one in the front center.
Here’s the first tree (center whiter one) from different angles so you can see the fluffy effect of the thread.
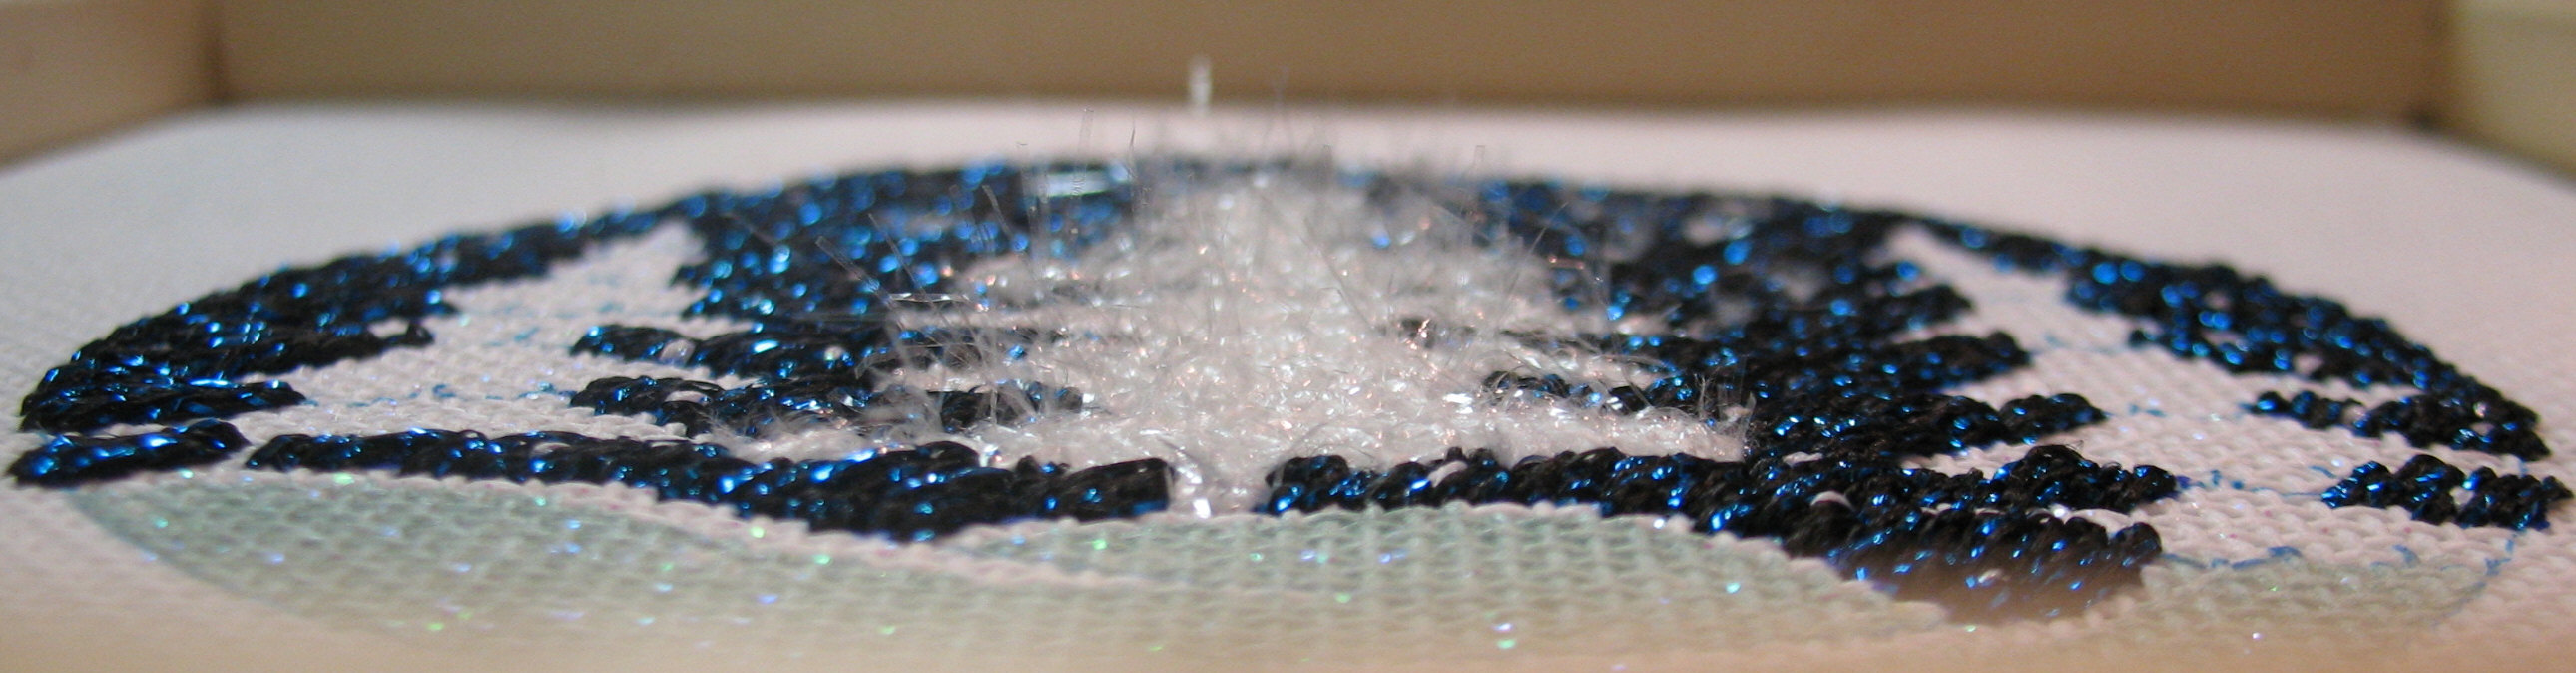
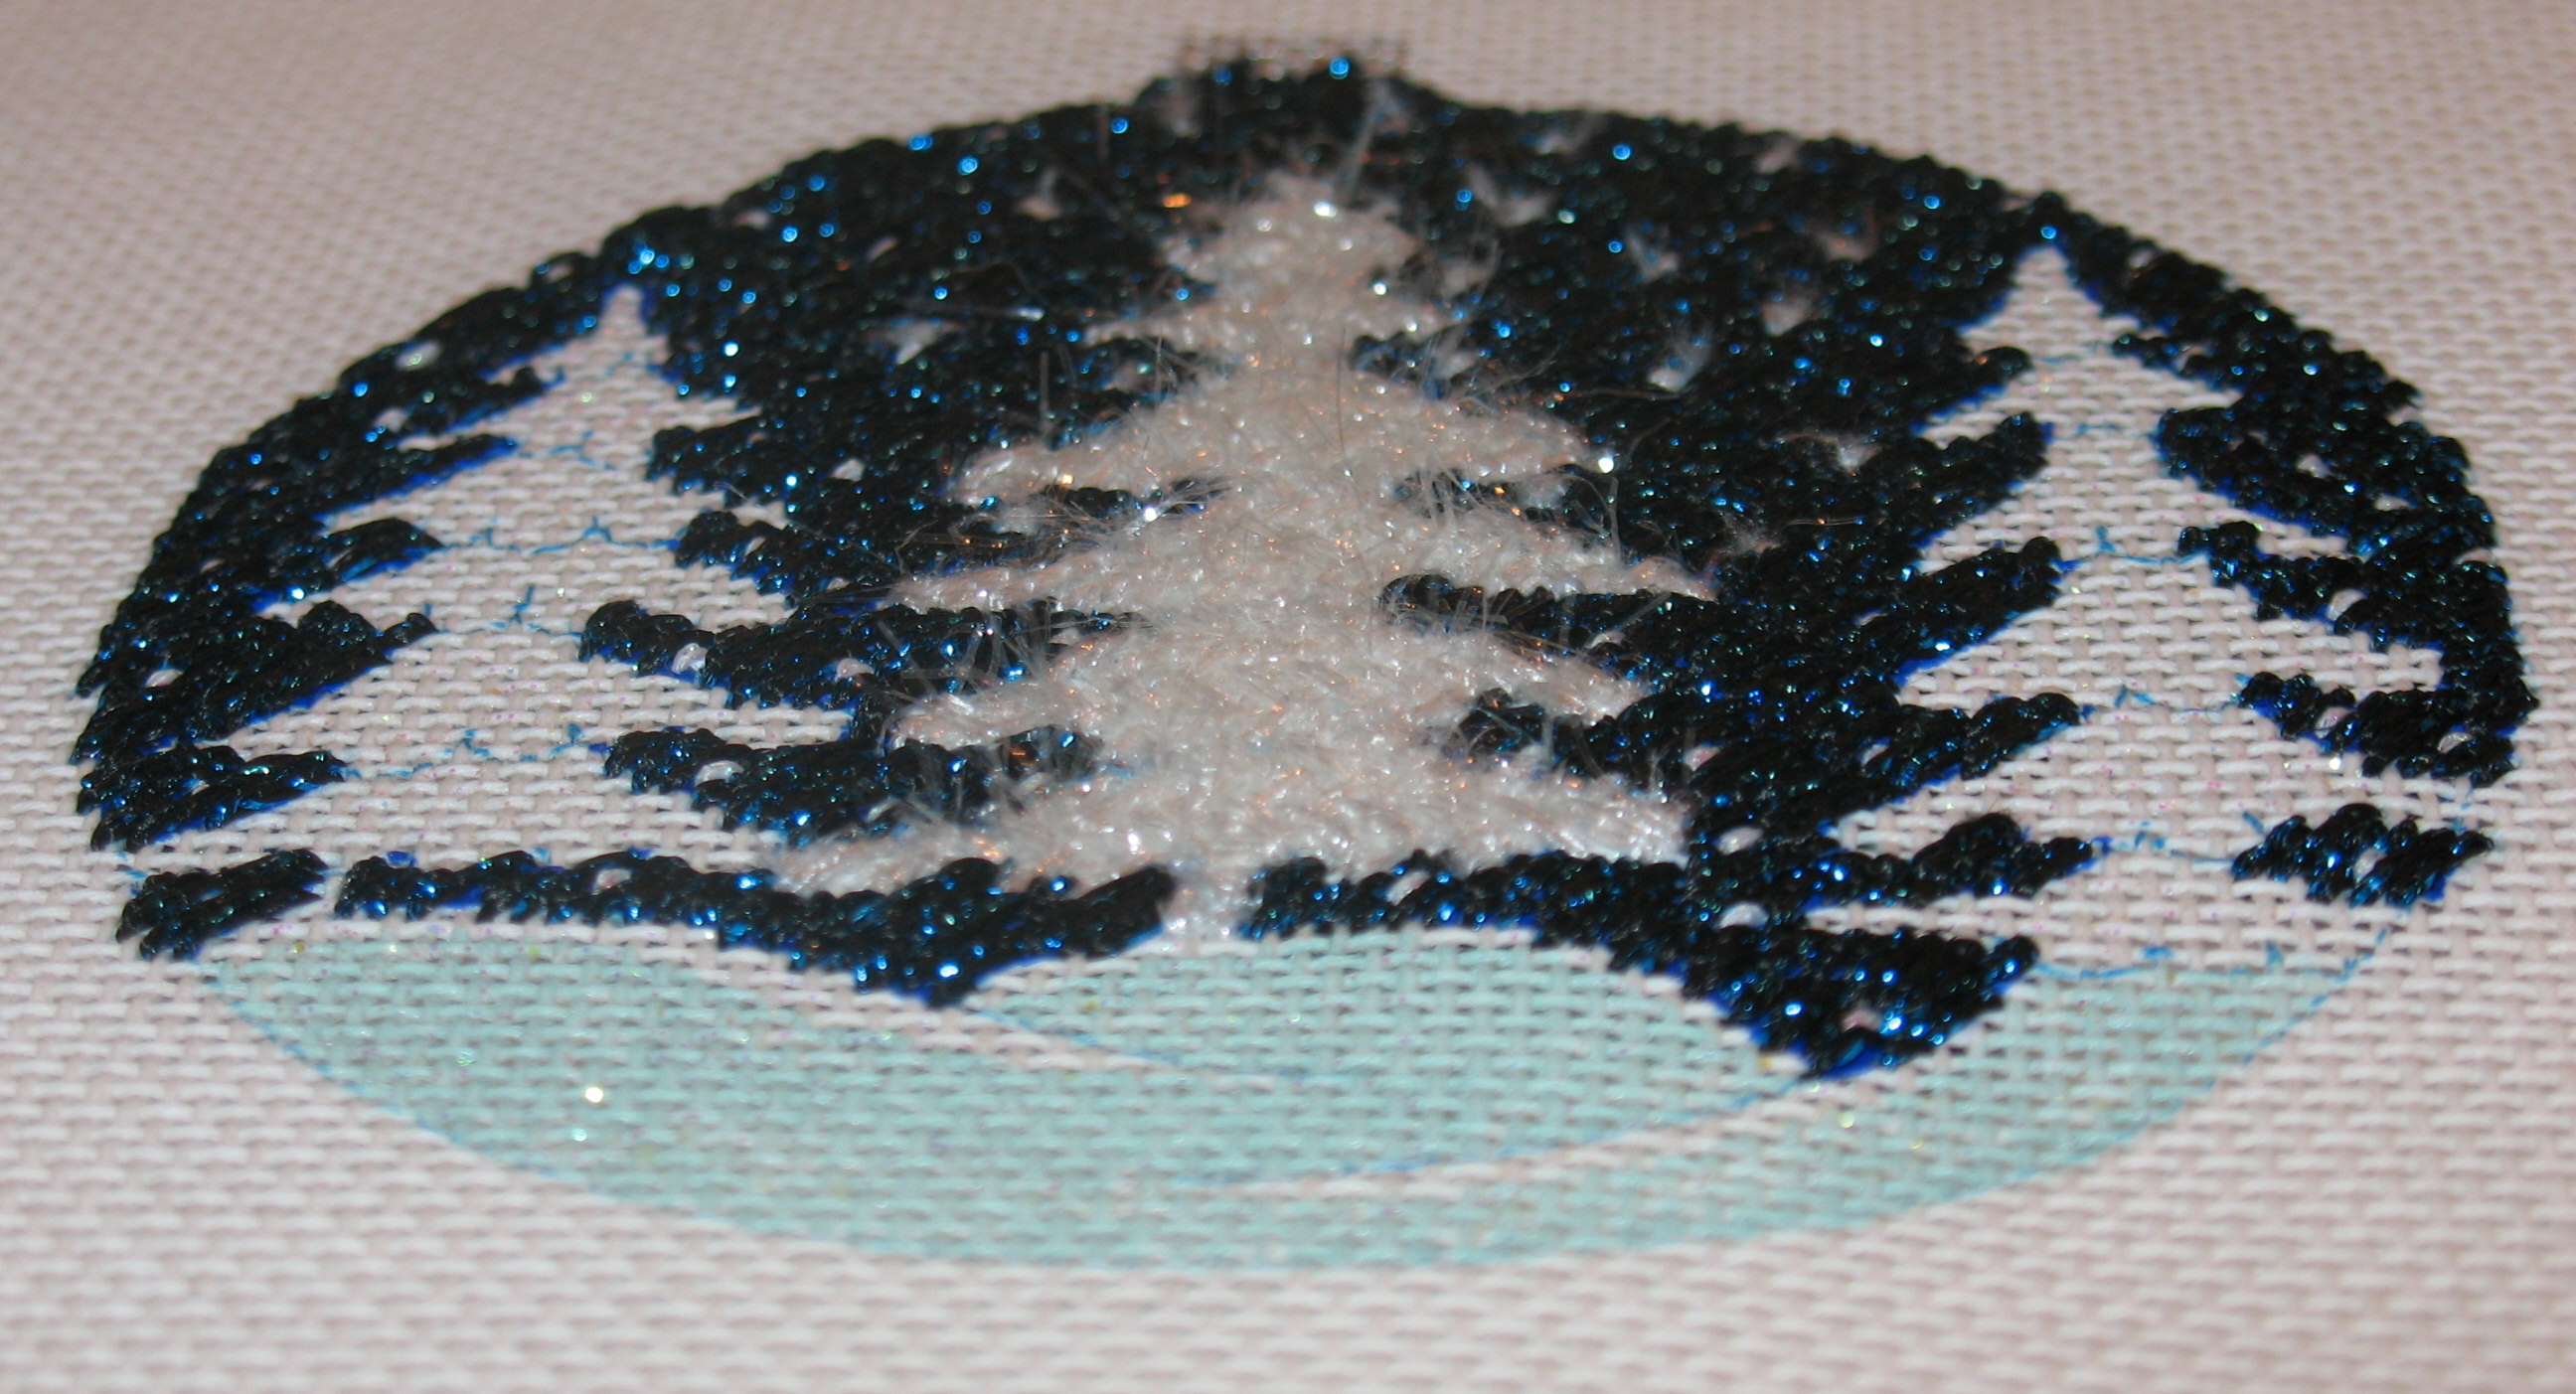
I like the pattern because it resembles branches going in different directions cathing the snow – it is Tree 16 from Stitch Landscape.
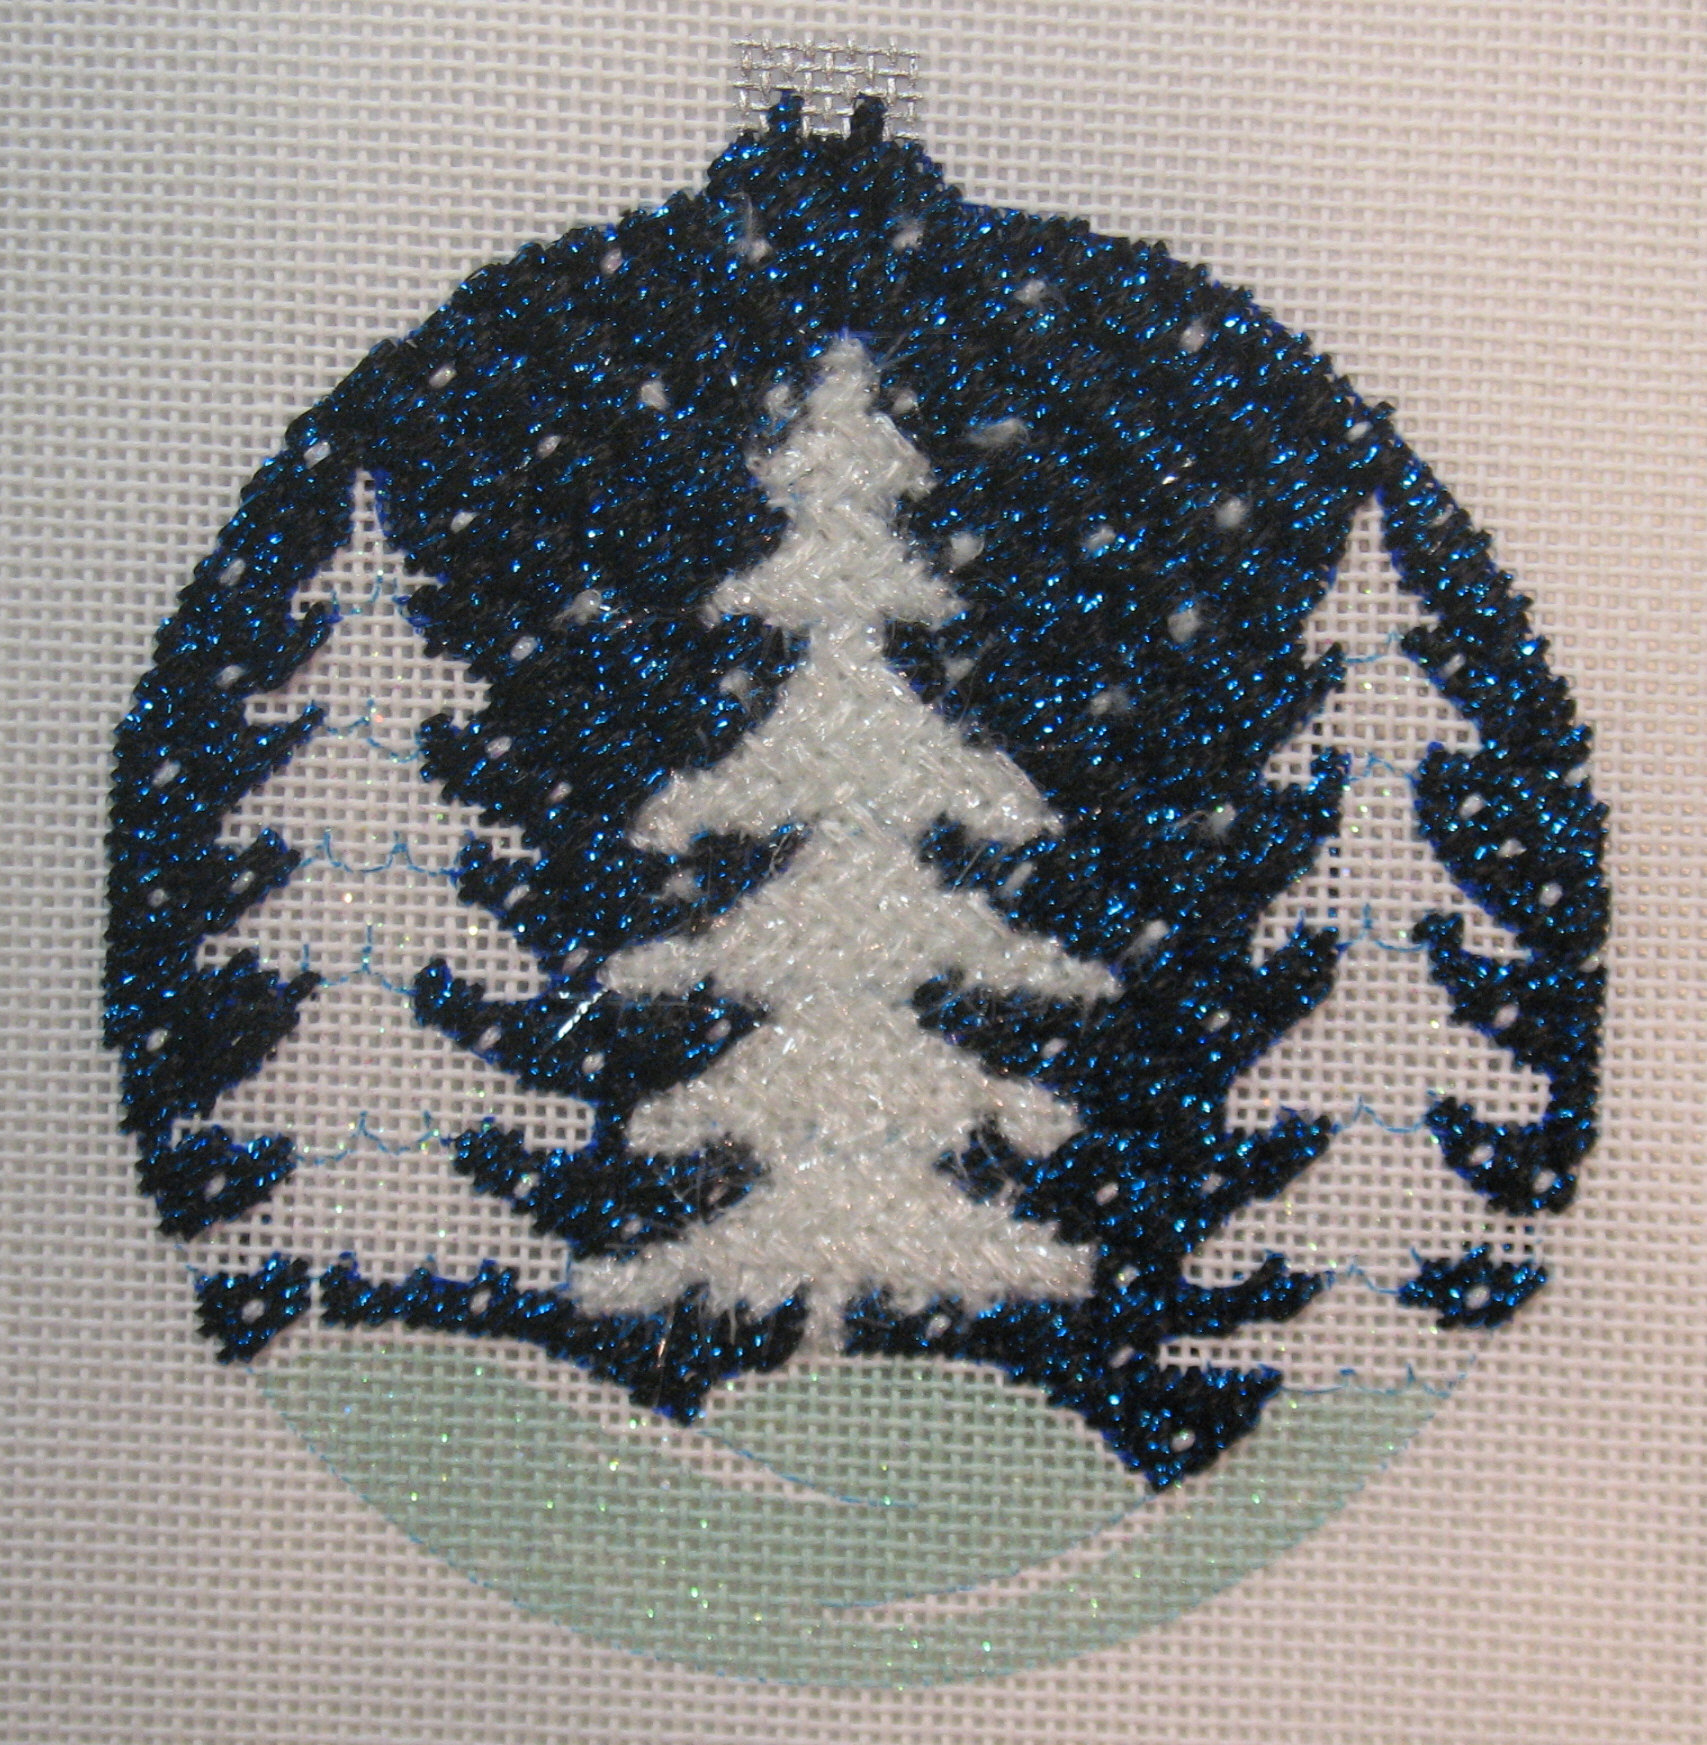
I got the blackwork finished & the bottom. I really had to focus doing the blackwork (Area 7 – top photo). I enjoyed it because it was a challenge but I wouldn’t choose to do a lot of it!
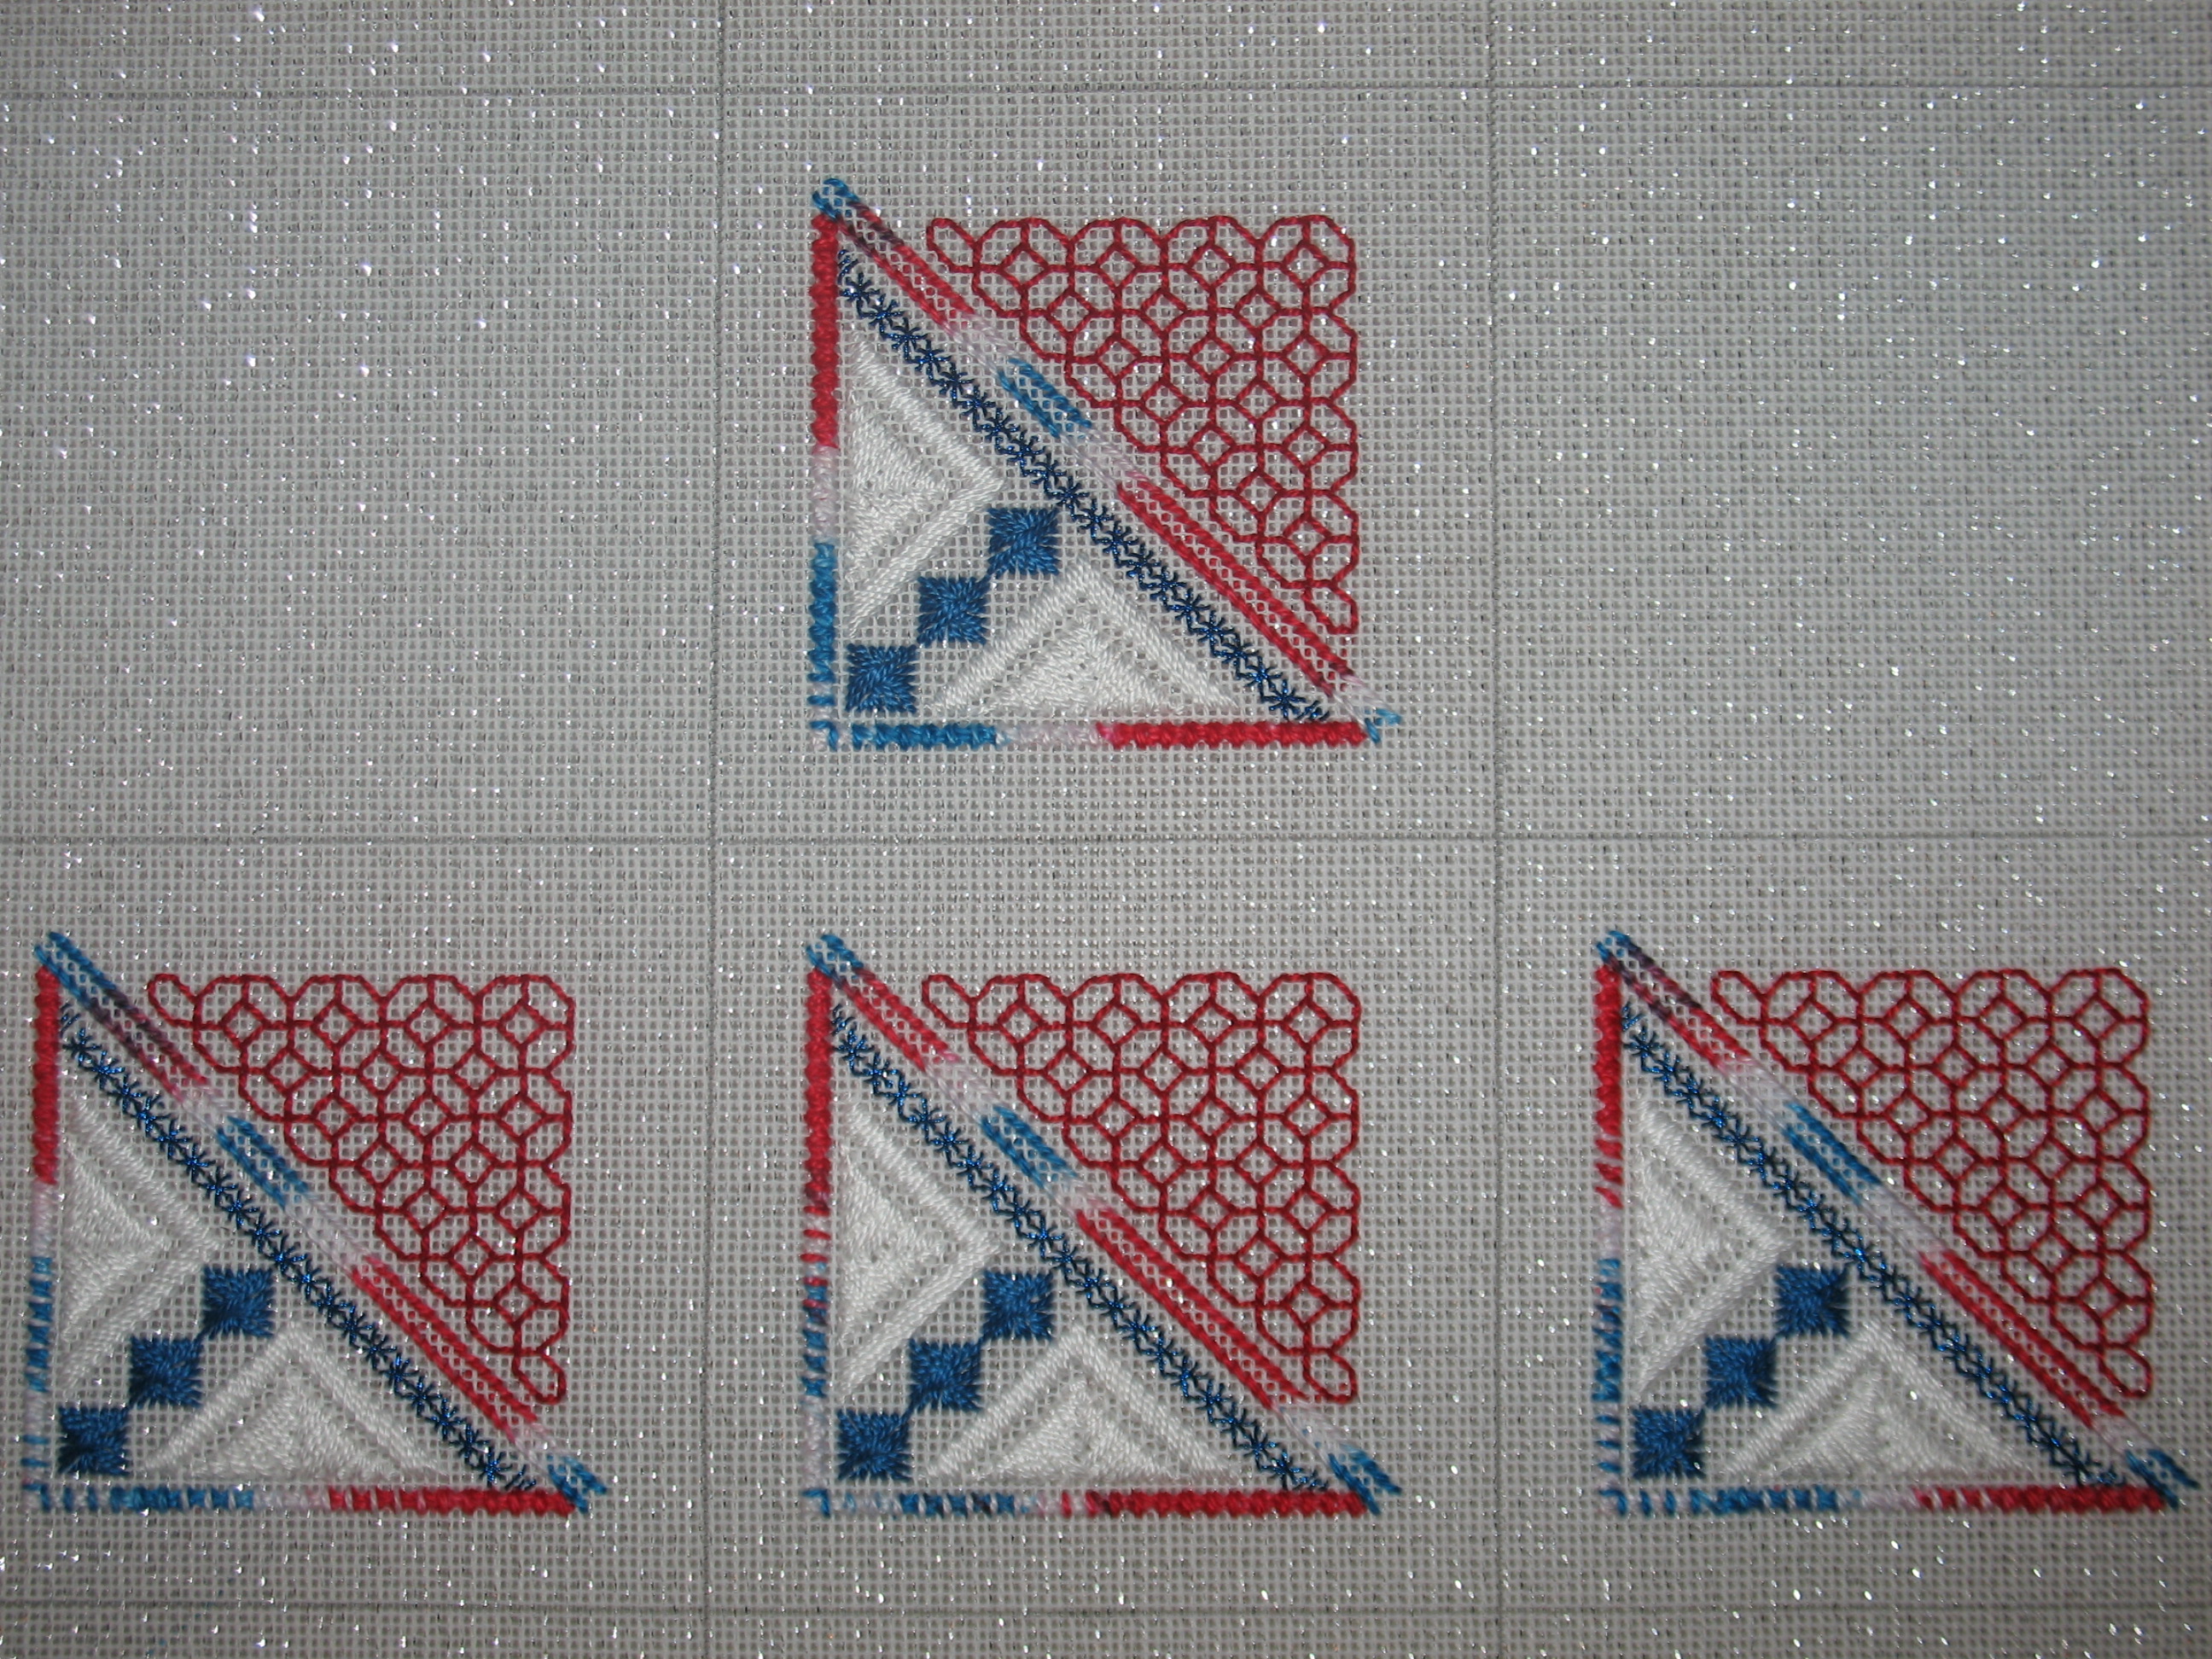
On the bottom square, I wish the overdyed thread on the one diagonal had some red & white in it. But, I didn’t notice that as I was stitching. I didn’t even notice it until I looked at the picture!

Now, I can remove the canvas from the frame, cut the squares apart, & stitch the edges down!
Well, I did have to go to the store for more threads because I’d already cut most of my DMC skeins in shorter pieces. Oh well – so much for using up stash.
I found I needed 40″ to complete the row of double upright crosses for Area 3 (blue Kreinik #8 051HL), 40″ for each set of 3 Rhodes stitches for Area 4 (blue DMC 825) & 40″ (folded in half) for each V of upright gobelin stitches for Area 5. On 14 count, doubling the DMC #5 provided excellent coverage. And, it seemed easier to do each V separate rather than turning 90 degrees to work the second. Area 6 are Sprats Heads worked with 54″ folded in half to make a 2 ply coverage as well in white DMC #5. This is still working up quickly & as our monthly meeting approaches, I hope to complete the blackwork as well.


We are off and running with the Ort Box. Directions were graciously provided directly from Marilyn Owen. And, Karen Milano at Nimble Needle gave us a very nice discount for INTERLOCKING canvas by the yard (of plain white 14 count, metallic silver and metallic gold 14 count, and plain white 18 count). Thanks to both!! Then, I cut it up & taped the edges for everyone in advance.
However, I didn’t fully read the directions (there is a lot to make such a small box) & didn’t see that the metallic interlocking canvas will be harder to put together. But, a couple of us are electing to give it the old college try, including myself. Some pros & cons of 14 count vs 18 count: the 14 count will be a slightly larger box & require thicker threads such as DMC #5 Perle Cotton as opposed to the smaller 18 count box that calls for DMC #8 Perle Cotton & Floss.
The directions for the blackwork go up to row 3 then you are to repeat directions for rows 1 & 2 alternating. So, diagrams 8A & 9A are key. I used the grayed out stitches as reference for stitches just completed. Because I’ve never done blackwork before, I practiced first. And, I finally saw the pattern. If others struggle to get it, these are my tips:
Row 1 stops at stitch 25 (as pictured in 8A)
Row 3 stops at stitch 19 (as pictured in 10 but also 8A)
Row 5 stops at stitch 13 (as pictured in 8A – stopping for shorter row)
Row 7 stops at stitch 7 (as pictured in 8A – stopping for shorter row)
Row 9 is only stitch 1
The odd rows all stop with the stitch going down and to the right.
Row 2 stops at stitch 22 (as pictured in 9A)
Row 4 stops at stitch 16 (as pictured in 9A – stopping for shorter row)
Row 6 stops at stitch 10 (as pictured in 9A – stopping for shorter row)
Row 8 stops at stitch 4 (as pictured in 9A – stopping for shorter row)
The even rows all stop with the stitch going straight down.
I also put the rest of the rows into a diagram for my chapter members & photographed it row by row.

I used a red, white, & blue over dyed thread for Area 1 & Area 2 (on silver metallic canvas). I don’t have enough of the over dyed to do it for the blackwork. You really do need at least 7 feet for 14 count. So, I am weighing options! One way or another, I’m using my stash.
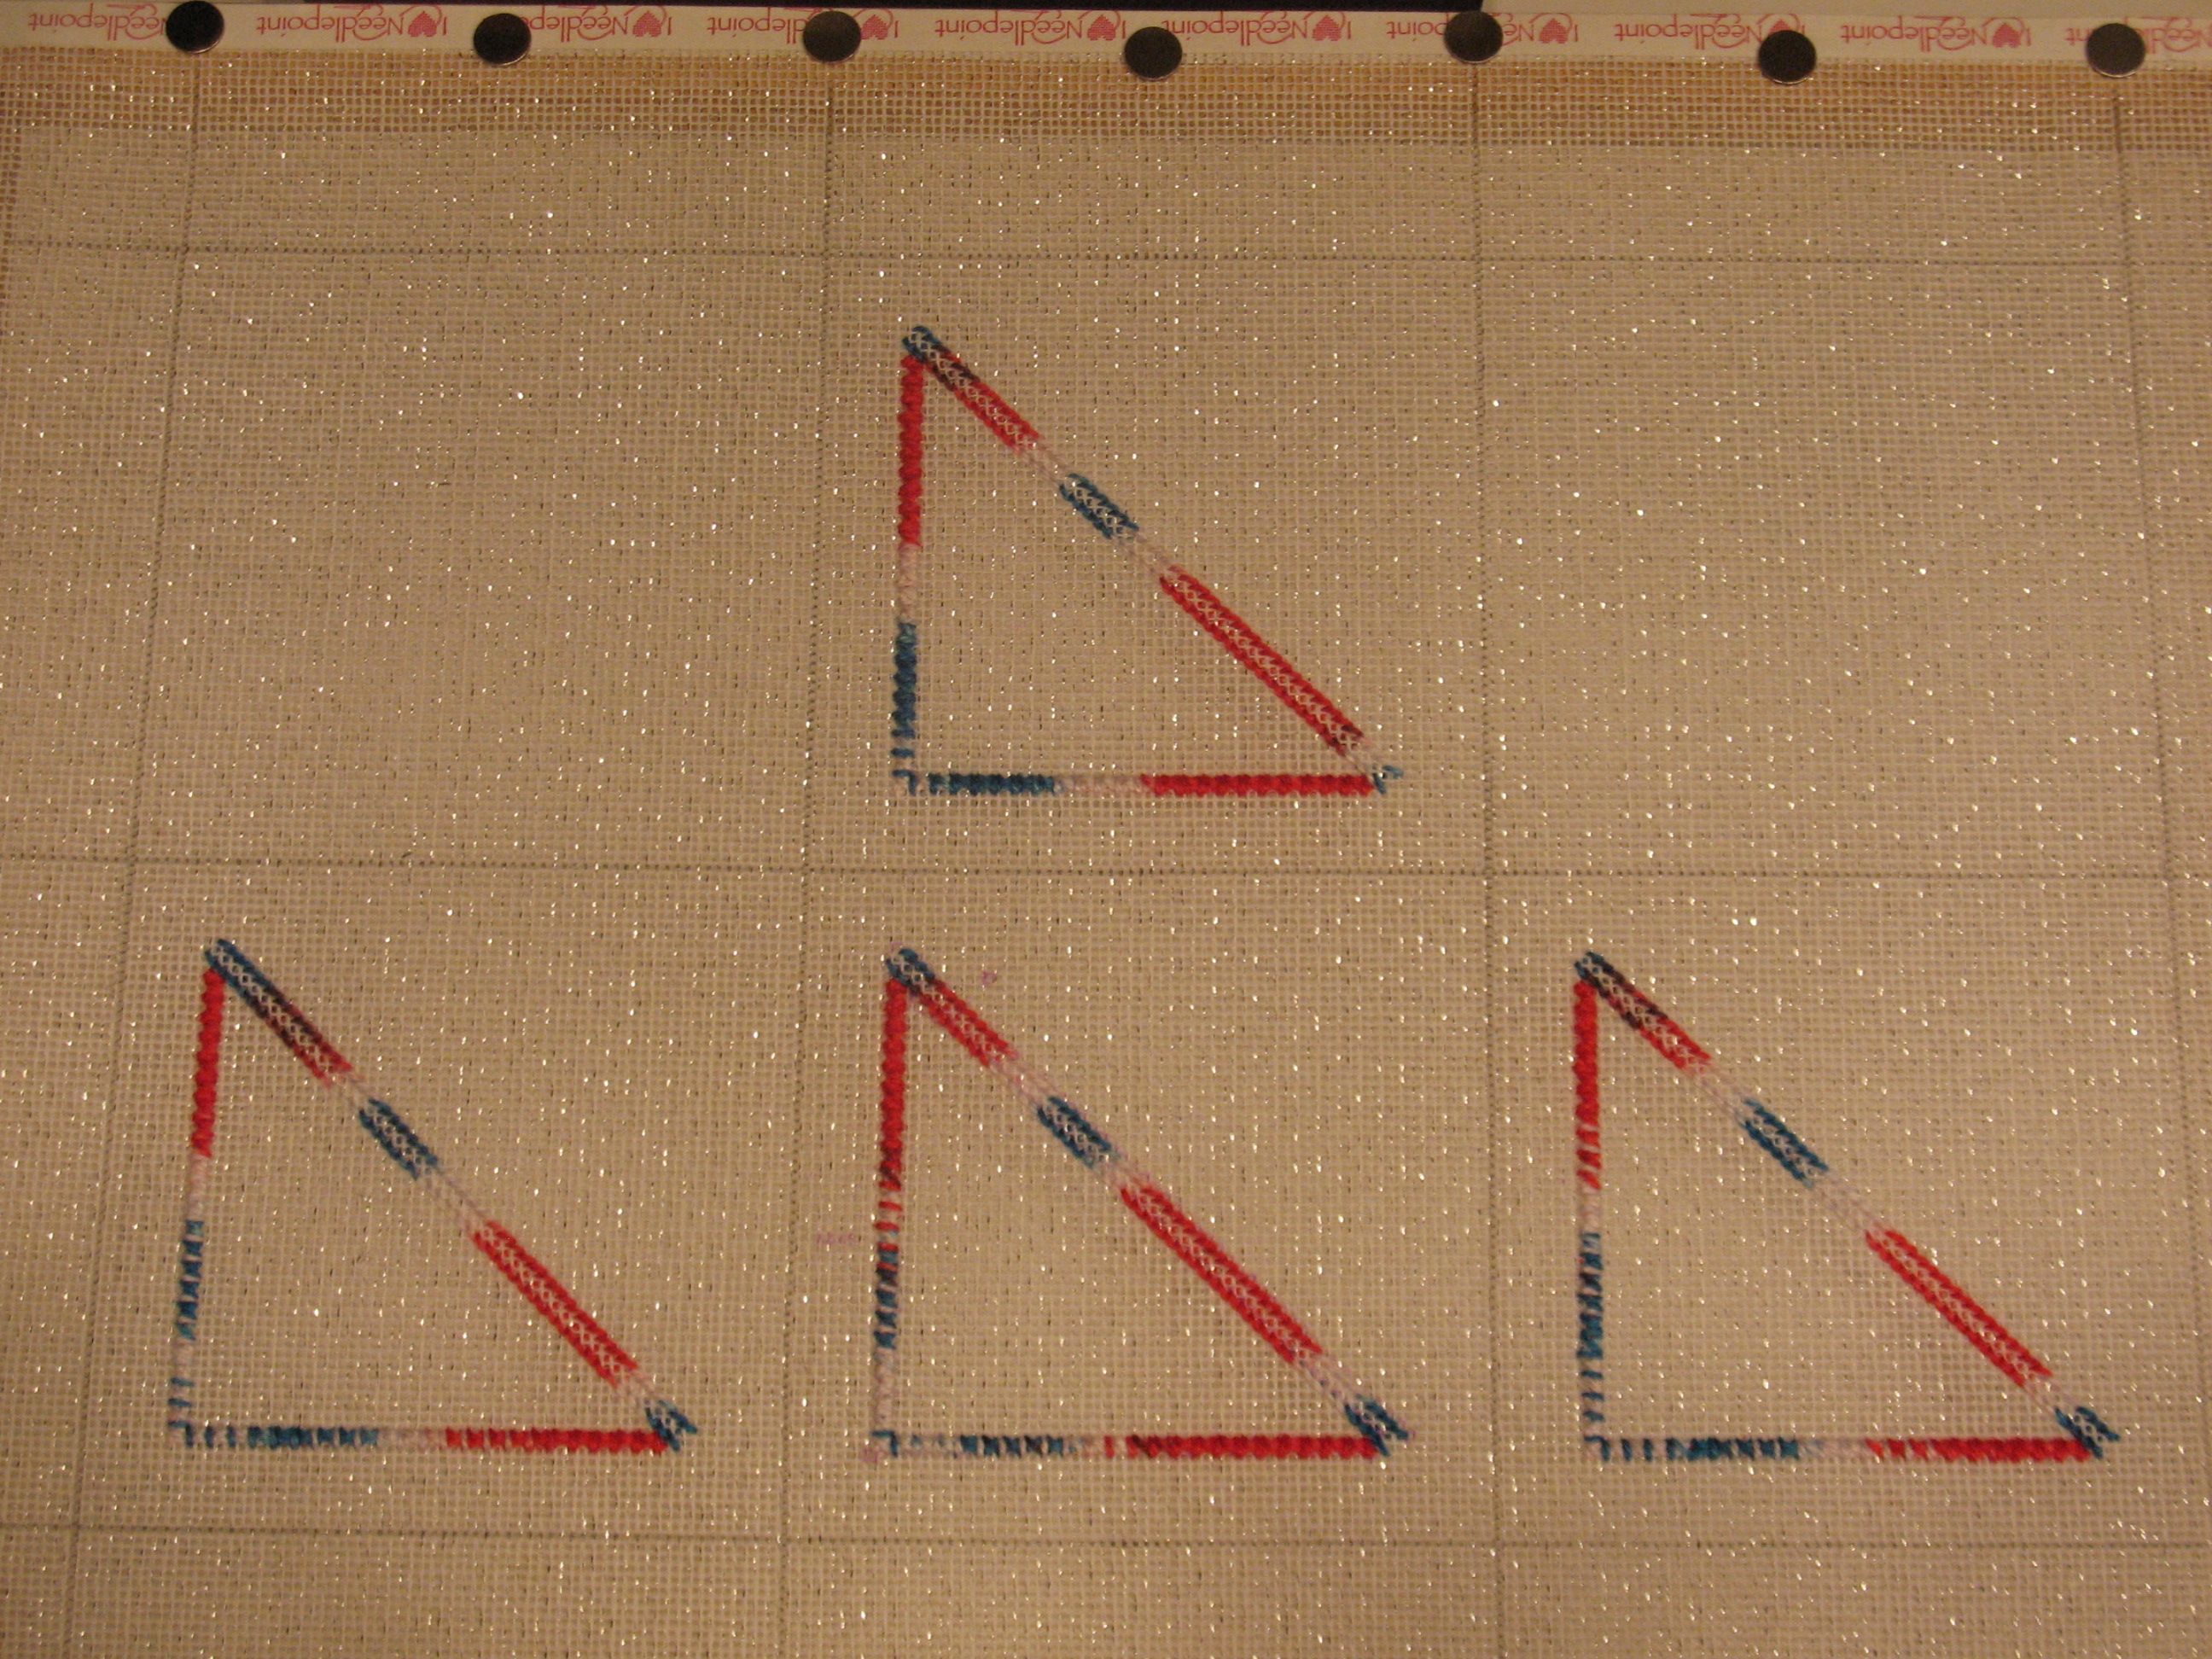
After replenishing my stock of Gold Rush 14 (WG84C), I was able to finish the sky. I have decided to to use Stitch Landscape, an iPad app, exclusively to select stitches for this piece.
Stitch Landscape is by Little Shoppe Canvas Company. And, the app is $10.99 at http://itunes.apple.com/us/app/stitch-landscape/id469541089?mt=8 (I have no financial connection to them or sadly, Apple). The landscape categories are clouds (28), flowers (27), grass (40), mountains (41), sand (30), shrubbery (18), sky (40), snow (27), soil (18), stone (18), tree (30), tree bark (12), & water (25). So, I think I should be able to find enough suitable stitches to finish this ornament which consists of sky, trees, & snow with 354 stitches to select from (the Description on iTunes says there are 370 stitches & within the hints section there could be more)! The diagrams are very clear at the smaller iPhone size. They do blur a tad when you open to the 2x size on iPad but not so horrible that you can’t look at it. And, the diagrams are easy to follow.
The Stitch Hints for sky are very helpful as they speak to what colors to select for the dynamics of the sky (fair weather, storm, time of day), coverage. For my sky, I reviewed the 40 patterns, narrowed down to 6 potential & selected pattern 23. It is difficult to pick this up on the stitched canvas. I have found that darker colors do not tend to display patterns as well as lighter ones. Here are 2 pictures to show that pattern I selected & to display the differences between the 1x & 2x for those you considering purchasing the app.


And, I love how the Gold Rush is dark black & blue with the sparkles when stitched. I still have to fill in some falling snow and I think you can see the slant of the stitch just enough to aid the impression of falling snow.

Filed under: ANG Main Line Stitchers Chapter, ANG Stitch of the Month, 2010
I was remiss in getting my finished “Promise of Mystery” designed by Sue Reed to the framers until late 2011. It got stuck in a corner & I forgot about it. But, I got it back shortly before Christmas! It is in a simple frame with an inner silver border & outer black border.
It was fun watching the piece develop over the year-long project. I think that the ANG Stitch of the Month is a wonderful resource with clear & thorough instructions (https://www.needlepoint.org/page/SOTM). AND, it goes back to 1998!! It is a member-only feature of ANG except for the 1998 design, Norwich Delight by Beth Robertson. By allowing that design to remain available to the public, it really promotes the mission of ANG which is:
The American Needlepoint Guild provides a stimulating and challenging environment through nationwide educational programs, a national publication, and Seminars & Exhibitions in which members: develop creative potential, serve public and professional constituencies, support faculty members in the joint pursuit of excellence in teaching and research, and promote intercultural understanding through the needle arts.
While this is the only one I’ve done (to date), I really appreciate the many designers over the years & the behind the scenes work that goes into the Stitch of the Month year after year!! I’m very happy that it is finally completed & hanging. Yes, I found a spot for it!!

Since posting this in 2011, I have stitched several other of the Stitch of the Month designs and have contributed my own design to the pieces. Crescent Journey joined the others in 2023!
While I have enjoyed this design for many years, I am now gifting this piece to my hairdresser, Carol. With limited wall space, I’ve got to make room for newer pieces! I’ve taken a better photo. It still doesn’t reflect the sparkle from the Kreinik and beads.

Our Mainline Stitchers Chapter of ANG did a Holiday Santa Exchange (steal) again this year at our Dec meeting. And, I got a beautiful ornament to stitch.
I don’t know the designer & I can’t tell by the mark in the lower left corner. If anyone knows, please leave comment & let me know.
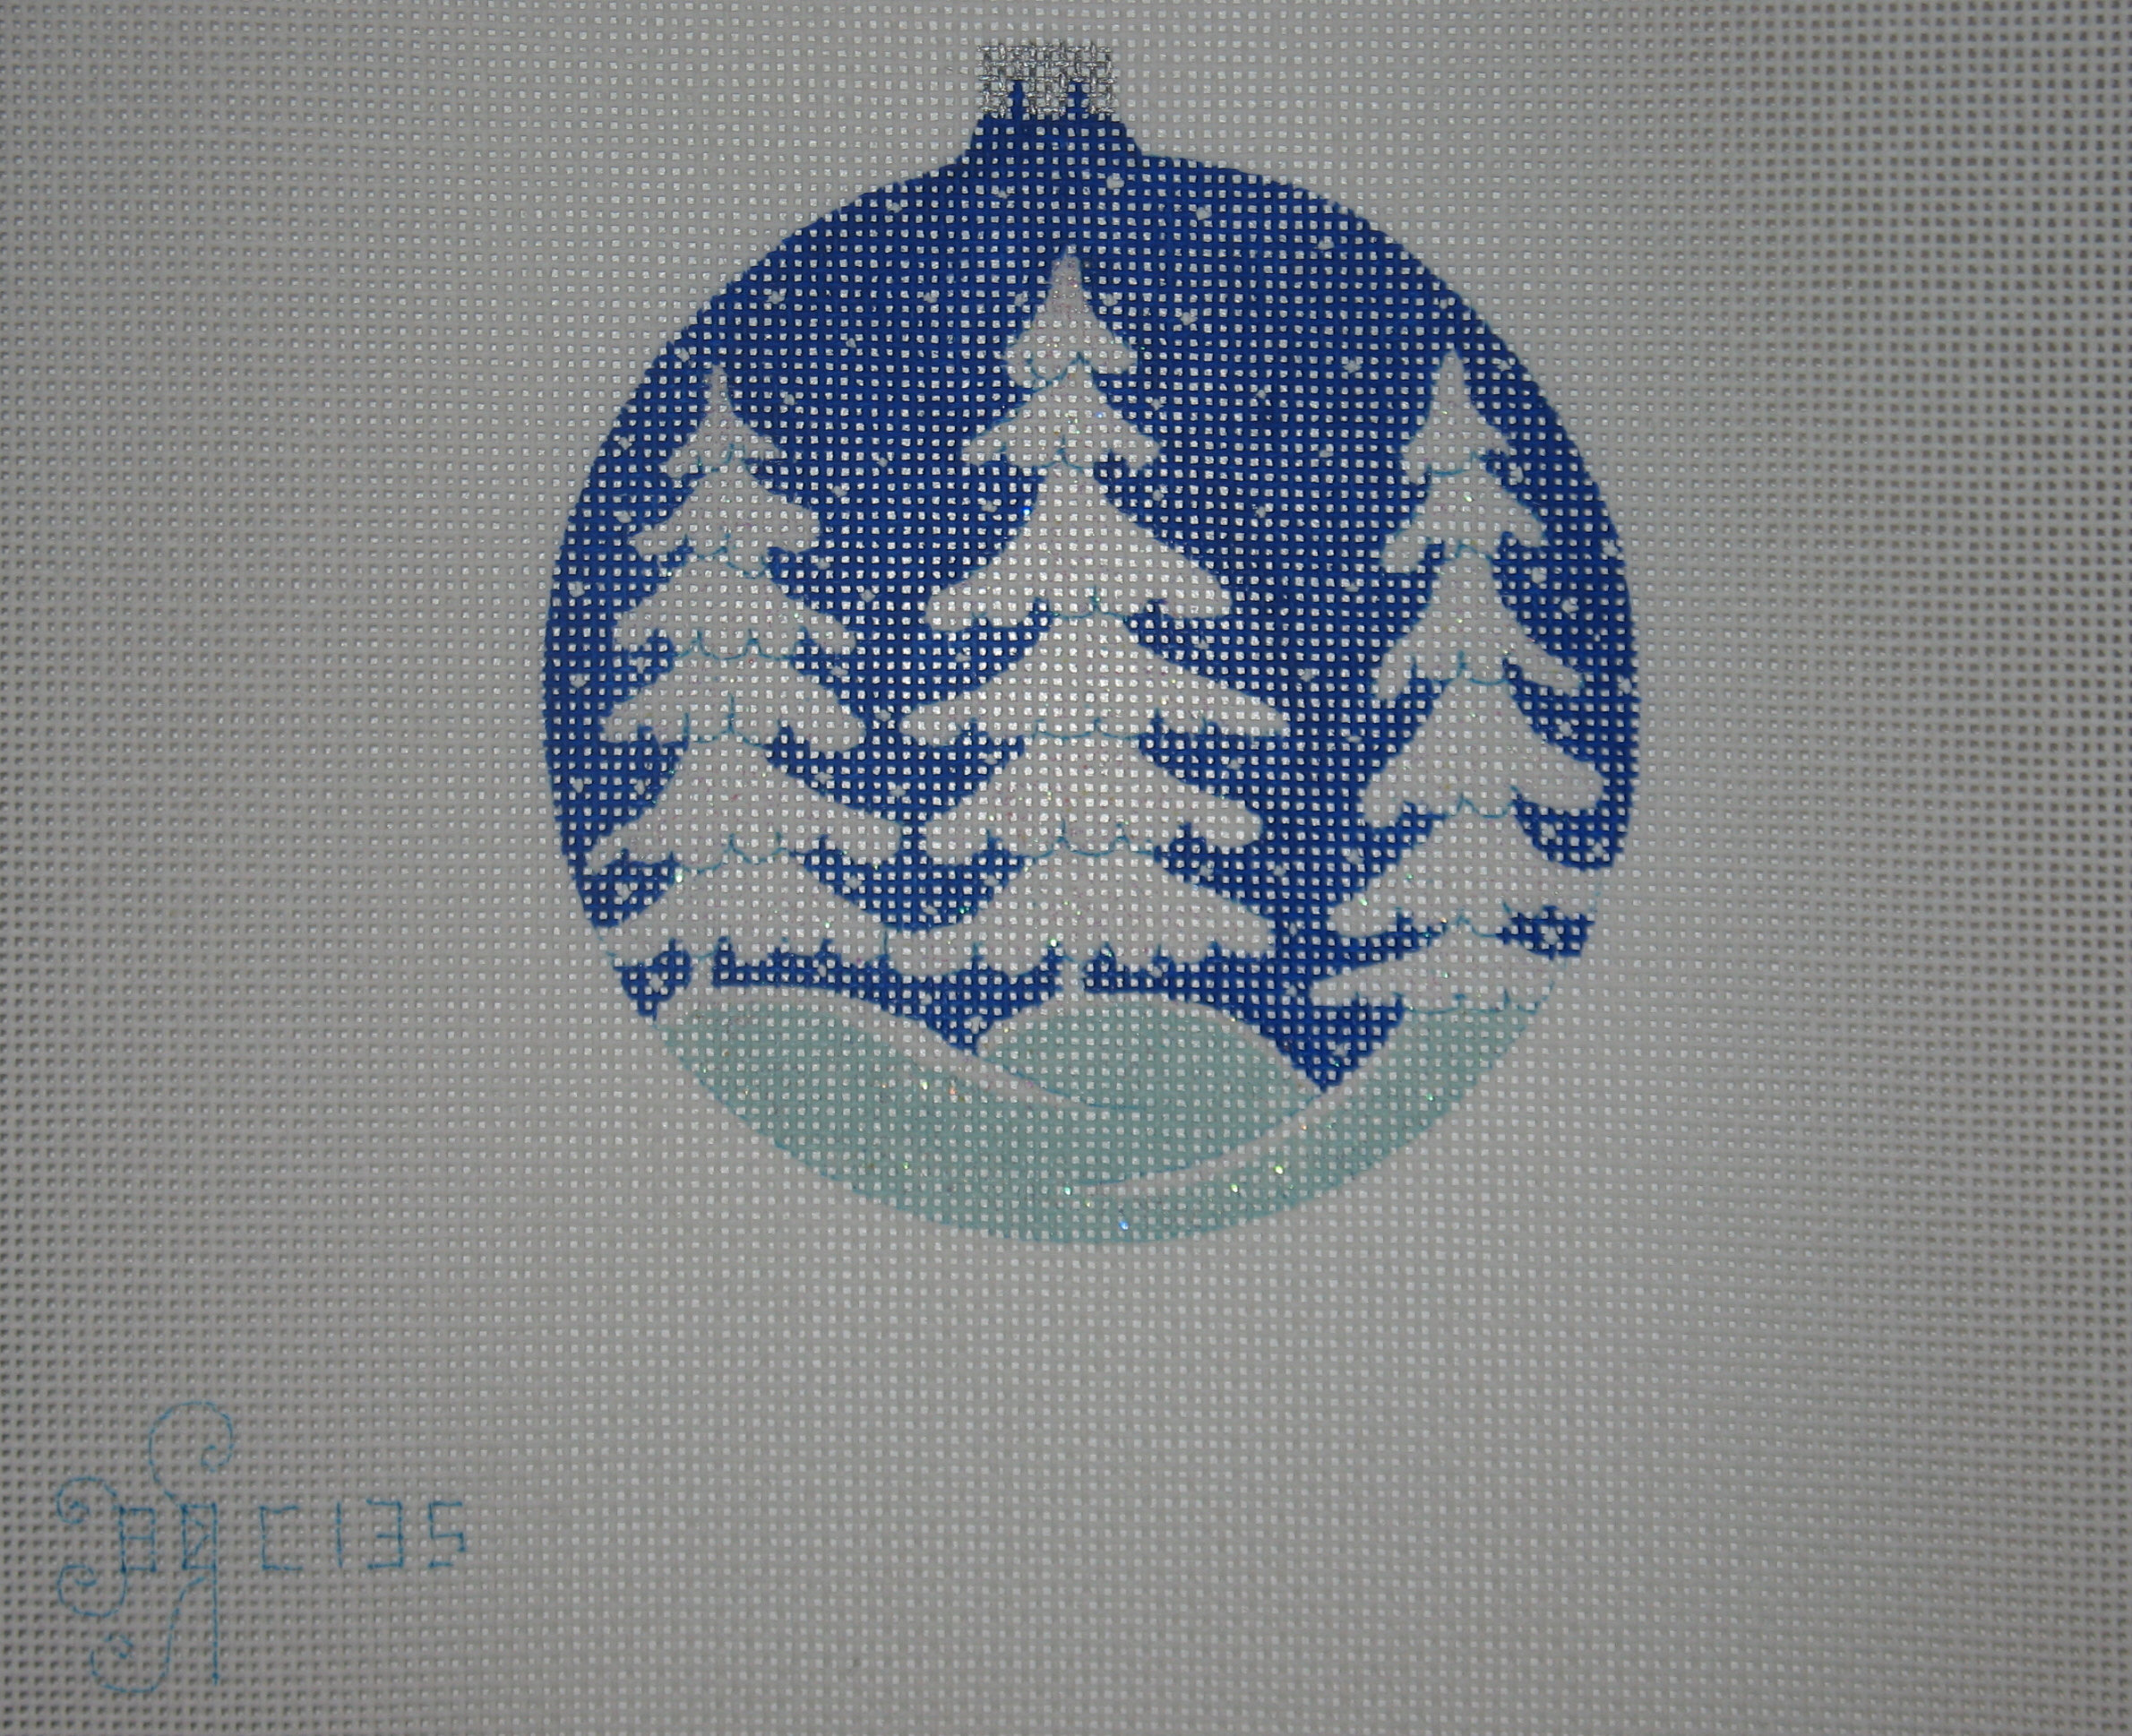
The threads are now ready – I went through my stash yesterday. Next, I need to select stitches. Then, I can get started just as soon as I finish my small cross-stitch ones. It’s a lovely piece.

Filed under: ANG Main Line Stitchers Chapter, Christmas Ornaments, Kumihimo, Melita's Other Completed Pieces
Our theme for this year’s ANG Main Line Chapter meetings is “small”. In the fall, we’ll learn how to finish a small ornament using simple finishing techniques & a Japanese braiding technique called Kumihimo. Then, in the winter/spring, we’ll make an “Ort Box”, a small, collapsible container. Also, in spring, we’ll explore the world of “Marnie’s Miniatures” (one of our member’s is an award winner in miniatures). Lastly in the spring, we’ll have a small “tasting” of other Japanese craft techniques at the start of meetings when we work on the small ANG bear frame weights for the 2012 seminar.
On Sept 12, I’ll lead an introductory class in creating a simple 8-cord Kumihimo braid, a Japanese technique. I made braids using floss, DMC # 5 threads, Watercolour overdye threads, 1 mm hemp cording, 2 mm satin cording, & a combination of threads. And, I have 2 finished bracelets. The chapter will provide the Kumihimo disk, some hemp cording, and materials to finish one bracelet. The application of braiding to needlepoint can lie in creating a decorative matching braid to hang your piece of needlepoint, finishing the edging of an stitched piece, & couching onto a design. From left to right: (1) DMC # 3 (4 strands of white & 2 each of blue & white); (2) 1 mm Hemp cording (4 strands of red & 2 each of blue & white). Mine & my husband’s! I learned in about 20 minutes how to finish the bracelets at a cost of about $2 each with the wonderful folks at The Bead Garden in Havertown.

I wanted to explore textures & thicknesses. So, these are my results & comments about each. From left to right: (1) Blue braid: 2 colors of Silk & Ivory with 2 colors of Watercolours (2 strands each color) – you can just barely see the effect of the overdye but they wasn’t a lot of variation in the overdye thread to begin with; (2) Large red, white & blue braid: 3 colors of 2 mm satin cording (4 strands of red, 2 strands of blue & white) – too thick for a bracelet – better for a necklace; (3) Medium red, white & blue braid: 1 color Flair (4 strands), 1 color Frosty Rays (2 strands), 1 color Fyre Werks (2 strands) – it is surprisingly rough for how the soft threads feel separately so it not good for a bracelet & it stretches after being braided; (4) Very small red, white & blue braid: 3 colors of DMC floss (4 strands of white, 2 strands of red & blue) – it took a long time to stitch that small example so it is impractical to use on a large-scale but perhaps would have some application for miniature work.

On Oct 10, Carol from The Bead Garden will teach an advanced 12-cord Z-braid. She’ll share tips and show us a different way to start the braid. Carol has examples of various braid techniques. And, she has learned even from books written in Japanese! We’ll have enough hemp cording to distribute or they can use their own thread & have it ready for November’s finishing class. These are 2 of her braids using 12 cords & comments about each. From left to right: (1) Pink & black braid: 2 colors of wool/yarn (8 strands of pink, 4 strands of black) – the 3-dimensional effect is more obvious than in the smaller braid; (2) Pink & white braid: 2 colors of DMC #3 (4 strands each of mauve, pink, & white) – a little fancier braid than the simple one

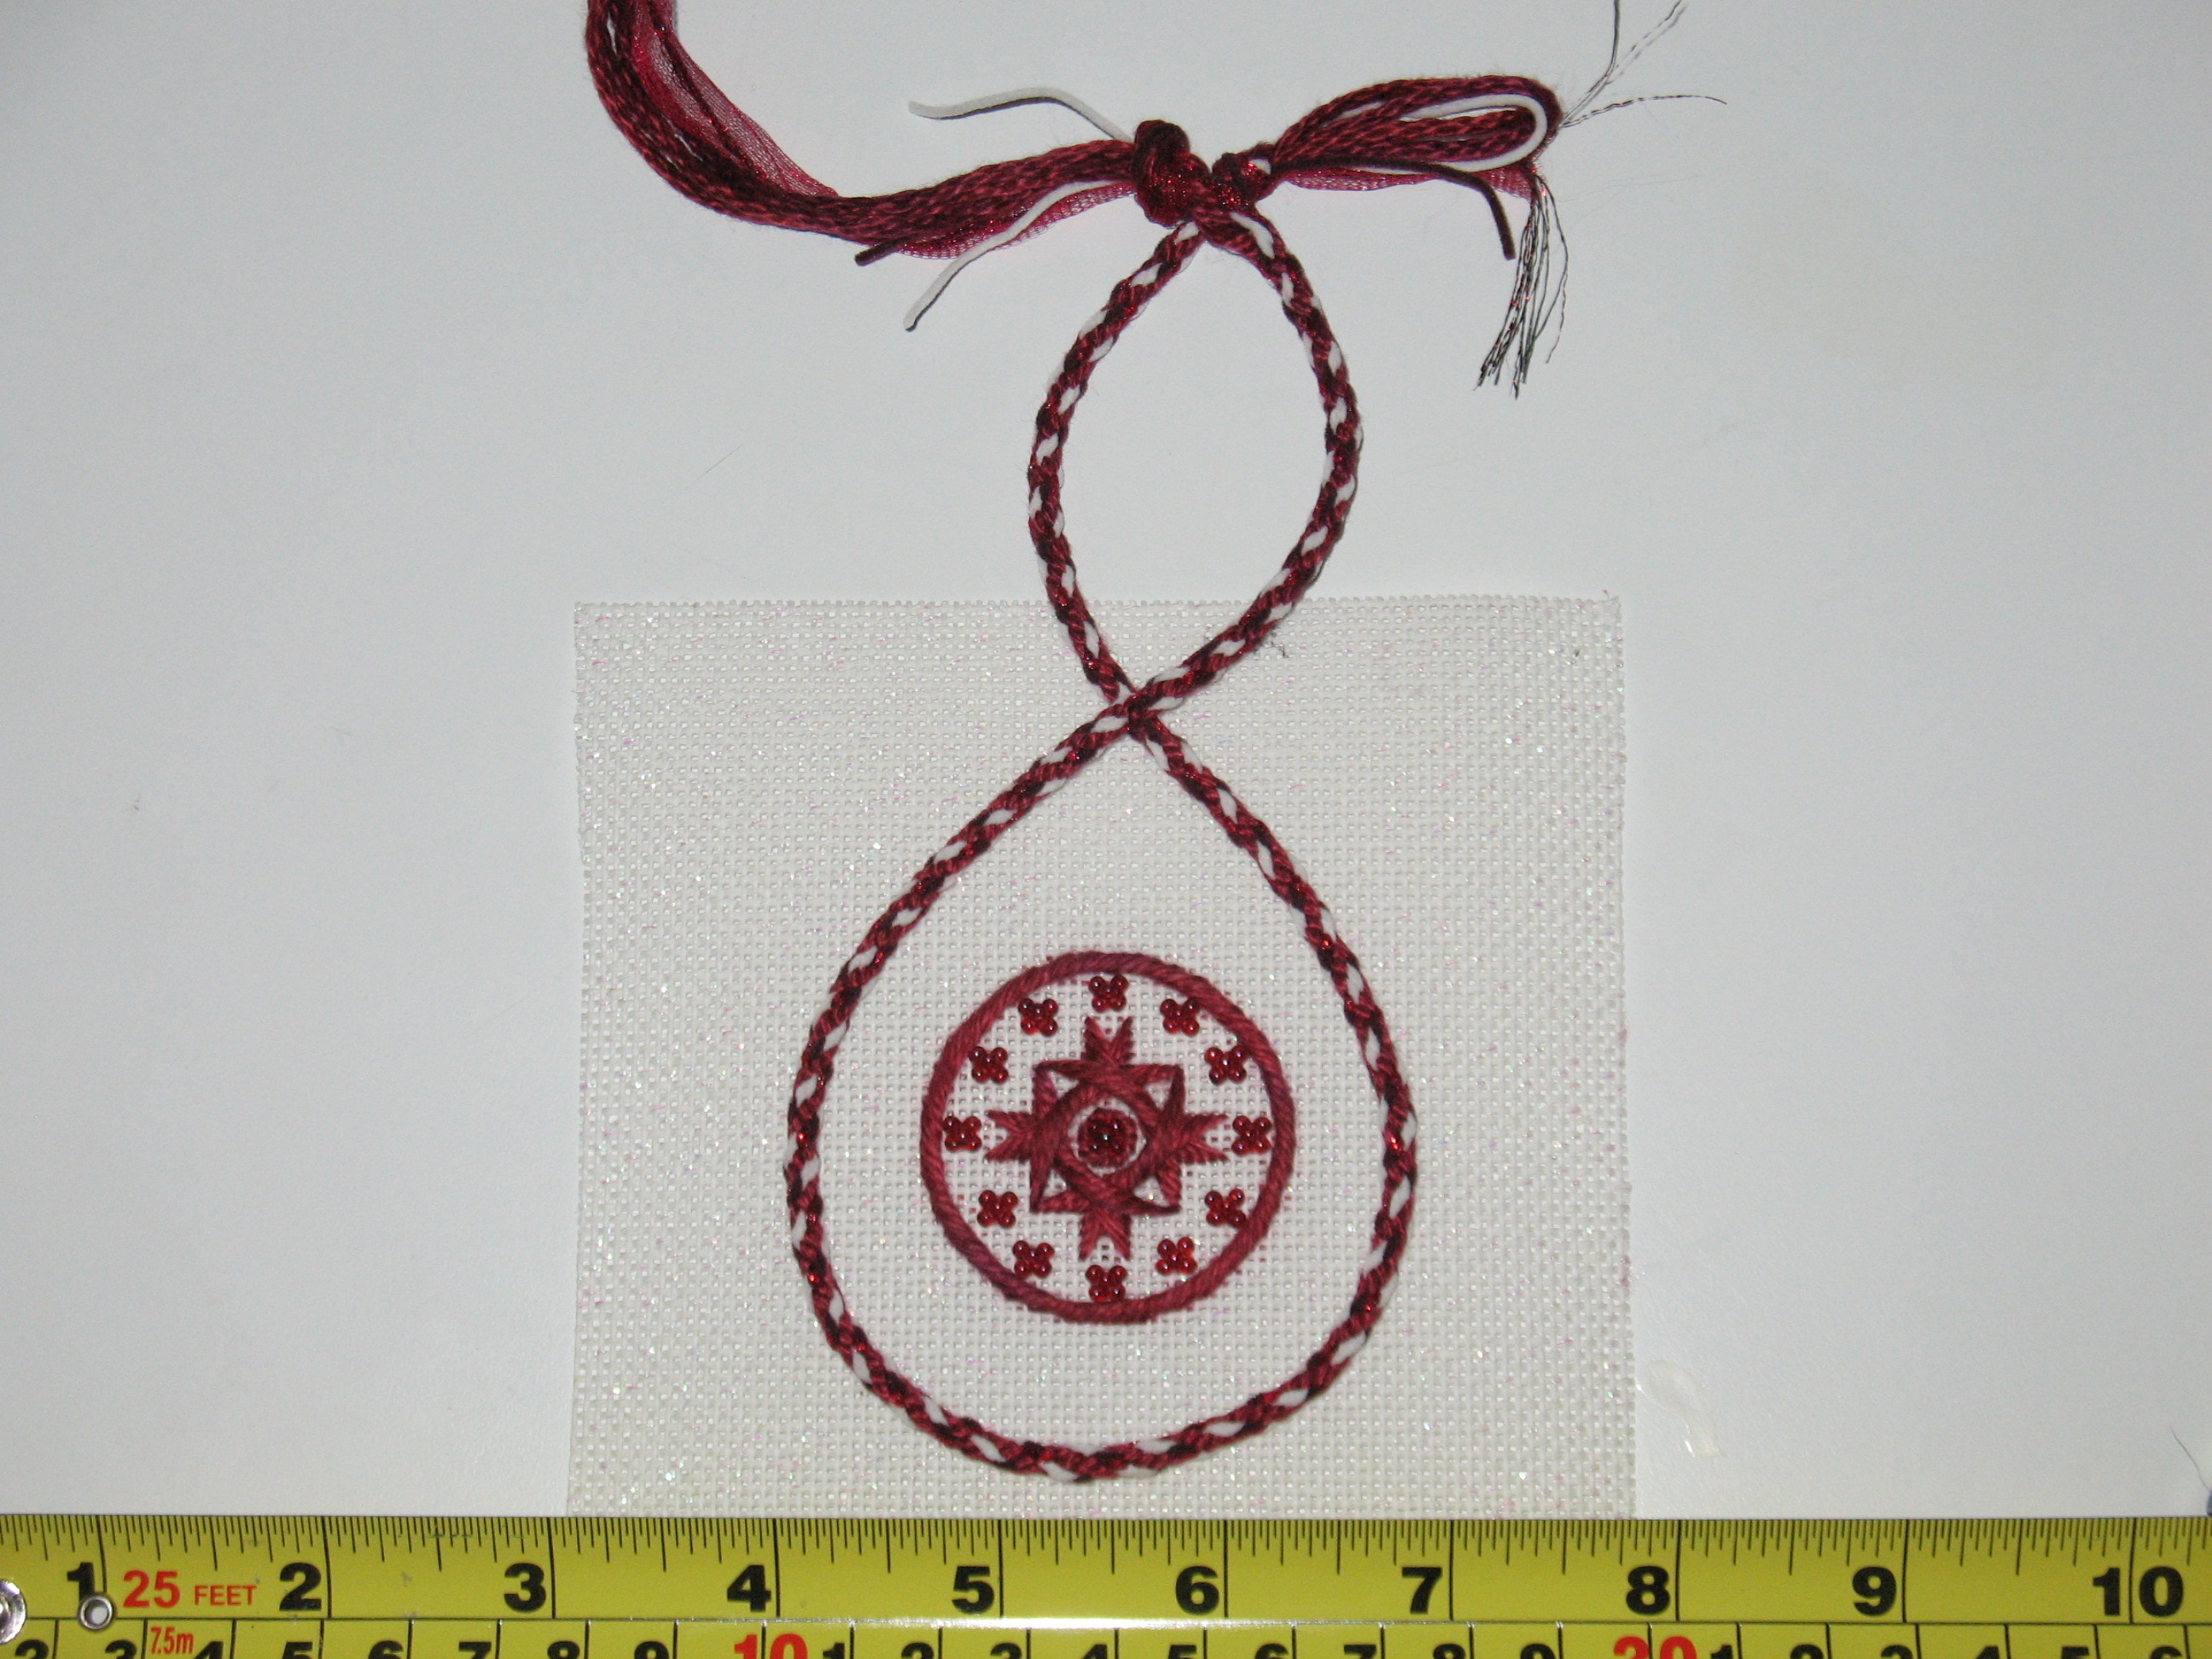
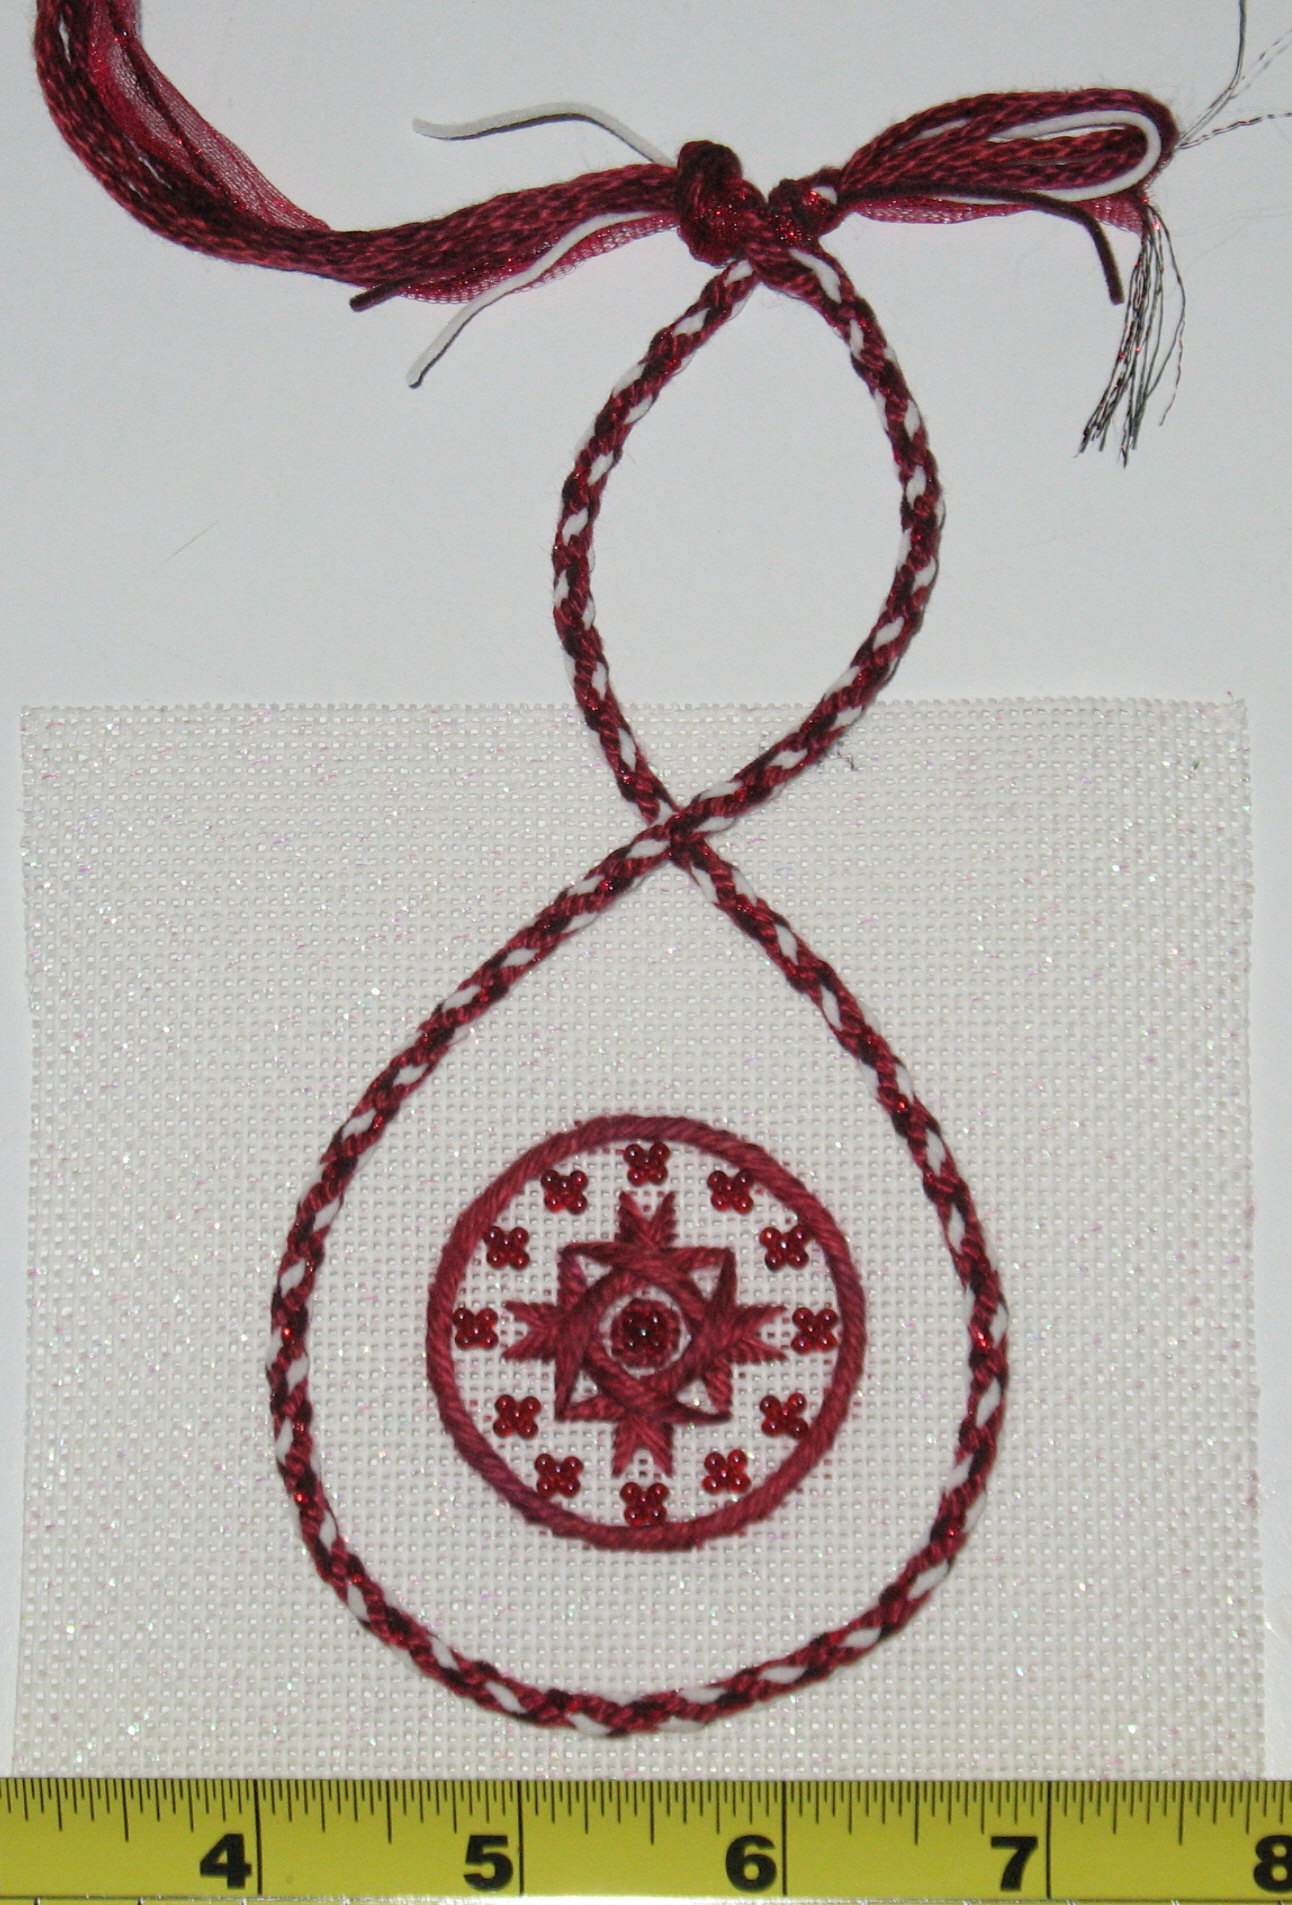
Then, on Nov 14, Karen from Nimble Needle will teach us a simple finishing technique for the 2 & ½” ornament. If we bring a stitched design and about a 12” braid (which allows for a 2” loop), we’ll be able to leave with a completed ornament! I’m ready as you’ll see below. For this, I used: 2 colors of Petite Very Velvet (2 strands each of red & white), 1 color Frosty Rays (1 strand of red), 1 color Watercolours (3 strands of Cinnabar an overdye without a lot of variation in it & the same as I used for the deign of the ornament) – I just wanted a little sparkle & needed the 3-ply per cord of the Watercolours so that it would be a thick enough braid.
Main Line Stitchers (PA): Join us as we explore Japanese braiding, Kumihimo. We’ll begin with 8 cords in Sept, then 12 in Oct, & use some braid to finish a 2&1/2 inch ornament in Nov! Come join us at 7:15 pm on the 2nd Monday of each month at St. Luke’s Church (203 North Valley Road, Devon, PA) just 30 minutes from Center City Philadelphia & 10 minutes from King of Prussia. Contact us at: MainLineStitchersChapter@needlepoint.org for more information.
Please note, I have no financial connection to artists or companies mentioned in my blogs.