Back in November 2024, I posted about my A to Z books and included a photo of my River Silk Ribbon and Flair Spring Flower.
As part of my recent flurry of finishing, I purchased a mini frame at Michael’s. The 3″ square opening is a perfect size. It’s going to be a get well gift for our neighbor’s mom who lives with her. She fell and broke her pelvis last week but is already home! And, this flower has no maintenance for her daughter who has her hands full.
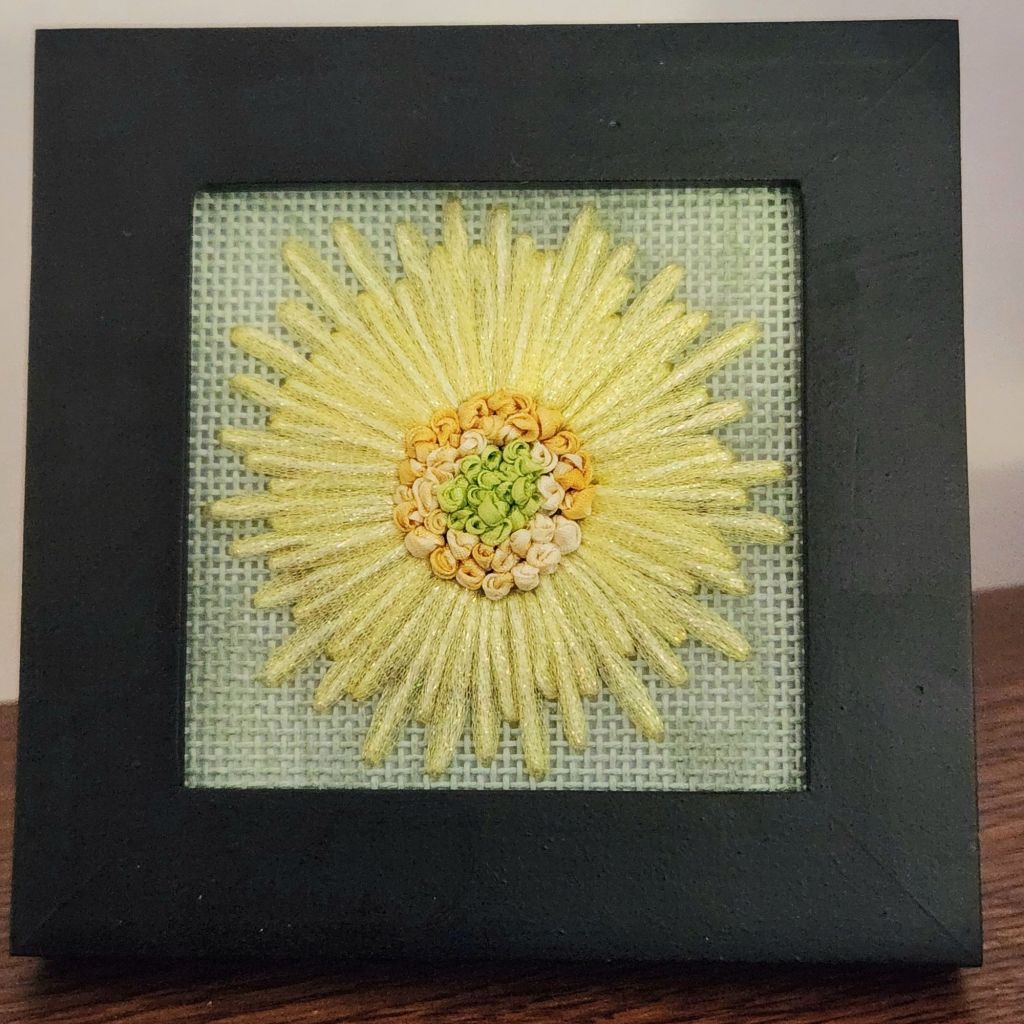
This is a great size for trying out stitches and threads while making a small gift. I love the vintage green canvas for these threads.
I keep a 5″ doodle canvas ready for experimentation. I don’t have more of the green canvas. So, eggshell is next up. Maybe I’ll use my markers to color the canvas.
Filed under: ANG New Jersey Needle Artists Chapter, Christmas Ornaments, Festival of Trees, Melita's Other Completed Pieces, Other People's Designs
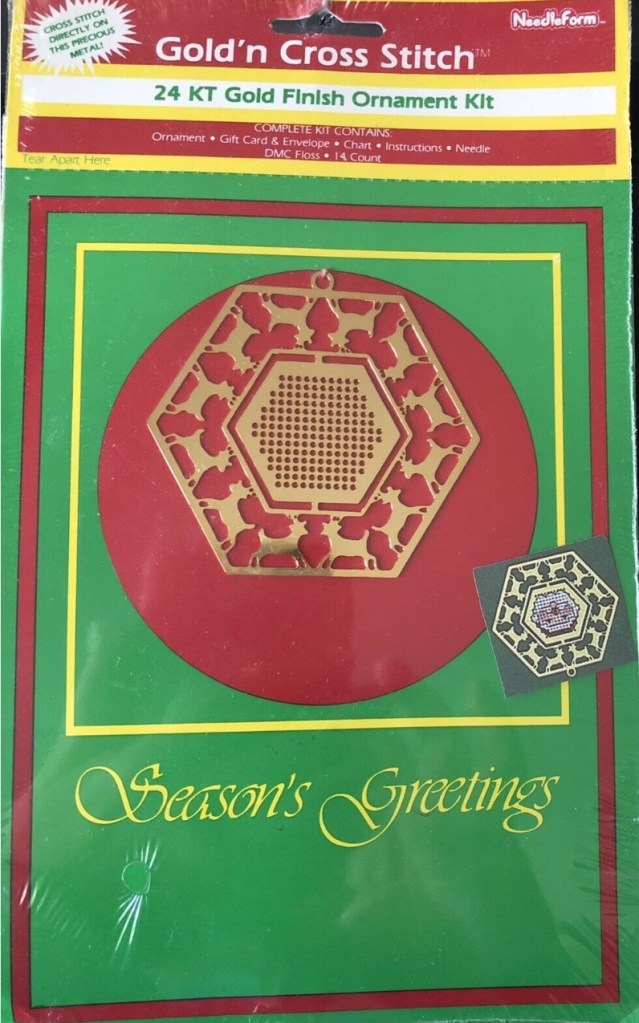
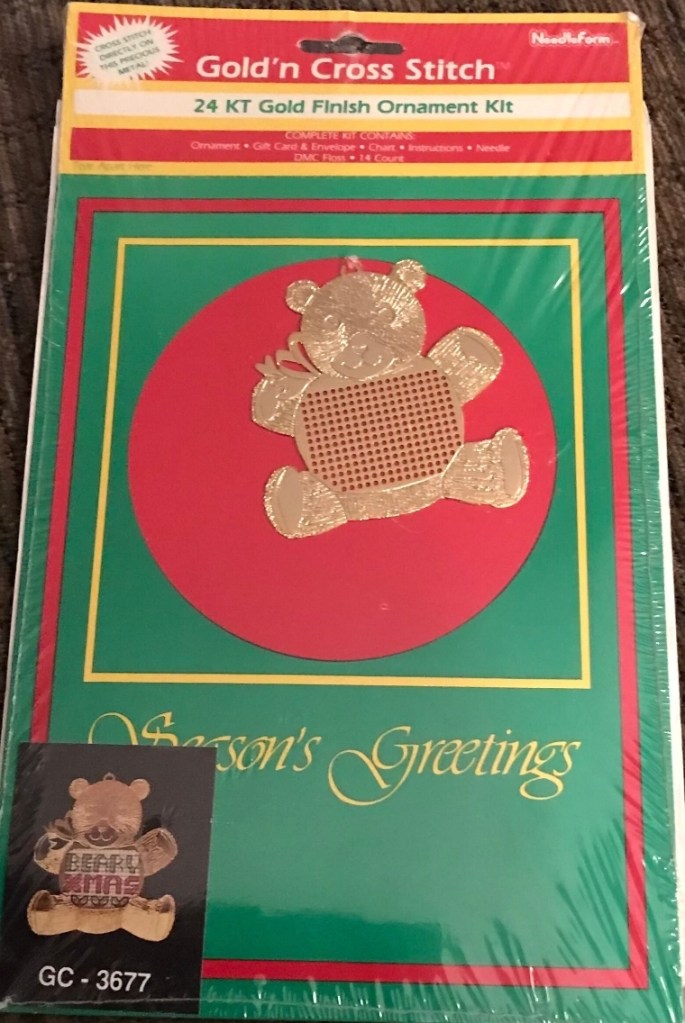
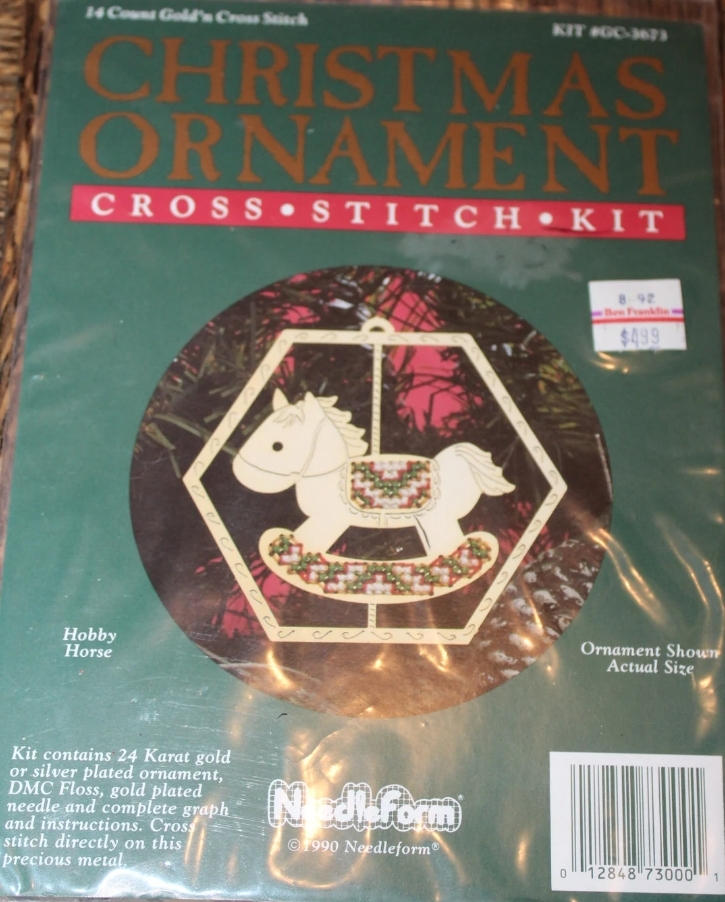
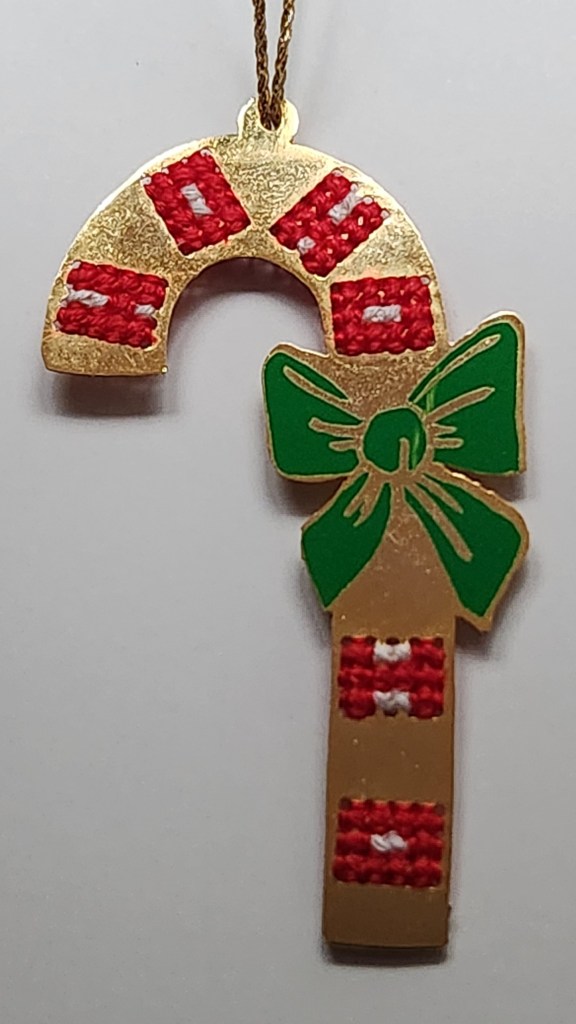
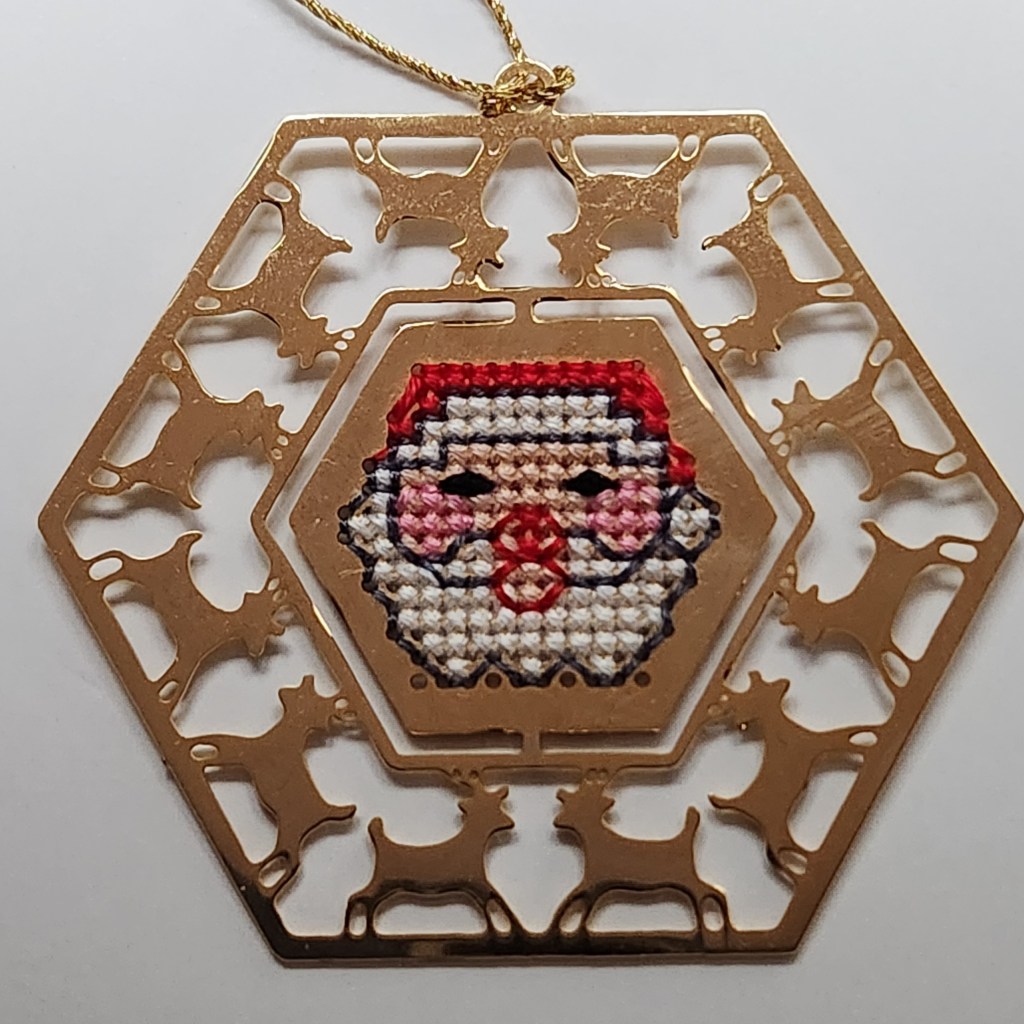
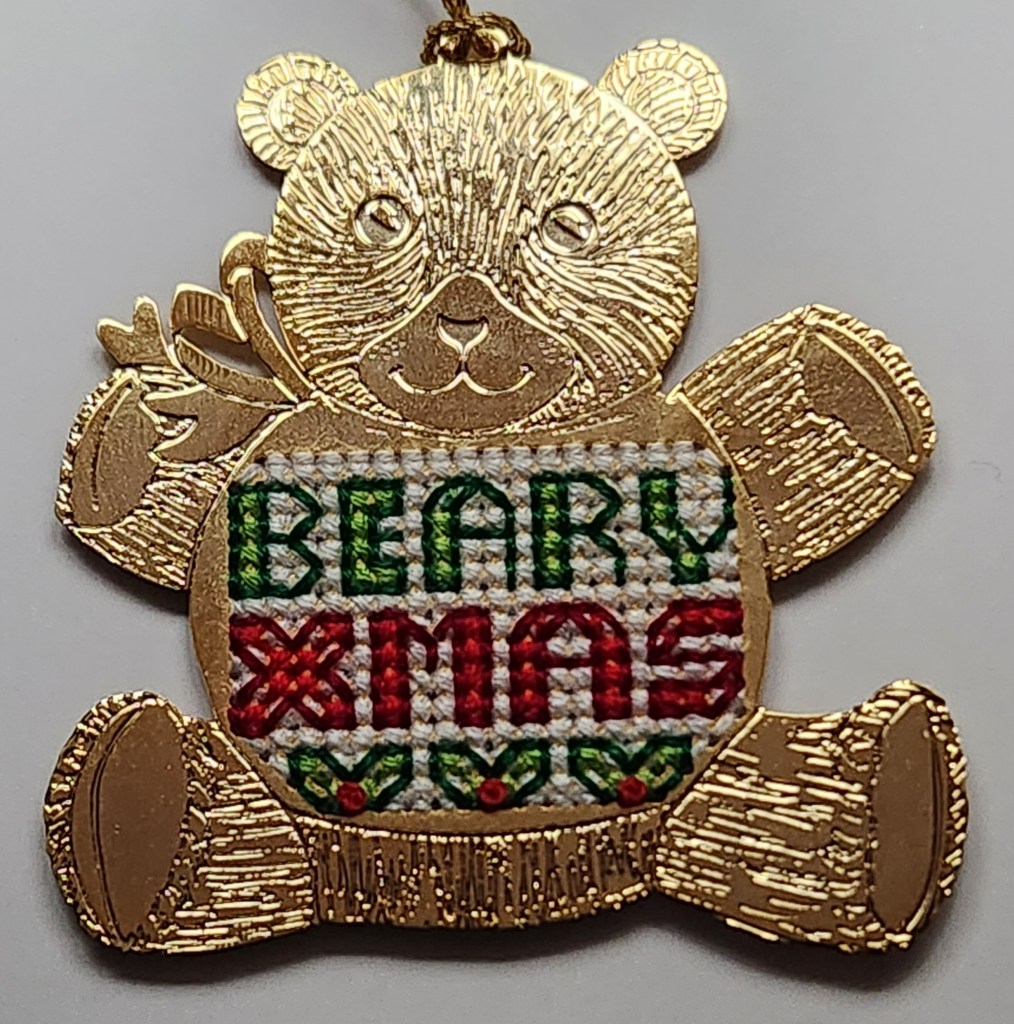
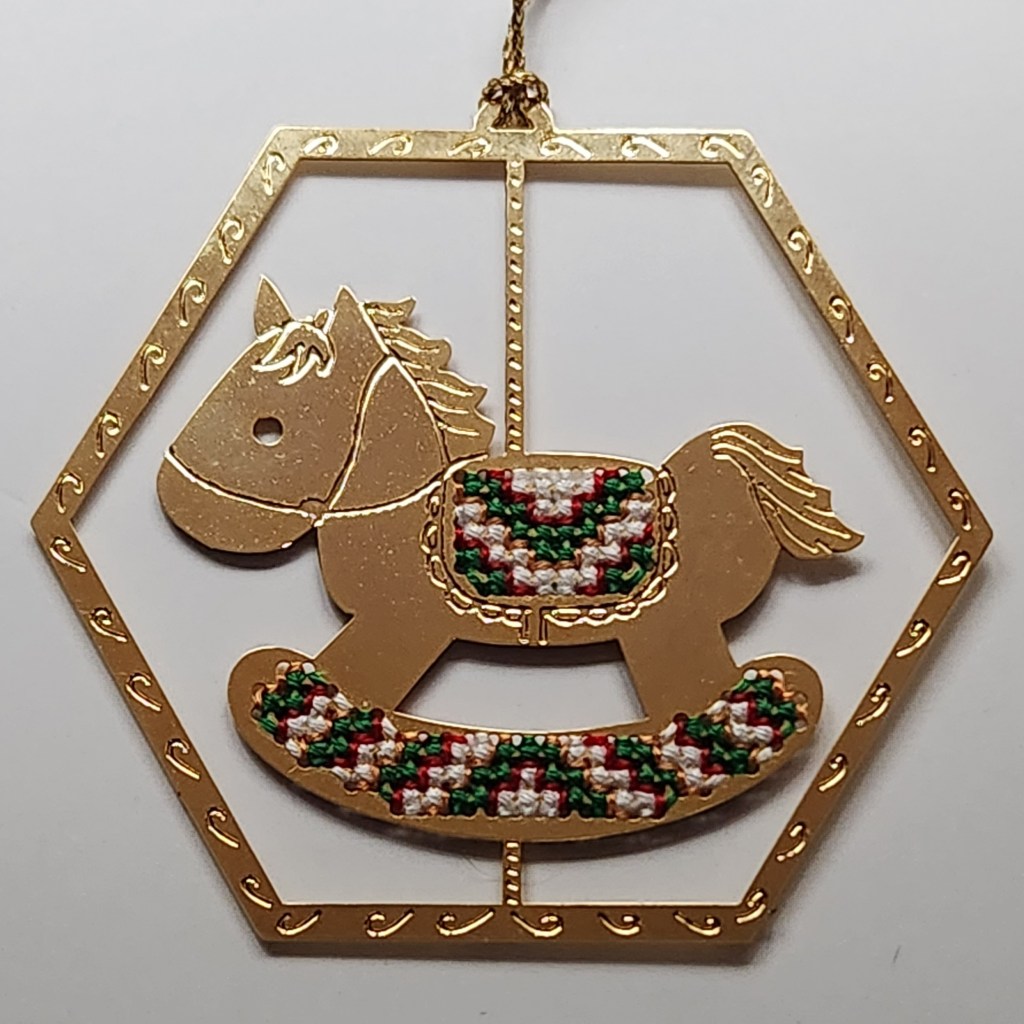
The Festival of Trees (see yesterday’s post) became a great opportunity for me to finish 4 more Gold’n Cross Stitch 24 KT Gold Plated Ornament Kits including:
Candy Cane (XGC-361) with HO HO HO spelled out.

Reindeer Santa (GC-3661)
Teddy Bear/Beary Xmas (GC-3677)
Rocking Horse (GC-3673)
All those are still available on Etsy and others I don’t have, but I resisted getting more!
Here are the 4 new ones stitched:
These are the other Gold’n Cross Stitch ornaments I took for display: https://melitastitches4fun.com/2012/01/02/other-3-ornaments-finished/ and https://melitastitches4fun.com/2010/12/20/on-the-5th-day-of-christmas-6-gold-christmas-ornaments/
Filed under: Christmas Ornaments, Christmas Ornaments, Melita's Other Completed Pieces, Other People's Designs
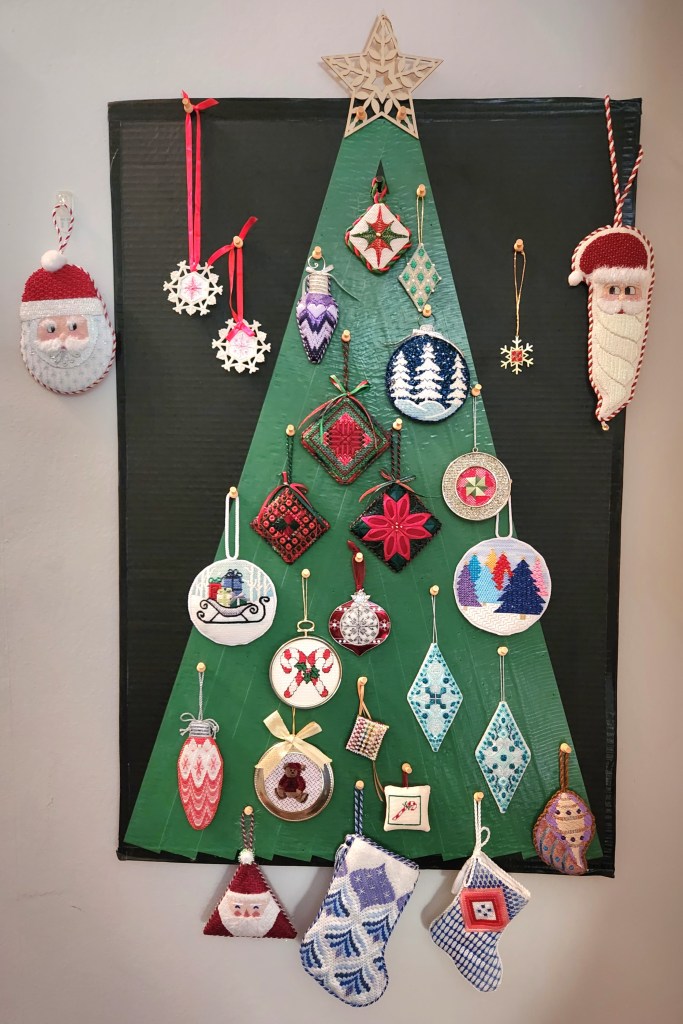
My Christmas Crafttree sprung up in 2016 and again in 2018 (I described how I made it previously: https://melitastitches4fun.com/?s=Craftree&submit=Search).
Well, it finally makes a return in 2023 with my needlepoint ornaments. Even though I lent 35 needlepoint ornaments to the ANG NJ Needle Artists chapter for the Festive of Trees display (more on this another time), I filled this tree with 22 needlepoint ornaments, 3 snowflakes falling, and both Linda’s Santa (left) and my Santa (right) looking approvingly at the tree!
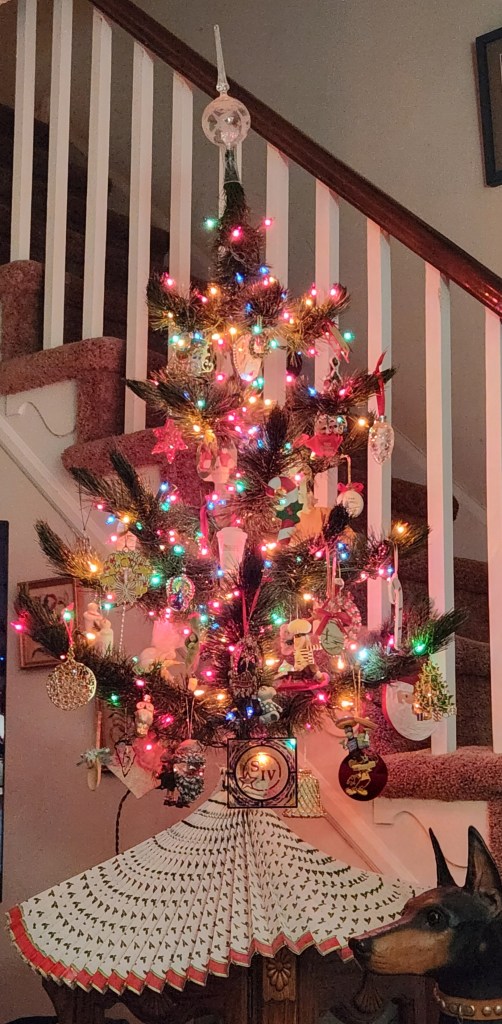
This year, our 3′ Christmas tree (from Brooks Drug Store in 1984 which was my first year as a pharmacist and our first Christmas together) that goes on a table holds the non-needlepoint abd some hand-crafted ornaments (beaded, ceramics, and crocheted) that we have collected over the years, been given, or inherited. It may be a small tree, but it still can hold up to 100 ornaments. I have about 65 ornaments and 20 icicles, not including the 2 dozen multi-colored tinsels. I usually alternate yearly between ornaments and icicles (with a few special ornaments).
We bought a “tall, skinny” tree one year from a catalog, but it was defective, and we returned it, believing that meant we were supposed to keep our little one! Forty years old next year? How’s that possible?
Our guard dog, Buddha, is named for our dear friend, Johhny G, who passed away way too early on this day in 1994 at 39 years of age.
We miss each and every one of our family and friends but have lots of fond memories!! Wishing he and others who have passed rest in peace.
Filed under: 2022 Christmas in Williamsburg, Golf, Melita's Other Completed Pieces, Needleworkers Delight
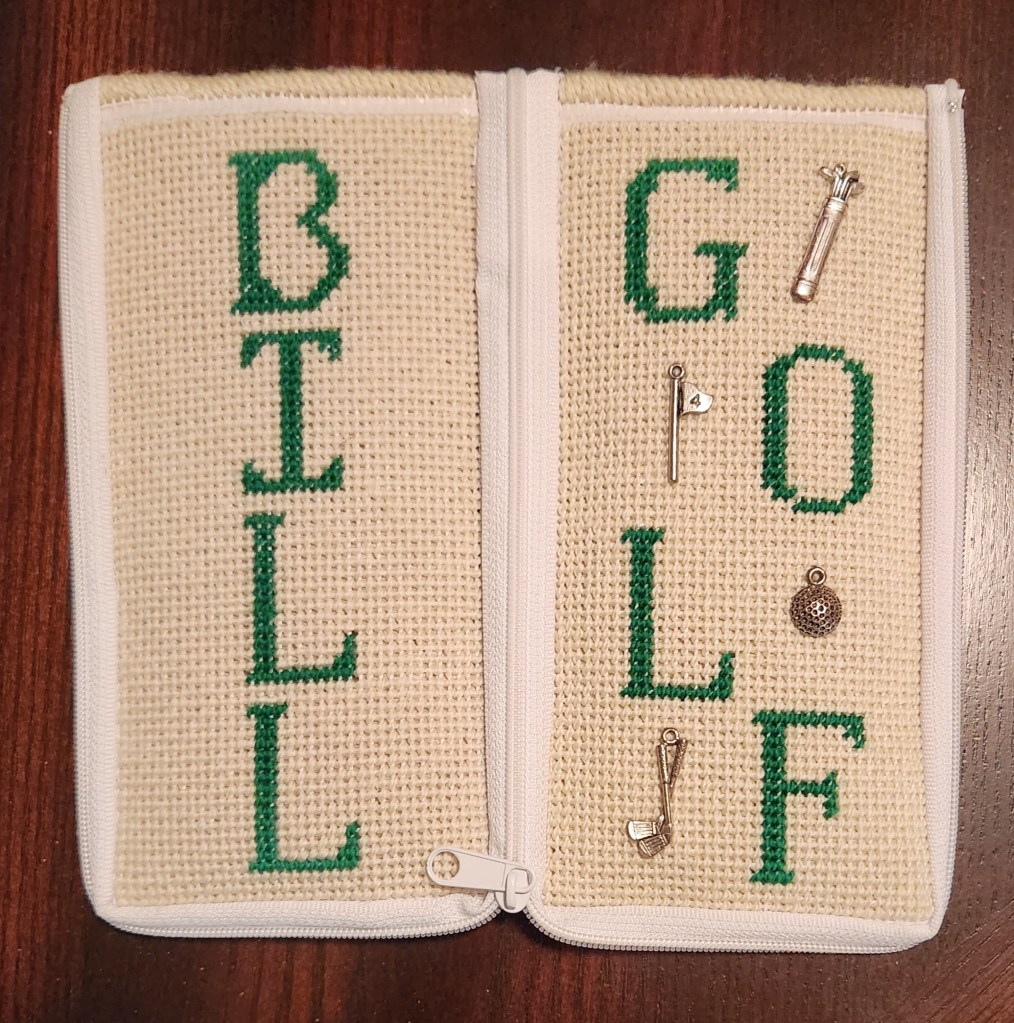
I started Bill’s golf eyeglass case at Christmas in Williamsburg. The Mini Block Golf design comes from Hinzelt kit. I created the B and I to stitch BILL on the opposite side of GOLF. It came with 4 charms that I attached with invisible thread. By the time the weekend was over, I had stitched the letters on both sides and started the background. I couldn’t stitch on the case exclusively or else Bill would have wondered what I’d done for 4 days – he does pay attention!!
Each half used almost a whole skein of Vineyard Silk Merino for the background. So, unbeknownst to Bill, he ran into Rittenhouse Needlepoint for another skein of thread so I could stitch the basketweave background of the second half. It took a couple of late nights but I finished stitching Bill’s golf eyeglass case before Christmas.
I did have to “finish” it after Christmas by adding a lining. And, the challenge was that his sunglasses are so much bigger than his eyeglasses that his eyeglasses will fall out easily. So, I stitched 2 magnets in place along the upper edge (one each side and then covered the inside with ultrasuede).
Filed under: ANG Main Line Stitchers Chapter, ANG Seminar 2021, Finishing, General comments, Interpreting Color Theory for Needlework with Susan Hoekstra, Seashells, Snail Shell
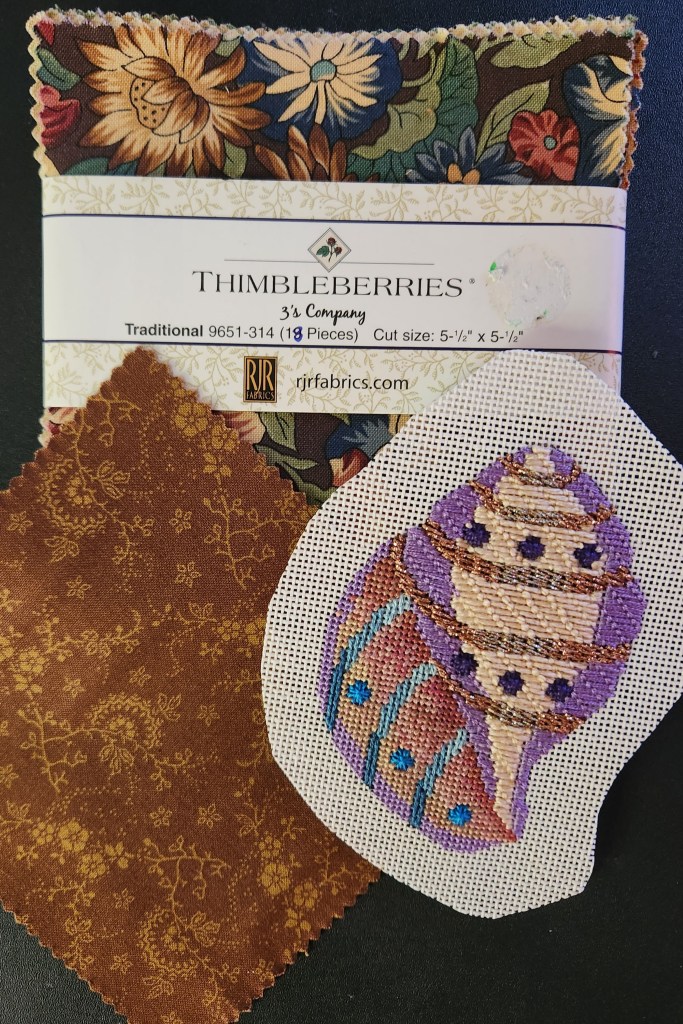
Thanks to stitch suggestions from Susan Hoekstra in a Seminar Color class in 2019 and a thread from Rosie at NJ Needle Fest in 2021, I finished stitching this Seashell ornament. Fast forward to 2022 when I won fabric pieces as a door prize at Linda’s Quilt Guild Show. There are 19 pieces 5&1/2″ squares all different but coordinated. I narrowed the choices for the backing down to 6 and let my husband pick the fabric to coordinate with the seashell.
I did my cutting and ironing of the fabric and fusing web onto Skirtex as previously described.
On the canvas, I see areas that appear raised and want to accentuate them. So, I spent time cutting and tacking felt into the vertical areas along the bottom left and the larger upper right area. One layer of felt on the outer 2 vertical areas, two in center 2 vertical areas, and two in the upper right area.
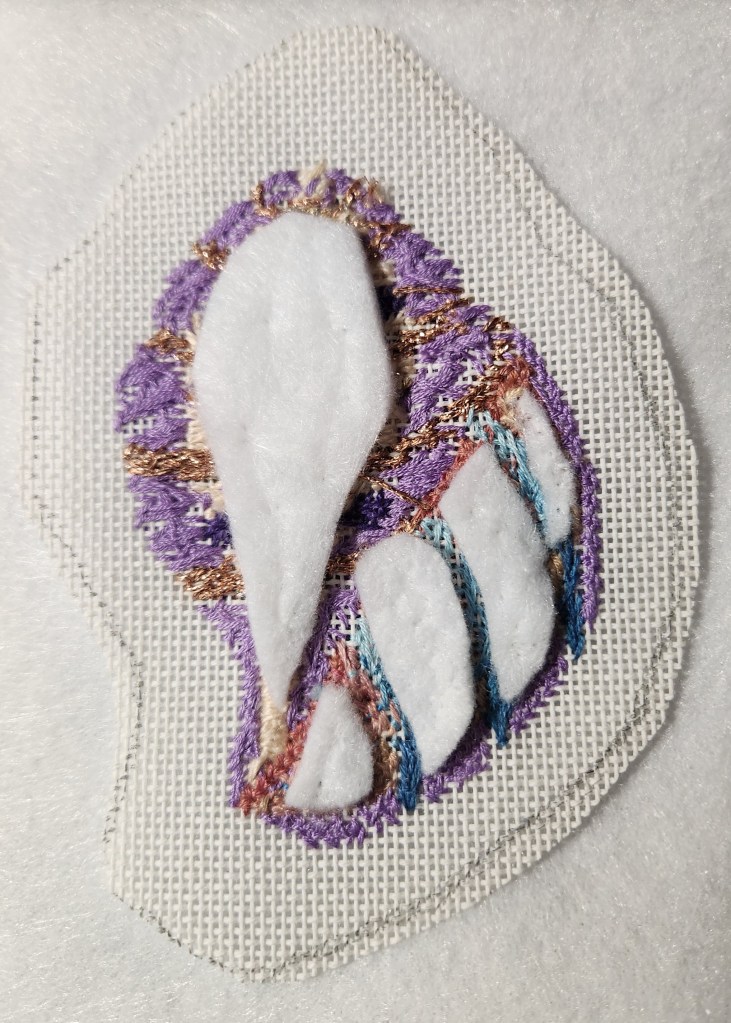
Then, I attached the padded canvas to another piece of Skirtex in the unpadded areas to make the padded areas raised.

I tacked the edging back using invisible thread (not the lacing technique).
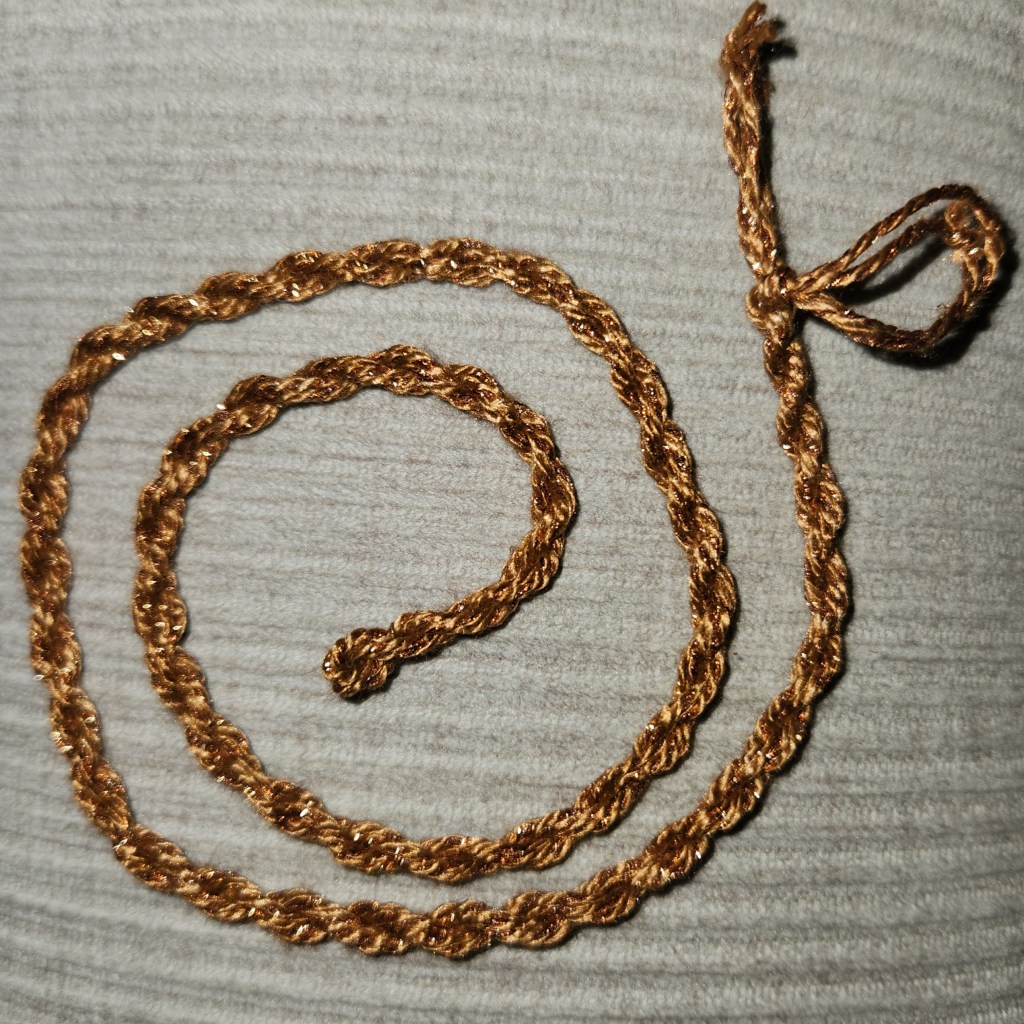
I didn’t have any cording I liked. So, I went into my stash and found Vineyard Silk Shimmer S-515 Toffee which is brown to match the back, frames the seashell nicely, and has a little gold sparkle. The skein was already cut into 38.5″ lengths. So, I thought I’d need 11″ without a hanger. The instructions for the Kreinik Custom Corder say to start with 3x what you need. Tension can vary ending length.
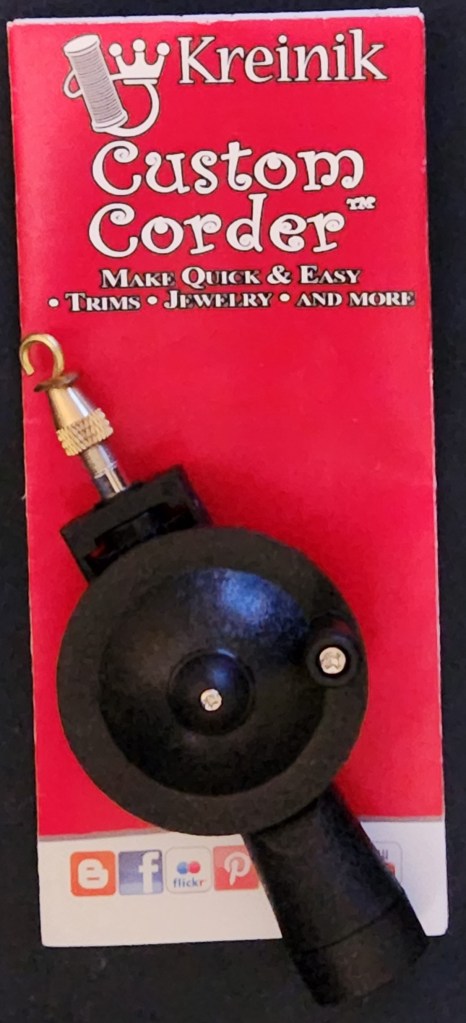
By tying together 2 lengths for one large loop and 2 for the other, I got 16″ final twisted cord which even allows for a hanging loop. Between the Kreinik written instructions and YouTube video, I made the cord and hopefully I got enough twist.
With more invisible thread and Wonder Clips to hold the back and front together, I attached the twisted cord between the two layers.

Plenty of time to clean up the dining room table before Christmas!
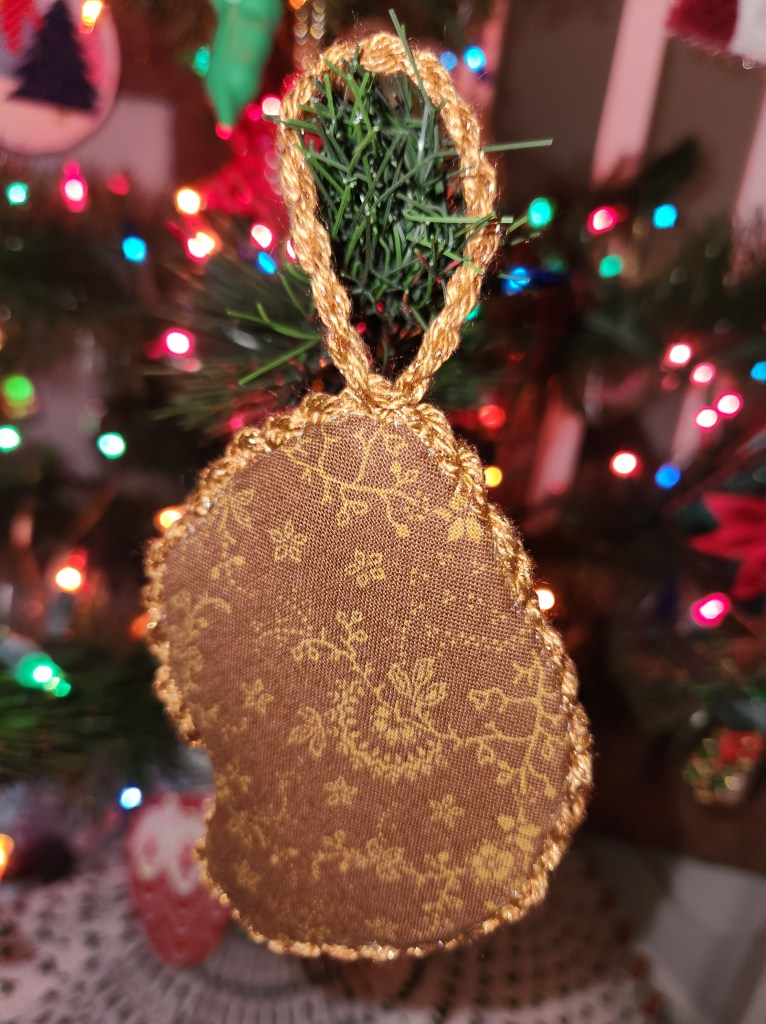
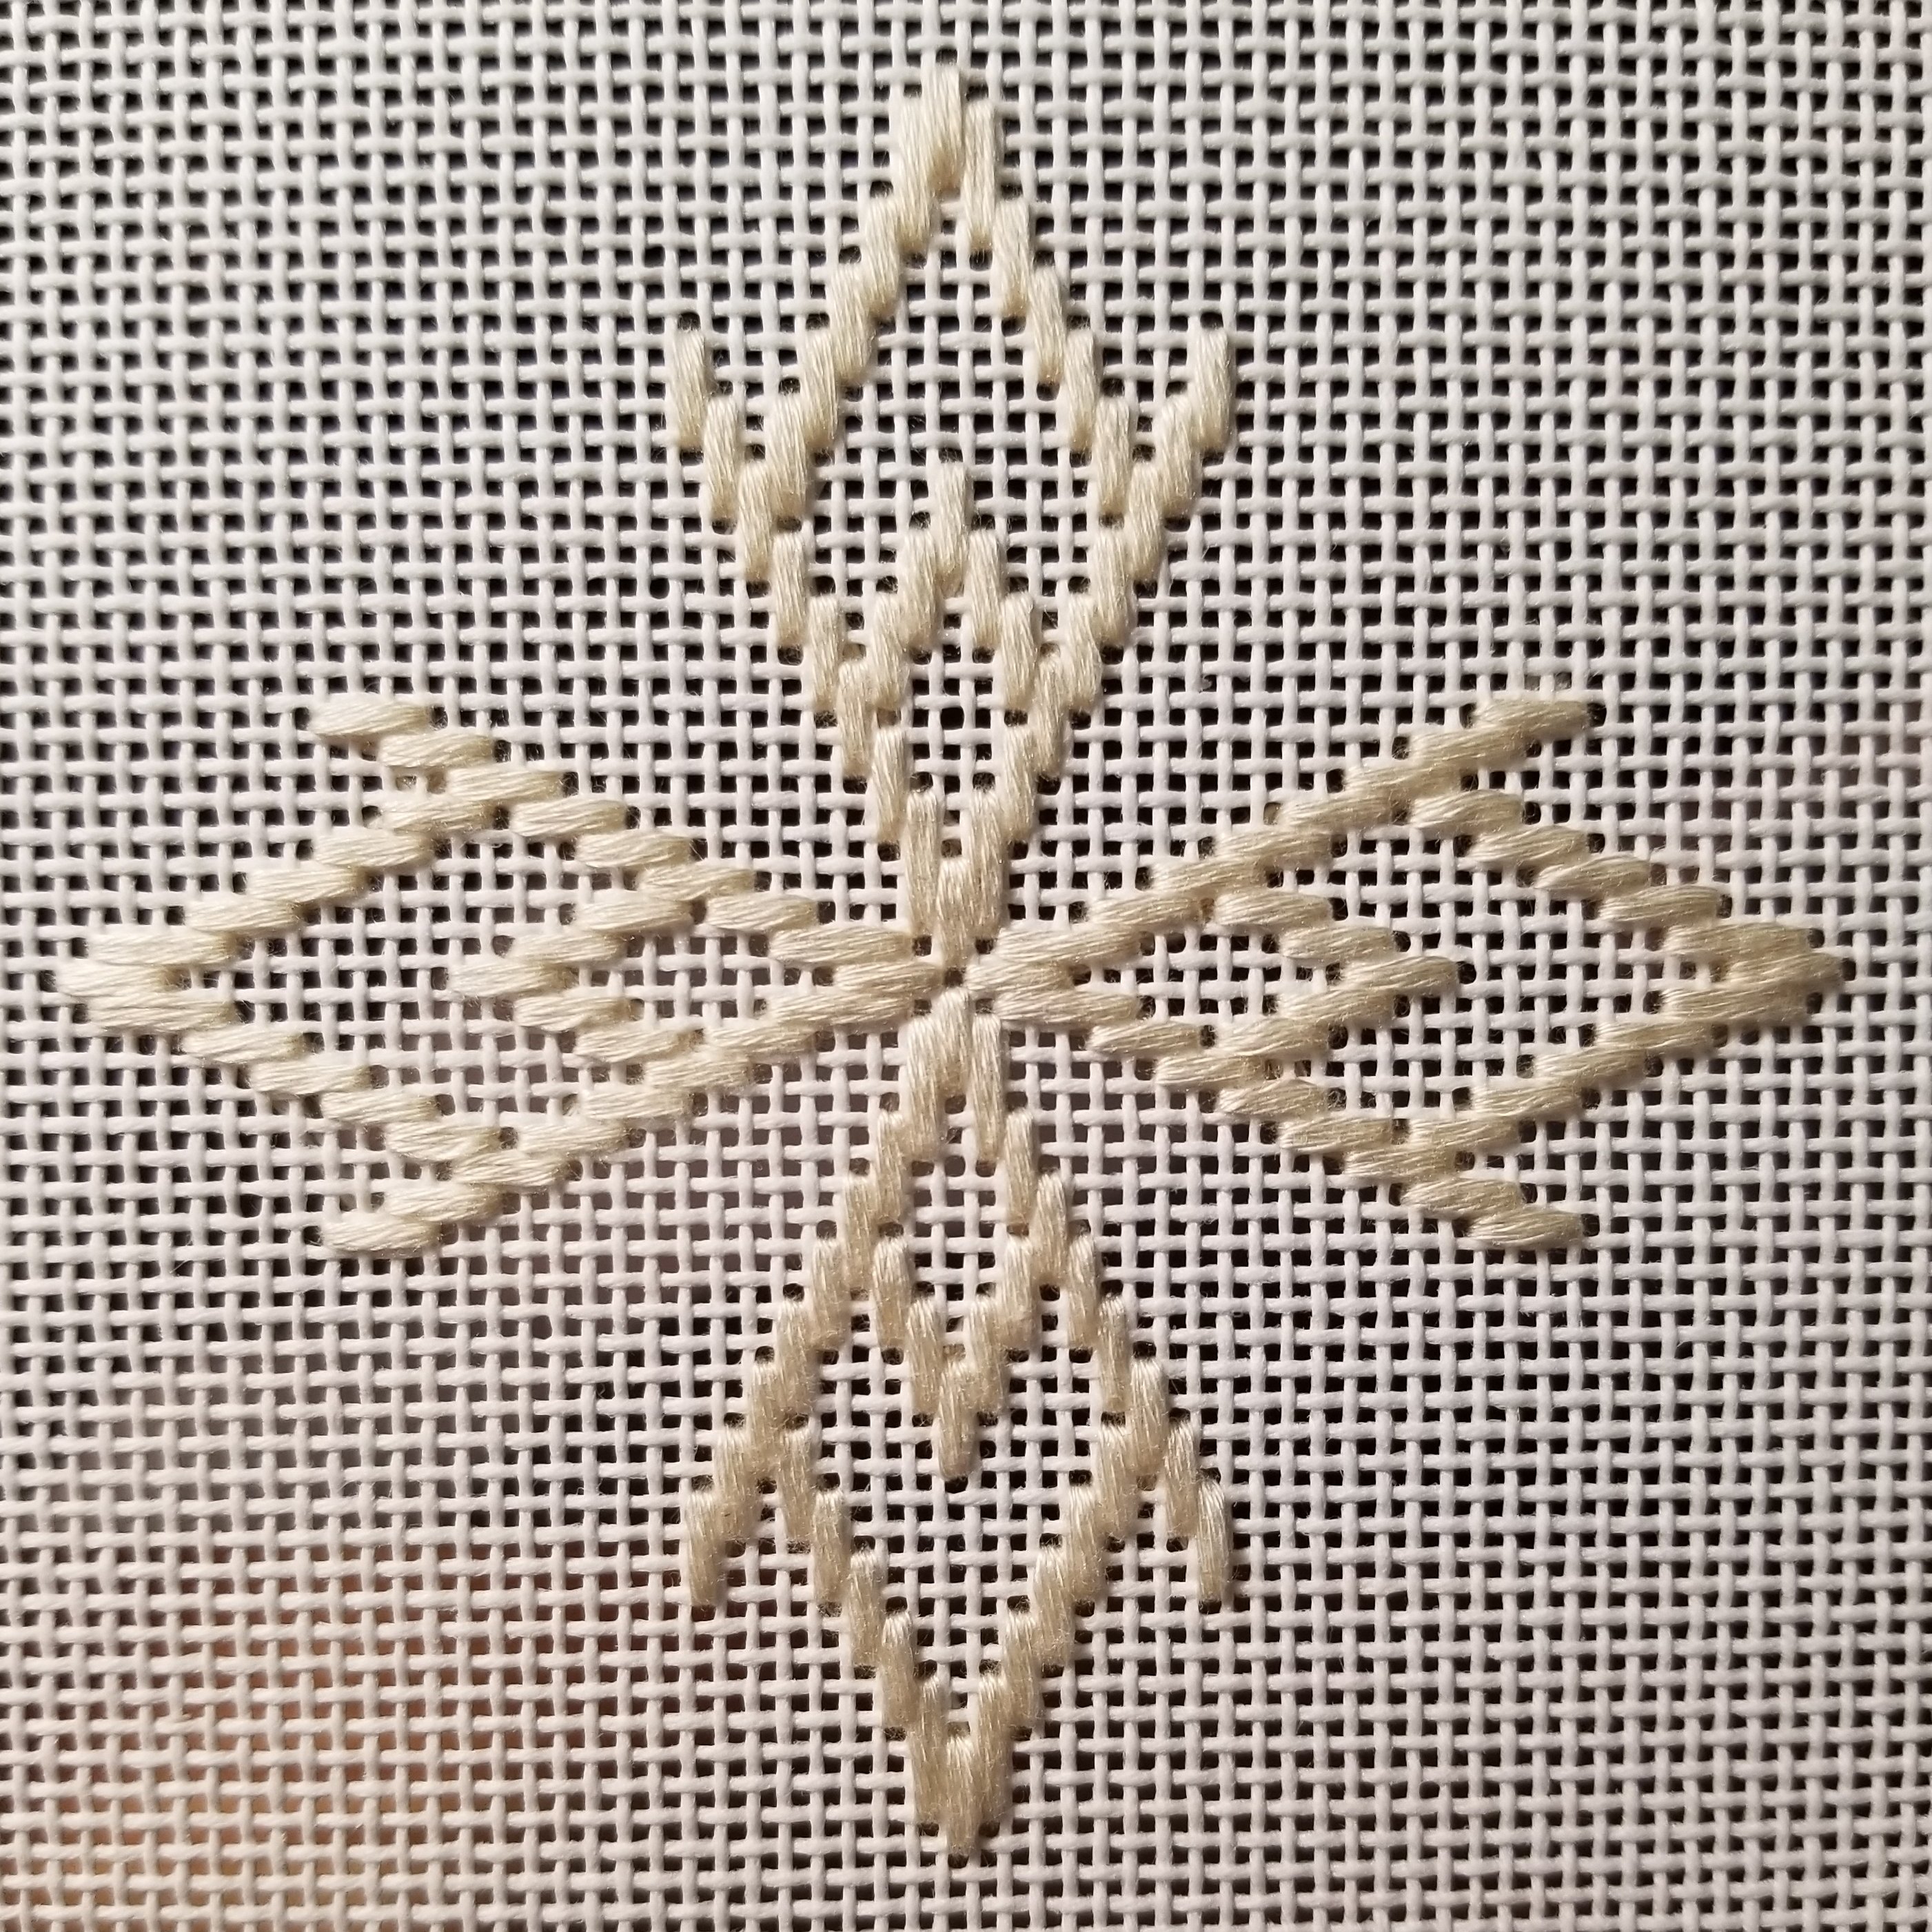
There was some thread left over from the Floche Star Ornament and I had this small photo ornament (opening of 1 & 3/4″ diameter) just waiting for something.
I drew a circle on the canvas as large as the paper with the fake photo that came in the face of the ornament.
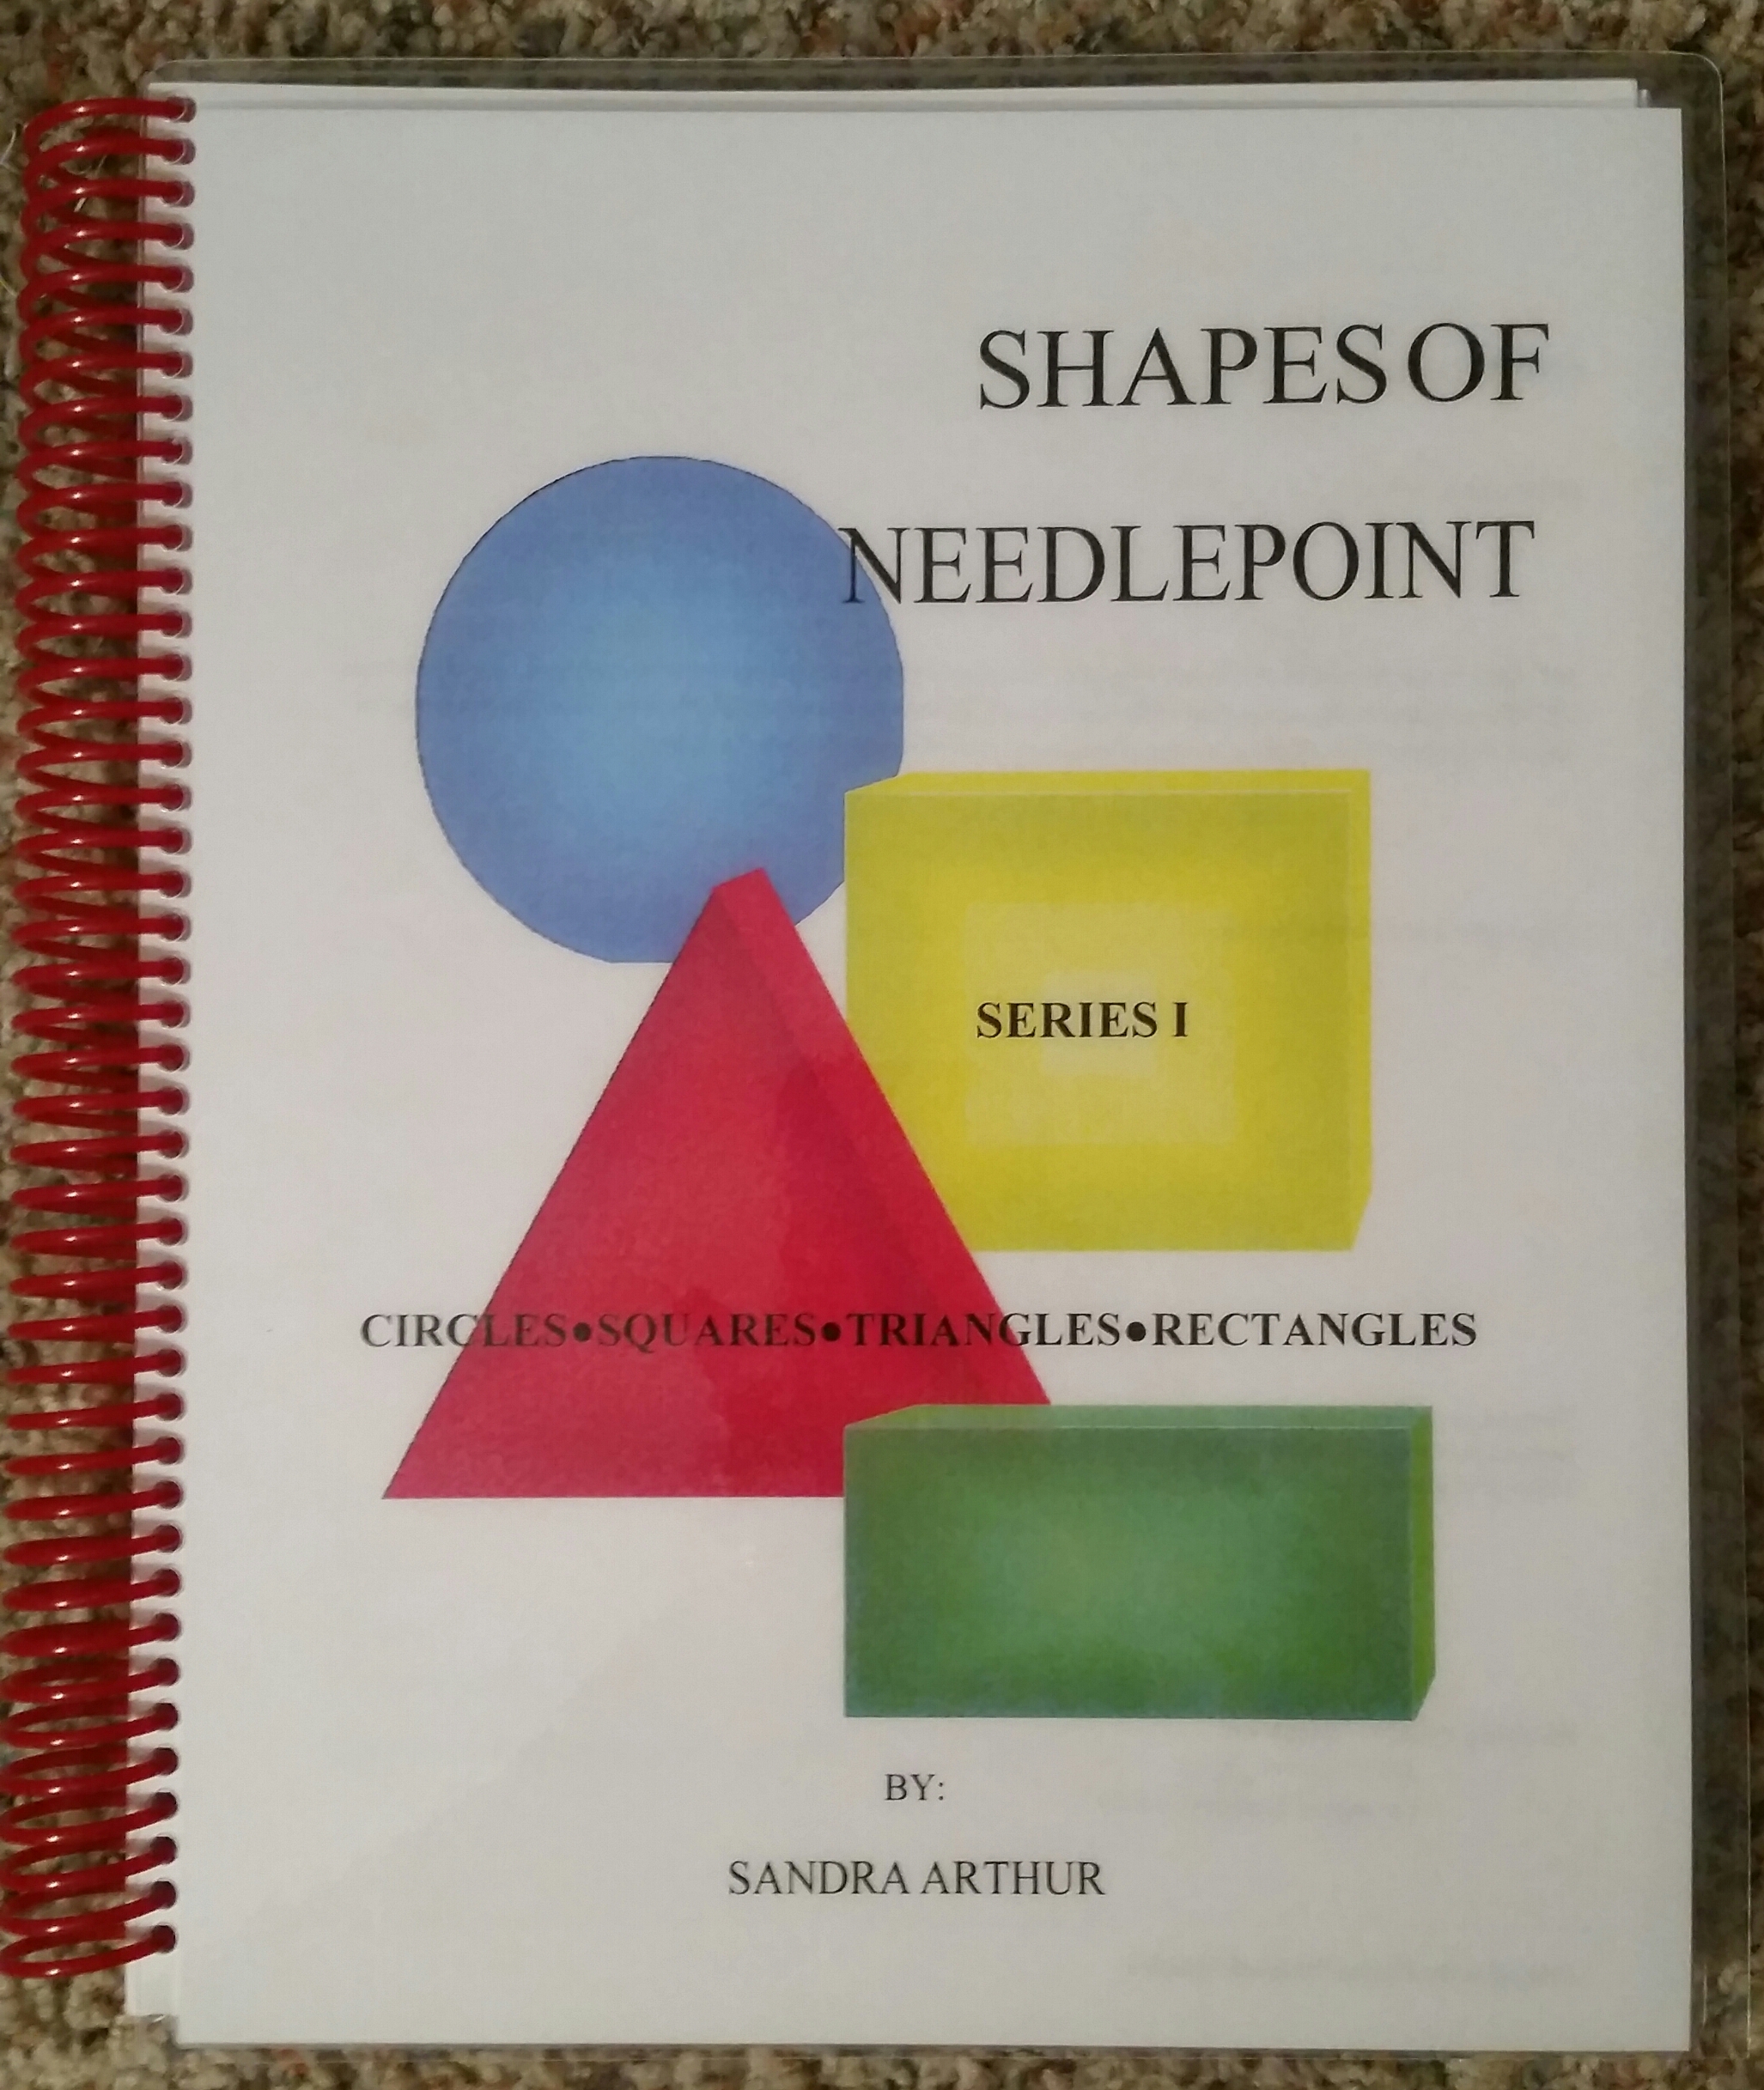
Sandra Arthur’s Shapes of Needlepoint, Series I, includes stitches for circles and the Milanese Pinwheel stitch is the largest at 22 x 22 canvas threads.
For the red background, I intentionally rotated the canvas to stitch acute triangles of basketweave using DMC Perle Cotton #5 (321) in different directions to add some interest. I learned that is called directional rotation from teacher/designer Diane Hermann.
Using a frame ornament like this, you can’t have thick thread near the edges or fold back the edges to secure them because it won’t close completely. So, I used 4 strands of Kreinik Silk Mori (1114) a Diagonal Weave stitch (see Painted Canvas Embellishment: An Idea Book by Carole Lake and Michael Boren.
I cut close up to where I had stitched without cutting the stitching. The ornament is not going to get opened up often to worry about finishing the edges any better. That made finishing really easy and inexpensive (it’s a $3 frame ornament from Big Lots).
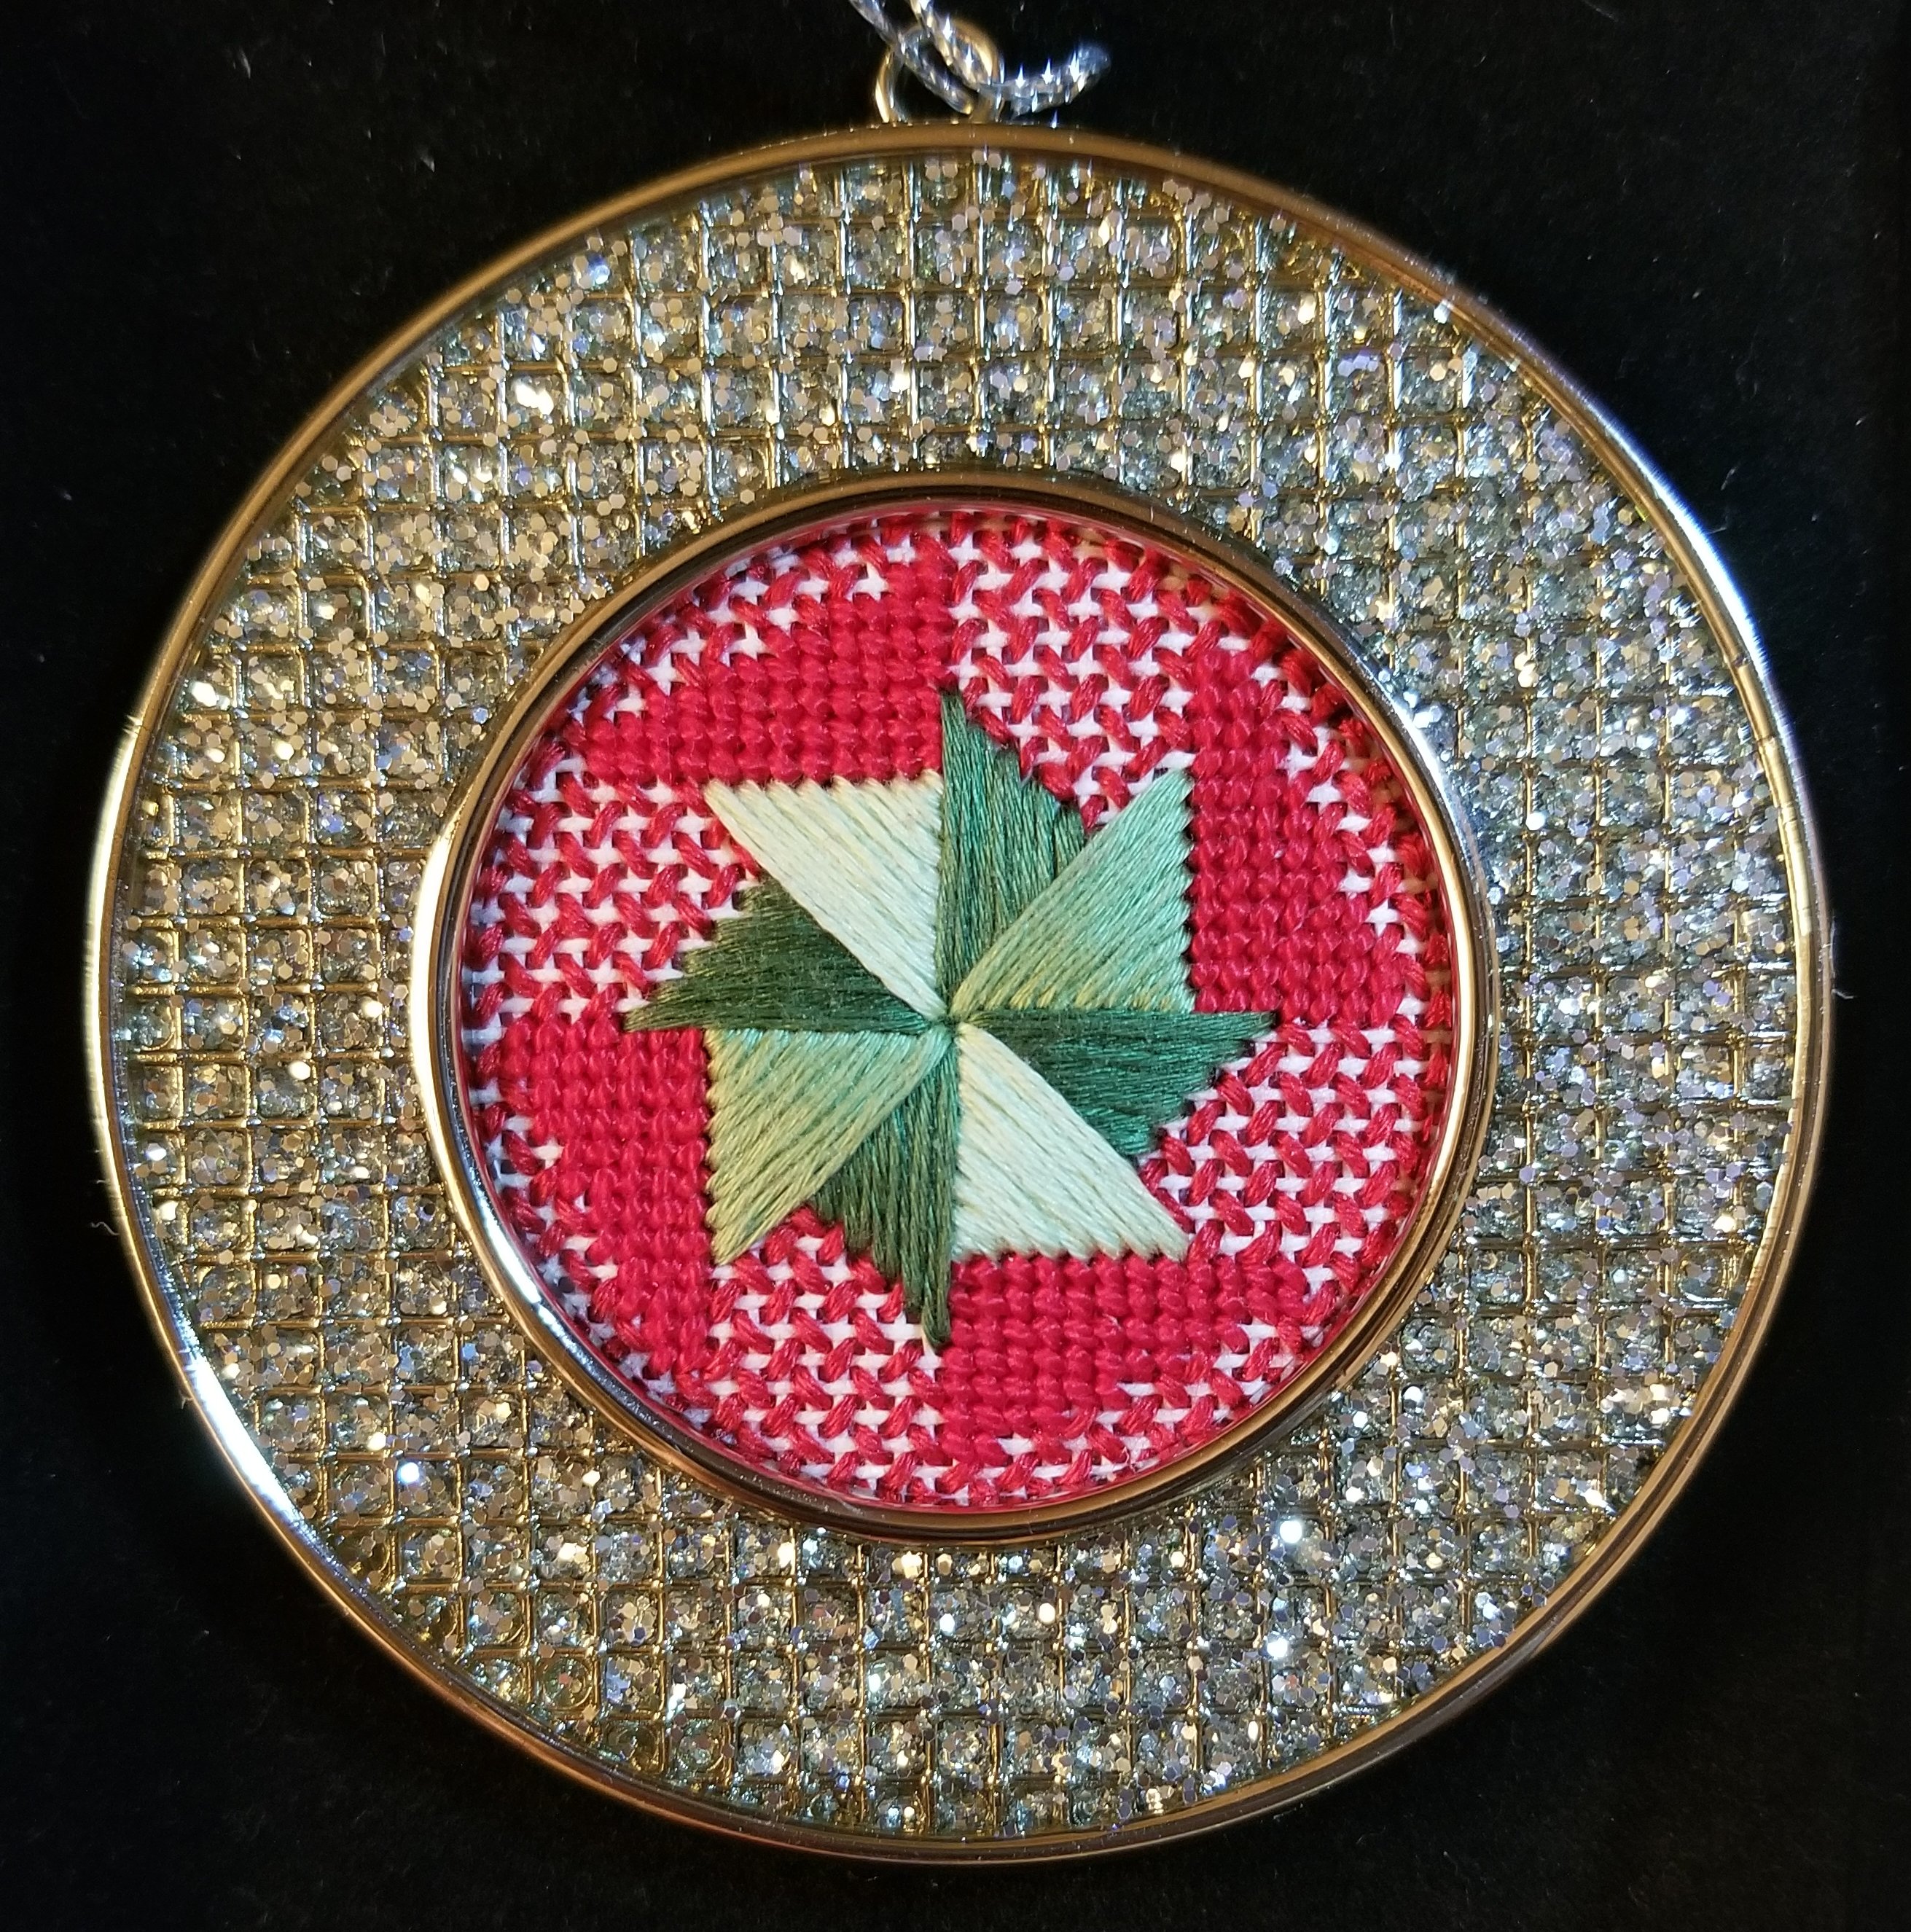
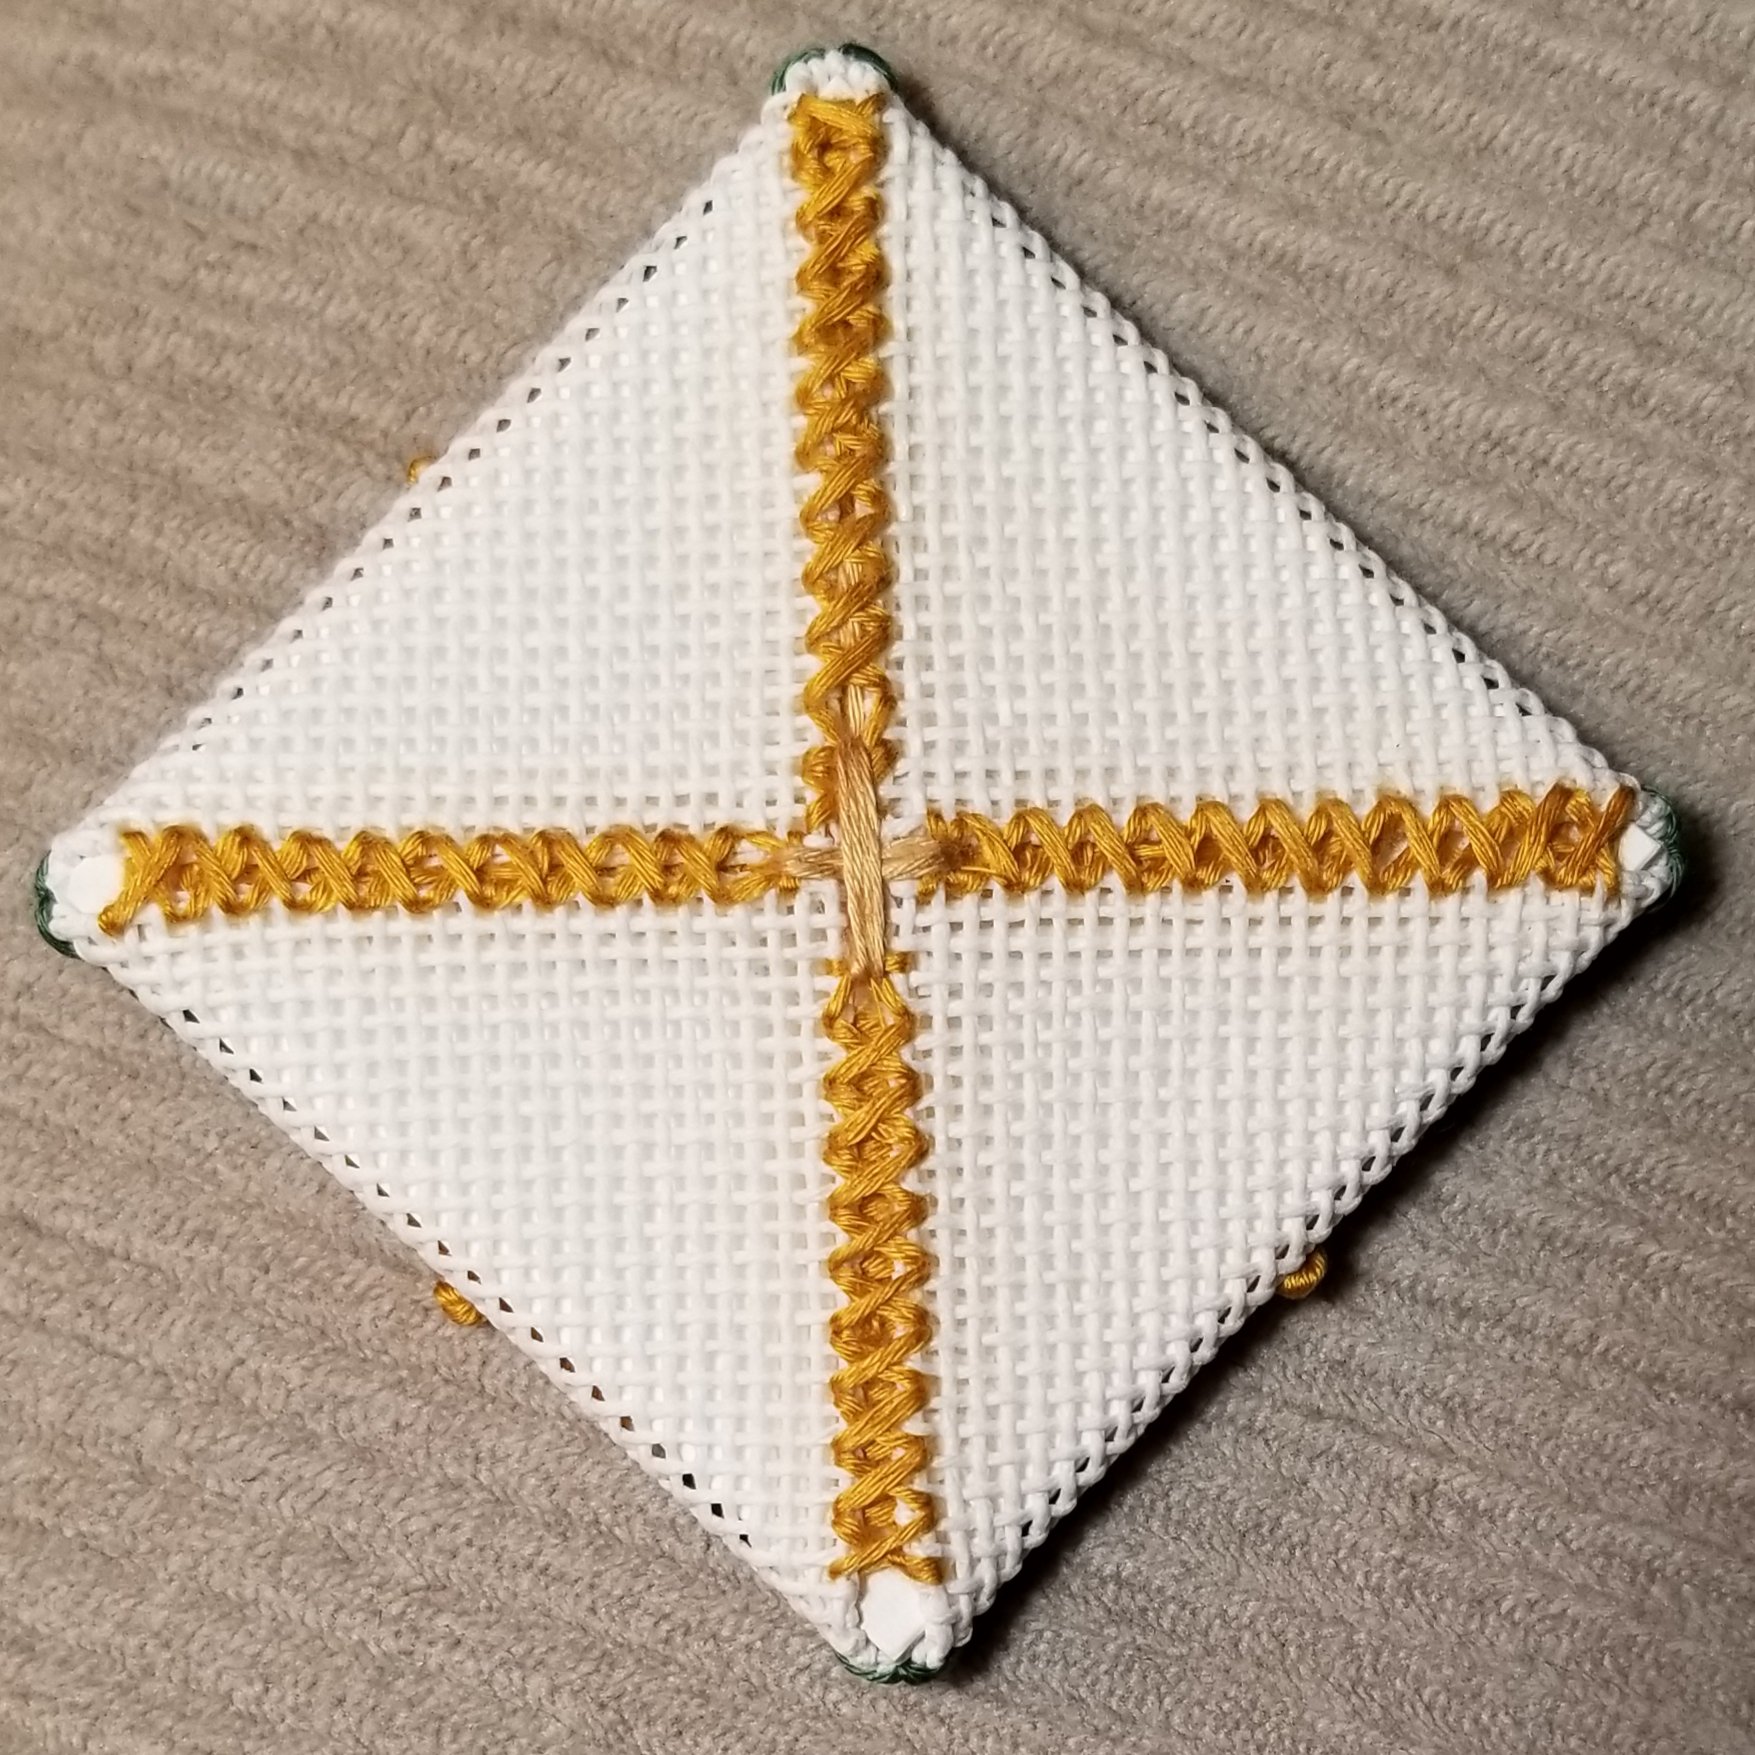
Filed under: ANG Keystone Garden Chapter, Christmas Ornaments, Floche Star Ornament, Melita's Other Completed Pieces
I didn’t see the stitches over 5 canvas threads in the top and bottom of the centers until I’d stitched 2 diamonds!
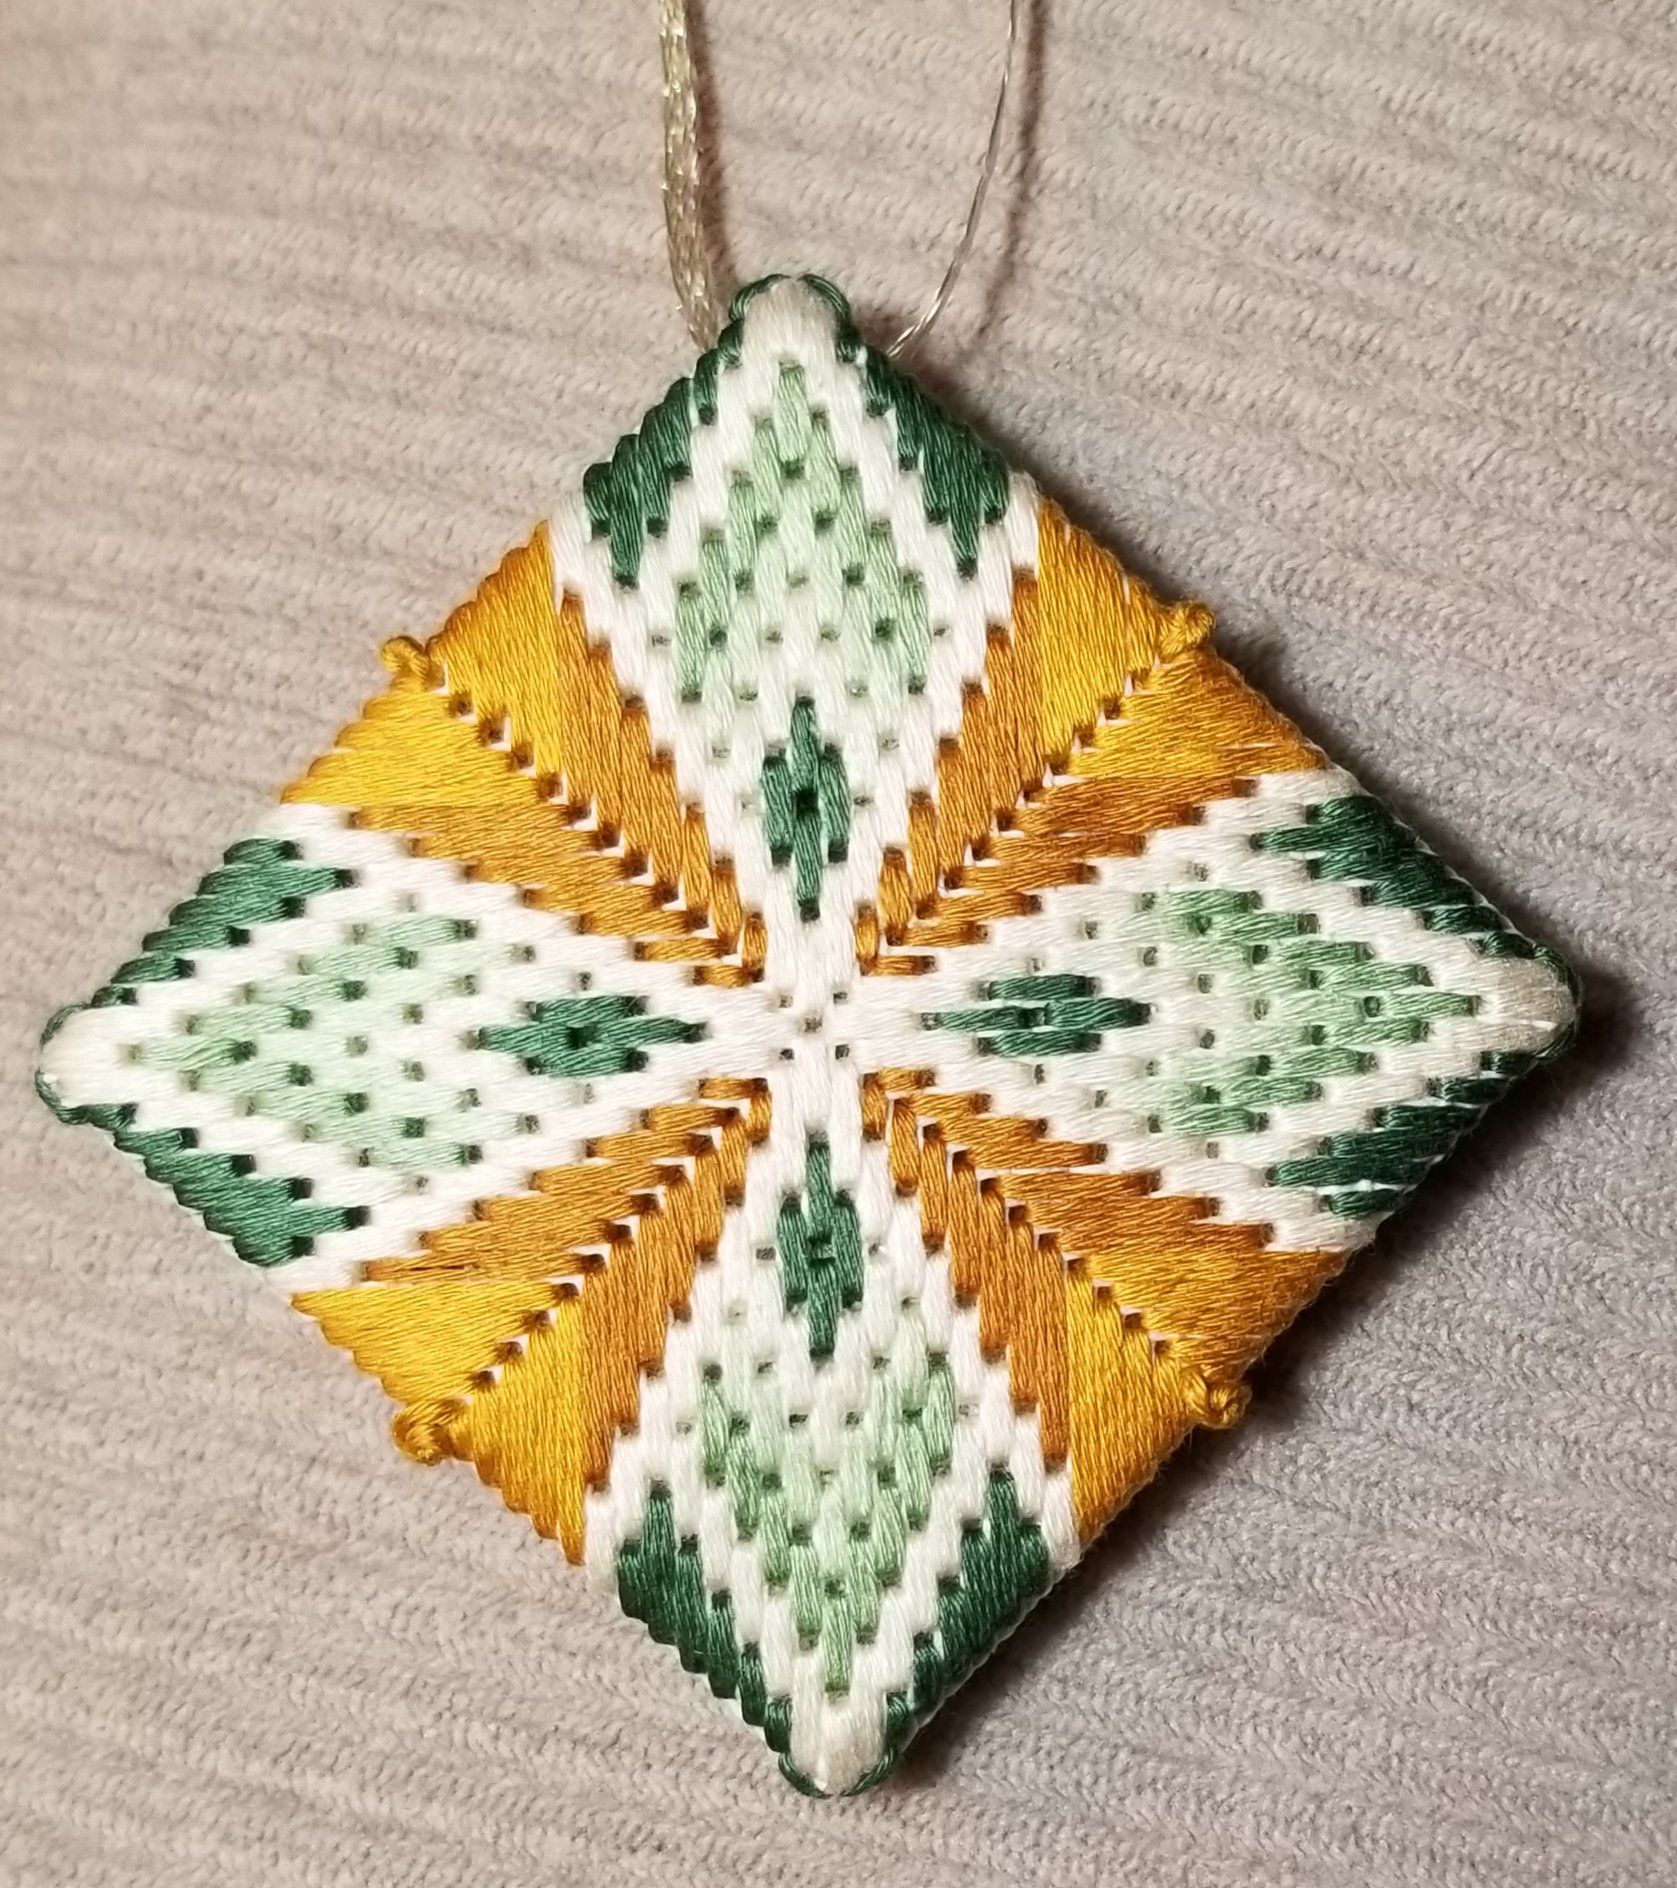
I’m not sure where I got the design but I apparently used Watercolours Cinnabar, an overdye without a lot of variation. A few years ago at an ANG Main Line meeting, I made a cord using the Kumihimo Japanese braiding technique to finish the ornament but never did attach the cord and can’t find it now. So, I cut around the design to fit this silver ornament. It beveled up just a little for a perfect fit.
Filed under: Canvas Connection Golf Bag, Melita's Other Completed Pieces
During my trip to Woodlawn this year with Linda and Ginny, I picked up a Canvas Connection Golf Bag (3″ x 4″) (GB-556) from Waste Knot (4502 Lee Hwy, Arlington, VA) to stitch for Bill. I love the little clubs!!!
I stitched some while he was out golfing this summer and finished it while I was on my way to and from Seminar in New Orleans this year. Since he didn’t come along this year (too hot to golf), this is a surprise gift for Christmas! I’m so happy with the finishing – Karen at Nimble Needle in NJ has a fantastic finisher.

Santa also dropped off a book for me – Sandra Arthur’s Shapes of Needlepoint Series Volume I. I am looking forward to getting time to read it once the Christmas turkey is in the oven. Merry Christmas!
Filed under: ANG Keystone Garden Chapter, ANG Main Line Stitchers Chapter, Christmas Ornaments, Christmas Ornaments, Melita's Other Completed Pieces, Santacicle
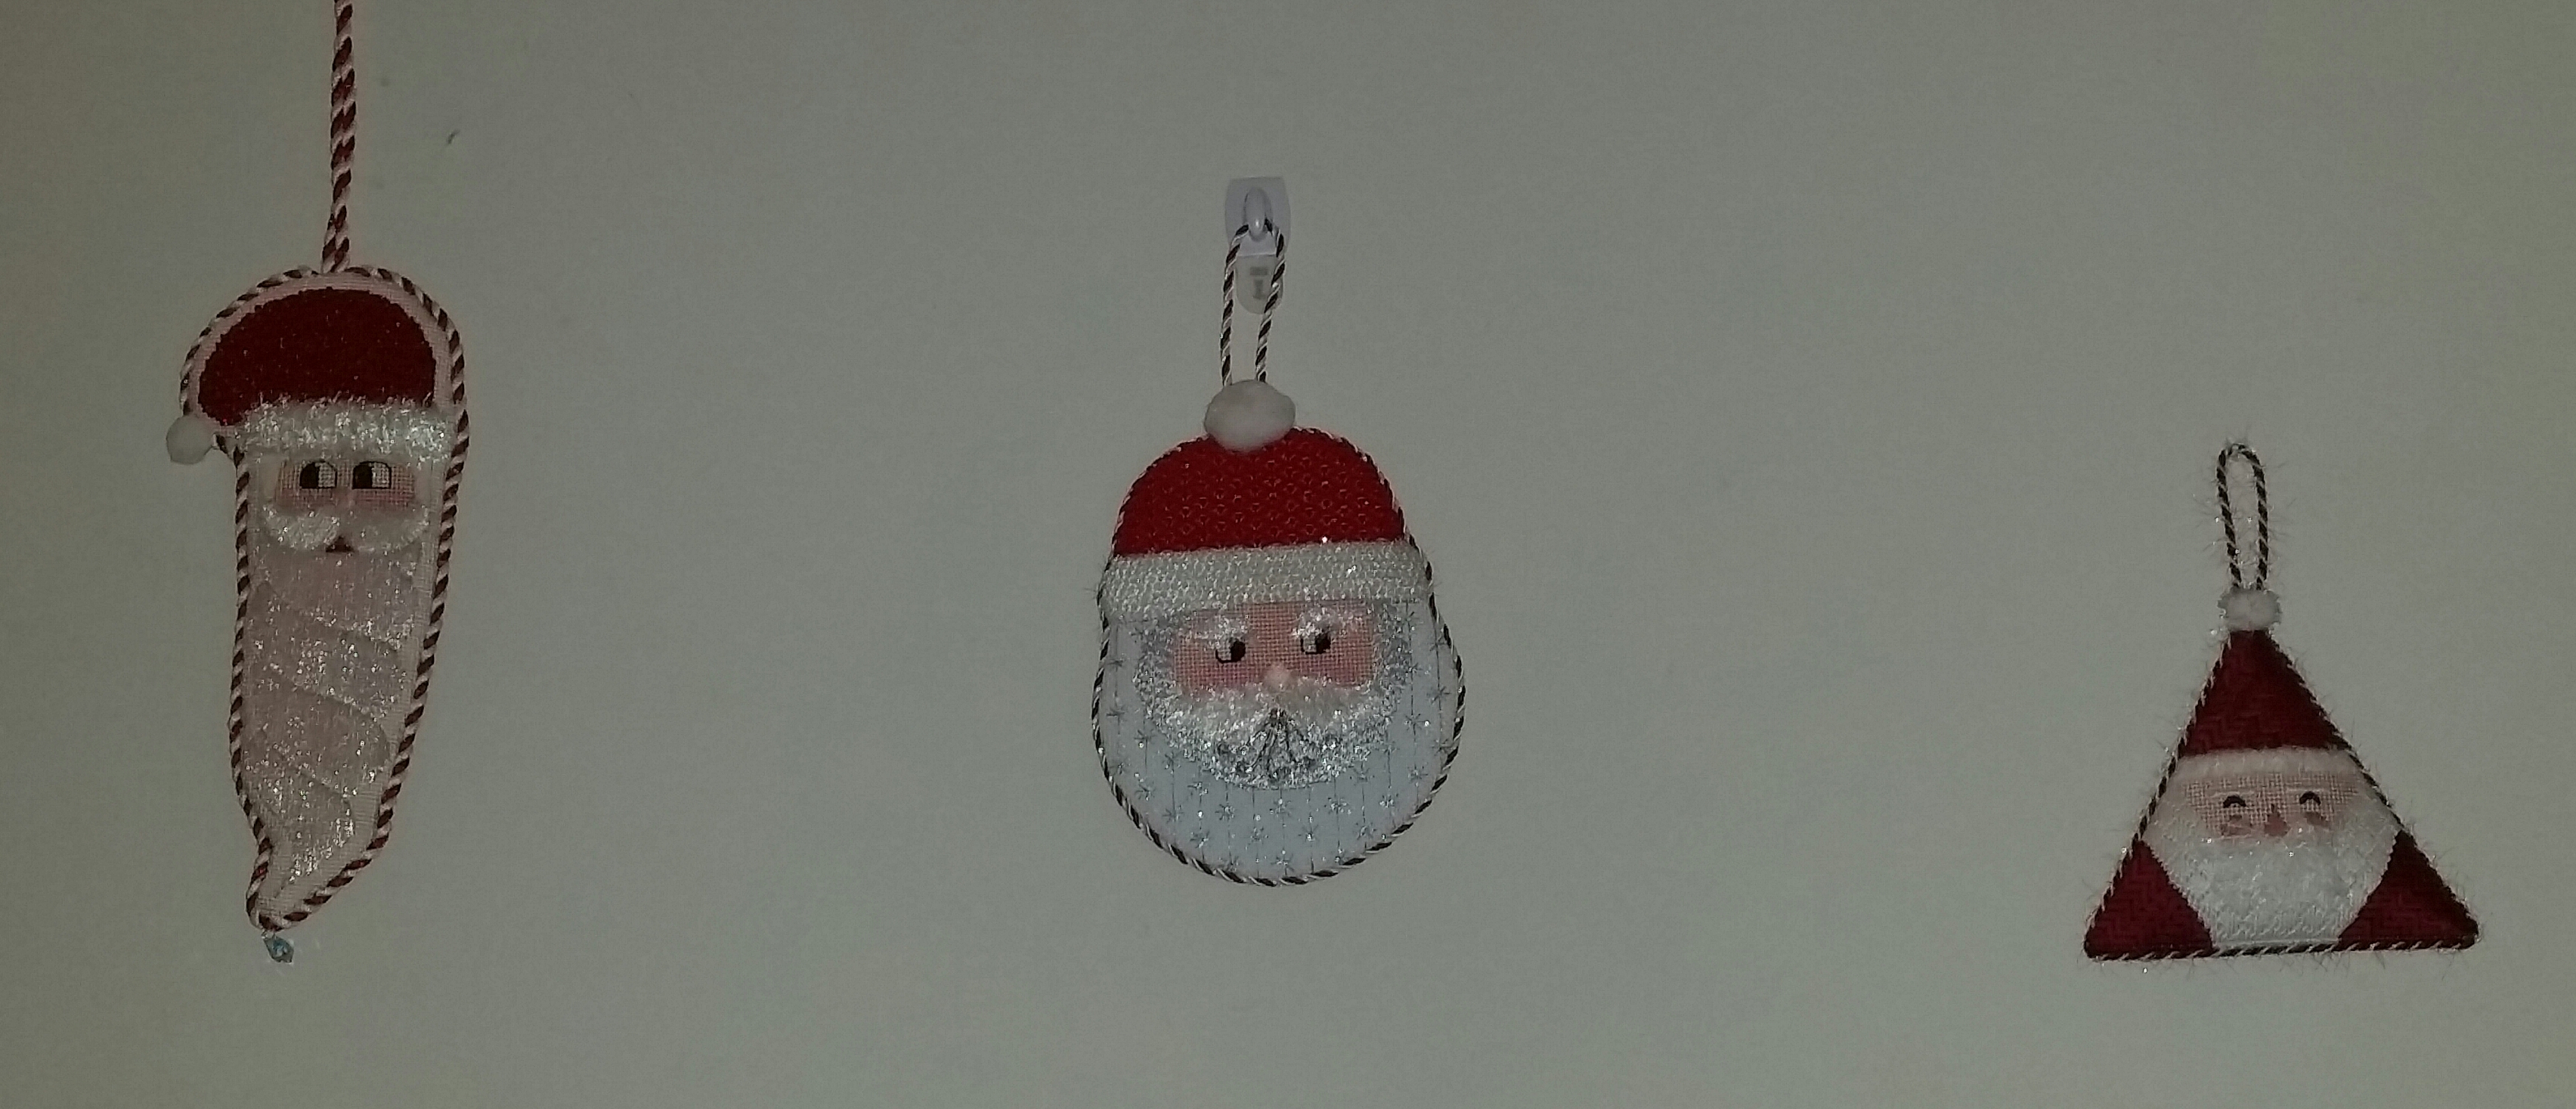
Here’s Santa’s row – they are so cute together hanging in the hallway. The one on the left is my Santacicle by Janet Casey Ziegler from a class at my first ANG seminar.
Linda’s Snow Globe Santa by Janet Casey Ziegler is in the center.
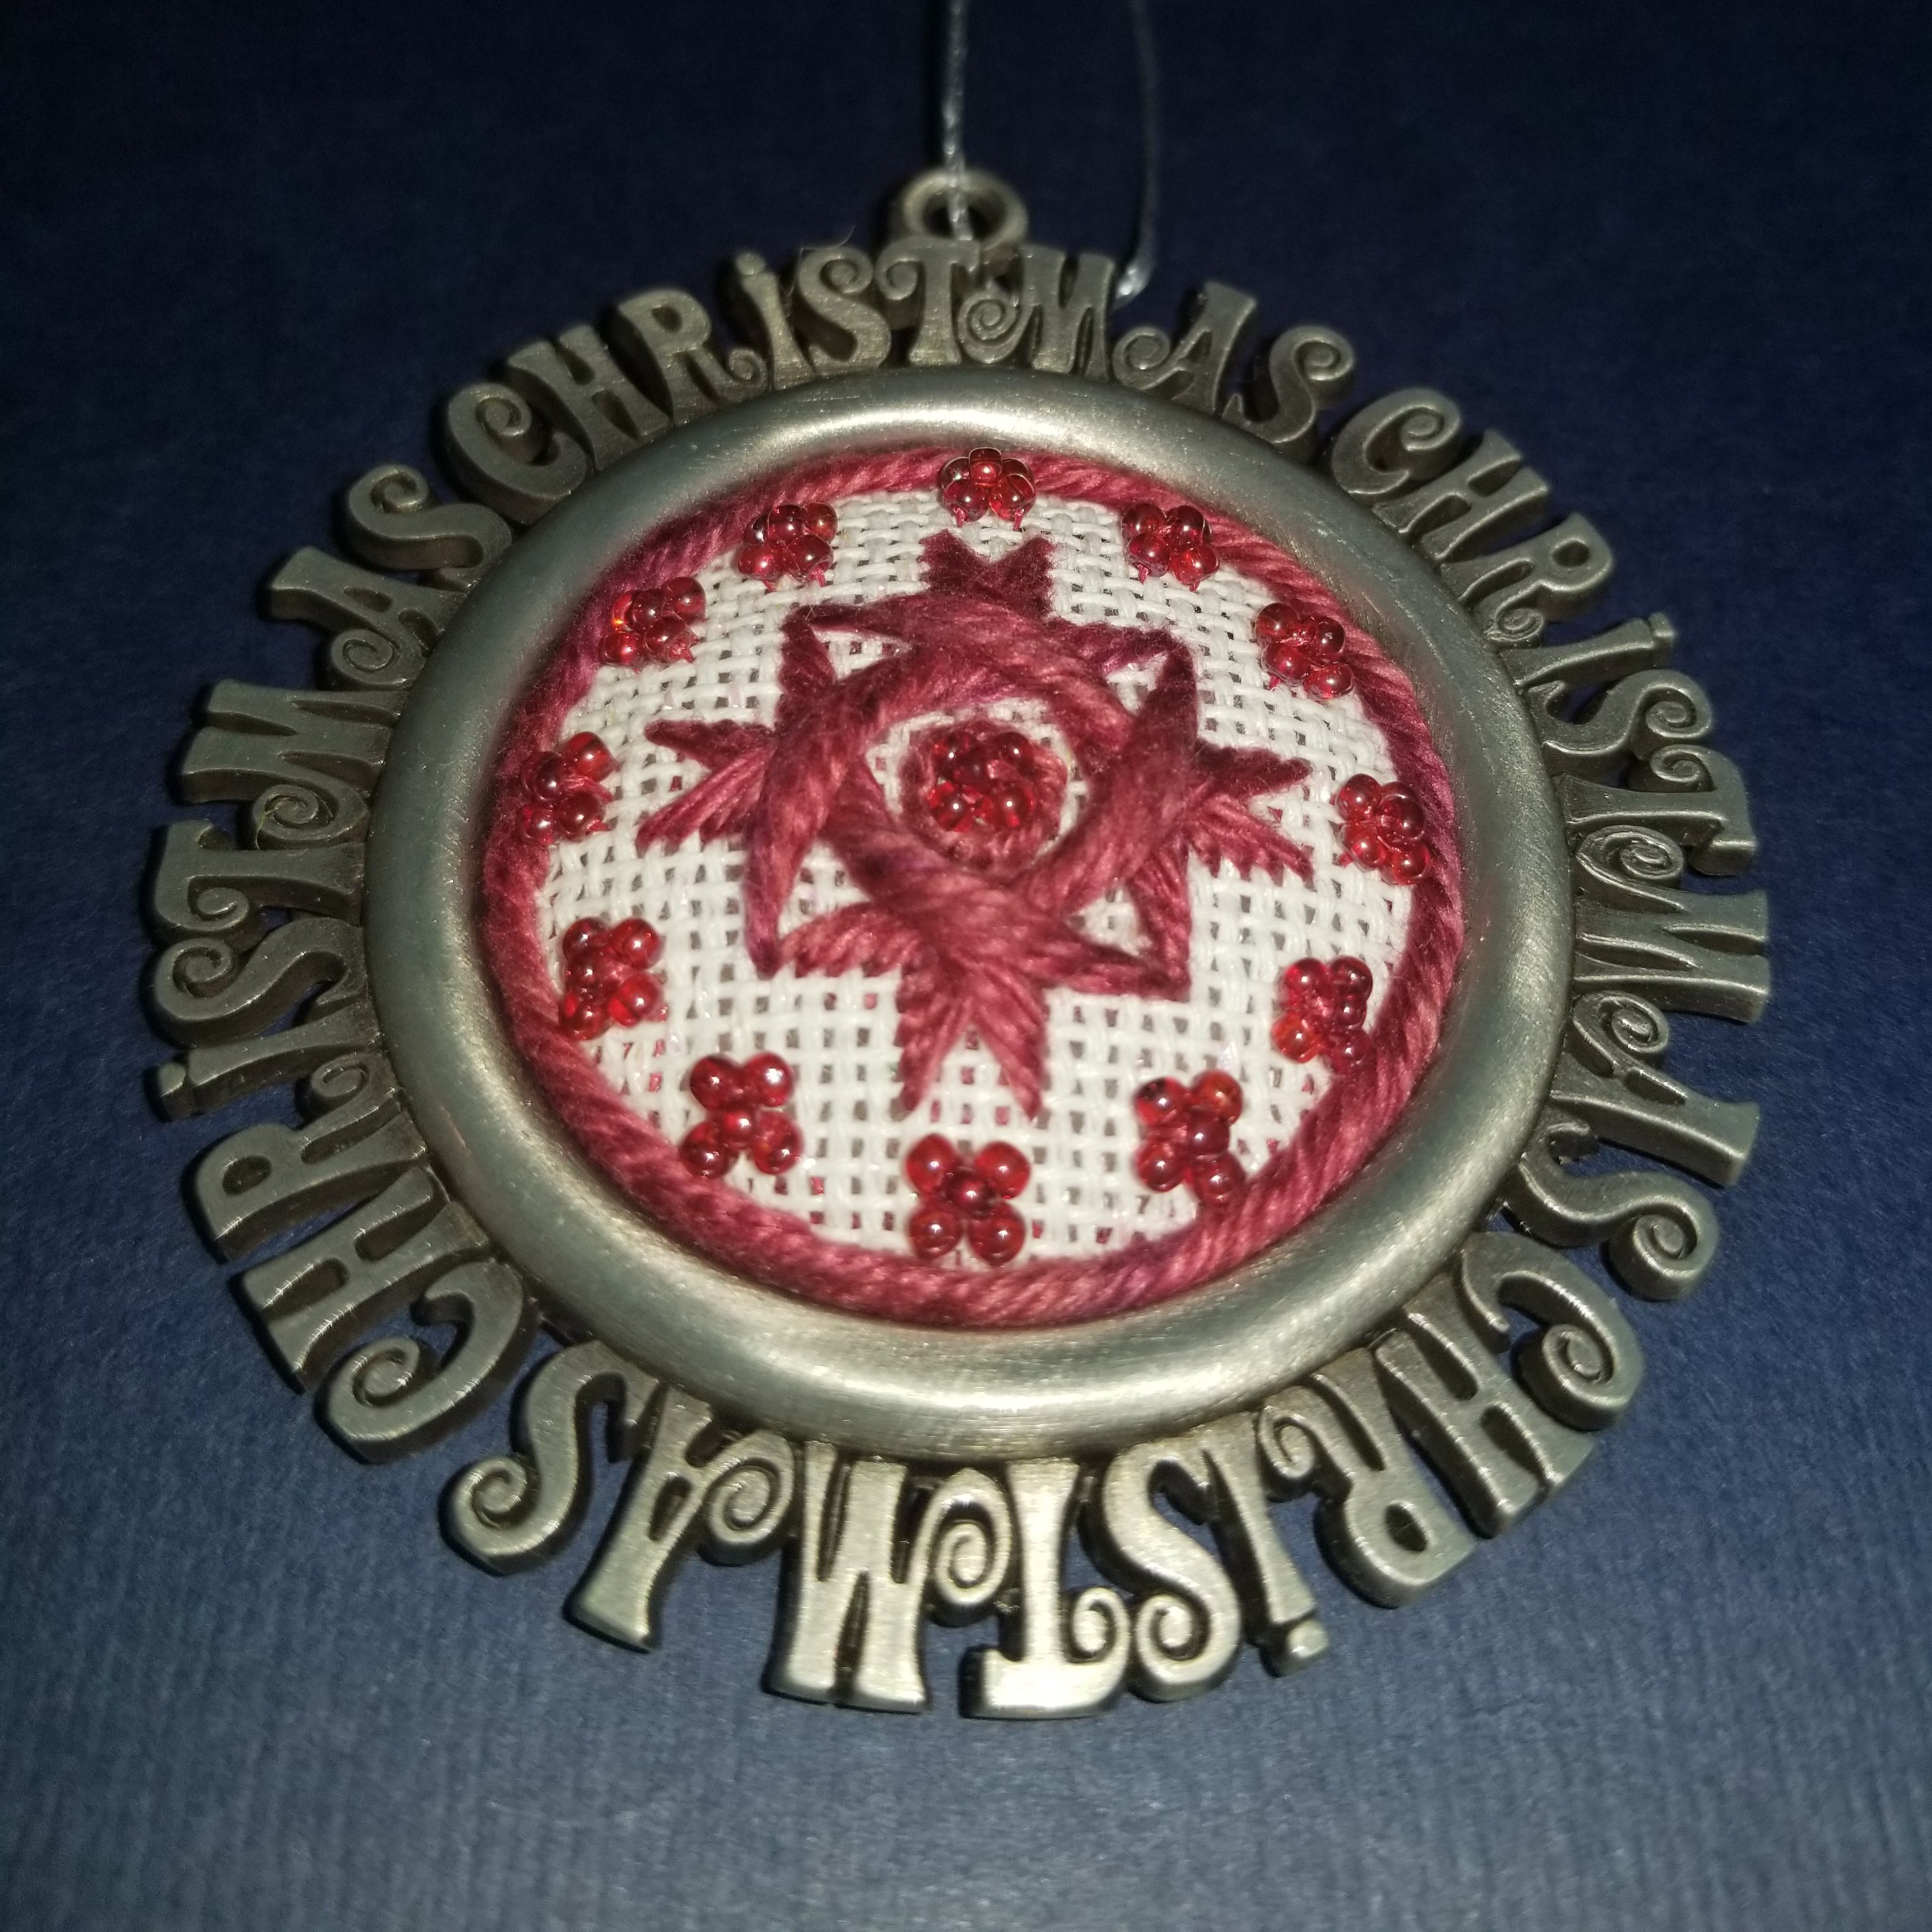
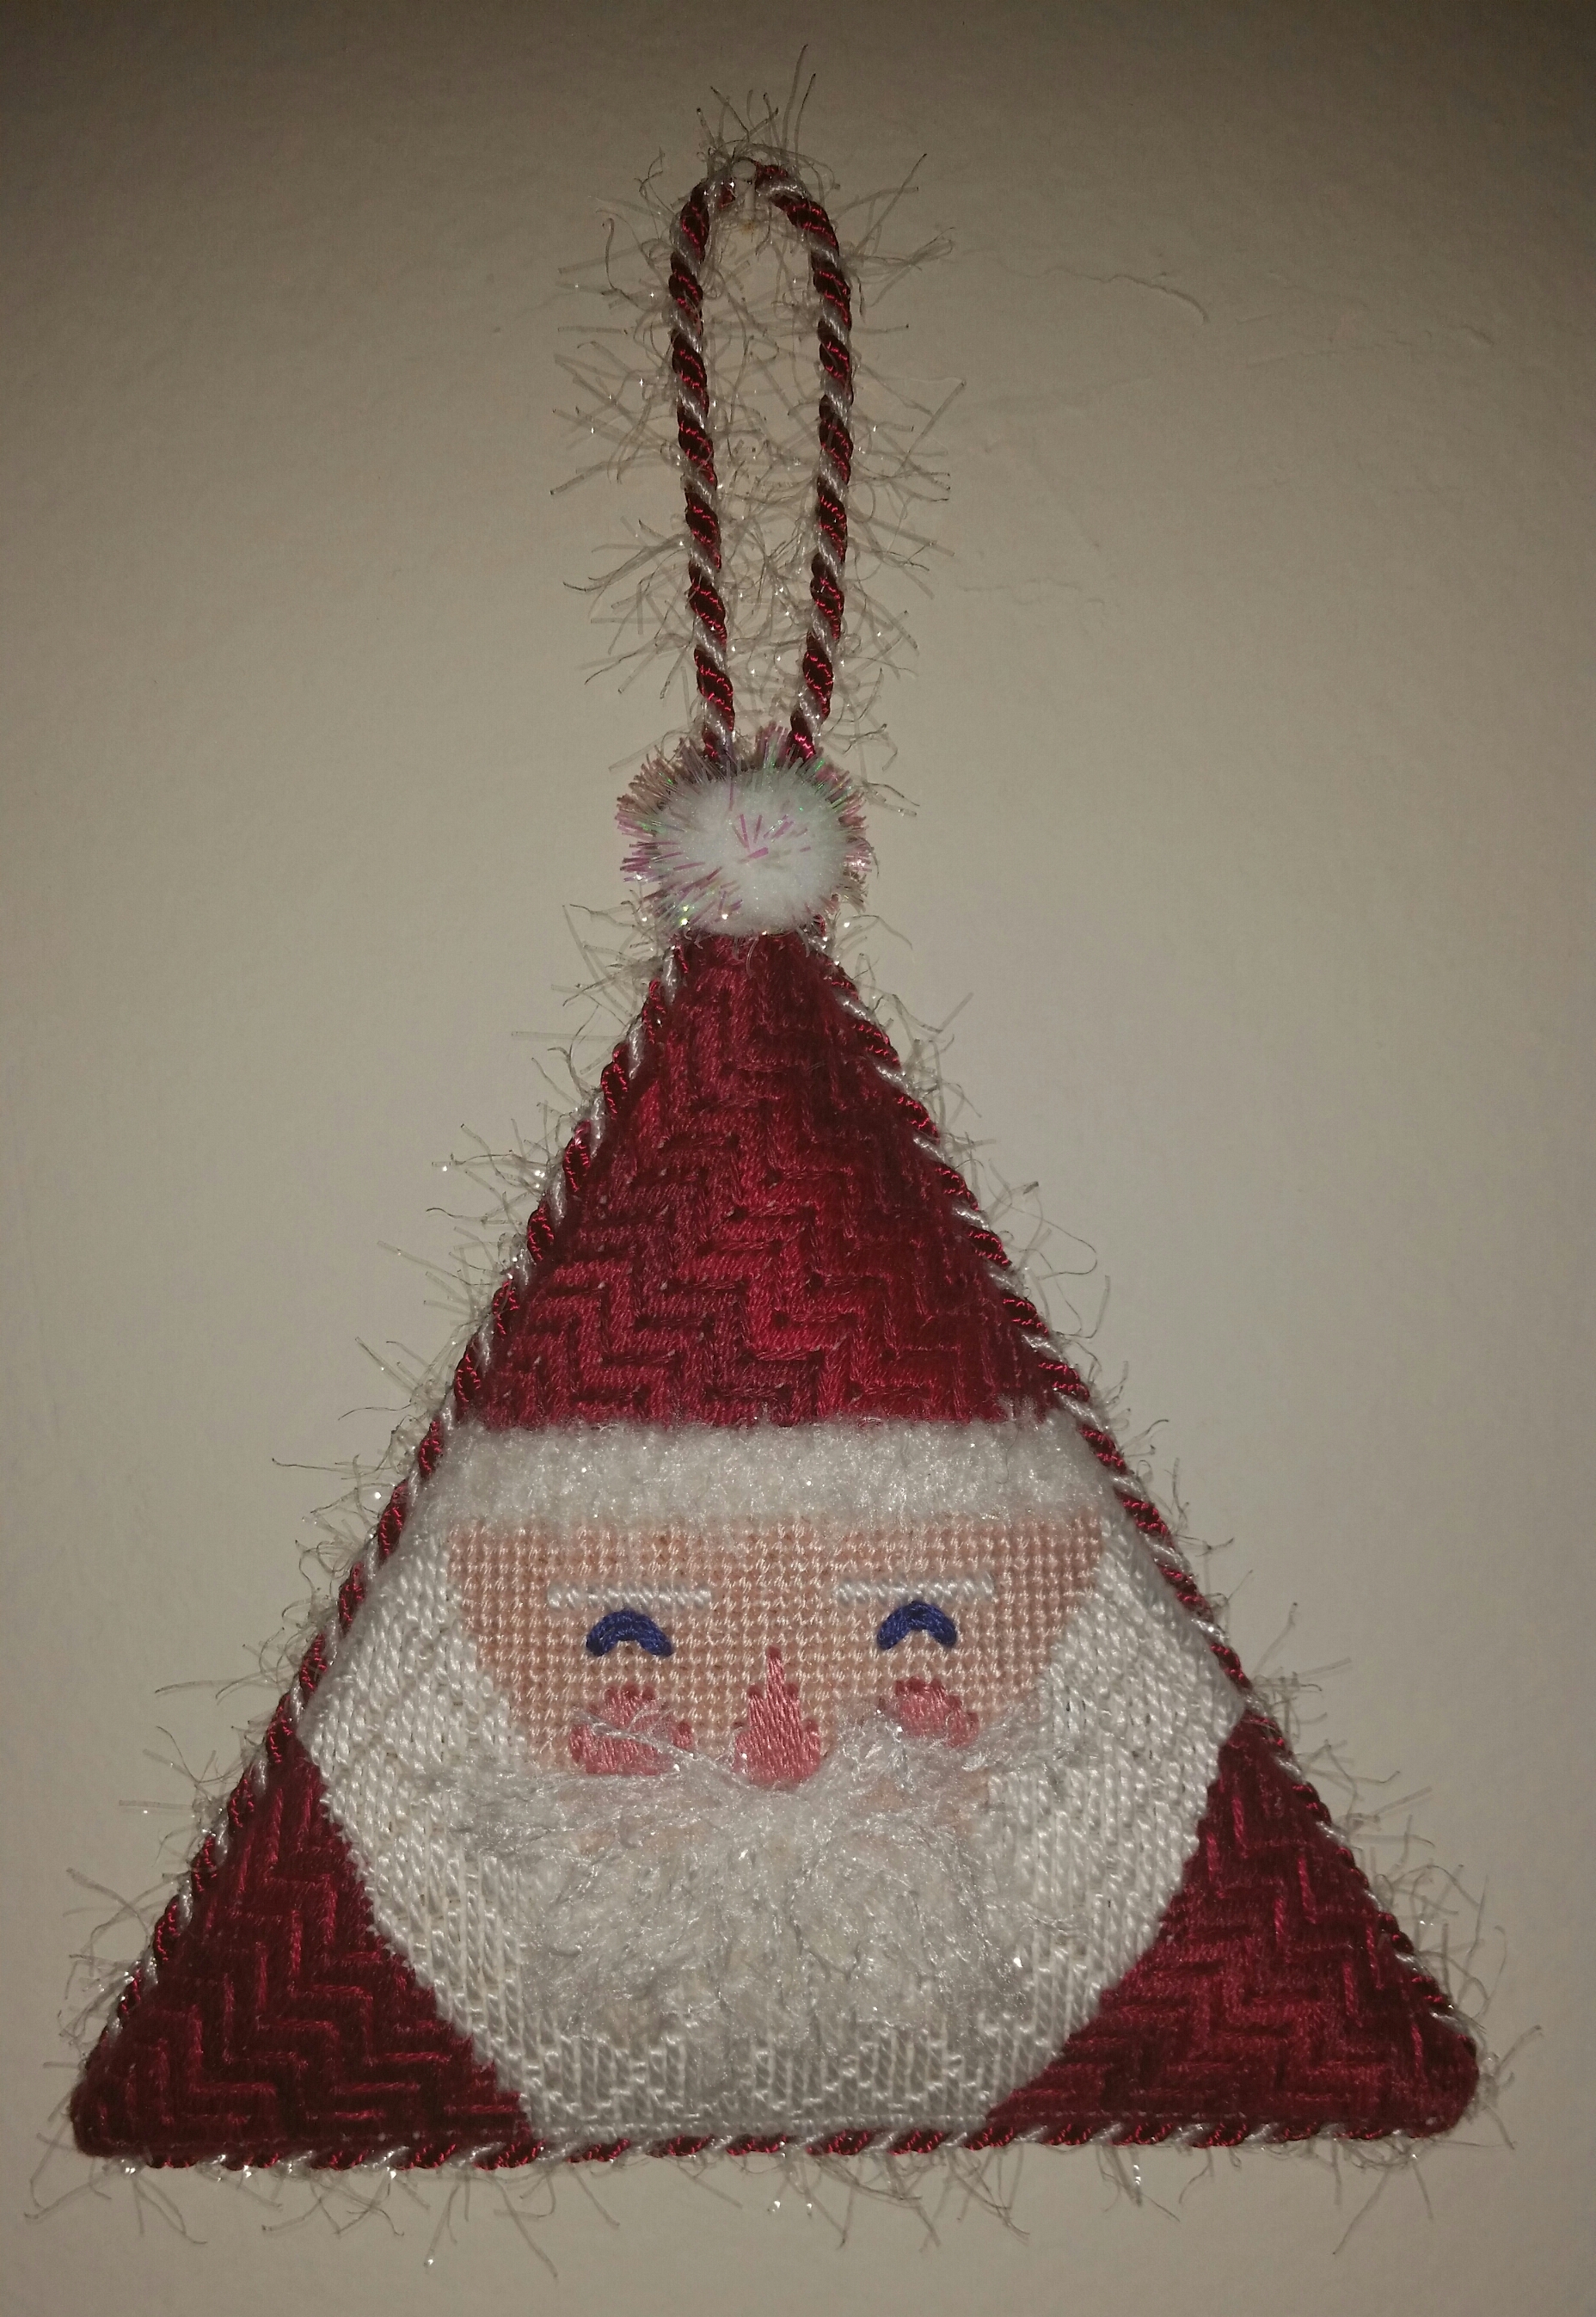
Peg Dunayer’s Triangle Santa ornament from Needlepoint Now (Nov/Dec 2007) was finished through Nimble Needle and I absolutely love it! The sparkles just make it a little more special. My ANG Keystone Garden Chapter stitched as a project in 2014 and when I got it back I forgot to post it too – been slipping on my blog.
Wishing one and all a happy holiday and a healthy New Year!!