Thanks to my ANG Keystone Garden Chapter who wanted to stitch this for a project, I restitched it using different threads.
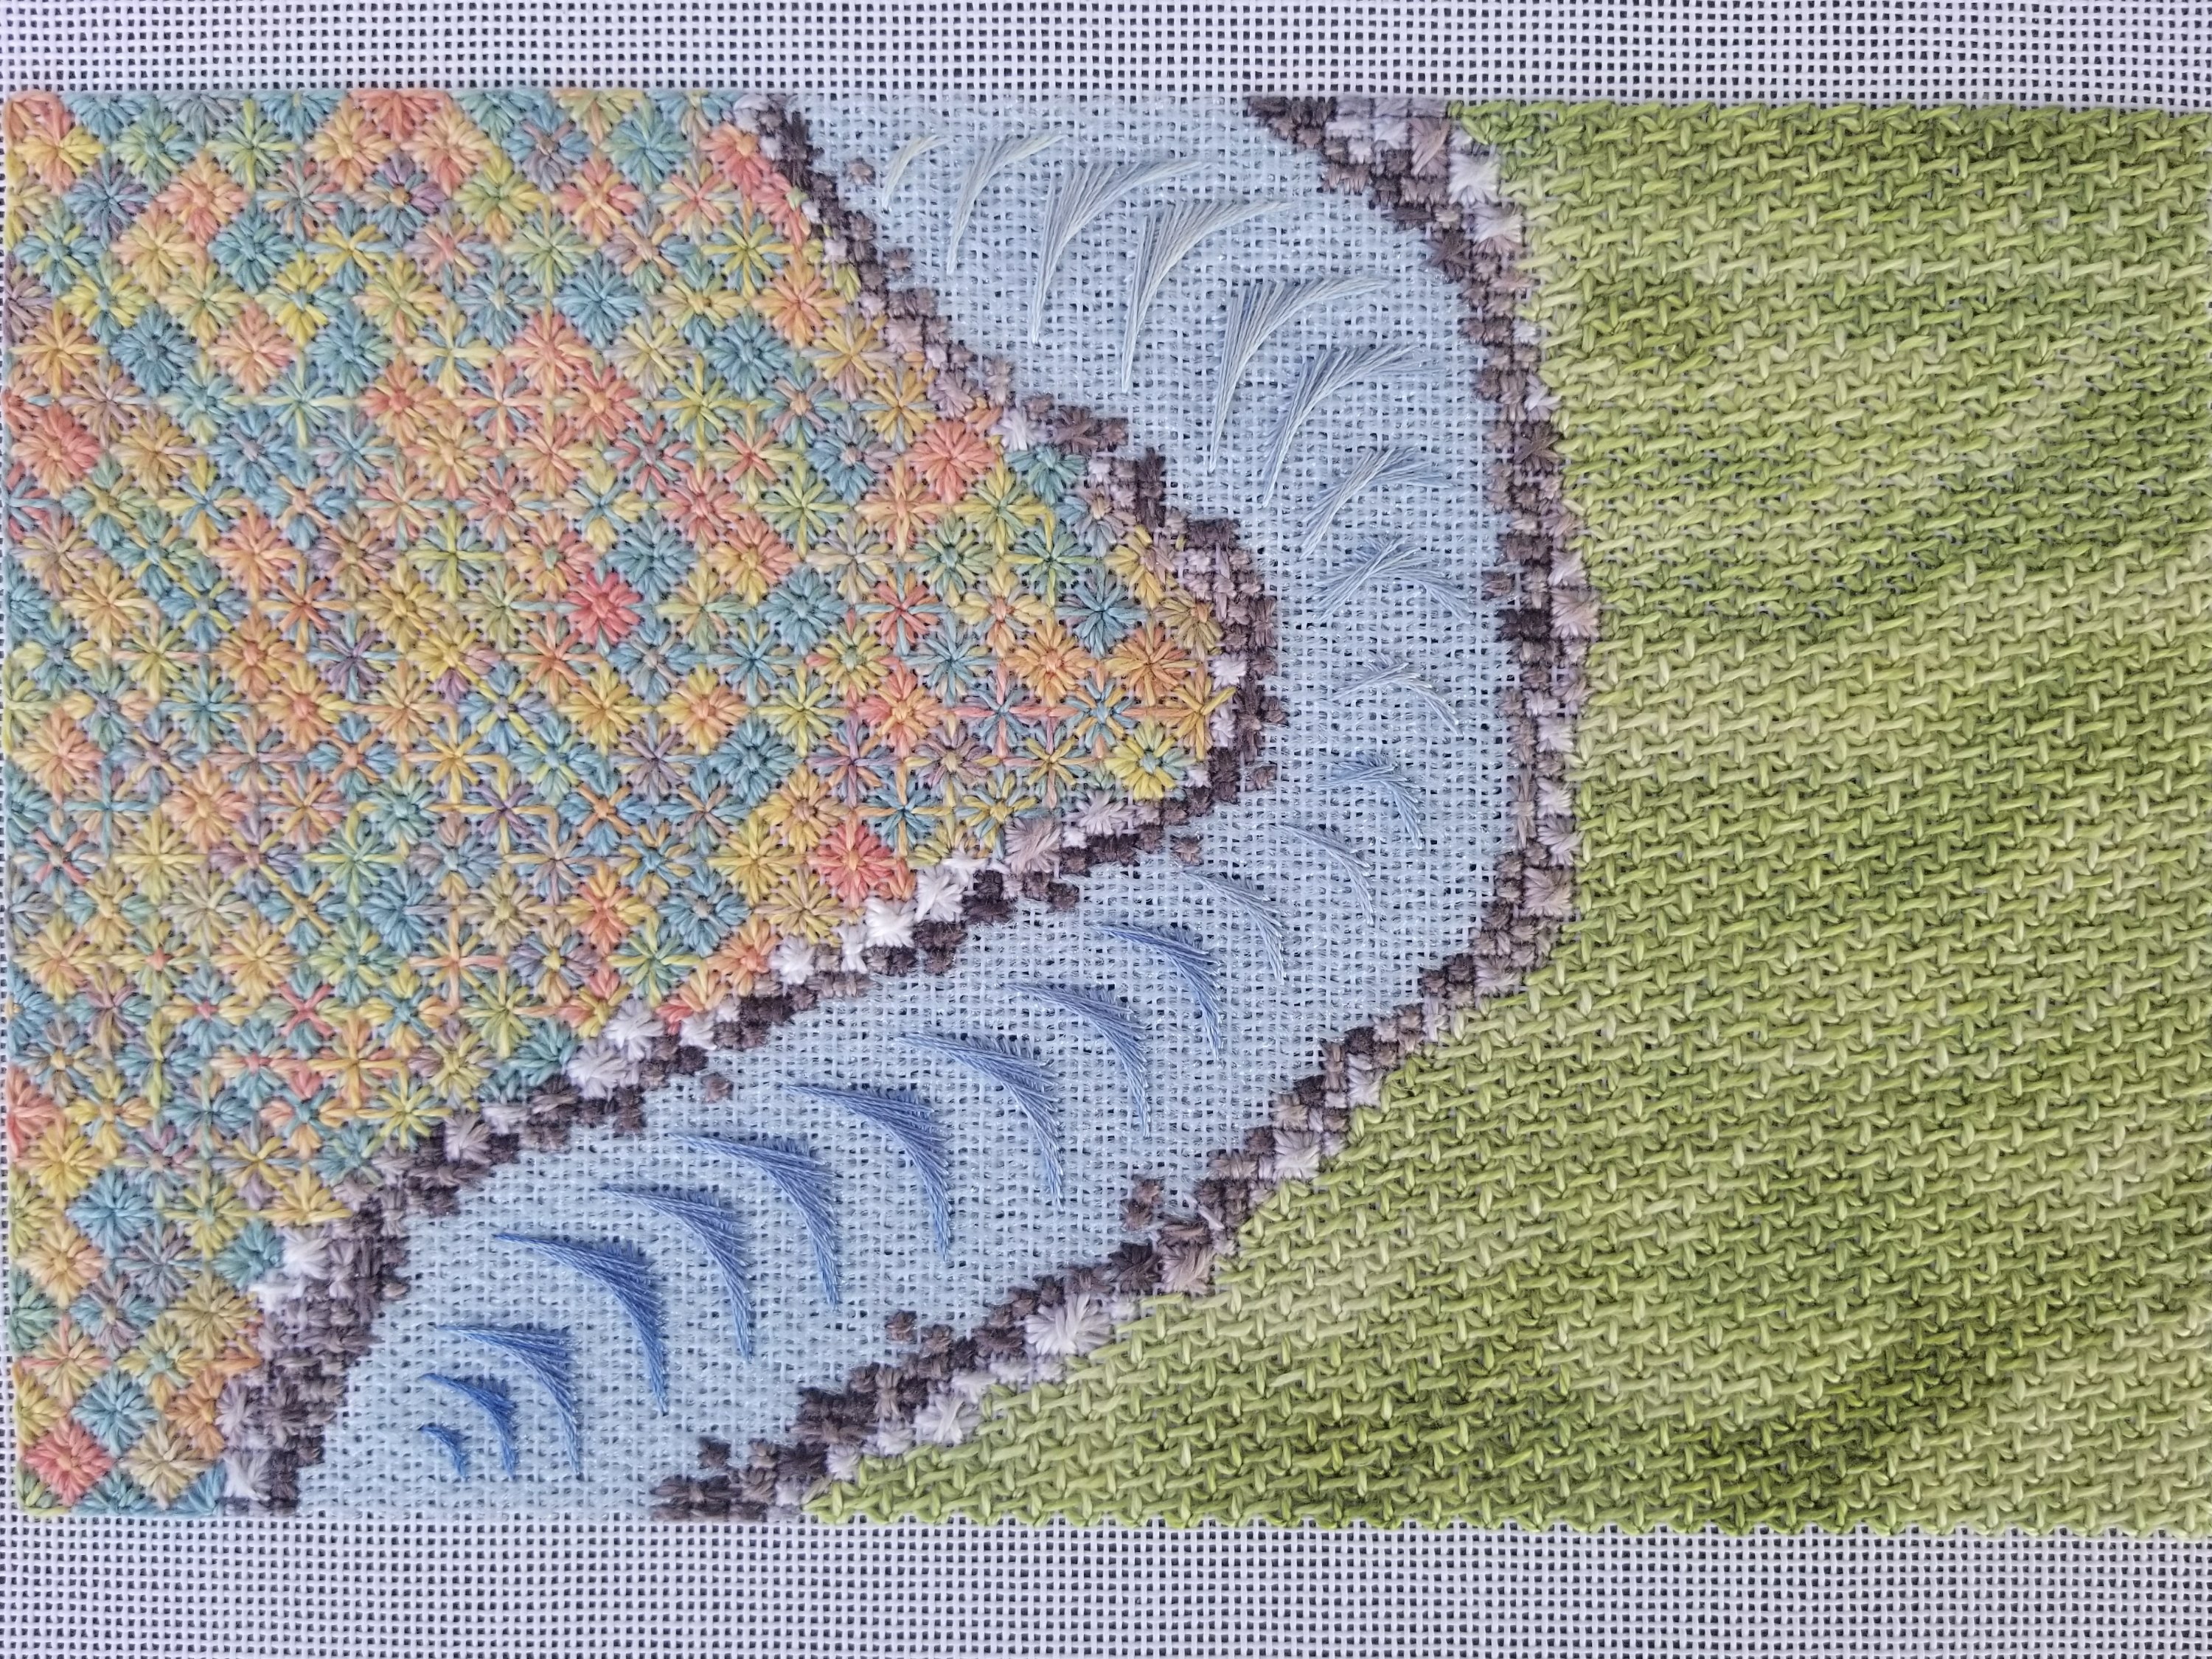
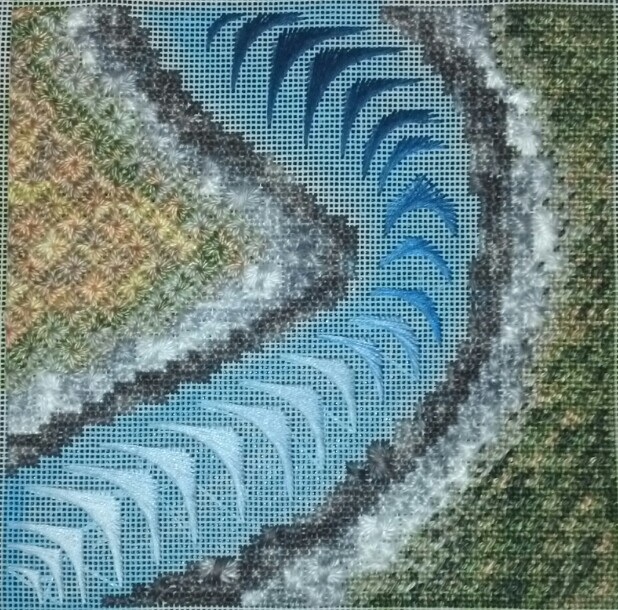
I can’t remember where I found this stitch for the grass but it worked well. The shades of green Watercolours Wasabi 271 provided most of the grass. The slightly dark grass is from Watercolours Guacamole 206. I wanted the shading to look like sun making certain areas lighter. I think I added too much grass. So, I may have the mat cover some of the right grass area.

And, the wild flowers are either Diamond Eyelet from Stitches by Effect by Suzanne Howden and Beth Robertson or Diamond Eyelet Variation from Plants & Animals by June McNight. To avoid a streaky effect from Watercolours Autumn Frost 143, I didn’t always complete each eyelet. Rather, I would start a second or third in order to get to a new color along the overdyed thread.
This one doesn’t have the threads showing under the crescents but it seems to lack the contrast that the first one had. I forgot to check the gray values of the threads. Others are still working on the project.
Some members of my ANG Keystone Garden Chapter wanted to stitch this for a project this year. So, I wrote up the directions and made up diagrams that they could follow. I am restitching it to see if I can improve it.
Instead of using a blue Copic marker and clear Water n’ Ice for the water in the river, I switched to the blue Water ‘n Ice (WT2).
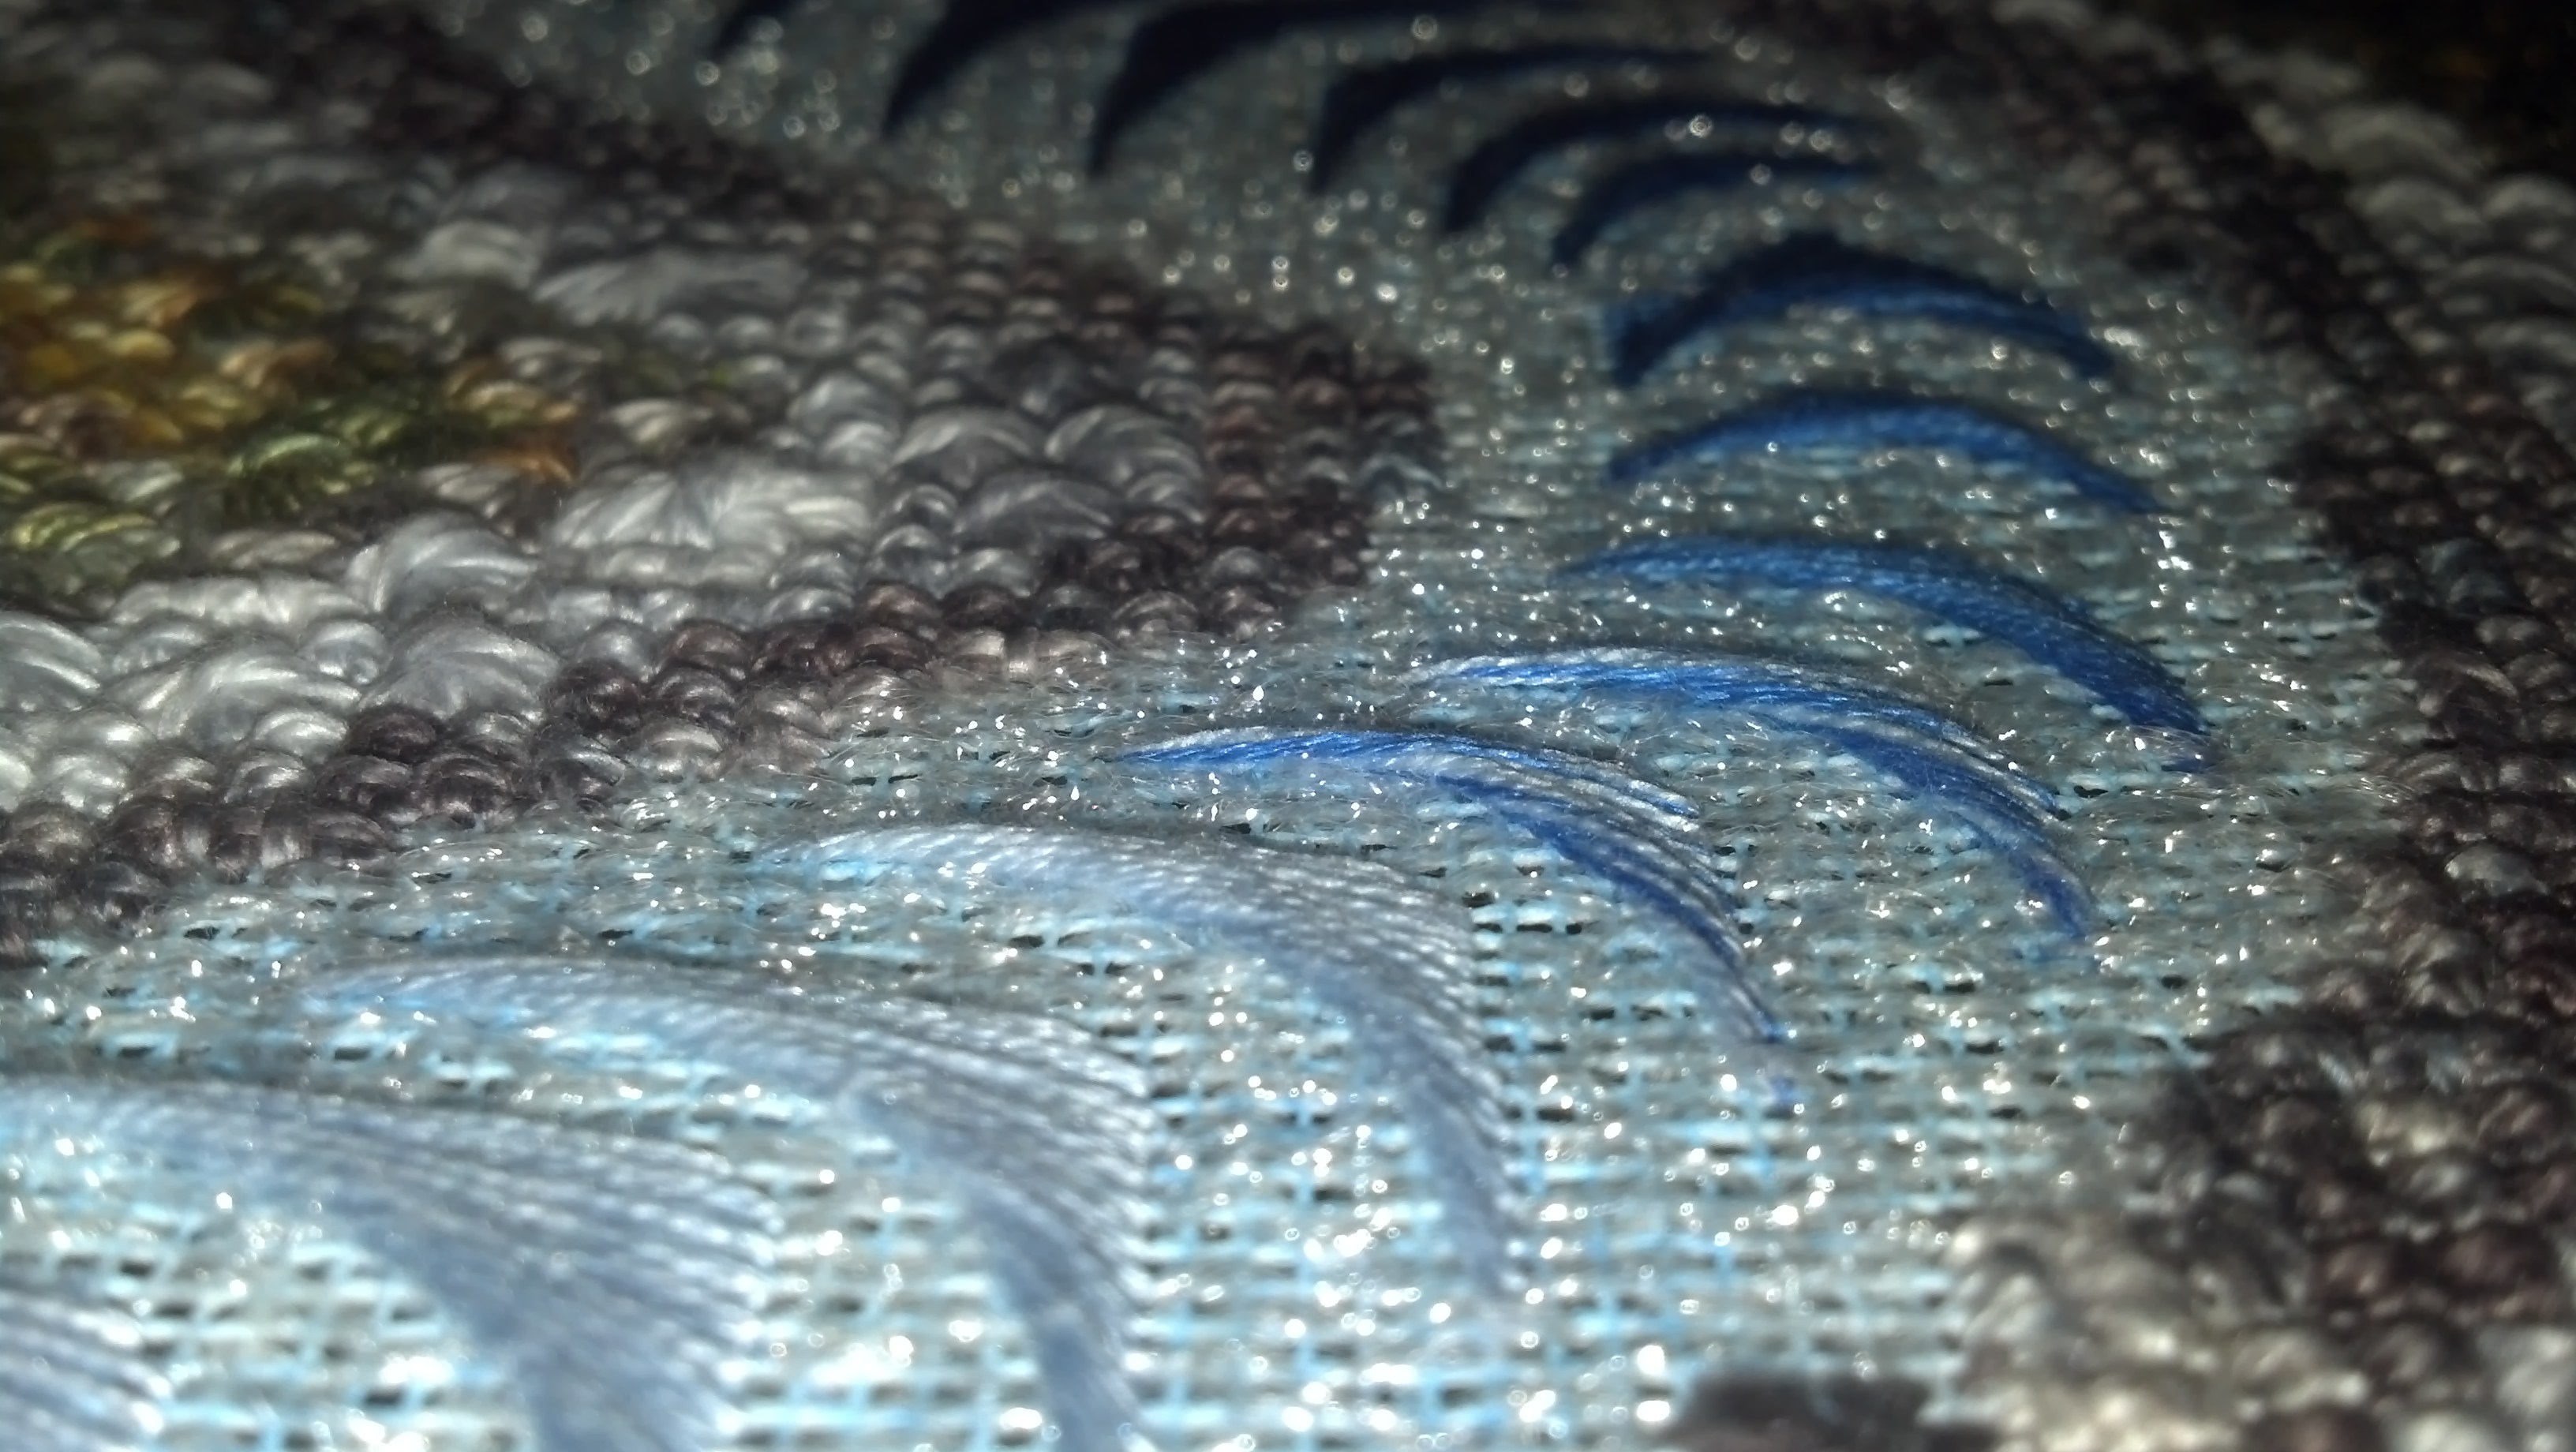
And, instead of Splendor and Pebbly Perle for the crescents, I am using Shades of Africa Two Oceans, Au Ver a Soie, hand-dyed by Chameleon Threads. The packet has 5 wonderful shades of blue that blend smoothly. I stitched the water first with the crescents placed on top. The darker crescents are on the bottom this time and they are a little smaller this time. I made sure the threads are not showing through this time by using away knots for each crescent.
Also, the overall design shape will be rectangular instead of square.

Crescent River returned from the framer. I used The Great Frame Up in Wayne, PA this time. My husband, Bill, & I with one of the employees spent quite a bit of time selecting it. Bill has a good eye & commented that the grooves in the frame made the piece continue outward on all sides just like I hope you think when you look at the piece – it spans a vast area but you are seeing just a small part.
And, by now, it should have floated down to Woodlawn for the 51st annual exhibit! They want an artist statement but only allow 50 words & I have a lot more that I could have said but settled on this:
I kept seeing a river from the sky in my mind. The crescents added motion to the waves of the river on a hand painted surface of blue. The bumpy, random mix of Smyrnas and Rhodes became the rocks banked on either side by grass or eyelet flowers.

Looking forward to March already. It is always a fantastic show with hundreds of pieces – each one just fantastic.
Postscript, no ribbon at Woodlawn but 3rd place ribbon at ANG Seminar 2014 in Chicago!
I was almost done with the wild flowers when I saw Janet Perry’s Nuts about Needlepoint’s blog about an ‘open water stitch’ that would work for my river. She said it is a slight variation of a stitch David McCaskill used for an ANG Stitch of the Month. So, in addition to the waves, I added some water using Water n’ Ice. It’s WT1, a translucent thread, perfect for a reflective surface. However, I had quite a time with that thread fraying.
The ANG Yahoo Group and private emailers came to the rescue (thanks so much) and suggested various products:
Thread Zap II (to sear the end)
Fray Check
Fray Block
Nail polish (I don’t own any!)
Given some terms to search, I also googled and came across Beeswax and Thread Heaven (their website offered a chart comparing several products). I had picked up some beeswax a few years ago. So, I tried several methods to test the various products. But, it probably will vary depending on what type of thread you are working with to find what works best for the situation. I found beeswax, Fray Check, and Thread Heaven was working ok at the start but not for the length of the thread. I never tried Fray Block. And, I didn’t have Thread Zap so I tried a match and found searing the ends worked best. Also, using a larger eye in the needle seemed to help stop the drag. So, I invested in the safer battery operated gizmo. It helped as did using shorter lengths of thread.
I stitched 3 rows for the framer to cover with the mat leaving the design area 6″ x 6″. And, yeah! I’m done!! I might get Mylar for under the water to increase the reflectiveness of the water. What do you think?

The ‘flowers’ are growing wild on the left side of the river. I say wild because there is a slight deviation from the diamond eyelet pattern that I began using from The Needlepoint Book by Jo Ippolito Christensen. First, I didn’t use the frame stitch but that’s not what I’m talking about. I was trying to blend the light portion of Watercolours Sierra 222 into the Rye 223 but I got confused on the pattern. Can you find the “wild” flowers? And, I just realized that when I first stitched them, I followed the diagram fine. But, after I put it away and went back to it a few days later, I put all stitches into the center hole. Now I know why it was harder to stitch the second batch of flowers! Oh well.
I thought that I was going to be done with this piece but there will be one more thread added. Those of you in ANG Yahoo Group will have an idea of what thread I will be using. More later.
In case you didn’t see my blog Tuesday, my husband, Bill, is one of the finalists for this week’s The New Yorker Cartoon Caption Contest!! Please vote for his caption (golfer walking into operating room, contest #388) at: http://www.newyorker.com/humor/caption
I added grass along the river bank using Watercolours (222 Sierra and 165 Granite). The Granite has a gray-green overdyed thread making the transition from rocks to sparse grass. Then, I blended various portions of Sierra which has a nice variety of greens and yellow.
I used stitch pattern 14 from Stitch Landscape from the grass category. But, it ended up having a pattern and I wanted a more random effect. So, I just added half crosses in the open areas. The top half of the stitched grass has the pattern and the bottom includes the random stitches.

You won’t find a neat back because I skipped around a lot with various portions of the color to avoid bunching colors together. And, I pulled out my paints again and painted the canvas green because some (not a lot) canvas shows through.

I’ve got the rocks done using an overdyed thread, Watercoulors Dark Suede (247) & Ash (218). The darker threads are nearer the water because wet rocks would be darker than the dry rocks farther from the water. And, the smaller rocks closer to the water are Smyrna and Elongated Smyrnas while the larger rocks farther away are various Rhodes (from Jean Hilton’s Needlepoint Stitches, pg 45 and 47, respectively).They are just randomly placed without any planning. I would look at the area as I progressed and try to pick the next stitch for the area and vary what I picked. But, they weren’t always a perfect fit and so there are a couple of half cross stitches over 1 thread here and there to cover the canvas.

I attended my first but the 2nd Annual NJ Needle Festival held at The Presbyterian Church at Pluckemin, 311 US 202 Bedminster Township, NJ hosted by Susan Hoekstra (foxview.com). It was so well organized. We got a retractable tape measure with “New Jersey Needle Festival” & the website (needlefest.com) marked on it as a favor. And, there were a bunch of free designs you could take if you wanted. I want to do a piece for someone who brought back a scarf from India for me. And, there was a mosaic pattern inspired by a scarf from the Philippines. It is very colorful (and it will be our secret that the pattern is not Indian).
About a dozen vendors including Nimble Needle were there – it is always nice to see Karen!
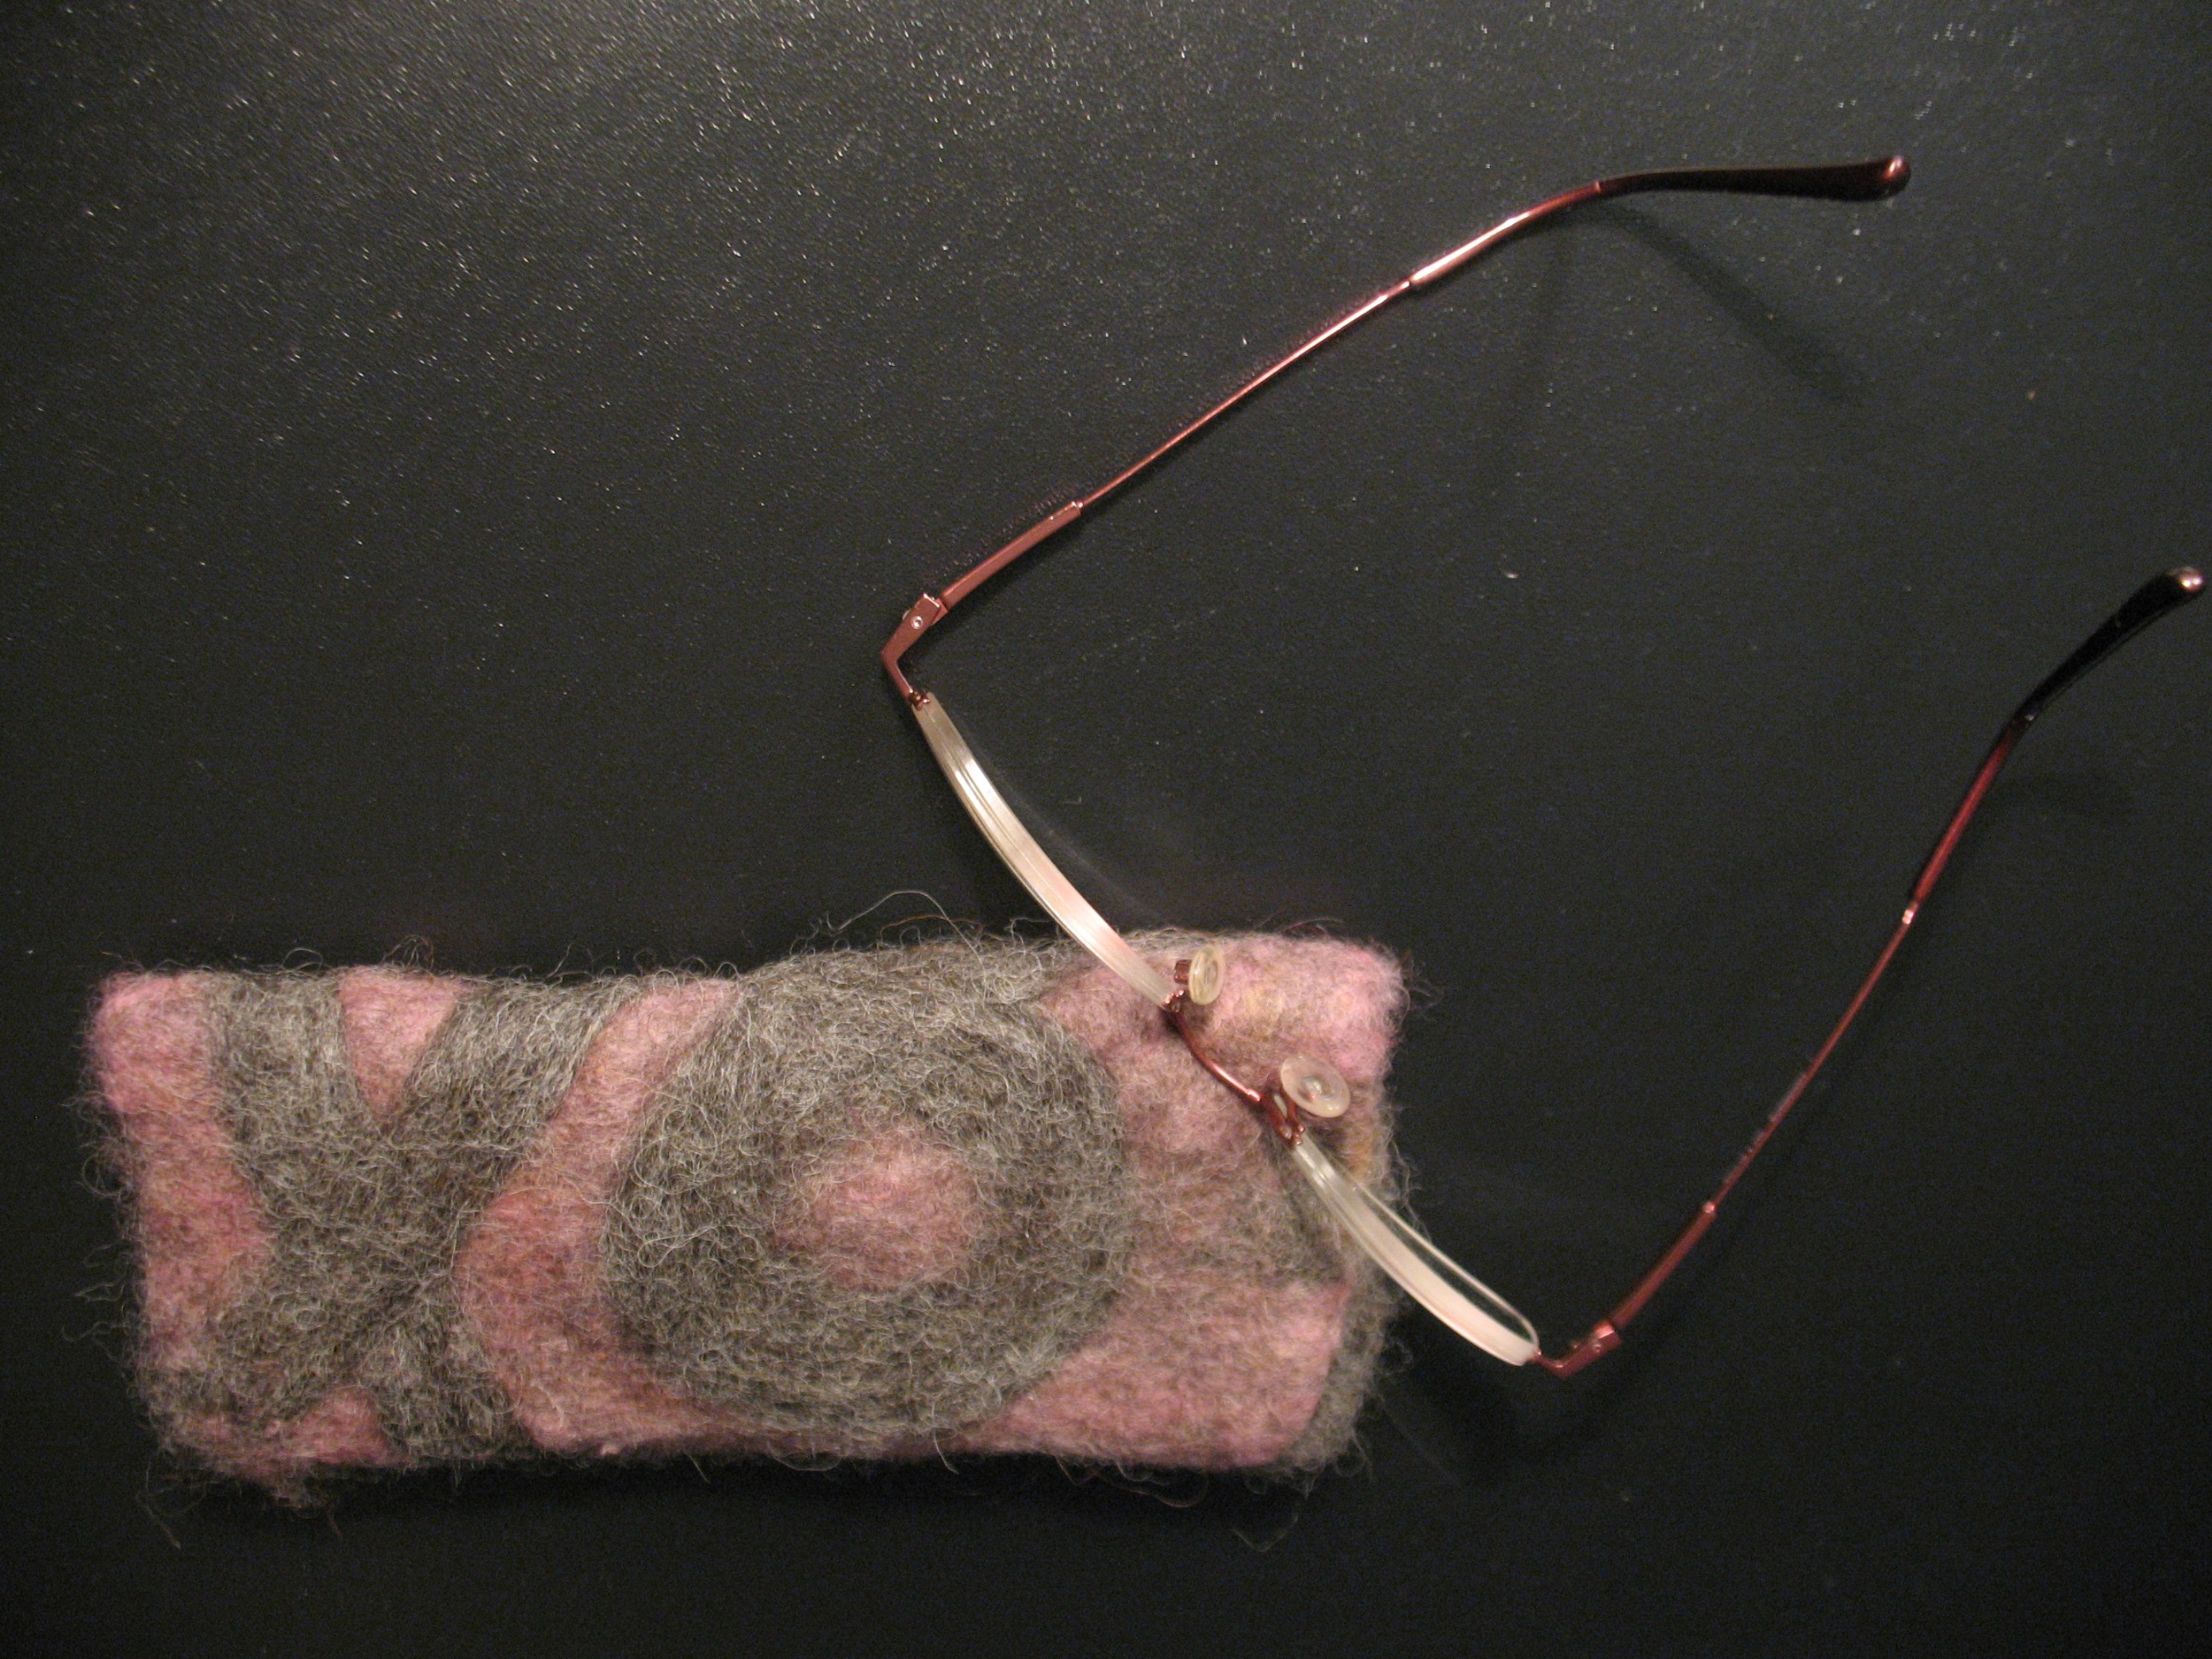
I got a lesson on fleece stabbing (a wonderful way to work out frustrations and be productive) using a needle felting tool & bought this eye glass case made from alpacas (hwralpacas.com) for me (since Bill didn’t need it)!
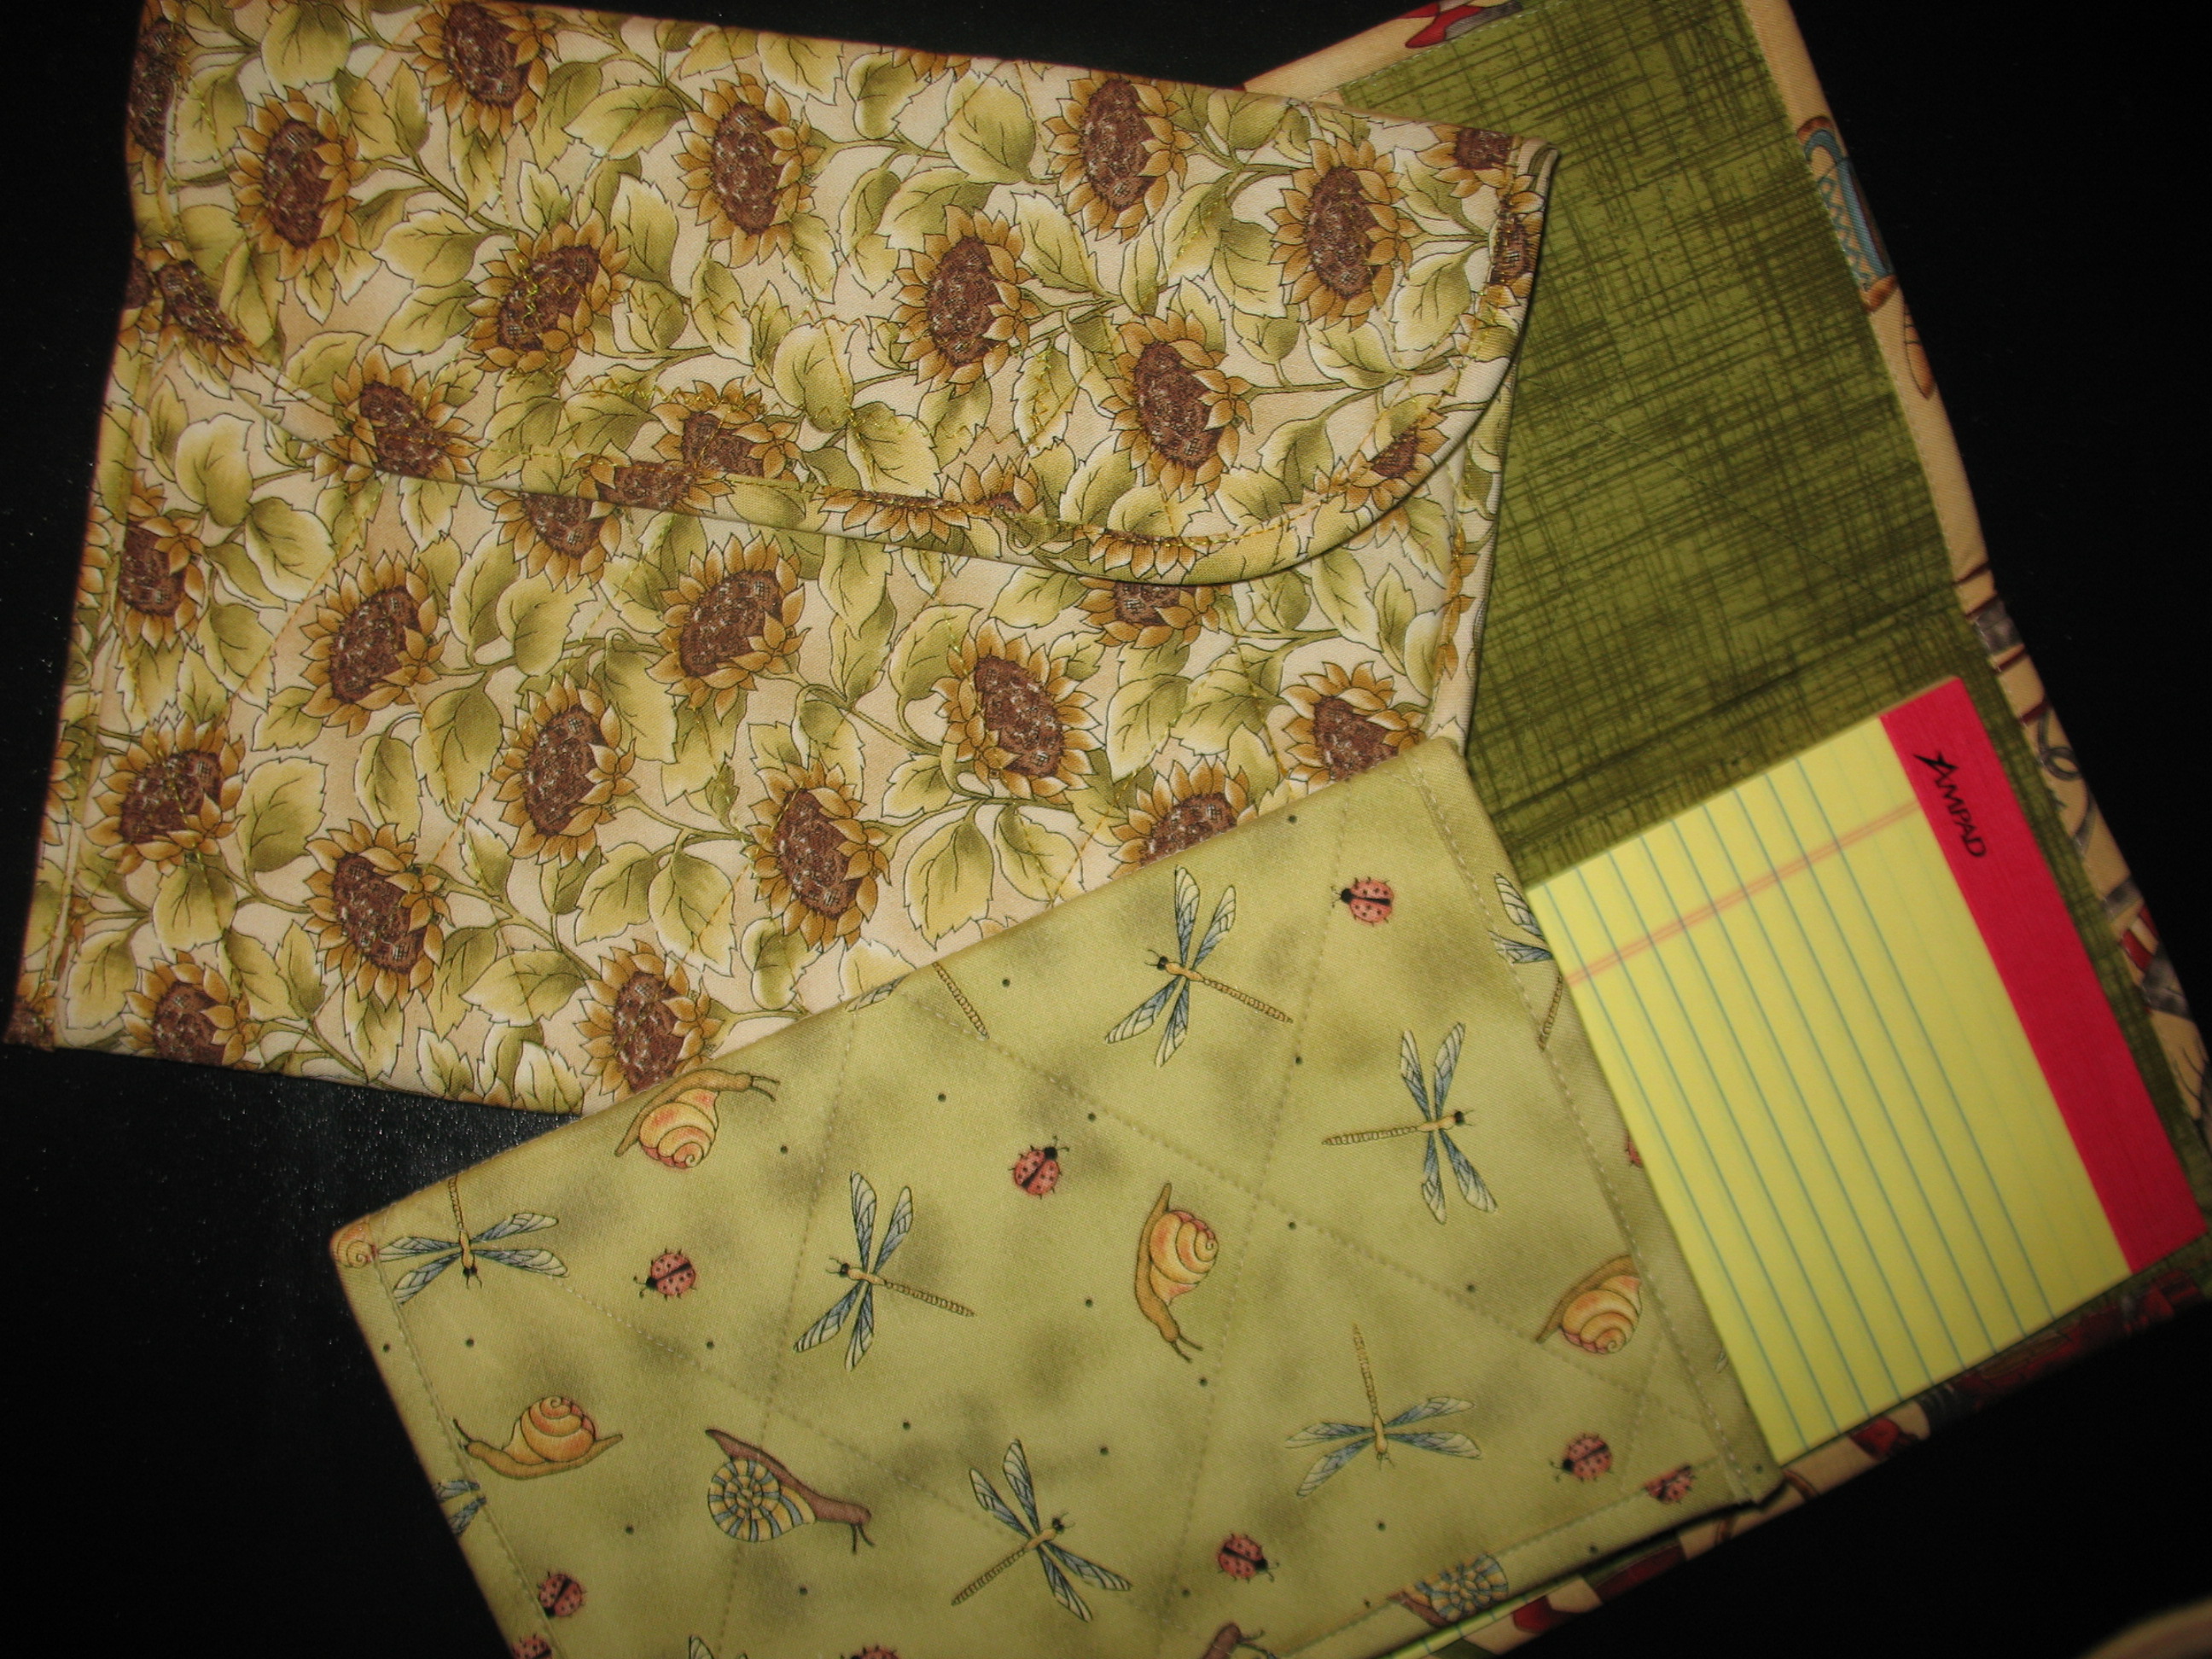
And, I got 2 quilted notepad covers (Xmas gifts) and an iPad pouch for me from Trish Vine Designs. I had met Trish from ANG PA Keystone Garden Chapter last month when I visited them with the Correspondence Course booklets. She also had some wonderful clear plastic project holders with quilted edging.
Read more about both vendors and others at http://blogs.mycentraljersey.com/institches/
You can see my table in the In Stitches blog (bottom left but 2nd one up – I was probably walking around looking at all the pieces or shopping – it is the table with the large flag on a frame). I had a great time chatting and stitching with Rae & Rona – Ann & Barbara from NYC joined us & then Mary McG also from the Keystone Garden chapter arrived a little late. I was thrilled when Rona first looked at my piece and said “what great movement” – that was what I was going for! Then, before I’d gotten too much done, Mary asked about how I was going to develop the piece & I shared my very rough ideas & showed my threads. But, she set me on the right path about the size of rocks along rivers. I’m thrilled because while I want it abstract, I do want it to be authentic. Now I know the smaller rocks are nearer the water & large rocks are farther away from the water’e edge.

You can see me standing on the far left of the first picture (light green shirt) admiring someone’s work in Rosie’s entry at http://blog.njneedleartists.org/ . I love that the whole NJNA chapter can contribute to the blog entries. I didn’t know that was possible. Bill and I really enjoyed dinner and talking with Rosie & Sue later that evening. I’m looking forward to seeing how they progress on the stitch of the month project.
It was a fun, wonderful opportunity to meet tons of people & see loads of beautiful projects! Already looking forward to next year’s event on Saturday April 26, 2014.
Thread blending is time consuming. Seems like I just get a rhythm going & then need to rethread. These crescents do take a good amount of thread. And, even with my chart, I got confused a couple of times!
Thread blending formula (lightest to darkest):
Splendor/Pebbly Perle (# crescents)
S1026/P061 (4)
S860/P061 (3)
S860/P80 (3)
S868/P80 (2)
S868/P57 (2)
S1143/P57 (2)
S1143/P58 (2)
S858/P58 (4)
The river is flowing!!

I love working a design out on graph paper almost as much as stitching it! Maybe that is why mechanical drawing was attractive to me in high school. I thought it was the music (Bob Dylan) that the teacher played during class. Or, that HE was nice looking, pretty cool, and the youngest male teacher that I ever had as a teacher. Or, because as one of the few elective vocational courses that I took, I liked the change of pace from all the academic ones.
My first attempts dissected the paper almost straight across with no movement but it did narrow nicely.

No need to bore you with my 2nd or 3rd attempts that wouldn’t curve. But, my 4th was better.

And, by starting at both the top and the bottom, I found I could get the bend. However, it was necessary to modify the crescent shape from the diagram in Jean Hilton’s Stimulating Stitches in order to make the bend. But, I think she’d be ok with that. I didn’t narrow as much as in my earlier attempts but there is narrowing and I love the bend. The design doesn’t look too top-heavy to me. I like it!

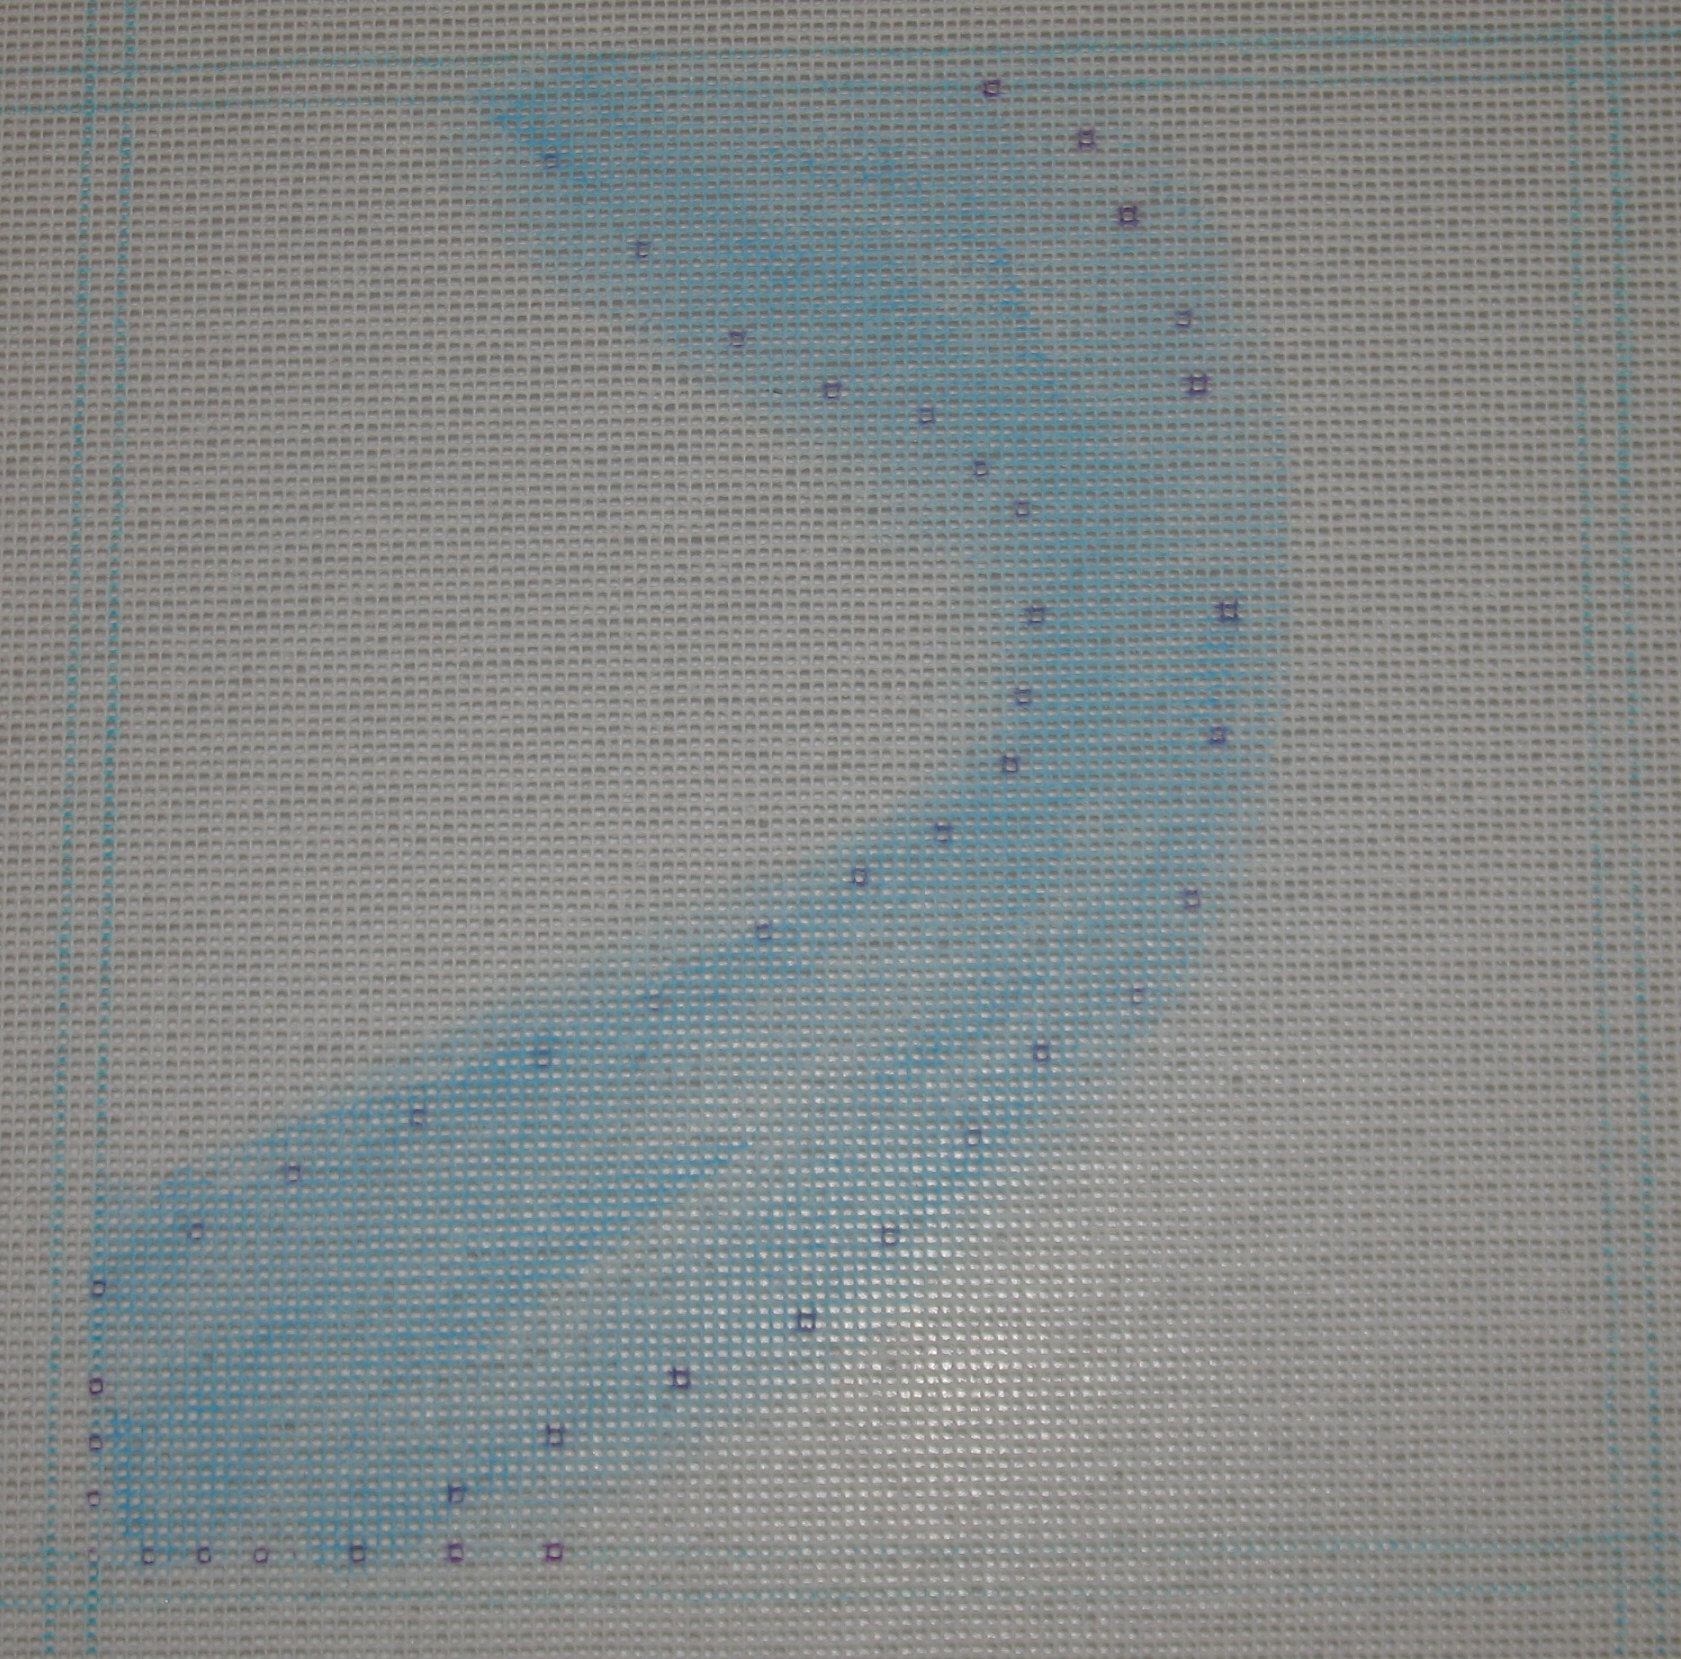
The blue Copic marker didn’t look good with my blue threads. So, I got the paint out. And, I am glad I did. I’m very happy that there are areas with a little less paint than other areas. I went beyond the area where the crescents will sit because the cresents are supposed to be the ripples in the water. The purple dots you see are the Disappearing Ink Pen marks. I’ll have to get the crescents stitched soon or keep reapplying more ink! The borders are marked by the Mark-Be-Gone Pen (water washable) but they should get covered by stitching. My framer says he like about 3 extra stitched rows on the edges to work with.