Filed under: General comments, Needlework and Textile Guild of Media, Punch Needle, Punch Needle Demo
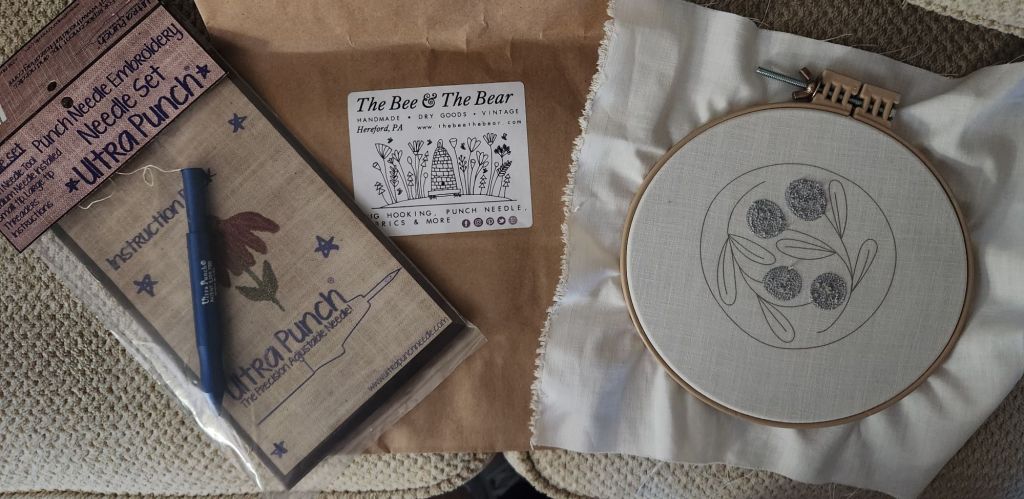
The Needlework and Fiber Guild of Media continues to meet monthly and have demonstrations by various members and occasionally a speaker or road trip. This month, I volunteered to show what I learned about punch needle from a class in November 2024 with Katie Kriner, Author, Fibert Artist, Shop Owner of The Bee & The Bear in Hereford, PA. I hadn’t worked on the project since then.
Meghan brought a punch needle pillow to the meeting done with chunky yarn and a big needle. She described hers, and it was probably very similar to the Oxford Punch.
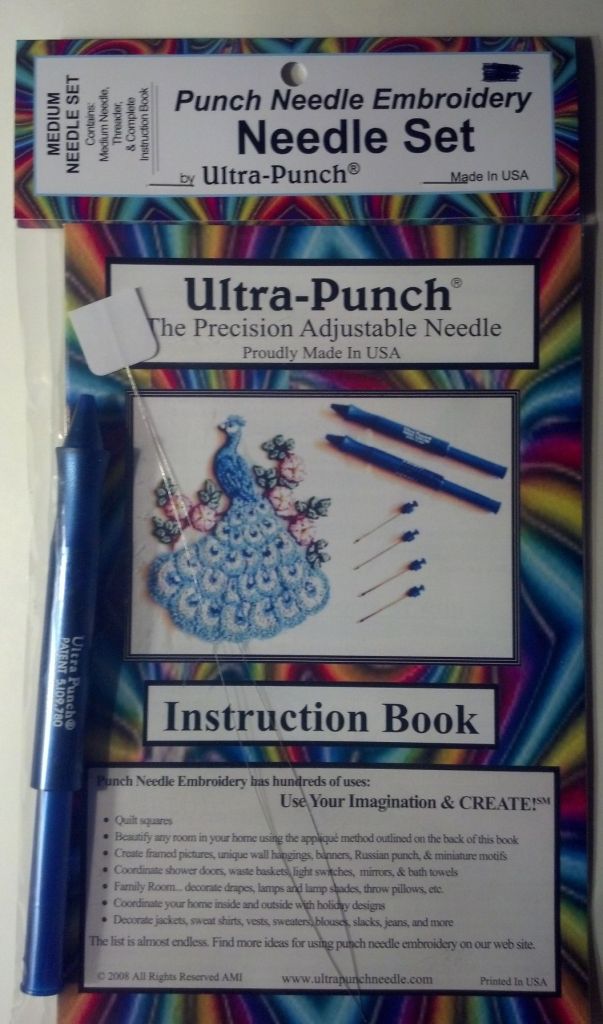
I’m using the Ultra Punch needle, which seems to be the gold standard in punch needle for projects using embroidery threads. It has 12 heights to vary the length of the loops as you punch.
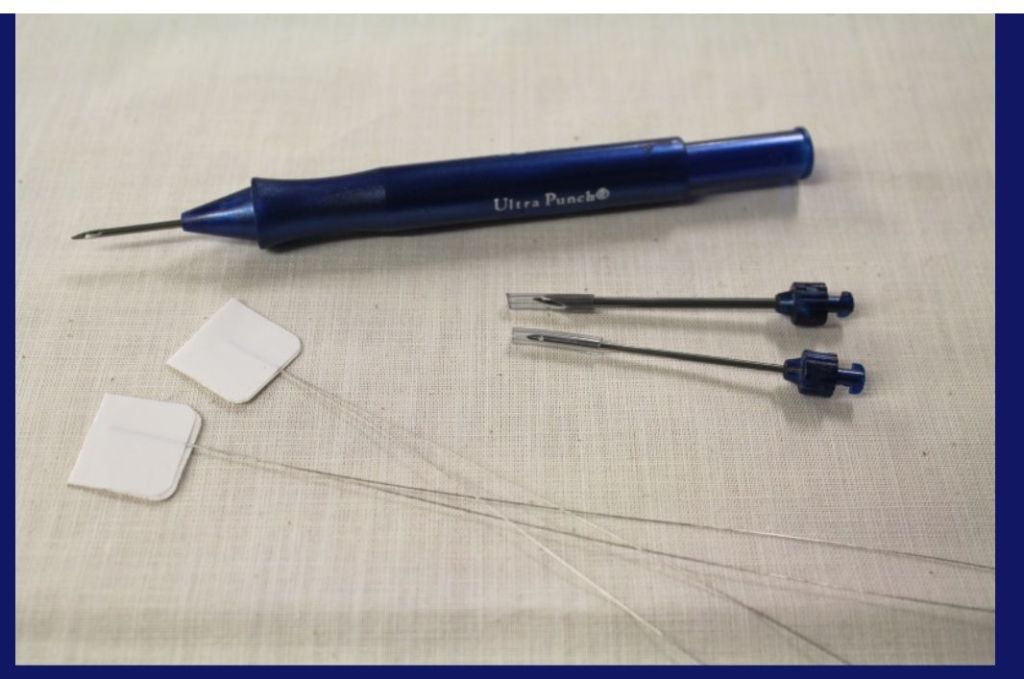
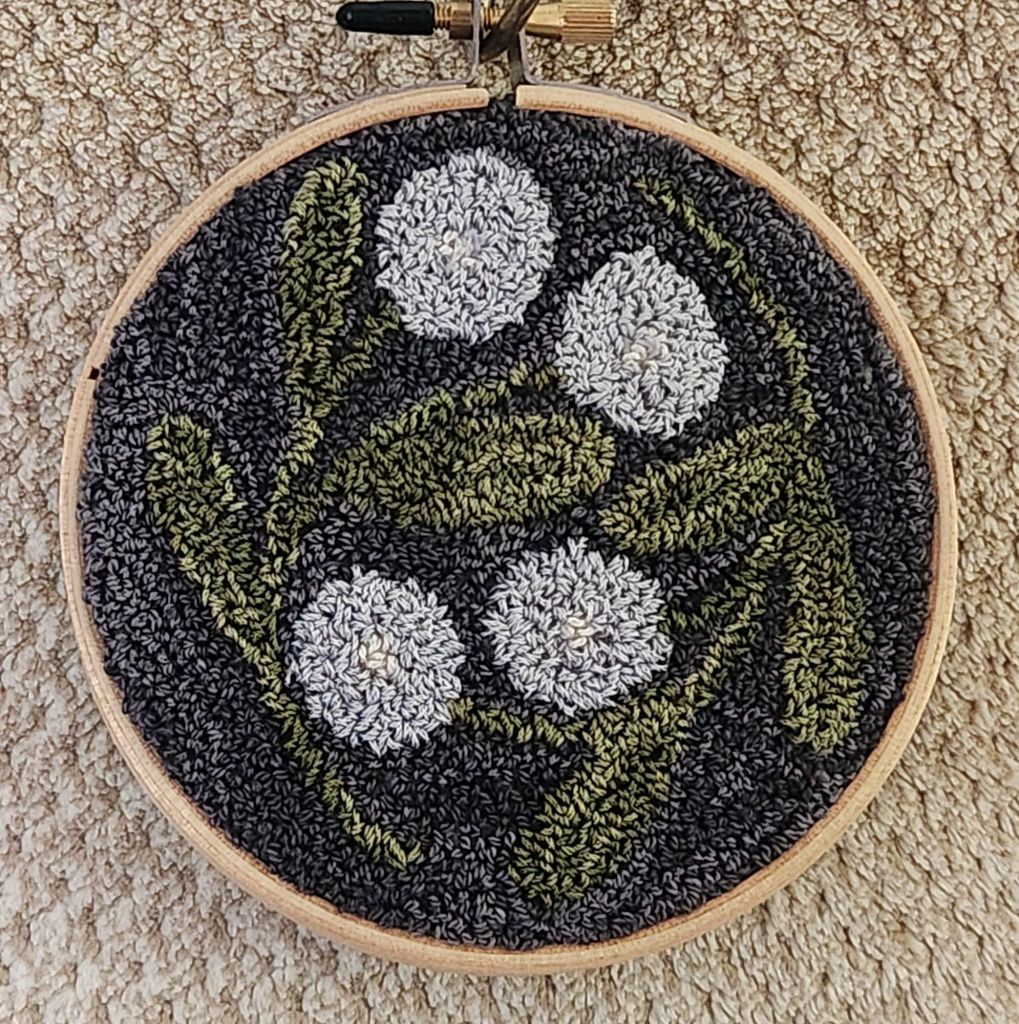
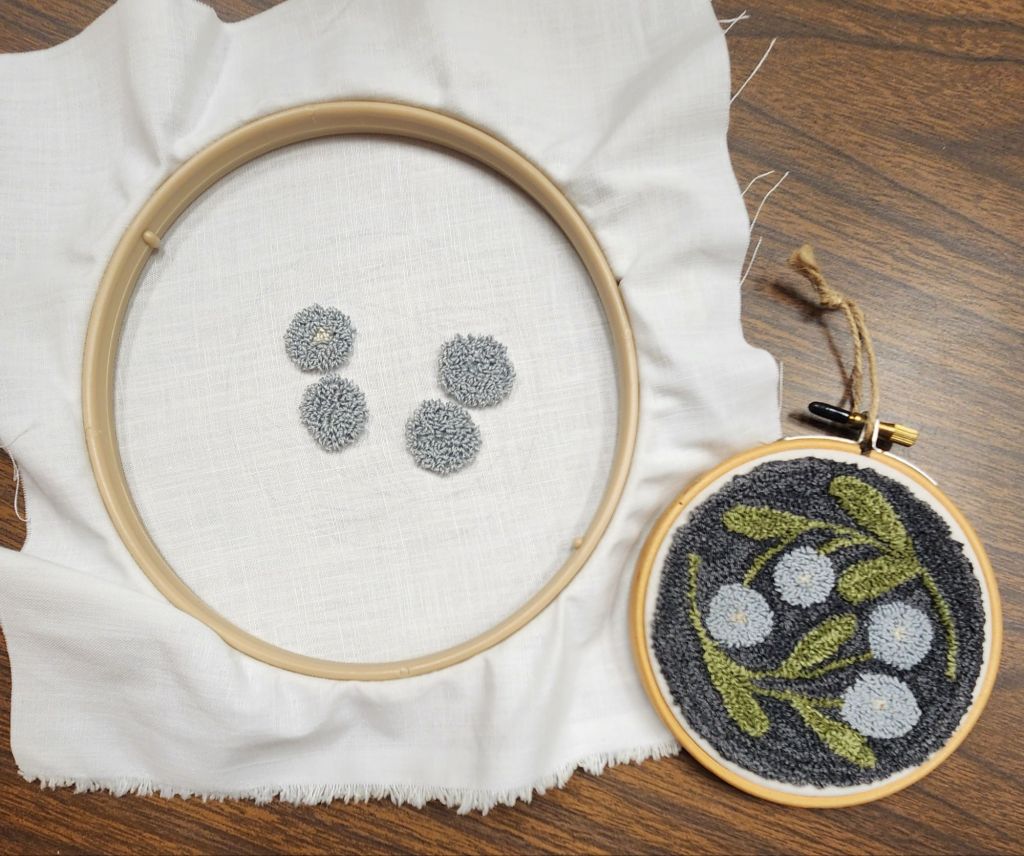
This design is done at level 2, which creates a higher loop than the background, which was done at level 1 and creates depth in the design. You can’t see in the photos, but you can in person and feel it.
Since I only have evenweave fabrics (weavers cloth was supplied with the kit), I cut a piece from an old sheet for me to practice on. After watching a YouTube video, I realized that I had not loaded the punch needle properly (that sample was not photographed). After that, I got the hang of it quick enough (photographed below). Following a line is tougher than you think! Once the areas get filled in, it looks smoother.
Needlepoint stitchers might find it odd that you cut ends of threads from the front. It just blends into the loops.
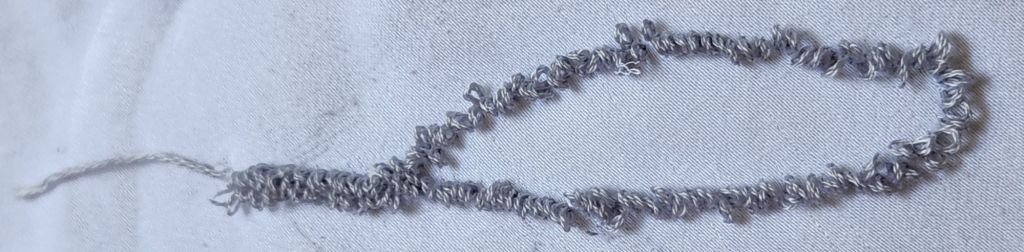
If you pull the thread, it can all come undone. Kristen suggested applying fusible fabric to the back would help prevent that. But I don’t think I’ll be touching it to have that happen.
The design is drawn on the back of the fabric (not photographed), and that’s where you punch as the design appears on the front (as seen in the photos). The overdyed green and light gray threads are Valdani balls of 3 stranded floss (worked as supplied, not stranded). Placing the thread balls in a small jar allows the thread to continuously feed through the needle and not roll away. You don’t cut the thread into multiple lengths as we do in needlepoint.
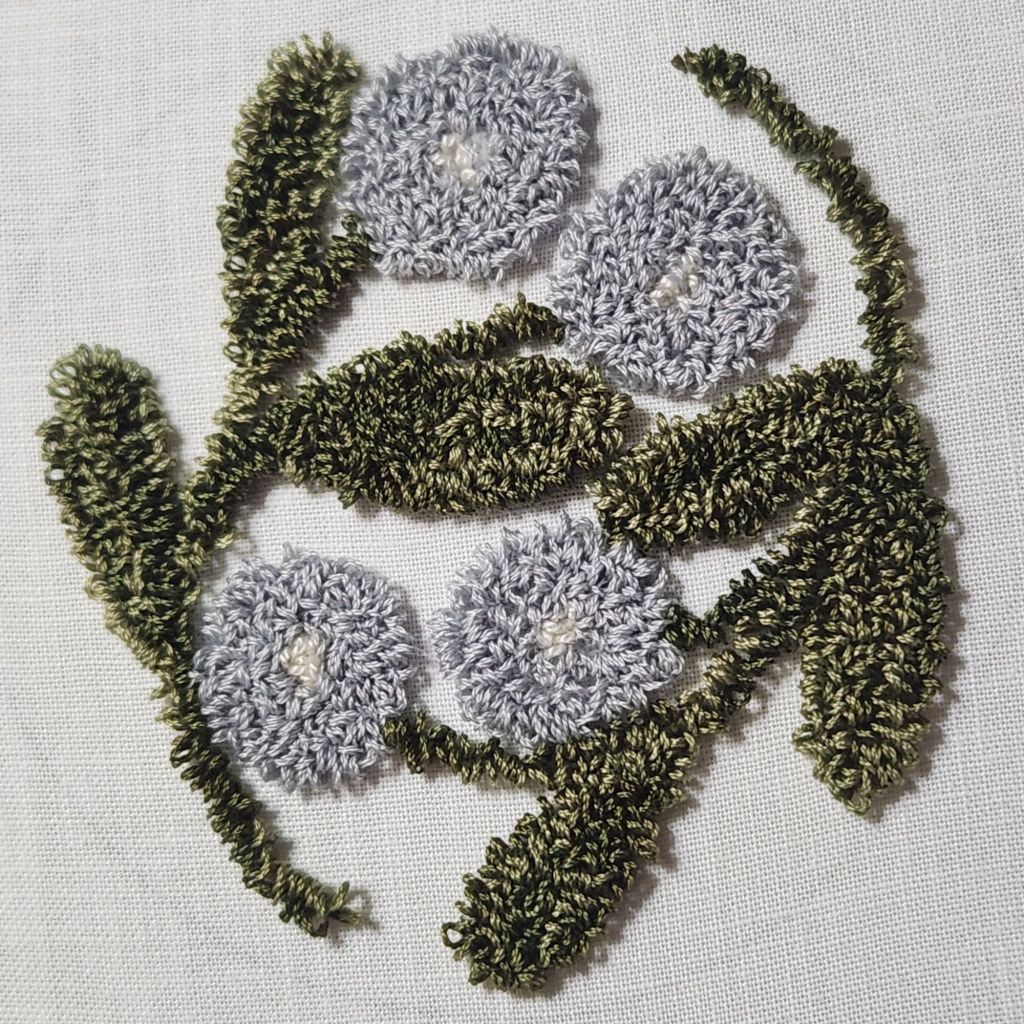
The overdyed dark gray for the background is Valdani #8 perle cotton.
I never expected to get this done before our meeting, and I didn’t get much of anything else done, but I finished the punching in 2 days.
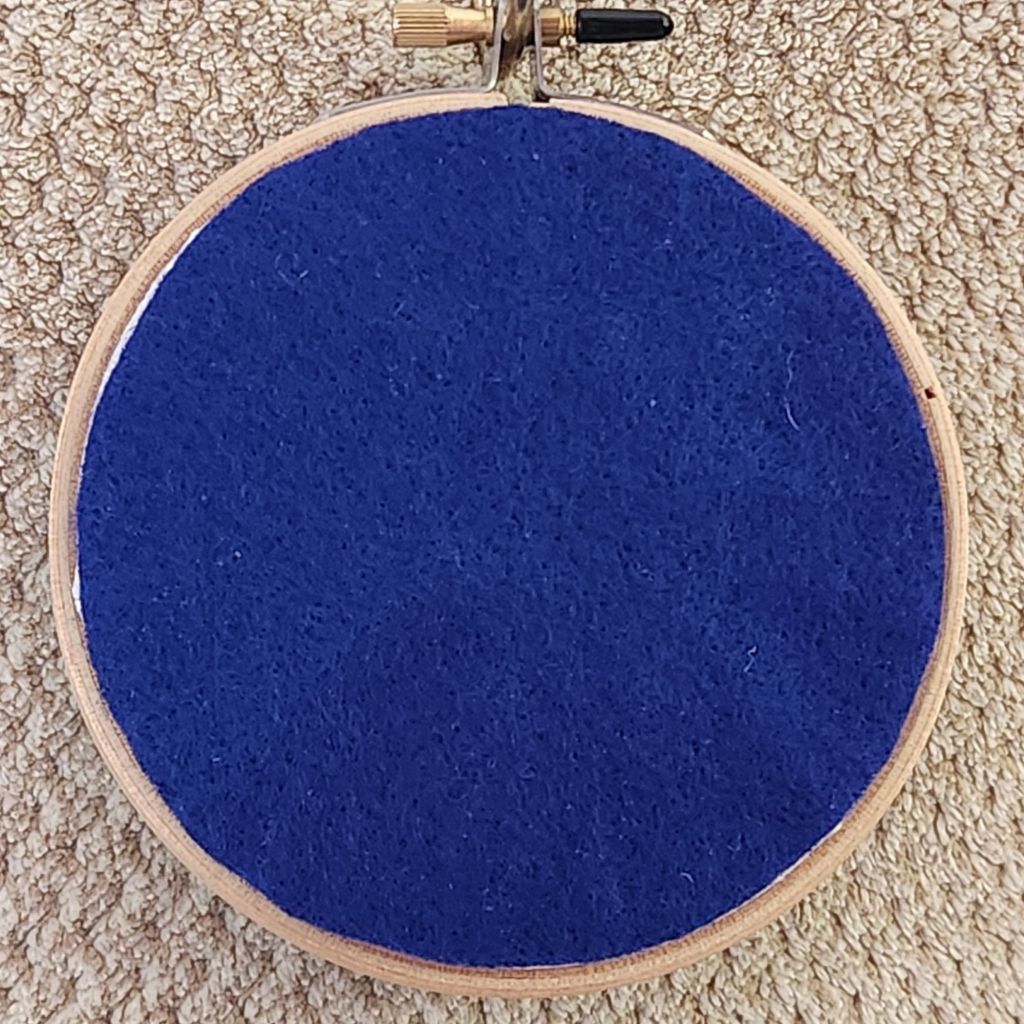
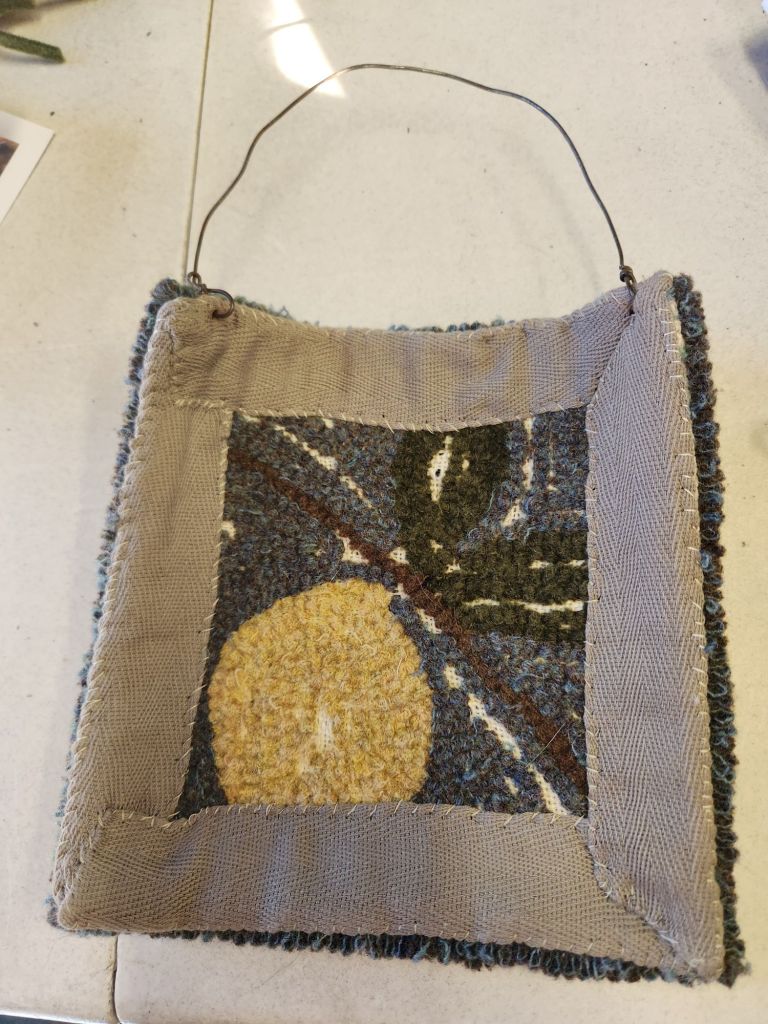
The kit included the display hoop and a piece of felt to cover the back. I did a running stitch along the inside edge to gather the fabric, cut away the excess fabric, filled the width of the hoop with the excess fabric and batting, covered with magazine board, gathered the fabric, laced it flat, and glued a piece a felt on the back that came with the kit. I placed Aleene’s Fabric glue on the weavers cloth and simply pressed the felt down. It was dry in no time.
Thanks to the deadline of the demo, this completes Goal #8 for 2025!
I was asked if I plan to punch again. And, I would if I happened to see a cute design, but I don’t feel the desire to seek it out. The repetition of punching reminds me of basketweave. But, I prefer basketweave because of the lack of precision with punch needle. The loop height in punch needle has some variation, and getting stitches close enough is an issue, although both would probably improve with practice. There is also the concern that it could unravel.
Kristen said the tool has been used for Turkey work. Again, I would be concerned about unraveling.
All said, I will keep my punch needle!
Filed under: Crescent Journey, General comments, Melita's Designs, Woodlawn Needlework Exhibition
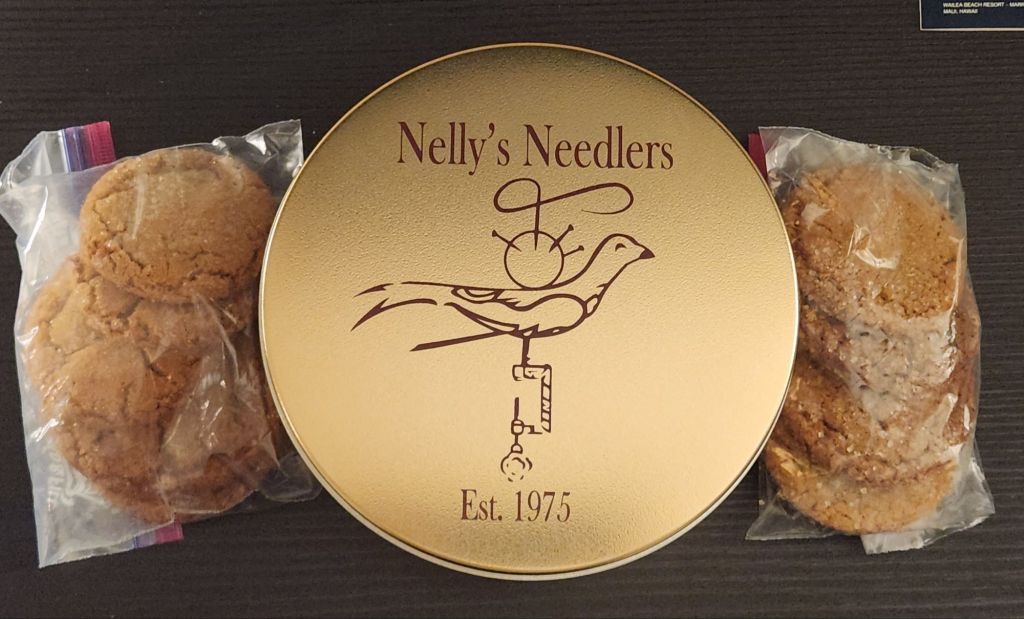
The Nellie’s Needlers are celebrating their 50th Anniversary with an excellent show, the 62nd Annual Needlework Show at Woodlawn. We made it on March 1 this year!
There are 579 judged entries listed but over 600 with the non-judged pieces on display by Nellie’s Needlers and ANG Checkerboard Chapter, who are celebrating their 50th Anniversary.
Congratulations to both.
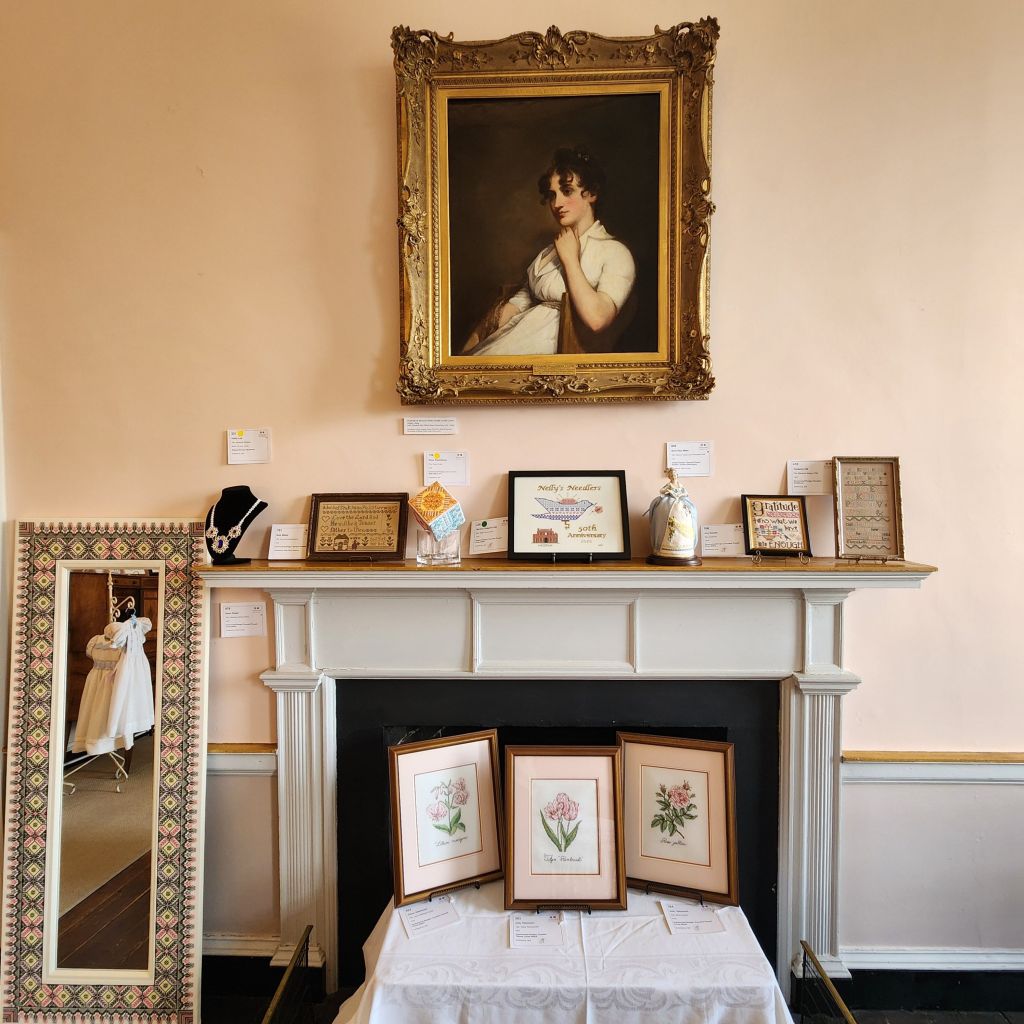
That is Nellie in the photo above. And, look at stitched frame around that mirror by Eman K. Wonderful.
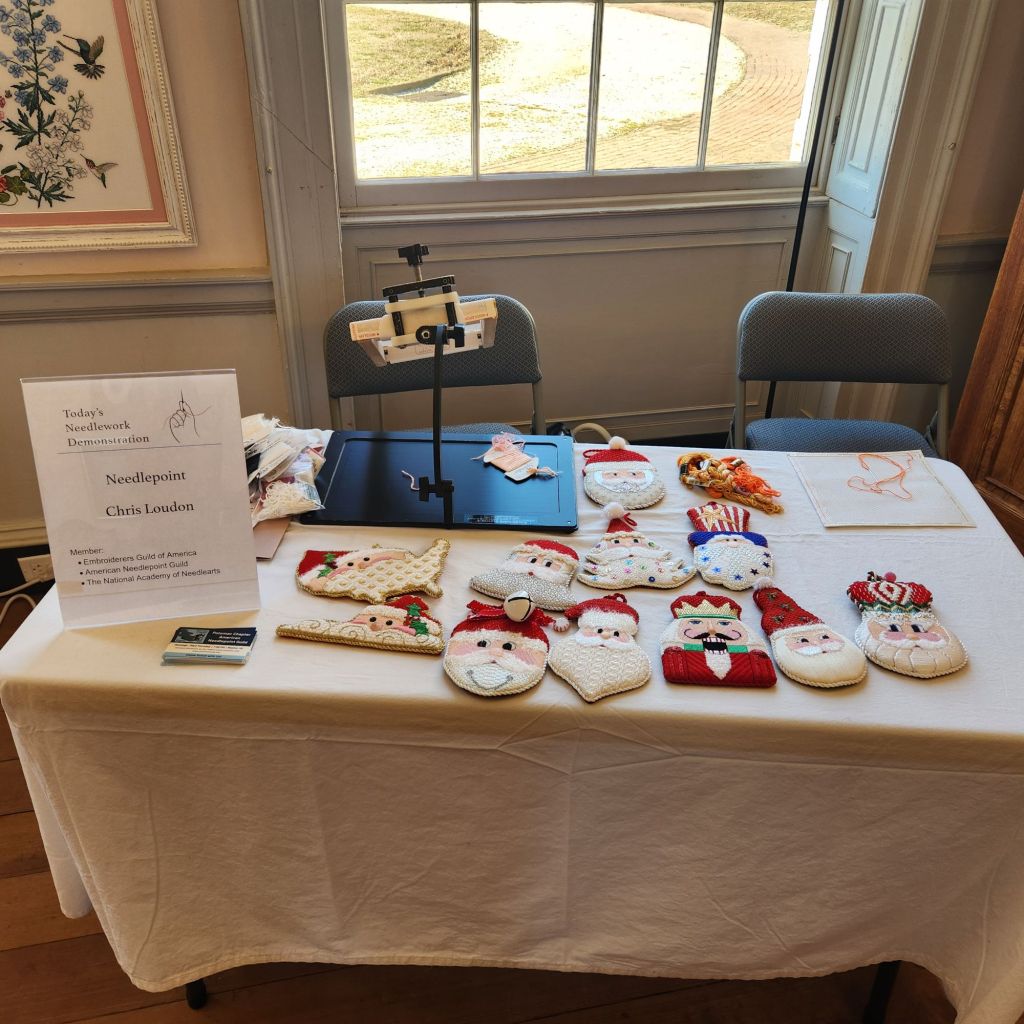
I got to see Chris L and her Janet Casey Zickler Santas. We had a nice chat when she returned from lunch. And, I found out we’ll both be at NAN in a couple of weeks. How fun is that!
To see more information on each piece exhibited, use the QR code listed in the brochure. That’s all the information in the docent paperwork located in each room. Fantastic feature! Now, if Woodlawn asked for and people included the name of the designer for commercial pieces, it would be incredible! I recognized about 3 dozen of the canvaswork counted pieces. Too many to write about but lovely to see.
My photos are not great this year. The light was super bright shining in the windows or there was glare from artificial lights. Woodlawn allows glass and reflections are impossible to avoid. And, I was reprimanded by a docent for taking photos too close.
Link to the photos of the major award winners and a list of all winners are available at: https://www.woodlawnpopeleighey.org/2025-nws-award-winners
Theresa B swept Original Senior Sampler Multi-Stitch awards as she does here and in Rehoboth Beach’s exhibit. I won’t share photos of any original designs without permission. See the link above for photos of the major winners.
The American Needlepoint Guild (ANG) New Jersey Needle Artists Chapter was well represented with 24 entries by Sylvia B, Diane B, Sue C, Cathryn C, Noelle D, Barbara L, Rosie L, Linda M, Janet P, and myself.
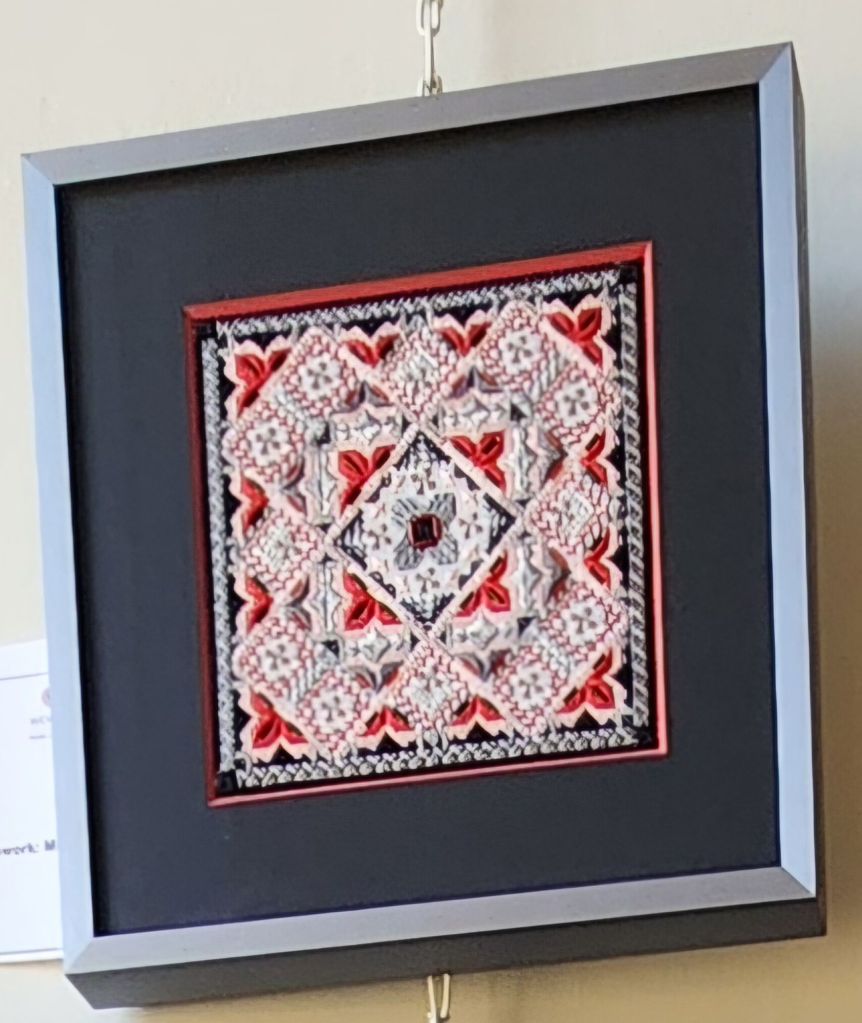
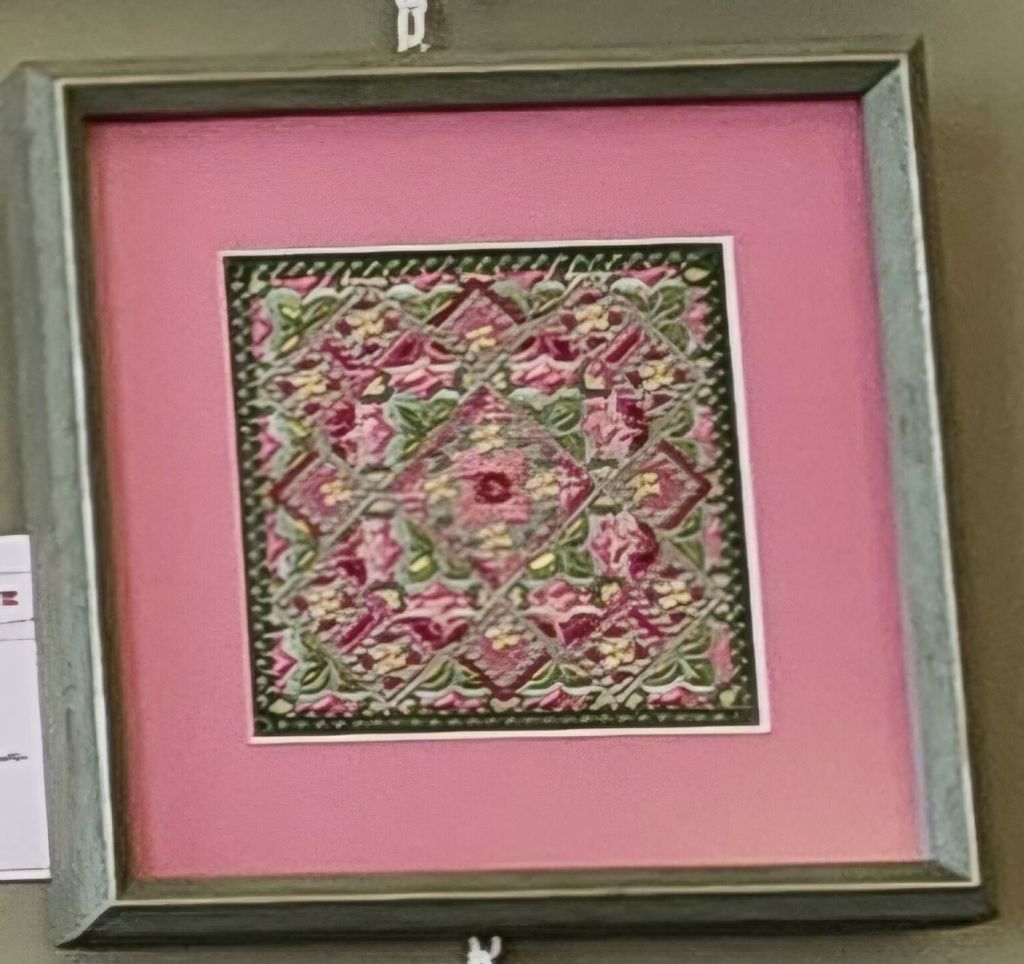
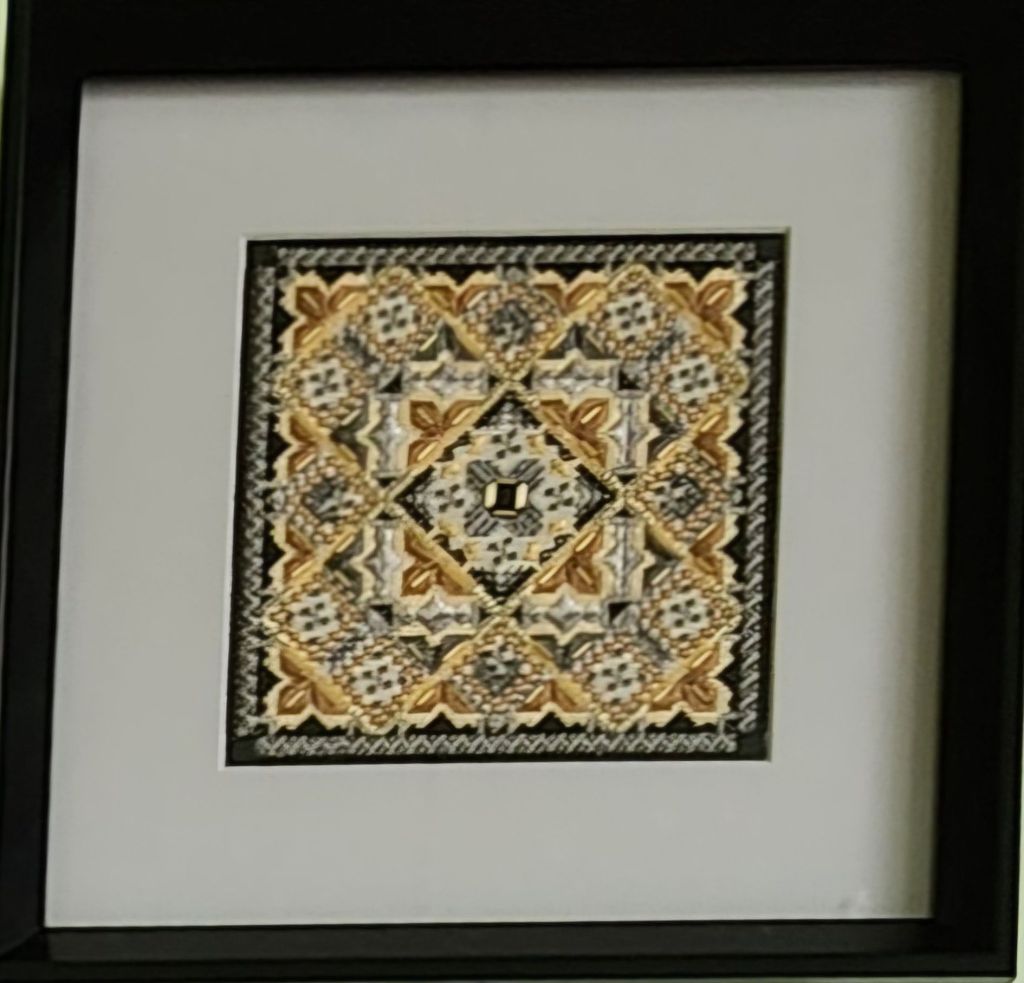
There are 3 Crescent Journeys, my design, and the ANG Stitch of the Month from 2023, on display. Diane’s B did hers in black and red, earning Honorable Mention. Rosie’s green and pink colorway remains my favorite one despite not getting a ribbon. Linda M got 3rd place for the neutral colorway.
Linda M got 4 awards in total – one for sampler, miniature, and 2 for canvaswork. Linda M also stitched Interchange by Linda Rienmiller (which I stitched too). Fun piece.
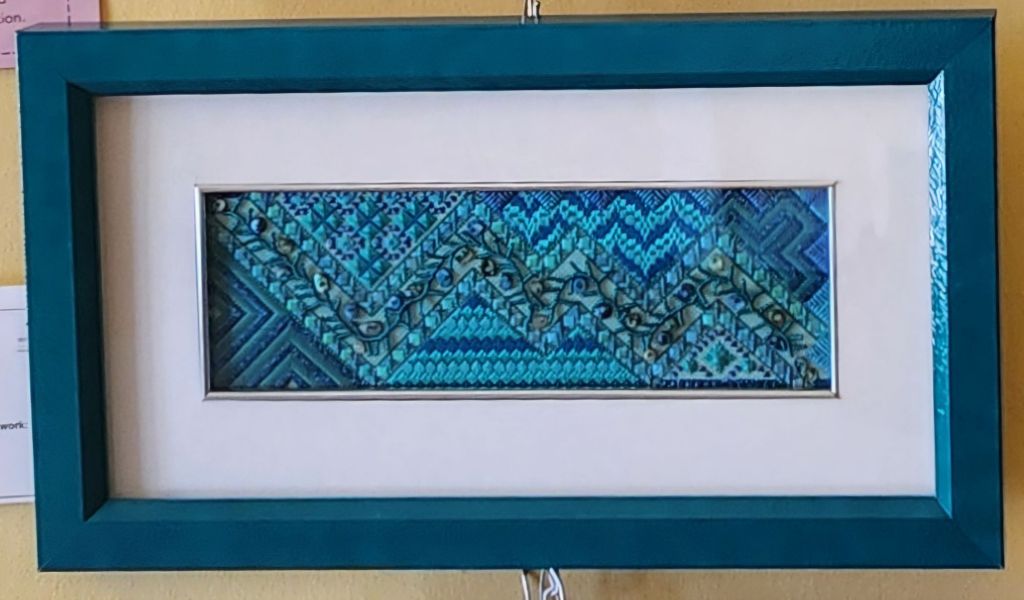
Noelle D and another person stitched Bermuda Reef by Kathy Rees. Love those blues. And, it’s a great light colored (sandy) frame and blue mat that Noelle selected.
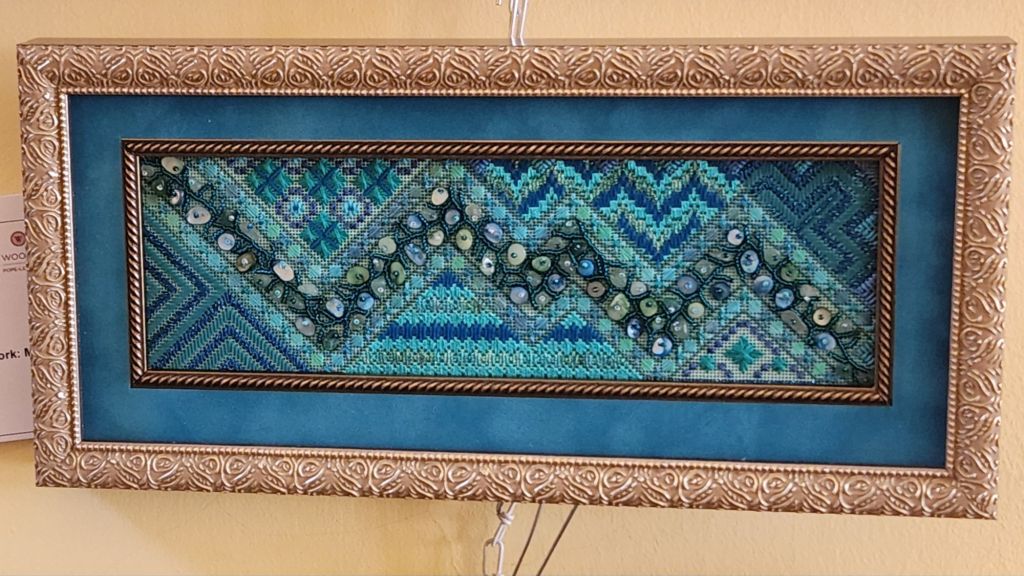
Kristin S went in the opposite direction with a blue frame and white mat. Do you have a preference?
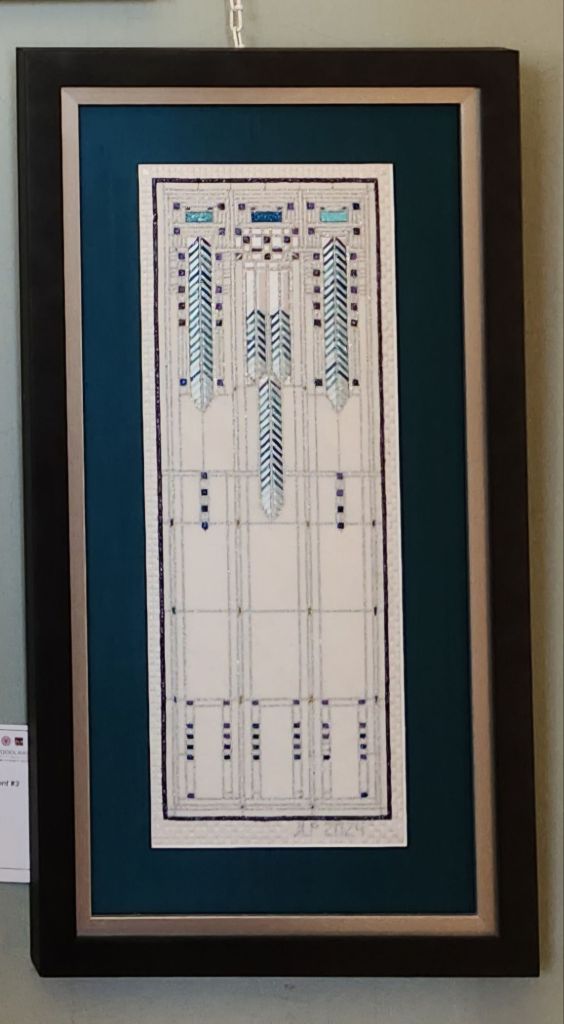
The NJNA members got 14 total awards, including the Director ‘s award for Janet P for Frank Lloyd Wright in Needlepoint #2. Big congratulations! But, I preferred FLW #3.
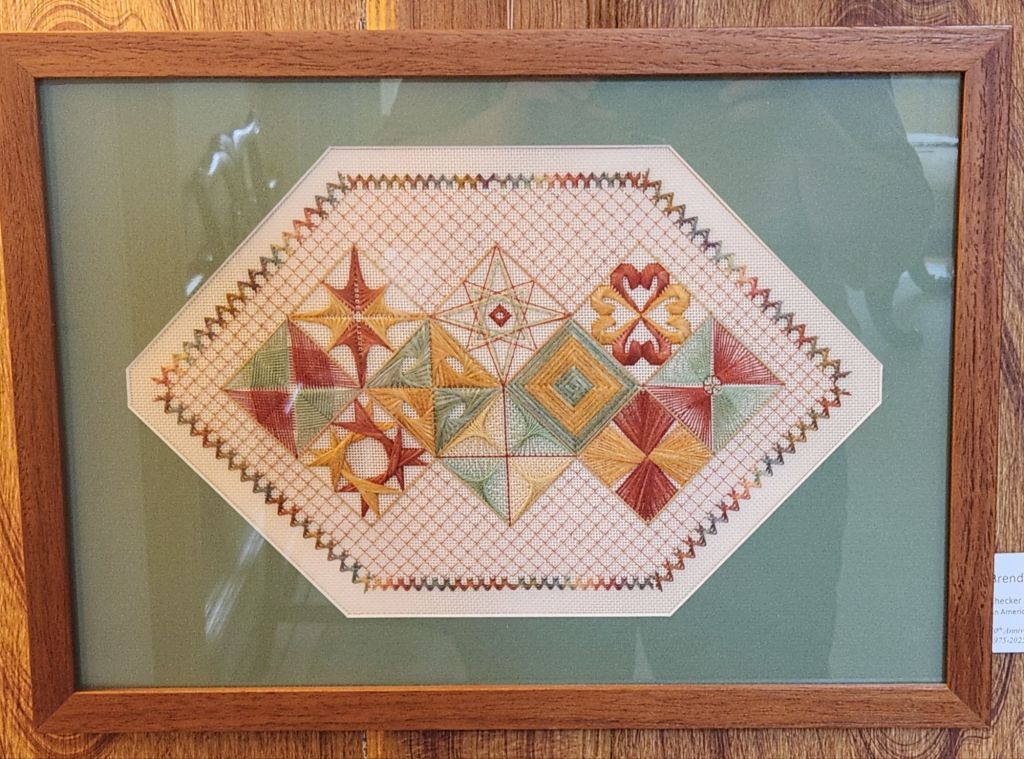
Heather G, from my ANG Main Line Stitchers Chapter, must not have anything left on her walls because she entered 6 pieces! Heather led discussions for our chapter on Flowers of Italy designed by Ro Pace, Stitch of the Month in 2011. It looks great in a tray.

Brenda C. from the ANG Delaware Seashore chapter stitched it as well, but framed it. They both pulled the green for the mat surrounded by wood.
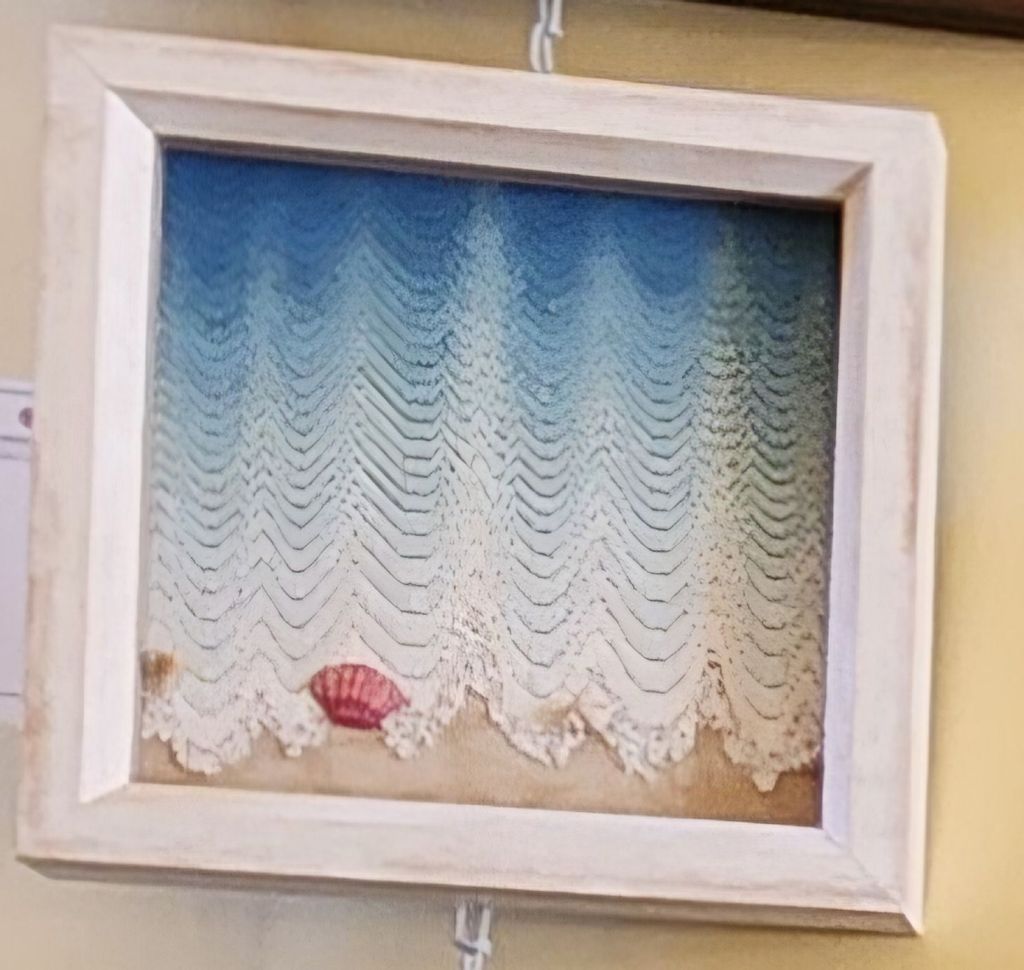
Nissa W flipped Walking the Water’s Edge by Dianne Herrmann making for a very interesting interpretation.
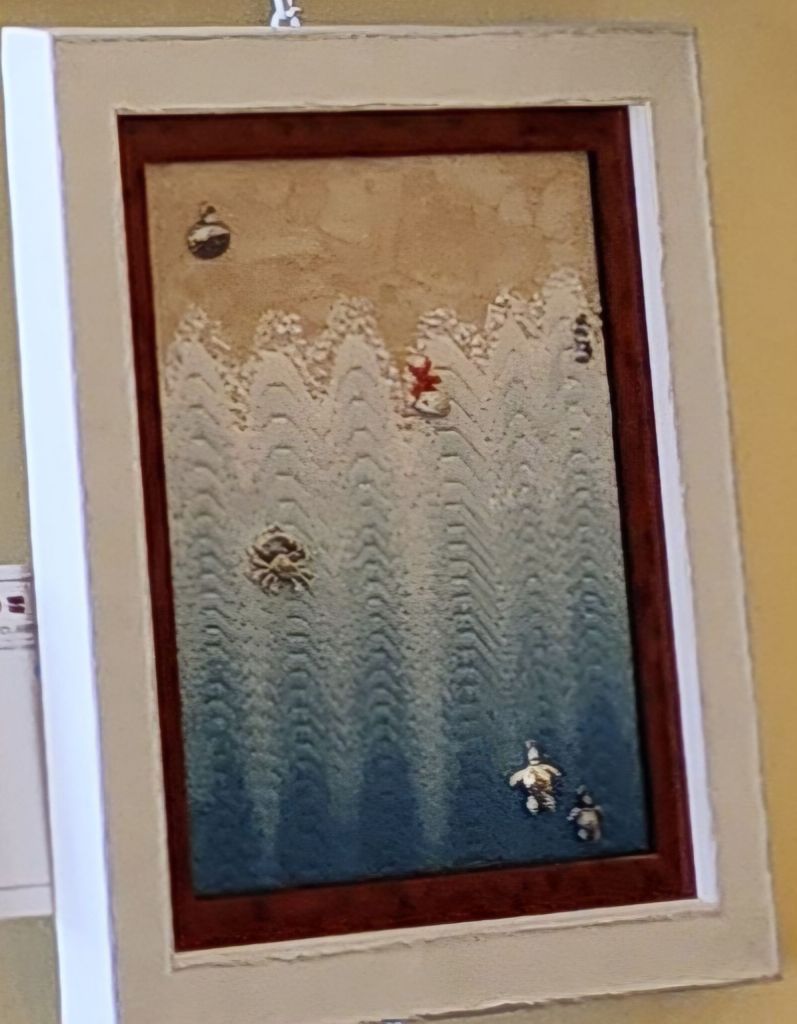
Kathy W oriented as in the original but changed the seashell and named hers Granddaddy’s Beach.
Thomas S-G from my EGA Brandywine Guild submitted a crewel piece. It’s a commercial design by Sunset Stitchery from 1978 but looks timeless to me (there is one on eBay).
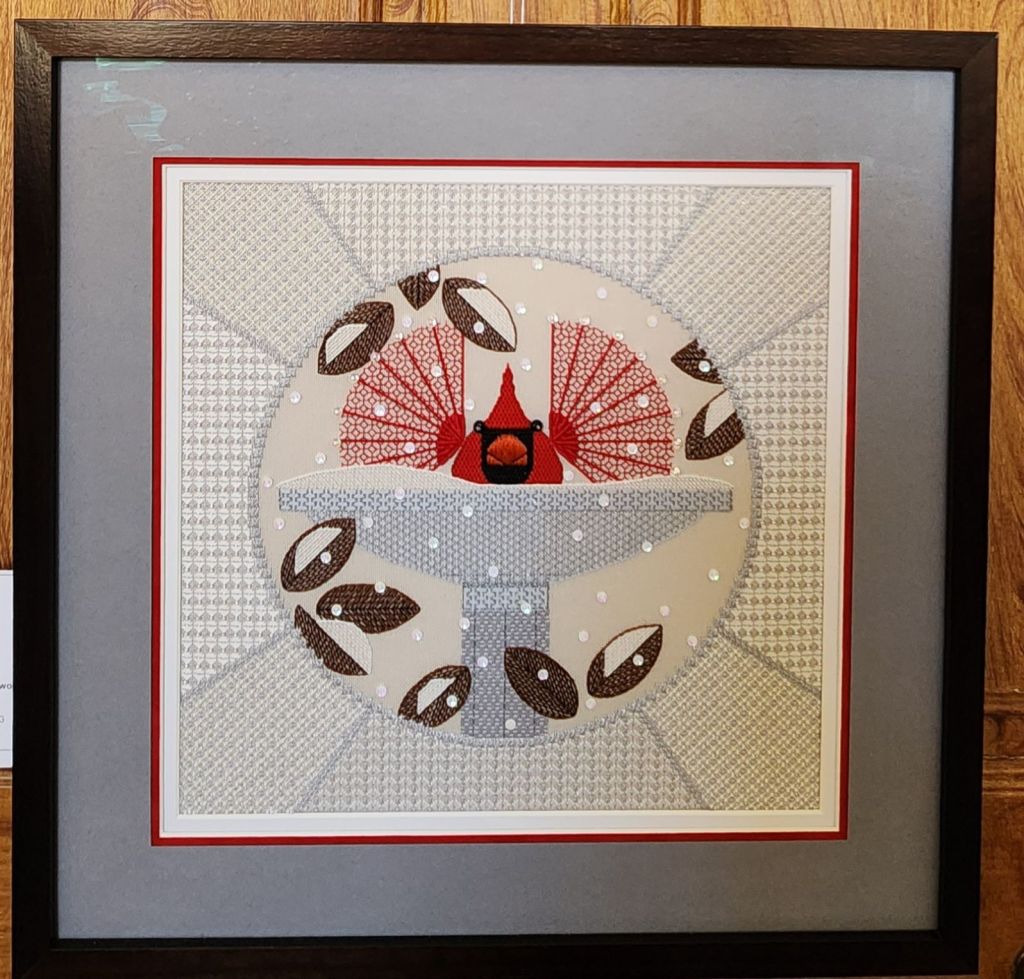
Norma H did it again! She does pieces I absolutely love. This year, she had Brrrdbath, a Charlie Harper design and got a Blue Ribbon (723). And, even better, she was there in person, and we had a wonderful chat.
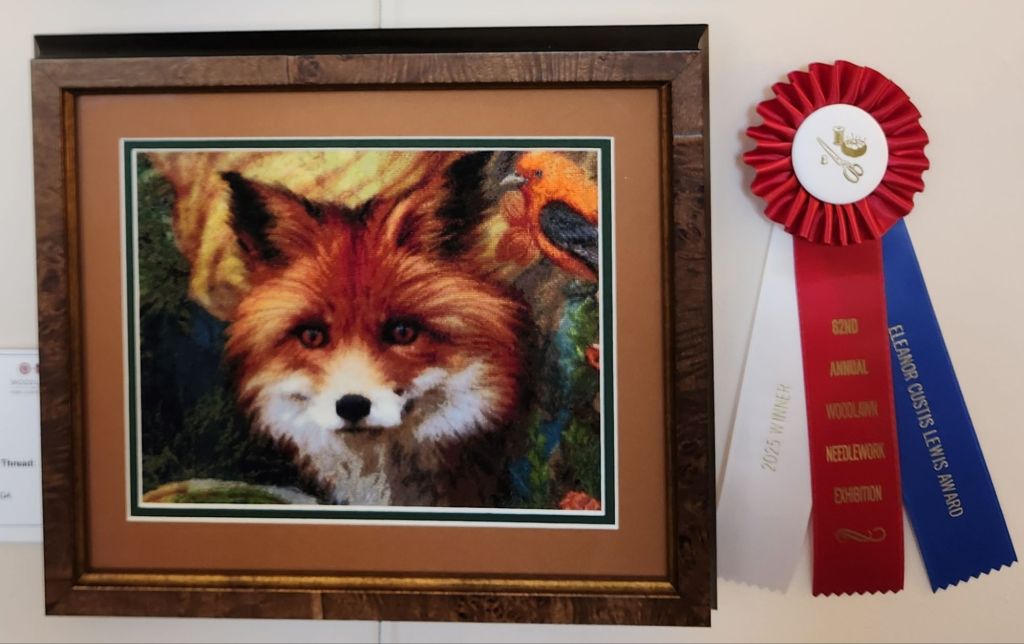
It’s not just cross stitch when you have pieces like Vixen by Nancyanne C where the shading makes you feel the soft fur and deserved First Place and the Eleanor Custis Lewis award. Bill voted for the fox.
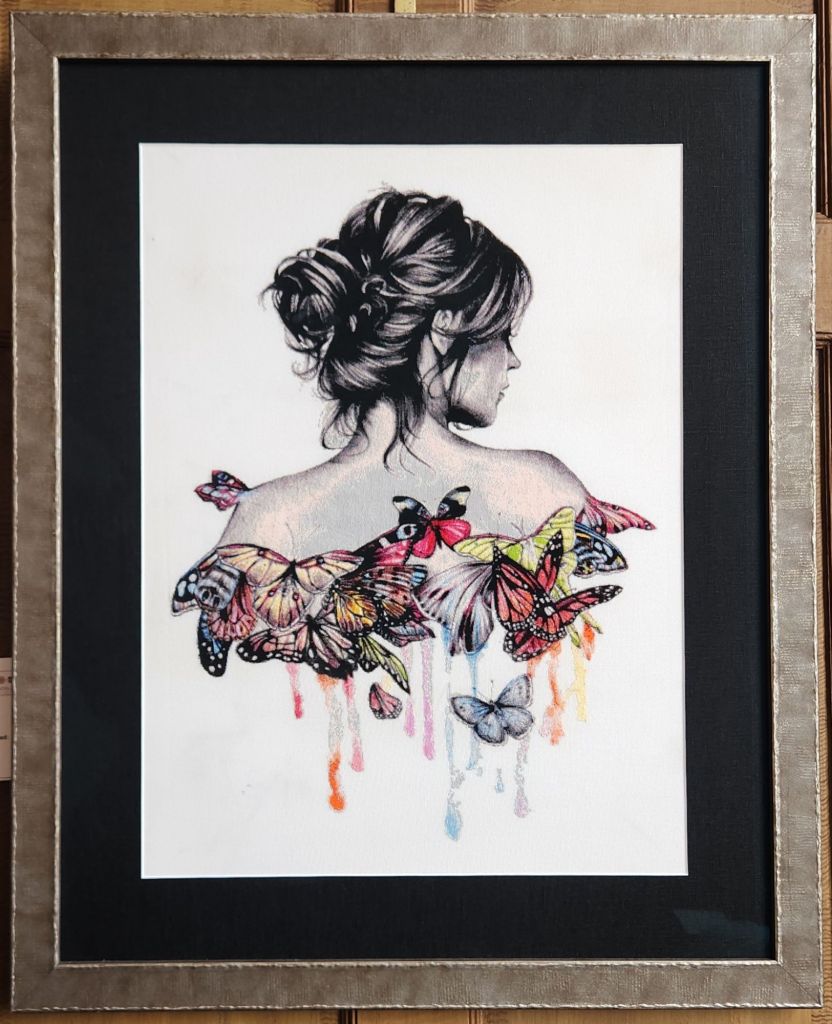
Butterfly Effect by Richard S gives a fresh new look to cross stitch designs.
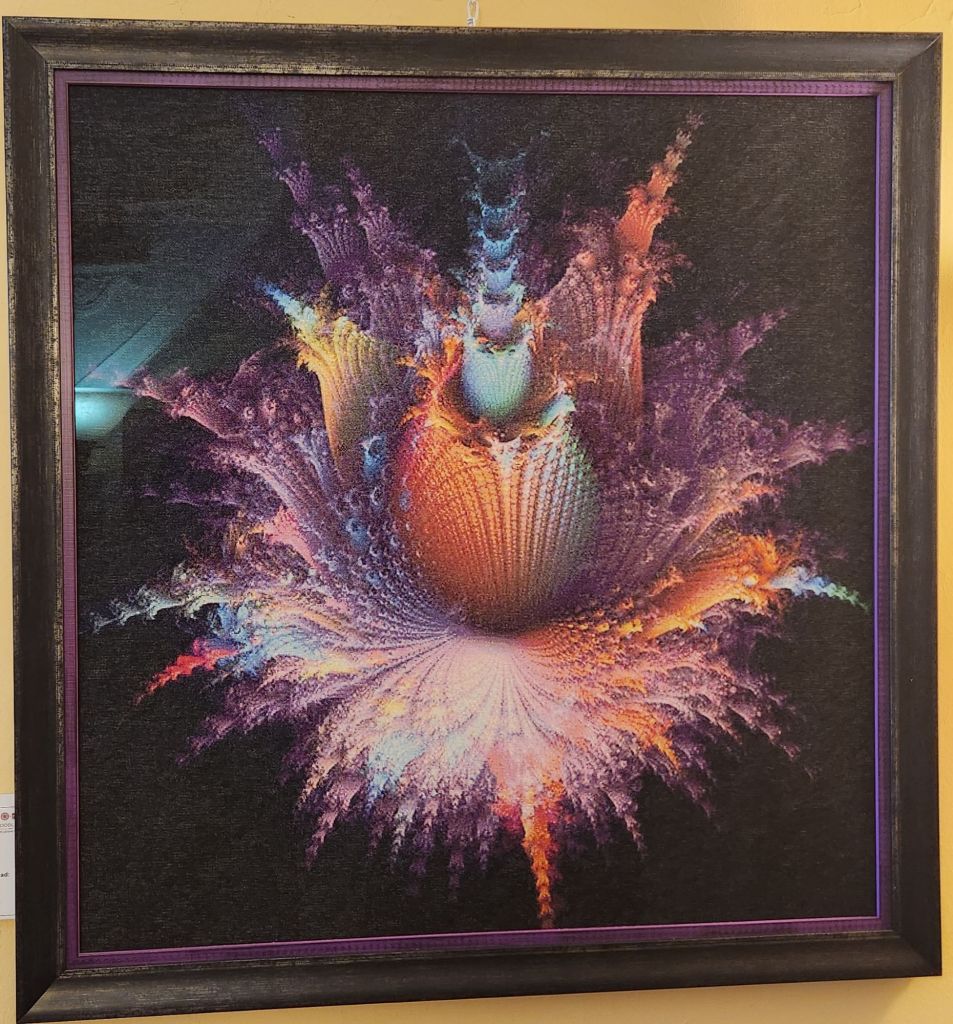
Fractal by Gay S (24″ square?) has amazing shading. Between the size and burst of colors using cross stitches, I made it my People’s Choice vote.
Being in the midst of stitching Dawn Donnelly’s Treasures of the Great Lakes, I probably should have voted for the 10 times more complex, A Bleached Coral Reef by Kim B-R. It’s an original design 8″ diameter full of beachy stumpwork and surface embroidery. A must see!
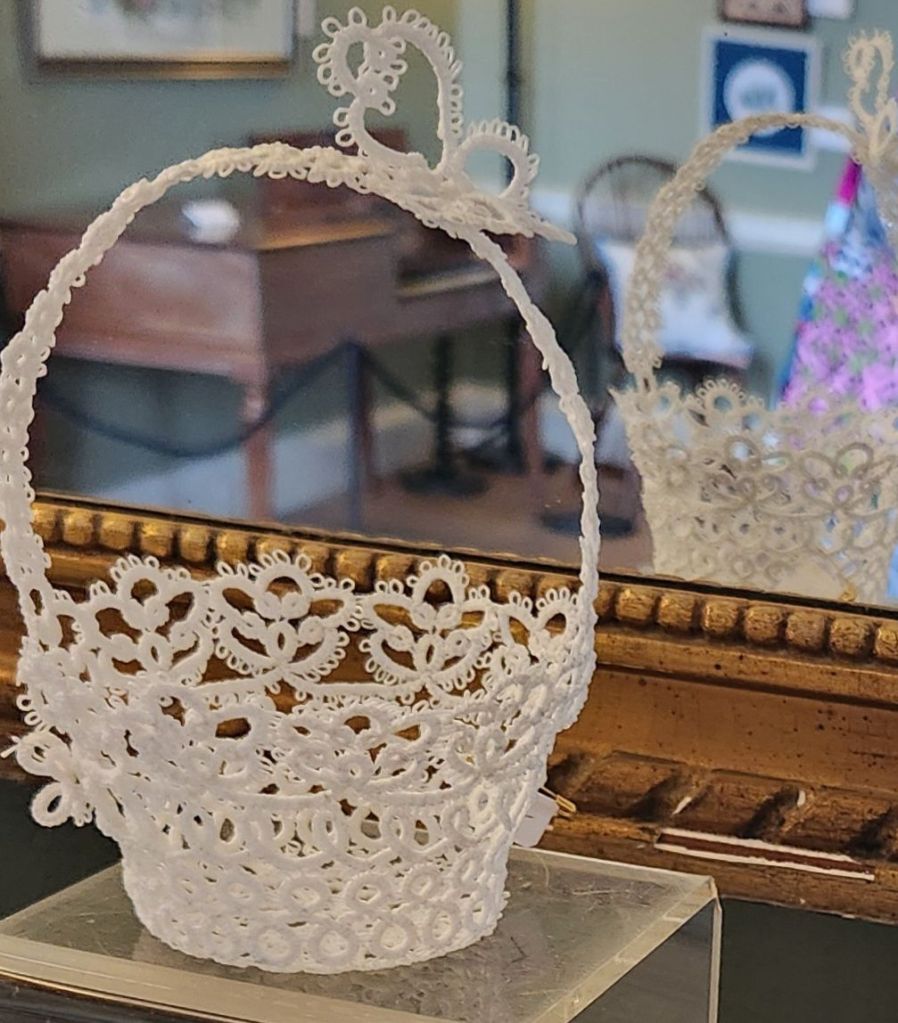
Bob-Bon Basket by Bonita S is an adorable piece of needle lace.
Before I left, I saw Dana C, who informed her chapter would be doing Festive Fireworks from Needle Pointers Magazine July/August 2017 issue. I love to hear that published pieces get utilized by chapters.
They have commemorative tins! And, I got 2 bags of their cookies (yes, one has been eaten as I had to make sure they were up to their usual standards before I recommend them-they are delicious). They made 5,200 of them and expect to sell out. So, don’t delay!!
With multiple finishes over the past few weeks, it leaves me with a pile of threads to be stored away. I do it by color. What a mess! I wish I were disciplined to put them away after each project.
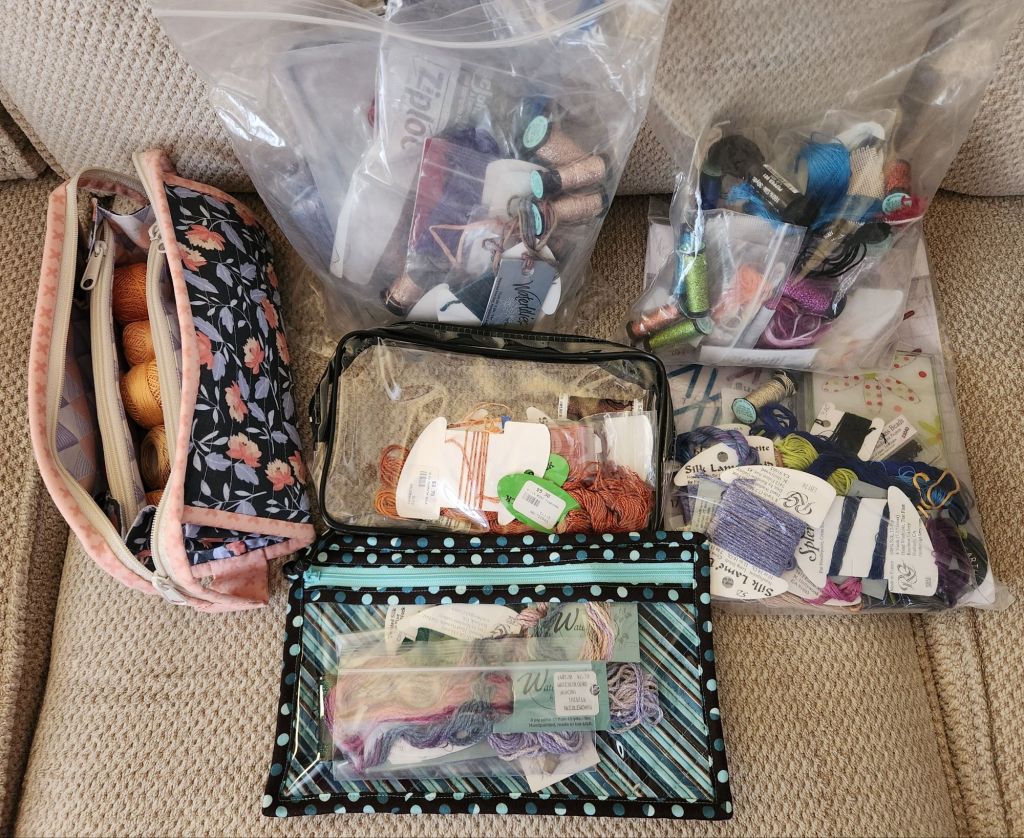
How do you manage your threads after finishing a project?
Filed under: ANG Needle Pointer's Article, General comments, Sunflower Heart by Judyann Designs
It’s that time of year to thank you for your interest in my needlepoint journey, review what I accomplished over the year, and reflect on what’s ahead. Only 300 below 10,000 visits to my blog. That’s amazing.
I’ve gotten a lot of stitching done including:
- Tumbling Stripes by Marilyn Owen with the ANG New Jersey Needle Artists (NJNA) that I finished into an ornament.
- Amanda Crawford’s Christmas Angel (my first commissioned piece – not something that I will seek out again but I was glad I helped the woman).
- Blue Violet Name Tag by Lee designed exclusively for ANG Central Jersey Chapter (CJC). I joined them as they meet on Saturdays 10-3 and are a little over an hour away (I try to attend quarterly). I enjoy the people, seeing how another chapter operates, and being “just a member.” This group only meets in person and combines a meeting and stitch-in. There are a few programs you can sign up for (or not, but of course I did).
- Imperial Topaz by Sue Reed with ANG Main Line Stitchers (MLS). Gifted.
- Sashiko Mini Sampler by Miniature Rhino (a gift from CJC). Undecided about what to do with it.
- Stitches in Sterling by Nancy Cucci from a class in 2011 with the ANG DE Seashore Chapter has been finished and framed.
- All That Shimmers by Sundance with my ANG Main Line Stitchers (needs to be framed).
- Bookmark using one of many patterns from Ruby Razzle Dazzle by Ann Strite-Kurz.
- An overdyed thread experiment that I made into a coaster.
- A pointallism experiment that I made into a coaster.
- Medusa Sea Jelly by Kim of the Shoreline Stitchers that I finished as a stand-up ornament.
- Silken Sonata by Jim Wurth. Goal #1 for 2025; DONE & I did the finishing. See https://melitastitches4fun.com/2025/04/01/silken-sonata-by-jim-wurth-finished/
- Tar River Trail by Gail Stafford from my second Seminar in 2012 has been finished and framed.
- Roman Ruins by Joan Rinehart, an EGA Petite Project and Casalguidid Flower by Becky Quine were both stitched so I could teach Casalguidi to my EGA Brandywine Chapter. I’m undecided about what to do with them.
- Fibonacci Swirls by Olivia Hartshorn with my ANG MLS Chapter. I did 2 colorways. I enjoyed doing them but am undecided about what to do with them.
- Rainbow Butterfly by Danji. Goal #2 for 2025; DONE & I did the finishing too: https://melitastitches4fun.com/category/ang-main-line-stitchers-chapter/laurel-burch-rainbow-butterfly-by-danji/
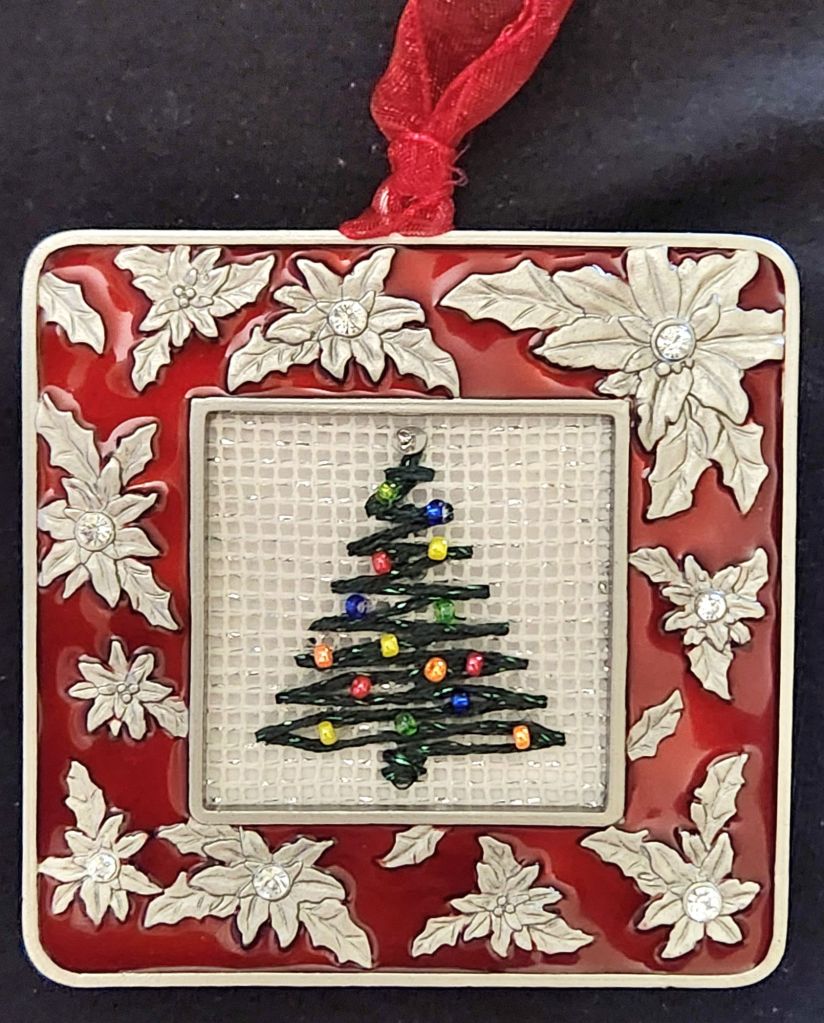
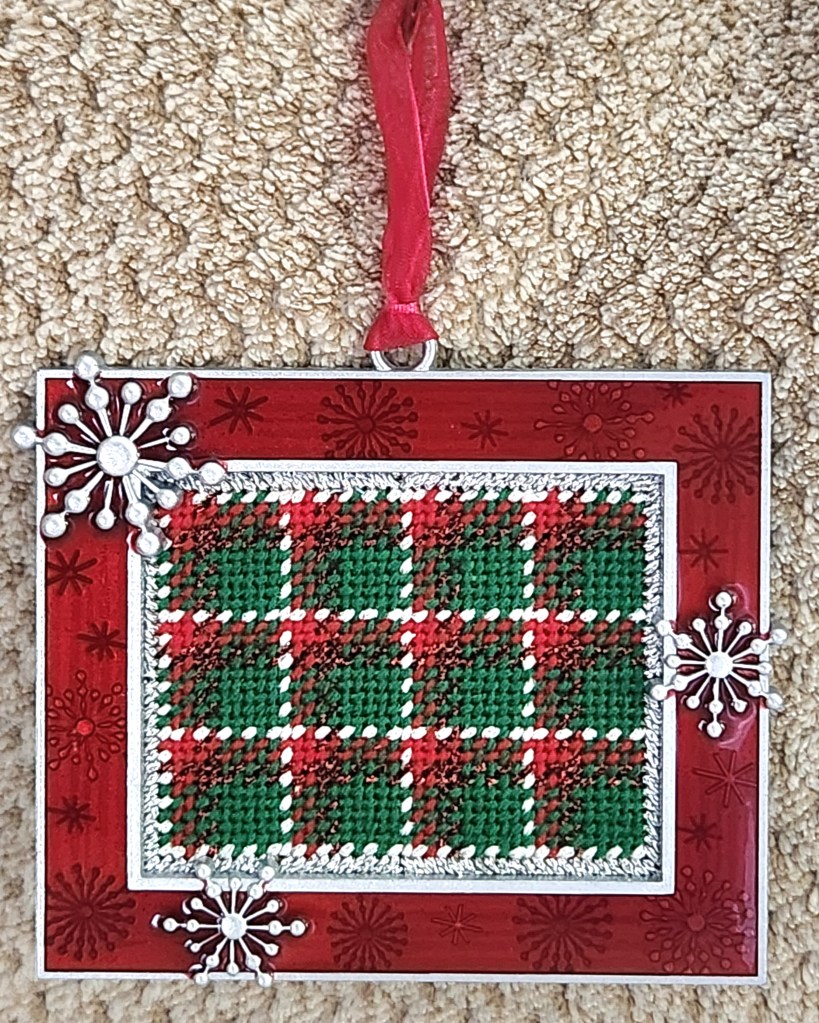
- Two small metal frames with a Christmas Day Plaid (1 2 2 5) and a Christmas Tree with lights. They were part of the display at the Festival of Trees on the ANG NJNA tree.
- Three Ribbon Candy Ornaments with ANG NJNA.
- My Needlework and Textile Guild of Media continues to meet and we take turns sharing an in depth discussion of our various crafts. I completed a felt purse with beaded edges that now holds another a beading project that was inspired by seeing Jan Huling’s beaded pieces at a museum (google her) and qualifies as Goal #3 for 2025.
Teaching opportunities included:
- A Spring Sampler in fall colors and not as wide as my original design as I led my EGA Brandywine Chapter through the design during several workshops. I finished mine onto the front of a purse.
- A Stash Sampler for the ANG Cyberpointers May meeting program. It was a mini band sampler that gave the stitchers different options each day. I made 5 of them them into bookmarks and/or small framed pieces. I particularly enjoyed seeing Jennie W enlarge hers and make it into a snap tray. Gifted two of the framed ones.
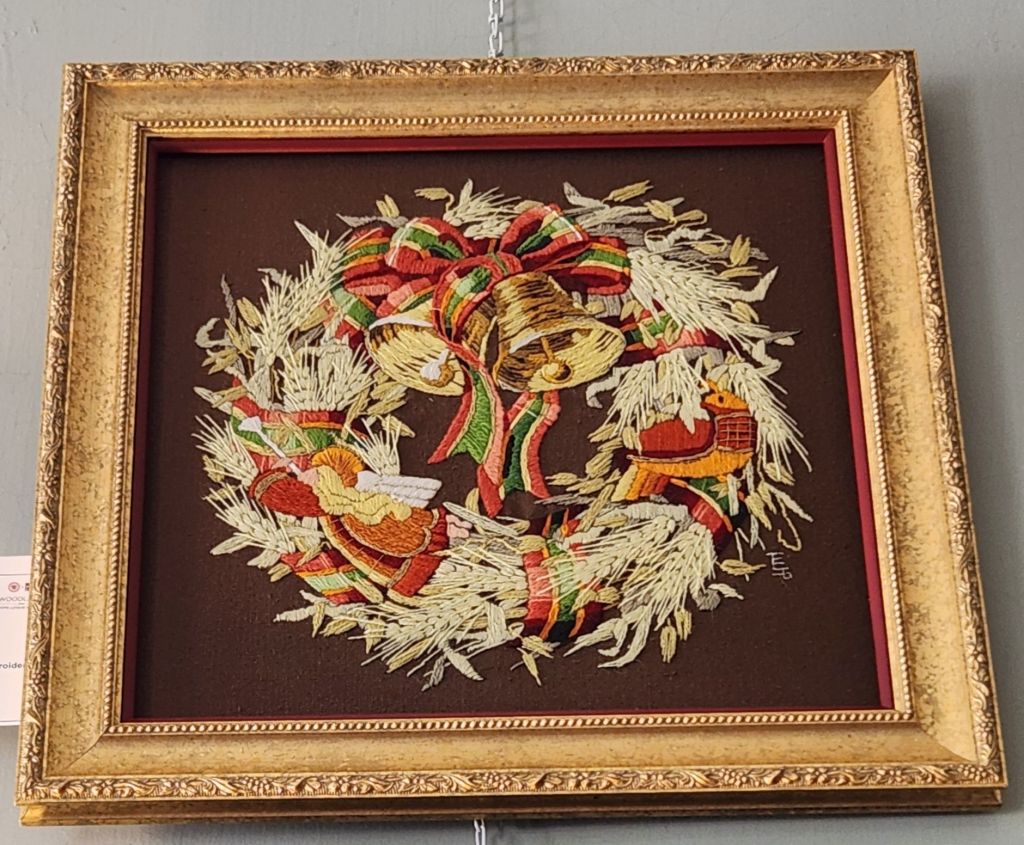
- Crewel Wreath by Lucy Edmison is an EGA Petite Project that I led for my EGA Brandywine Chapter.
- Cardinal Felt Ornament by Liz Kisielewski for my EGA Brandywine Chapter. I had taken Liz’s class at an EGA Mid-Atlantic Regional Meeting.
I exhibited my Fireside Sampler at ANG’s Seminar (no ribbon) and at Woodlawn (3rd place ribbon). I am pleased to say it is on display now at Fireside Stitchery.
Besides shopping at my local needlepoint stores (Fireside Stitchery, Nimble Needle in NJ, and Rittenhouse Needlepoint-listed in alphabetical order), I also enjoyed my visits to Ye Olde Cross Stitchery in Bristol, PA, Edwardian Needle in Fairfield, NJ, and the Valley Forge Quilt Show.
Classes were great and always a good learning experience. They included:
- Landscape Features: A Notebook Class with Gail Stafford (online) with ANG Cyberpointers (going through that gave me the added confidence to tackle and finish Tar River Trail).
- Explore and Design with Debbie Rowley (online). I created Diamonds, Triangles, and More to test various stitches from Debbie’s booklet. I have yet to start the garden path, Flowers Along a Rhode, that I designed during class. Goal #4 for 2025. DONE & I won the ANG Creative Inspiration Award! See https://melitastitches4fun.com/category/melitas-designs/flowers-along-a-rhode/
- From Summer Stitch Camp with Ellen Johnson of Serendipity, I took the 16 stitches she taught and made 2 coasters and a mini framed piece.
- From the Compensation Class with Ellen Johnson of Serendipity, I took 7 stitches and placed them into a 3.5″ round that I finished into coaster.
- At ANG’s Seminar in Kansas City, I took 3 classes including:
- Byzantium with Lorene Salt; Goal #5 for 2025 is to finish stitching for my cousin, Kathy. DONE. See https://melitastitches4fun.com/category/ang-seminar-2024/byzantium-lorene-salt/.
- Treasures of the Great Lakes with Dawn Donnelly; Goal #6 for 2025; DONE & I did the finishing. See https://melitastitches4fun.com/category/ang-seminar-2024/treasures-from-the-great-lakes-dawn-donnelly/
- Heart Swirls with Janet Zickler Casey; Goal #7 for 2025; DONE & I did the finishing. See https://melitastitches4fun.com/category/ang-seminar-2024/heart-swirls-janet-zickler-casey/
The two new techniques I learned in classes with Katie Kriner from The Bee and The Bear were Punch needle and rug hooking. Goals #8 and #9 for 2025 are to finish them. Goal #8 DONE. See https://melitastitches4fun.com/category/general-comments/punch-needle/
There are 2 more projects I’ve barely begun:
- Summer Fireworks by Ann-Marie Anderson-Mayes with CJC; Goal #10 for 2025 is to complete the stitching. DONE. See https://melitastitches4fun.com/category/ang-central-jersey-chapter/summer-fireworks-by-ann-marie-anderson-mayes/
- Ort Box with a Twist by Marilyn Owen; Goal #11 for 2025 is to lead this for my ANG MLS Chapter. I have the basting done (took me 3 tries to get it correct). DONE. See https://melitastitches4fun.com/category/ang-main-line-stitchers-chapter/ort-box/
Goal #12 for 2025 is to complete the succulent from Scarlett’s Stitch Gothica’s Skull & Succulent piece. This is considered stumpwork and I need to practice this technique.
Goal #13 for 2025 is to stitch a pair of earrings. My design is ready! DONE. See https://melitastitches4fun.com/2025/03/16/2025-national-academy-of-needlearts-nan-assembly-opening-banquet-the-exemplary-and-the-needleworks/ and https://melitastitches4fun.com/category/jewelry/gemstone-earrings/
Sixteen books were described and added to “Books in My Library”. Goal #14 for 2025 is to continue to go through my library of stitch books and post about them. I got 2 booklets for Christmas. DONE. Search Books in My Library for 23 books added.
I’ve really been enjoying reading the archived issues of the ANG Needle Pointers magazine and writing articles about various topics. Goal #15 for 2025 is to continue the articles and, of course, continue to write up projects provided by various authors and format them for the magazine. I am particularly excited for the Jan/Feb issue to be released since Meghan M from my ANG MLS chapter contributed an excellent stitch guide for Folk Heart, a painted canvas by Mindy. She really did an excellent job. Her notes were great and easy to follow. And, there is an article about Crescent Journey with several more colorways discussed. DONE. See
* https://melitastitches4fun.com/2025/02/07/design-by-susan-dawson-contrast-talk-and-folk-heart-by-meghan-in-jan-feb-2025-issue-of-needle-pointers-magazine/
* https://melitastitches4fun.com/2025/03/31/hearts-of-ang-in-timeless-treasures-from-the-archives-in-the-mar-apr-2025-issue-of-needle-pointers-magazine/
* https://melitastitches4fun.com/2025/05/10/hearts-from-1980s-in-timeless-treasures-from-the-archives-in-the-may-june-2025-issue-of-needle-pointers-magazine/
Goal #16 for 2025 is to stitch Sunflower Heart, a Judyann Needle Art Canvas Design. It is my favorite of the 6 designs that will have stitch guides provided in Needle Pointers this year. This was a Christmas gift as well. If you’re not a member of ANG, it’s a great magazine and guild. DONE. See https://melitastitches4fun.com/2025/12/14/sunflower-heart-flower/

Goals #17-21 for 2025 will be to finish 2 classes I will take at National Academy of Needlearts in March and 3 classes at ANG’s Seminar in New Orleans in August.
- Flowering Maple with Celeste Chalasani at NAN 2025. Goal #17 is DONE. See https://melitastitches4fun.com/category/national-academy-of-needlearts-nan/2025/flowering-maple-with-celeste-chalasani/
- Project Runway with Dawn Donnelly at NAN 2025. Goal #18
- Walk in the Woods with Deborah Mitek at ANG 2025 Seminar. Goal #19 DONE. See https://melitastitches4fun.com/category/ang-seminar-2025/walk-in-the-woods-with-deborah-mitek/
- Nautilus with Kay Stanis at ANG 2025 Seminar. Goal #20 DONE. See https://melitastitches4fun.com/category/ang-seminar-2025/nautilus-by-kay-stanis/
- Nights in White Satin with Jennifer Reifenberg at ANG 2025 Seminar. Goal #21 DONE. See https://melitastitches4fun.com/category/ang-seminar-2025/nights-in-white-satin-by-jennifer-riefenberg/
Goals #22-29 for 2025 is to kit the eight pieces in The Cabochons series by Susan Portra that I have acquired and at least get started stitching them (to make this a realistic goal). DONE: See
* Love – https://melitastitches4fun.com/category/other-peoples-designs/susan-portra-the-cabochons-love/
* Joy – https://melitastitches4fun.com/category/other-peoples-designs/susan-portra-the-cabochons-joy/
* Charity – https://melitastitches4fun.com/category/other-peoples-designs/susan-portra-the-cabochons-charity/
All the Rhapsody threads have been acquired plus a few extras in case I find #11 and #12 in the series.
Final Goal #30: Don’t get any more goals!! Wasn’t possible. See https://melitastitches4fun.com/2025/02/13/the-cabochons-series-by-susan-portra/
Good luck with your goals and Happy New Year!
Here’s what mine is supposed to look like! Katie Kriner, owner of The Bee and the Bear in Hereford, PA had the models in the classroom for us today.
The kit made a lovely presentation to greet each of the 10 students (class max size).

Everything needed to finish the piece was included.
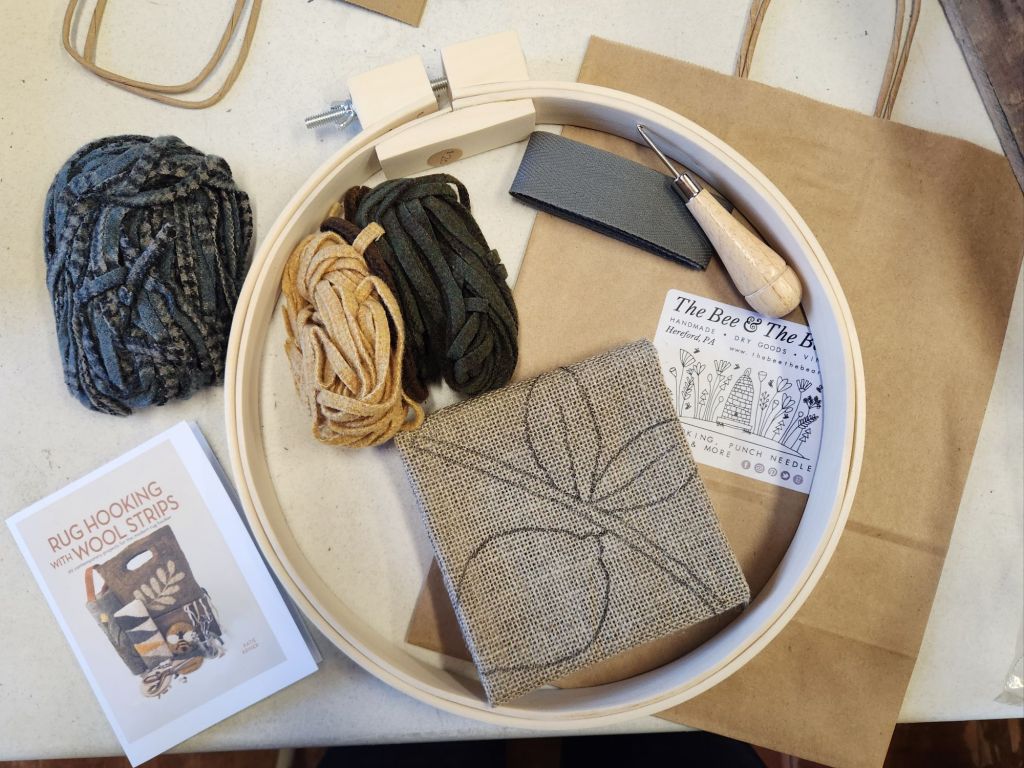
We’re working on wide weave linen (it feels rougher than the linen that I’m used to using for embroidery). Burlap is what was probably used many years ago, but the fibers break down. The strips are an “8” width (1/4″). They are also called worms.

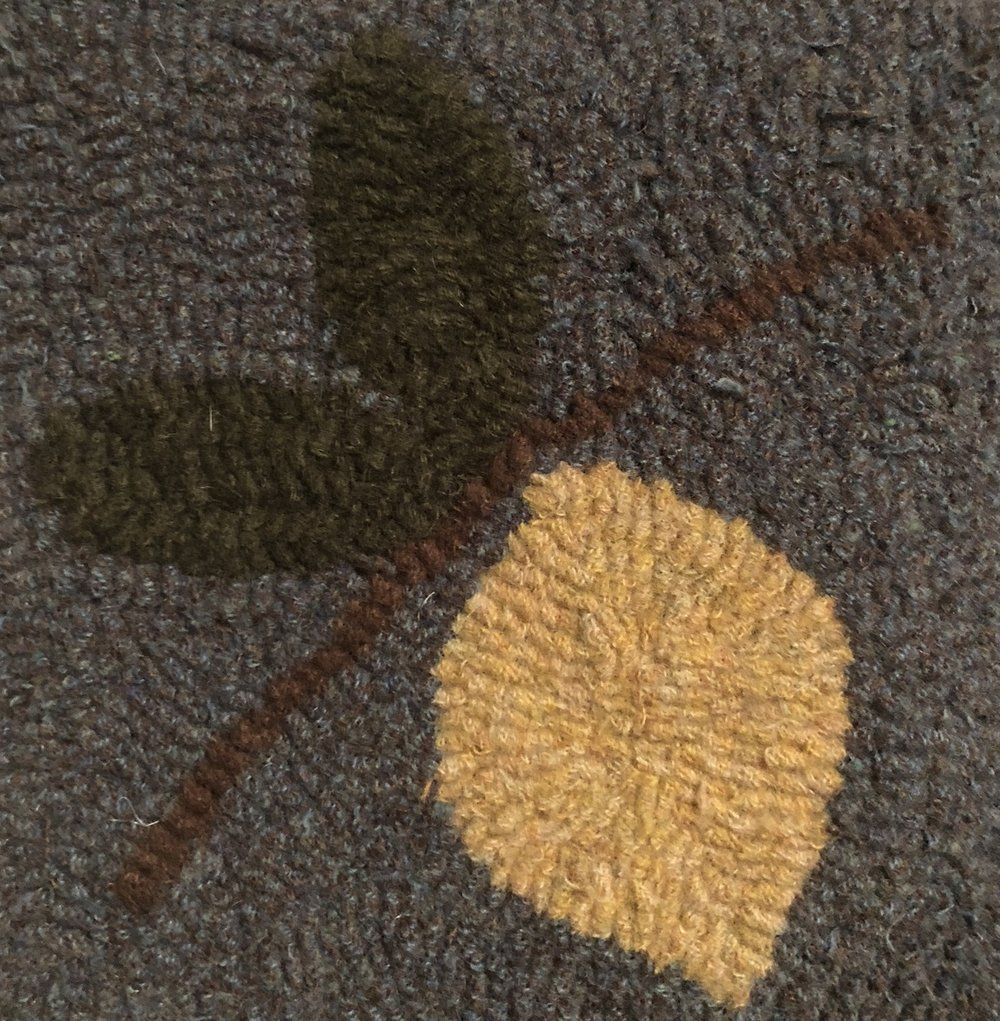
We hook motifs first (lemon, leaves, stem) then background. As with punch needle, Katie had us work in a circular fashion toward the center.
The hooks don’t have the latch like what I used with precut lengths of yarn to make rugs back in my teens. Herrschners was where we bought our crafts back then, and they are still in business and still have latch rugs.
This is a different hook. It’s bigger than a crochet hook. Katie had a wide variety of quality hooks to try (smart businesswoman). The kit included a straight hook that wasn’t as easy to work with compared to the better ones. The dark wood ones (for $68-88) were pretty, but there wasn’t one with a bent shank. I decided the Hartman Hook with an ergonomic handle medium bent shank (5 mm) was my favorite (for $46). She offers $10 off to swap out the straight hook provided in the kit for any other hook.

I struggled some, but that’s not unusual in a class. I’m not in my comfy chair, lots of chatter, and an unfamiliar tool. You hold the hook above the linen in your right hand and hook the worm with your left hand below the linen. The woman across from me finished the leaves, stem, and most of the lemon before we ran out of time. I get it – you hook the worms! And, you cut the tails and leave them on the top.

Both Kristen and I needed a stand (we settled on a weight from a box). We both tried to put the tool below the surface on multiple occasions. And, we both agreed that the lack of precision (different height of loops at different angles) is not as pleasing to us as what we can get from needlepoint. But, it is our first attempt. Katie says we’ll see improvement as we progress. I believe that there is always a learning curve for any new endeavor.
The night before class, I had seen a friend’s first attempt also in progress, but she had hooked hers so tightly that each motif was folding up on itself. So, I am probably a little bit on the loose side. We’ll see what happens as I do plan on finishing this and the punch needle (eventually). Here’s what the backside should look like.
Filed under: ANG New Jersey Needle Artists Chapter, Christmas Ornaments, Festival of Trees, General comments, Melita's Designs
Sue C from New Jersey Needle Artists Chapter had this frame in her unwanted stash pile, and I knew that I would make a nice ornament for the chapter’s tree at the Festival of Trees held annually.
There will be 2 large rooms on display at the Environmental Education Center in Basking Ridge, NJ (190 Lord Stirling Rd). You can see them Friday, December 6, through Sunday, December 29 (except 24th and 25th).
So, I dubbed this ornament Festive Tree for the Festival of Trees. There is silver Kreinik #8 Braid in a diagonal gobelin stitch to secure the edges the size of the frame (doesn’t show). One length of green Silk Lame Braid for 18 count was used to form the base and criss-crossed upward to create the tree. There is a silver sequin and a bead for the tree top and 3 beads of 5 different colors (blue, green, red, yellow, and orange) making up the lights. The canvas has silver sparkle in it.
I delivered it, and the Christmas Plaid ornament I posted previously to Jacqui at the November of the Central Jersey Chapter (CJC) Saturday meeting/Stitch-in (every 3rd Saturday 10-3).

During Friday’s reorganization, I gathered all my laying tools.
On the top is an African porcupine quill topped with a bead that was made by Patrick B. The middle row starting on the left has an extra Trolley Needle (went to Ebay; my other one is in my travel tool tote). Next is my fancy Celtic laying tool based on the Trolley Needle design that I use at home (it has a blunt end, and I’ve never come close to poking my eye with it). The “Stitcher’s Best Friend” (SBF) is third and has a nice angled tip, so I brought it upstairs to give it a try. The 4th is the “Best Laying Tool” (BLT), but not for me, although I will keep it in the basement cabinet because it says it’s an American style “Tekobari” with a really sharp tip which is needed doing goldwork.
On the bottom is a double end dental tool that I got as a free gift when daily drawings were held at ANG Seminars. It comes in handy for different things!
Since Saturday was ANG Main Line Stitchers chapter Stitch-in, I grabbed the Adjustable Stretcher Bars by Frank A Edmunds (they didn’t keep the canvas tight and easily got bumped out of shape) and my plastic hoops (I will use Morgan hoops or wooden ones wrapped in twill tape) and dropped them off for sale on Ebay.
I also threw in 1 of 2 Crafter’s Pride “Stitch A Ruler” because I plan to stitch a blackwork piece for 1 of them (I won’t need 2).

It may not be much to get rid of, but it’s some progress in a never-ending goal of getting organized.
After yesterday’s punch needle saga, I used this afternoon’s much needed, rainy, dreary day to tackle a few drawers in the basement.
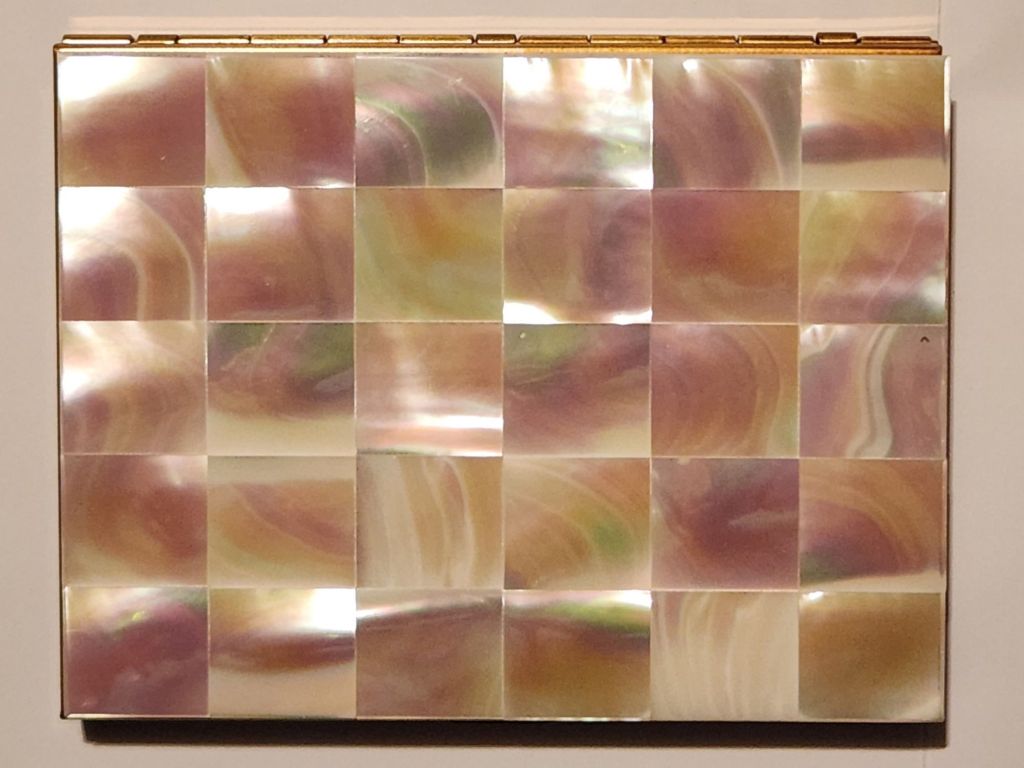
It didn’t take me long to channel Patrick B from my ANG and EGA chapters to finally repurpose a lovely mother of pearl vintage (1950’s) Marhill cigarette case into a needle case for my beading needles. It has no chips or cracks to the mother of pearl and is in fantastic condition inside too. The case still has the original “Marhill” sticker inside and measures 3 by 4 inches. I even have a Marhill purple pouch to hold it, which is probably why the case is in such good condition.
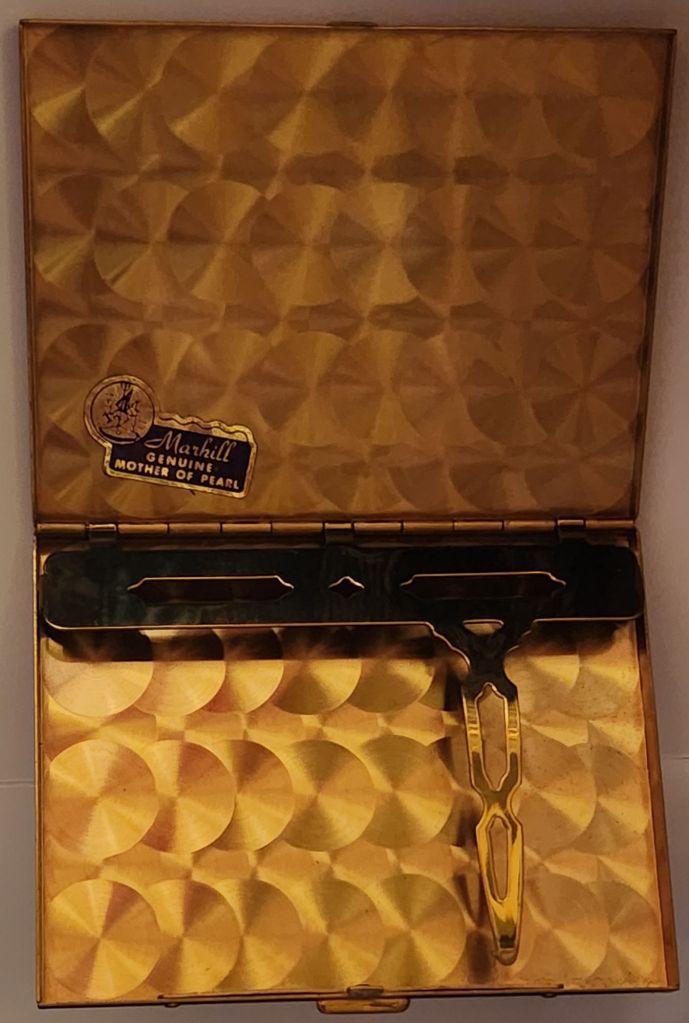
I’ve had these business card magnets for several years, which were bought for the case. However, I was never able to find both the magnets and the case at the same time. I got lucky today!
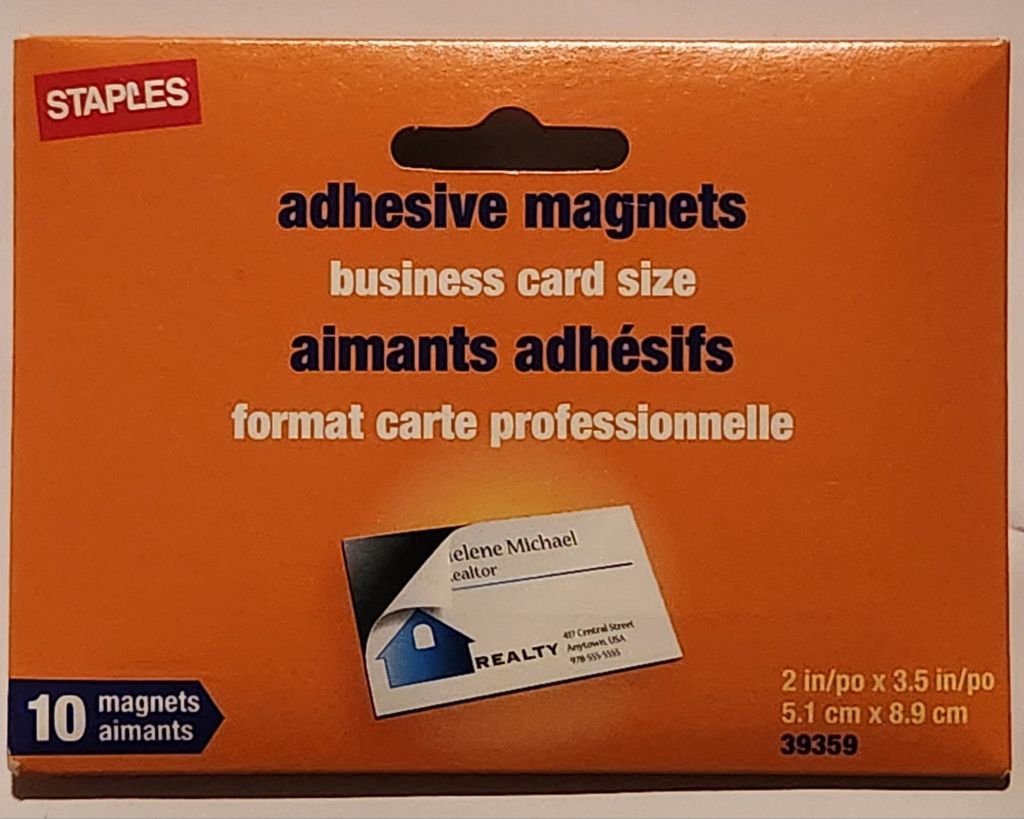
I cut 2 magnets to fit side by side. One side is sticky. It now holds the beading needles that I don’t know what size or brand they are.
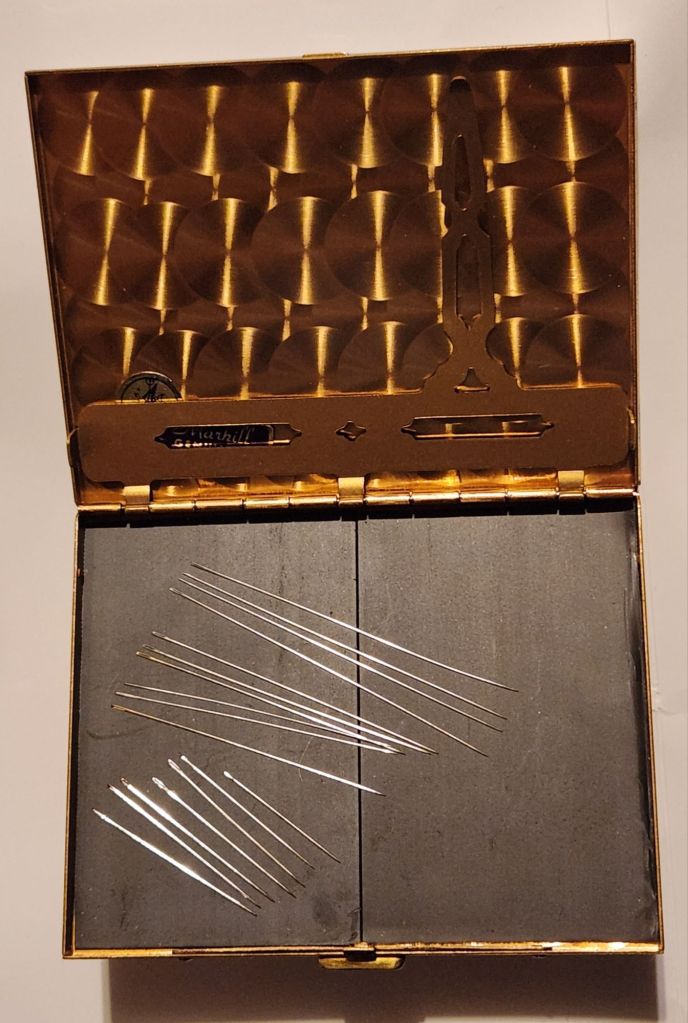
My EdMar #11 Beading Short Needles and Tulip #10 Beading Long Needles are in a tube that won’t fit in this case. The pack of Bohn #28 Tapestry needles really aren’t beading needles but work for many beads. I’ll keep these with my new case in my beading box.
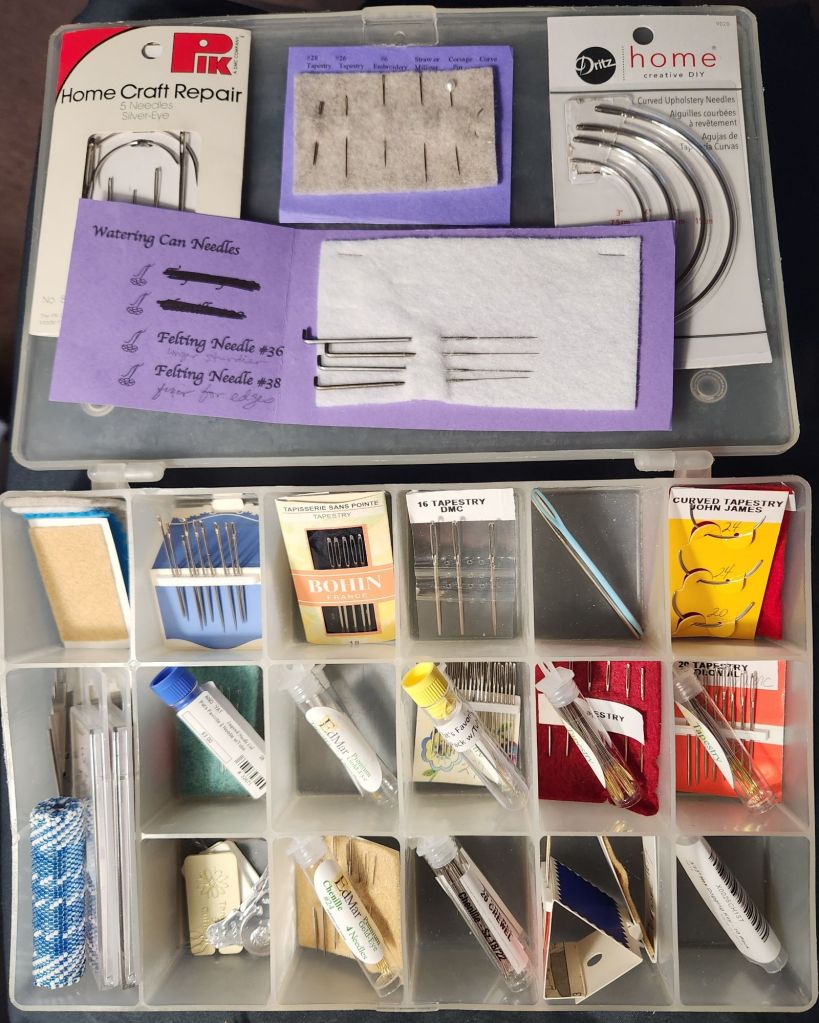
With that success, I tackled my regular needles and tossed about 2 dozen used needles. I think I can replace my needles more frequently!
That’s enough for today.
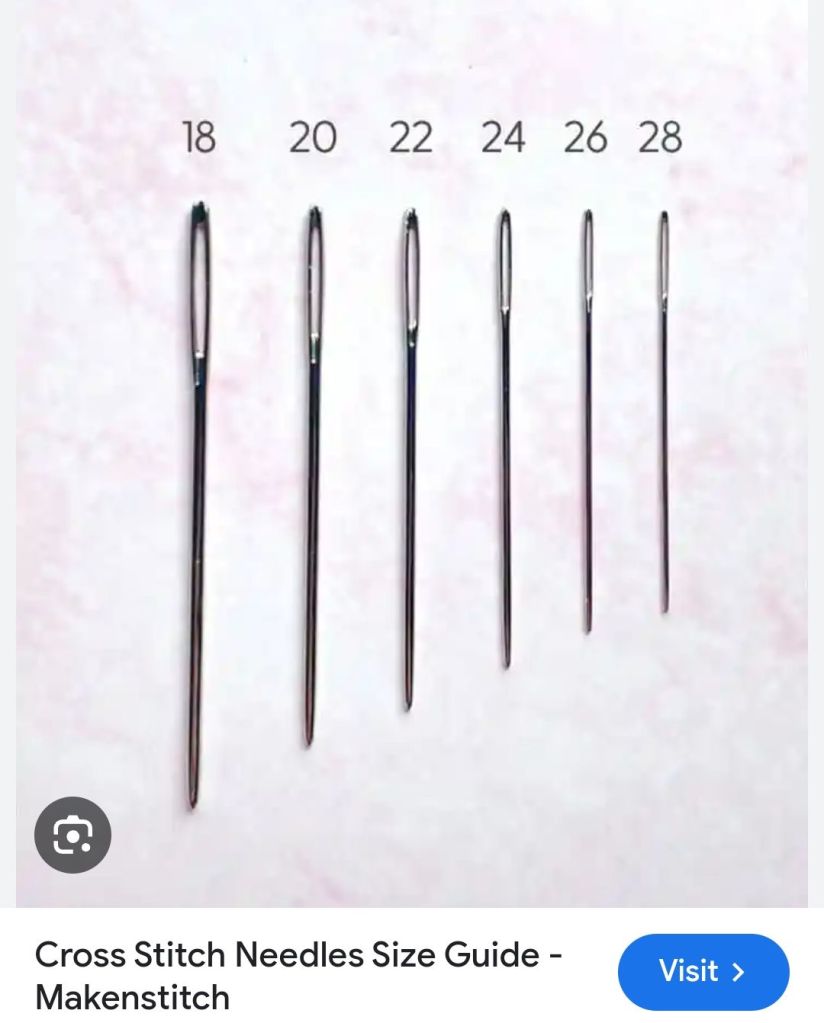
Here’s a Tapestry needle size guide.
Filed under: General comments, Needlepoint Shops, Punch Needle, The Bee & The Bear - Punch Needle
I have (or had) 3 punch needle projects that I tried without success. They were not where I expected them to be. I was going to take them to my class. Damn, Bill was right – he said I wouldn’t be able to find them! Is it possible that I gave up on them and put them in an Ebay auction at Fireside Stitchery?
Here’s a photo of the one I picked up in 2013 at Liberty Cottage, a Folk Art Stitchery store – close to Expressions in NeedleArt in Canandaigua, NY. I know this thanks to my post https://melitastitches4fun.com/2013/07/17/needlepoint-visit-to-rochester-canandaigua-ny/. I’m happy to say both stores are still operating. I don’t get there too often but they are well worth the visit if you’re in the area (30 minutes southeast of Rochester).
I signed up for this class as soon as I saw “Punch Needle with Embroidery Floss for Beginners” would be at Mainline School Night(.org). The teacher is Katie Kriner, Author, Fibert Artist, Shop Owner of The Bee & The Bear, which I see is in Hereford, PA (about 1 hour 20 minutes north of Philadelphia-kind of between Allentown and Reading). From the photos, I would describe it as a Folk Art Stitchery store, too.
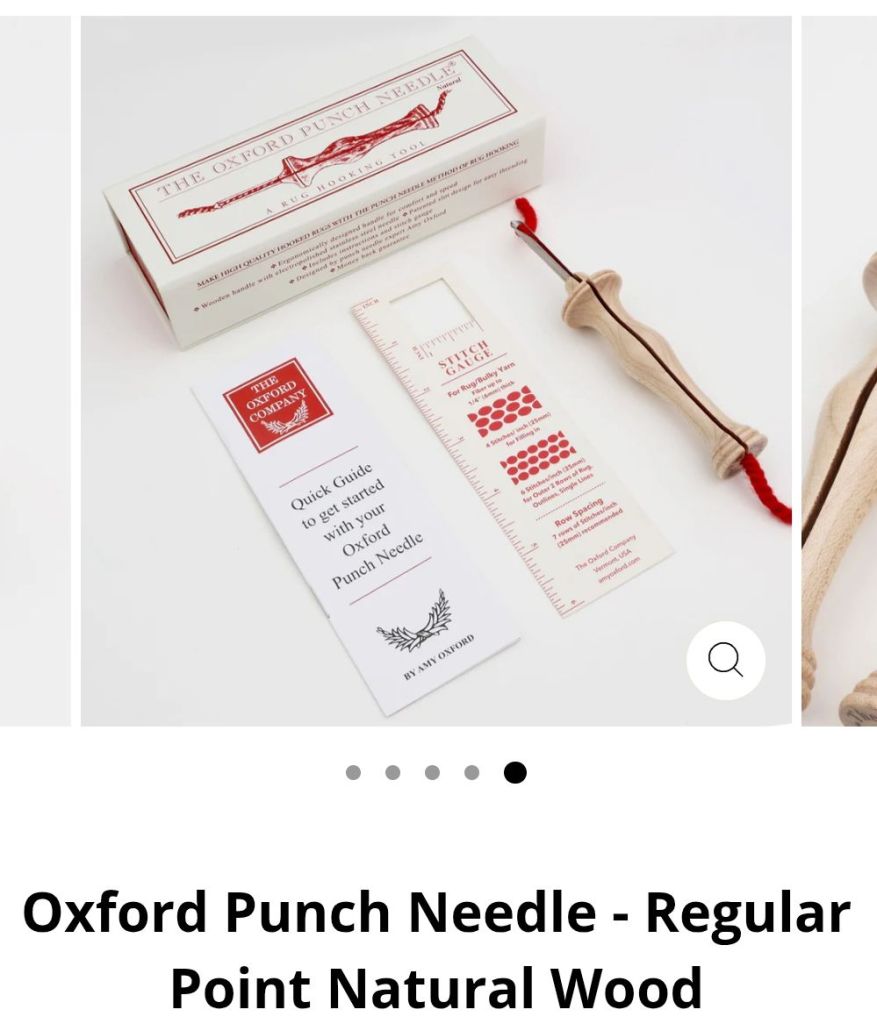
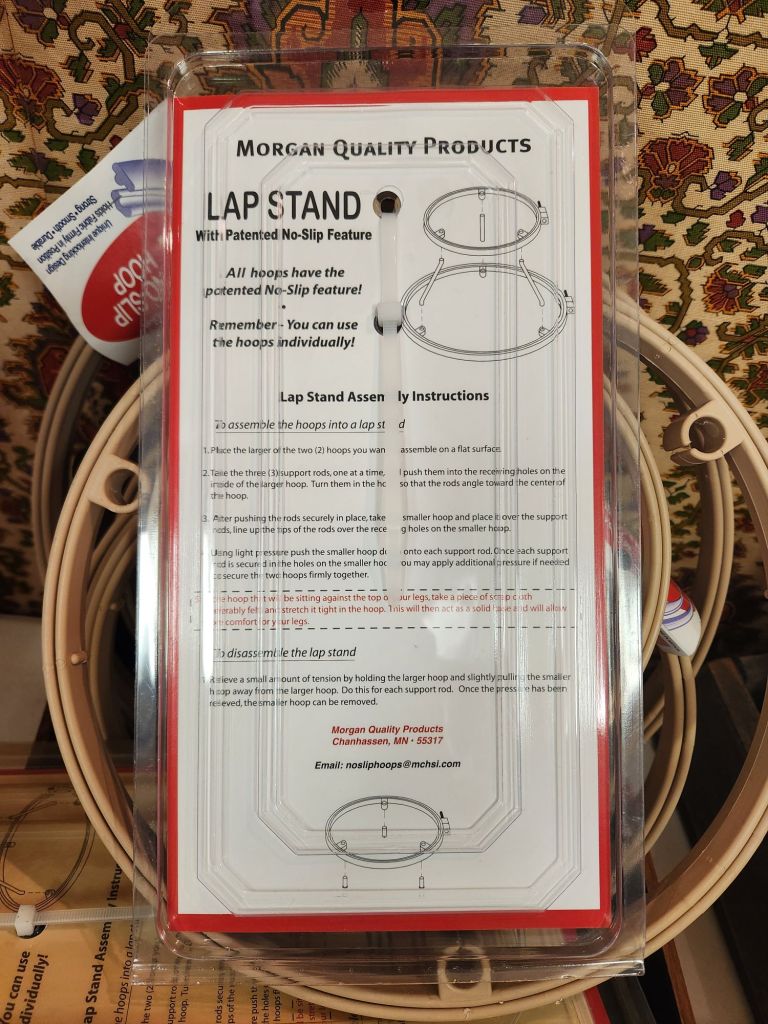
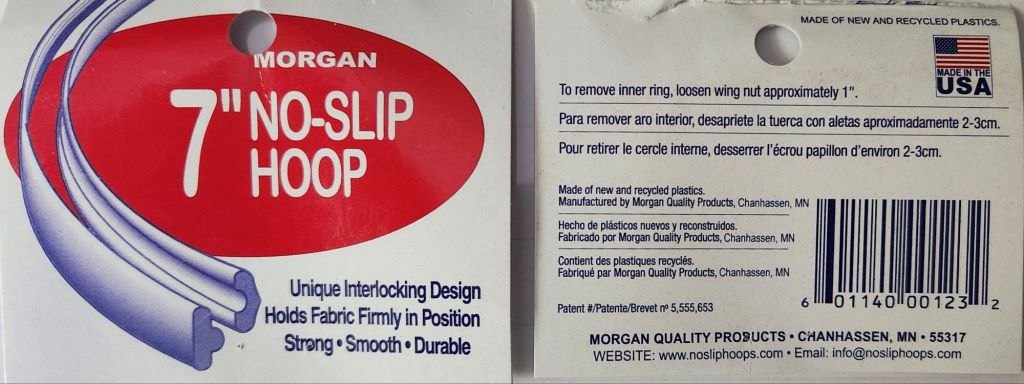
Class description: Learn to punch an intricate floral 4” embroidery hoop; choosing between various different flower colors. Leave with instruction and knowledge to punch and the tools to create your own future pieces. Class materials include an ultra punch punch needle, 7” Morgan interlocking hoop for punching, wooden display hoop, backing fabric, and floss to complete the piece.
The class was in the Creutzburg Center – 260 Gulph Creek Road (in Harford Park) Radnor, PA 19087. They hold a variety of classes there. The parking lot was full. It’s a great venue.
The Morgan hoop as a single hoop is fantastic. You can get the fabric really tight because of a ridge inside the one hoop (interlocking design). You can get a pair of 5″/7″ or 7″/10″ and make a lap stand. I’m surprised that nobody in EGA has ever mentioned these.

The ultra punch needle is the same as the one I can’t find. Perhaps I didn’t thread the needle properly. Or, perhaps I didn’t understand that you punch on the design side and that is actually the back.
This is what I got done during class (left side) and what it should end up looking like (teacher’s sample on the right).
It was a small class of 8 people and 2 hours went quickly. Katie is a mother of 2-year old twins (boy and a girl). Very nice woman. She brought some of everything from her store to entice us! I can always make a road trip to Hereford, especially if we visit our friend near Jim Thorpe.
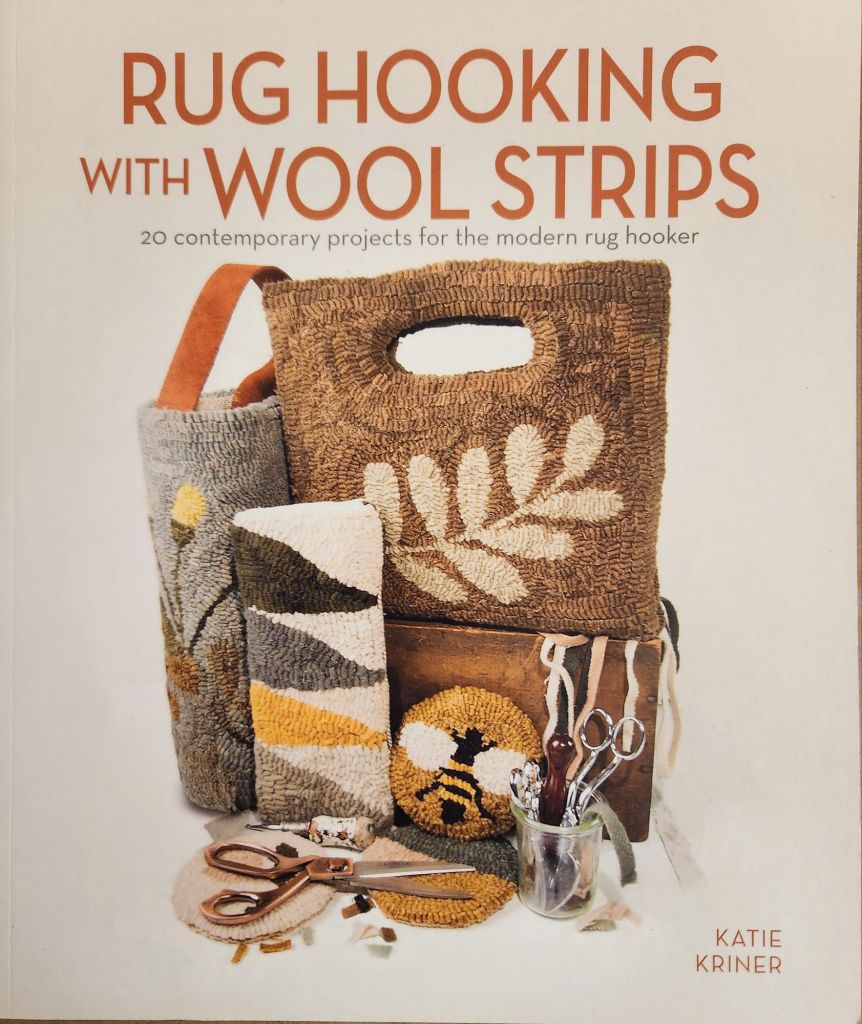
Katie wrote a book during covid. She sells it at her store, on her website, or Amazon. She has an Etsy store. I’ll probably try her rug hooking class. It uses a different tool and yarn.
As I was finishing this post, I realized that the punch needle that I purchased should be in my infrequently used “tool” drawer in the basement cabinet. I was looking for a project. I wondered why I’d buy a peacock to punch. It was there! Now, I can punch with 2 different colors without switching threads. It’s a process to thread the punch needle. I still don’t know where those 2 little punch needle projects are hiding. Katie’s ultra punch needle came with 2 threaders, 2 springs, and 3 needles (small, medium, and large). So, I am set with equipment.

Filed under: General comments, Serendipity - Stitching Club with Ellen Johnson, Spring Stitch Challenge, Tips
Ellen of Serendipity challenged us to stitch the Trellis Cross stitch in 2 different ways and compare results.
In this stitch sample, I used a pink Neon Rays+ as Step 1 for the large cross. For Step 2, I used dark purple DMC Perle #8 over the Neon Rays+ intersections. Then, on the top half, I filled in with blue and purple Kreinik Braid #8 which added too many colors, too much sparkle and left exposed canvas. If this was a painted canvas, exposed canvas might look better. On the bottom half, I used 4 strands of Splendor in a light purple. So, using 2 purples looks better to me. And, there is less exposed canvas which looks better too. Zooming in on the stitching shows more canvas than looking at it at a normal distance.
Here’s the photo with my old phone.
Here’s the photo with the new phone.
I don’t pretend to understand the specs they list but the new Samsung S25 Ultra has optical zoom vs the old digital zoom (S22+) which is what I have been using. They explain it at: https://www.samsung.com/uk/mobile-phone-buying-guide/samsung-galaxy-s25-camera-specs-explained/
Quite a difference in clarity!
I thought I could handle the transfers (Bill and I have to upgrade together) but it took maybe 2 hours on the phone (and I was following instructions quickly) and a short second phone call to complete both phones! I had a very helpful young lady on the first call. These phones better last for a long time. I don’t need to do that again any time soon. I might just reshoot some (all?) of my needlepoint pieces some rainy day.
Some explanations have come in from someone more technically savvy than I:
Optical zoom means they have added another lens so that the light is bent (in complicated ways) on its way to the camera sensor to provide the additional detail.
Each of the little circles on the back of my phone is a different camera and lens. The phones don’t really have “zoom”, but rather 2 to 5 separate cameras. My old phone only had 3 cameras. There are options for 0.6X, 1X, 2X, 3X, 5X, 10X, 30, and 100 magnification that the various cameras provide. As soon as I use my fingers to zoom between sizes, I go back to digital zoom. That would be better to do in Photoshop.
Wow. That’s so much great info!
Here’s I took a photo at 30X. The one with the new phone I already posted was at 2X or 3X. According to the megapixels I discovered in the details of the photo, this new 30X one has 10MP while the other one has 6MP and the old phone had 5MP. It should be even better. The lighting is different and my hand may not have been asked steady.