I love working a design out on graph paper almost as much as stitching it! Maybe that is why mechanical drawing was attractive to me in high school. I thought it was the music (Bob Dylan) that the teacher played during class. Or, that HE was nice looking, pretty cool, and the youngest male teacher that I ever had as a teacher. Or, because as one of the few elective vocational courses that I took, I liked the change of pace from all the academic ones.
My first attempts dissected the paper almost straight across with no movement but it did narrow nicely.

No need to bore you with my 2nd or 3rd attempts that wouldn’t curve. But, my 4th was better.

And, by starting at both the top and the bottom, I found I could get the bend. However, it was necessary to modify the crescent shape from the diagram in Jean Hilton’s Stimulating Stitches in order to make the bend. But, I think she’d be ok with that. I didn’t narrow as much as in my earlier attempts but there is narrowing and I love the bend. The design doesn’t look too top-heavy to me. I like it!

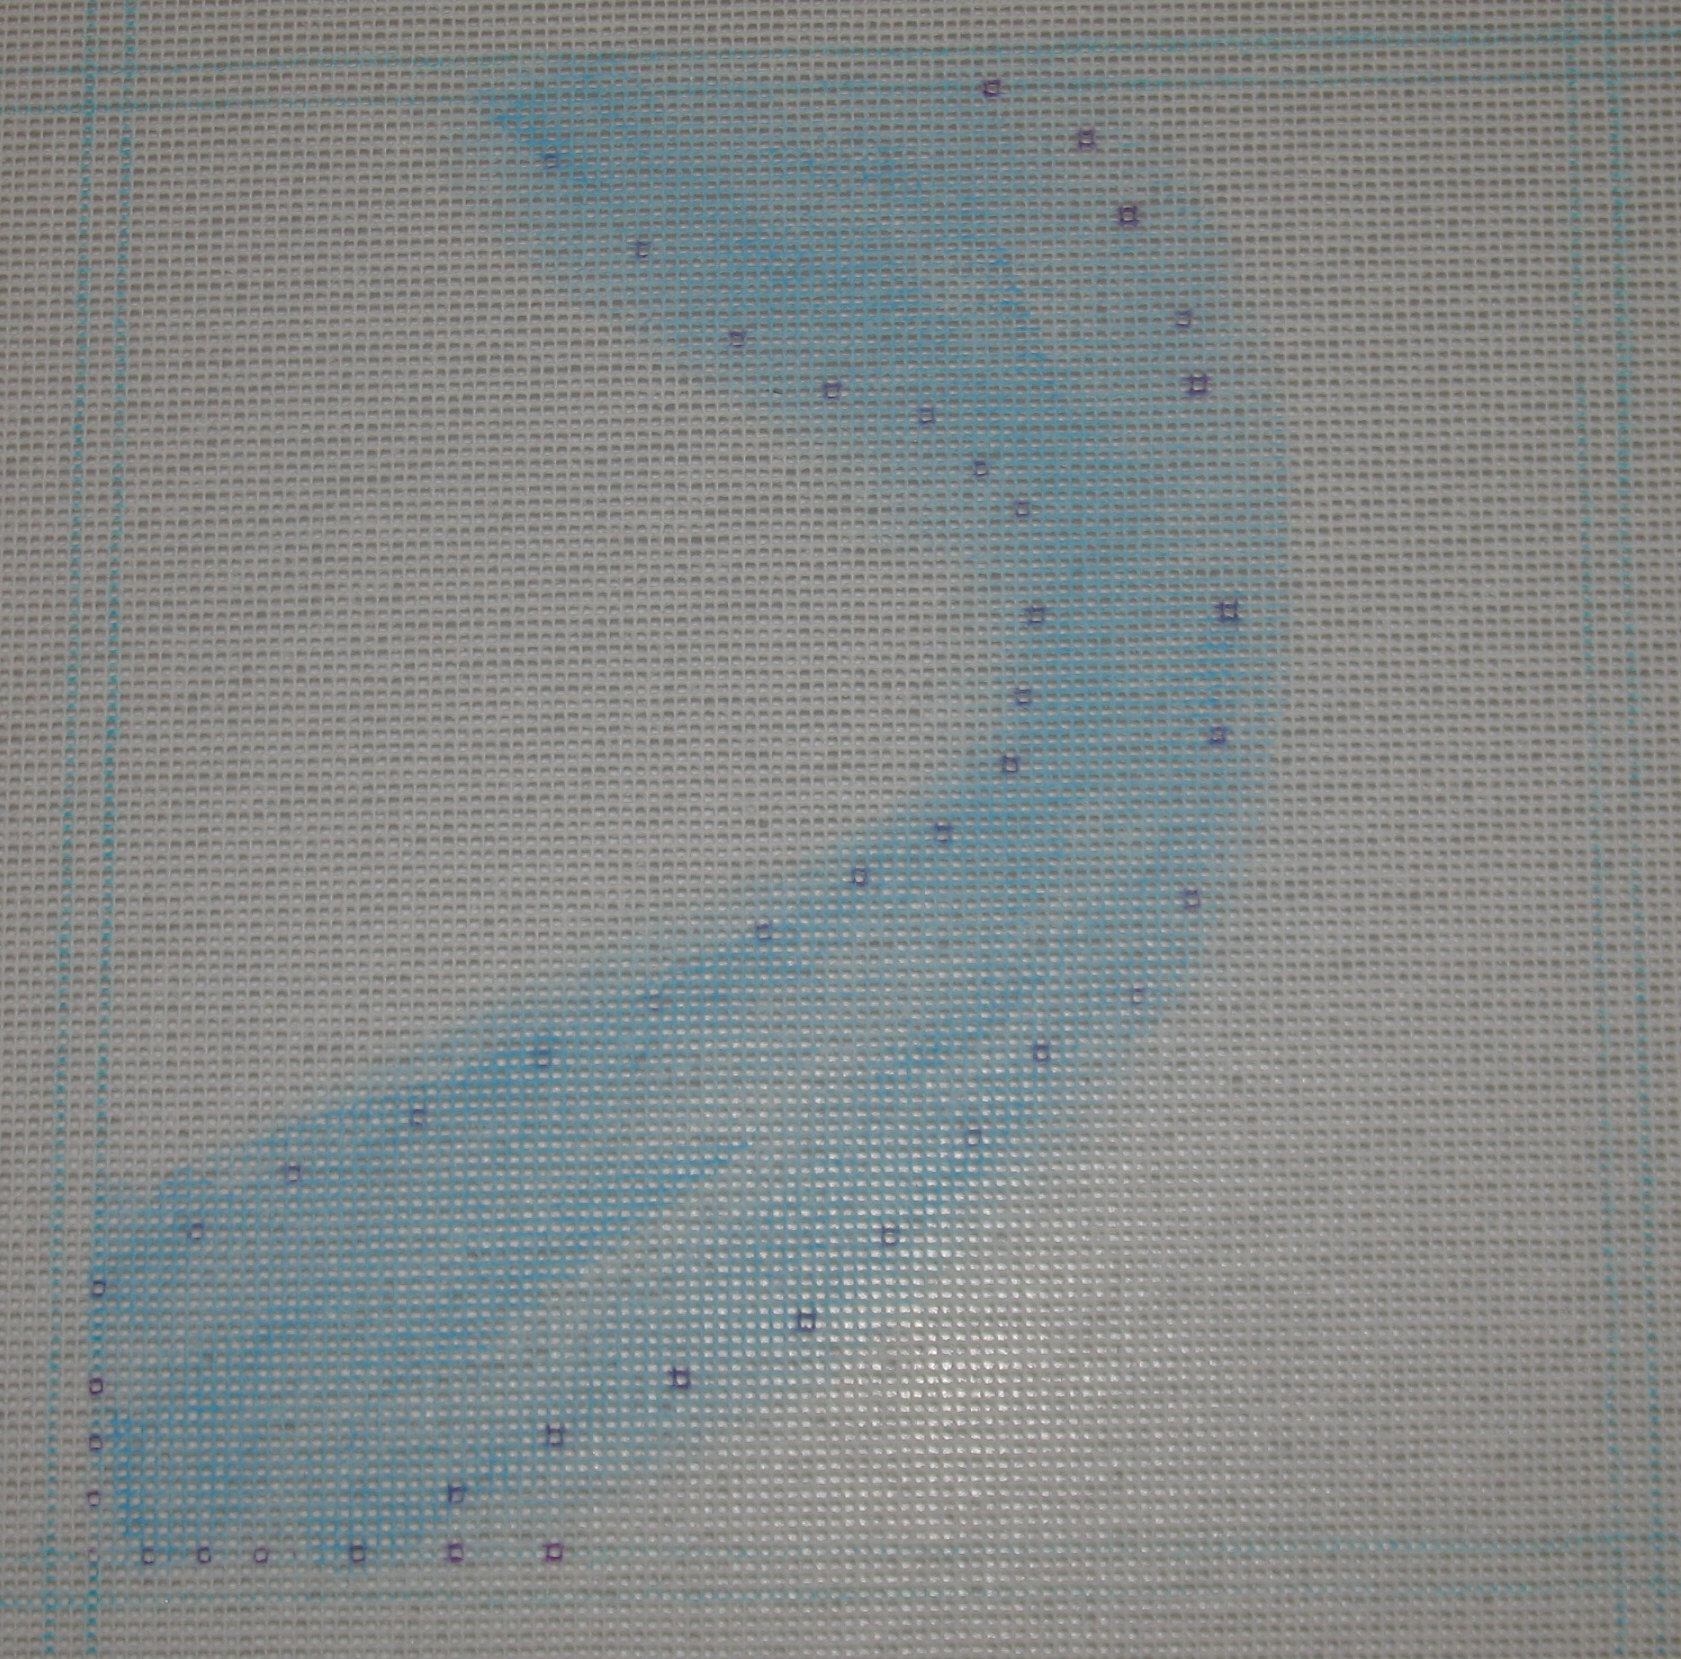
The blue Copic marker didn’t look good with my blue threads. So, I got the paint out. And, I am glad I did. I’m very happy that there are areas with a little less paint than other areas. I went beyond the area where the crescents will sit because the cresents are supposed to be the ripples in the water. The purple dots you see are the Disappearing Ink Pen marks. I’ll have to get the crescents stitched soon or keep reapplying more ink! The borders are marked by the Mark-Be-Gone Pen (water washable) but they should get covered by stitching. My framer says he like about 3 extra stitched rows on the edges to work with.
I’ve been talking fall ANG chapter projects via email with Carol T in Central PA and mentioned that I was “making a Fireside Stitchery run after work tonight (Friday)! Need (?) some threads. Great start to the weekend.”
Later, I had to laugh when Carol asked, “Did you get to Fireside? What’s your new project? What new threads did you buy? Did you get to start it? I’ve always got a bad case of startingitis and am always interested in new projects and what others are stitching.” I could just hear the excitement in her “voice”! And, there is a thrill to starting a new project – maybe that is why we have so many works in progress (WIP)?!? Speaking of WIP, I do have to finish my Queen’s crown by applying the beads but am afraid to get started – it looks like it is going to be hard to get them placed just right. So, I am getting my next one ready as I mentally prepare to sit down with the Queen.
I replied to Carol, “I did (get to Fireside)! Well, I’m going to call it Crescent River. And, it’ll use Hilton stitches. I’ve had a river in my head for quite a while & decided to get it done for seminar in CA. There will be areas on both sides that will be gray for rocks & then green for grass/meadow. It is going to be an abstract depiction rather than a realistic view from the sky. I’ve been working out the crescents on graph paper-trying to get a curve – that’s been the tough part. I have decided to make the crescents fit the space rather than follow a strict shape defined on a page in one of Jean Hilton’s books. I’m going rogue! Living life on the wild side! Tomorrow, I’m going to paint my canvas with blue where the river belongs because the crescents will not cover the canvas. My last painting experiment wasn’t all that successful but this is just a light blue. I could even use my Copic marker. Hmmm, wouldn’t have to let paint dry! And, I can start stitching! We’ll see what happens when I start tomorrow after a good nights sleep.”
Today, I realized that I had the start of my blog entry already done! I just needed to answer, “What threads did you buy for Crescent River?” & take a picture of the threads. I am not sure if I will use all these but I have lots to work with.
The river is going to use Pebbly Perle blended with Splendor:
The Splendor Designer Collection card for Delft Blue gives me S800, S860, S868, S1001, S1143, S858 to work with. And, I selected Pebbly Perle’s P061, P80, P57, P58.

The left crescent used 1 strand of Pebbly Perle, the middle used 1 strand of Splendor, and the right used 1 of each.

The rocks and grassy meadow will use some/all of:
Impressions (1106) light golden-yellow
Watercolours (223) Rye, overdyed with golden-yellow/brown
Impressions (1104) dark golden-yellow
Impressions (5022) medium green
Watercolours (222) Sierra, overdyed with greens and some golden-yellow
Impressions (1043) dark gray
Watercolours (247) Dark Suede, overdyed grays/browns
Impressions (1065) light grayish brown
Watercolours (165) Granite, overdyed grays and some light green
Impressions (1062) medium gray
Impressions (1072) medium grayish blue
Watercolours (223) Ash, overdyed with grays/whites
Impressions (1046) light grayish blue

Now, back to the graph paper. This is about my 5th attempt to work it out on paper & each one is getting closer to what I see in my head. I think letting go of the pre-defined stitch pattern to make the shape of the crescent fit my space will make the big difference. And, from what I read of Jean Hilton through her books, I think she’d agree!
All this is good to write down now anyway because I’ll need it for the artist statement that goes with each original design (being optimistic it will be adequate to send once stitched).
This is so exciting! I couldn’t say anything until now but I am published! What I didn’t know was that it would be on the cover of Needle Pointers!! I worked with Pam G. who took my hand drawings and turned them into beautiful diagrams. And, she really helped with describing how to execute the stitches from what I had provided. So, I hope you can stitch it without a problem. But, if you do have questions, I’ll be here to help. I just can’t get over how wonderful it turned out.

March 2013, Volume XLI, Number 2
Our ANG Main Line Chapter met tonight & I gave each of the board members a gift. The woman got a felt purse, good for carrying small needlepoint projects, that I purchased at the Philadelphia Flower Show. And, I made this change purse for our male member who, as Past President, is on our Board. This is the inside:

And, the outside is stitched with Needle Necessities Spring II (355) and Splendor Designer Collection Deft Blue (S858, S868, and S860) threads using the Swirl stitch from Stitches To Go by Suzanne Howren and Beth Robertson. I got the change purse a few years ago at Needle Me in Havertown, PA.

The CyberPointers Chapter of ANG, of which I am a member, came up with an idea to make houses stitched by members of the various Special Interest Groups. I belong to the Hilton SIG. Luckily, the project stalled & I finally had time to stitch the house I had designed when the project was first announced. So, I’d like to welcome you to The Helen Ashland House, composed of stitches from Needlepoint Stitches by Jean Hilton.
Supplies:
18-count canvas, ecru; 10 x 10 stretcher bars; #22 and #24 tapestry needles
| Thread/Color | Location | Stitch | Page Number* |
| ThreadworX – 11212 | Outline of house and door | Half Cross | 36 |
| Watercolours – 218 Ash | Body of house | Ashland Stitch | 36 |
| Wildflowers – 118 Opal | Space between outline of house | Smyrna | 36 |
| Wildflowers – 118 Opal | Area around large upstairs window | Smyrna | 36 |
| Wildflowers – 118 Opal | Windows in door | Small Jessica | 9 |
| Wildflowers – 118 Opal | Inner circle of upstairs window | Small Jessica | 9 |
| Wildflowers – 118 Opal | Door | Elongated Smyrna | 45 |
| Wildflowers – 118 Opal | Lunette, the half-moon space above door | Sprat’s Head, Flat Top | 55 |
| Vineyard Silk Shimmer – S-537 | Outer circle of upstairs window | Large Jessica | 9 |
| Watercolours – 251 Sunflower Seed | Trees | Offset Scotch | 38 |
| Watercolours – 228 Honeydew | Grass turf (bottom layer) | Tent Stitch | |
| ThreadworX – 10471 | Grass blades (top layer) | Wrapped Coils | 33 |
| Flair – F502 | White sheer window curtains | Straight Stitch | |
| River Silks 4 mm Ribbon – 237 Brown | Brown window drapes | Oval Jessica, 1 around only* | 9 |
| Pebbly Perle – P061 | Blue sky | Helen’s Lace | 22 |
| Watercolours – 256 Barely Blue | White clouds | Helen’s Lace | 22 |
* From Needlepoint Stitches by Jean Hilton; Some were modified to fit the available space.
** More familiarly known as the Crescent Stitch from Stimulating Stitches by Jean Hilton (page 9).
The 2 predominant stitches are Helen’s Lace for the cloudy sky & the Ashland Stitch for the body of the house. That Ashland stitch is tricky especially because I was using an overdyed thread & didn’t want it to get streaky. I would probably do the sky again in a more thread-blended fashion. But, I like the movement the pattern gives to the clouds.

I am very pleased to say that this won a 2nd place ribbon in the Original Design category. I didn’t ask for a critique for this piece but every entry is given a numerical report (no charge beyond your entry fee). I got 24 out of 25 for design characteristics, 23 of 25 for color, 19 of 20 for workmanship/technique, 19 of 20 for suitability, and 10 of 10 for finishing. I am particularly thrilled with the finishing score. I did it myself. It is lined with a pretty red print. And, I sewed the lining into the edging which was something I had not done on my first scissors sheath band sampler from our chapter project (https://melitastitches4fun.wordpress.com/category/ang-main-line-stitchers-chapter/scissors-sheath-band-sampler/). The red heart-shaped scissors was a great find as was the display stand (intended for a doll).
Here’s my artist statement for ‘Celebrate Love’.
With ANG’s 40th Anniversary Coming to Philadelphia in 2012, I decided to donate something unique to the auction. However, I fell in love with the scissor sheath & wanted it as my commemorative remembrance of the Seminar. So, I donated something else that I designed. Then, I decided to enter this scissor sheath in the Original Category after realizing that it qualified for “Small Masterpiece” AND “President’s Choice Award”!
And, what inspired this piece? The love of Philadelphia, ANG, and needlepoint! Obviously, the design had to include the ANG logo, 40, and 2012. Every day I walk through LOVE Park (& see the LOVE sculpture) on my way to work in the City of Brotherly Love, Philadelphia. And, nothing says Philadelphia more than the Liberty Bell. So, with what little space I had left, I managed to fit in the American Flag and a few stars.
Welcome greetings are sent out to all ANG members as you join me ‘Today’ in Philadelphia to celebrate our love of needlepoint from all of the ‘Yesterdays’ and as we look forward to all of the ‘Tomorrows’.


I wanted to stitch something to thank all the volunteers but unfortunately that’s too many people to personally stitch one for each person. So, I decided to stitch one for each day & hold a daily drawing – one chance for every hour worked. This is for the Day 7 winner. It is a double heart glass frame measuring (to be added later) designed it on 14 count red vinyl canvas (from crafterspride.com under fabrics) to fit the space. I like the vinyl because the edges don’t fray.

“Points of Tranquility” in 3 color families were entered in the 2010 ANG Seminar in the original design category. My artist’s statement follows:
When I was given a lovely blue and gold square frame, I decided to design a piece of needlepoint for it. I like to be challenged and felt I had learned enough from recent geometric designs we had done as part of ANG Main Line Chapter projects to make the attempt.
Because the square frame has an inner portion of thin royal blue and gold strips, then a wider blue strip, and lastly a gold strip, I wanted to create that same ‘frame within a frame’ effect in the design area and keep the piece symmetrical. I found enough triangular-shaped stitch patterns that squared up nicely and didn’t require much compensation. Although I had to stitch no larger than the opening for the frame, I didn’t plan everything out in advance. For example, the Triangular Ray band, had a diagonal gap that filled in nicely by the Pearl stitch, with its small triangle portions, and really added to the effect of depth. The Raised Lattice Band for the outermost band could be as wide as needed. It all seemed to fit into place as I progressed.
I couldn’t think of anything other than, ‘Trianguality’, for a name but I knew it wasn’t good. So, I solicited input from the wonderful women who help take care of my mother. And, I just fell in love with Kathy’s suggestion, “Points of Tranquility”. Thanks again Kathy!
When I showed off my finished piece at our end-of-year dinner and my fellow Chapter members asked “Who’s design is that!?!”, I was thrilled. Then, I was flattered when they actually wanted to stitch it as a project. From my scribbled notes, I wrote my first stitch guide using just Adobe Acrobat. And, to make sure I was writing everything down, I stitched a second one in another color family. Then, when we stitched it in the fall, I did another in a third color. So, I distinguish each “Points of Tranquility” by adding “in the Sky” for the blue piece, “on the Earth” for the brown piece, and “in the Sea” for the aqua green piece.
Thanks for the frame Dottie & for many tranquil visits to your Pocono home!
“Points of Tranquility” scored the lowest (73% of total and 19% lower than the top score in the category). But, this was my first attempt at a geometric design and not surprised that they had issues. The comments get quite technical but key issues were around values chosen and confusion about the focal point. I’m still struggling with seeing different focal points in each piece. Apparently, in the blue, there are 2 focal points – one within the navy/metallic area and the other the true center; in the brown, it is the area enclosed with the brown metallic; in the green, it is the true center. I’ll keep studying them! One of the elements I liked the best was the outer border. I just love how it was described, “Your wrapped stitches for the outer borders are an effective and inspired selection. It is effective, provides a variation in texture and loft to the pieces and lends itself to the utilization of subtlety while still providing weight for balance of the piece.” I said it before and I’ll say it again, I really appreciate the thoughtful and thoroughness of each critique.


Filed under: Love
I did the same basic pattern for a friend/co-worker (& her husband) for their wedding. It’s the same design as mine & not that I didn’t have enough pins or an appropriate one to use, but the design for the O was an original design from their wedding invitations. And, she’s actually the taller figure on the left!! The back of hers was done differently than most.


Filed under: Love
Since June is the wedding theme, I’ll post mine 4 months to the day early. After however many years this has been . . . I have to stop & do the math . . . 23 years!! I knew I was more than 20 but less than 25.
This is a “Pinsations” original design & stitch selection. The pin is added to the piece so that the pin can be removed, worn, & replaced. I made this to see if I could get something to recreate for other folks as wedding gifts. I only had two other weddings worthy of creating a piece of needlework since I did this & one I did differently (you’ll see).
I’m using whipped running stitch for the light blue part of Love & not sure I found this combination of stitches for the dark blue parts or made it up myself. The heart darning stitch for the background.

