This year we, my husband and I, are in Boston for the EGA Seminar. We traveled by Amtrak from 30th Street Station to South Station in Boston. Nice way to travel.
We explored around the hotel yesterday and the trolley tour today gave Bill options to fill the next 3 days while I’m in class.
I’m taking Pomegranate Heart (3″x3″), a one-day class with Melissa Sherbring worked in three late 16th / early 17th century English embroidery stitches that I’ve not used before. More on that later.
My second class, a two-day class, is Understanding Color Relationships: Luster and Luminosity with Patricia Goaley. Lecture with some sort of stitching project.
EGA has very nice name tag holders. I’m still using the one from Chicago because it holds both my EGA and ANG name tags. The swag bag is a reusable project bag.

Filed under: 50th Anniversary Flower Round by Danji, Other People's Designs
Since the ANG 50th Anniversary was exceptionally special for me because my Crescent Journey was announced as the 2023 ANG Stitch of the Month, I purchased this canvas and stitch guide by Sundance Beads from The West while I was at the Tucson Seminar. We discussed the stitch guide for this at our last monthly ANG Main Line Stitchers meeting.
I’d seen this stitched on a presentation they gave (their talk is free if you’re looking for a Zoom presentation for your chapter/guild). The stitch guide came along with the canvas (Danji: CH-639). I purchased the threads and beads at Edwardian Needle in April.
This was going to be my round ornament for a finishing class in October with Kelly Starke hosted by NJ Needle Artists but I’ve got round down pretty good. So, I will take only the irregular shaped class. I digress.
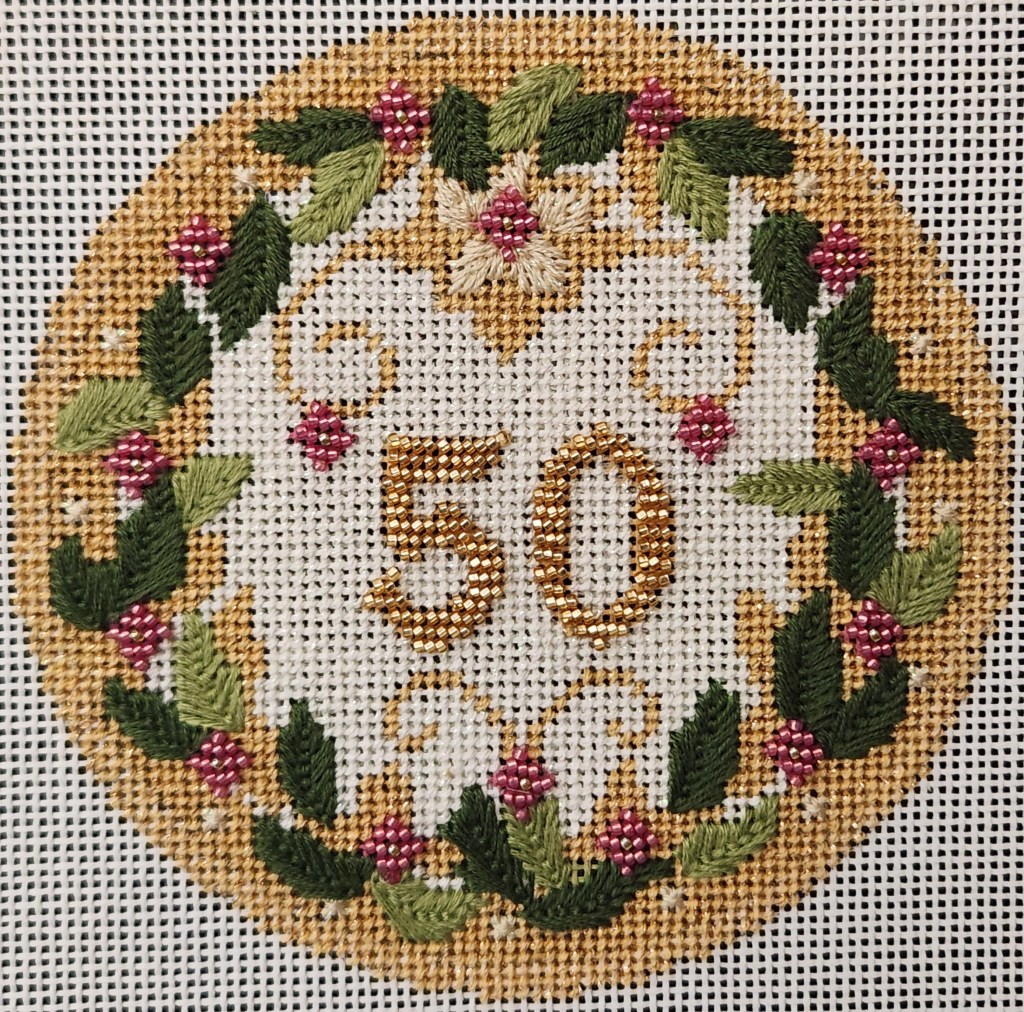
I added 1/4″ of basketweave around the outside so the decorative portions of the design would be seen after finishing.
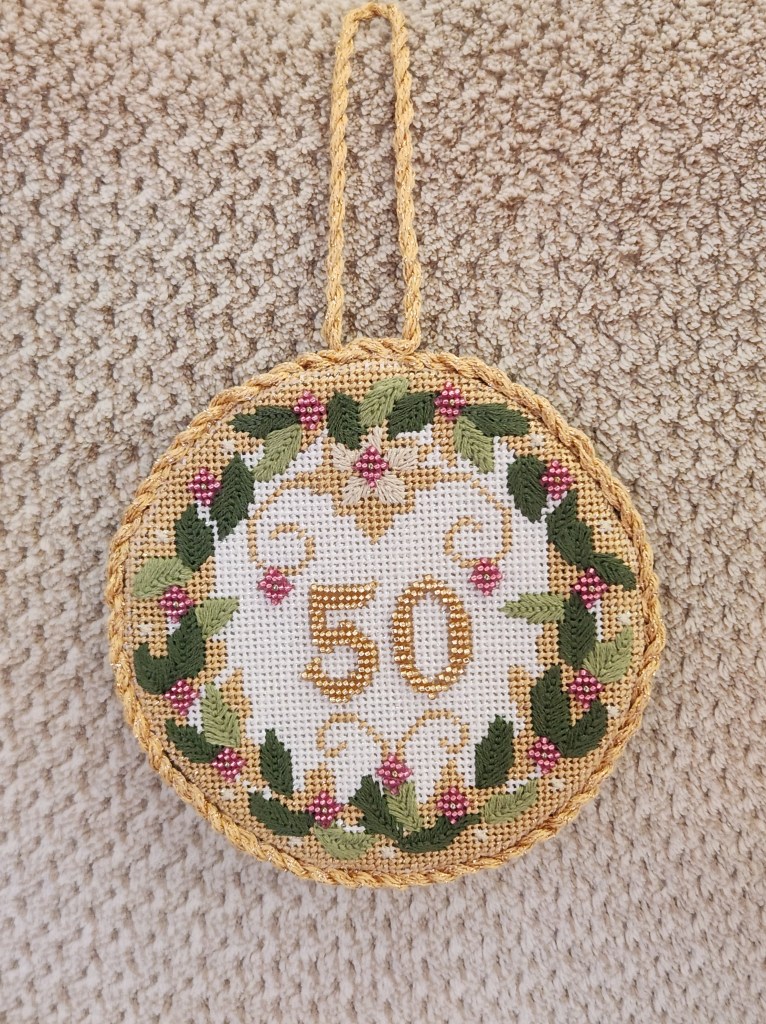
Using heat to press back the tabs worked well enough (a Kelly tip) but I wanted them securely in place so I laced each tab to the Craf-tex (cut slightly smaller than the stitched piece). I could have folded back more (which is what Kelly does on her YouTube video) than I did but I like the gold edge showing.

The fabric for the back is actually the back of a small fabric swatch that I’d won at a Valley Forge Quilt Show raffle and held in place by Scotch Tape Runner, a double-sided tape, on Magazine Board (a Brenda C tip) instead of a second piece of Craf-tex. I’d cut the template the same size as the stitched piece but by turning back the edge around the Craf-tex, the back ended being slightly larger than the ornament. That turned out to be great. I was able to attach the cord along that width by grabbing a little fabric, going through the Craf-tex towards the front, going through the cord towards the back, going through the fabric, going through the Craf-tex towards the front, etc – all the way around. I used invisible thread again which is more difficult to work with but it wasn’t terrible.
Silk Lame Braid for 13 count was used for the cording and is color matched to the gold previously used. I used the Kreinik cord maker, assisted by my husband, and really twisted this time. Better.
The loop started off center (not on purpose) and there was no going back and starting all over again! So, I extended the cord along the ornament edge to where it would hang straight. Another happy accident. I like that look. For a larger size ornament (4″), I finished late in the evening but I did finish 2 ornaments in one day. This may be my best one yet!

Filed under: ANG Main Line Stitchers Chapter, ANG Stitch of the Month, 2011
Between needing the bars for the upcoming EGA Seminar, getting the proper color DMC for cording, and having a free day (thanks to a PGA golf tournament), I was able to do the finishing for the individual motif from Flowers of Italy by Ro Pace, an ANG Stitch of the Month from 2011.
Using the same colored DMC floss as the tent stitch to cinch the 2 sides together.
Heather is leading this piece starting in September. The original was done on Congress Cloth but I will do them on 18 count canvas. I’ll probably do four of them as a unit and the rest as individual ones.
The finishing of the waffle went faster than usual. I stitched 3 rows of tent stitch around the motif. I laced the sides down over a piece of Craf-tex (thanks to to surplus from Linda’s Boutique). I cut the corners a tad to decrease bulk.
I used Scotch Tape Runner, a double-sided tape to hold the backing in place on a second piece of Craf-tex.
The cording was a double cording of matching DMC Perle #3 (thanks to Nanda for picking it up for me).
Again, using the matching colored DMC floss I attached the cording. Perhaps using a thread I can see (as opposed to Sulky invisible thread) made things easier. Or, perhaps that both sides were together before attaching the cording helped decrease the complexity of stitching.
I was worried that the laid threads would get messed up with all that handling but a little careful adjustment fixed a couple of strands that were askew.

Thanks to a rain delay for the golf game, I will work on another ornament!
Filed under: ANG Stitch of the Month, 2011
My ANG Main Line Stitchers is gearing up the next counted project. We usually have 2 pieces working because not every project appeals to everyone.
Heather will be leading Flowers of Italy by Ro Pace, the 2011 Stitch of the Month. It’s one I kept looking at but have been intimidated by some of the diagrams. She’s got a camera at home to demonstrate the stitches over Zoom at our meetings. I’m looking forward to seeing the technology utilized. I’ve only seen a camera used by a teacher a couple of times.
The original design was done on Congress Cloth and that’s what Heather did. So, I stitched the Waffle Stitch on 18 count canvas. I used 4 strands where 2 are used on Congress Cloth. It’s about 2.5″ and will make a cute ornament. More practice finishing! I think I’ll stitch a couple of rows around the outside before finishing it. I don’t want to mess up the laid threads.

There are 12 motifs in all. I might do 4 motifs in a larger diamond arrangement for framing. We’ll see what happens as we progress.
Directions are free for previous Stitch of the Month pieces to all members of ANG.
I had to get both the silk paints and Resist for painting on silk! This stencil of a rose has been in a drawer for years and finally used it! This used the Serti technique which requires clearly defined areas for the paint. Serti means “closed fence”.
The silk habotai I found online was too big. I needed a quarter of the piece. I figured having the extra pieces will be useful if my first attempt doesn’t go well.
After tracing the rose, I applied the Resist and let it dry. I forgot to wash it off but otherwise, I did fine with the second painting exercise. There is a lot of paint left over because a few drops of paint just absorbed to the lines of Resist.
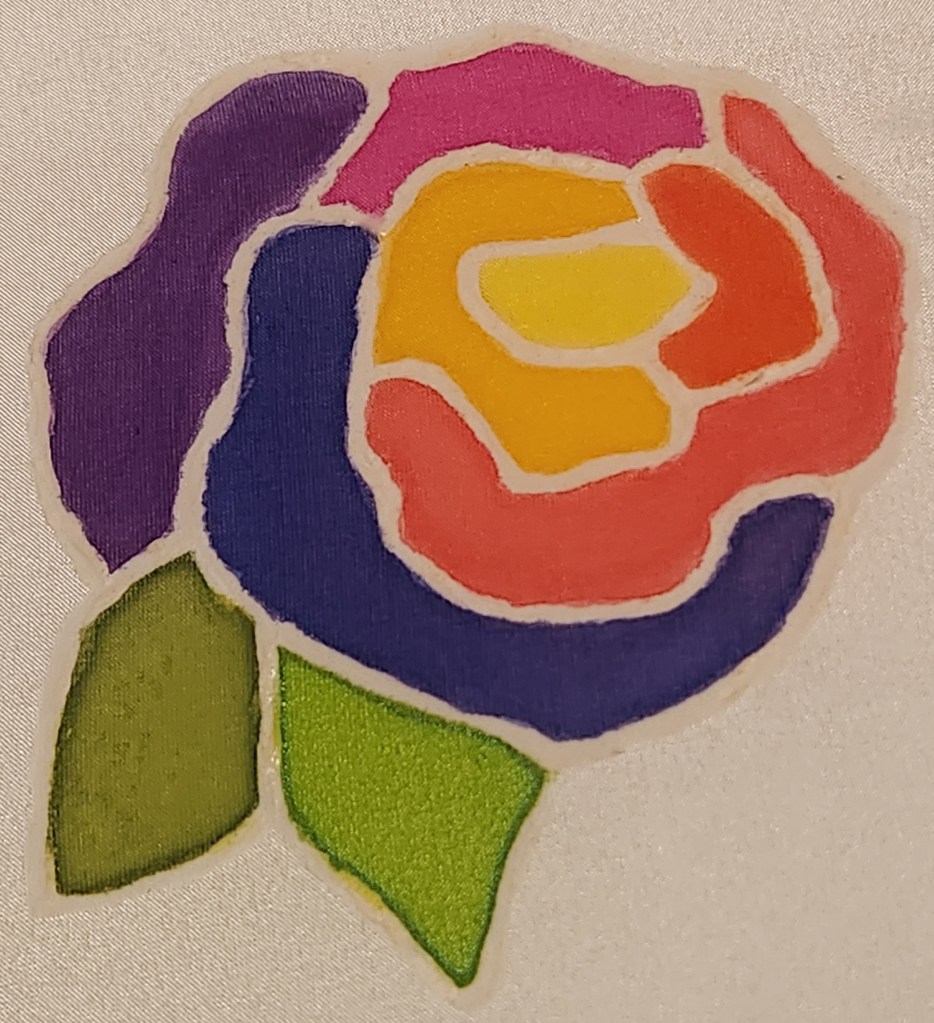
I have to use interfacing behind the silk because the silk is so thin. Laura gave me ideas for stitching this one too.
Laura Smith was kind enough to offer an extention on her EGA class, Draw and Paint.
I thought too much white (“snow”) came through on the canvas for my fish tank but I sent her a photo and she says it’s good after cleaning up around the edges of the fish. The rest is shading and will be covered by stitching.
This design is one I did years ago in the shape of a fishbowl on white plastic canvas. The plastic canvas made finishing easier because you could cut up to the edge without worrying about fraying. Yes, that’s a frog pin attached to the canvas which I’ve had since I was a child – his legs move!

It’s a design that I wanted to try again and to make it a little larger now that I am more experienced. This is also different from the first because I painted the canvas. Since I painted the water blue, I decided to change the blue fish to an orange one.
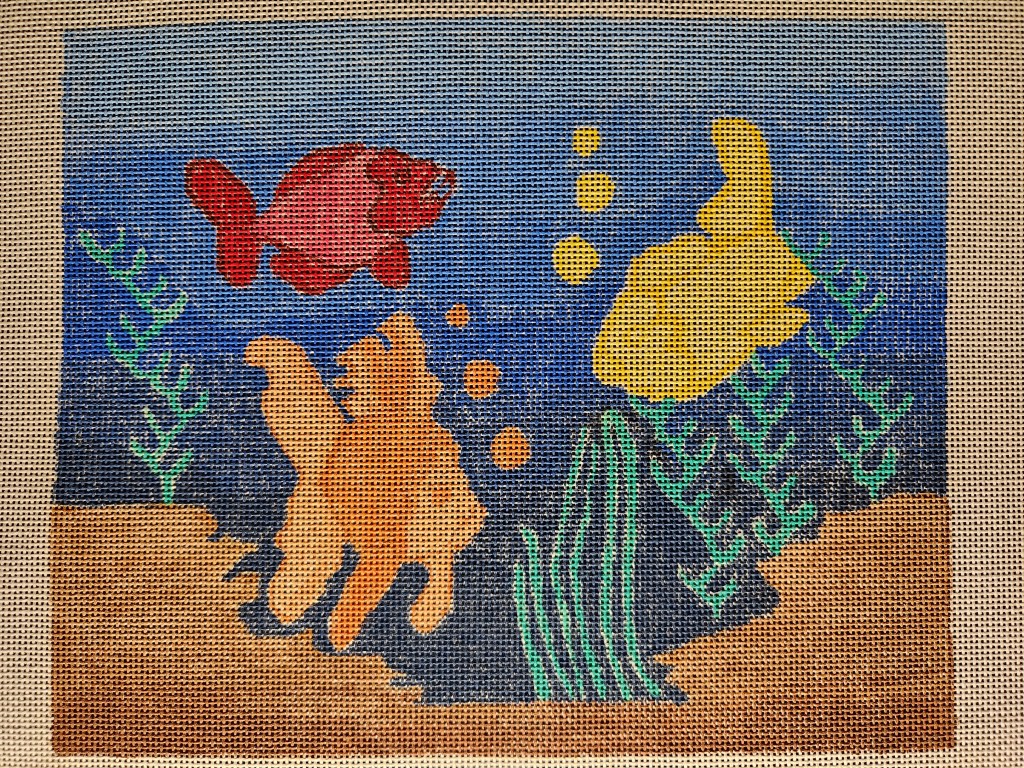
Laura said “Your painting is beautifully nuanced, yet not overcomplicated.” And, that the consistency of the paint mixture was good, no filled holes, and the color choices were excellent. Laura provided stitching ideas that are general. She suggested a few different things that I’ll have to think about.
I tried using the brushes I had but finally emailed her for suggestions on specific sizes and styles of brushes. I got a small set of Hogs Hair flat and round brushes and tested them out on this small scrap. I changed from light blue to dark blue as I moved downward. I love how my practice sky turned out.

I also reinforced that painted canvases are expensive for a reason – it’s not easy or a quick process.
