I picked up this Sewing Stitch & Zip (SZ 126 by Alice Petersen) in July 2019 from at Sandy’s X-Stitch On The Go in Hendersonville, NC. I finally got around to it when I decided to create dual sided business cards for Linda this year. I stitched the ultrasuede lining into place with invisible Sulky thread.

She can leave some at quilt stores to advertise her Valley Forge Quilt Guild and our ANG Main Line Stitches. The quilt is one of her award winners at this year’s exhibit. And, the needlepoint piece is her colorway for my design and the ANG 2024 Stitch of the Month, Crescent Journey. I think the neutral colorways look great together.
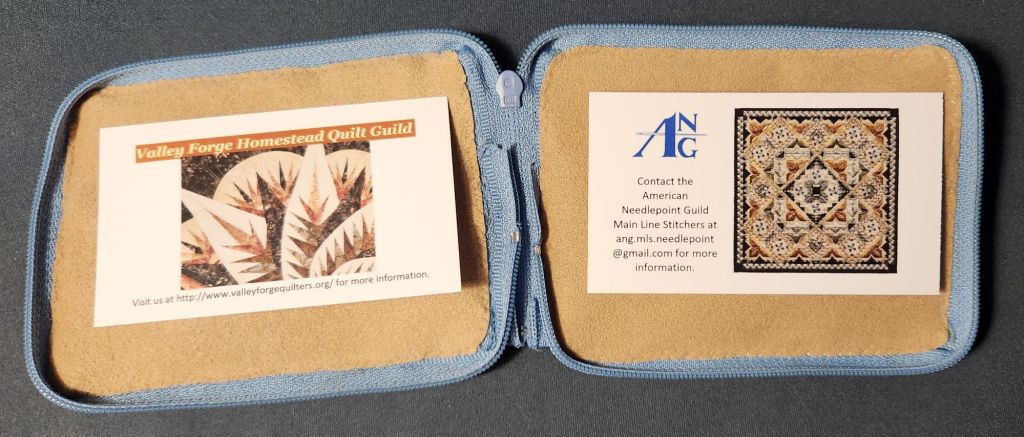
Staples makes creating business cards easy and affordable. If your organization is looking to spread the word, they are a great option because they fit easily in a member’s purse or wallet. Be sure to use both sides. I have personal cards and chapter cards.
Filed under: Uncategorized
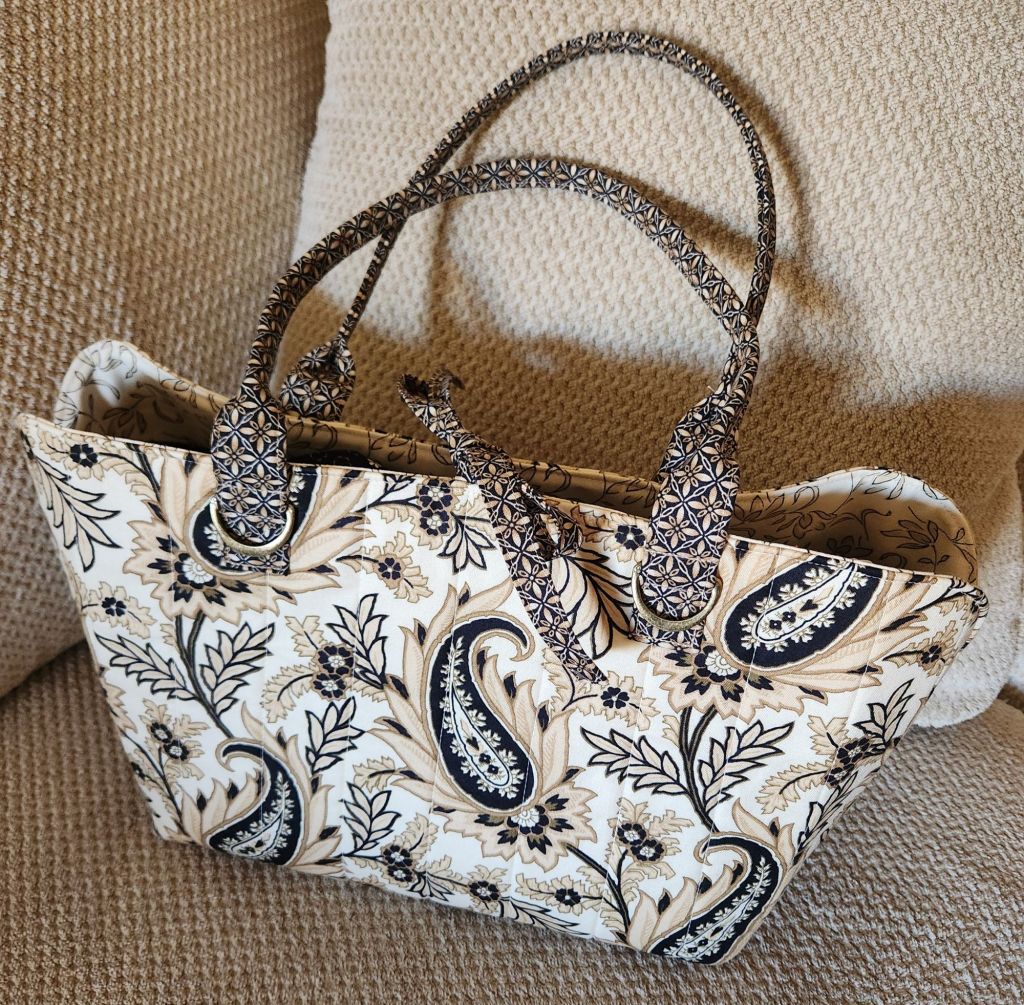
Once again, Linda has outdone herself with this lovely Night and Day Bag by Annie for my Christmas gift. Why is called that? Stay tuned.
The combination of fabrics in this bag is fantastic. Here are just two of them. More to follow. It’s light weight and ties closed in the center.
Inside is another bag with a magnetic flap closure, 2 zippered pockets, and one unzipped but under the flap! It is completely separate if you need a second bag during your day. You see a third fabric revealed.

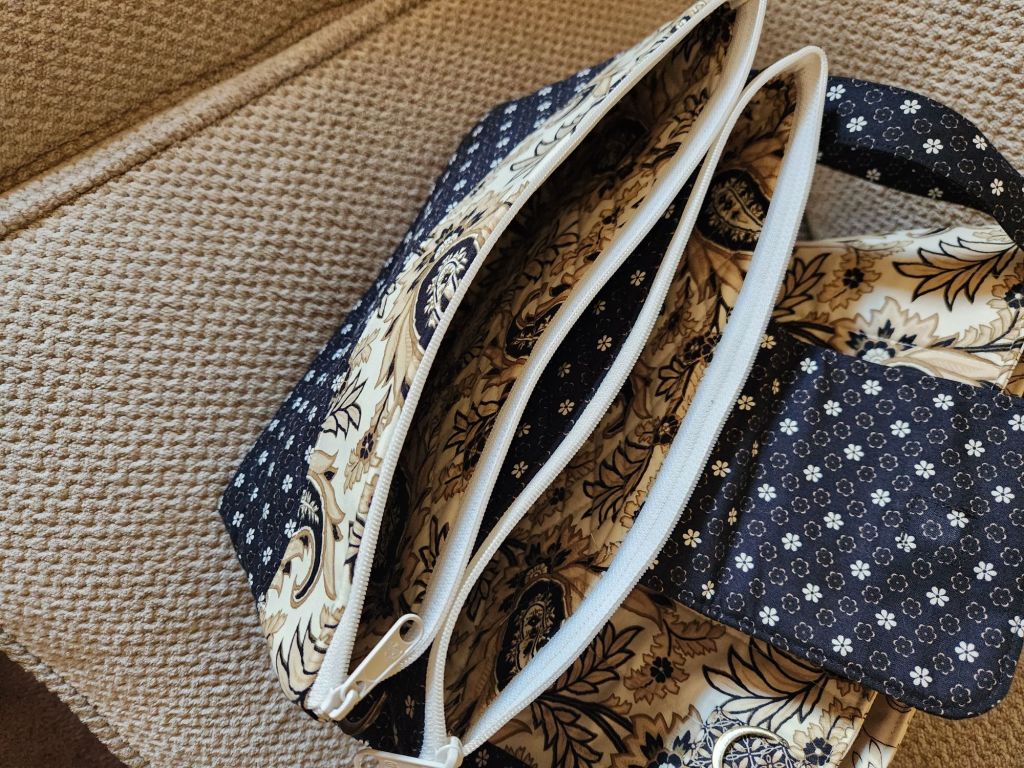
And, the first bag is reversible!

There is the fourth fabric, a small zipper pocket, and the adjustable strap can attach to either bag.
So, you can have one look for daytime and another for nights! It’s almost too pretty to use. Almost! I just bought a new black leather wallet that will look great in it.
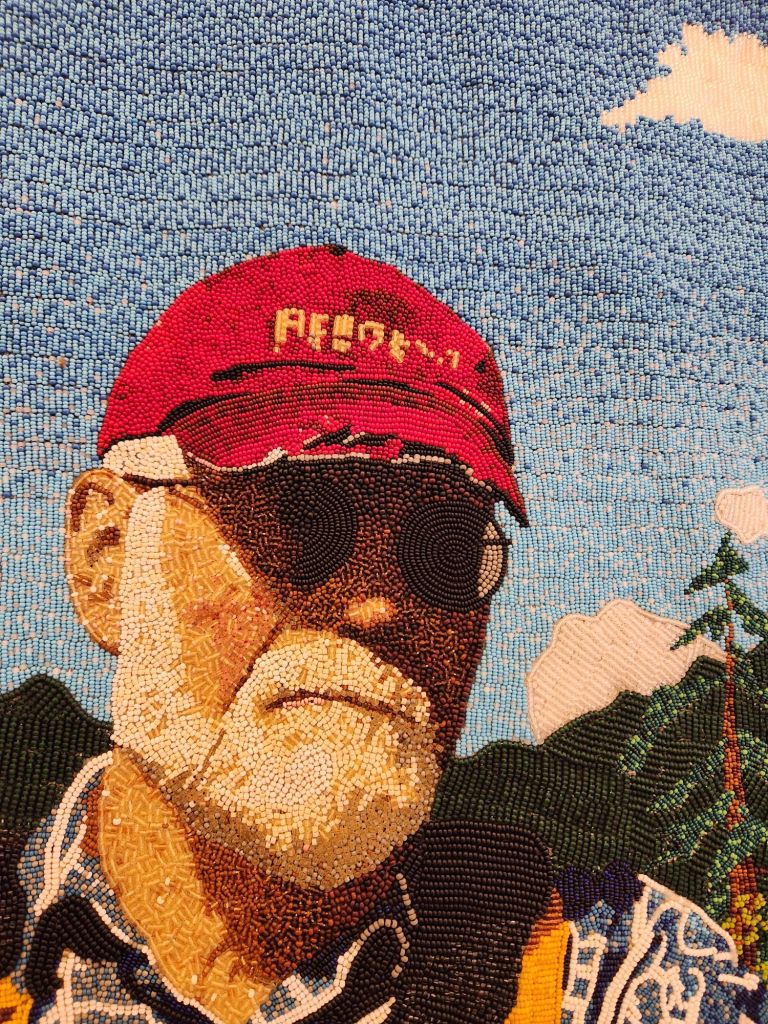
If you’re near The Wayne Art Center, the current exhibit has some great pieces (and some not particularly appealing). If you’re not nearby, they do post the whole exhibit online at https://craftforms.org/craftforms-2024-online-exhibition/. Since they post online, I will share a closeup of an amazing beaded piece.
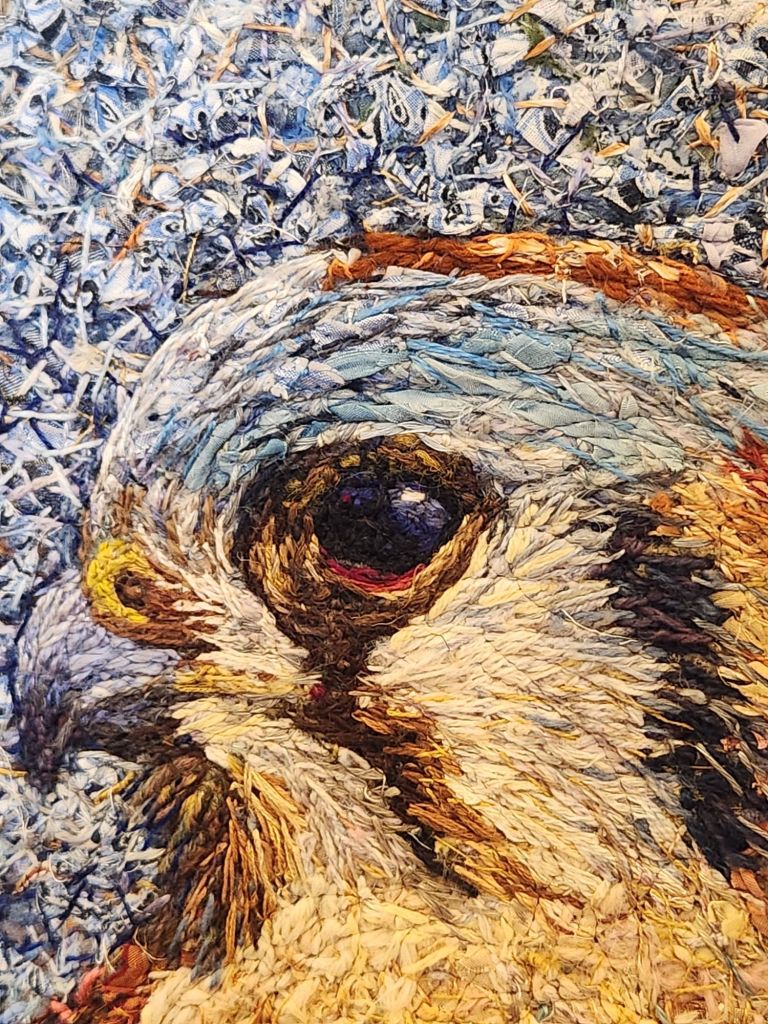
Close up of a bird’s eye.
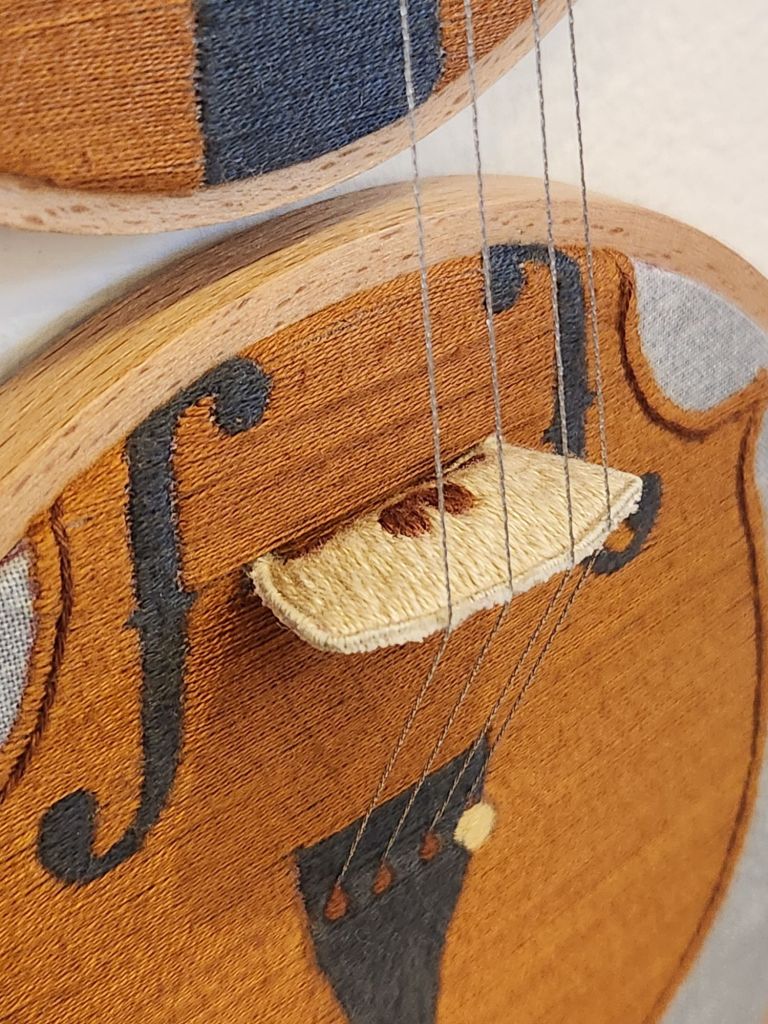
And, closeup of stumpwork of a violin’s bridge.
Very enjoyable day!
Filed under: ANG Main Line Stitchers Chapter, Laurel Burch Rainbow Butterfly by Danji
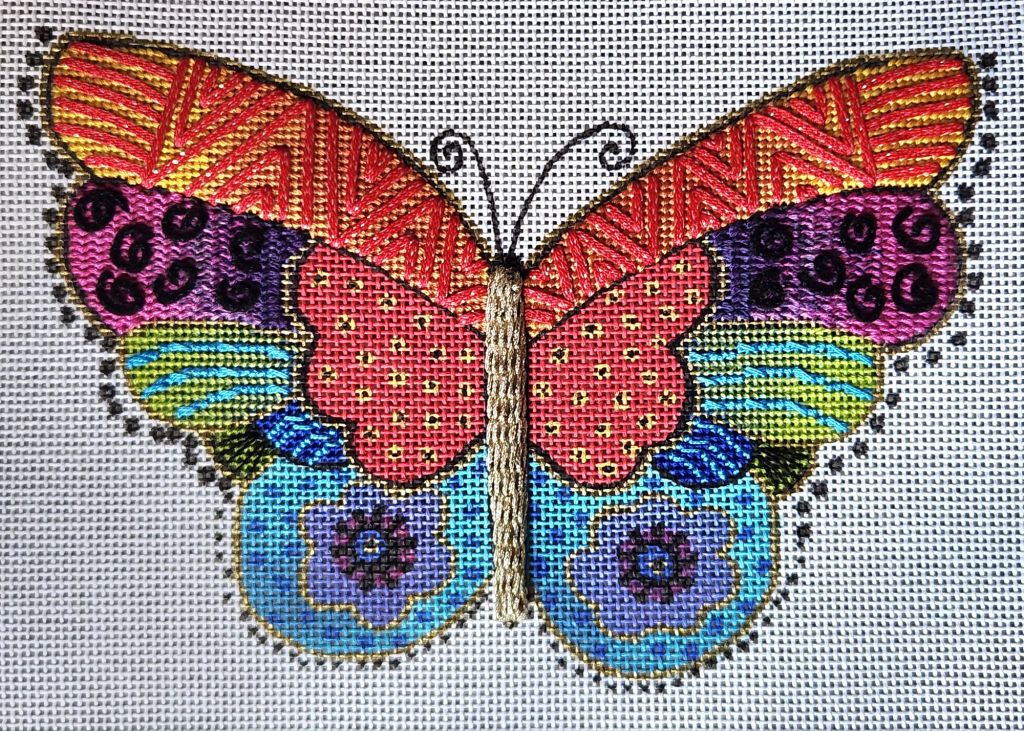
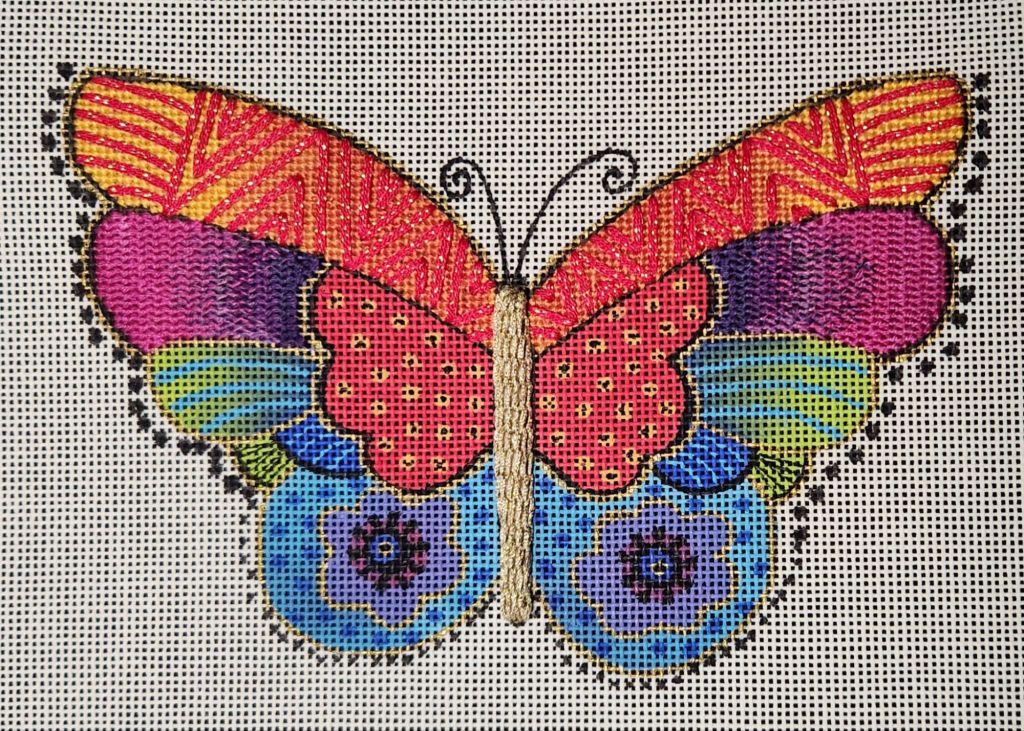
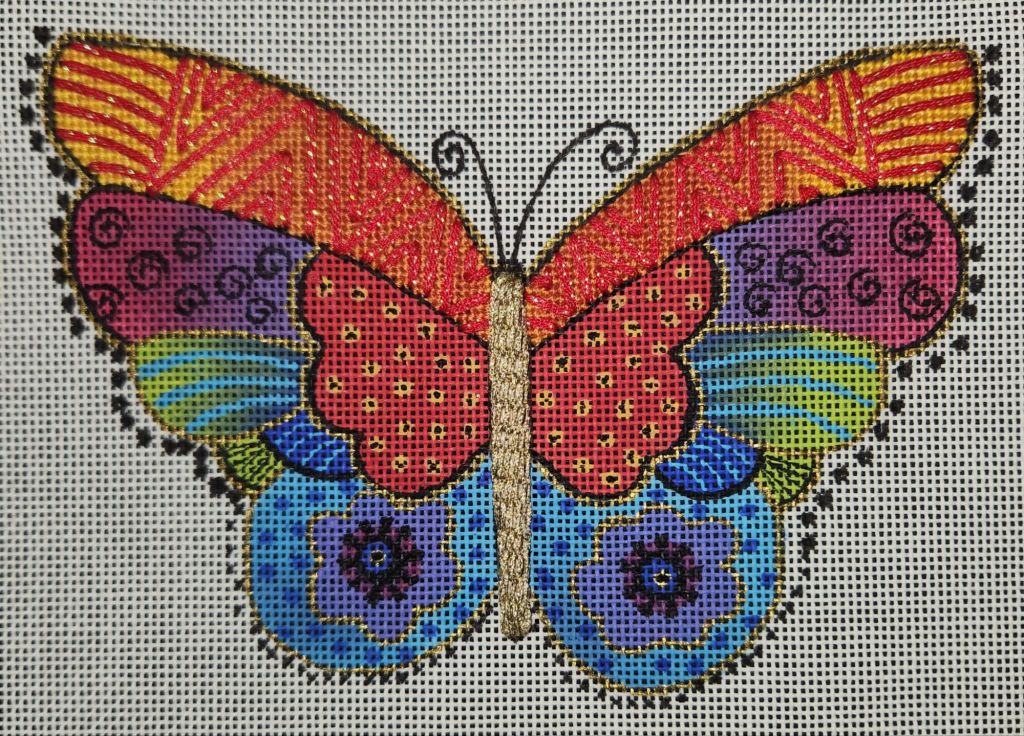
The final steps (antennae, outlines, and beads) of my Rainbow Butterfly by Danji.
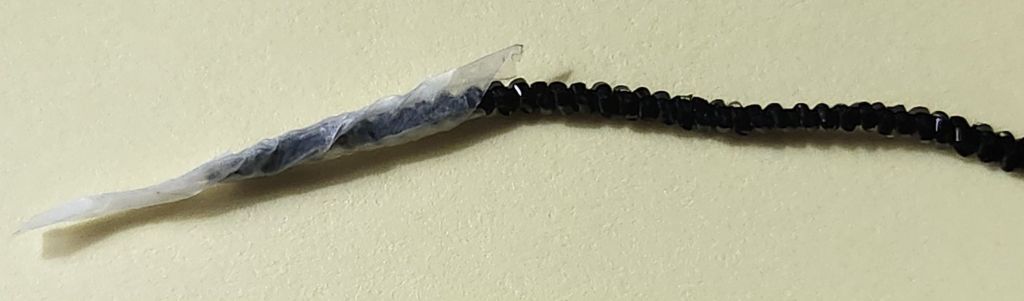
I wanted the antennae to be more substantial than the black outlines, so I used Kreinik Facets and Petite Facets, respectively. These were all couched into place with Kreinik #4 Braid in matching 005 Black. I had to make the starting and ending holes pretty large to sink the Facets. Wrapping the thread with tape and making a pointed end allowed me something to grab and nudge through the enlarged hole, which I then tacked into place.
I planned my path with the Petite Facets to minimize the number of starting and ending holes. One long piece goes from the top left side of the yellow-orange wing down and around the body and across to the top right side. Two shorter pieces follow along the top of the fuchia-purple area. I made the “tape needle” again to start each side but used a large eye needle to finish.
The Kreinik Petite Facets 002 Gold looked more gold than the Kreinik #16 Braid 002 Gold that I had used for the body, and it was too thick, especially considering how much was getting outlined. I couldn’t have gone to #12 Braid because I needed the thicker #16 Braid to cover the width of the outline. I couched with #4 Braid 002 again. I also used #4 Braid to outline the edge of the small green and blue areas.

I often refer to Marilyn Owen’s article in the ANG Needle Pointers May/June 2021 issue for beading techniques. I used 2 different methods to attach the same size bead with 2 strands of black DMC floss. Both methods orient the beads vertically, but one is over 2 canvas threads and the other over 1 canvas thread. This allowed the same size beads to appear larger on the top half compared to the bottom, which is how the canvas was painted. I used Mill Hill Antique Glass Beads 11/0 (03040).

I’ll wait to share the background until it’s fully finished.
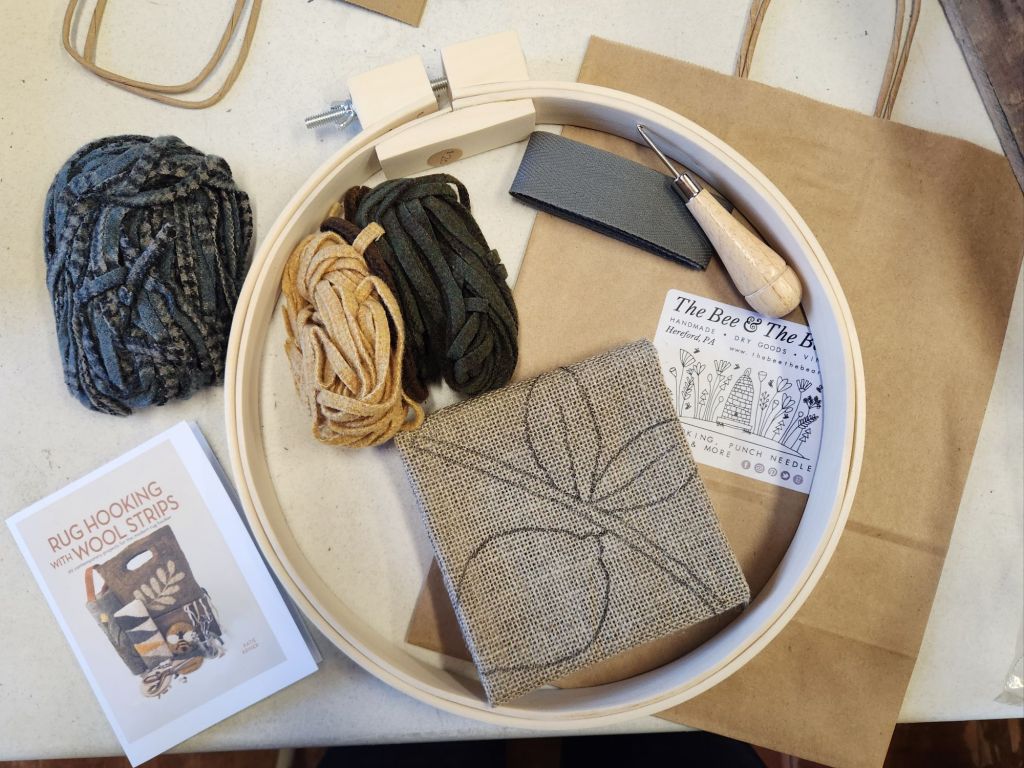
Here’s what mine is supposed to look like! Katie Kriner, owner of The Bee and the Bear in Hereford, PA had the models in the classroom for us today.
The kit made a lovely presentation to greet each of the 10 students (class max size).

Everything needed to finish the piece was included.
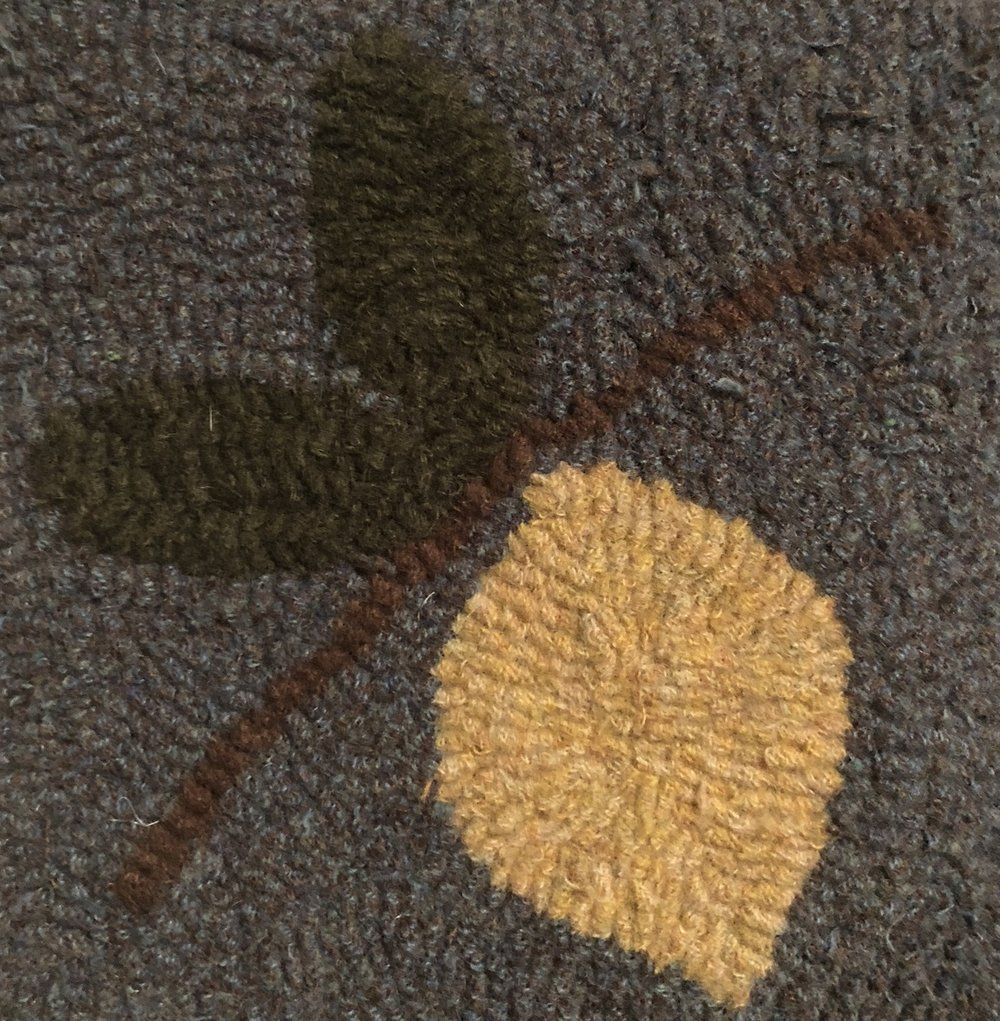
We’re working on wide weave linen (it feels rougher than the linen that I’m used to using for embroidery). Burlap is what was probably used many years ago, but the fibers break down. The strips are an “8” width (1/4″). They are also called worms.

We hook motifs first (lemon, leaves, stem) then background. As with punch needle, Katie had us work in a circular fashion toward the center.
The hooks don’t have the latch like what I used with precut lengths of yarn to make rugs back in my teens. Herrschners was where we bought our crafts back then, and they are still in business and still have latch rugs.
This is a different hook. It’s bigger than a crochet hook. Katie had a wide variety of quality hooks to try (smart businesswoman). The kit included a straight hook that wasn’t as easy to work with compared to the better ones. The dark wood ones (for $68-88) were pretty, but there wasn’t one with a bent shank. I decided the Hartman Hook with an ergonomic handle medium bent shank (5 mm) was my favorite (for $46). She offers $10 off to swap out the straight hook provided in the kit for any other hook.

I struggled some, but that’s not unusual in a class. I’m not in my comfy chair, lots of chatter, and an unfamiliar tool. You hold the hook above the linen in your right hand and hook the worm with your left hand below the linen. The woman across from me finished the leaves, stem, and most of the lemon before we ran out of time. I get it – you hook the worms! And, you cut the tails and leave them on the top.

Both Kristen and I needed a stand (we settled on a weight from a box). We both tried to put the tool below the surface on multiple occasions. And, we both agreed that the lack of precision (different height of loops at different angles) is not as pleasing to us as what we can get from needlepoint. But, it is our first attempt. Katie says we’ll see improvement as we progress. I believe that there is always a learning curve for any new endeavor.
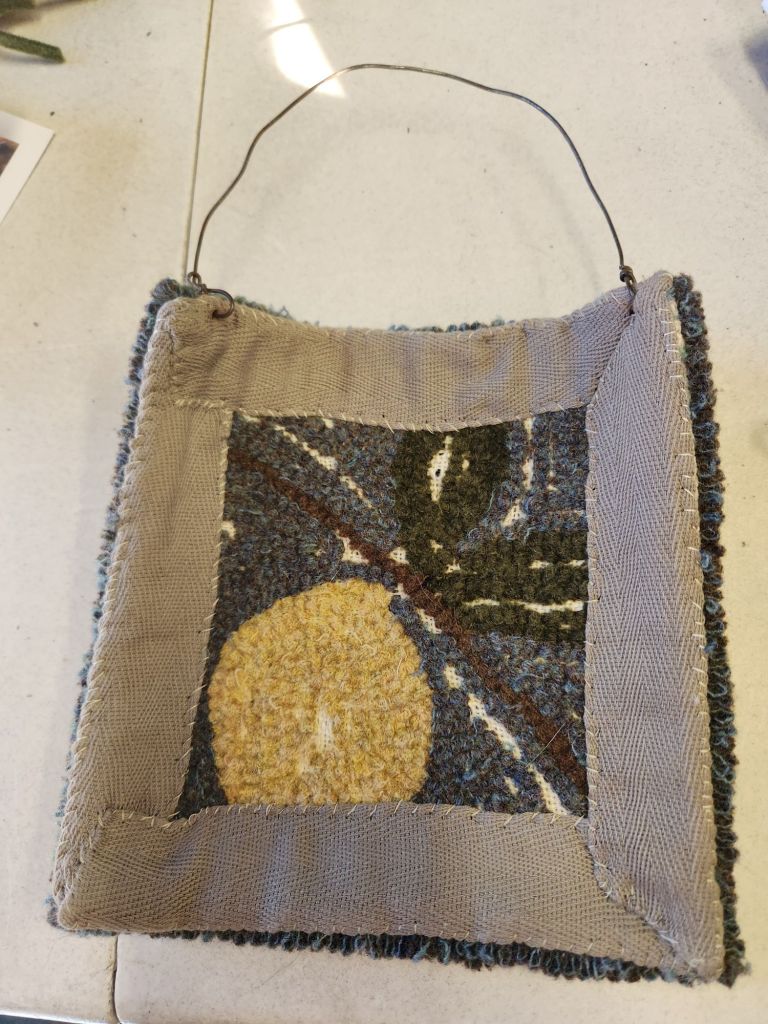
The night before class, I had seen a friend’s first attempt also in progress, but she had hooked hers so tightly that each motif was folding up on itself. So, I am probably a little bit on the loose side. We’ll see what happens as I do plan on finishing this and the punch needle (eventually). Here’s what the backside should look like.
Filed under: ANG Main Line Stitchers Chapter, Laurel Burch Rainbow Butterfly by Danji
It probably would have made sense to work the center red areas before the outer center areas on my Rainbow Butterfly (by Danji, Laurel Burch Artwork). But, it worked out ok.
I stitched over the red painted area with 3 strands of Planet Earth Silk, Fury 1005 using a Climbing Stitch located in Painted Canvas Embellishment: An Idea Book by Carole Lake and Michael Boren (in the section appropriated labeled Wings 2).
I ignored the painted placement of the Sundance Sequins (SQ216) and placed a few extra in the area which are held in place by Miyuki Delica Beads 11/0 (DB-0310, Matte Black). Again, the sides are uneven (the left side is larger than the right side).

Filed under: ANG Main Line Stitchers Chapter, Laurel Burch Rainbow Butterfly by Danji
These 3 areas in the outer center area will be the only areas where I will let your eyes “rest” (a little) anywhere on my Rainbow Butterfly (by Danji, Laurel Burch Artwork). Did you know? Butterflies “roost” at night and avoid the rain. The raindrops can be devastating for a butterfly, and so they seek shelter.
The combination blue and green area used a couple of stitch ideas from Painted Canvas Embellishment: An Idea Book by Carole Lake and Michael Boren. The blue crosses are my variation to fit my space of theirs from page 68 on Wings 2 (Planet Earth Silk Ply, Azure 1233). The green is alternating rows of tent stitch going in different directions to change the reflection of light (Planet Earth Silk Ply, Fiddlehead 1056 – love that thread name). The canvas does have shading with it getting dark towards the center. So, I used one strand of the Planet Earth Silk in order to see some of the coloration of the canvas show through.
I did basketweave in the other areas with 2 strands Planet Earth Silk. I didn’t want it heavier than the blue and green area. One strand of the black worked fine for the lines.
Working this out on my computer before stitching it was very helpful. The sides are not perfectly identical. Did you know? Asymmetrically-winged butterflies are called chimera [ky-mee-ra] butterflies.

Filed under: ANG Main Line Stitchers Chapter, Laurel Burch Rainbow Butterfly by Danji
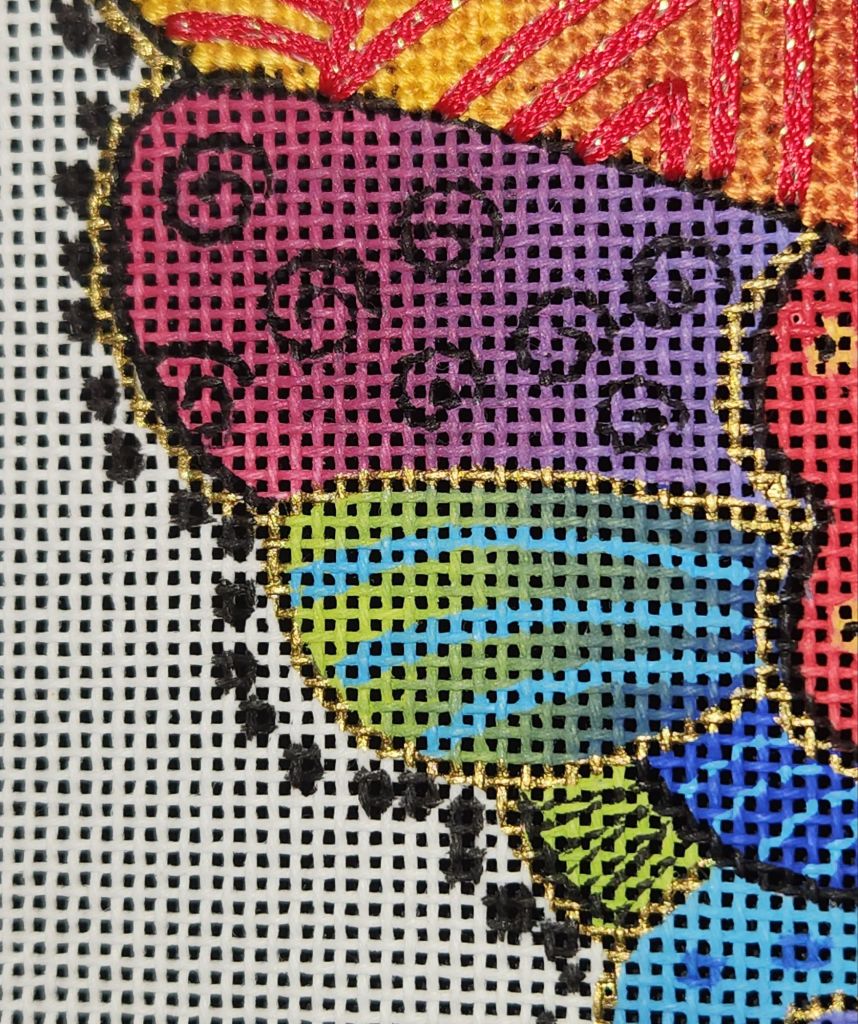
Next up was the fuchsia-purple area. This is another area with a lovely color shift from fuchsia to purple. I found Waterlilies 084 African Sunset in my stash and got Waterlilies 286 Aubergine (means eggplant).
Top left.
Top right.

I started with 4 strands of fuchia, then thread blended with purple in 3 steps (3+1, 2+2, 1+3), and finished with 4 strands of purple using a knitting stitch variation from Desert Island Stitches, Volume 1, pg 46.
Again, relying on my photos, I couched black Velour Yarn Fine Mesh by Fleur de Paris with one strand of DMC Floss 310 black. Instead of the 8 swirls, I only made 7 of them because of the odd number rule. Although, looking at the painted canvas, I see them grouped as 5 and 3, which looks fine too.

I couldn’t pass up the butterfly magnet by Accoutrements. They are pretty and strong.
Kristen used a fuchsia-purple overdyed and let the colors fall as they came. It was an excellent and less complicated option.
Filed under: ANG Main Line Stitchers Chapter, Laurel Burch Rainbow Butterfly by Danji
Back in August, I posted about the padded raised stem stitch that I used for the body (https://melitastitches4fun.com/2024/08/16/raised-stem-stitch-for-rainbiw-butterfly/).
I’ve been working on it while Kristen from my ANG Main Line Stitchers chapter has been working on hers. We each selected our own stitches and threads without sharing ideas. We both got done for this month’s chapter meeting. So, we revealed the progress photos and discussed choices as the program topic. I’ll post by area over the next few days.
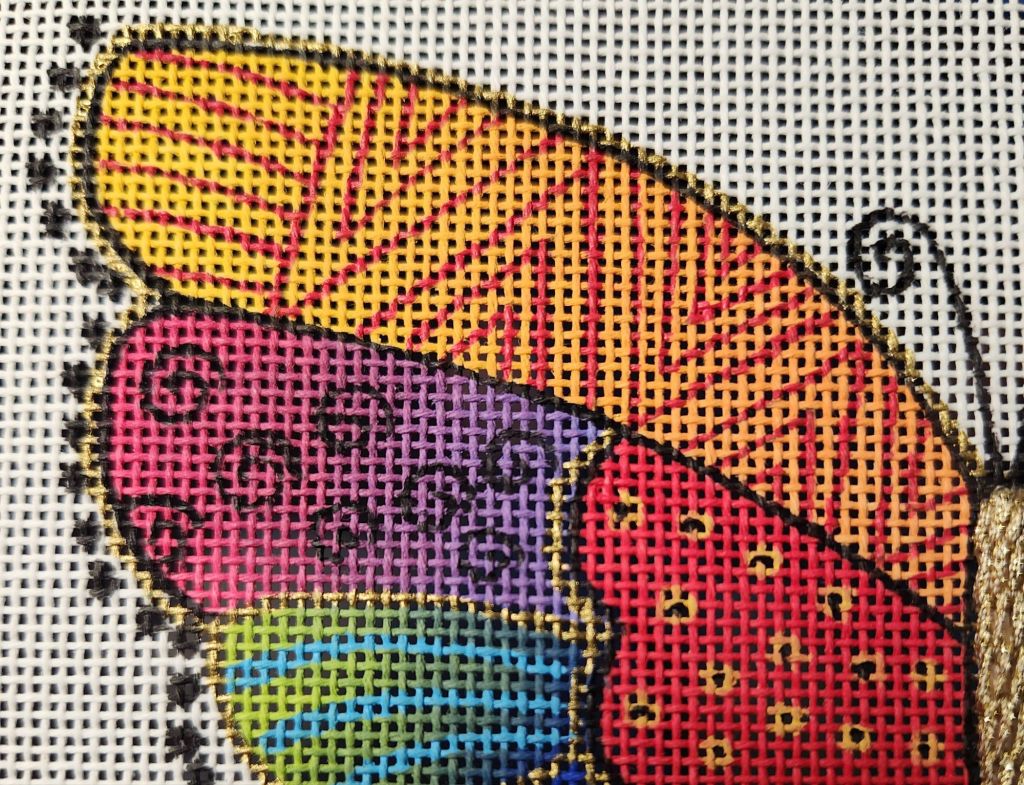
For the top part of the wing on my Rainbow Butterfly by Danji, I found Waterlilies 280 Casabasa that has a color change from yellow to orange that very closely matches the colors on the canvas.
Left wing.
Right wing.

I decided to basketweave, which meant I would cover the red lines. I’ve never tried covering an area so completely to stitch on top of before, so I took close-up photos.
There was about 24″ left of the Waterlilies left because I had to cut lengths that moved from yellow to orange.
Kristen did basketweave, too, with an overdyed that created repeats of the yellow to orange color changes for a more banded effect. I’m sure hers was easier and looked great, especially since the red lines covered some of the area.

By carefully following the photos, I was able to place lines of Sparkle Rays (SR29) where they were meant to go. It’s probably not going to be something I do too often, but these were straight lines in a small enough area to give it a try. I just love that sparkle in Sparkle Rays. Kristen used a Kreinik Braid very effectively.
I decided to match the right side to that of the left partly because Sparkle Rays is a flat ribbon slightly wider than the painted lines. The inter wrapping triangle on the right wing had bothered me anyway. So, I followed the left side mostly. It’s not painted as widely as the left side, and so it does differ slightly.
Filed under: ANG New Jersey Needle Artists Chapter, Christmas Ornaments, Festival of Trees, General comments, Melita's Designs
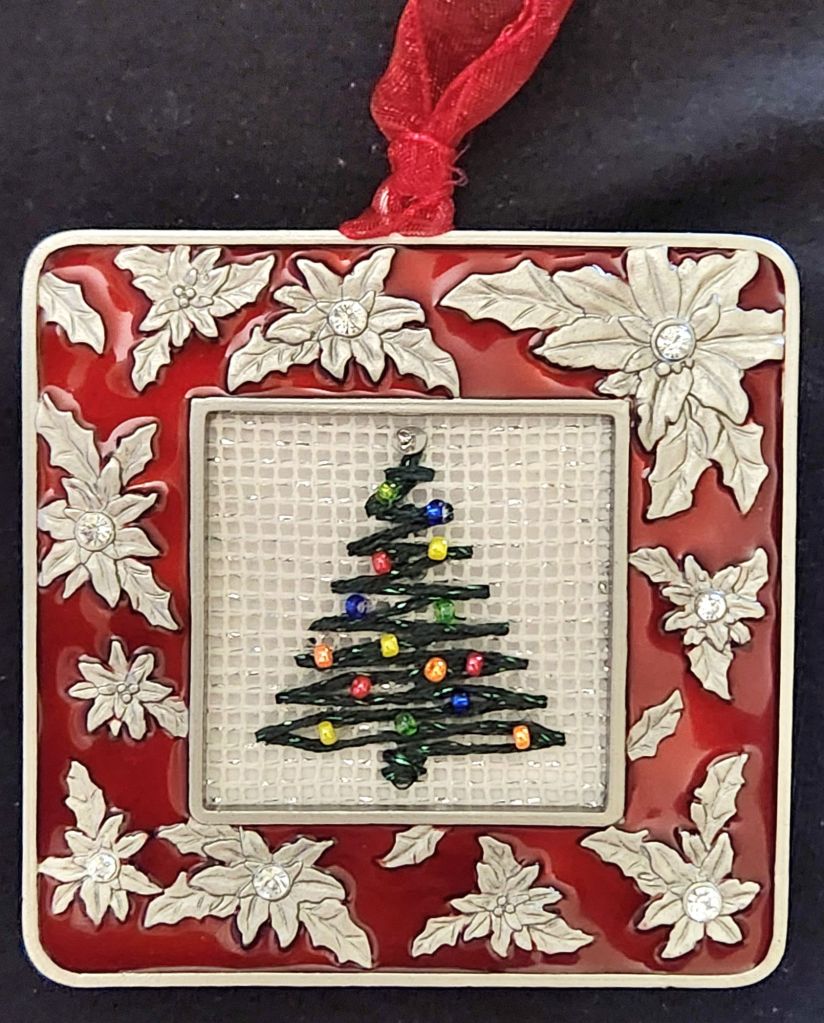
Sue C from New Jersey Needle Artists Chapter had this frame in her unwanted stash pile, and I knew that I would make a nice ornament for the chapter’s tree at the Festival of Trees held annually.
There will be 2 large rooms on display at the Environmental Education Center in Basking Ridge, NJ (190 Lord Stirling Rd). You can see them Friday, December 6, through Sunday, December 29 (except 24th and 25th).
So, I dubbed this ornament Festive Tree for the Festival of Trees. There is silver Kreinik #8 Braid in a diagonal gobelin stitch to secure the edges the size of the frame (doesn’t show). One length of green Silk Lame Braid for 18 count was used to form the base and criss-crossed upward to create the tree. There is a silver sequin and a bead for the tree top and 3 beads of 5 different colors (blue, green, red, yellow, and orange) making up the lights. The canvas has silver sparkle in it.
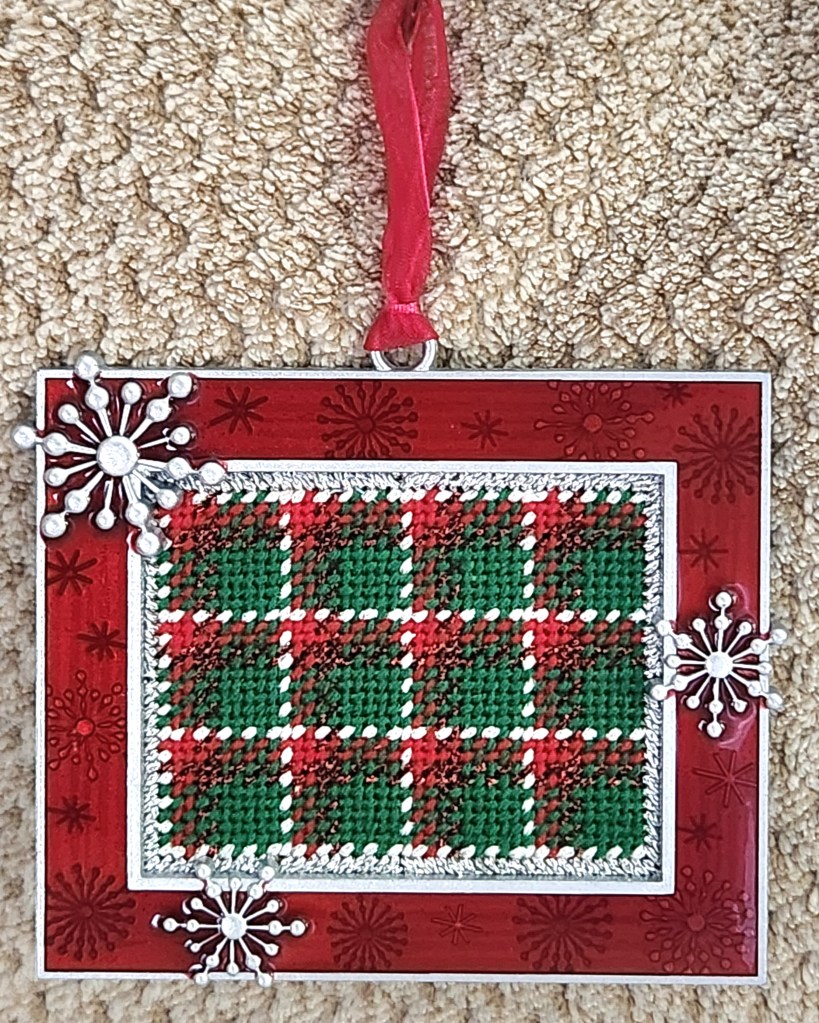
I delivered it, and the Christmas Plaid ornament I posted previously to Jacqui at the November of the Central Jersey Chapter (CJC) Saturday meeting/Stitch-in (every 3rd Saturday 10-3).