Filed under: Explore and Design with Debbie Rowley
I realized that I didn’t post my Diamonds, Triangles, and More design probably because I wasn’t sure what I would do with it. I still don’t know but wanted to share it anyway.
The class, Explore and Design, with Debbie Rowley began in February earlier this year and I read through our booklet upon arrival and dove right in! I detailed my progress within the groups.io platform during the 6-session class throughout March and April. I mostly did this piece just to play with the variety of stitches in the booklet Debbie provided. It was a very extensive booklet. So, I have almost no repeated stitches. The motifs in yellow are larger than I usually stitch which is why I choose them. I used a thin thread to see the motif better. I might like this better if I used a colored canvas because canvas does show. I also learned that a continuous Herringbone border does not work our perfectly! Trust me I tried – more than once.

I am very interested in getting to my garden path, Flowers Along a Rhode. I have it diagrammed and just need to find time to start stitching.

During Friday’s reorganization, I gathered all my laying tools.
On the top is an African porcupine quill topped with a bead that was made by Patrick B. The middle row starting on the left has an extra Trolley Needle (went to Ebay; my other one is in my travel tool tote). Next is my fancy Celtic laying tool based on the Trolley Needle design that I use at home (it has a blunt end, and I’ve never come close to poking my eye with it). The “Stitcher’s Best Friend” (SBF) is third and has a nice angled tip, so I brought it upstairs to give it a try. The 4th is the “Best Laying Tool” (BLT), but not for me, although I will keep it in the basement cabinet because it says it’s an American style “Tekobari” with a really sharp tip which is needed doing goldwork.
On the bottom is a double end dental tool that I got as a free gift when daily drawings were held at ANG Seminars. It comes in handy for different things!
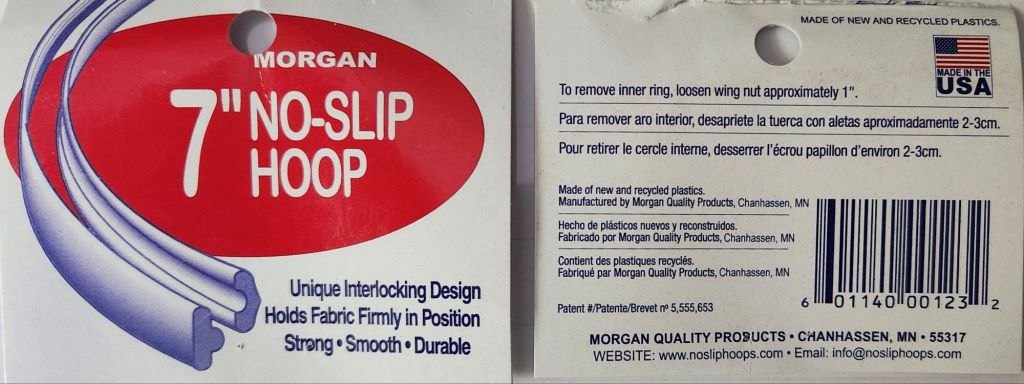
Since Saturday was ANG Main Line Stitchers chapter Stitch-in, I grabbed the Adjustable Stretcher Bars by Frank A Edmunds (they didn’t keep the canvas tight and easily got bumped out of shape) and my plastic hoops (I will use Morgan hoops or wooden ones wrapped in twill tape) and dropped them off for sale on Ebay.
I also threw in 1 of 2 Crafter’s Pride “Stitch A Ruler” because I plan to stitch a blackwork piece for 1 of them (I won’t need 2).

It may not be much to get rid of, but it’s some progress in a never-ending goal of getting organized.
After yesterday’s punch needle saga, I used this afternoon’s much needed, rainy, dreary day to tackle a few drawers in the basement.
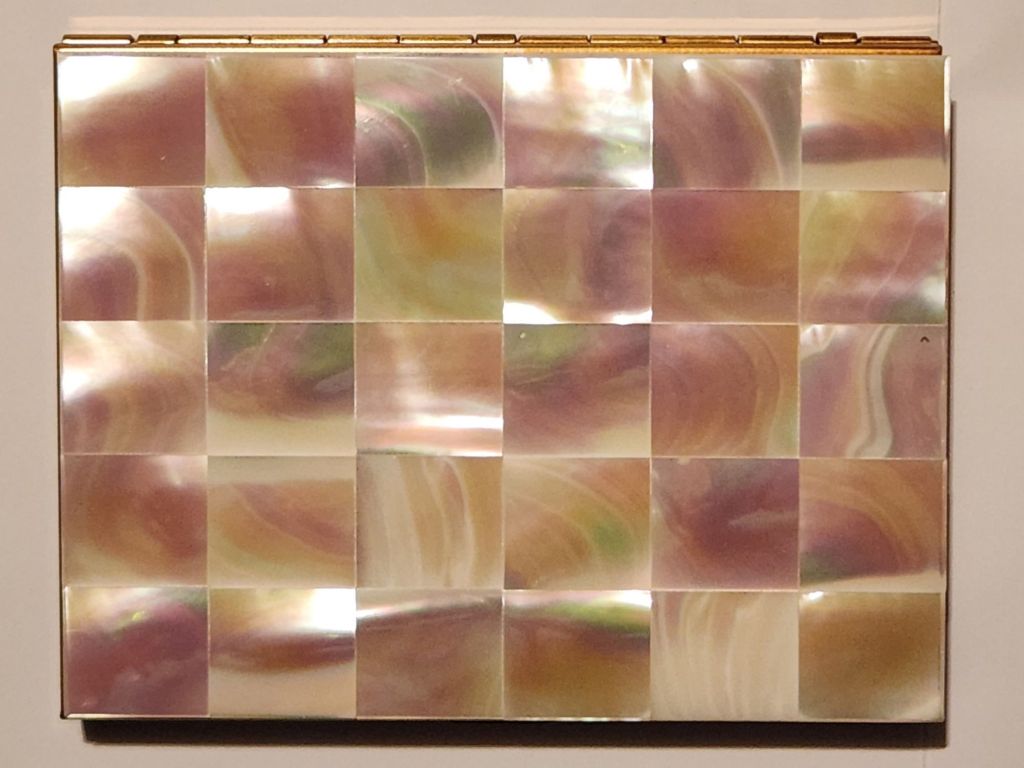
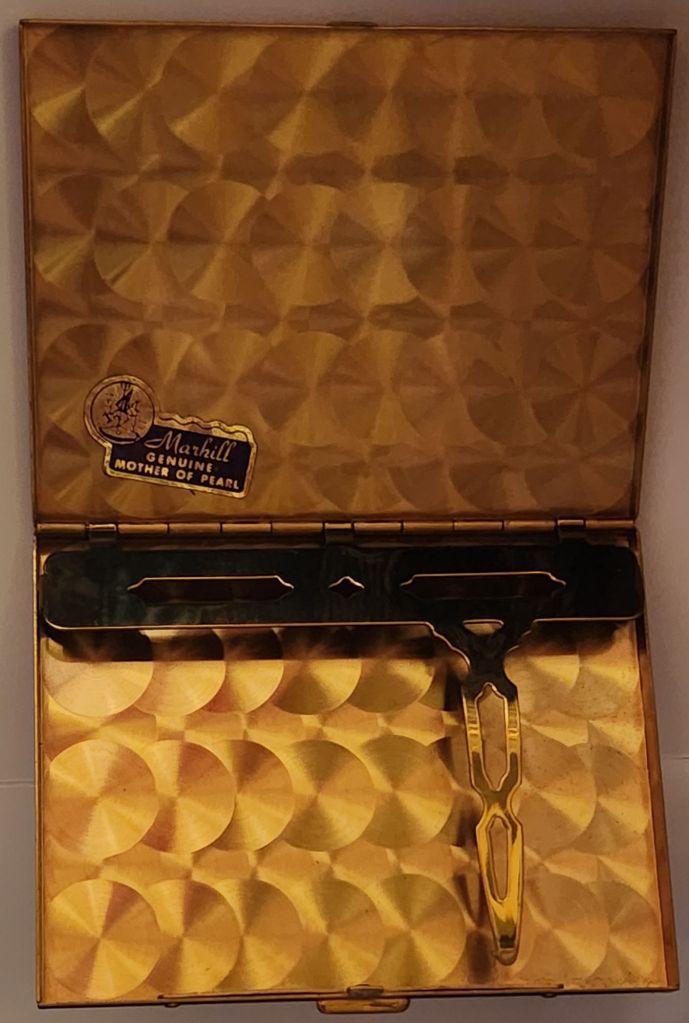
It didn’t take me long to channel Patrick B from my ANG and EGA chapters to finally repurpose a lovely mother of pearl vintage (1950’s) Marhill cigarette case into a needle case for my beading needles. It has no chips or cracks to the mother of pearl and is in fantastic condition inside too. The case still has the original “Marhill” sticker inside and measures 3 by 4 inches. I even have a Marhill purple pouch to hold it, which is probably why the case is in such good condition.
I’ve had these business card magnets for several years, which were bought for the case. However, I was never able to find both the magnets and the case at the same time. I got lucky today!
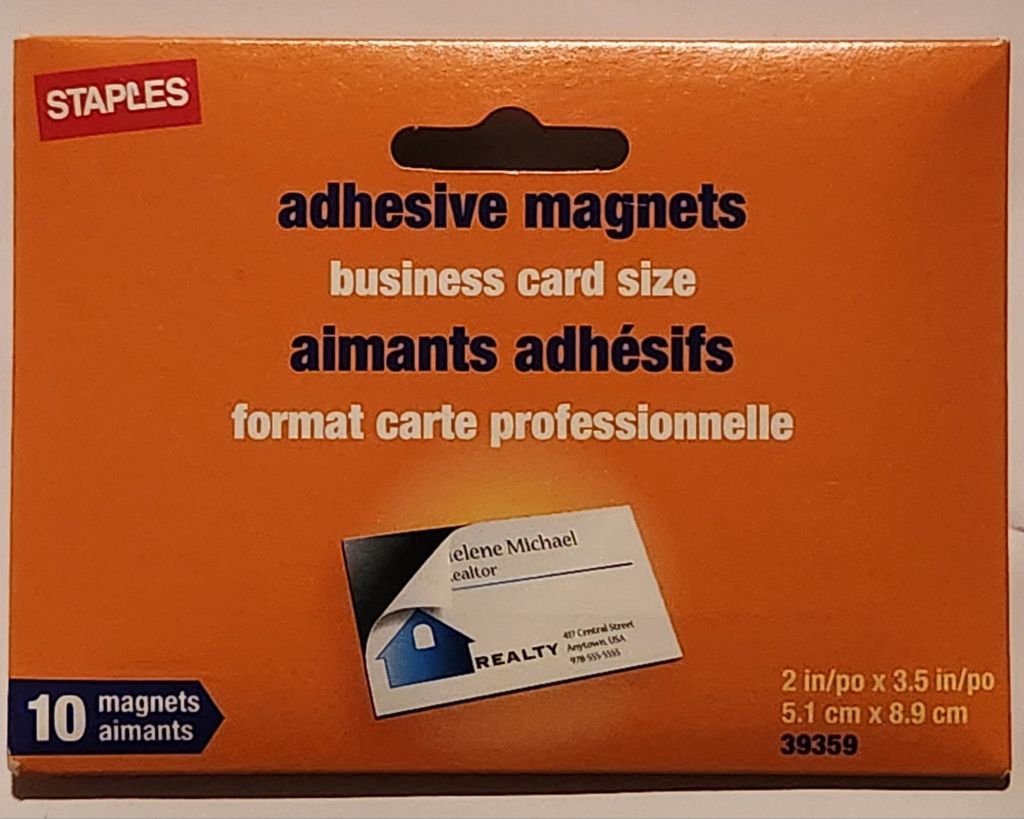
I cut 2 magnets to fit side by side. One side is sticky. It now holds the beading needles that I don’t know what size or brand they are.
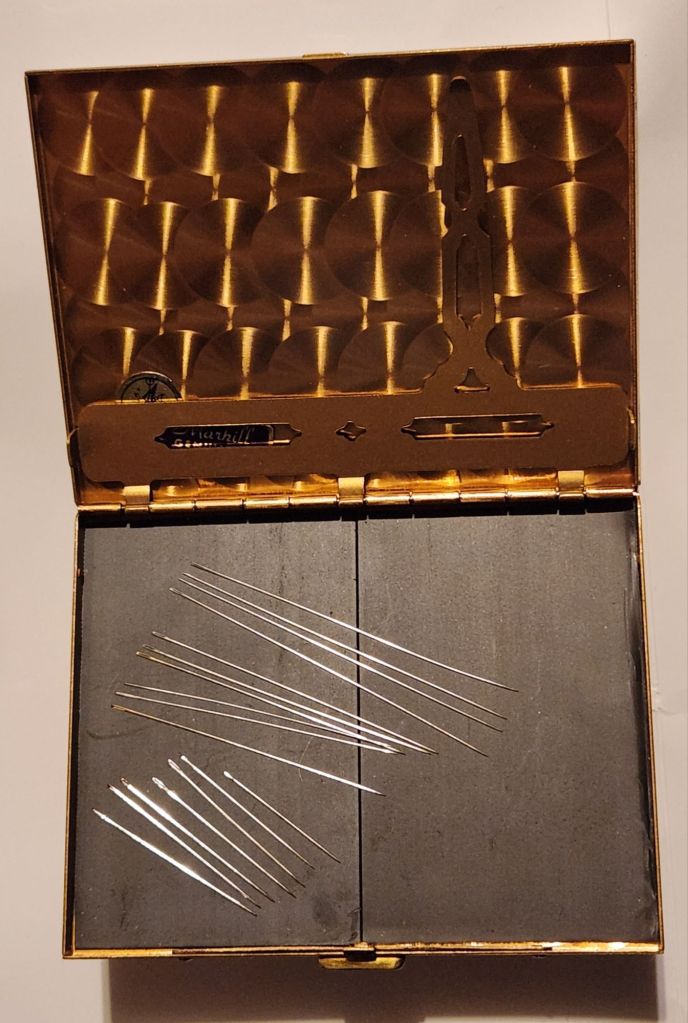
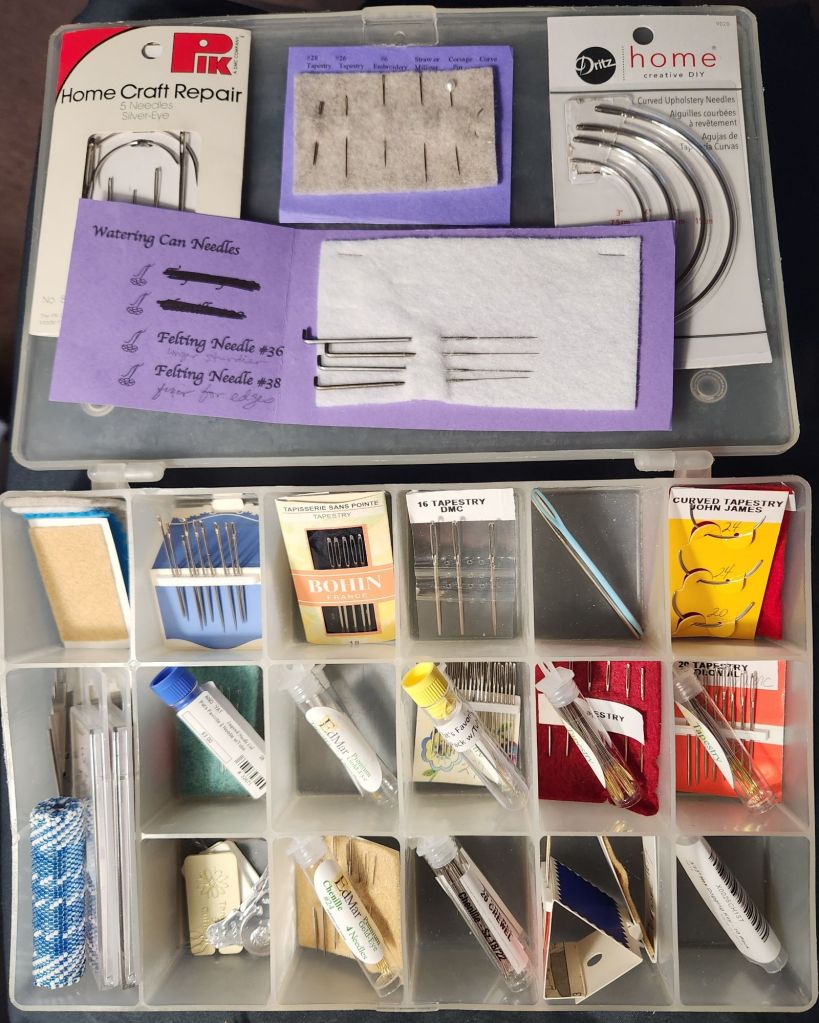
My EdMar #11 Beading Short Needles and Tulip #10 Beading Long Needles are in a tube that won’t fit in this case. The pack of Bohn #28 Tapestry needles really aren’t beading needles but work for many beads. I’ll keep these with my new case in my beading box.
With that success, I tackled my regular needles and tossed about 2 dozen used needles. I think I can replace my needles more frequently!
That’s enough for today.
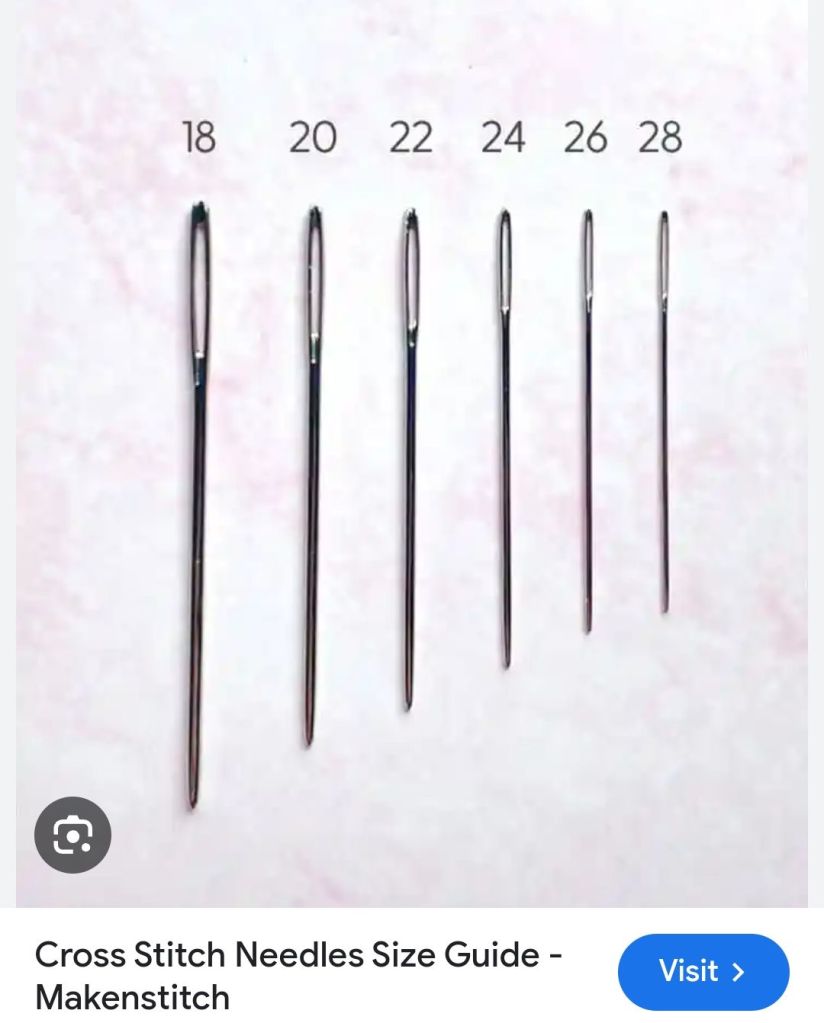
Here’s a Tapestry needle size guide.
Filed under: General comments, Needlepoint Shops, Punch Needle, The Bee & The Bear - Punch Needle
I have (or had) 3 punch needle projects that I tried without success. They were not where I expected them to be. I was going to take them to my class. Damn, Bill was right – he said I wouldn’t be able to find them! Is it possible that I gave up on them and put them in an Ebay auction at Fireside Stitchery?
Here’s a photo of the one I picked up in 2013 at Liberty Cottage, a Folk Art Stitchery store – close to Expressions in NeedleArt in Canandaigua, NY. I know this thanks to my post https://melitastitches4fun.com/2013/07/17/needlepoint-visit-to-rochester-canandaigua-ny/. I’m happy to say both stores are still operating. I don’t get there too often but they are well worth the visit if you’re in the area (30 minutes southeast of Rochester).
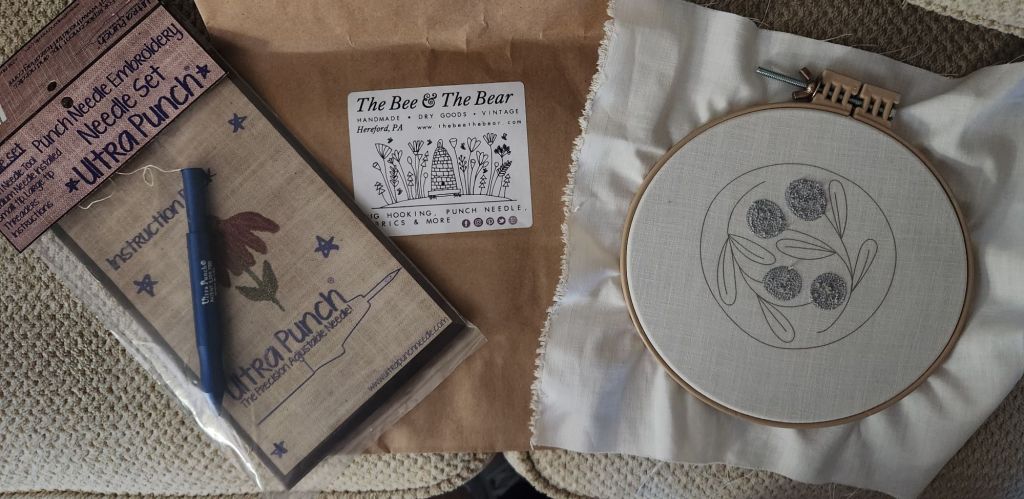
I signed up for this class as soon as I saw “Punch Needle with Embroidery Floss for Beginners” would be at Mainline School Night(.org). The teacher is Katie Kriner, Author, Fibert Artist, Shop Owner of The Bee & The Bear, which I see is in Hereford, PA (about 1 hour 20 minutes north of Philadelphia-kind of between Allentown and Reading). From the photos, I would describe it as a Folk Art Stitchery store, too.
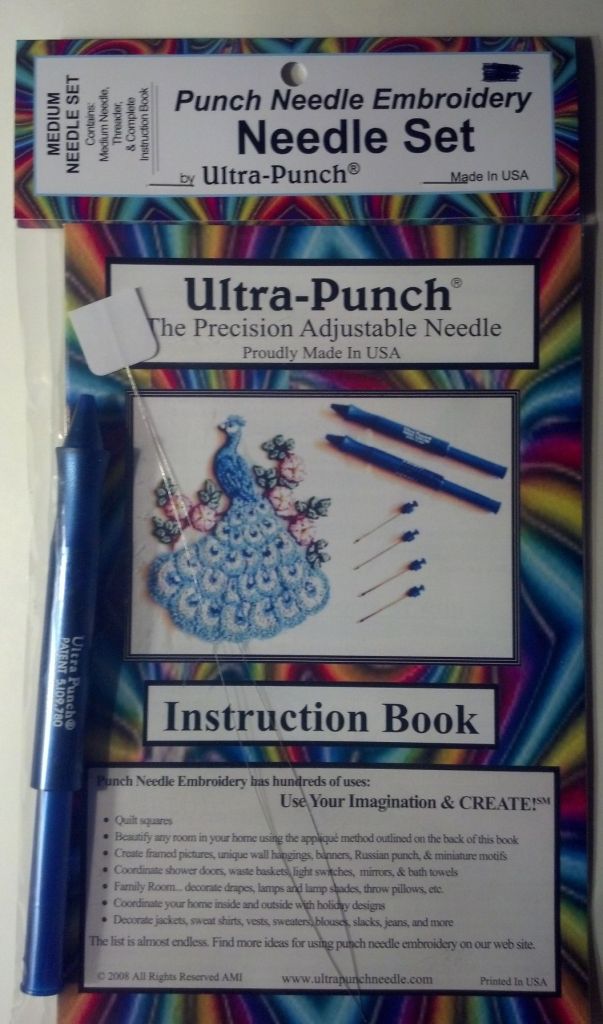
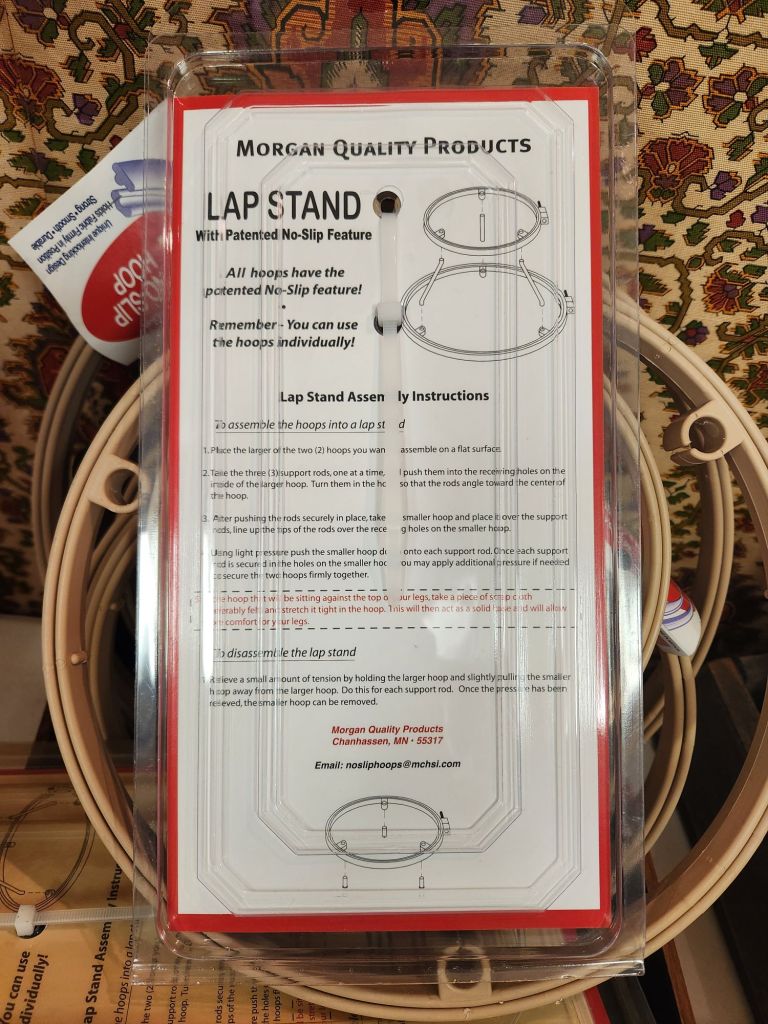
Class description: Learn to punch an intricate floral 4” embroidery hoop; choosing between various different flower colors. Leave with instruction and knowledge to punch and the tools to create your own future pieces. Class materials include an ultra punch punch needle, 7” Morgan interlocking hoop for punching, wooden display hoop, backing fabric, and floss to complete the piece.
The class was in the Creutzburg Center – 260 Gulph Creek Road (in Harford Park) Radnor, PA 19087. They hold a variety of classes there. The parking lot was full. It’s a great venue.
The Morgan hoop as a single hoop is fantastic. You can get the fabric really tight because of a ridge inside the one hoop (interlocking design). You can get a pair of 5″/7″ or 7″/10″ and make a lap stand. I’m surprised that nobody in EGA has ever mentioned these.

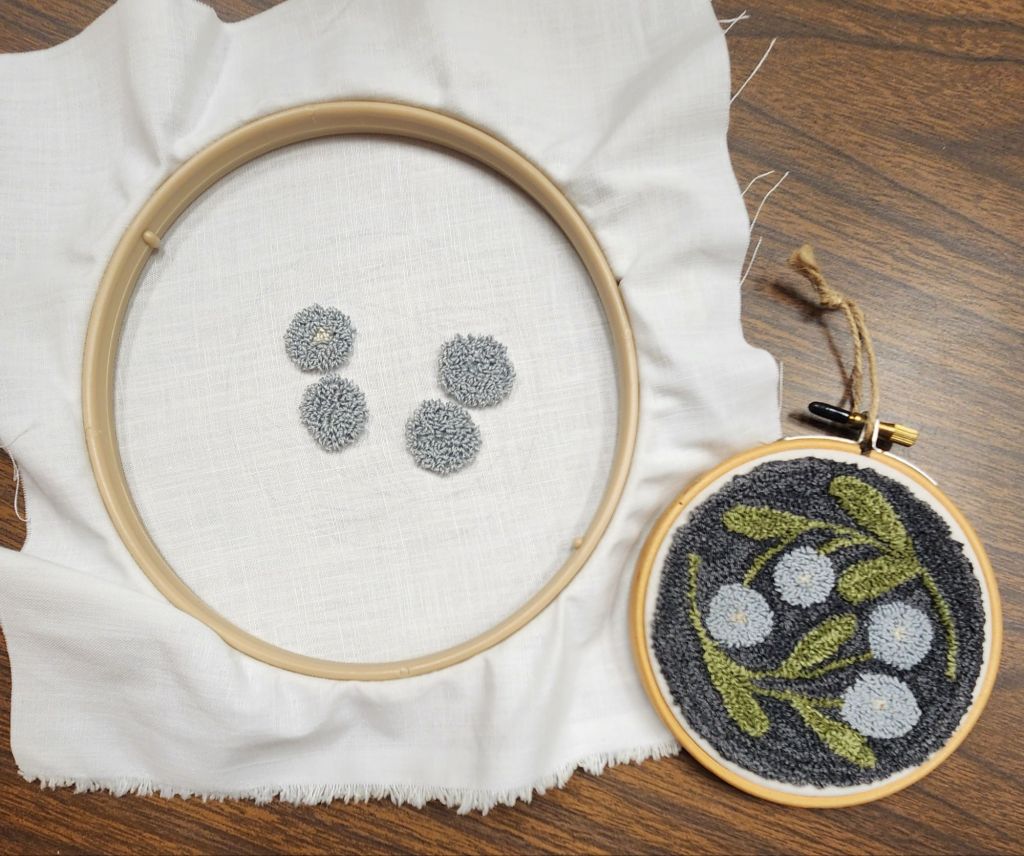
The ultra punch needle is the same as the one I can’t find. Perhaps I didn’t thread the needle properly. Or, perhaps I didn’t understand that you punch on the design side and that is actually the back.
This is what I got done during class (left side) and what it should end up looking like (teacher’s sample on the right).
It was a small class of 8 people and 2 hours went quickly. Katie is a mother of 2-year old twins (boy and a girl). Very nice woman. She brought some of everything from her store to entice us! I can always make a road trip to Hereford, especially if we visit our friend near Jim Thorpe.
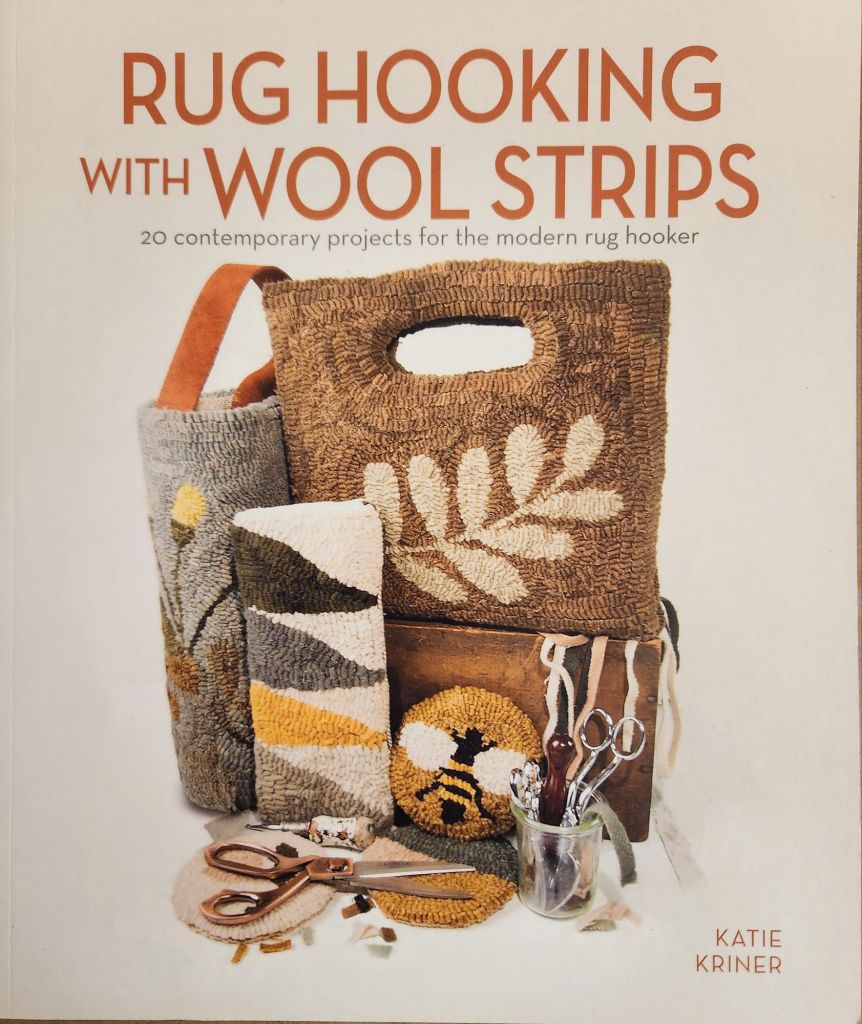
Katie wrote a book during covid. She sells it at her store, on her website, or Amazon. She has an Etsy store. I’ll probably try her rug hooking class. It uses a different tool and yarn.
As I was finishing this post, I realized that the punch needle that I purchased should be in my infrequently used “tool” drawer in the basement cabinet. I was looking for a project. I wondered why I’d buy a peacock to punch. It was there! Now, I can punch with 2 different colors without switching threads. It’s a process to thread the punch needle. I still don’t know where those 2 little punch needle projects are hiding. Katie’s ultra punch needle came with 2 threaders, 2 springs, and 3 needles (small, medium, and large). So, I am set with equipment.
Filed under: ANG New Jersey Needle Artists Chapter, Ribbon Candy Ornaments
Nancy B from New Jersey Needle Artists Chapter put together lovely kits to make 3 Ribbon Candy Ornaments at this month’s meeting.
We were given 22″ lengths of Grosgrain ribbon with stripes printed on both sides in Christmas red, green, and both. Nancy said locating the ribbon was the hardest part. I did a search just now and can’t find these colors in stripes. She marked the end at 1″, 2″ increments, and 1″ from the end on each of our ribbons. That made it super easy for us!

We got 7 small and 7 large clear beads for each ornament (4 mm, 6 mm, or 8 mm), matching green and red floss, and a needle.
The instructions are from Martha Stewart, but Nancy walked us through it (in person and for Zoom people).
I revised how to make the loop on my second one, so no knot end would show. The knot you see holds the bead in place.

I tied it off inside the first fold.

Then, I tried to end with a knot, but it wasn’t as close to the bead as I wanted. So, I went back through the bead and tied off inside the last fold. The little green loop is a happy accident!
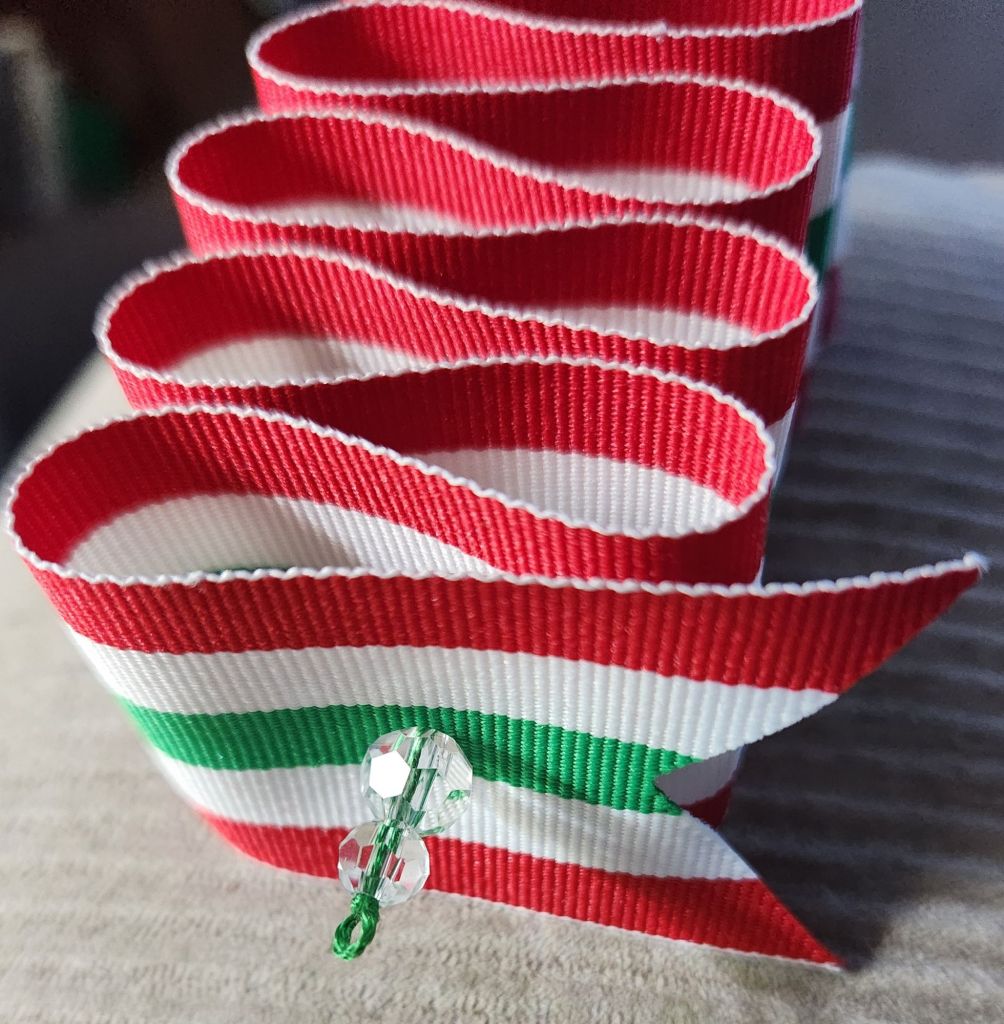
My third one worked up easily.
Place your loop right of both beads.

Make a knot right of the small bead at your preferred loop length.

Run both threads through ribbon and tie a knot with the short end. Pick up a bead with the long length.

Alternate a small and large bead as you progress. I ended with a knot close to the bead and still ran it through the last fold to knot again and cut.

My loops are a little long for this hanger, but all three are ready for our Christmas tree.

Lovely, fun, and quick. Thanks again, Nancy!
Filed under: ANG Central Jersey Chapter, Summer Fireworks by Ann-Marie Anderson-Mayes
I started Summer Fireworks by Ann-Marie Anderson-Mayes at today’s Saturday meeting/Stitch-in at ANG Central Jersey Chapter (CJC). They meet on the 3rd Saturday of every month (from 10 am – 3 pm; I try to make it quarterly).
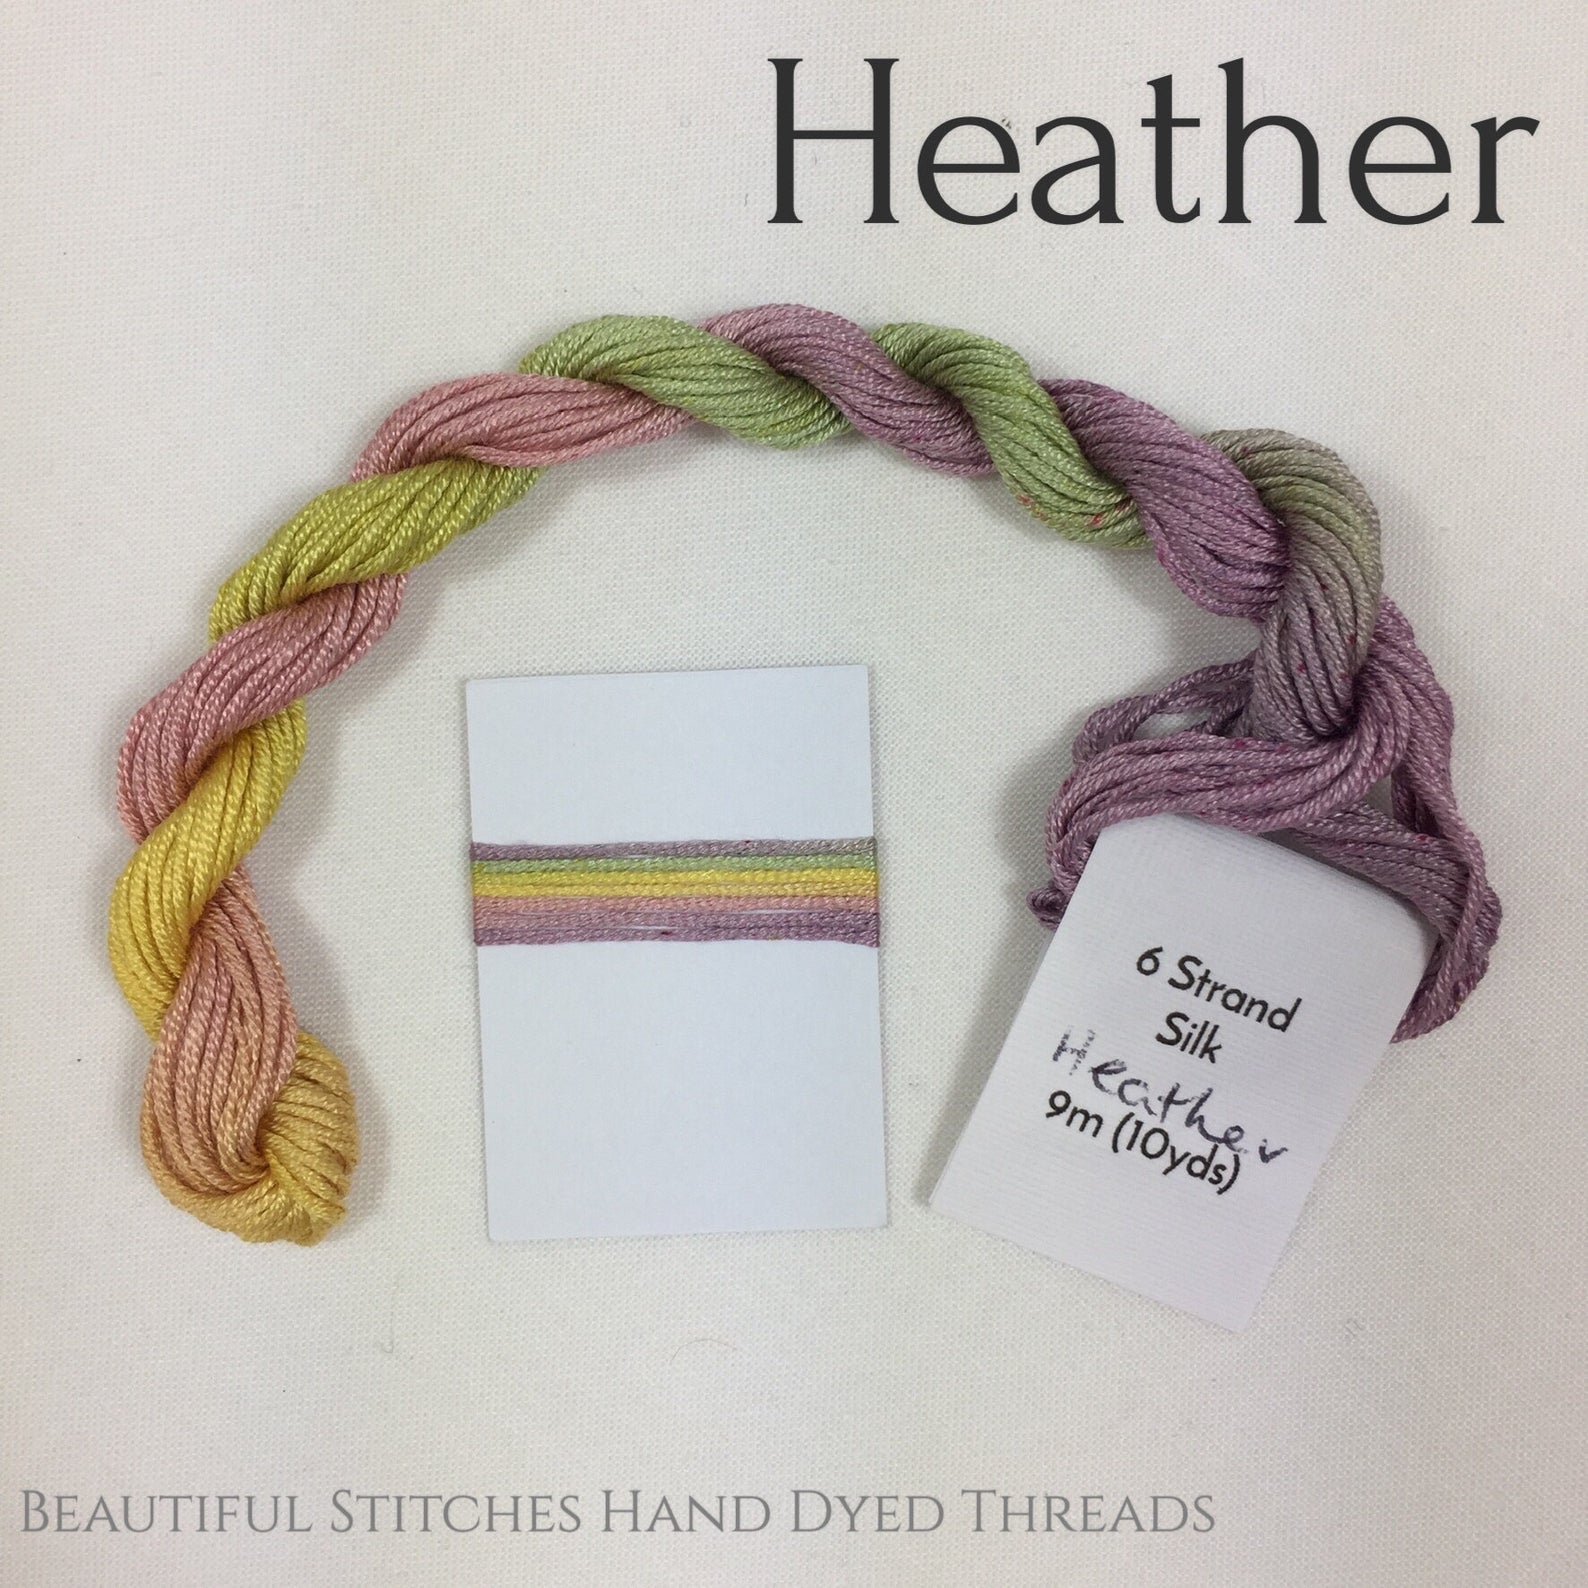
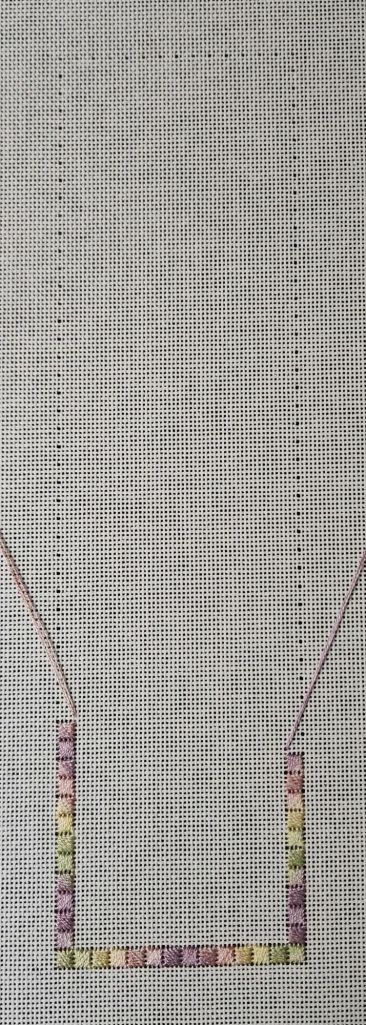
The chapter provided the Congress Cloth and threads, but I had enough of the lovely threads Ann-Marie sells on BeautifulStitches (.com.au) leftover from two previous projects based on Heather. A few people started stitching it last month in different colorways. It’s one of several free designs available on her website.
I do find black tougher to stitch on but it would look fantastic on black too.
As I read the instructions, I commented that the outermost border, a Van Dyke stitch, looked like it would be difficult to count. Sue C said she started with the Scotch stitch border before the Van Dyke border and said it was easy to avoid counting errors. An advantage of having others get started first on a project. So, I marked off the Scotch stitches with the needle (see the outline of enlarged holes). I prefer that to spend time basting. And, on Congress Cloth, it’s easy to see the holes (just don’t count wrong since it can be tough to make the hole small again).
We’re using 3 strands for each Scotch stitch. So, I am creating a mirror image working up each side. Here’s my progress for the day.
Filed under: ANG Needle Pointer's Timeless Treasures From the Archives
A series of articles, “From our Mind into a Design” were published in American Needlepoint Guild’s (ANG) Needle Pointers magazine by Debbie Deem in the 1980s. Debbie takes a thistle sketch and leads you through the process to develop a very creative interpretation of the sketch (not pictured here). I’d love to stitch it. Here is how a thistle stem became a border. Very ingenious.

From a google search, I see Ann Strite-Kurz took a Color and/or Design class from Debbie. Debbie started a blog in 2009 but it didn’t last long (artneedlethreadstitches). She shows how she paints a canvas and a few designs in classes she was teaching, including Starship Needlepoint and Stitching Sudoku, both of which appeal to me. I haven’t seen her book, but she and Mary Anderson published Stitchery Under Southern Skies Eleven Needlepoint Designs for the Creative Canvas Embroiderer. I don’t know any more about Debbie. If you know/knew her, please leave a comment and share a memory.
Join the American Needlepoint Guild (ANG) to get access to more about this topic in the Timeless Treasures from the Archives article in the current issue of Needle Pointers (November/December 2024 at https://www.needlepoint.org/page/NeedlePointers) and all the issues since the 1980s. The issue will be in the mail soon, but it’s online now.
Read about all the ANG member benefits at: Click here.
I don’t think that I mentioned that the Needlework and Textile Guild of Media moved to the Media Bourough Hall in Media, PA. We still meet on the 2nd Tuesday at 7 pm.
Karen taught us how to bead a felt purse. Her favorite book on the topic is Fine Embellishment Techniques by Jane Conlon. She has taken a few plain shirts and added beads around the neck to dress them up. Very nicely done. Karen usually attaches them with a single strand of polyester sewing thread because it’s stronger than cotton. She has used invisible thread but finds it difficult to see. I hear that!! She puts the shirts in the washer, no special care.

I used the Coral stitch on the sides. I skipped the strap because I won’t use it as a purse.

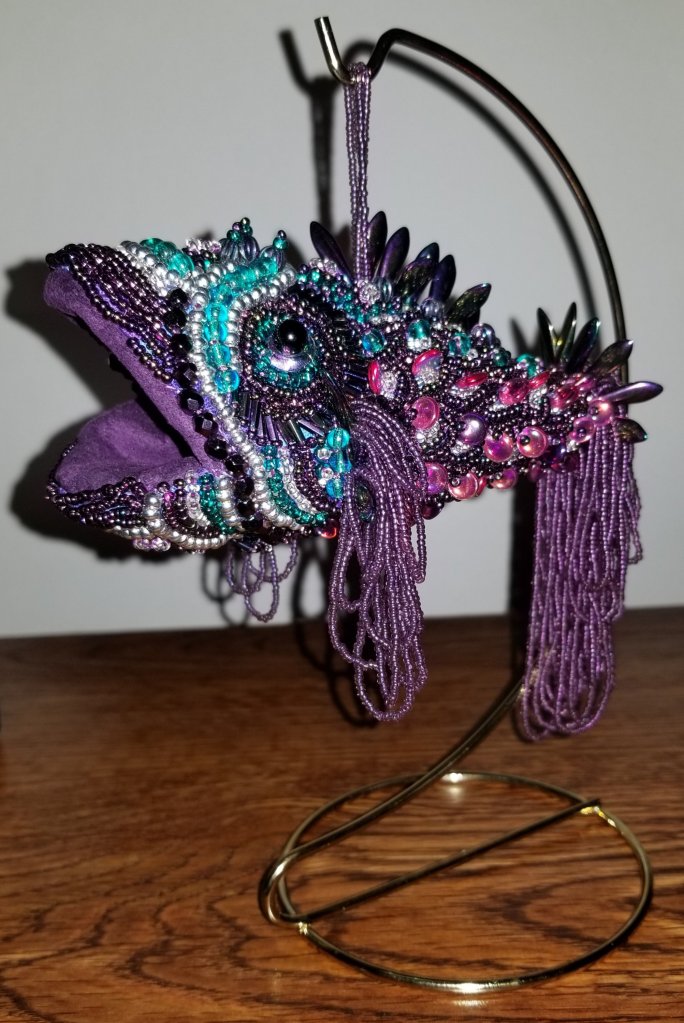
I will put a beading project that was inspired by seeing Jan Huling’s beaded pieces in person. Her magnificent dress was not in the exhibit. Thanks to Sue C for suggesting that we see that exhibit earlier this year. I thought my Edward Scissorfish was a lot of beads!
Filed under: ANG Main Line Stitchers Chapter, Fibonacci Swirls by Olivia Hartshorn
Linda went through all 4 of the Area Ds on Fibonacci Swirls by Olivia Hartshorn (from Needle Pointers Mar/Apr 2022) at our October meeting for our ANG Main Line Stitchers chapter.
The stitch that caused the most issues was for Area D1 (upper right). The Alternating Scotch stitches are over 3, and compensation is required. Not all of the compensation will be hidden by the swirls. The bigger issue for me is that the stitch is all overdyed thread, while the other 3 areas combine it with a solid color. So, I grabbed the nearest stitch book (Painted Canvas Embellishment: An Idea Book by Carole Lake and Michael Boren) and opened it from the back end (which is how my husband reads magazines for some strange reason). On page 96, I found the Hesitation Stitch. It’s a solid and overdyed combination stitch in diagonal, offset Scotch stitches over 3. Perfect!
The Hesitation Stitch really works best by keeping 2 needles working. Two needles were needed for Area D2’s Milanese stitch (bottom right). I don’t know which I find more challenging – working with 2 needles or compensation of these stitches. Olivia didn’t compensate correctly but Linda pointed out the areas we needed to be careful. I am 99.9% sure I got it right. And, if I messed up, I hope it’s on an edge getting covered by the swirls which will be next month’s lesson.
Here’s the colorway on Congress Cloth. This uses the same overdyed thread but cut and stitched to create color movements.

And, on canvas. I worked on this a couple of days before our October Stitch-in Saturday, at our Stitch-in, and a few days afterward during the World Series Games 1-5. Only the upper left area worked up easily and quickly. Bottom left were small stitches that were easy but not quick. I let the color flow as it wanted only in the top right area.
I’m all ready for the final installment, the swirls, at our meeting tomorrow night.
Filed under: A to Z of Bullions, A to Z of Embroidered Flowers, A to Z of Embroidery Stitches, Books in My Library, Embroidery Books
There are a bunch of books (at least 20) in the A to Z Series. I have 3 of them (1st, 2nd, and 5th) but there are a few of them free online at Archive.org.
https://archive.org/details/azofembroideryst0000unse (A to Z of Embroidery Stitches 2)
https://archive.org/details/azofembroideredm0000unse (A to Z of Embroidered Motifs)
https://archive.org/details/azofcrewelembroi0000sueg (A to Z of Crewel Embroidery)
https://archive.org/details/azofsilkribbonfl0000coxa (A to Z of Silk Ribbon Flowers)
And, for knitters
https://archive.org/details/azofknitting0000unse
Here are mine:
A to Z of Embroidery Stitches


There are excellent color photos and step by step stitched examples (not diagrams). Up to 12 photos per stitch all on the same page. So, no flipping pages.
A to Z of Bullions. One of the first embroidery classes I took was with Mendie Canon and it remains unfinished. I bought 2 more projects and they remain in my Brazilian Embroidery drawer. Some day!

There are 10 pages with stitched step by step photos, including 47 photos for the classic bullion rose. The bulk of the book gives you colored illustrations, line drawings, a list of DMC threads, the number of strands, and number of wraps to make each design. Most designs are individual figures such as a frog or sheep but there is a cute 5″ square fishing frog at a pond of reeds, a very challenging flower cart, any of the rose designs would be lovely wedding gifts, and a cottage spray that measures 8″ long x 3″ high.
A to Z of Embroidered Flowers.
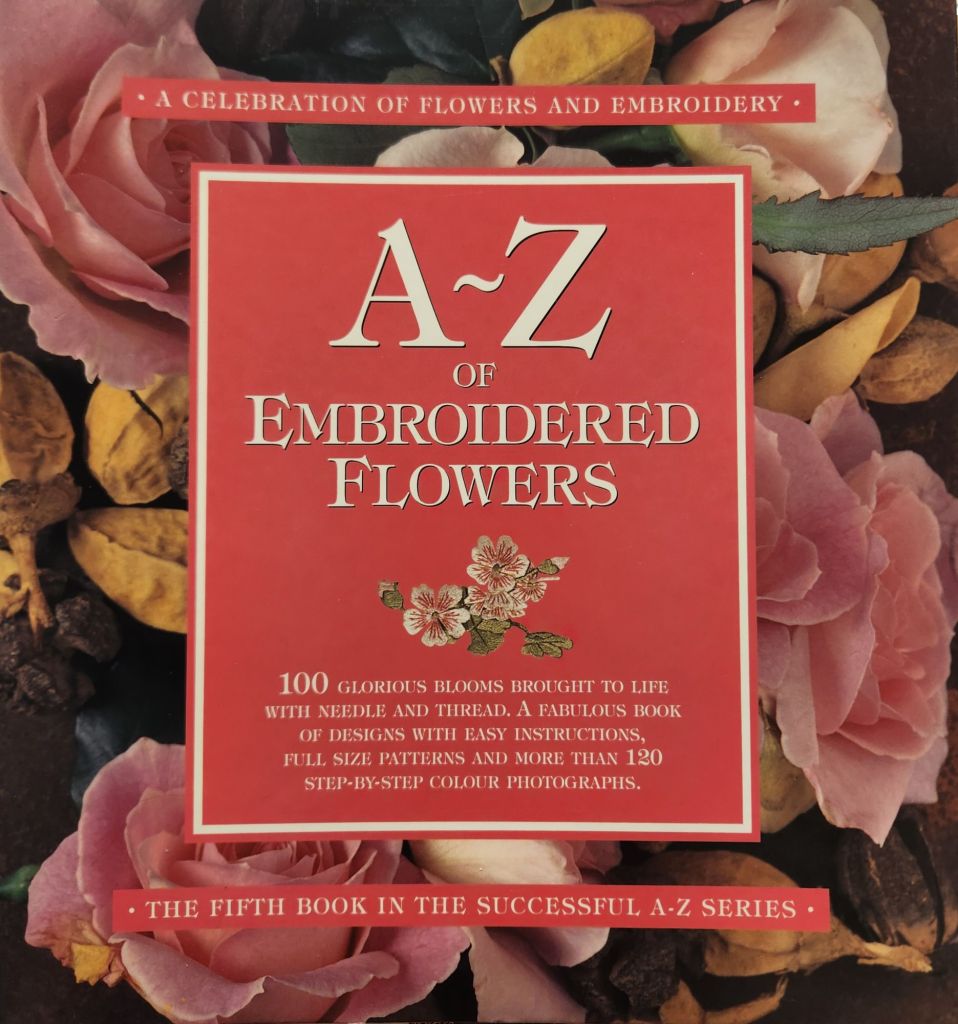
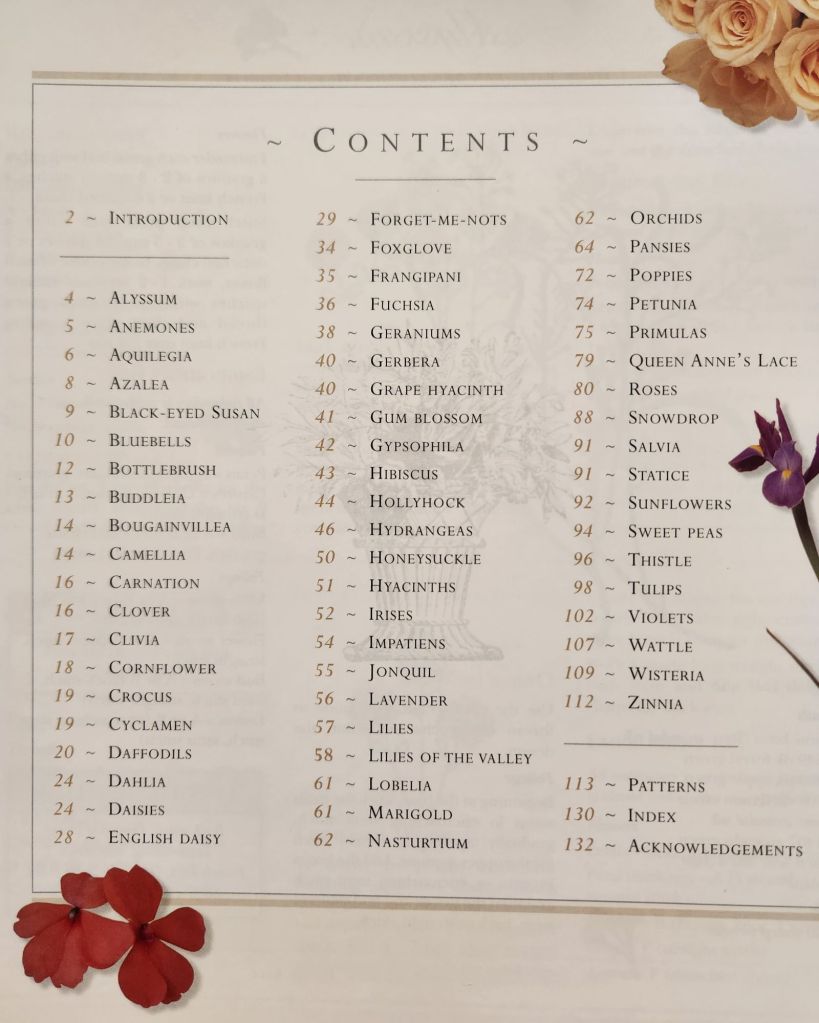
This book shows a stitched flower, threads to use, stitches to use (no stitch directions in this book), order to work, and patterns for transferring are provided. The tulip motif is especially stunning in an art nouveau style. A couple of the designs include a simple vase.
I had great ideas when I bought this book! Different vases with flower arrangements. I’ve got to live a long time.
I played with River Silk ribbon threads and Flair for this Sunflower.

