Filed under: All That Simmers by Sundance Beads, ANG Main Line Stitchers Chapter
I finished this in 2024 but never posted about the last area, the red poppy, in All That Shimmers. This was a painted canvas with a stitch guide by Sundance Beads done with my ANG Main Line Stitchers chapter.
Kristen’s tip to place the running stitch along both sides of the red ribbon before gathering was very sensible. Doing the second edge after the bottom is gathered and in place has to be next to impossible. The red ribbon is called Christmas Red by BE Ribbons and appears to be available only at Sundance Beads (sundancedesignsonline). It comes in great colors. The green leaves are also BE Ribbons, Retro Ribbon Avocado. They are clearly different materials, but the website doesn’t provide details. I guess I would have to email them if I had questions about buying more ribbon.
The center was too large and I had to cinch it smaller so that the center of the flower didn’t disappear. The first three beads slipped through the metallic center, so I used 5-7 beads to show through. Thanks again to Kristen for leading us through this project and to Sundance Beads for making a stitch guide available.
This needed a deep box, but not really knowing where I’d put it, I didn’t take it to a framer. But, since I had such great results with Treasures of the Great Lakes, I decided to give this a go, too. There is a difference in that this is on monocanvas and slightly larger than 5″ x 7″. I found 6″ x 8″ is also a standard frame size in shadow boxes for medals (at Michael’s). That required additional borders (5 and 7 canvas threads wider) to be stitched. I used the Woven stitch in the four colors matching the original tent stitch outer borders with the same Kreinik #12 Braid. I found them in my stash and even had enough!
Then, I added a row of buttonhole over 2 canvas threads so that I could cut it exactly to fit the frame opening. Because I stitch on Evertites, it was exactly square when I took it off the bars.
And, it fit liked a charm. I did lace it to the interior back board provided just so it wouldn’t shift when it gets moved about. But, it doesn’t photograph well because of glare. In person, it looks really good. It’s standing upright as Sundance apparently intended it to be displayed. But, which way do you like it?
New camera in the Samsung S25 Ultra is making a big difference.
Filed under: ANG Seminar 2024, Treasures from the Great Lakes - Dawn Donnelly
I was worried about asking a framer to handle this, and so I contacted Meghan from my ANG Main Line Stitchers chapter, who is a professional framer and now also a teacher. She gave me great guidance discussing lacing and pinning to foam board.
This shadow box frame was perfect at 11″ x 8.5″ and grey to pick up the color of the stones. Once it arrived (from Amazon in 2 days), I only had one option. There was no way to fit a second foam board in the frame or another layer of anything because the back is a foam board with a soft white felt back attached to the back. So, I attached the needlepoint to the foam board with small nails every 1/4″ piercing Congress Cloth threads as much as possible around each inner edge. I used three white pearl push pins they sent to hold it in place after I centered it. I was tempted to leave one in place near the large stone so it wouldn’t sag from the weight of the stone but I think the weight of the stone is dispersed across enough of the Congress Cloth that it won’t be an issue.
Then, I cut the Congress Cloth at the outer edge, which is about 2-3 threads from the nails. The pressure of the fasteners on each side is applying pressure as well.
The shadow box came with tempered glass which does have some glare depending on the lighting. Meghan did suggest that I could get a framer to order museum glass to fit this frame. But, where I have it hanging, there is no glare and I even got a decent photo.

Thanks, Meghan. I am thrilled with how it turned out!
Filed under: ANG Seminar 2024, Treasures from the Great Lakes - Dawn Donnelly
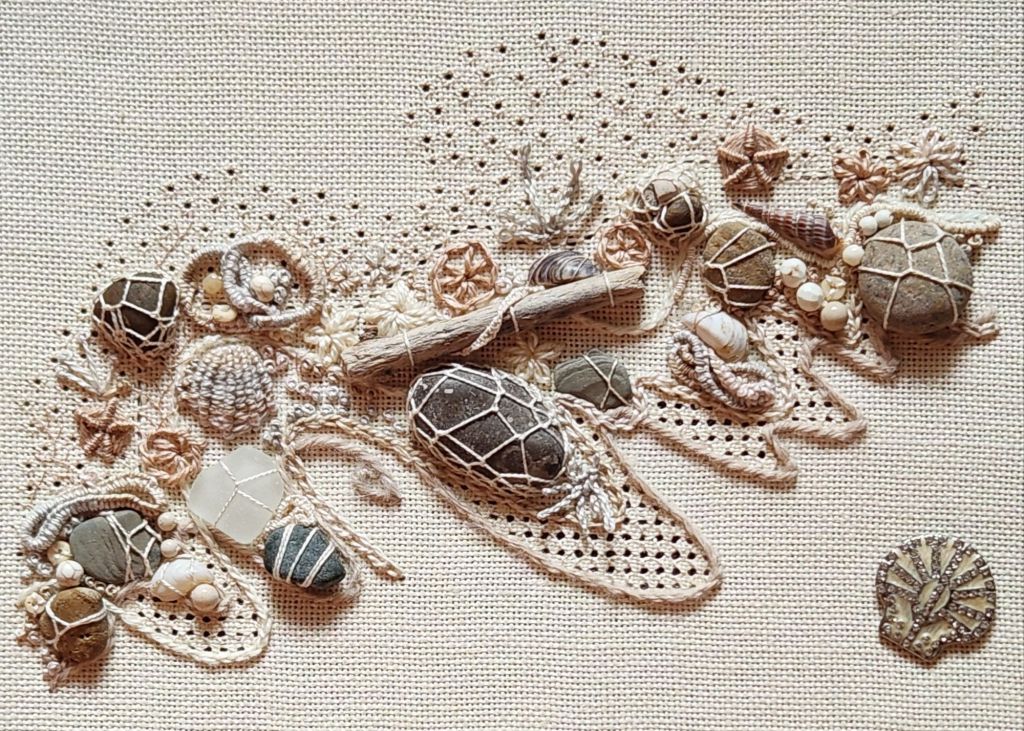
One of Dawn Donnelly’s comments in her Treasures of the Great Lakes class was, “know when to say when with embellishments.”
I have enough stones, seaglass, driftwood, and shells to make another one!

But, this one has enough treasures. I did use all the beads. Each of the 7 threads was used as well. It only took about 4 more hours to add the finishing touches (the rest of the beads, long armed French knots, French knots, and feather stitches), and yet it’s kind of hard to tell the difference from the last photo.

It measures 8.5″ x 5.5″. I was asked if it needs to be finished flat. No. I can turn it over, and nothing falls. During the stitching, a couple came loose, and I had to reinforce them. I don’t plan on shaking it, though.
Goal #6 for 2025 is complete! That’s the third and final ANG Seminar class from September 2024. Yeah!! I’m very happy. I sent a photo to Dawn, who appreciated seeing it.
It was fun, I love it, and I am glad I did it, but I am looking forward to my counted pieces. The ort boxes need my attention. And, I haven’t touched the two pieces from National Academy of Needlearts.
Filed under: Uncategorized
I returned to the Treasures of the Great Lakes by Dawn Donnelly, one of my ANG 2024 Seminar classes, a challenging piece.
First up was adding buttonhole rings made from the Watercolours. They were fun once I got the hang of it.

One is scrunched in between the seaglass and a stone. The large one is above that in the sea bubbles. Two small ones are in the upper right area.
The seashells are added, some small beads, the driftwood is attached. I stitched buttonhole wheels, eyelets, ribbed spider, lazy daisy, twisted dribble, feather stitch, long stem French Knots, and French Knots.
I still have a few more finishing touches to go.
Filed under: ANG Central Jersey Chapter, ANG Chapter Book Projects, ANG CyberPointer's Chapter, ANG Main Line Stitchers Chapter, Orchid Lady by Mary Knapp, Starburst by Patricia Hartman, Summer Fireworks by Ann-Marie Anderson-Mayes
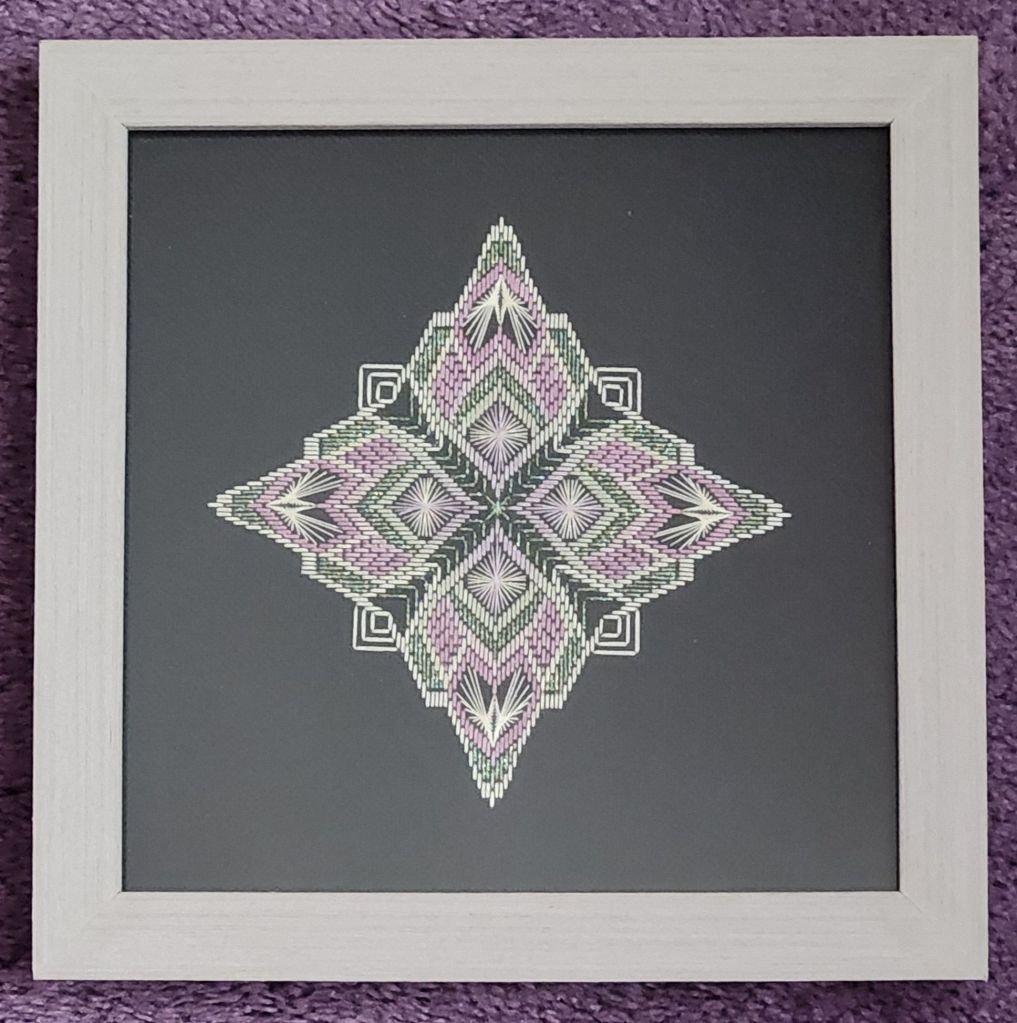
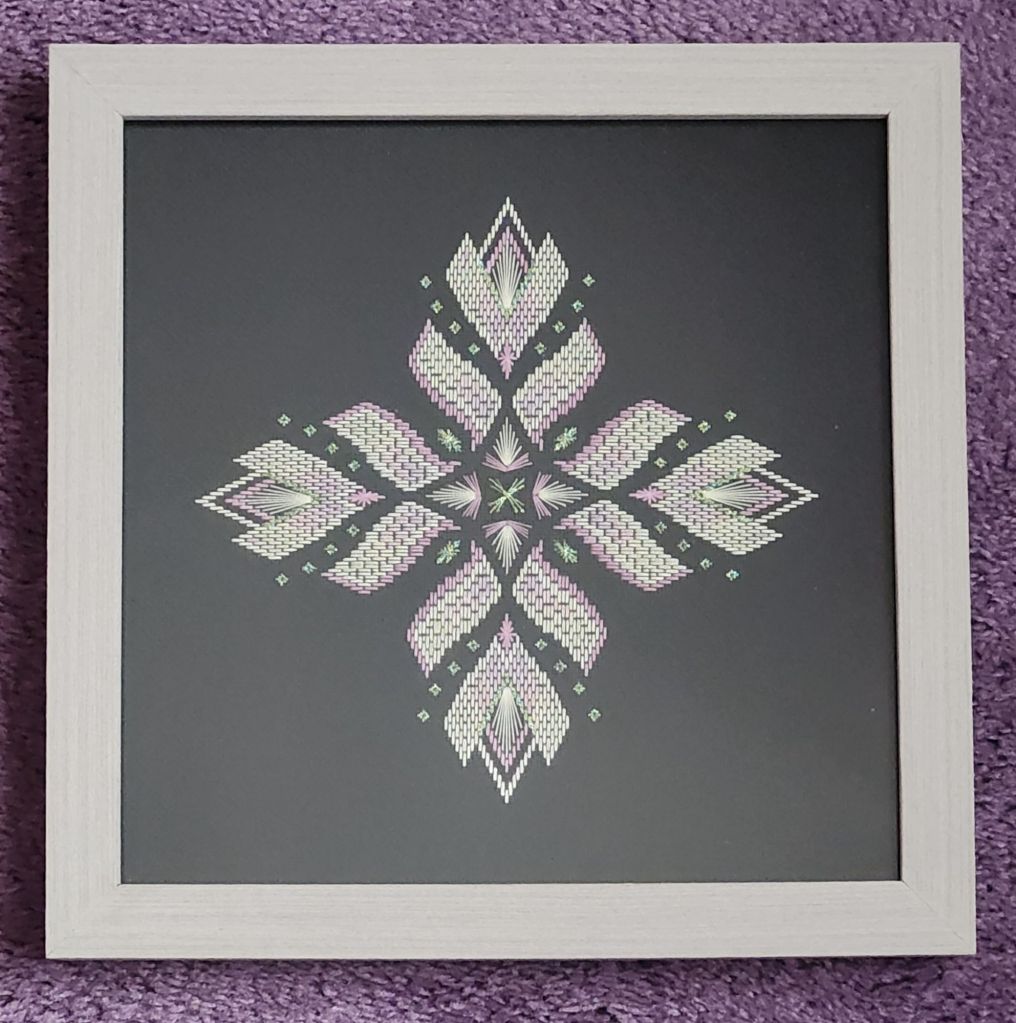
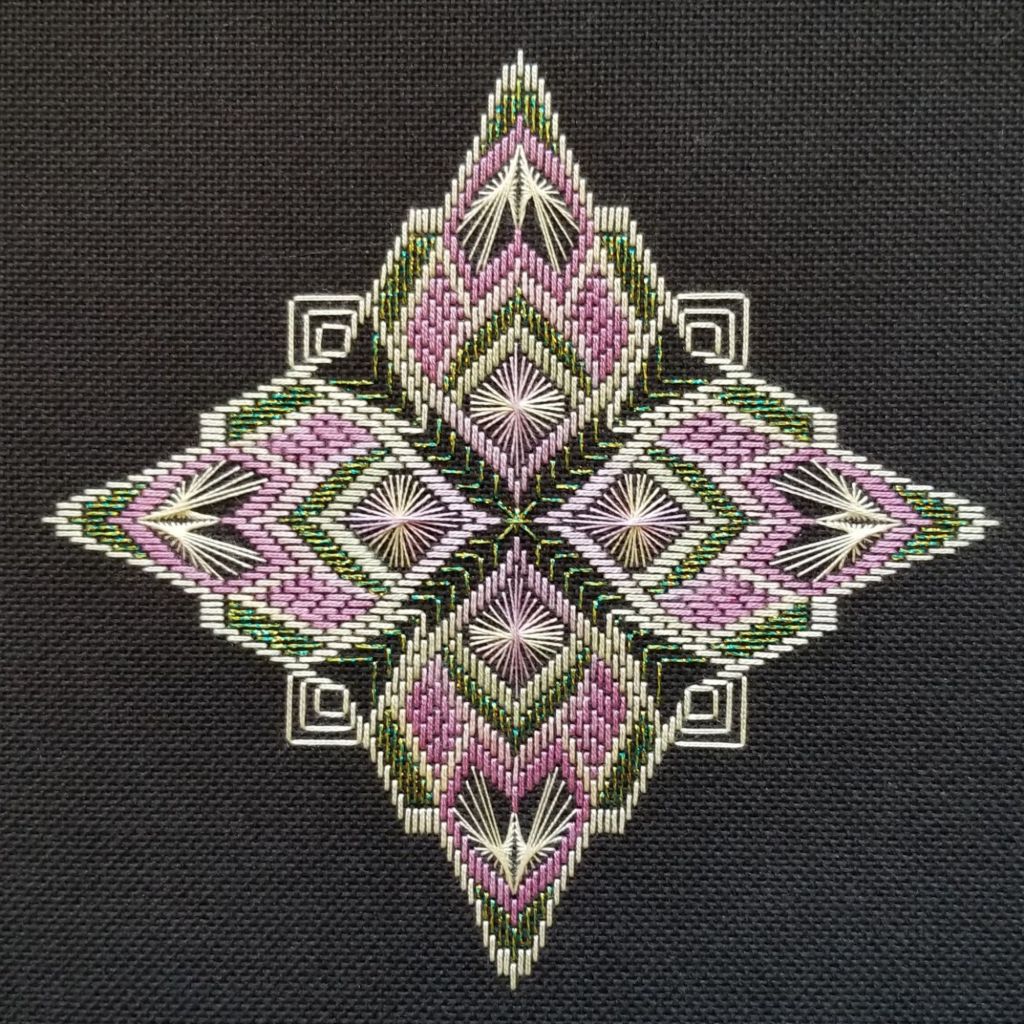
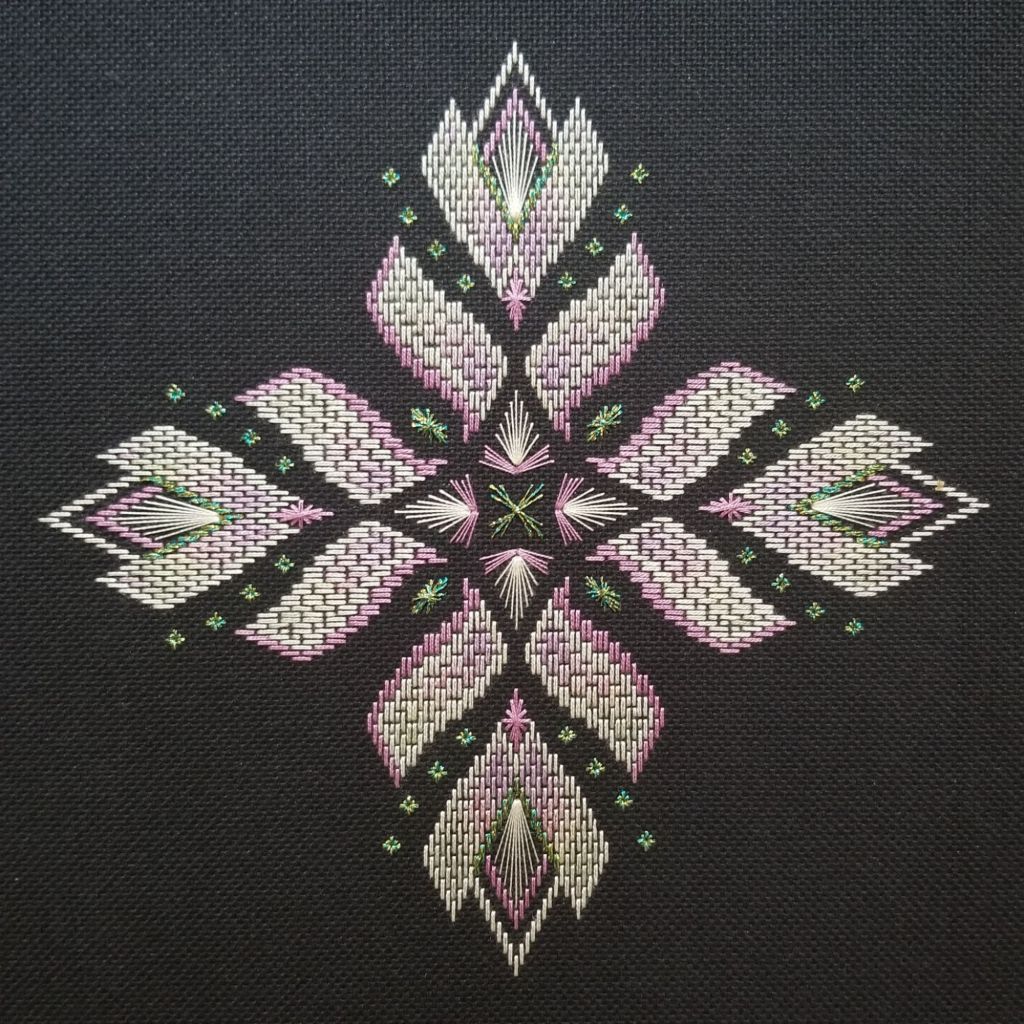
I realize I never posted Starburst by Patricia Hartman (from the 2013 Chapter Project Book that was an ANG Main Line Stitchers project) or Orchid Lady by Mary Knapp (an ANG Cyberpointers project from 2021) after they were framed at Repenning Fine Arts.
Both are counted projects completed with the same thread line called Beautiful Stitches from Ann-Marie Anderson-Mayes in Australia.
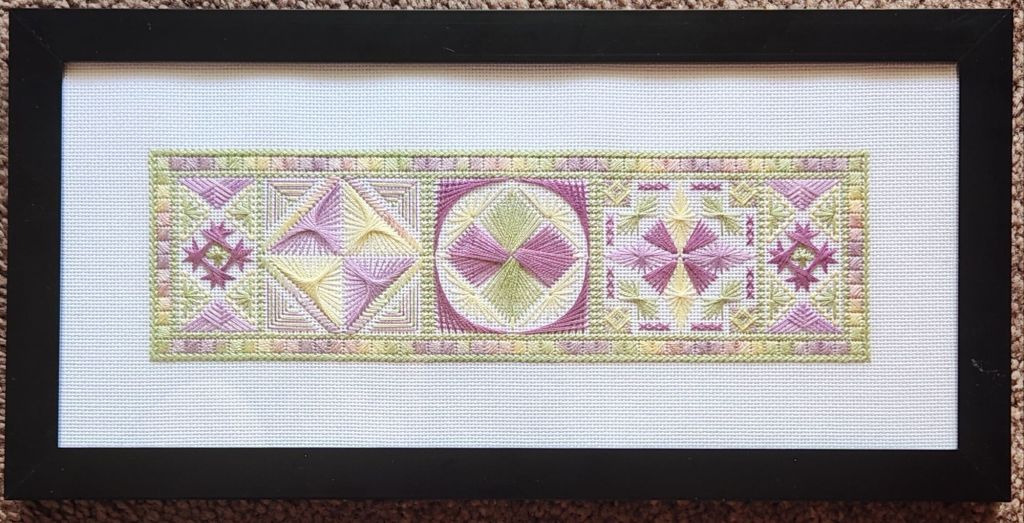
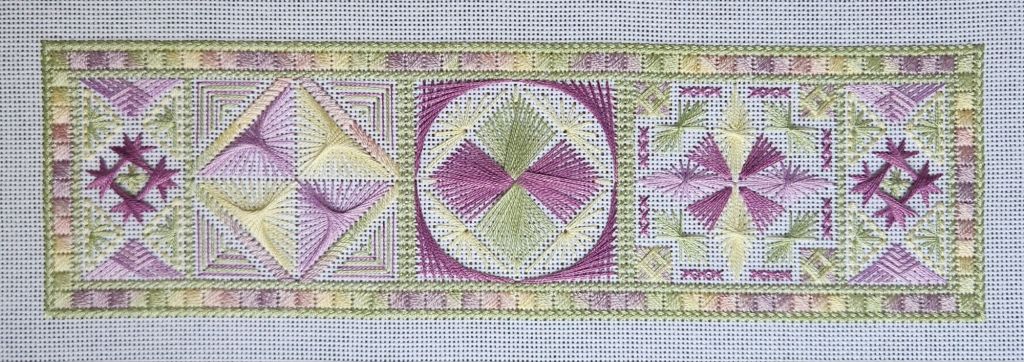
The ANG Central Jersey Chapter is doing Summer Fireworks by Ann-Marie Anderson-Mayes this year as one project, and I had enough threads left to complete it and match these other 2 pieces.
I didn’t use museum glass, and that makes photos difficult. Both were stitched on a black Congress Cloth and have a light gray frame.
Summer Fireworks by Ann-Marie Anderson-Mayes was done on white Congress Cloth and placed in a 5″ x 11″ black frame (by me). I laced it to magazine board. Foam core would have been too thick. It came with plexiglass. I used it and still got a decent photo. The stitches are slightly raised but don’t look like they are getting squished.
Since the photos are not showing the color on the first 2 as well, here they are before framing. Stitching on black makes a totally different look.
Goal #10 for 2025 is completed and framed.
I have a recent EGA Brandywine Guild project that is easy, portable, and would be perfect for the leftover threads! Ann-Marie also has a companion piece, Autumn Fireworks (also free instructions). That sounds like I am adding another project to the 2025 goals which is something that I was trying to avoid. We’ll see what happens.
Filed under: ANG Central Jersey Chapter, Summer Fireworks by Ann-Marie Anderson-Mayes
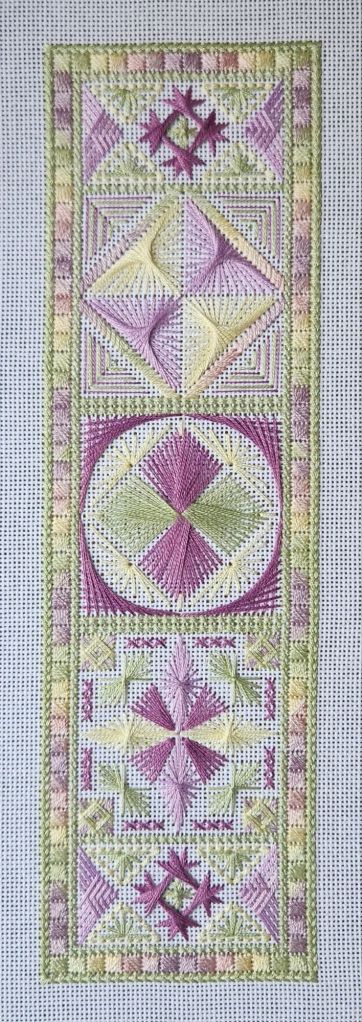
I finished the top square and the center square crescents while enjoying a pre-meeting stitching session with Sue and Rosie.
Later, during the ANG New Jersey Needle Artists Chapter monthly meeting, I started on the bottom square. The following day, after I got home while watching the Phillies, I finished the bottom square.
The center Double Fan Doubled (DVD) looked tough, and it was. It was fully demonstrated in a video. There are detailed instructions and several diagrams. So, I needed quiet and concentration. The TV was off and it still took three tries over several hours, getting threads to lay flat, going under, over, under over. When I was done the first time, I realized one arm was off! Can you find it? It’s glaringly wrong to me. Oh, well. I cut it out in no time.

The second time was wrong after two rounds (no photo). The third time was the charm and a thing of beauty. The threads are laid flatter, too.
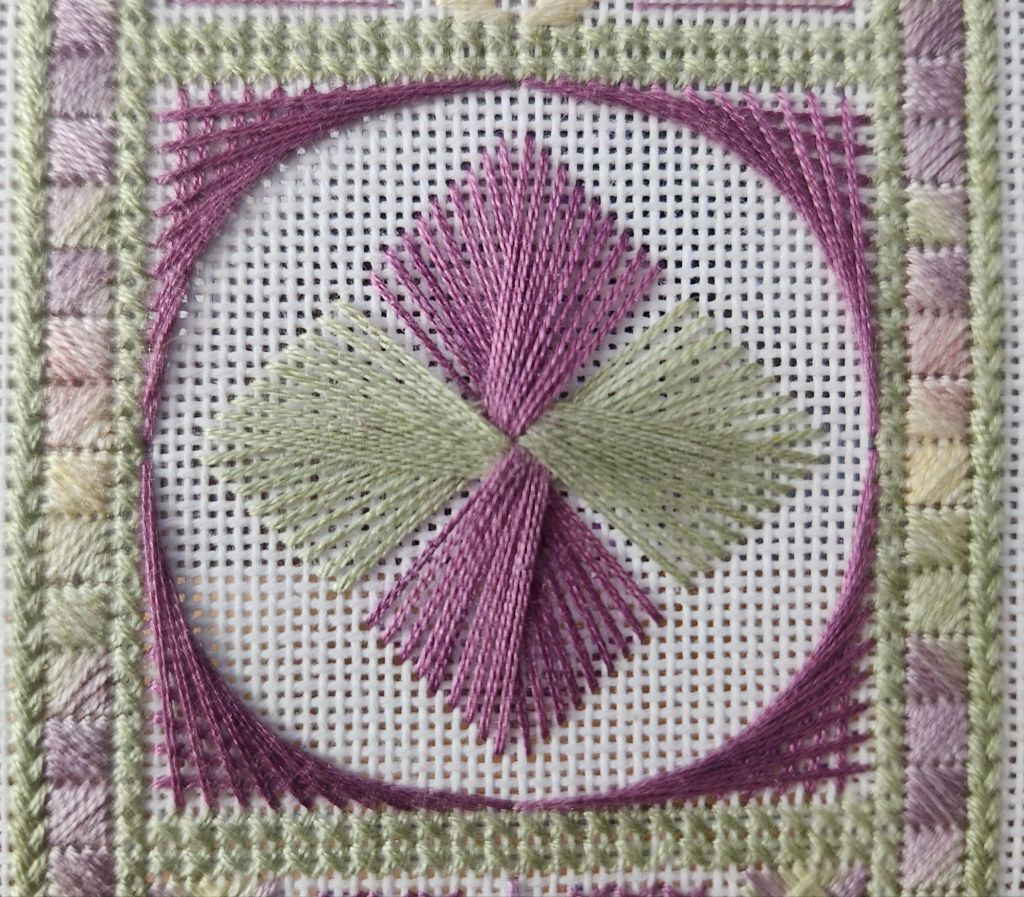
The last of the yellow in the center went in the next day because the DFD did me in!
Goal #10 for 2025 is completed.
My ANG Main Line Stitchers Chapter is stitching the Folding Ort Box (OB) and the Ort Box with a Twist (OBT) both designed by Marilyn Owen. I stitched the Folding Ort Box years ago on 14 count interlock canvas and was never happy with it because it is too big and floppy. I was happy with the blackwork but that small area is about as much blackwork as I need in my life. The path needed to take is tricky – reminds me of organic chemistry in college – you have to see where you’re going too many steps in advance. I didn’t need organic chemistry in the pharmacy and I don’t need blackwork in my life!
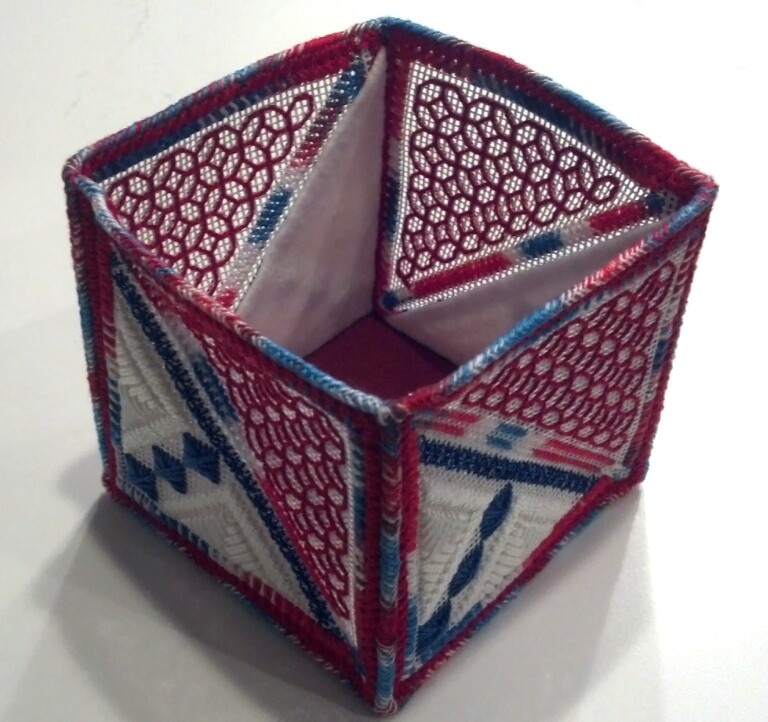
I am stitching both now on 18 count interlock. Because I save everything, I have my extra detailed blackwork map that I created years ago. Maybe it’ll be easier this time.
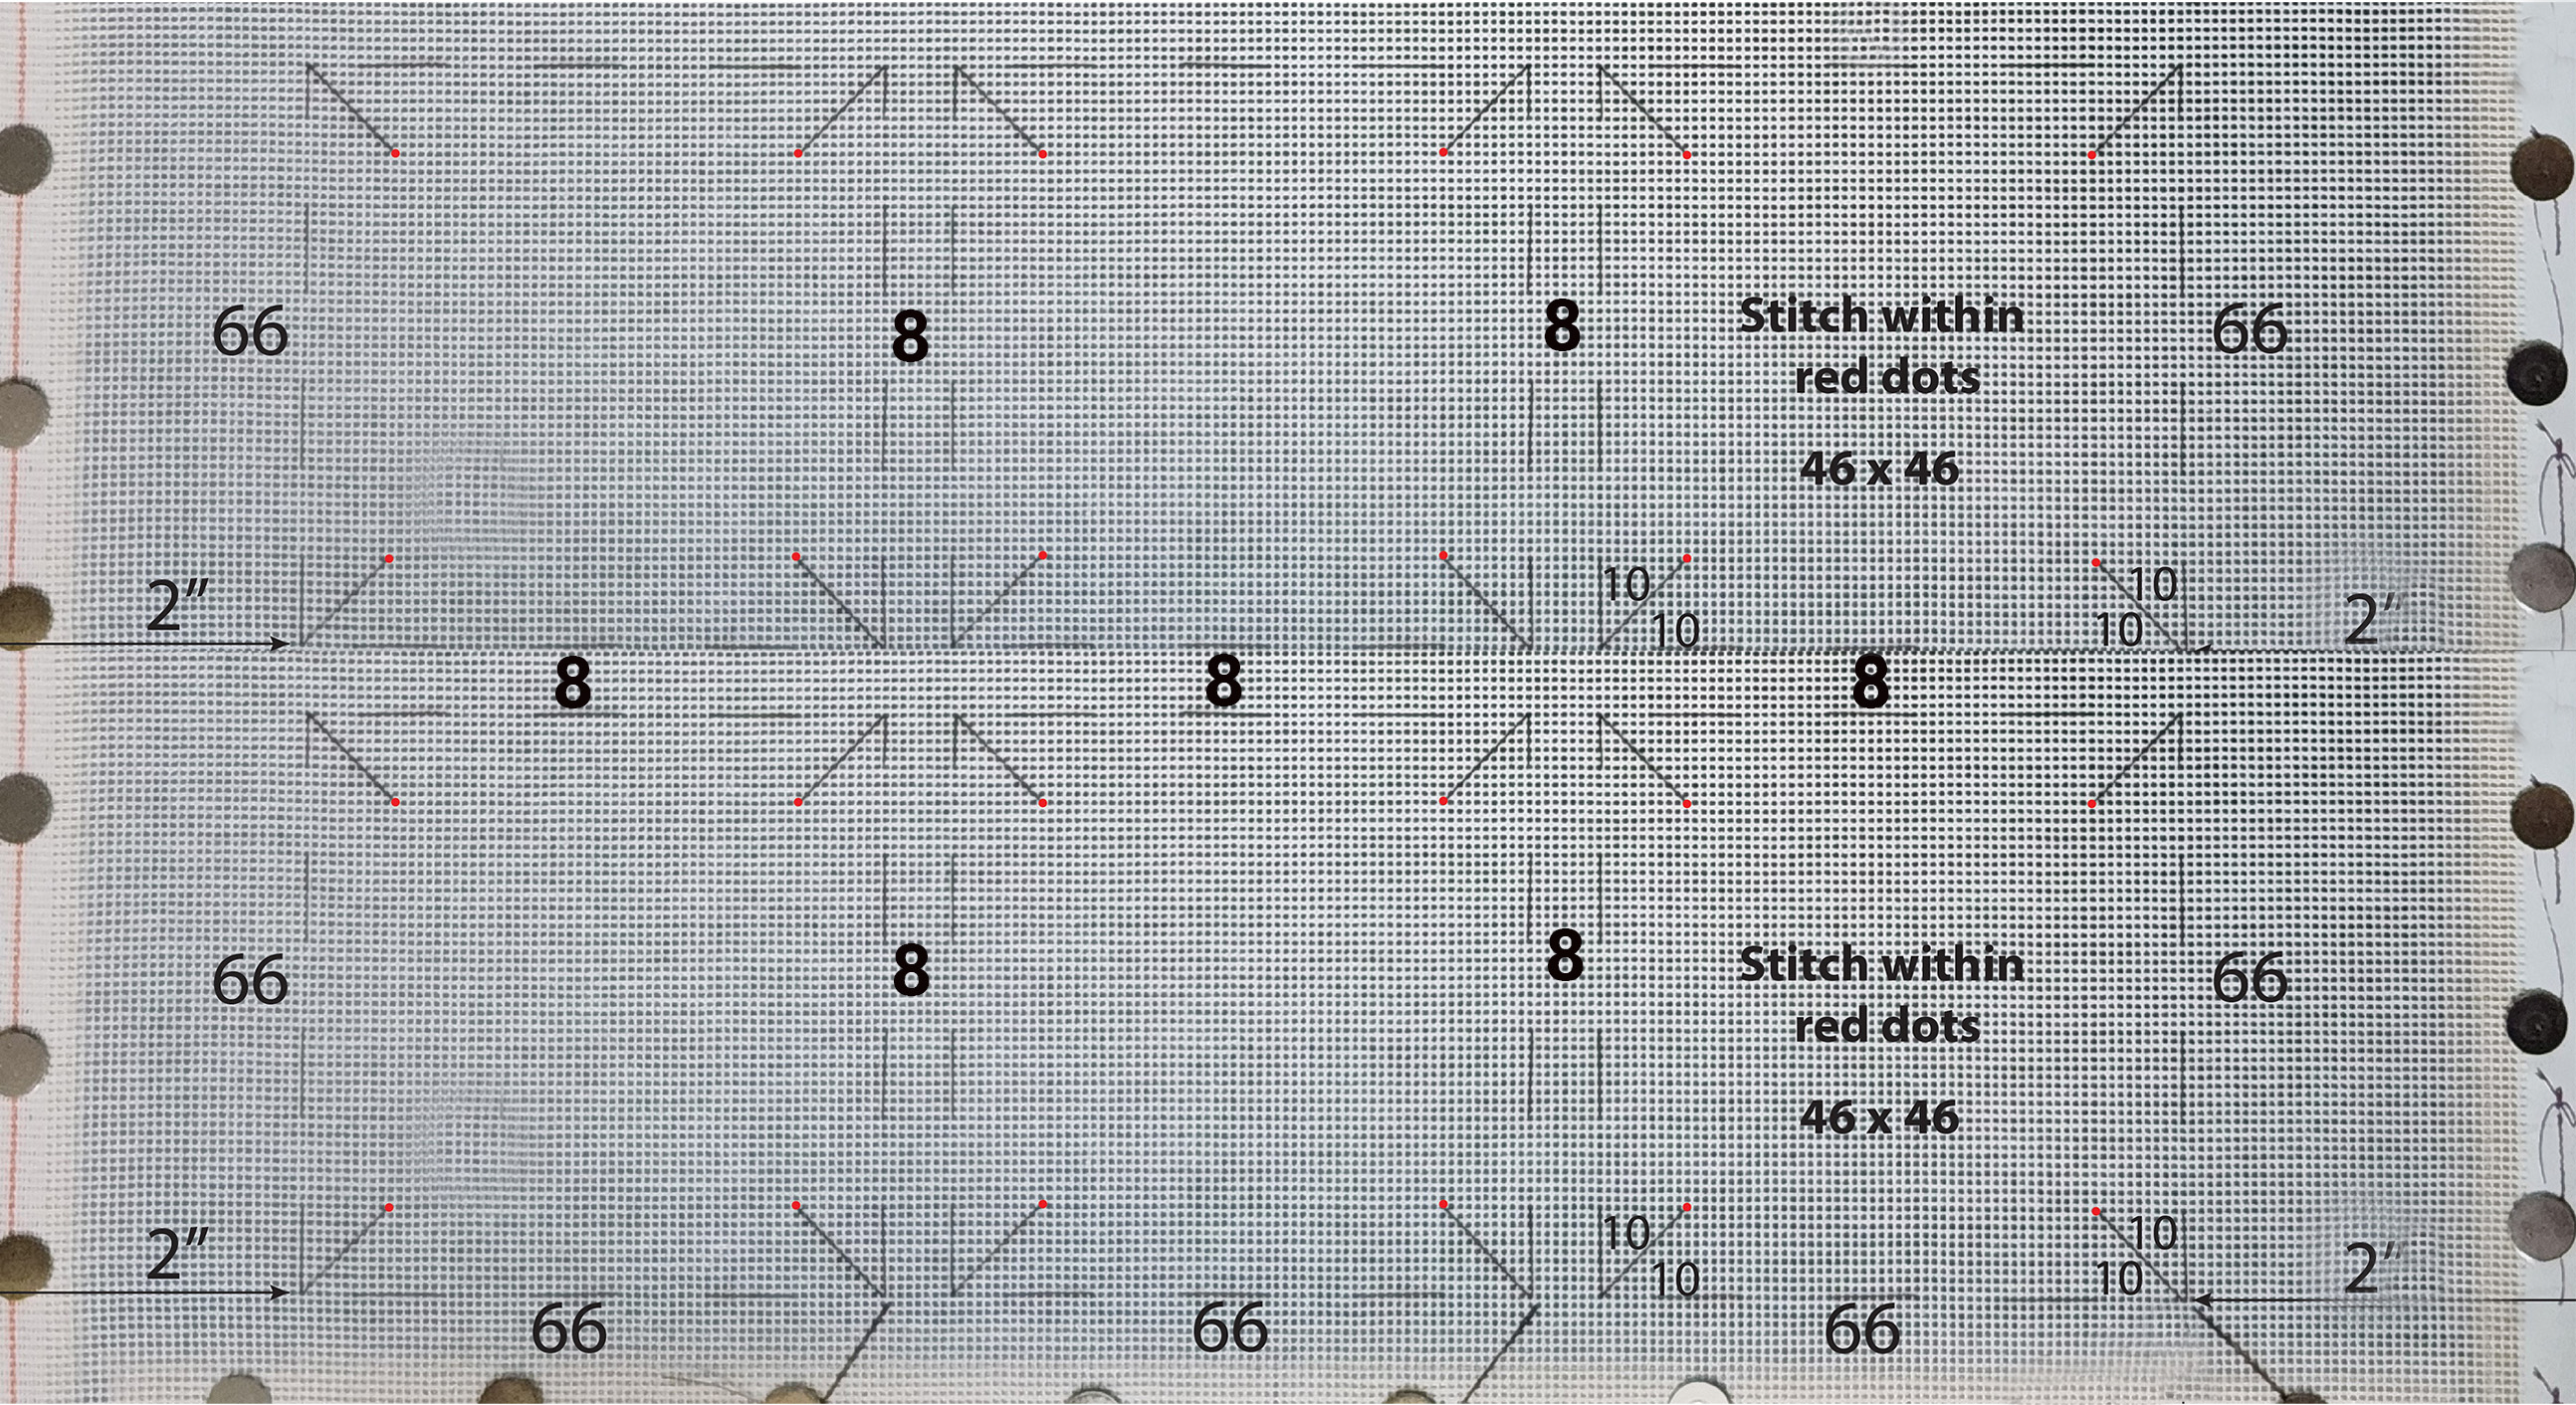
There are 7 members stitching the OB and 6 stitching the OBT. I am leading both pieces. Last month we covered colorways and basting. It took me 3 tries to get the basting on the OBT and Patrick found a mistake on my OB basting but that was easily fixed.
The error in this photo is pretty evident (stop laughing MO!). You’d have to count to find the one error (56 basted but should have been 66) and the other is marking the inner area.
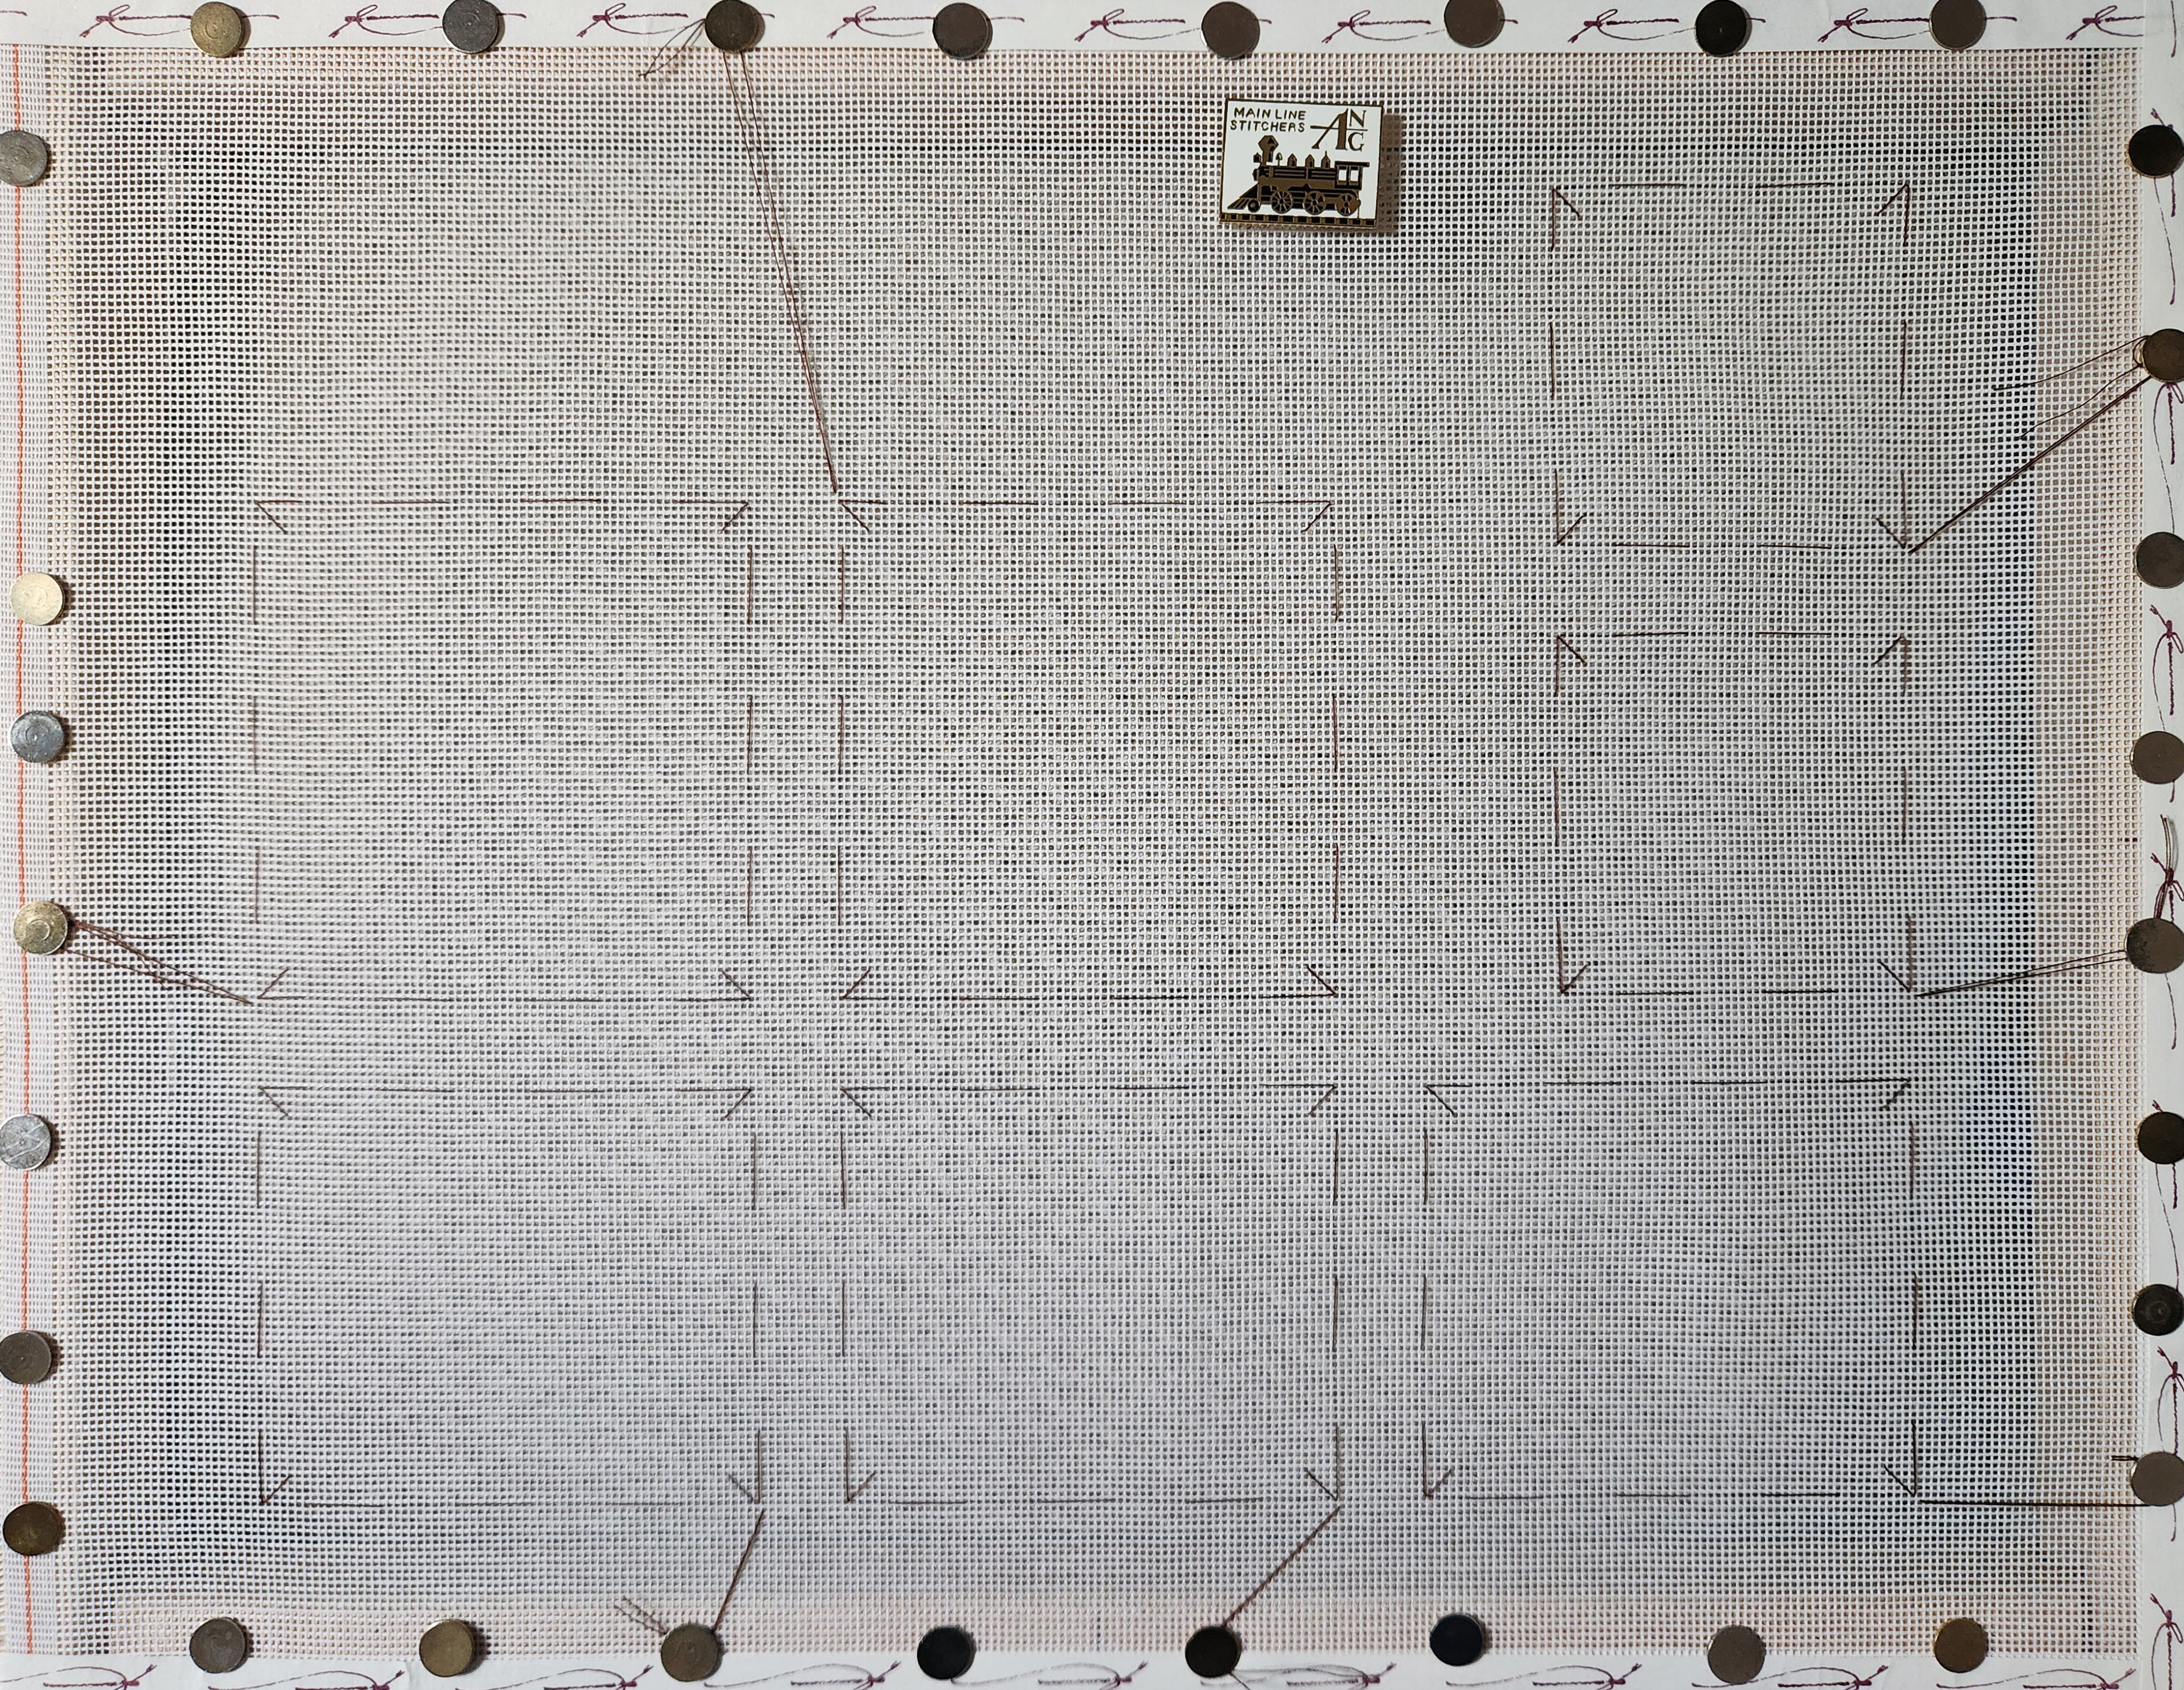
Finally, I got it correct. Had I drawn lines instead of basting, the canvas would have been a mess!
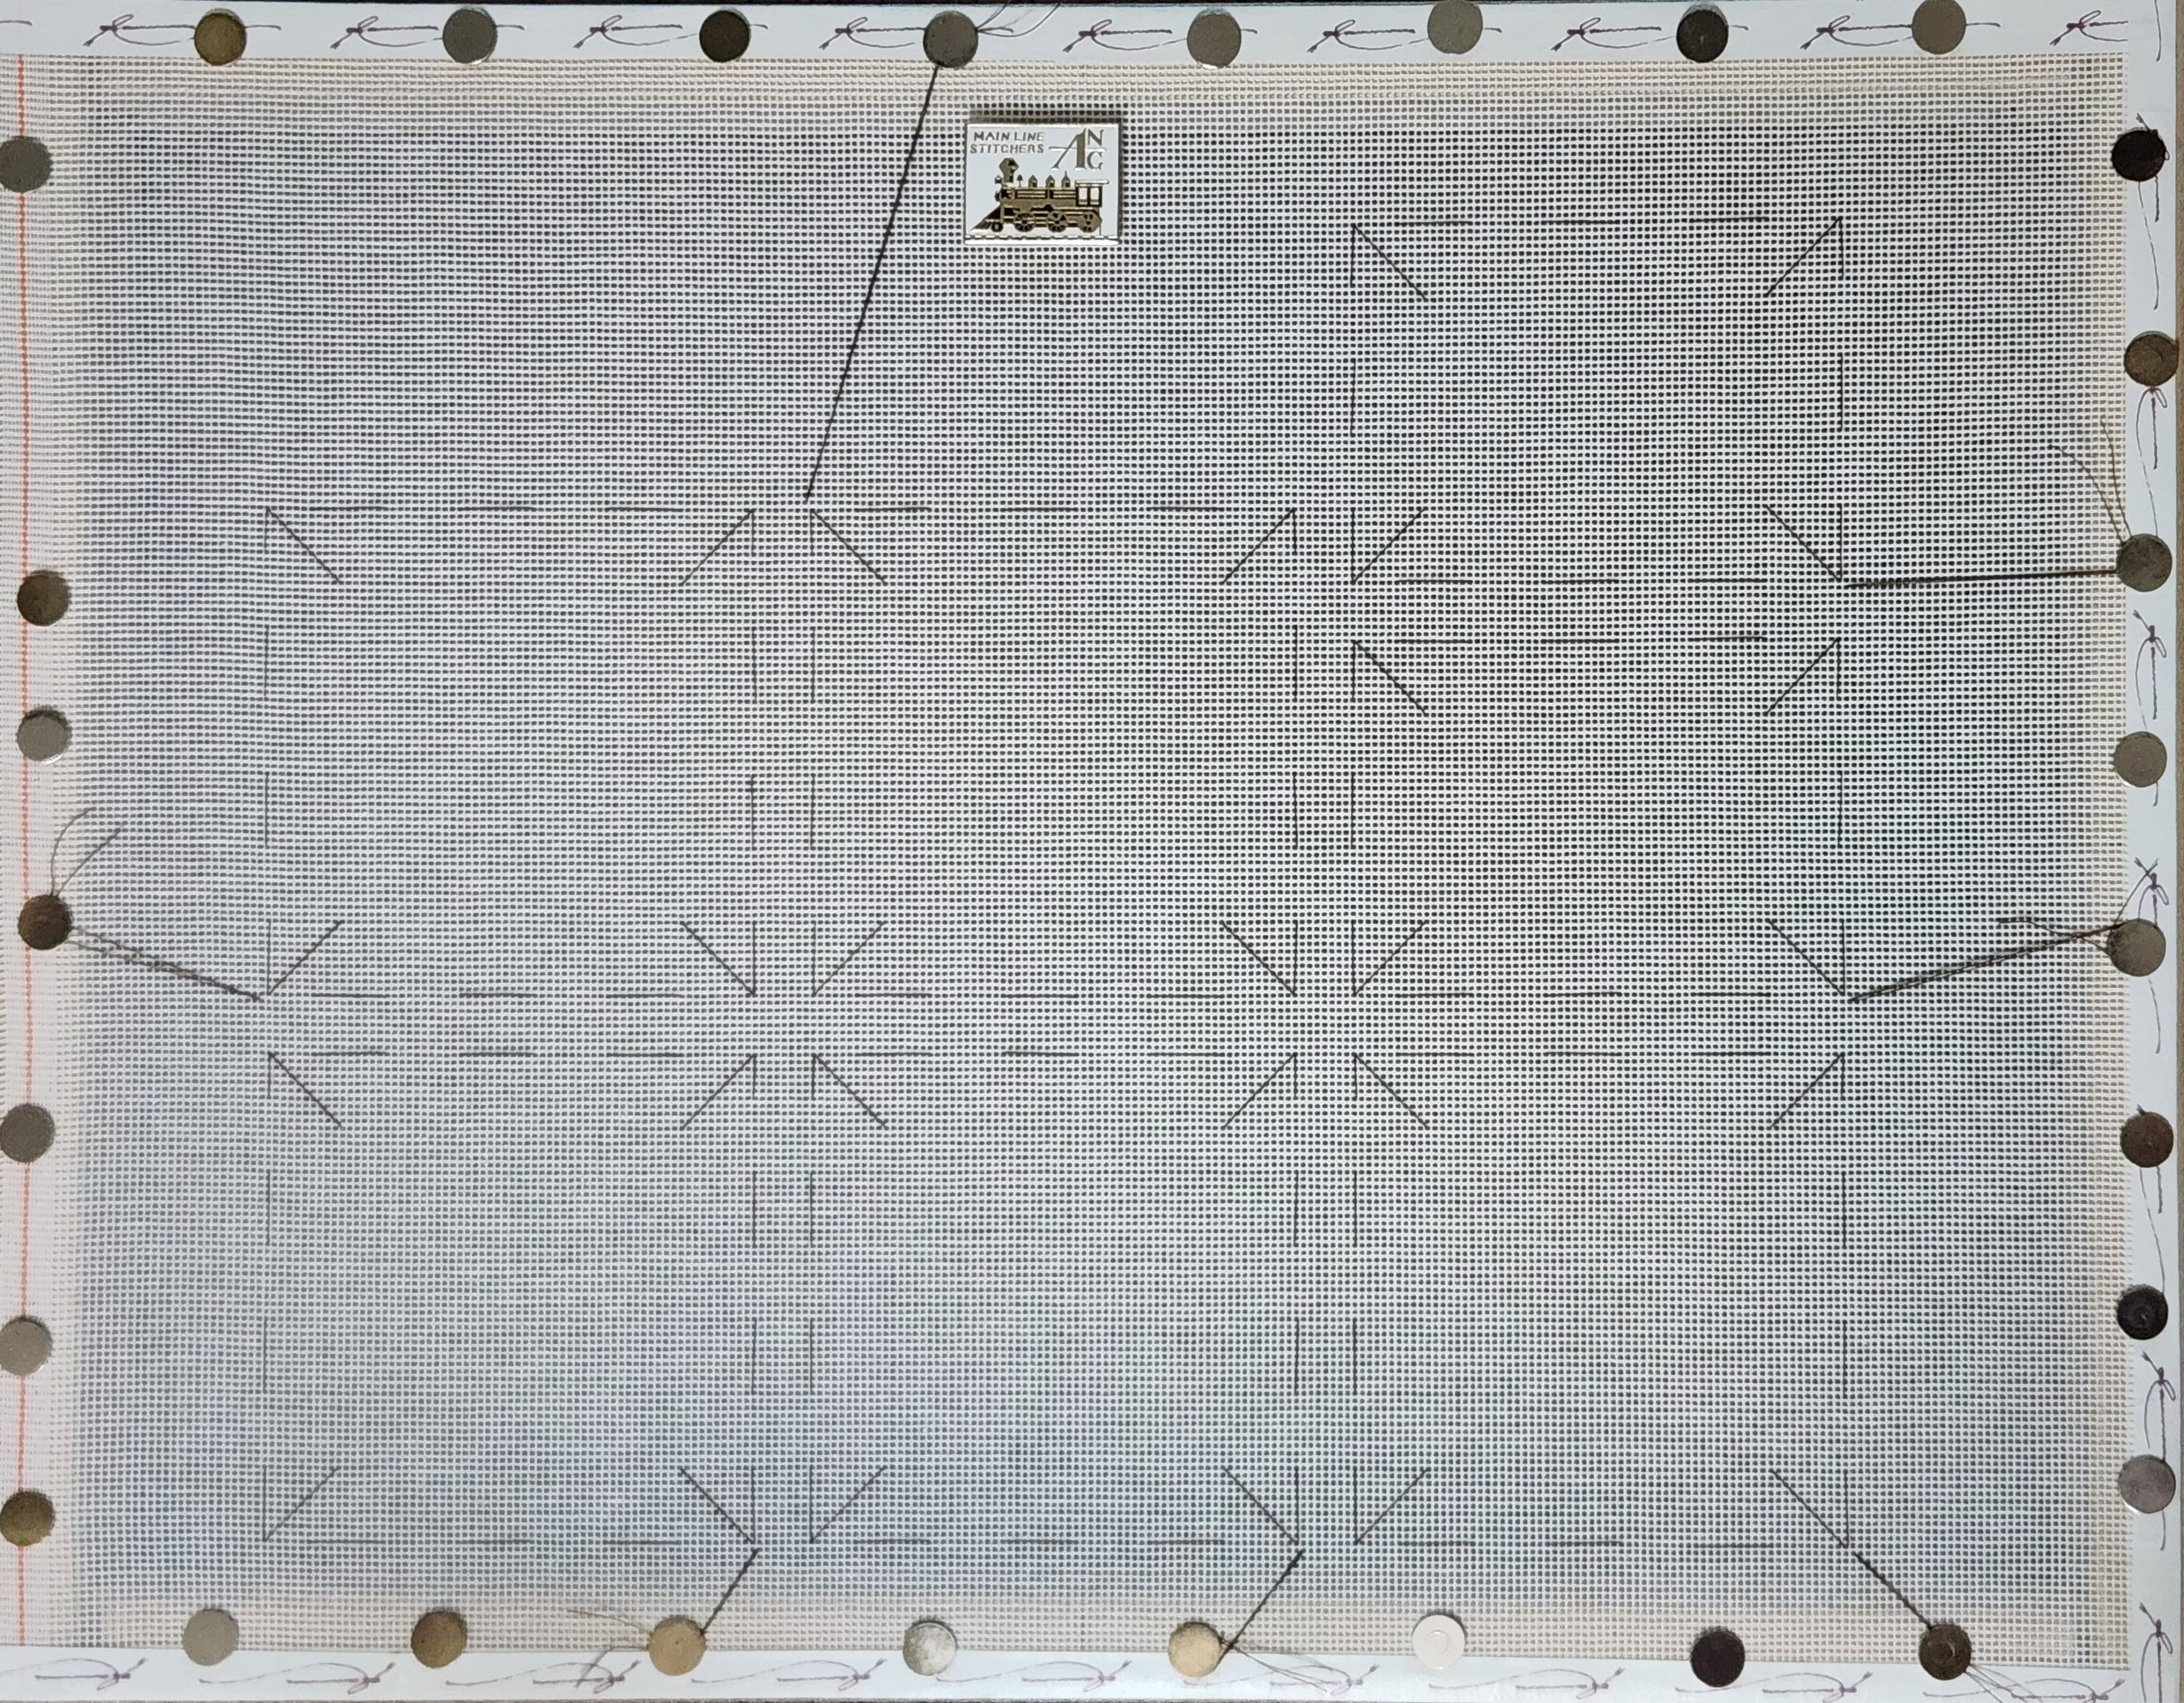
For both, I provided details as seen in this photo.
For this month, I am going to focus on the diagonal divider of the OB and the pockets of the OBT. The idea is to get less thread on the back in the dividing line. Marilyn figured out how to do that. I pretty much had to flip the canvas to catch the thread (left side of photo below) or else I wound up with a hot mess (right side of photo below).
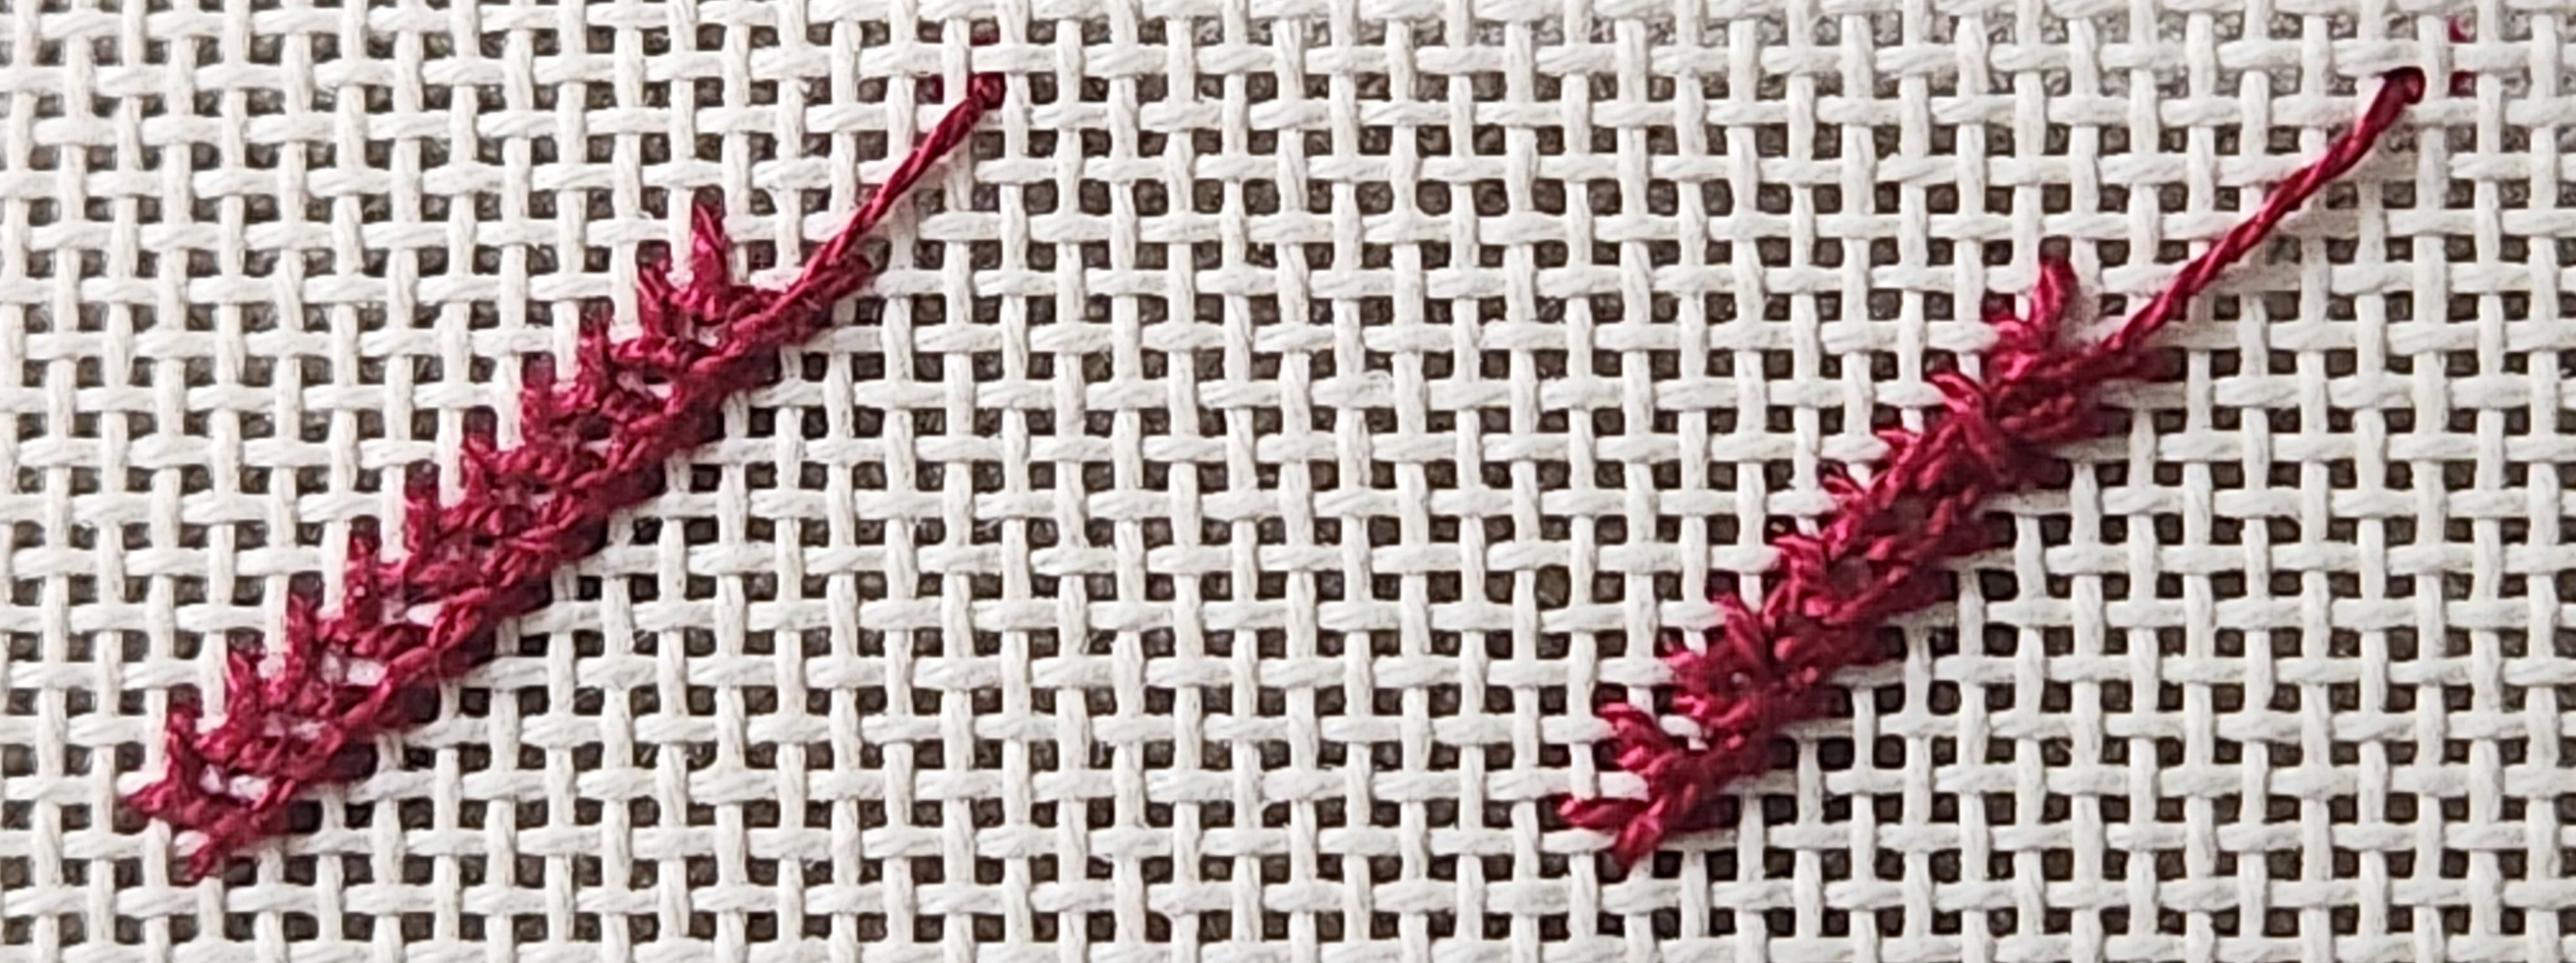

The pockets will prevent the same type of folding on the OBT and what dividing lines there are, they are different (easier).

So, I need to finish these areas and get to next month’s areas.
Filed under: ANG Central Jersey Chapter, Summer Fireworks by Ann-Marie Anderson-Mayes
After doing the rewarding but more difficult finishing recently, I pulled out Summer Fireworks by Ann-Marie Anderson-Mayes. The Walnetto in the outer rectangles was the fun new stitch pattern for me. It was a tad challenging because it called for 2 strands, and getting them to lay flat was tricky.
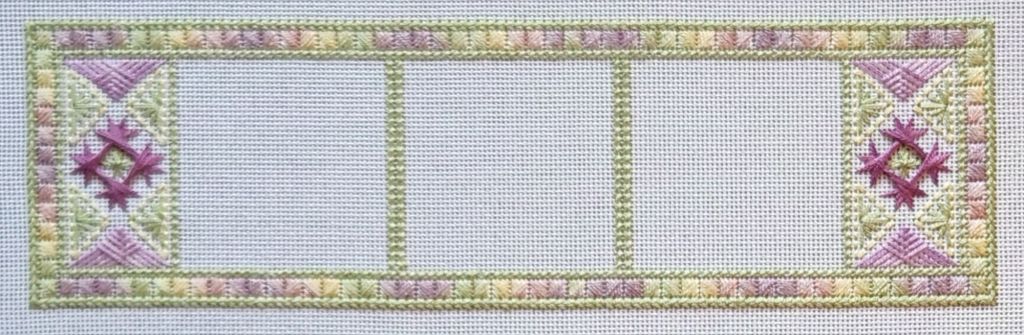
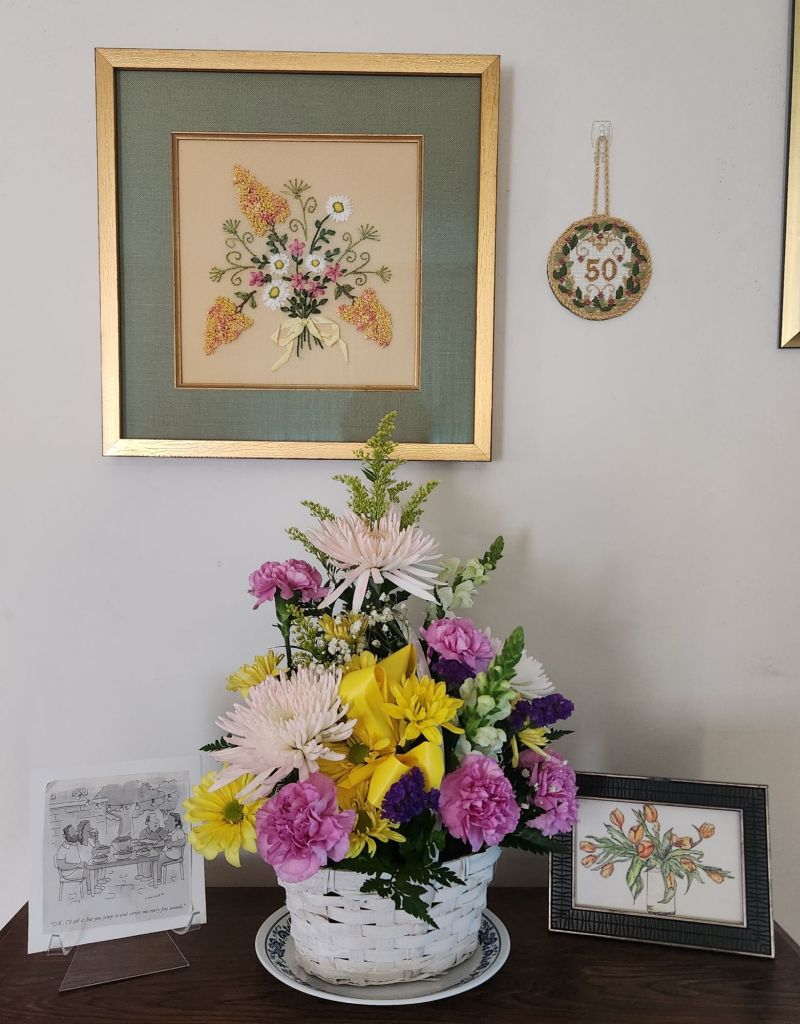
It’s so light, and in this colorway, it looks more like a spring bouquet to me. So, working on it now is appropriate. We’re enjoying several spring bouquets, including a ribbonwork one, a painted one, and a fresh one.
I’m heading to NJ on Wednesday to return the 22 pieces submitted to Woodlawn Needlework Exhibit from other members from the ANG New Jersey Needle Artists (NJNA) Chapter. Jacqui C will be discussing beading as the program topic. And, I will take this to stitch on. Rosie offered to be my hostess for the trip. Looking forward to seeing everyone.
Summer Fireworks is an ANG Central Jersey Chapter project, but several members are in both chapters. The April CJC meeting was canceled due to Easter. I’ll see them in May and have been asked to demonstrate finishing a coaster. It’s so interesting to be in multiple chapters and see the differences between the chapters.
Filed under: Brandywine Chapter, Embroidery Guild of America, Strawberry Pincushion
Patrick and I volunteered to be co-Presidents for one quarter of our EGA Brandywine Chapter’s year of meetings.
For April, we had a Zoom speaker, Toni Gerdes, speak on Additions to Stitching. I heard it recently through the ANG San Bernadino Chapter and enjoyed it again. There are several threads that I haven’t seen anywhere and a couple of ideas that I will try.
We handed out the motif Patrick designed, and I diagrammed. Then, in May, we will lead people through its assembly into a strawberry pincushion. For June, we go to Blue Santa Beads to make a Chataline.
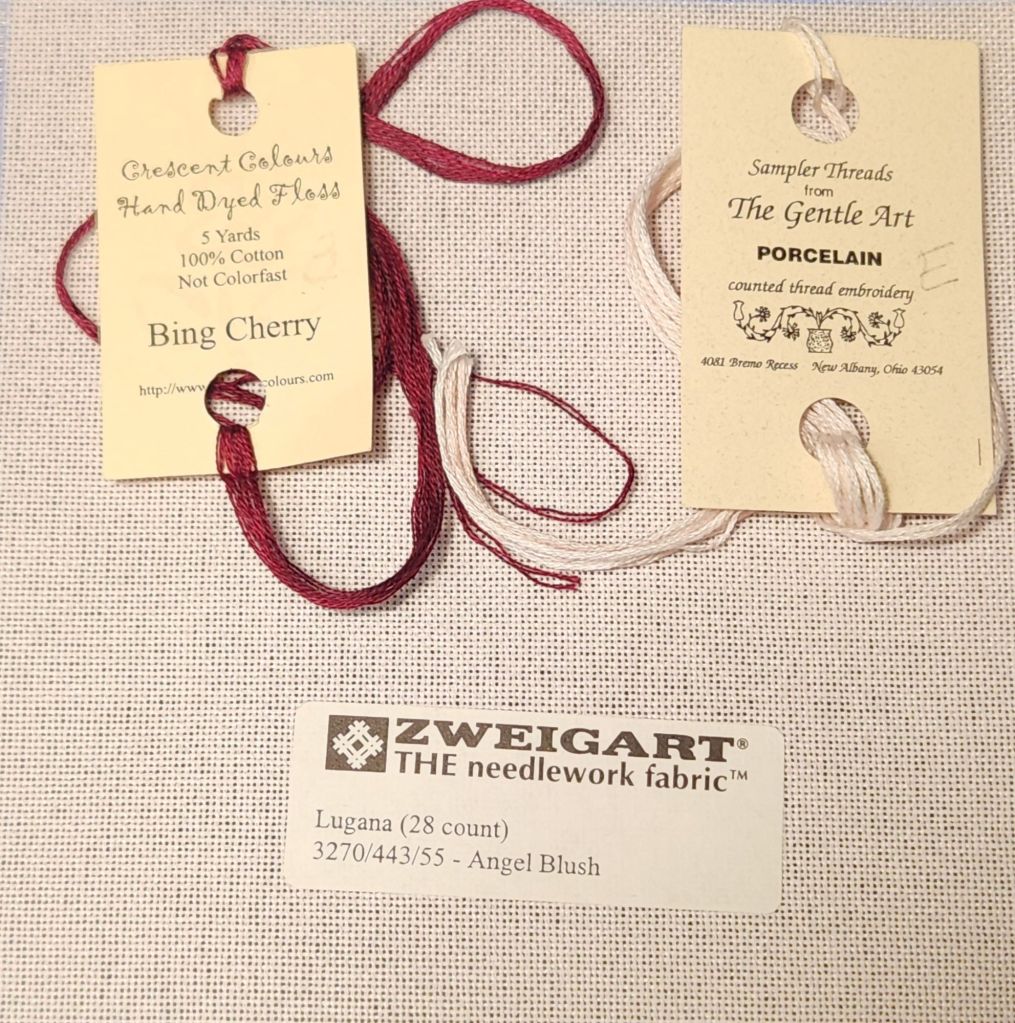
I had a piece of Lugana (28 count in an Angel Blush that is slightly pink) and stitched over one canvas thread for a small one (about 2 and 3/8″ x 2 and 3/4″). Patrick stitched over two canvas threads for a larger one (about 4″). My stash had Crescent Colours, Bing Cherry fot the motif, and I’ll use Sampler Threads from The Gentle Art, Porcelain for finishing.
It turned out great and was ready to show at my EGA Brandywine Guild Chapter Quarterly meeting yesterday.

Patrick, Karen, and I had plenty of ground fabrics in different counts (24 – 36) and colors for people to choose. People had fun selecting theirs. Tough choices!
Filed under: General comments, Needlework and Textile Guild of Media, Punch Needle, Punch Needle Demo
The Needlework and Fiber Guild of Media continues to meet monthly and have demonstrations by various members and occasionally a speaker or road trip. This month, I volunteered to show what I learned about punch needle from a class in November 2024 with Katie Kriner, Author, Fibert Artist, Shop Owner of The Bee & The Bear in Hereford, PA. I hadn’t worked on the project since then.
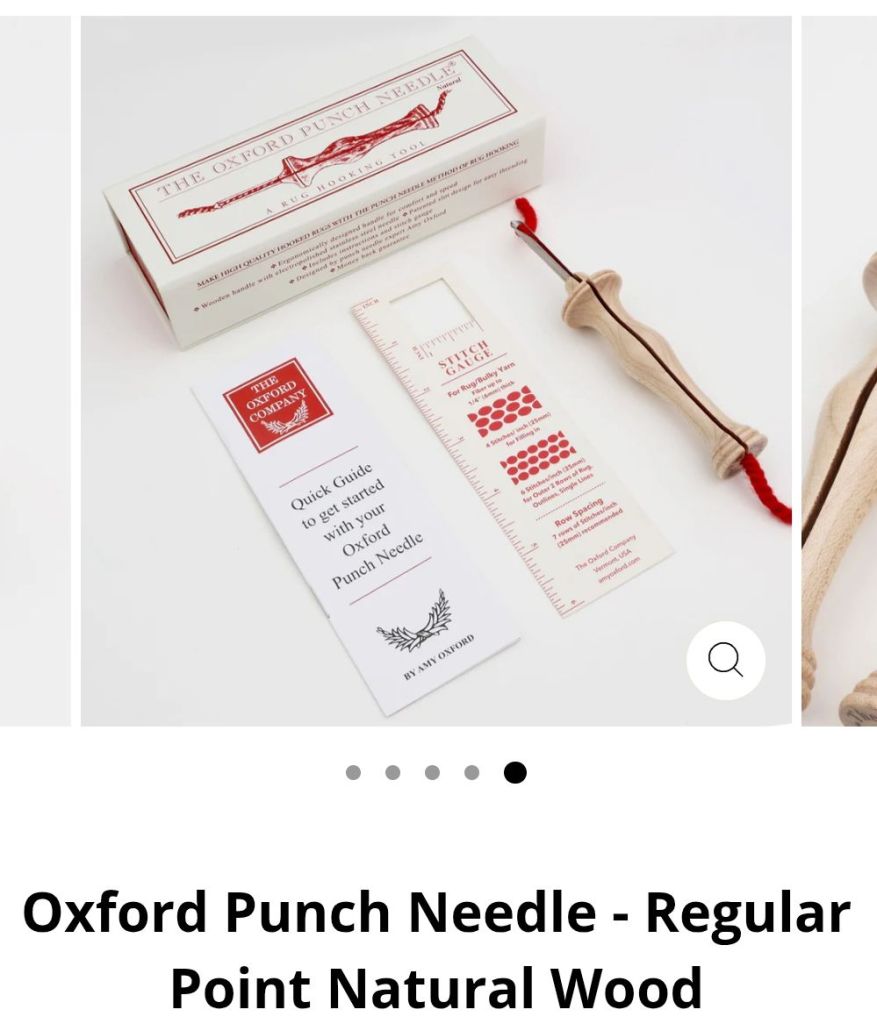
Meghan brought a punch needle pillow to the meeting done with chunky yarn and a big needle. She described hers, and it was probably very similar to the Oxford Punch.
I’m using the Ultra Punch needle, which seems to be the gold standard in punch needle for projects using embroidery threads. It has 12 heights to vary the length of the loops as you punch.
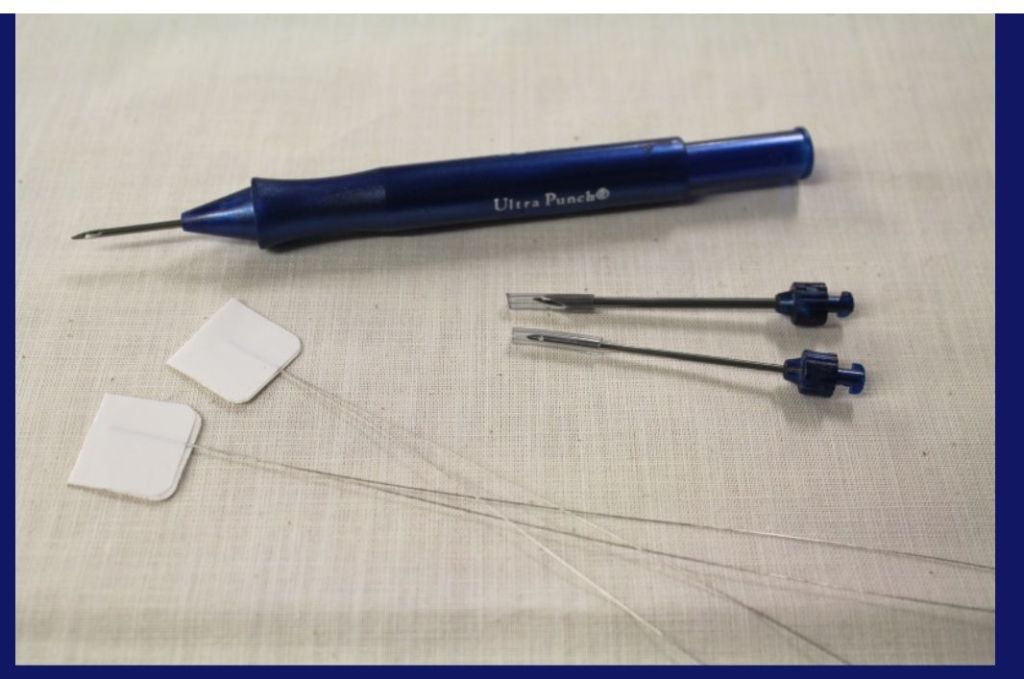
This design is done at level 2, which creates a higher loop than the background, which was done at level 1 and creates depth in the design. You can’t see in the photos, but you can in person and feel it.
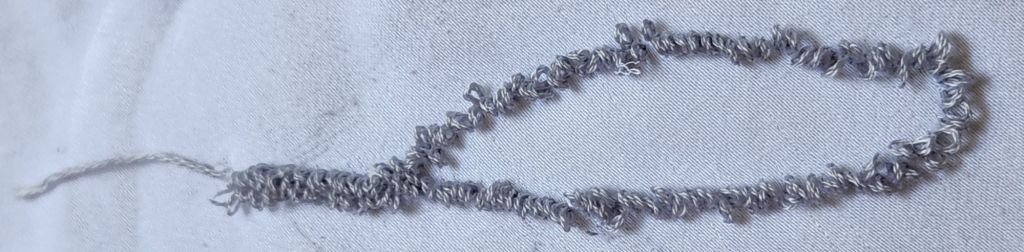
Since I only have evenweave fabrics (weavers cloth was supplied with the kit), I cut a piece from an old sheet for me to practice on. After watching a YouTube video, I realized that I had not loaded the punch needle properly (that sample was not photographed). After that, I got the hang of it quick enough (photographed below). Following a line is tougher than you think! Once the areas get filled in, it looks smoother.
Needlepoint stitchers might find it odd that you cut ends of threads from the front. It just blends into the loops.
If you pull the thread, it can all come undone. Kristen suggested applying fusible fabric to the back would help prevent that. But I don’t think I’ll be touching it to have that happen.
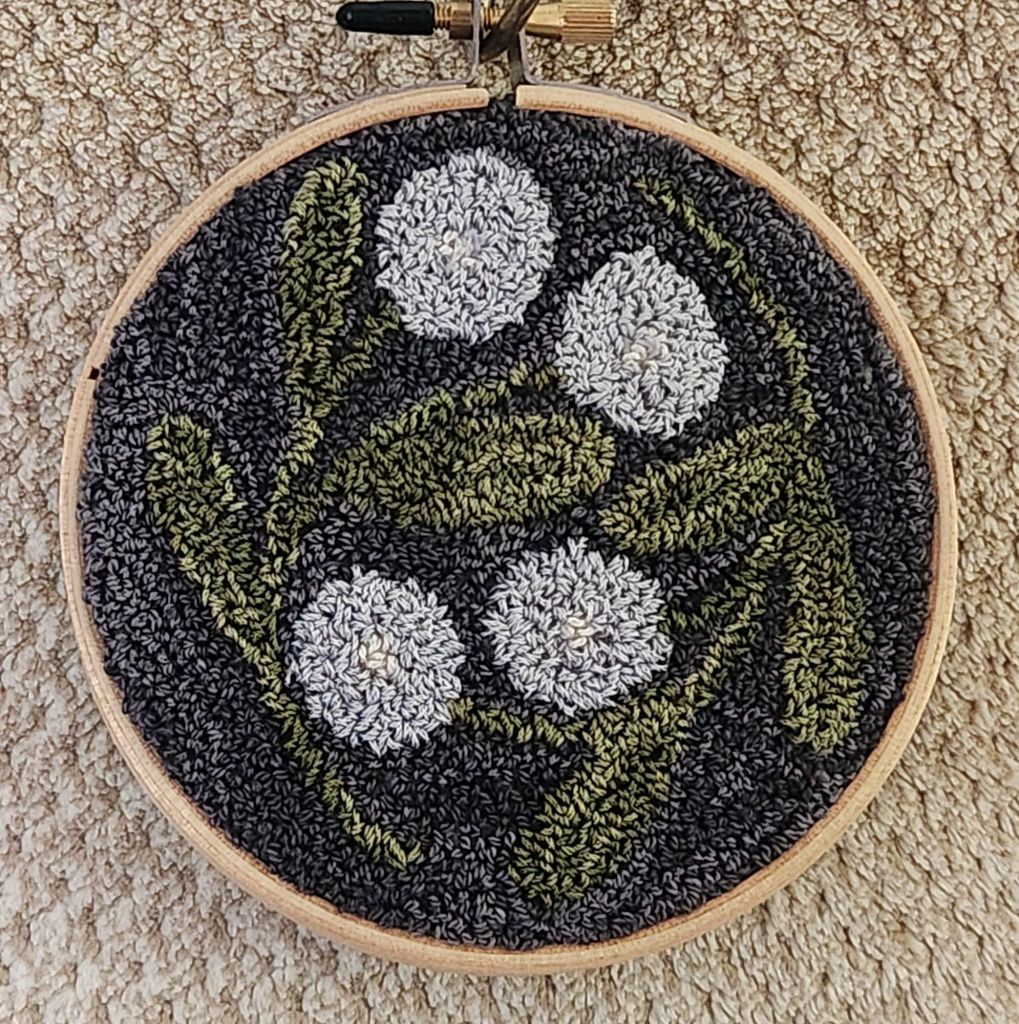
The design is drawn on the back of the fabric (not photographed), and that’s where you punch as the design appears on the front (as seen in the photos). The overdyed green and light gray threads are Valdani balls of 3 stranded floss (worked as supplied, not stranded). Placing the thread balls in a small jar allows the thread to continuously feed through the needle and not roll away. You don’t cut the thread into multiple lengths as we do in needlepoint.
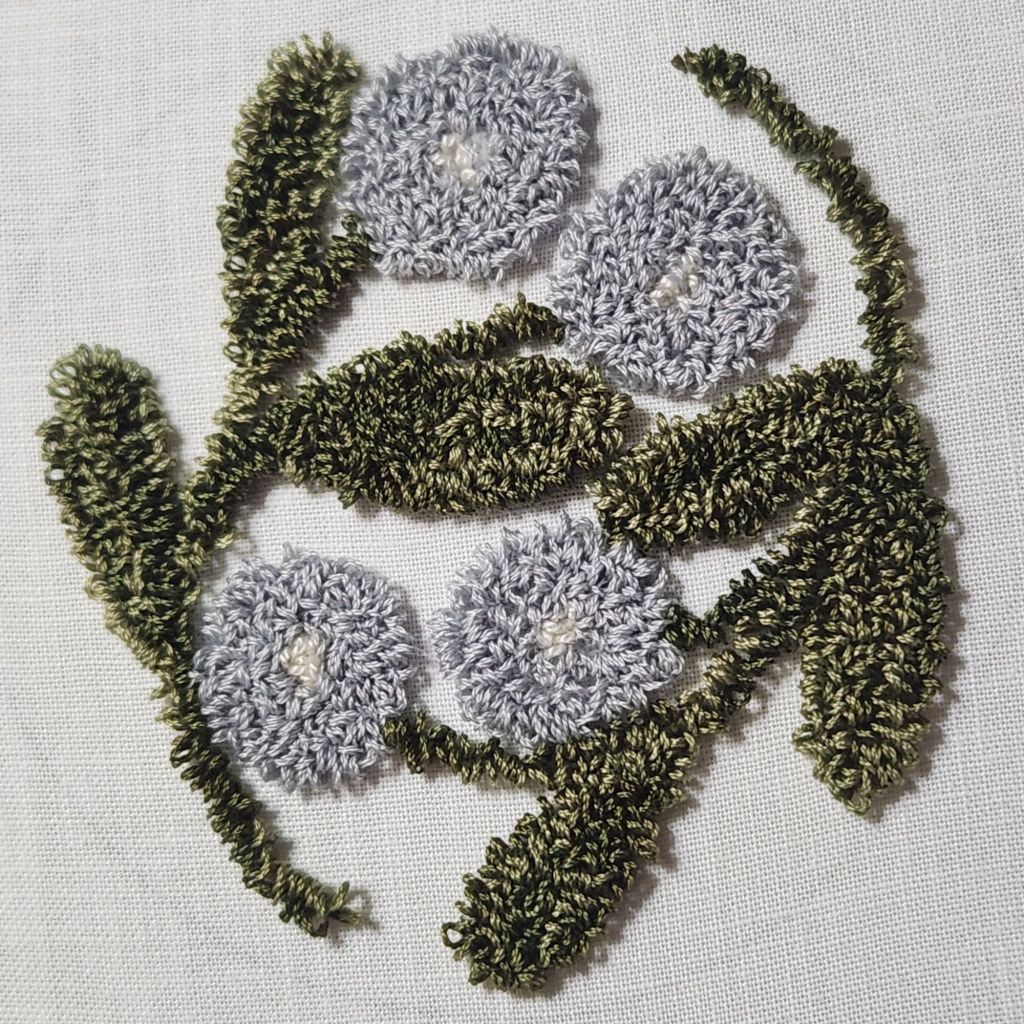
The overdyed dark gray for the background is Valdani #8 perle cotton.
I never expected to get this done before our meeting, and I didn’t get much of anything else done, but I finished the punching in 2 days.
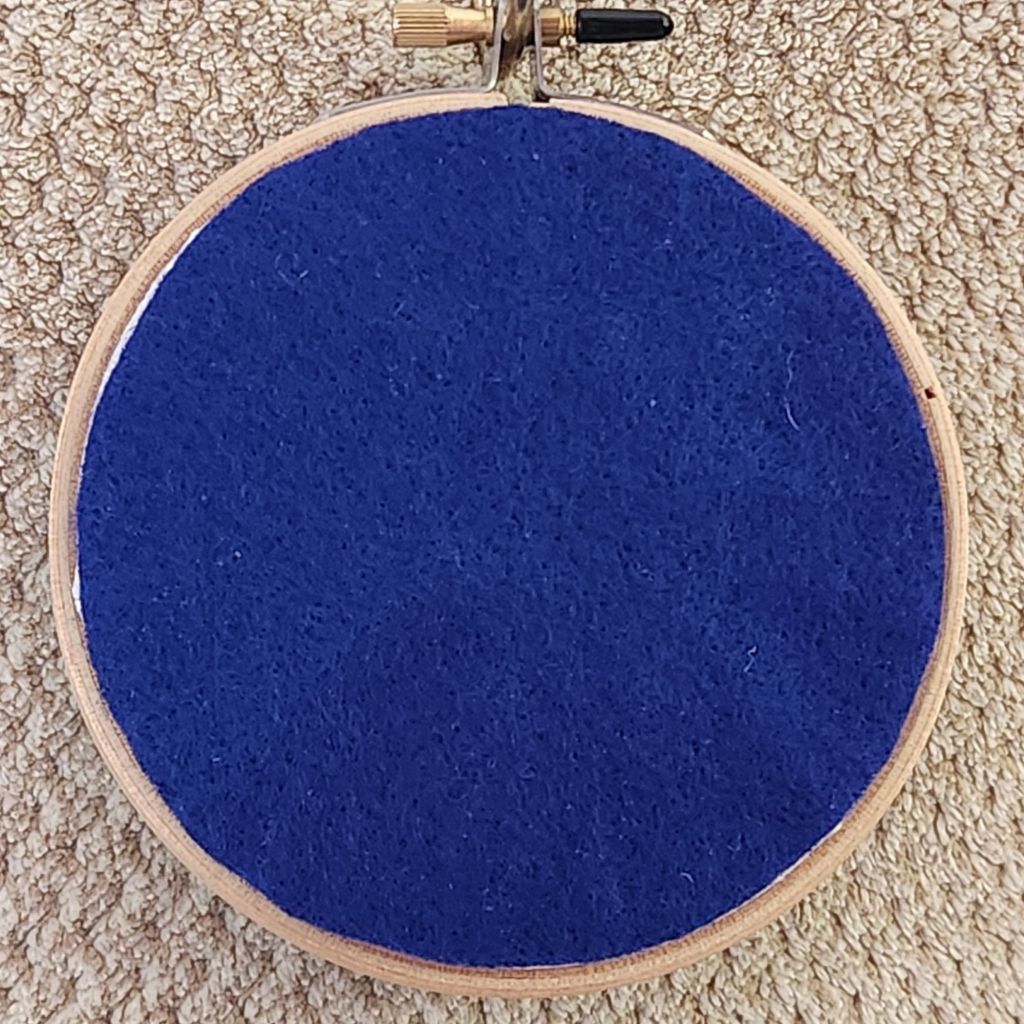
The kit included the display hoop and a piece of felt to cover the back. I did a running stitch along the inside edge to gather the fabric, cut away the excess fabric, filled the width of the hoop with the excess fabric and batting, covered with magazine board, gathered the fabric, laced it flat, and glued a piece a felt on the back that came with the kit. I placed Aleene’s Fabric glue on the weavers cloth and simply pressed the felt down. It was dry in no time.
Thanks to the deadline of the demo, this completes Goal #8 for 2025!
I was asked if I plan to punch again. And, I would if I happened to see a cute design, but I don’t feel the desire to seek it out. The repetition of punching reminds me of basketweave. But, I prefer basketweave because of the lack of precision with punch needle. The loop height in punch needle has some variation, and getting stitches close enough is an issue, although both would probably improve with practice. There is also the concern that it could unravel.
Kristen said the tool has been used for Turkey work. Again, I would be concerned about unraveling.
All said, I will keep my punch needle!
