A few Christmases ago, my sister-in-law, Sher, gave me a wooden cutting board on which she had painted a bluebird because I had raved about how good it was when I saw her post it on Facebook. I knew she was crafty but hadn’t known she studied art or painted!

Since Sher had made three similar bluebirds, I used Photoshop to morph my favorite face on my favorite body. And, after taking several classes on how to paint on canvas, I was ready to paint and stitch it for her Christmas gift.
Step 1. I made a line drawing using Vellum tracing paper. This allowed me to focus on the main elements of the design.

Step 2. Initially, I was going draw the tracing onto the canvas. Instead, I placed Congress Cloth on top of the photo. I could see the photo clearly when it was on my light box. My first attempt was heavy on the paint and holes got clogged.
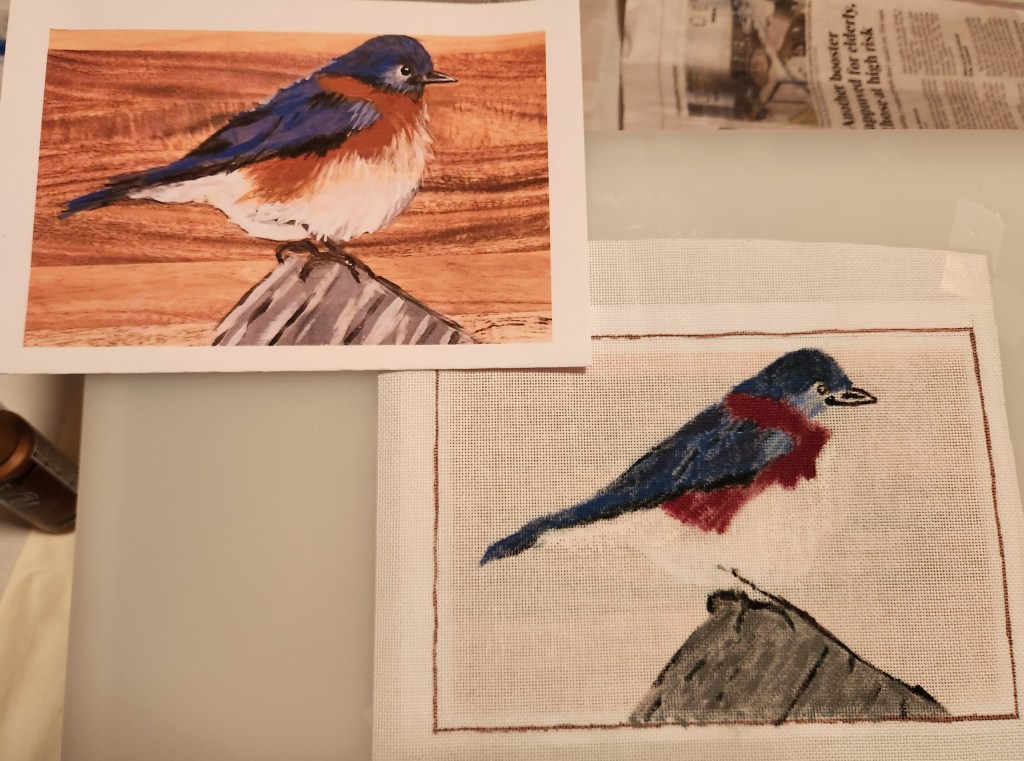
Step 3. In my second painting attempt, I used less paint and waited for each color to dry before starting on the next. I didn’t try to get the exact coloration of the bird’s feathers onto the canvas because I knew I’d cover them completely with threads. I especially loved how the background turned out.

Step 4. I selected threads and a stitch for the log. The grays are Cosmo, a 6-strand cotton floss in 3 values of grey (from dark to light, including 2154, 153A, and 2151) and black DMC 310 for his perch (3 strands). The stitch is from Patchwork of Peace (page 68), which I saw stitched on Facebook’s Virtual Notebooks by Meg W. The pattern created a bit of a vertical appearance, but from a distance, it is ok.

For his feet and leg, I used Trio T12 Black with an outline stitch.

Step 5. I definitely wanted to do the background first in case the feathers needed to cover that up some along the edges. The background is a brown wooden board. I love how my painted canvas turned out. So, I don’t want full coverage.
I tested a Woven Trame (too heavy), Woven (the holes show more than canvas), Alternating Oblong Cross Trame (some canvas would show but still heavy), a Horizontal Wave Double Running Stitch (photo makes it look more open than it actually was and it was tough to see the holes with brown thread on brown canvas), and finally the Horizontal Wave Running Stitch without the short stitch (from Sandra Arthur’s Shapes of Needlepoint Series IV page 46). It is open so my painted canvas will show through.
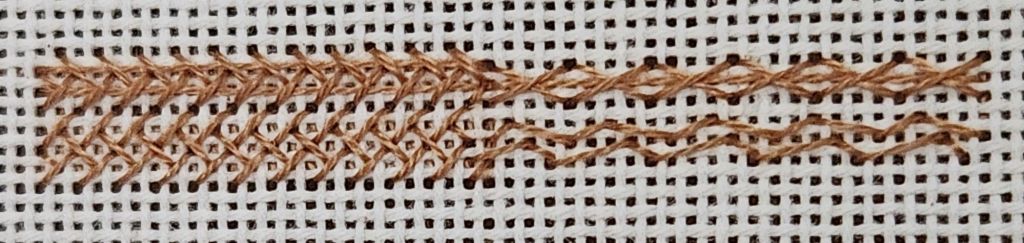

I had intended to use 5 different values of browns to follow my paint coverage. I realized that it would be difficult to switch threads so often. Then I remembered that Amy Bunger (in her DVD #6 Barely There) suggested matching the thread to the middle value of a shaded painted area and used the same stitch throughout. Here are the top 10 rows and the right side stitched.

It really evened out the paint and allowed the painted color variation to show through. I couldn’t be happier with the result. But, the background seemed to take forever to stitch.
Once I got to the bird, I stayed with it and was done in about 5 days of concentrated stitching (thanks in large part to the US Open for keeping my husband occupied for 4 days!).
I used Splendor threads for the bird’s body using 1 white, 3 grays, 3 blues, a brown, and a rust. I used 2 strands in the needle varying the combinations: 2 black, 2 bright blue, 1 black with 1 bright blue, 1 black with dark gray, etc. A couple of other threads for the leg and beak.
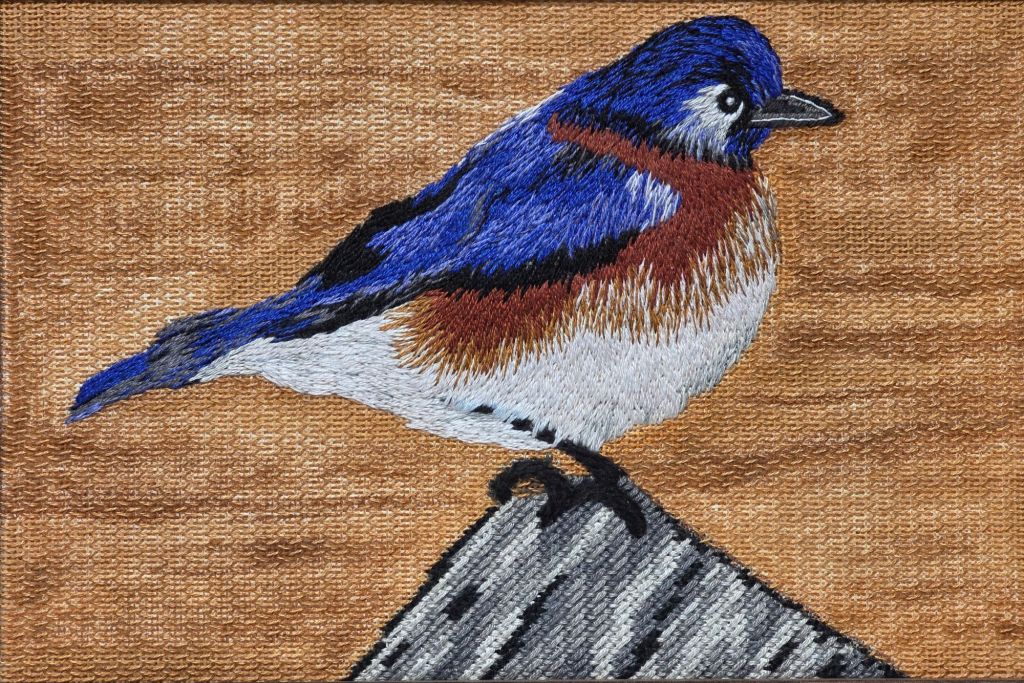
It flew off to the framer, Jim at Repenning Fine Arts in NJ, so it could head west to St. Louis for the ANG Exhibit at Seminar. That was the first of two exhibits he would enter before heading north for it’s permanent nest. I’m very happy with how it turned out!

It was in the Adaptation category in the exhibit. No ribbon but good scores and good feedback from the Judge in the critique:
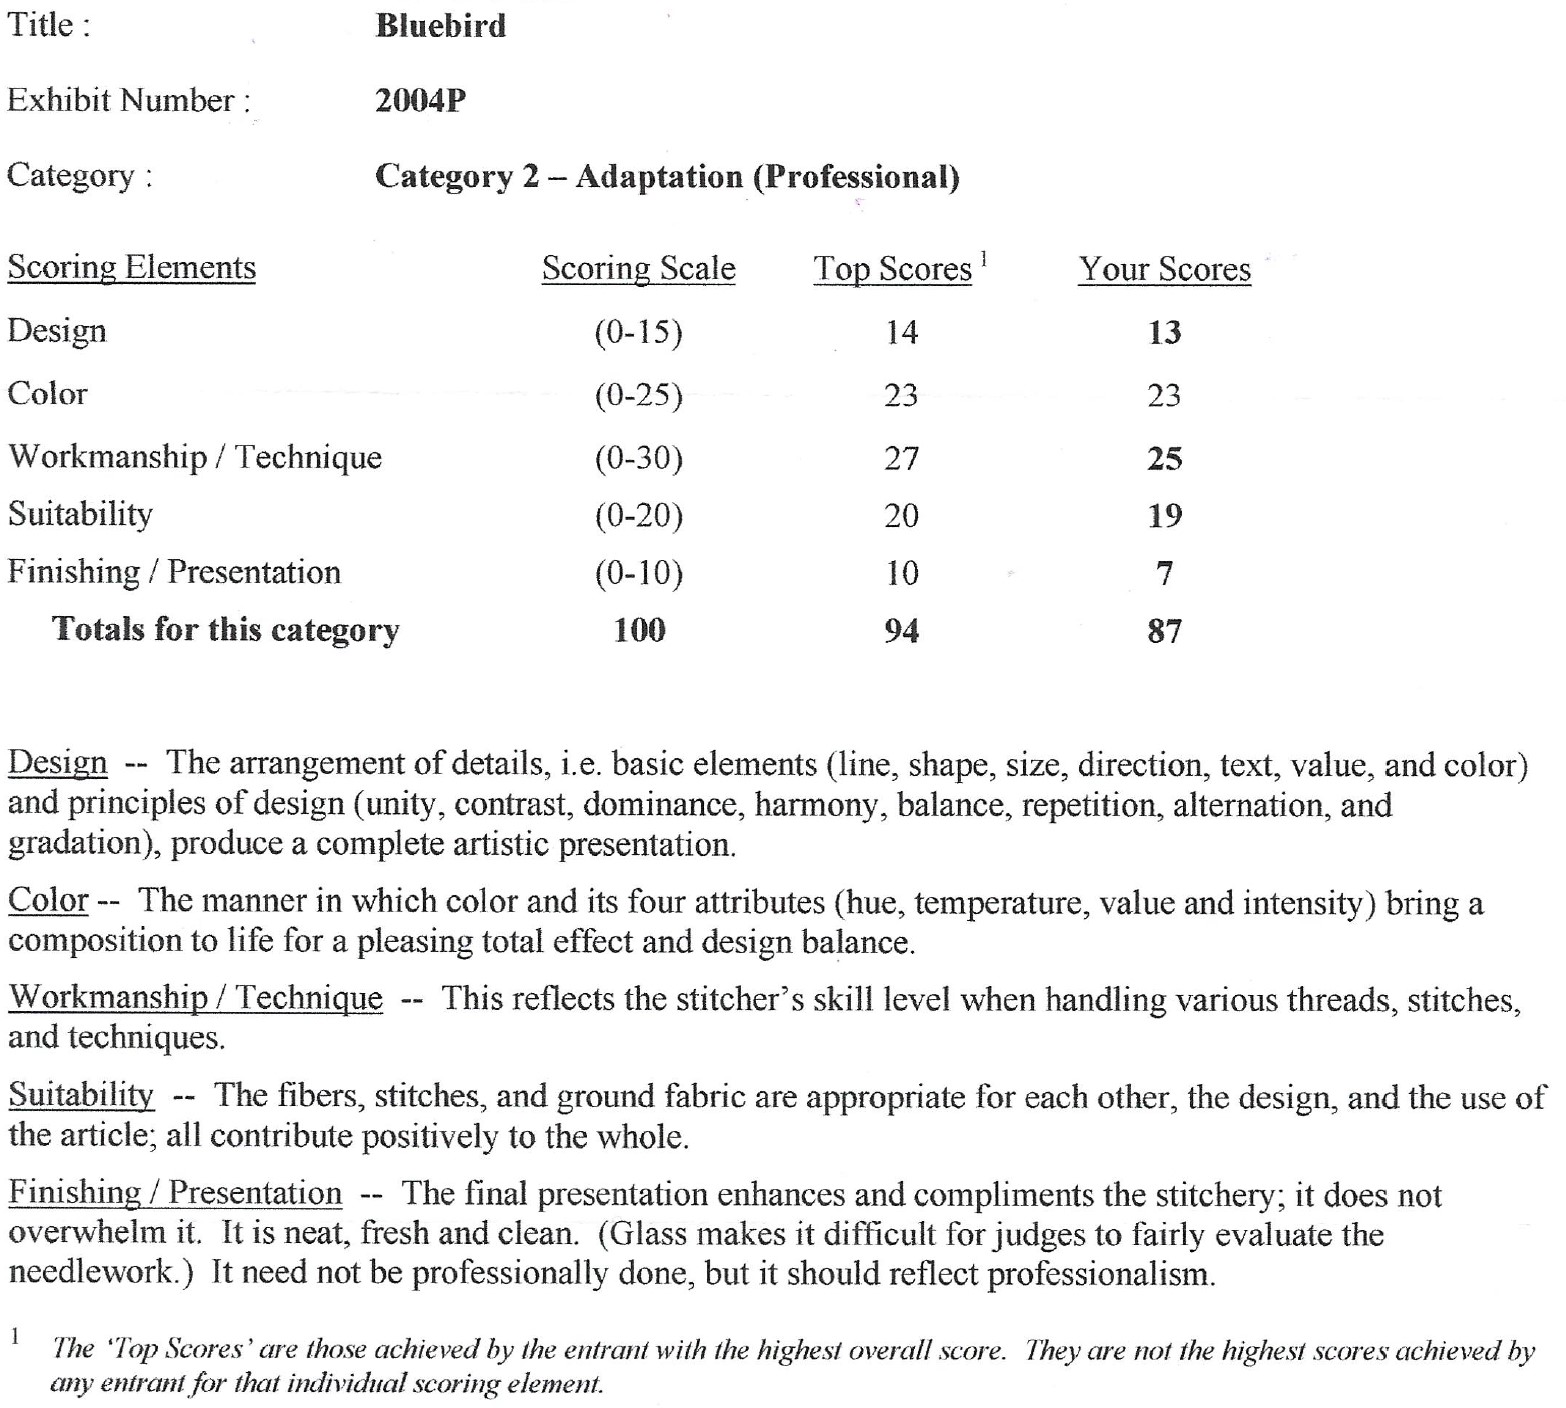
• Ordinarily some of my comments would have been about the line of the back of the bluebird could have been smoother. But then I realized that your depiction was truer to what had been painted, which is more important. Bluebirds may not be as dark of a blue as your sister-in-law painted him but we felt that you wanted to replicate her painting as much as possible in tribute.
• Your threadpainting was successful in transitioning from the darkest of colors to white. In the front of the breast, the transition was a bit more abrupt than on the side (middle) of the bird.
• Your threadpainting of the blue feathers was successful in the way you added the nuances of the different colors in those feathers. The success of the stitching of the feathers is in following the line of flow of the feathers from the breast to the tail. The line of stitches in the breast area follows the flow from the top of the breast to the lower part.
• Transitioning from the breast area to the midway area was not as smooth as it was from midway to the back area. The flow of the line of stitches truly followed the line of the body when going from the middle to the tail. Slanting some of the rusty brown stitches a bit in the middle areas would help a viewer to see a better flow.
• Using an open stitch allowed the shades of the background to come through in a much better way than if you had completely covered the ground fabric with stitching.
• Looking at the overall presentation of your piece, the bluebird might have been happier with a bit more space above his head. Adding some more background above the bird and less rock below would have helped. A less heavy frame would also have improved the presence of the bird.
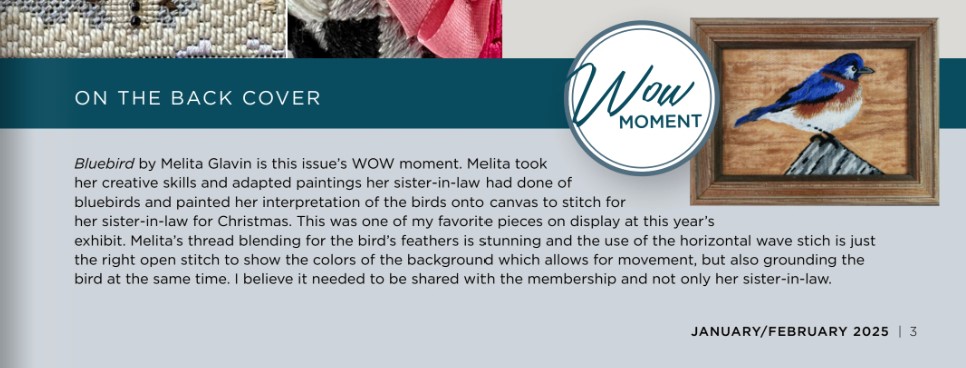
It was really special that Patty, the editor of NeedlePointers, has Bluebird as the WOW Moment & displayed it on the back cover page of the January/February 2025 issue! Here’s what she had to say about it:
Many thanks to Linda M who gave me her copy of the magazine so that I can present Sher with the issue. I want to keep a copy of the issue myself.
The piece was going to go to Sher for Christmas 2024, but I decided to send it south for the winter to the 2025 Woodlawn Needlework Exhibit where it earned Honorable Mention in Adaptation in Surface Embroidery category. It should not have been reclassified from Canvaswork to Surface Embroidery, but the Judges said it wasn’t them. There were 3 judges listed in the Woodlawn booklet and I had their contact information. Apparently, there is a committee that takes in the pieces, and it must have been them. I didn’t pursue it further.

Here’s the piece, ribbon, and pin from Patty..

We visited Sher for her birthday in May 2025. She was blown away and I can finally post this saga! Here we both are with our gifted bluebirds. Neither Lady nor DeeDee seem impressed.

Filed under: Bargello Books, Books in My Library, Needlepoint Bargello by Dorothy Kaestner
Books in My Library: Needlepoint Bargello by Dorothy Kaestner, 1974

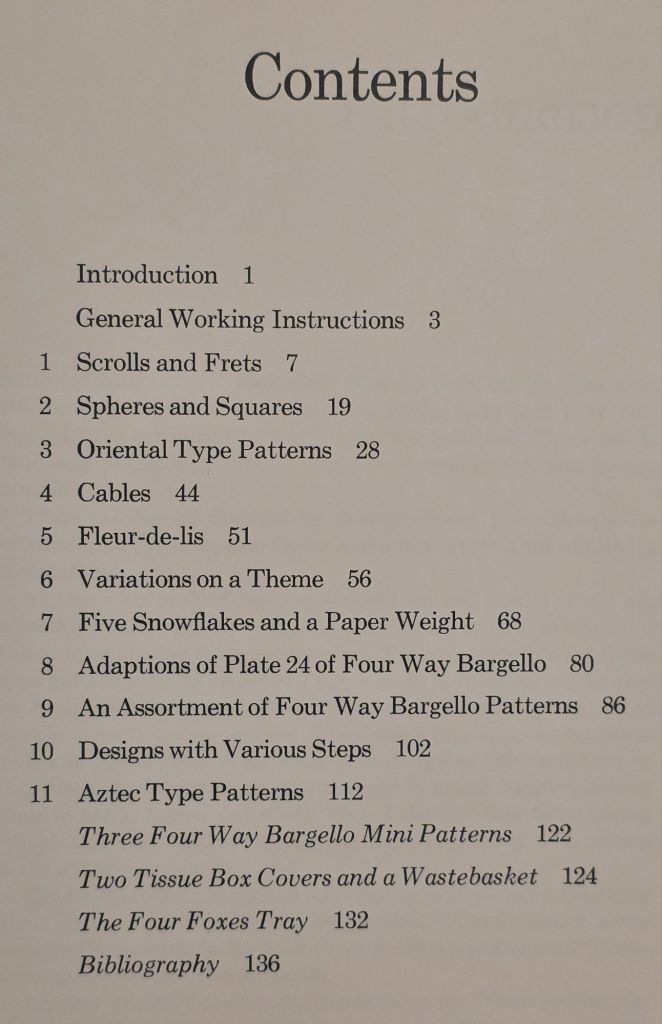

This book is where I found spheres on poles for the center flower of Bargello Bowls (page 20). https://melitastitches4fun.com/2021/04/22/canvas-master-craftsman-program-step-4/
I’m not into Foxes but she creates a fox head with bargello. There are circles, snowflakes, and a fleur-de-lis.
She shows you how to make a tissue box cover. Hmmmm.
I finished the ornament Love, 5th in the series from the Cabochons Series by Susan Portra.
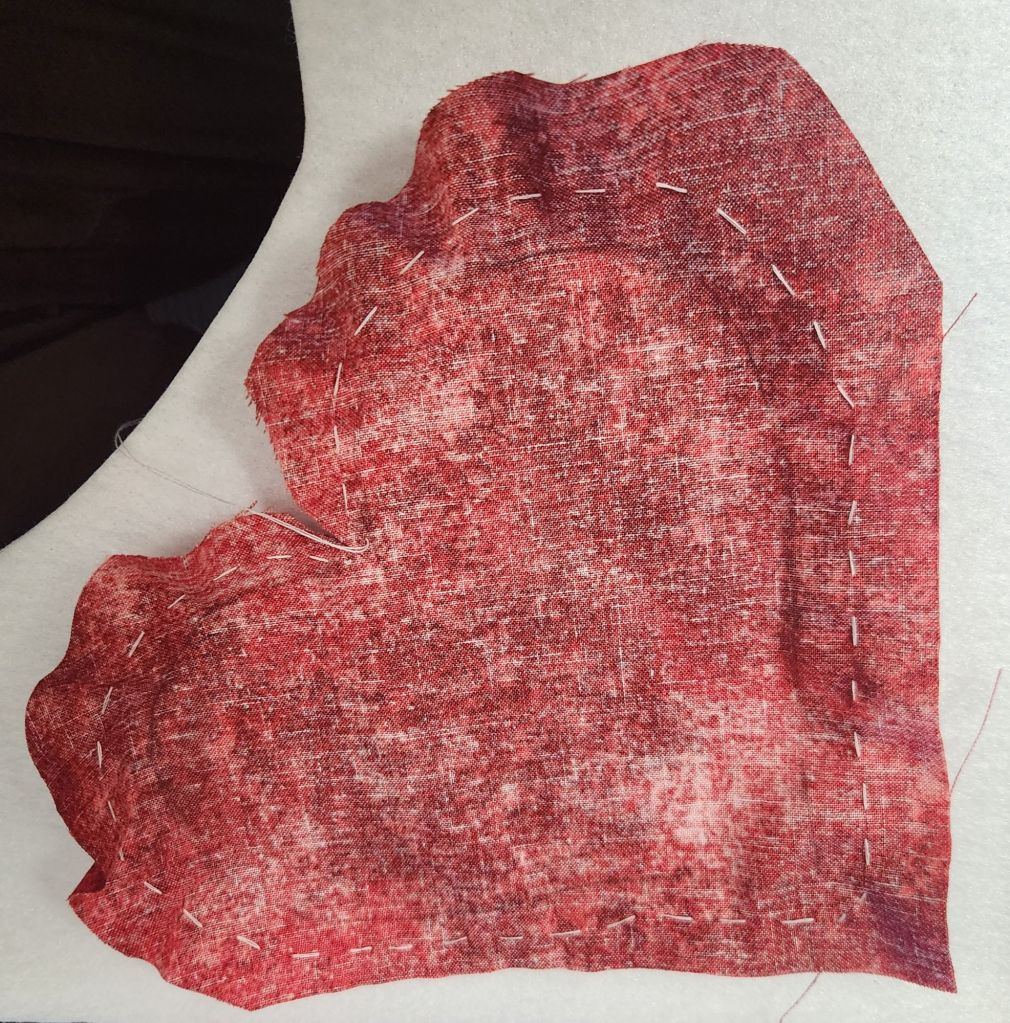
This time, I did it differently. I used a running stitch and cinched it around the magazine board. With the rest of the thread used as lacing to keep it snug.

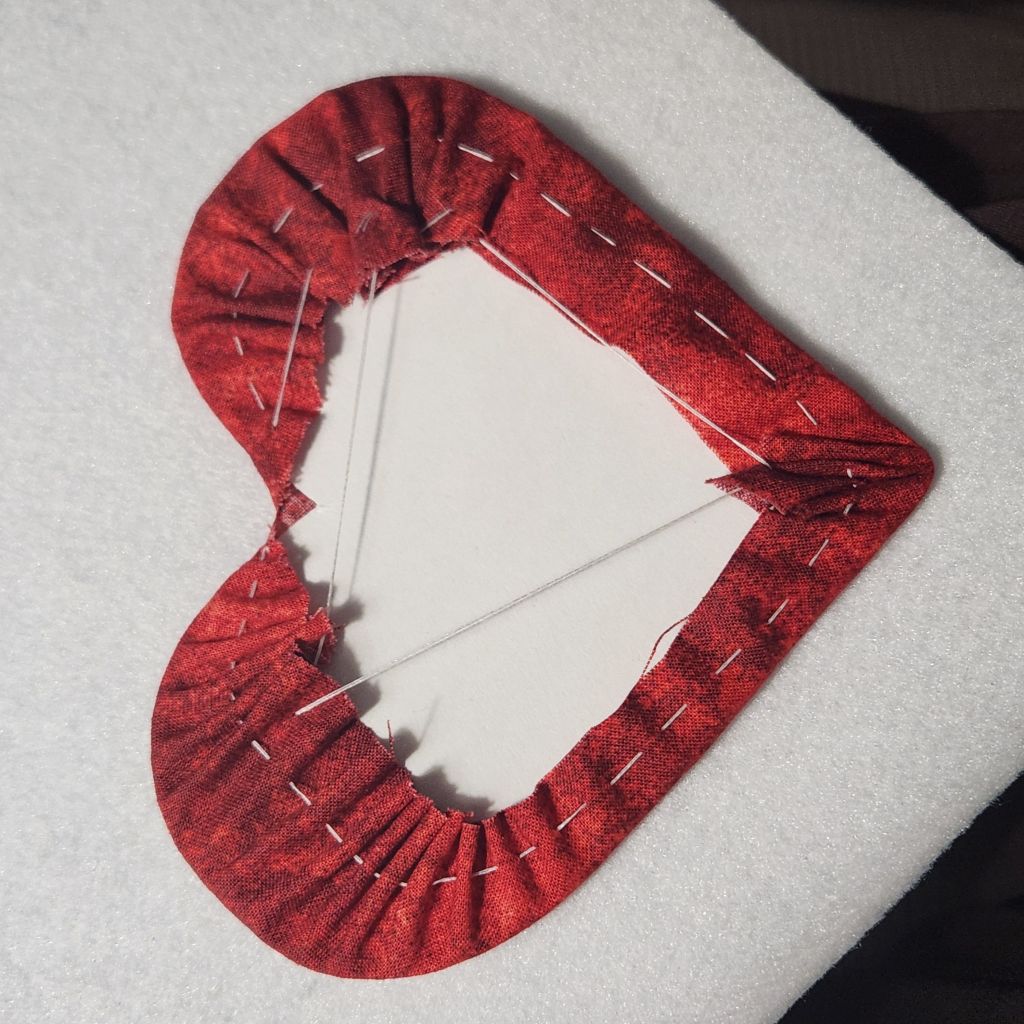
I added some Craftex as padding. Then, I glued it to the back of the front in a few spots with “Super NEW GLUE” by Euro Tool, Inc. that I picked up at Blue Santa Bead. It’s a small bottle and easy to control. It dries fast and firm.
I had enough of the DMC #5 Pearl 350 and Tiara T115 to use 4 strands of each to make the cording. I stitched the cording to the Craftex before gluing the cording into place while pinching the 2 sides together. I went back and stitched the cording in a few places to be safe.
Goal #21 stitched and finished! I decided to finish these when I take them off the stretcher bars so they don’t get jostled or the stitching skews once removed. Plus, finishing all ornaments together sounds like a worse option.
Filed under: General comments, Painting Needlepoint Canvases with Fancywork Finishing
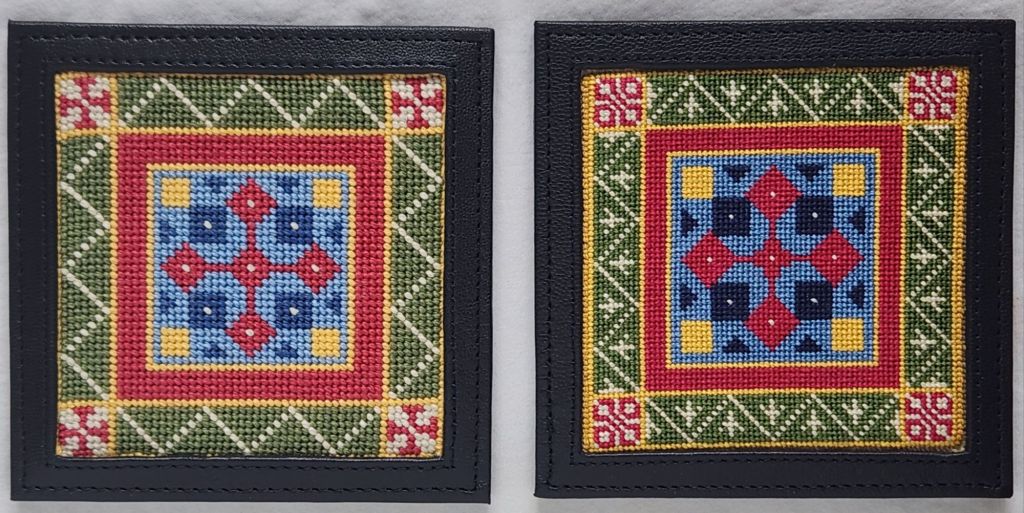
In 2020, I took a painting class with Nancy of Fancywork Finishing on Zoom. I think she may have retired since her website is not active. I painted and stitched a similar original design on 13 count (https://melitastitches4fun.com/2020/11/05/painting-needlepoint-canvases-with-fancywork-finishing/) and on 18 count (https://melitastitches4fun.com/2020/12/02/second-coaster-stitched/). I wanted to find red leather coasters. So, I put them away until I found them.
In September 2024, at KC Needlepoint, I finally found leather self finishing coasters with 4″ square openings. The red wasn’t the same red so I went with a very dark blue. But, when I got home, I couldn’t find the stitched pieces.
Finally, I found them last week while looking for something else! But, the stitched pieces were 3 and 15/16 x 3 and 7/8 on the 18 count canvas and 4 and 1/8 square on 13 count. So, I had to find the proper yellow and add a row on two sides of the 18 count canvas. I lost the outer yellow border on the 13 count canvas. Oh well!
Boy, that was tougher than I expected. Getting the paper off on the first coaster took tweezers to get it out from under the edges. The second one I nudged better and slower so the paper came off in one piece.
I had to cut right up to the stitching on the 13 count canvas and use one tool to lift the edge and a second to shove the canvas underneath. I was afraid the stitching would unravel, but it was fine. I lost most over the outer yellow border, but that’s ok. Both are on and not going anywhere!
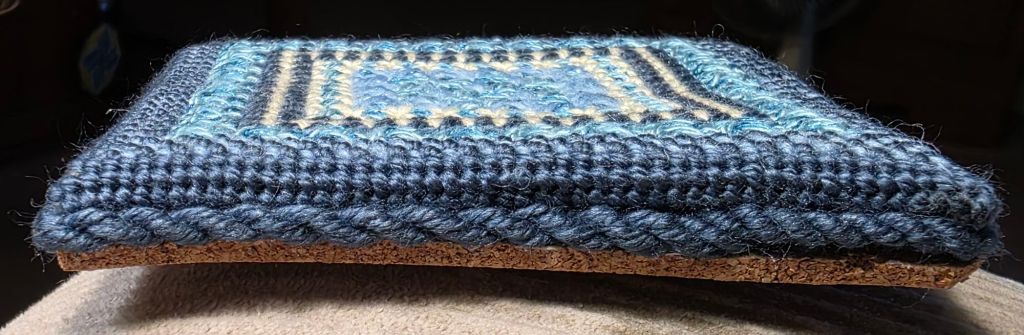
So, here are the finished coasters. I had not included this on my list of 2025 goals because I didn’t know that I’d find them. Bill picked the one on the right on 18 count for his.
We’ve got enough coasters now! So, I’m thinking that I will find an acrylic tissue box that I can insert 4 sides. Does anyone have any sources?
The Craftery PA in Perkasie (1 hour north of Philadelphia) has an event on June 14 (forgot to post this for the April event). They feature carefully curated, artisan handmade items, antique and vintage finds, fresh flowers, original art and more.

The Mid-Atlanic Fiber Association (MAFA) 2025 Conference will be held at Millersville University, Millersville, PA in June (26-29). https://mafafiber.org/conferences/mafa2025/ In the meantime, they are active online (classes, movies, book club, and more).

Maker Festivals featuring Bead Fest returns to Lancaster, PA August 1-3, 2025, along with a fiber arts community! The festival lineup will have thousands of fiber artists, and jewelry makers! https://www.makerfestivals.com

Save time in September for two Fiber Festivals in Pennsylvania. The front and back of the brochures are below. More on their websites.
September 6 – 7 in New Milford, PA for the Endless Mountains Fiber Fest. That’s about 3 hours north of Philadelphia.
September 20 – 21 in Allentown, PA for the Lehigh Valley Fiber Festival. That’s about 1.5 hours north of Philadelphia.


November TBD, 2025 (Fri, Sat, and Sun): Jockey Hollow Weavers Annual Show and Sale in Brookside, NJ (about 1.75 hours north of Philadelphia). Unique, one-of-a-kind handmade gifts, scarves, shawls, yarn, baskets, towels — lots to enjoy.
https://www.jockeyhollowweavers.org/annual-guild-sale
Filed under: 2024 Summer Stitch Camp, ANG Central Jersey Chapter, Making Coasters, Serendipity - Stitching Club with Ellen Johnson
Sharon B, the President of ANG Central Jersey Chapter, requested that I demonstrate how I make a coaster with the cork bottom at the May meeting today.
Last month, members were given pre-cut round Craftex and cork with a self-adhesive side. They were given 18 count canvas but no particular design. Three members were ready to finish theirs and a half-dozen more listened and watched.
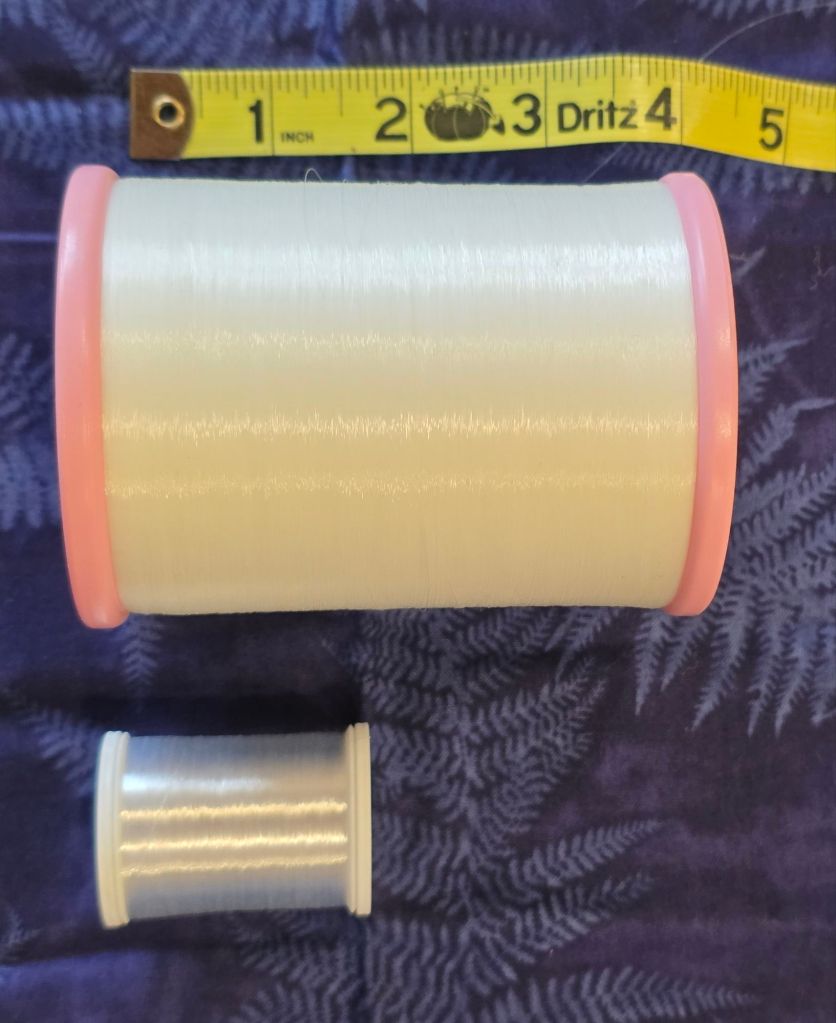
Besides the stitched piece and the piece of cork and Craftex that Sharon provided, scissors to cut canvas and any thread to attach the canvas to the Craftex is all that is needed (it won’t show). I brought a spool of white outdoor 100% poly thread by Coats & Clark. I also brought my lifetime spool of invisible thread but Janice M brought her spool of invisible thread that is big enough to be a lifetime supply for everyone in the chapter! I have never seen a spool so large.
I brought my Kreinik cord maker to add a cord between the top and bottom layers (which is optional but I like to do it). The threads typically match the one used in your design. I talked about attaching the cording by stitching and with glue. You need three times the circumference plus extra for starting and ending. Stitching is technically preferred but it is only a coaster! I brought the best glue I’ve found to date, Super NEW GLUE” by Euro Tool. My fingers even got stuck together – almost. It’s great glue.
The process is almost the same as I described here: https://melitastitches4fun.com/2024/05/04/compensation-coaster/
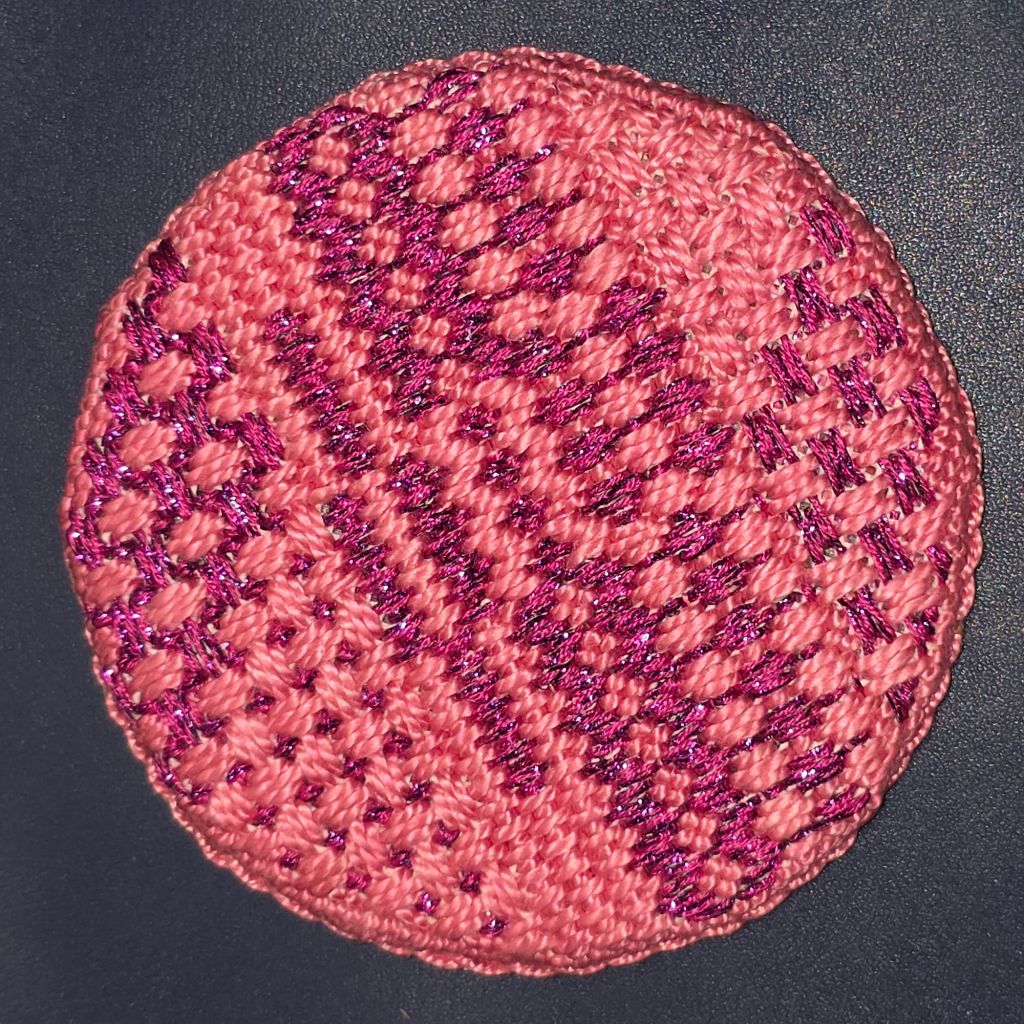
As I told them, I almost never do finishing the same way twice. I demonstrated a round using my pink coaster (https://melitastitches4fun.com/2024/07/14/2024-summer-stitch-camp/).
This time, I tacked the Craftex on the back of the needlepoint with invisible thread in 5 places. Then, I used 2 strands of the outdoor thread and laced each tab to the Craftex crossing to the opposite side as I moved around to various tabs. I glued the last half dozen tabs. I wanted to show how quick and firm the glue dried.
I only showed how to cut the blue square (https://melitastitches4fun.com/2024/07/18/summer-stitch-camp-square-coaster/) and I finished it later that night.
That’s when I remembered one way I avoid a knot on the cording which would create an unwanted bump which isn’t good for a coaster that needs to be flat. I put a piece of Scotch tape on the end with the knot and cut through the tape. It worked great on my thicker blue cord.
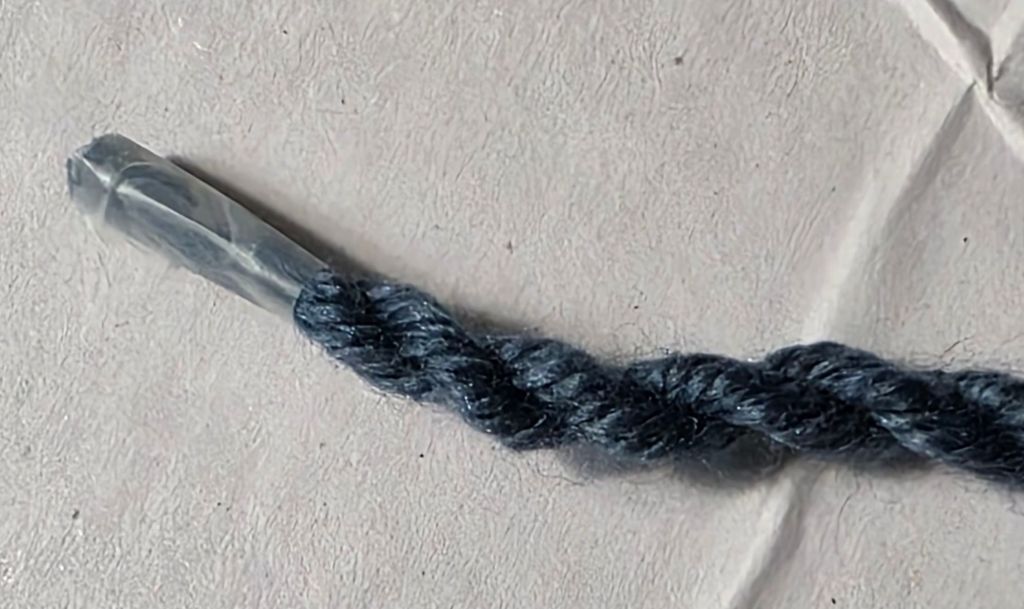
And, I was able to nudge the 2 cords together so you almost can’t see it. Can you see where the ends overlap?
Here’s where.

The corners kind of stuck out but since I cut the cork to shape, it worked out just fine. I just traced the shape and then cut the cork.
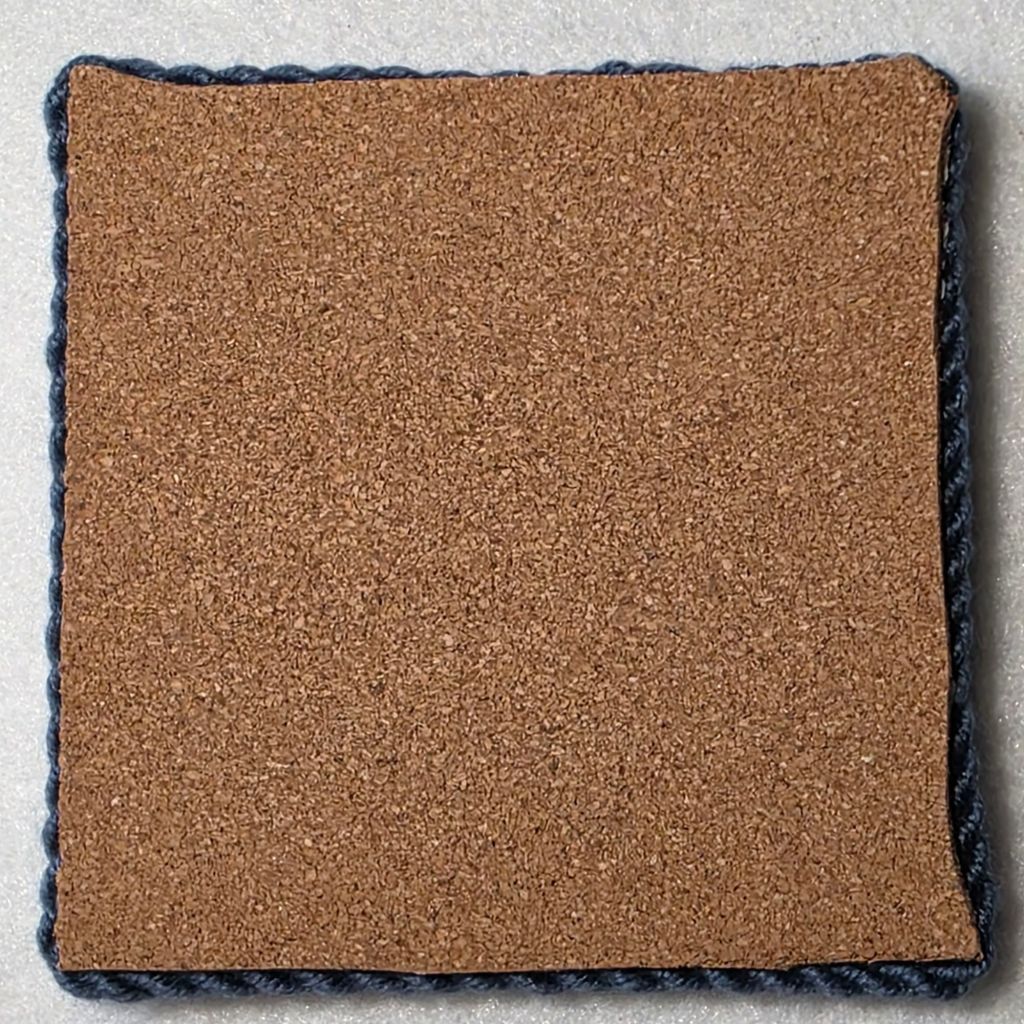
I used glue to attach the cording along each edge and at the corners. It looks great!
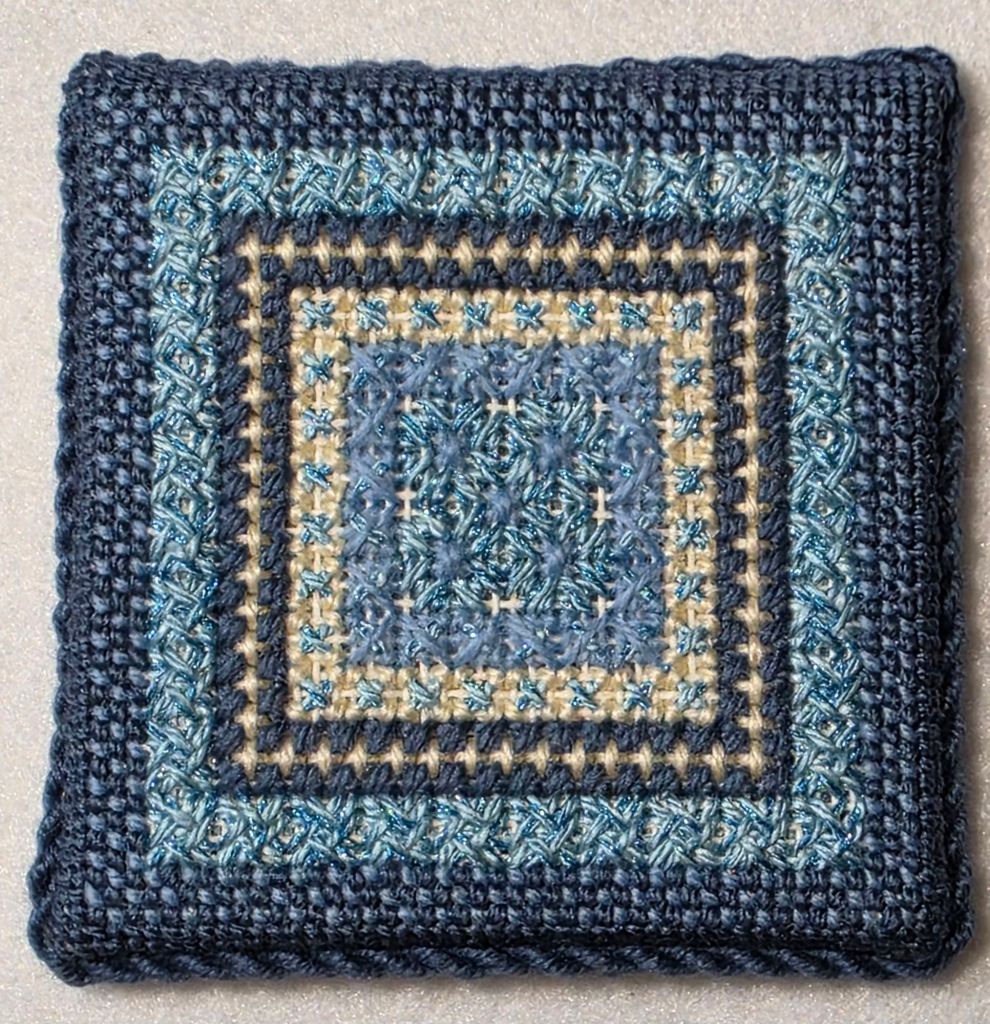
Mine will be the pink one and the blue one will be Bill’s.
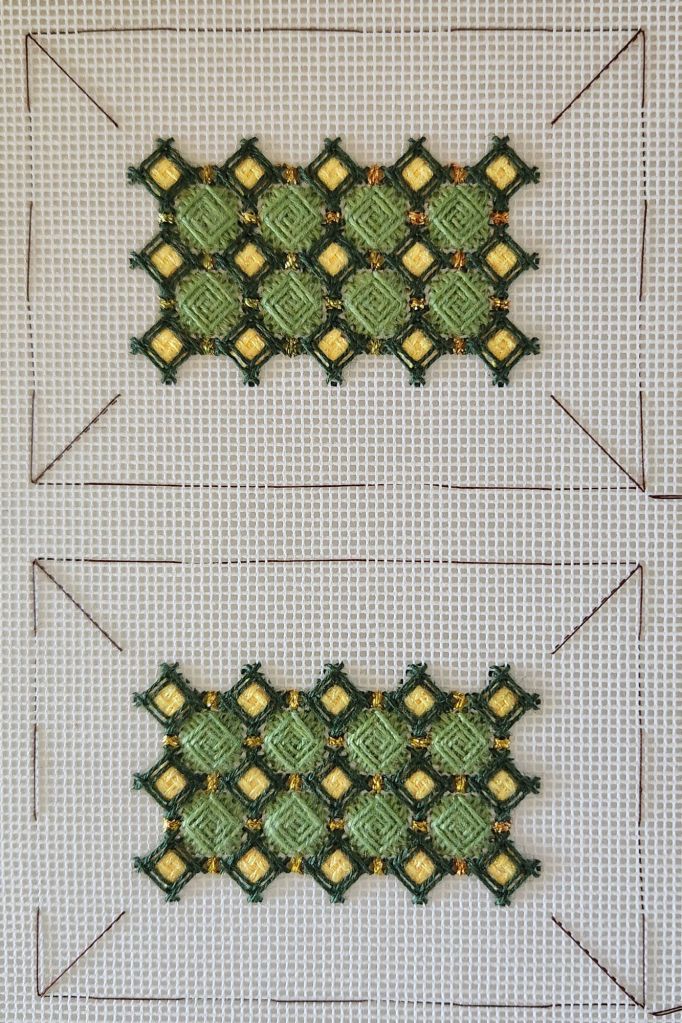
Here’s where I am up to on both ort boxes. These ort boxes have good lessons on how to have thread not show through canvas.
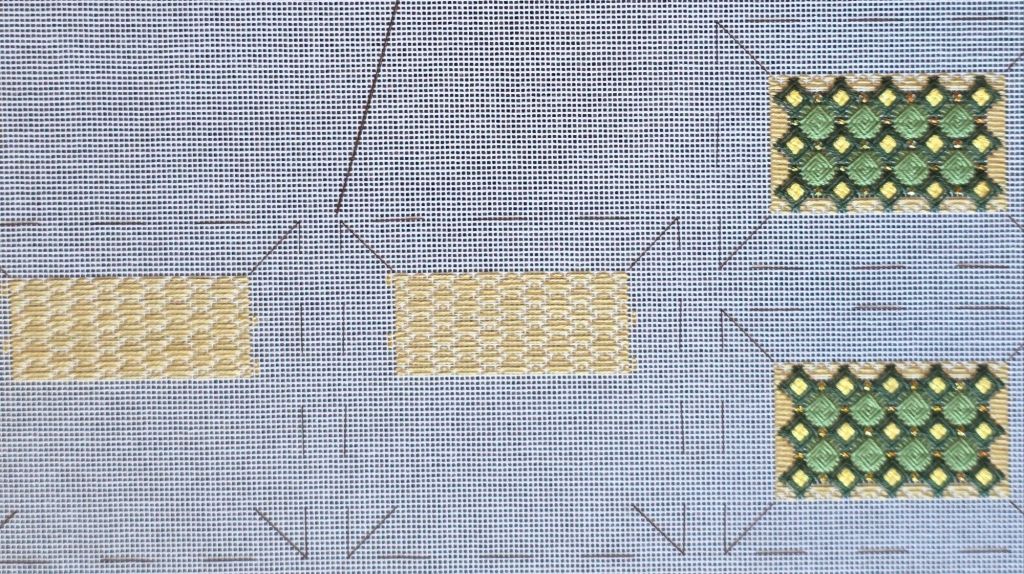
There are 2 sides each like this one.
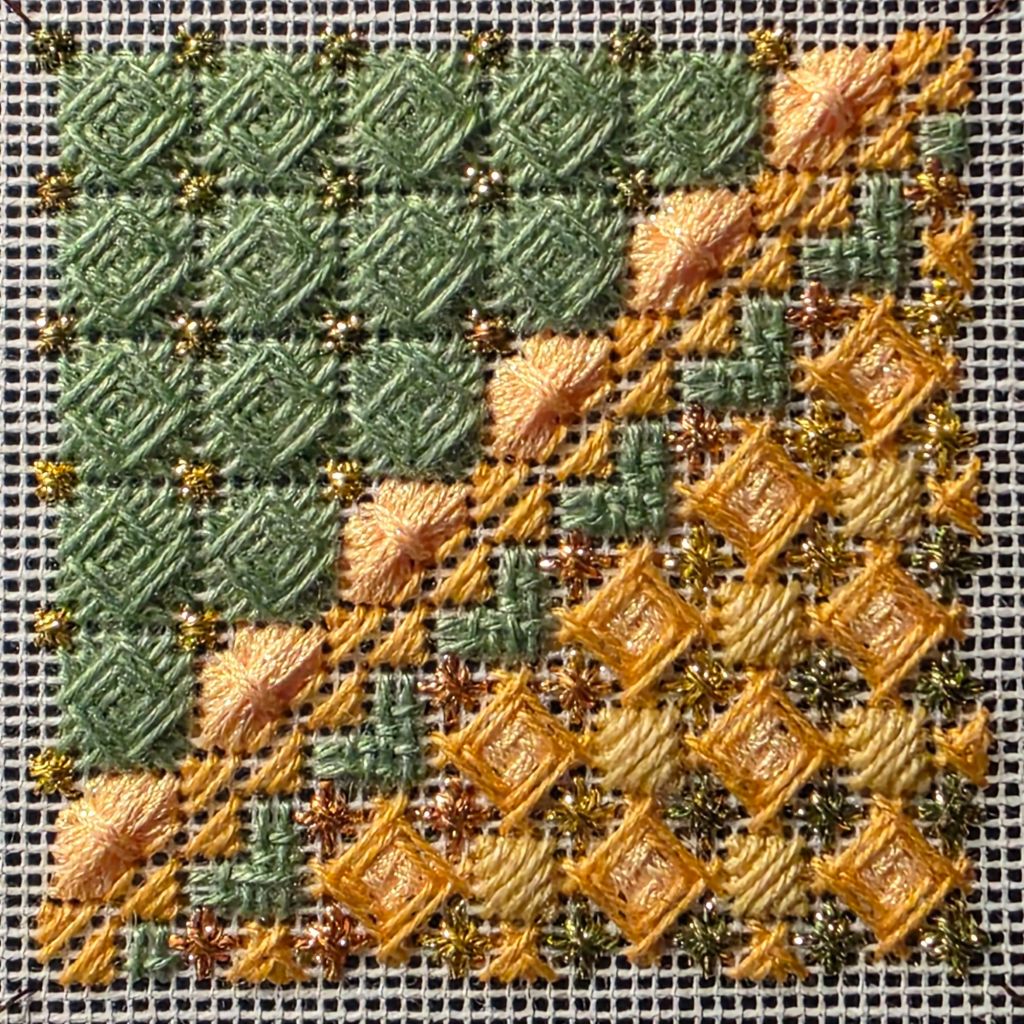
And, love how my color wheel folding ort box is shaping up. The blackwork pattern is next.

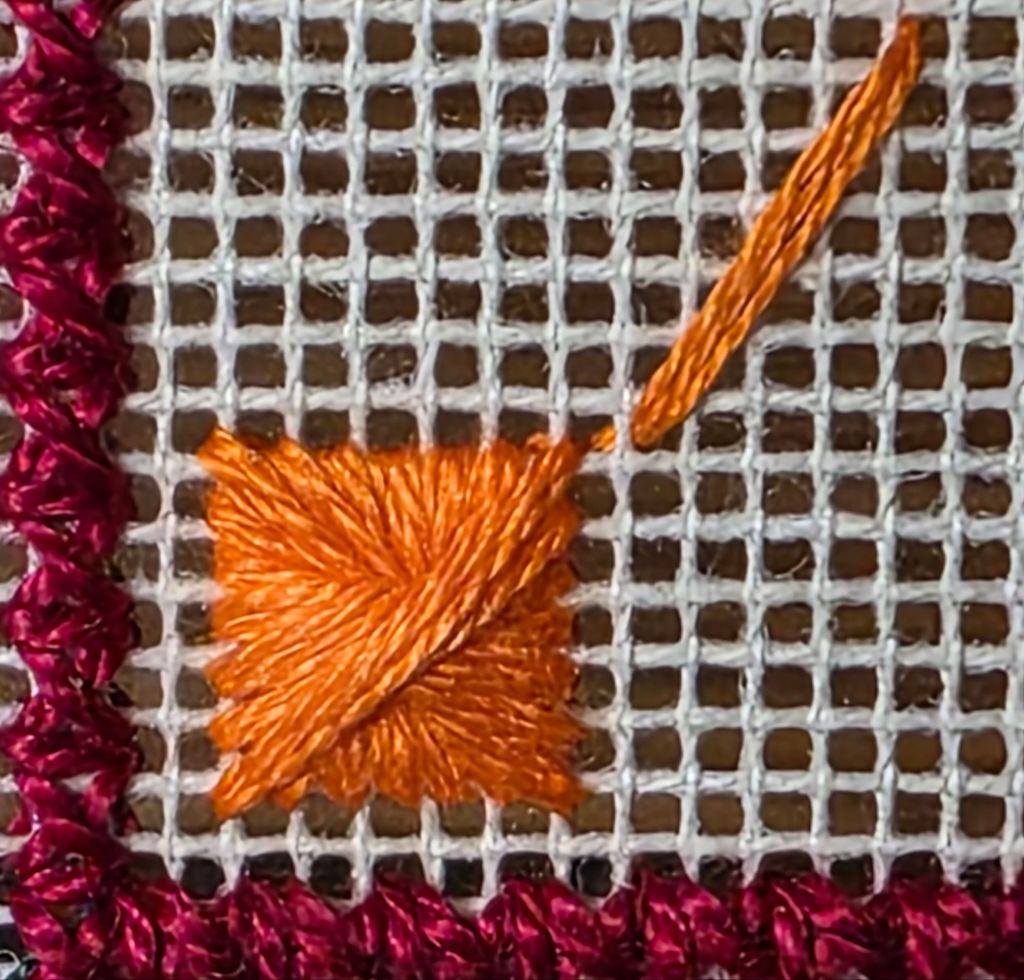
Even for members not stitching the project, there are lessons to learn. This shows when and why to use locking or tacking stitches especially when traveling to the next motif.

Next month, everyone can give blackwork a try!
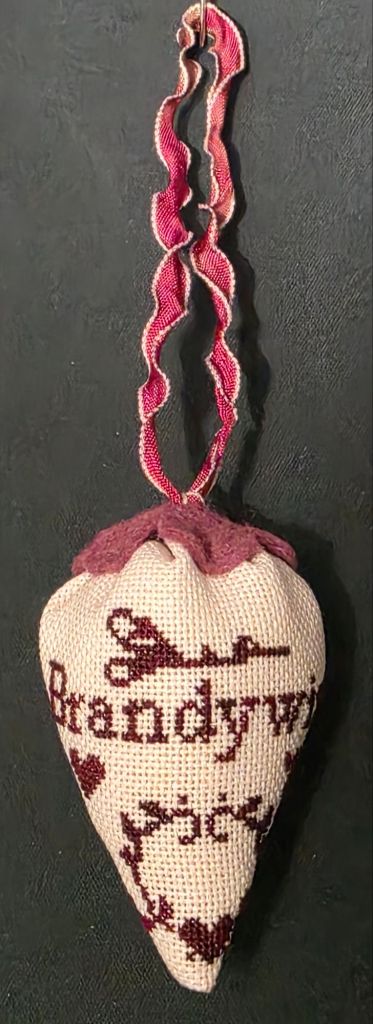
Filed under: Brandywine Chapter, Embroidery Guild of America, Strawberry Pincushion
Today, in the rain, Patrick and I were pleased that 10 members of our EGA Brandywine Chapter joined us for today’s project.
Patrick created the design which was distributed last month. Several had finished stitching it while others were still working on it.
Mine was the smallest (about 2 and 3/8″ x 2 and 3/4″). I used Lugana (28 count in an Angel Blush that is slightly pink) and stitched over one canvas thread.
Patrick led us through making it into a strawberry. He and JoAnne had stuffing. We also could have used walnut shells she brought! Patrick had a variety of colored felt and ribbons. He also had buttons we could have used. Here’s mine. It turned out great!
Filed under: ANG Needle Pointer's Timeless Treasures From the Archives
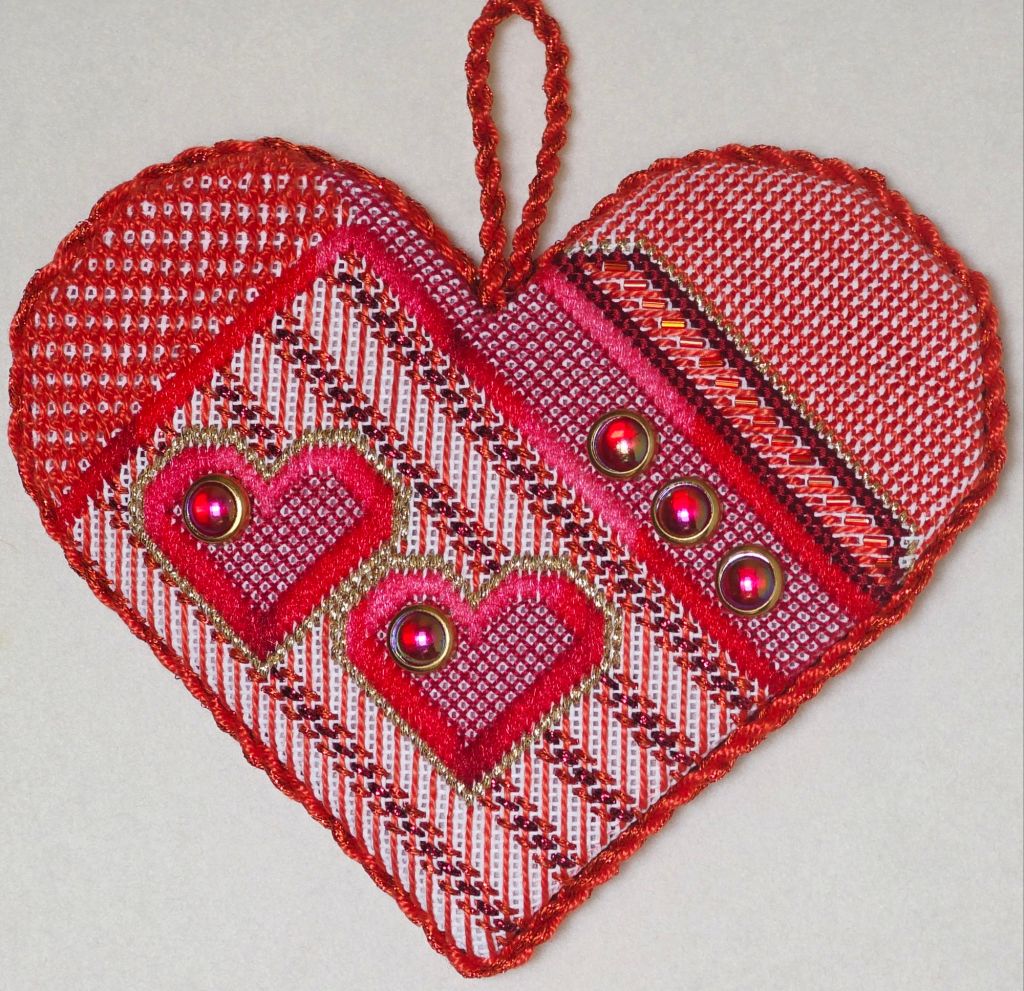
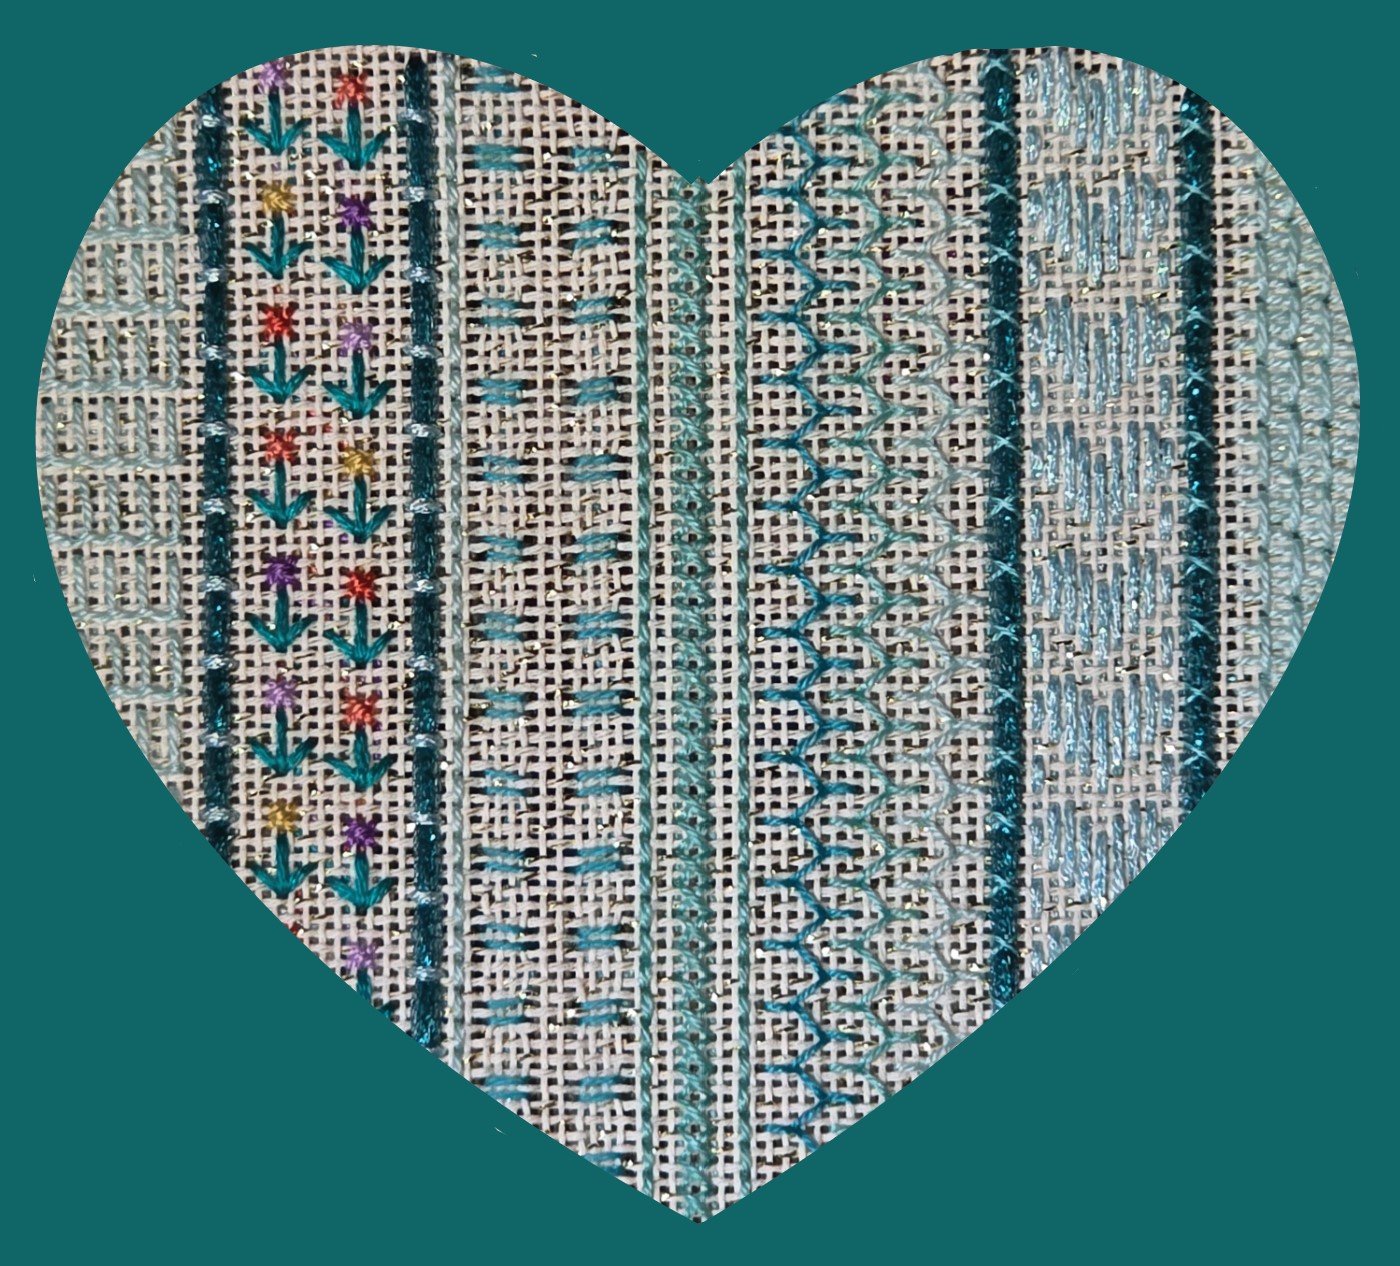
Besides the Hearts of ANG series discussed in the previous issue of Needle Pointers, many hearts have been featured over the years. Here’s my version of Spring Hearts and Ribbons Fantasy by Joan Scrutton. Read all about the one modification and the other heart projects from the 1980s in the May/June 2025 issue of Needle Pointers under Timeless Treasures from the Archives. You have to be a member of ANG and there are lots of reasons to join (https://www.needlepoint.org/page/MembershipOverview).
New photo using Samsung S25 Ultra with optical zoom (better than the one in the magazine).
I am caught up with last month’s suggested areas to complete. It’s always hard to figure out a pace when so many people are involved. At least two people are already to cut and assemble and others have paced themselves with stitching on other pieces.

I’ll post my next areas after our meeting. I still have some more to work ahead on the Folding Ort Box for the next ANG Main Line Stitchers chapter meeting on Monday May 12. Luckily, this weekend is The Truist Championship PGA Tour being held at the Philadelphia Cricket Club in Philadelphia.
