Filed under: Early Needlepoint
I can’t believe that I found the kit for the Pansies I did as a young girl on eBay!! And, I must have been at least 15 years old when I did it. A little older that I thought. It is a vintage “Pink Pansy Barrel” needlepoint kit by Needlepointers Sunset Designs dated 1975. It was designed by Randall Elwood. Kit includes printed design on 100% cotton canvas, 100% wool yarns, needle, mounting board, full color print and complete instructions Fits standard 5″ x 5″ frame. The kit has never been used. Bottom of bag has been opened but all contents are intact.
Filed under: Flower Basket
This Flower Basket is a “Pinsations” original design & stitch selection. The pin is added to the piece so that the pin can be removed, worn, & replaced. I never developed this into a series even though I have more flower pins – I must have started going into a different direction after I got done with it.
I have no idea what stitch I did for the flowers. The basket is Criss-Cross Hungarian (same as Basket 1 & 4). Obviously, I really like that stitch for the weave & shading (mix of DMC floche). The background green is a leaf stitch.
Books used:
- Stitches To Go by Suzanne Howren and Beth Robertson.
- The Needlepoint Book by Jo Ippolito Christensen.

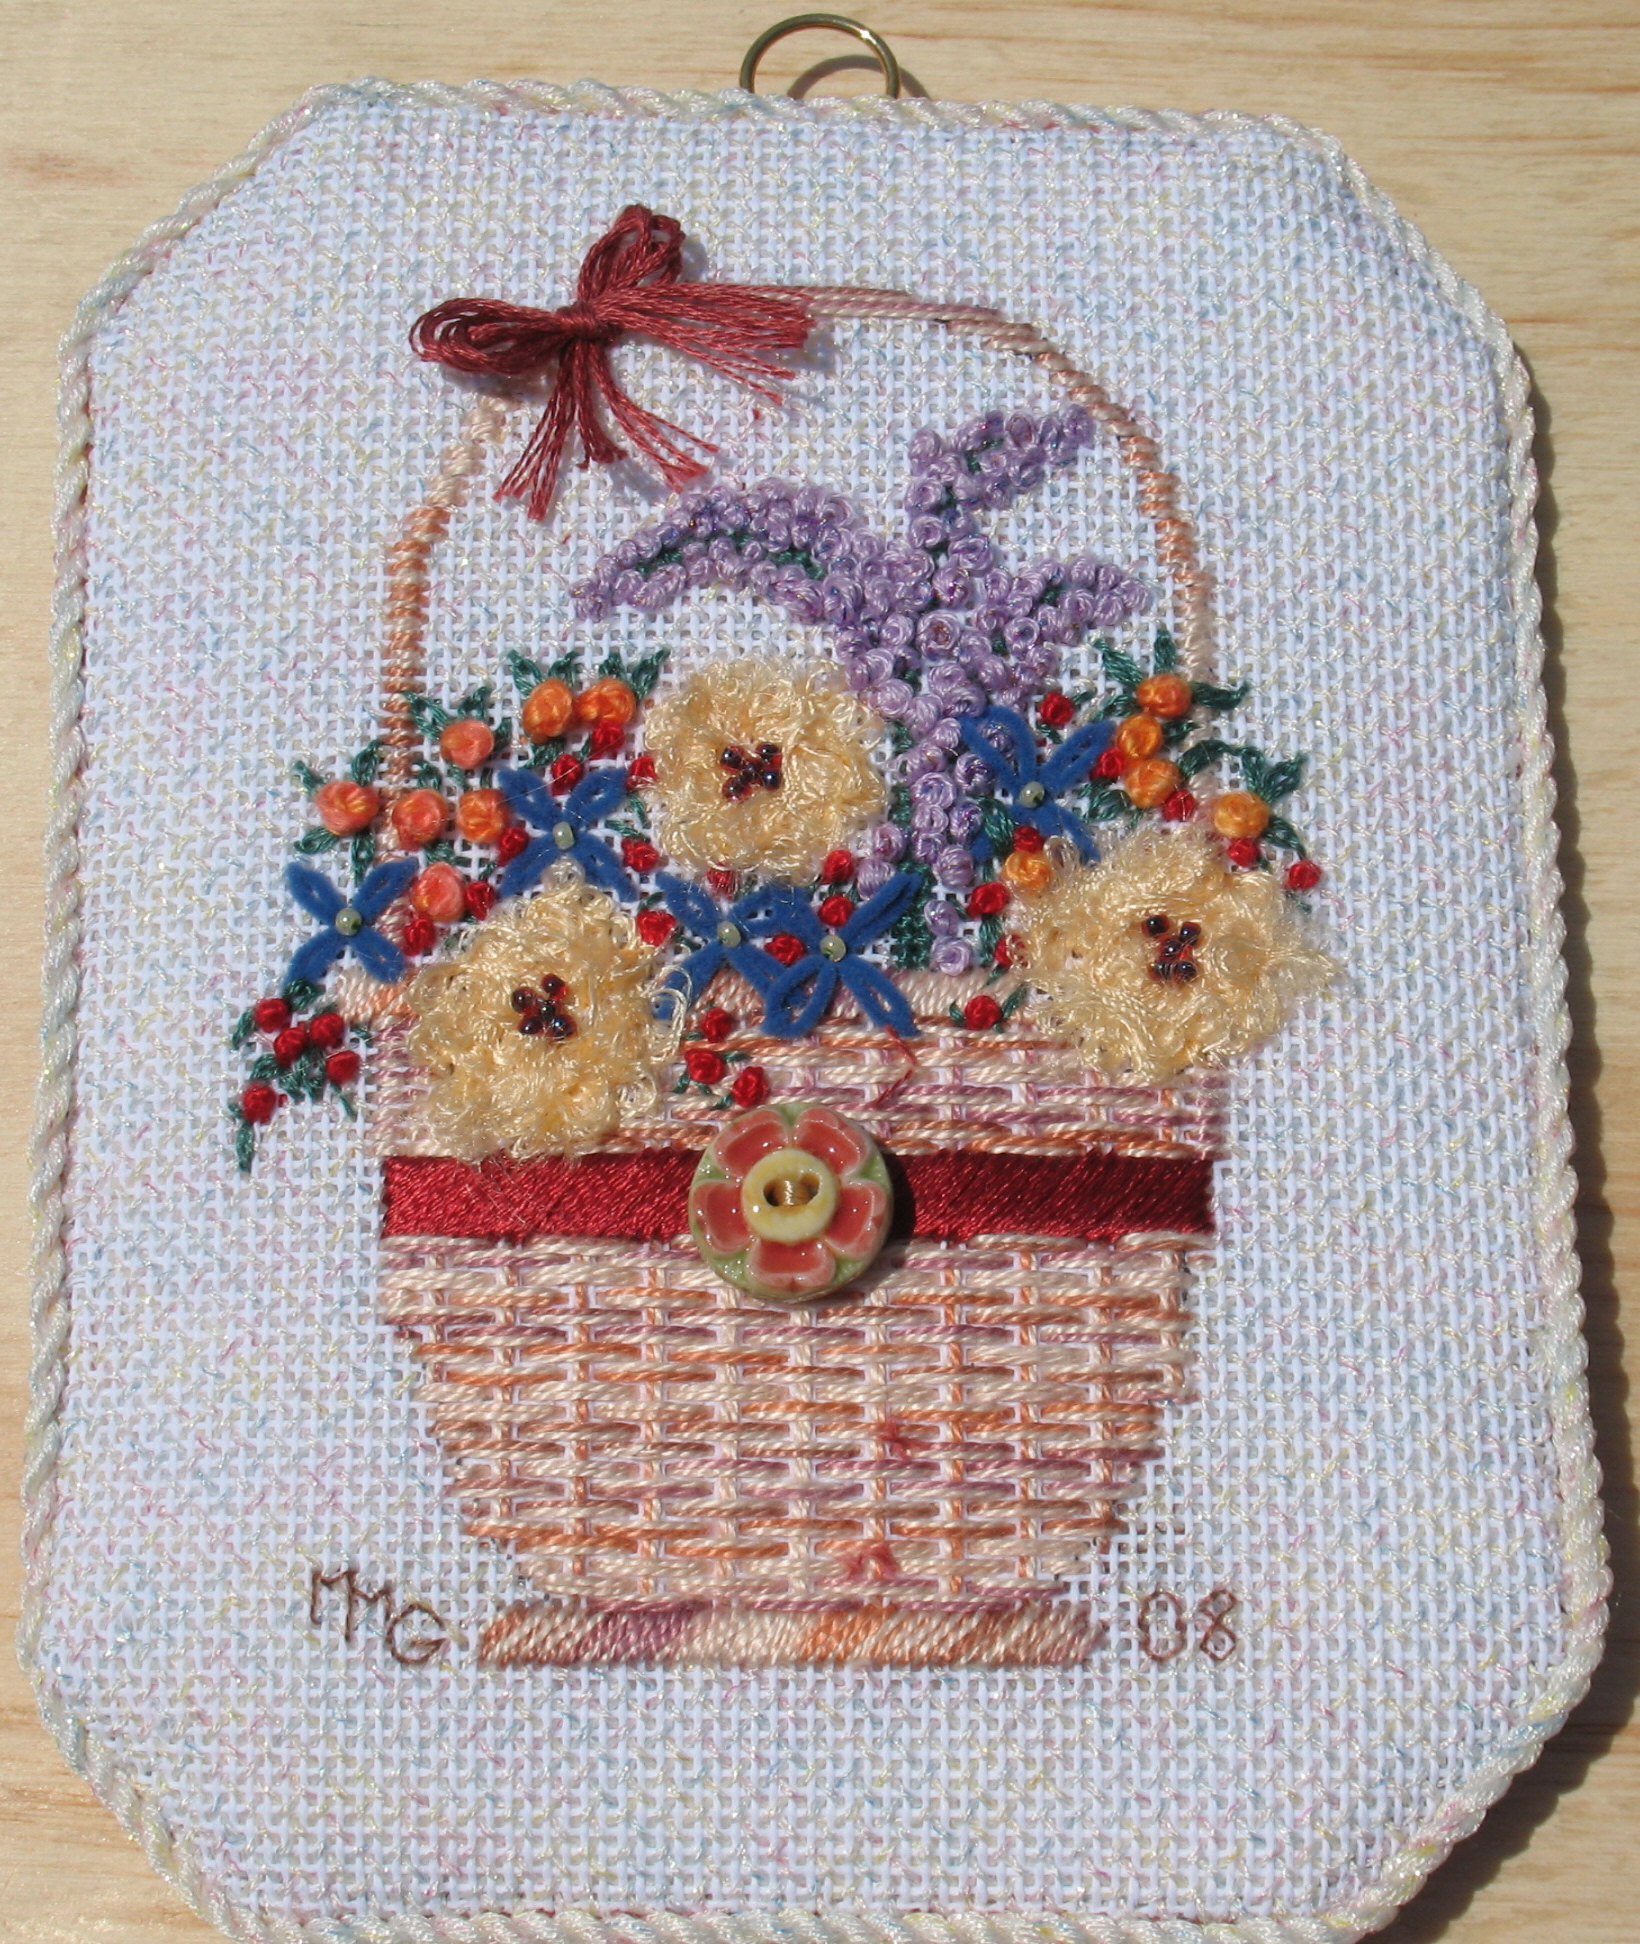
Filed under: A Basket of Flowers for Good Wishes
Our ANG chapter selected this David McCaskill design for a project in 2008. David supplied the handout & we supplied our own threads. So, we had the option to use his colors or our own. I went pretty much with his colors but may have used different thread selections. The yellow flowers manipulated Neon Rays. A very interesting technique.
It is a lovely basket & flowers. There is a nice variety of flowers both in color & type. So, your eye roams around the piece & is entertained. Yet, there is balance. And, if I didn’t know before doing David’s basket, I sure knew afterwards that I had better keep my day job! However, I am sure I learned from the project & so will continue to attempt my own designs. I just have too many things on my plate to attempt another basket right now – but someday I will.
This is one of a series (not all flower baskets) from “The Brides Tree Ornament Series”.

Filed under: Pooh Doing Nothing
“I wonder what Piglet is doing,” thought Pooh. “I wish I were there to be doing it too.”
I see so many nice many pieces by others & have designs in my head, I wish I could do half of all of them! But, this project officially moves to the ‘completed’ list. Bianca at Rittenhouse Needlepoint did a lovely job of finishing the eye glass case. I especially like that bit of stiffness at the opening because my glasses won’t fall out on their own. I’m going to enjoy this for a long time!


Wow, May 1 already. I love vases & so I stuck pretty much with this design.
I used:
- Diagonal Leaf & Leaf # 3 for tree trunk
- Woven Spider Web for flowers
- cross stitch for lower portion of vase & 3×3 cross on upper portion
- darning pattern for background (which you might not be able to see b/c it is a light colored thread – it is a simple diamond pattern)
- 6-trip herringbone for outer border


Stitch books used:
- The Needlepoint Book by Jo Ippolito Christensen
- Stitches To Go by Suzanne Howren and Beth Robertson
Filed under: ANG Stitch of the Month, 2010
We’re only 4 months into the project & there is so much done already. This month’s stitch doesn’t come across as much as a heart as the diagram showed it to be – maybe because my thread is black & too thick. But, it still looks nice.


Filed under: Butterfly Baskets
This is the sixth & last of the Butterfly Basket series & is a “Pinsations” original design & stitch selection. The pin is added to the piece so that the pin can be removed, worn, & replaced.
The flowers are a combination of Colonial Knot + Lazy Daisy + Straight Stitch + French Knots + Stem Stitch. The basket is probably something I made up to be like the Spider Web stitch only with vertical spokes for the basket & a circular portion for the rim. And, I do not go back under one rather I did an over under & pushed tight together. It used a lot of thread.
This basket was modeled after a basket that was my grandmothers, Mae (yes, that’s her in the picture). It is a woven wicker basket with a glass insert to hold flowers (I took them out so you could see the basket). I didn’t quite get the slope to the rim that I wanted. But, I haven’t figured out what would work better – perhaps someday I’ll try again. I’m not sure why I switched off the brown except that I liked that overdyed thread with the flowers.


Books used:
- Stitches To Go by Suzanne Howren and Beth Robertson.
- The Needlepoint Book by Jo Ippolito Christensen.
- from Elegant Stitches by Judith Baker Montano (a dozen pages are dedicated to combination stitches).
Filed under: Butterfly Baskets
This is the fifth of the Butterfly Basket series & is a “Pinsations” original design & stitch selection. The pin is added to the piece so that the pin can be removed, worn, & replaced.
The darker yellow flowers are Rambler Rose and the lighter yellow flowers are a combination of Lazy Daisy + French Knots. The basket is Tied Gobelin. The stem is Fern with variations in length for curves. I still used several shades of brown DMC floche to get some depth to the basket. For the edging around the basket, I used 2 rows of Wheat Stitch.
Books used:
- Stitches To Go by Suzanne Howren and Beth Robertson.
- The Needlepoint Book by Jo Ippolito Christensen.
- from Elegant Stitches by Judith Baker Montano (a dozen pages are dedicated to combination stitches).

Filed under: Butterfly Baskets
This is the fourth of the Butterfly Basket series & is a “Pinsations” original design & stitch selection. The pin is added to the piece so that the pin can be removed, worn, & replaced.
The flowers may be double layered cross. The basket is Criss-Cross Hungarian (same as Basket 1). I really like that stitch for the weave you expect to see in a basket & for shading although I used different threads (mix of DMC floche & a Vineyard Silk). Not sure about the stem.
Books used:
- Stitches To Go by Suzanne Howren and Beth Robertson.

Filed under: Butterfly Baskets
This is the third of the Butterfly Basket series & is a “Pinsations” original design & stitch selection. The pin is added to the piece so that the pin can be removed, worn, & replaced.
I don’t know what I used for the flowers or the background – but I won’t repeat that selection. The basket is Alternating Cashmere with Tent. I like the little extra variation in the shading from just the alternating cashmere in this basket. It is subtle but when threads are placed in opposite directions, the light does reflect differently. I used several shades of brown DMC floche to get the effect of depth to the basket.
Books used:
- Stitches To Go by Suzanne Howren and Beth Robertson.

