Filed under: ANG Seminar 2024, Treasures from the Great Lakes - Dawn Donnelly
Back to Treasures of the Great Lakes by Dawn Donnelly, one of my ANG 2024 Seminar classes.
The ribbed Spider seashell uses Watercolours 001 Sandstone but the length in my kit had no color variation.

So, I purchased a new skein and am much, much happier.
With Dawn’s piece, Blue Hills, from my ANG 2022 Seminar class, we were supposed to include a fake bullion across the whole design which was 6″ (requiring 72″). I elected to use an alternative thread, Woolly Whites. This time, the bullion only had to be 3-4″. So, I added it. DMC Pearl Cotton #5 is tacked down which required about 38″ to create the coil.
This will not get done before my next class with Dawn Donnelly. Oh, well but I am happy with how it’s progressing.

Filed under: Books in My Library, Mary's Whimsical Small Stitches by Mary Legallet, Needlepoint Books
Mary’s Whimsical Small Stitches, Volume 4 is the book I picked up at Stitching Fox earlier this week.
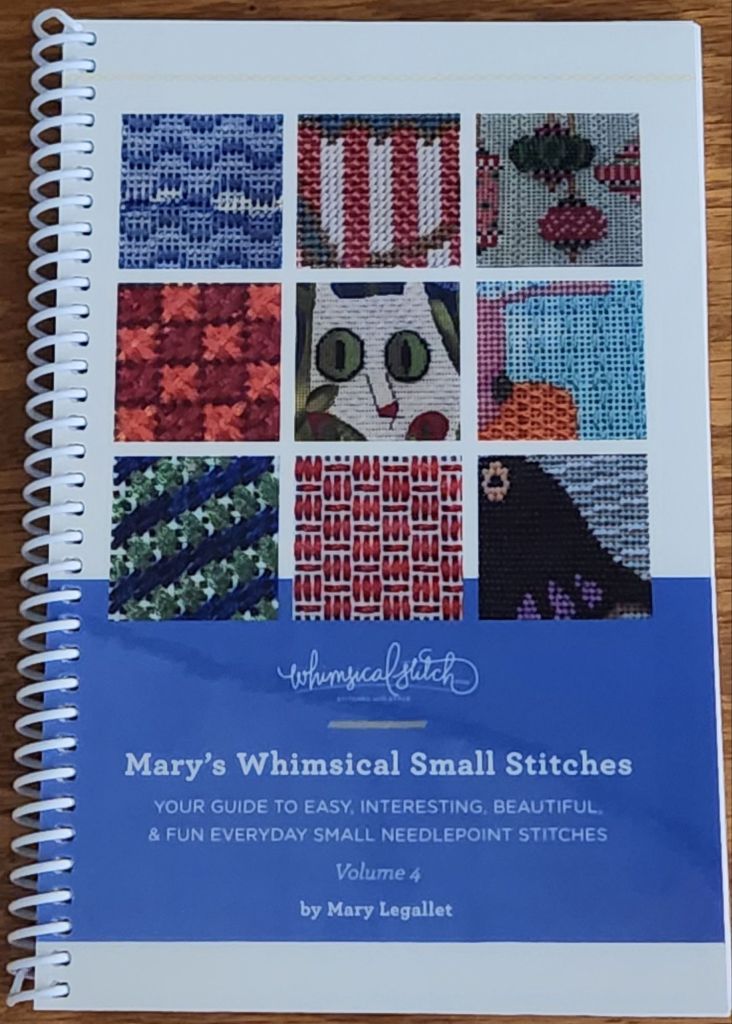
It has my favorite features: The stitch diagrams are easy to follow. It’s a small book at 6″ x 8.5″ with hard plastic covers on front and back but has rings, so pages flip and stay open.
It has a new feature. QR codes for stitched samples. Scan and the link takes you to her Instagram account for photos ofthestitch in action.
As the title states, these are stitch suggestions for small spaces. There is an excellent discussion of various issues under Stitch Planning 101.
Here’s the TOC:
The Decorative Stitch Index is a wonderful feature.

This book should get a lot of use.
It took a while to do 92 Jessicas and fill each one in Byzantium by Lorene Salt, but it’s worth it! It turned out great.
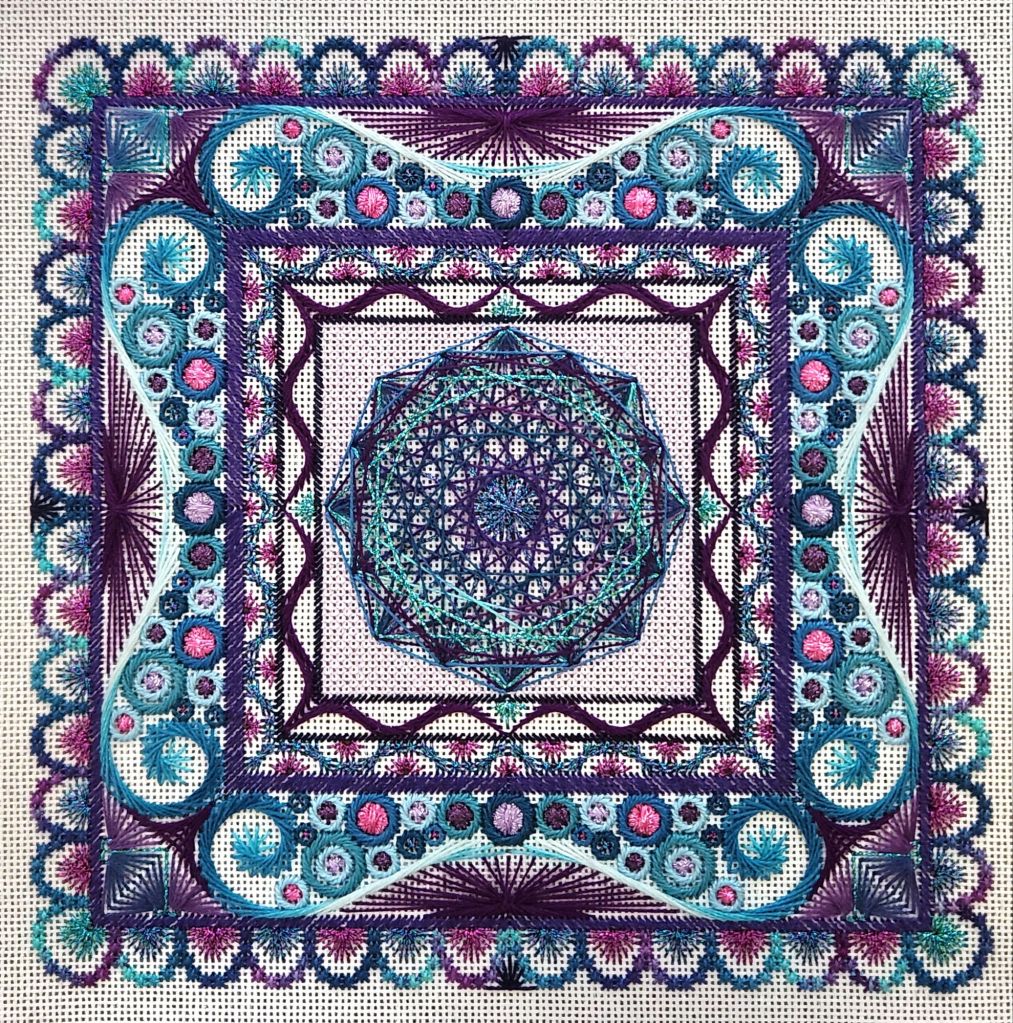
I’ll probably recreate the 16 spoke center for myself. Although that would be adding to my list of 2025 goals, and I was trying to avoid that!
My cousin Kathy picked it up yesterday, and she absolutely loves it. She’s right. It looks better in person. I’m glad Byzantium has found a good home!
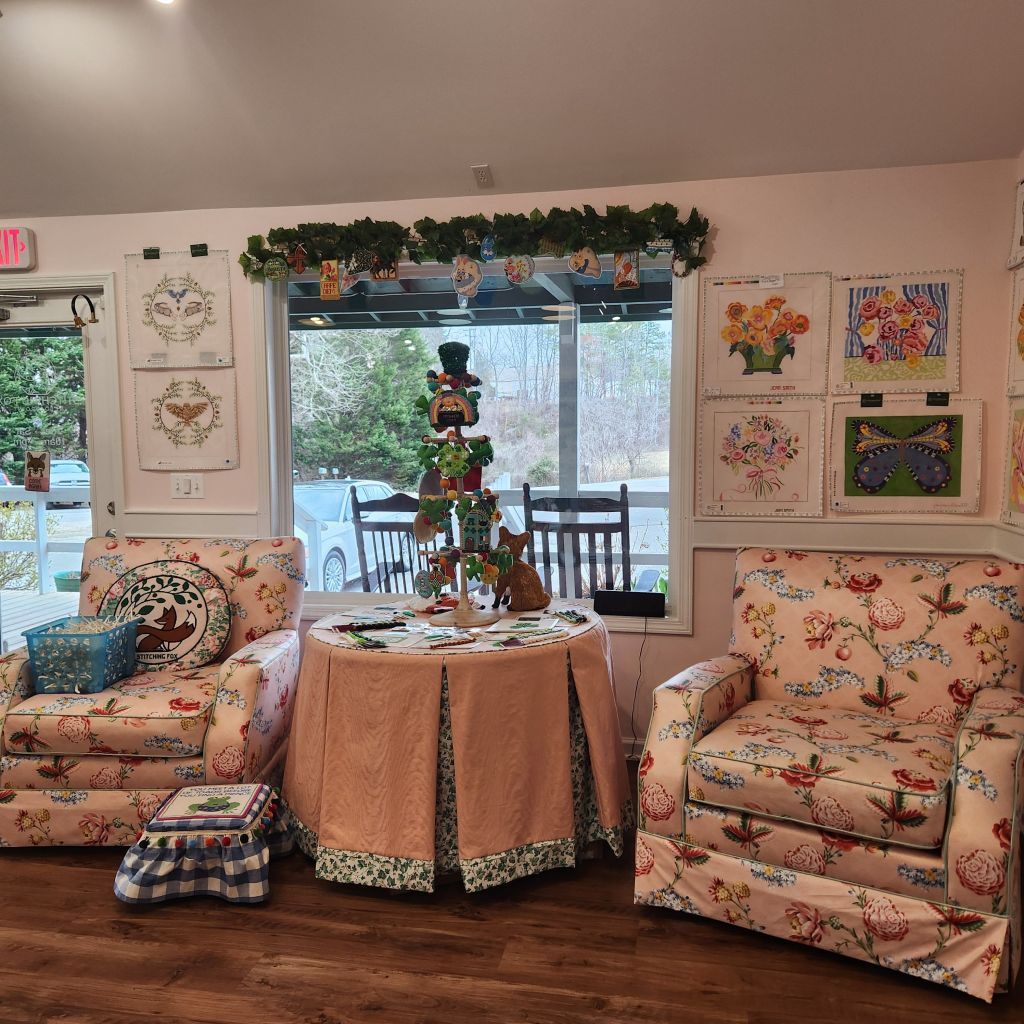
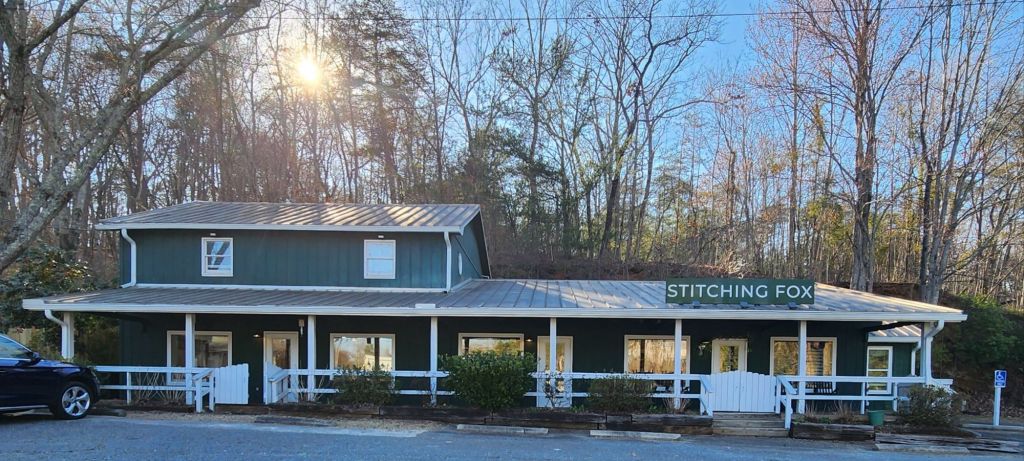
Just over the border from North Carolina lies a lovely store, Stitching Fox owned by Kathryn, who gave me a tour of the store. She’s been growing and learning along with her clients since she fulfilled her dream of opening a needlepoint store in 2020. She’s bound to succeed!
I bet a few significant others have enjoyed these chairs! Bill was golfing, or he’d have been there.
She has several monthly clubs for Fall Leaves, Foxes, and Candy Canes.

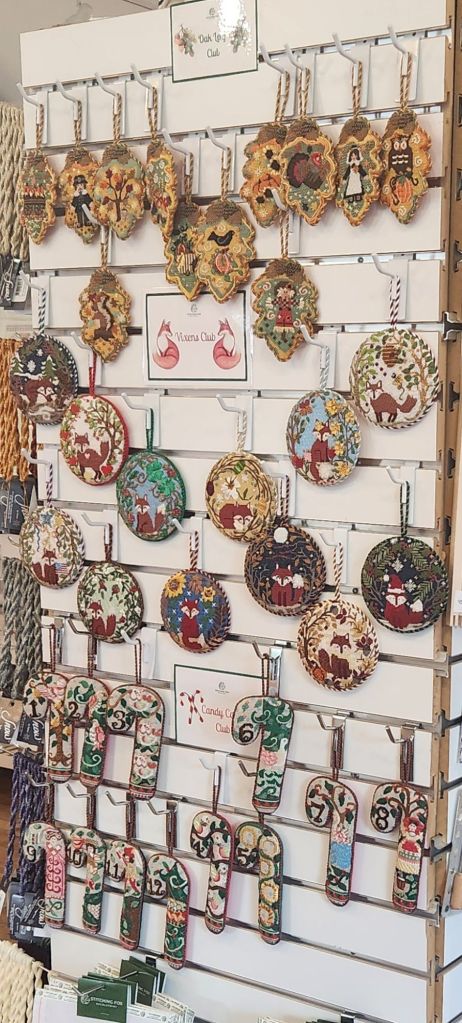
There are trunk shows and 30% off clearance items so she can bring home new items from Market.
Mary Pat is one of her right hand gals along with Vicki G, who teaches on Saturday and writes stitch guides for the store. This place may be the Southern Fireside Stitchery! Friendly people and really well stocked thread lines, especially for the most popular threads with 12″ deep pegs.
And there will be a good number of classes in 2025 with Kelly Clark (canvas embellishment), Brenda Stofft (sessions for Baby Santa and Baby Bunnies & Cart), Kate Dickerson & Elaine Aidonis (canvas embellishment), and Cynthia Thomas (Halloween Hat canvas, 2 sessions of BYO canvas embellishment & Help I’m Stuck, and a 1-day retreat for an anything is fair game day). She has great lighting and plenty of space. You can’t even see the 4th table at the far end and around the corner.
Stitching Fox has a nice selection of threads (about 50 thread lines), some miscellaneous items such as Access Commodites Double Twist Gimp, rhinestone chains, and a rack with leftover threads from past classes.
Then, I was blown away by the suite upstairs. See the link to Book Your Stay on her website! You can book the 2 bedrooms/1 bath/kitchen/living room by the night. How cool is that! The teachers get to stay there when they teach. No wonder Brenda will be there 6 days and Cynthia will be there 8 days. It certainly would make a great escape trip for 3 or 4 people to stay.
I did get her store’s magnet that looks just like her store! Accoutrement Designs has fantastic magnets.

The thread and book that I picked up will be subjects for another time.
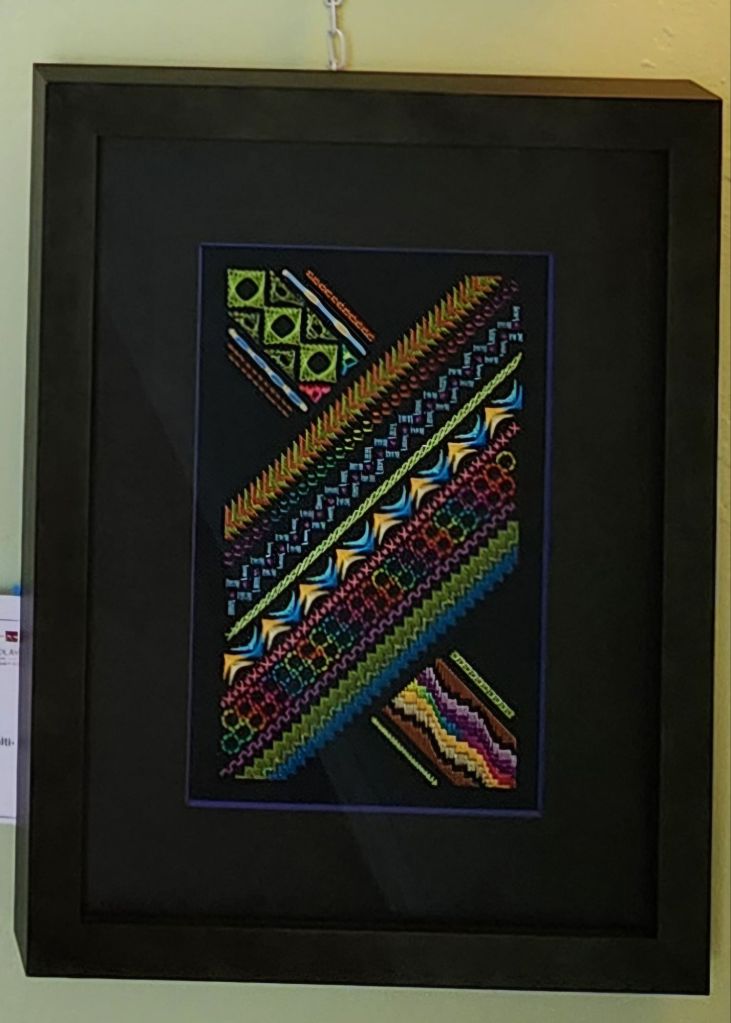
Filed under: Crescent Journey, General comments, Melita's Designs, Woodlawn Needlework Exhibition
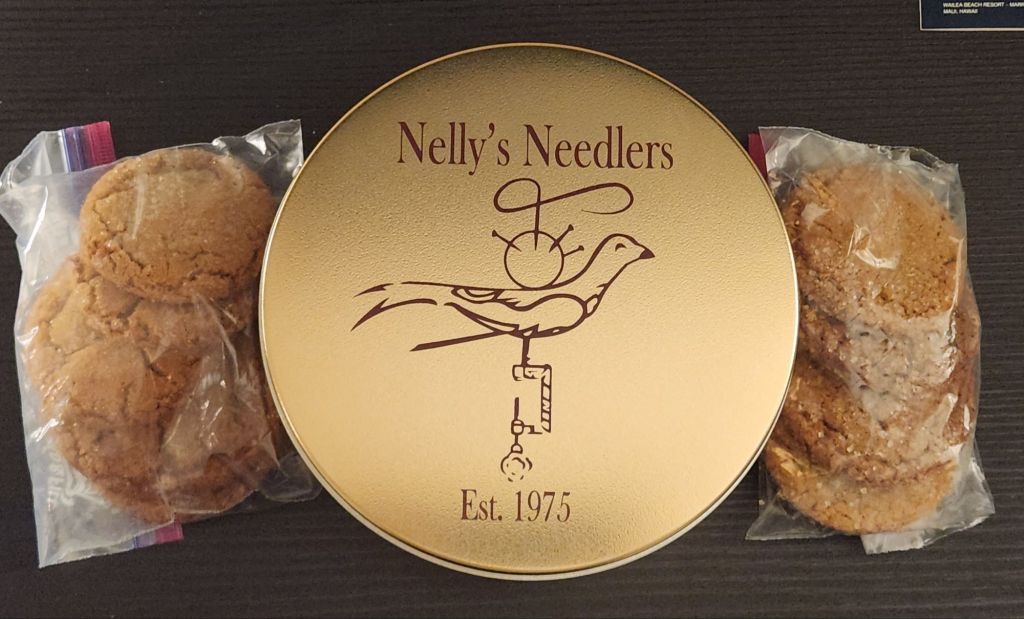
The Nellie’s Needlers are celebrating their 50th Anniversary with an excellent show, the 62nd Annual Needlework Show at Woodlawn. We made it on March 1 this year!
There are 579 judged entries listed but over 600 with the non-judged pieces on display by Nellie’s Needlers and ANG Checkerboard Chapter, who are celebrating their 50th Anniversary.
Congratulations to both.
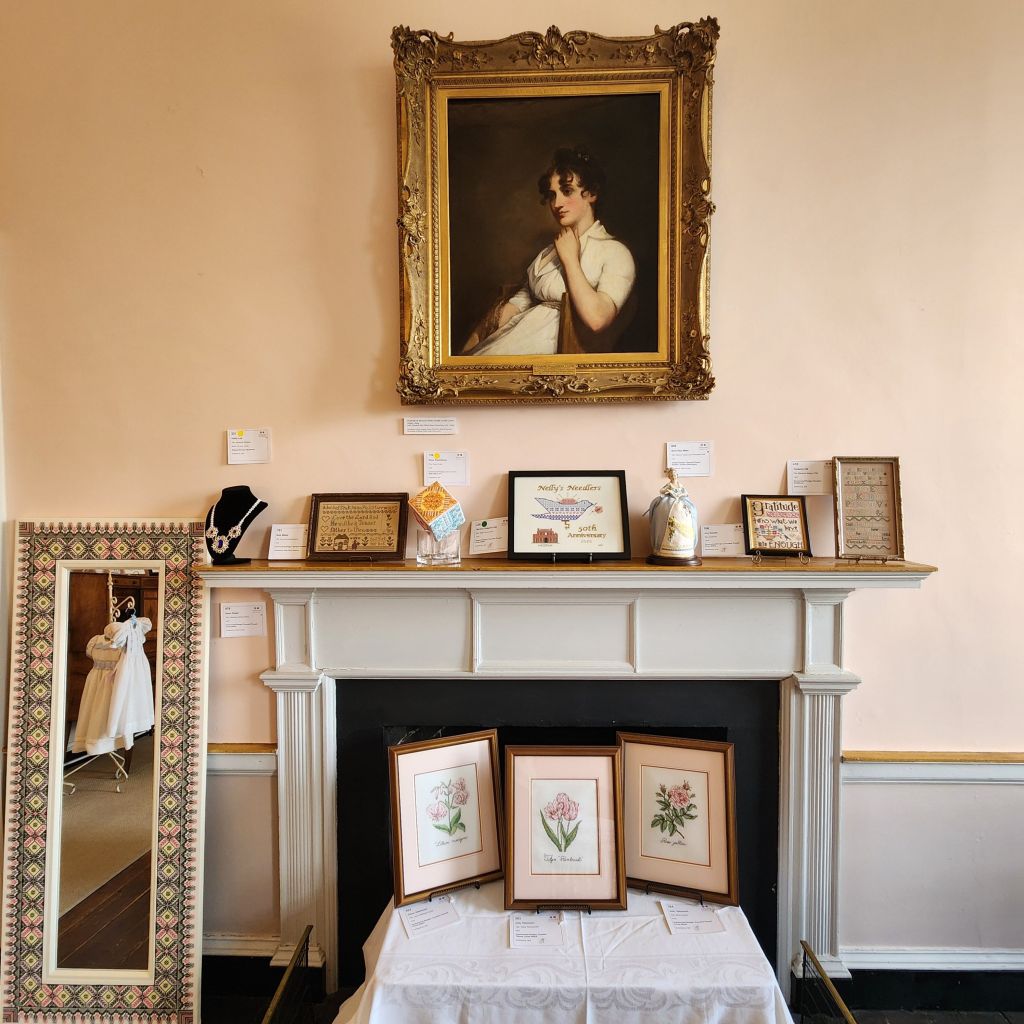
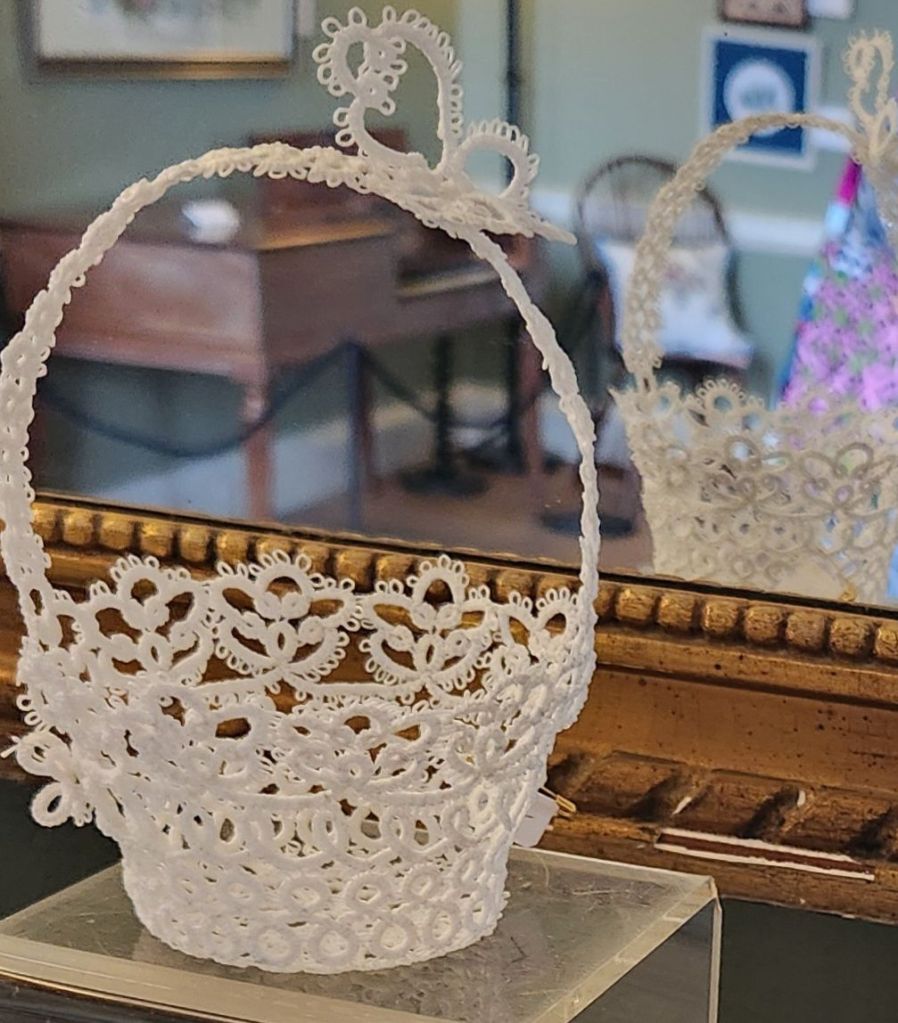
That is Nellie in the photo above. And, look at stitched frame around that mirror by Eman K. Wonderful.
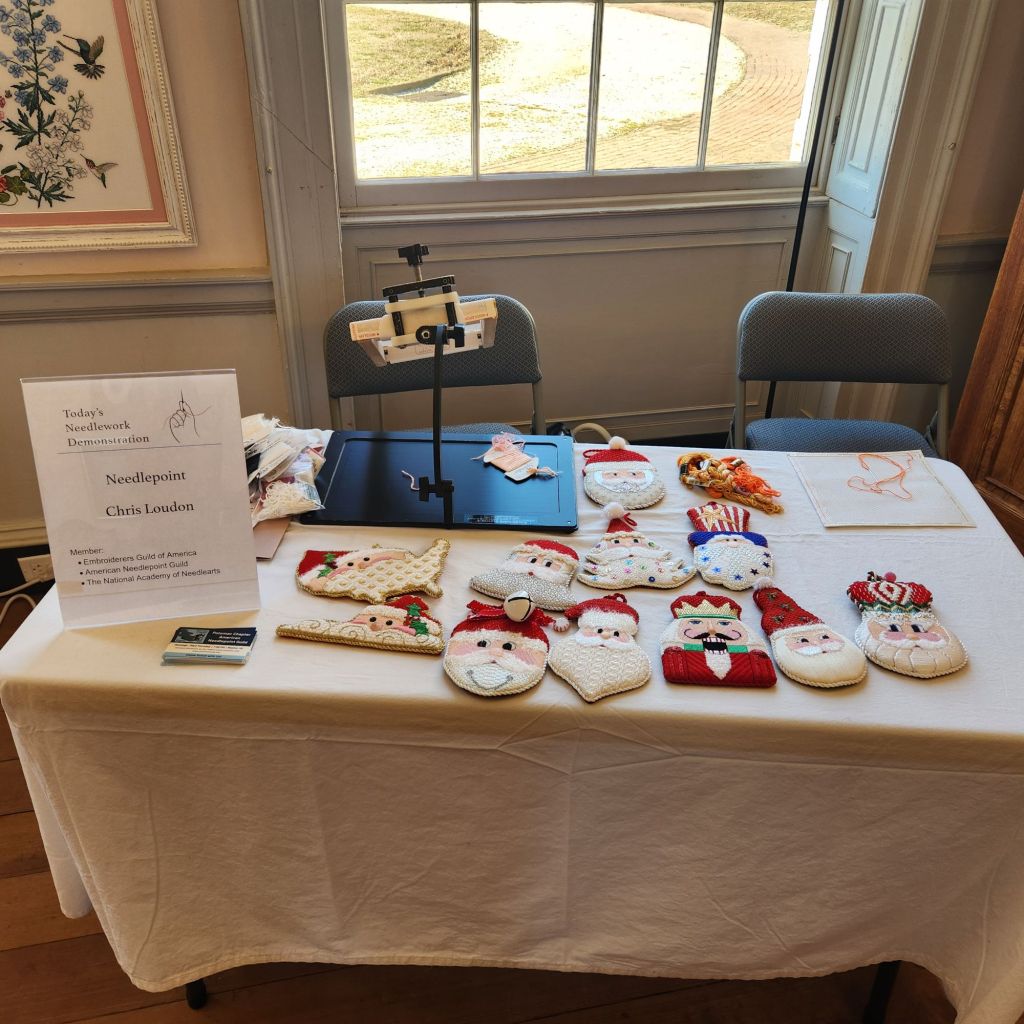
I got to see Chris L and her Janet Casey Zickler Santas. We had a nice chat when she returned from lunch. And, I found out we’ll both be at NAN in a couple of weeks. How fun is that!
To see more information on each piece exhibited, use the QR code listed in the brochure. That’s all the information in the docent paperwork located in each room. Fantastic feature! Now, if Woodlawn asked for and people included the name of the designer for commercial pieces, it would be incredible! I recognized about 3 dozen of the canvaswork counted pieces. Too many to write about but lovely to see.
My photos are not great this year. The light was super bright shining in the windows or there was glare from artificial lights. Woodlawn allows glass and reflections are impossible to avoid. And, I was reprimanded by a docent for taking photos too close.
Link to the photos of the major award winners and a list of all winners are available at: https://www.woodlawnpopeleighey.org/2025-nws-award-winners
Theresa B swept Original Senior Sampler Multi-Stitch awards as she does here and in Rehoboth Beach’s exhibit. I won’t share photos of any original designs without permission. See the link above for photos of the major winners.
The American Needlepoint Guild (ANG) New Jersey Needle Artists Chapter was well represented with 24 entries by Sylvia B, Diane B, Sue C, Cathryn C, Noelle D, Barbara L, Rosie L, Linda M, Janet P, and myself.
There are 3 Crescent Journeys, my design, and the ANG Stitch of the Month from 2023, on display. Diane’s B did hers in black and red, earning Honorable Mention. Rosie’s green and pink colorway remains my favorite one despite not getting a ribbon. Linda M got 3rd place for the neutral colorway.
Linda M got 4 awards in total – one for sampler, miniature, and 2 for canvaswork. Linda M also stitched Interchange by Linda Rienmiller (which I stitched too). Fun piece.
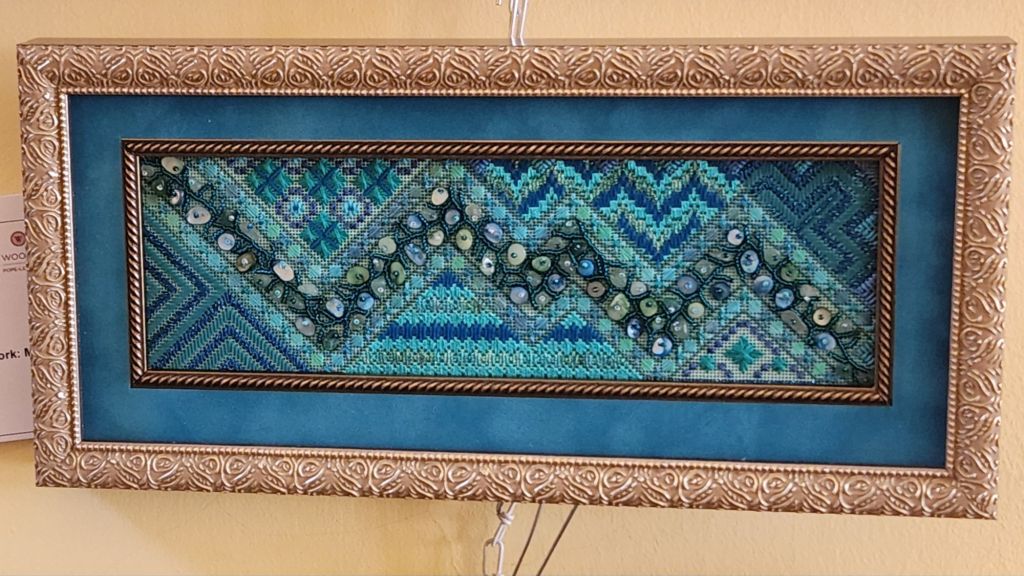
Noelle D and another person stitched Bermuda Reef by Kathy Rees. Love those blues. And, it’s a great light colored (sandy) frame and blue mat that Noelle selected.
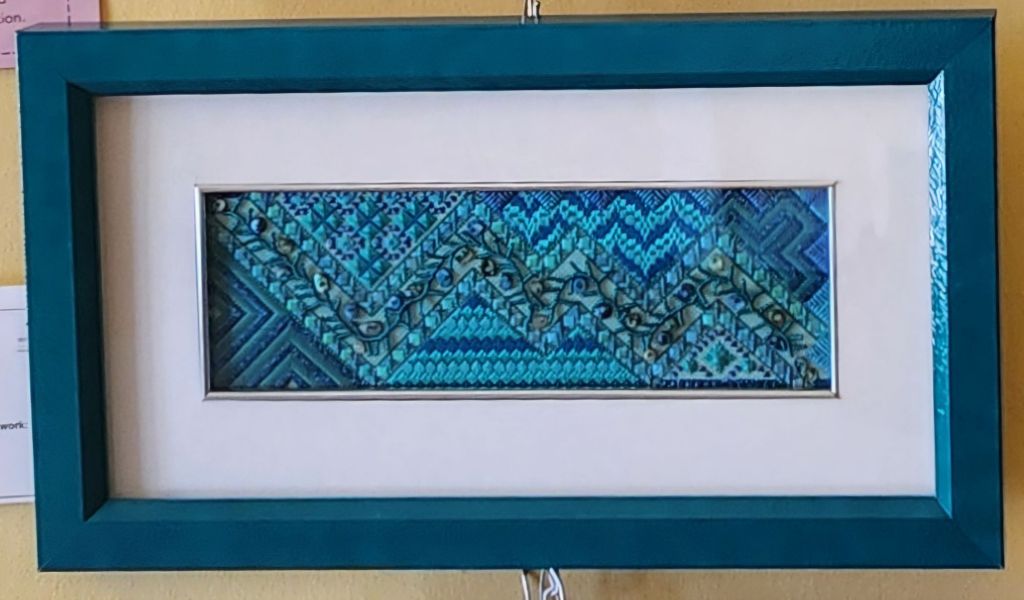
Kristin S went in the opposite direction with a blue frame and white mat. Do you have a preference?
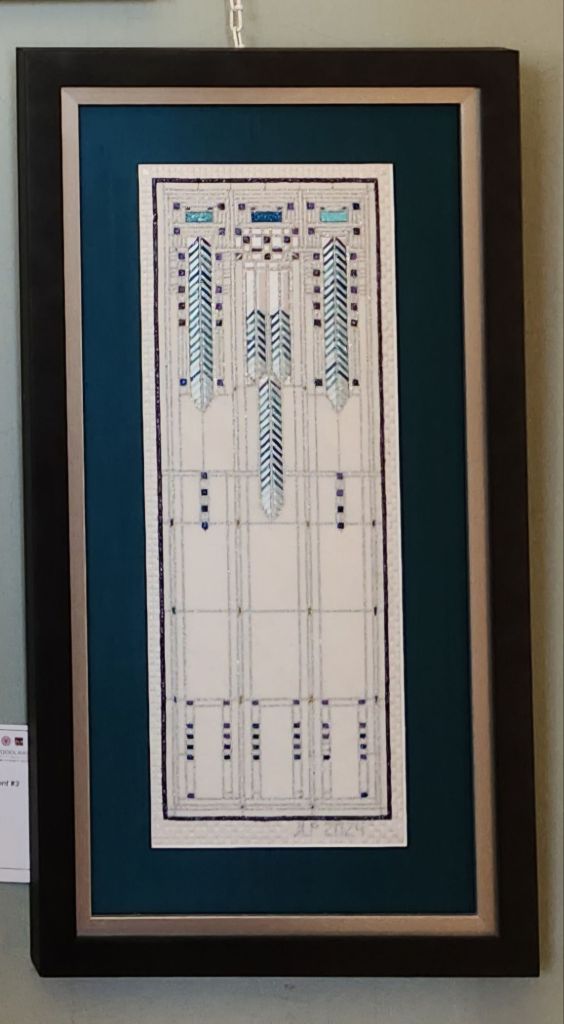
The NJNA members got 14 total awards, including the Director ‘s award for Janet P for Frank Lloyd Wright in Needlepoint #2. Big congratulations! But, I preferred FLW #3.
Heather G, from my ANG Main Line Stitchers Chapter, must not have anything left on her walls because she entered 6 pieces! Heather led discussions for our chapter on Flowers of Italy designed by Ro Pace, Stitch of the Month in 2011. It looks great in a tray.

Brenda C. from the ANG Delaware Seashore chapter stitched it as well, but framed it. They both pulled the green for the mat surrounded by wood.
Nissa W flipped Walking the Water’s Edge by Dianne Herrmann making for a very interesting interpretation.
Kathy W oriented as in the original but changed the seashell and named hers Granddaddy’s Beach.
Thomas S-G from my EGA Brandywine Guild submitted a crewel piece. It’s a commercial design by Sunset Stitchery from 1978 but looks timeless to me (there is one on eBay).
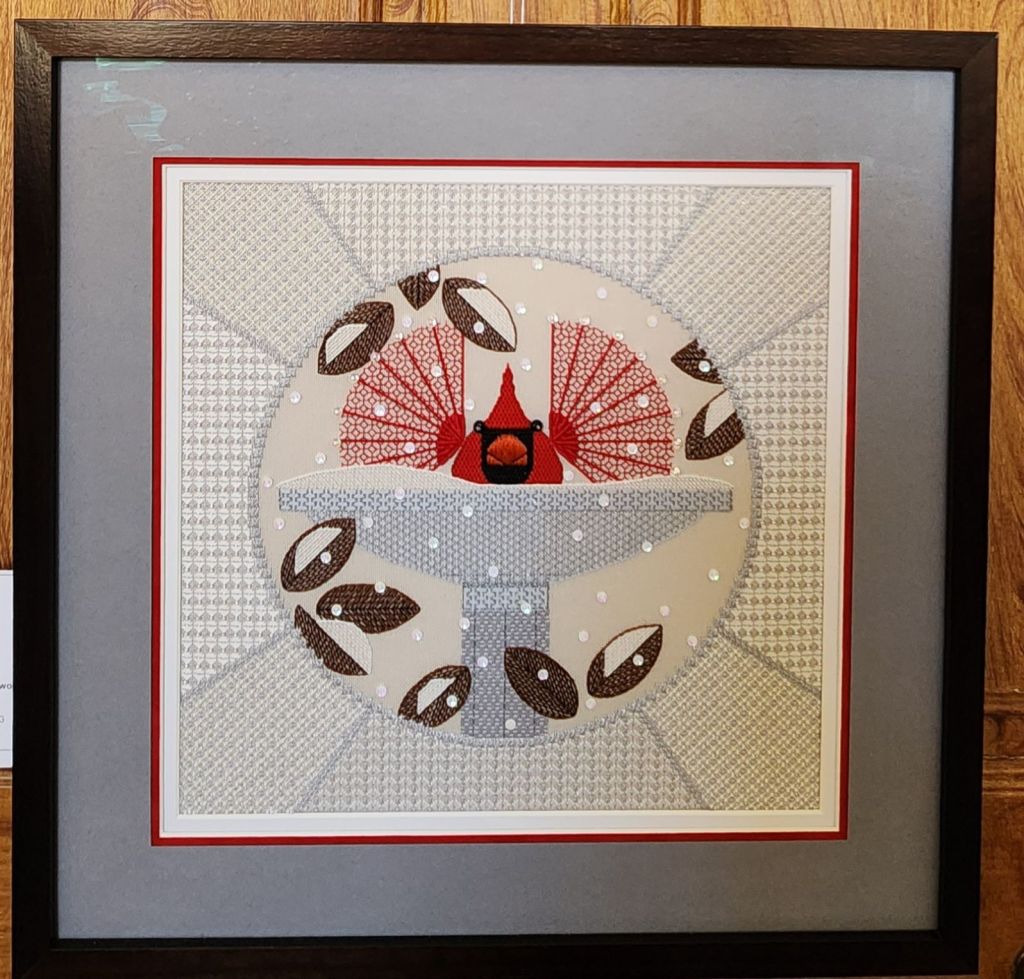
Norma H did it again! She does pieces I absolutely love. This year, she had Brrrdbath, a Charlie Harper design and got a Blue Ribbon (723). And, even better, she was there in person, and we had a wonderful chat.
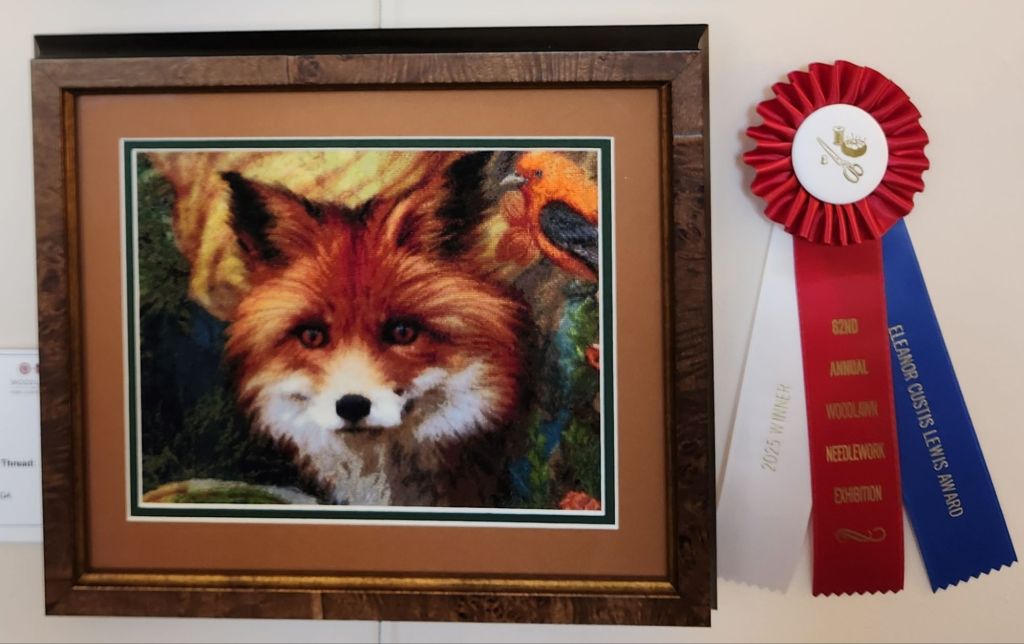
It’s not just cross stitch when you have pieces like Vixen by Nancyanne C where the shading makes you feel the soft fur and deserved First Place and the Eleanor Custis Lewis award. Bill voted for the fox.
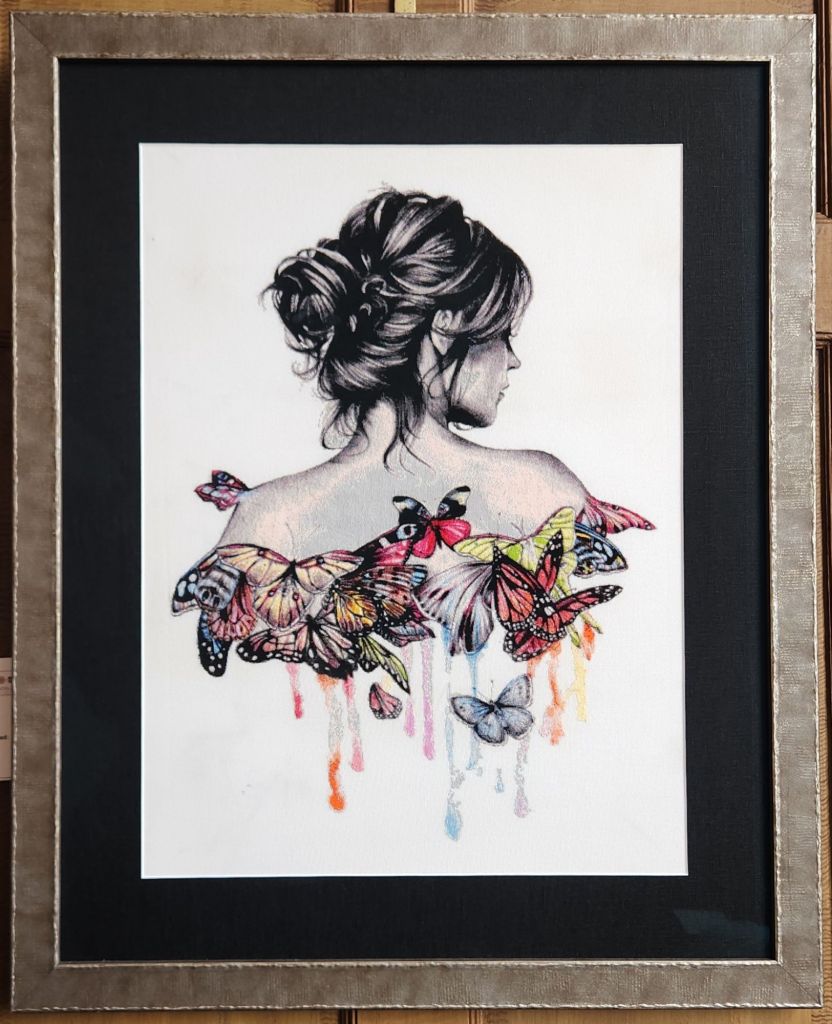
Butterfly Effect by Richard S gives a fresh new look to cross stitch designs.
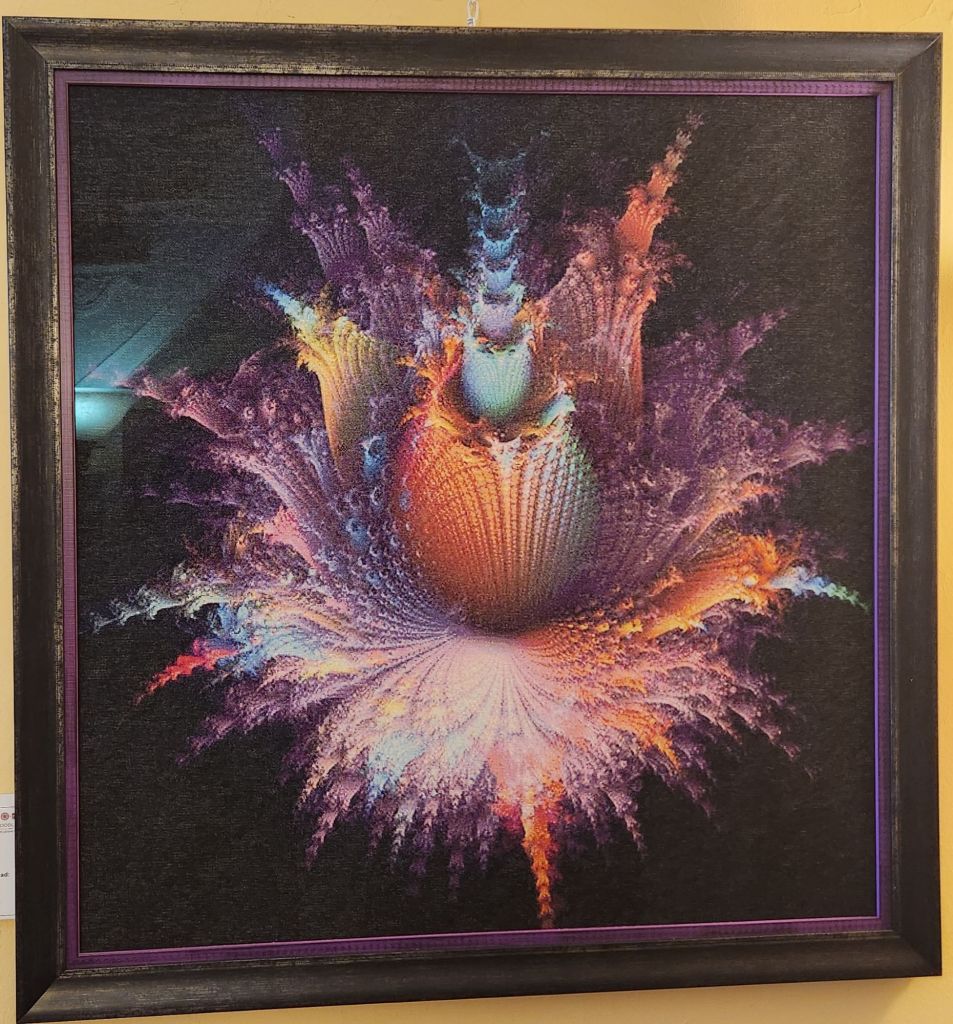
Fractal by Gay S (24″ square?) has amazing shading. Between the size and burst of colors using cross stitches, I made it my People’s Choice vote.
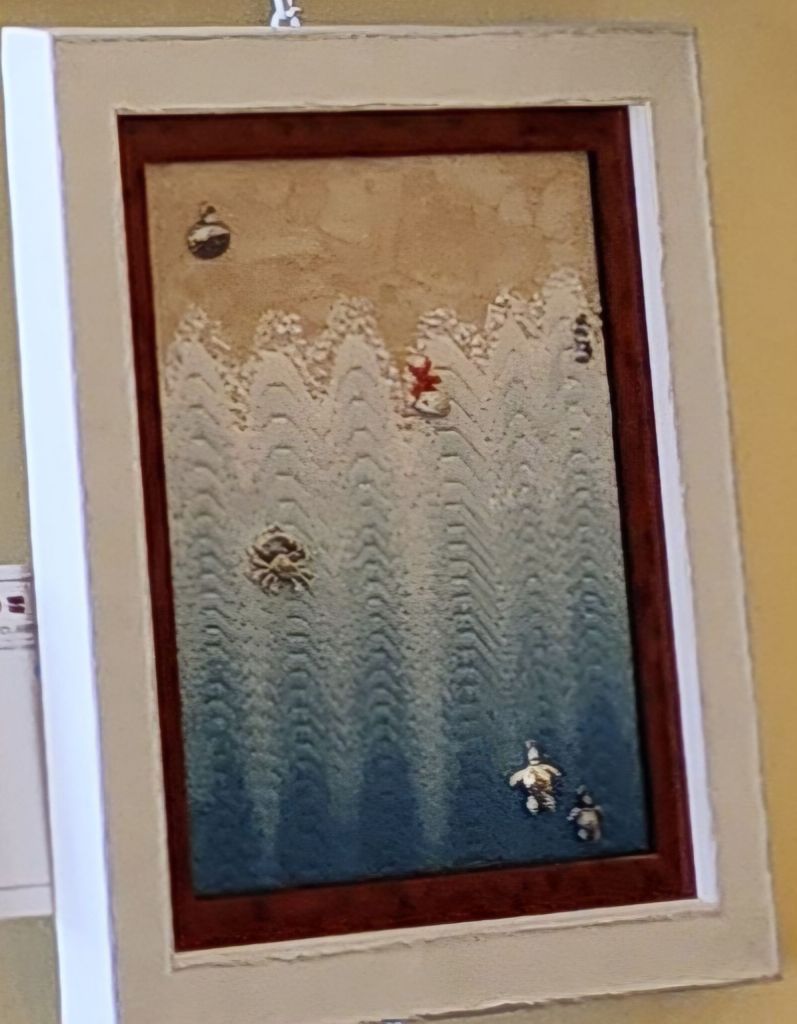
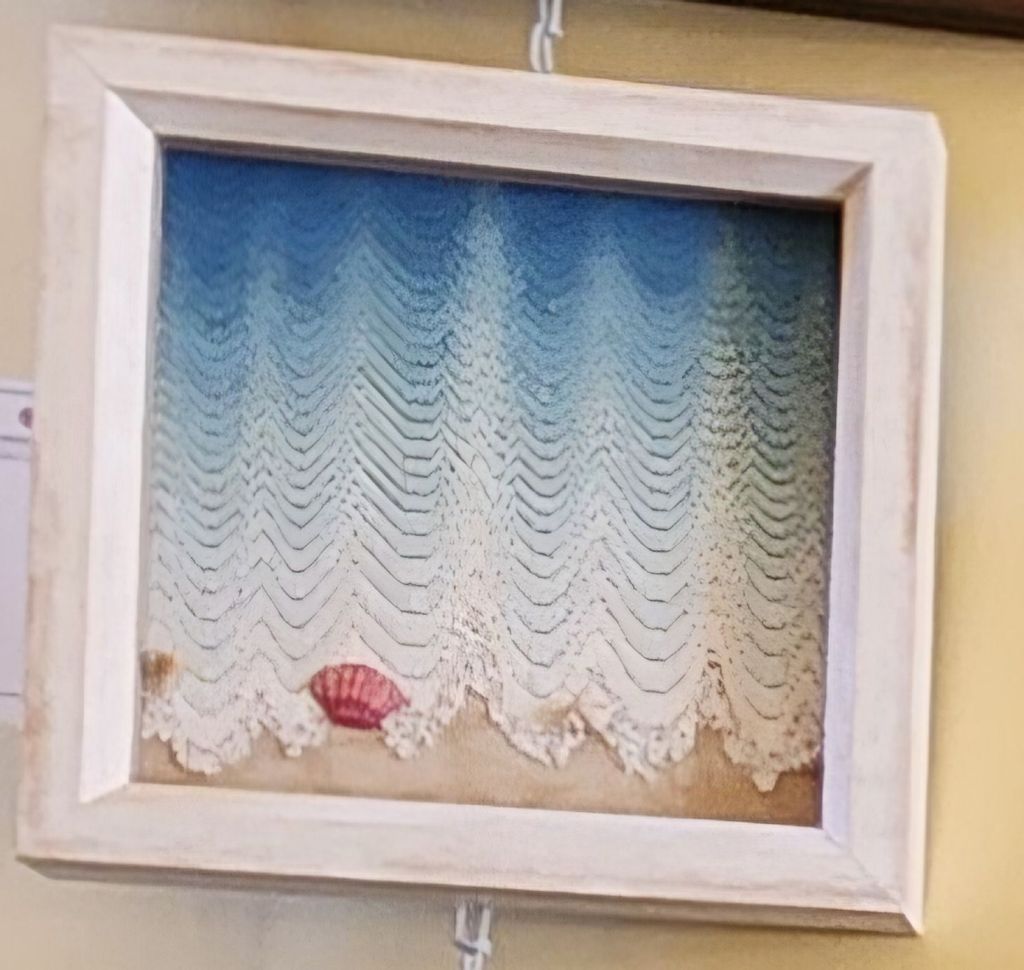
Being in the midst of stitching Dawn Donnelly’s Treasures of the Great Lakes, I probably should have voted for the 10 times more complex, A Bleached Coral Reef by Kim B-R. It’s an original design 8″ diameter full of beachy stumpwork and surface embroidery. A must see!
Bob-Bon Basket by Bonita S is an adorable piece of needle lace.
Before I left, I saw Dana C, who informed her chapter would be doing Festive Fireworks from Needle Pointers Magazine July/August 2017 issue. I love to hear that published pieces get utilized by chapters.
They have commemorative tins! And, I got 2 bags of their cookies (yes, one has been eaten as I had to make sure they were up to their usual standards before I recommend them-they are delicious). They made 5,200 of them and expect to sell out. So, don’t delay!!
Filed under: Architectural Stitches by June McKnight, Books in My Library, Decorative Backgrounds by June McKnight, More Backgrounds by June McKnight, Needlepoint Books, Plants and Animals by June McKnight, Shading and Thread Blending Techniques by June McKnight
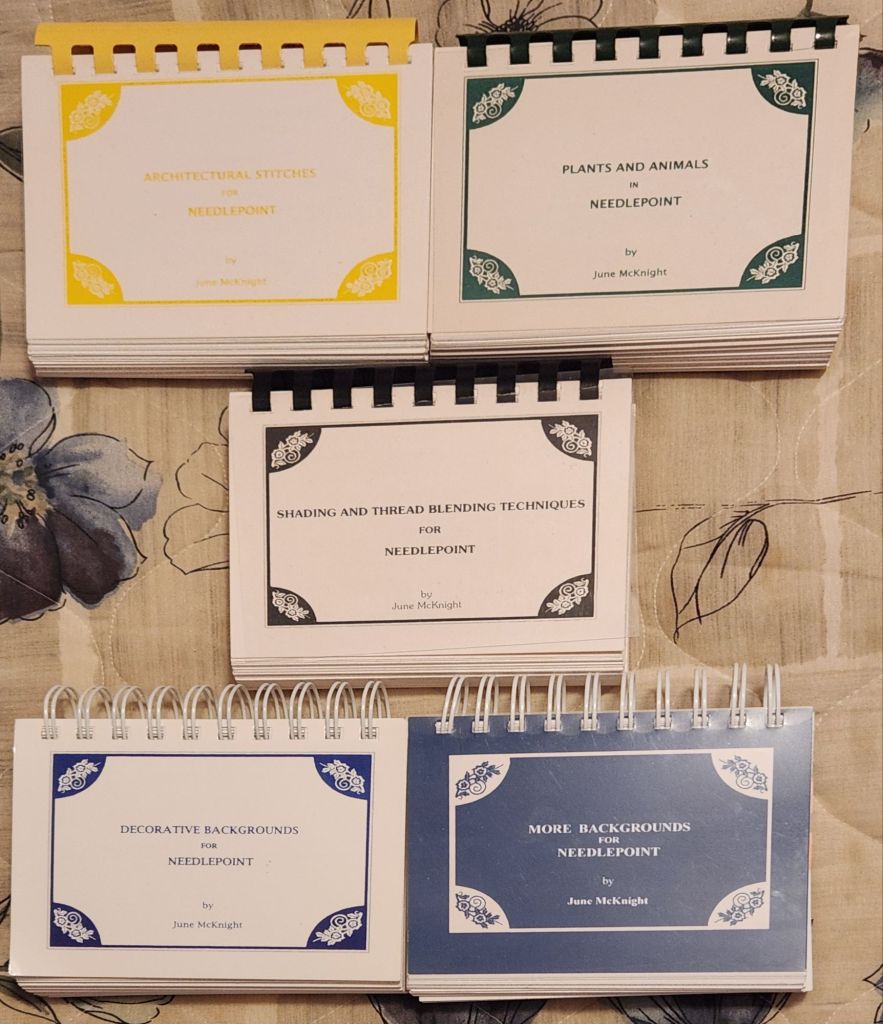
Most of my needlepoint booklets are 8.5″ wide x 11″ or 5.5″ wide x 8.5″ high. But these by June McKnight are 5.5″ wide by 4″ high, and they are thick at 1.25″ with heavy weight pages printed on one side only.
June McKnight has quite a few books of which I have these 5:
Architectural Stitches: Foundations, walls, masonry, windows, doors, roofs, and fretwork.
Plants and Animals: Foilage, flowers, garden structures, and animals.
Shading and Thread Blending Techniques: Precise thread blending, random thread blending, tweeding, twilling, twiddling, shading with dynamic threads, and decorative stitches. It’s my favorite book of the ones I own.
Decorative Backgrounds: In addition to the Ten Commandments of Backgrounds, there are basketweave and continental variations, fast and easy, delicate, trellis stitches, Florentine backgrounds, pattern darning & blackwork, pulled lace, and bold.
More Backgrounds: Covers lace, satin, stripes, wallpaper, chenille (patterns combined with FrenchKnots), and darning.
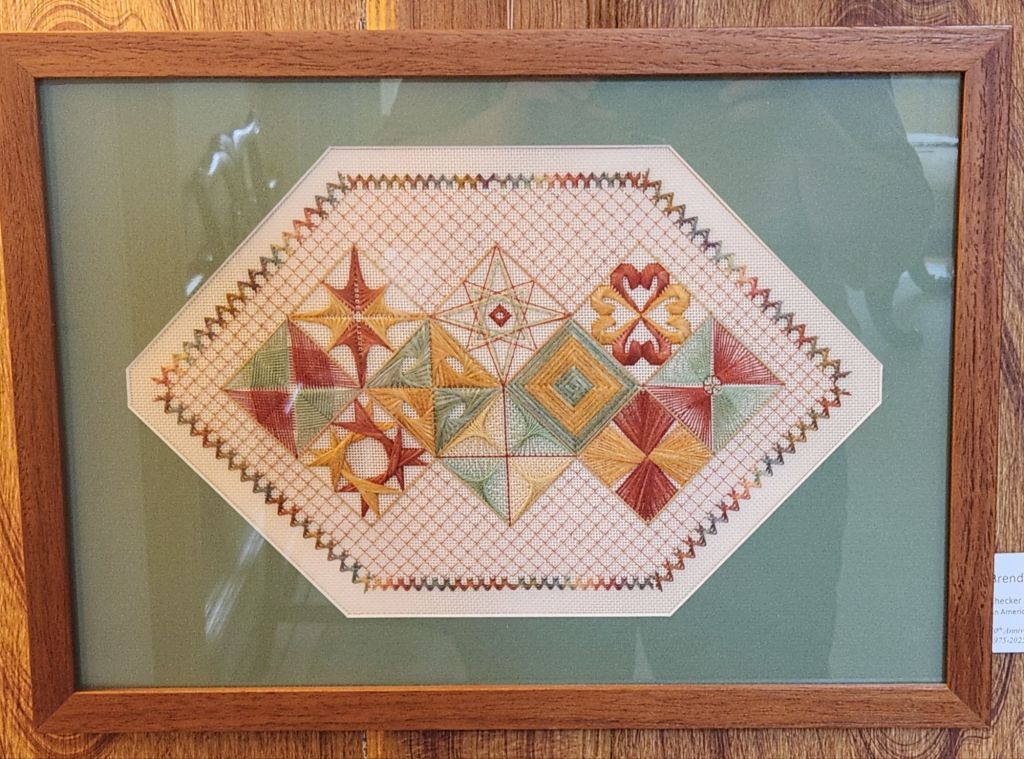
Filed under: ANG Seminar 2024, Treasures from the Great Lakes - Dawn Donnelly
The third class from the ANG 2024 Seminar in Kansas City, MO was Treasures of the Great Lakes by Dawn Donnelly.
I want to finish this piece before heading to the National Academy of Needlearts in mid-March, where I am taking 2 classes.
The eyelets, for bubbles in the waters edge (top), were tricky because the thread carry couldn’t pass behind an open hole. I did finally get the swing of it. I can’t see much of a difference between the #8 (towards the bottom) and #12 threads (towards the top), but I am happy, especially with my random placement.

The Pulled Stepped Backstitch for the bubbles on the sand (bottom) was more difficult, probably because the areas were so small, and it has to follow a pattern going 2 different directions. Again, the thread can’t pass behind the holes.

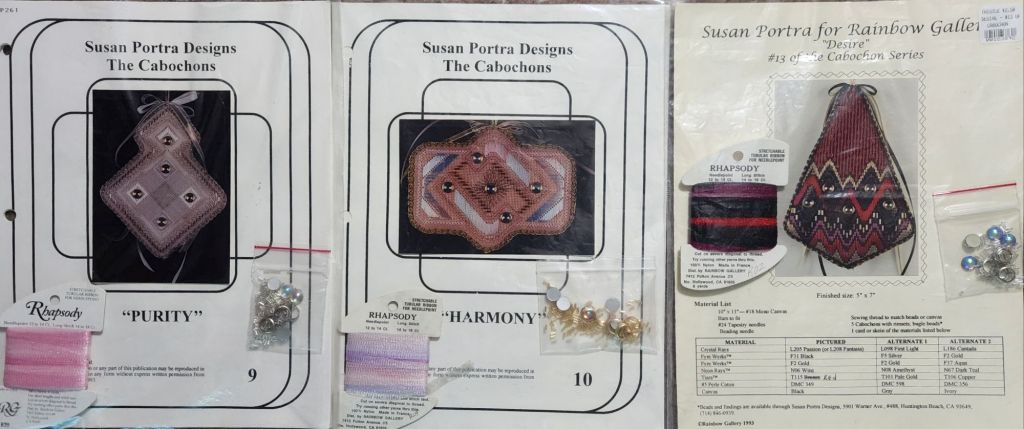
Filed under: Other People's Designs, Susan Portra, The Cabochons, Charity, Susan Portra, The Cabochons, Desire, Susan Portra, The Cabochons, Faith, Susan Portra, The Cabochons, Harmony, Susan Portra, The Cabochons, Hope, Susan Portra, The Cabochons, Joy, Susan Portra, The Cabochons, Love, Susan Portra, The Cabochons, Passion, Susan Portra, The Cabochons, Peace, Susan Portra, The Cabochons, Purity, Susan Portra, The Cabochons, Rapture
From my 2024 Year in Review post, I had said,
Goals #21-28 for 2025 are to kit the eight pieces in The Cabochons series by Susan Portra that I have acquired and at least get started stitching them (to make this a realistic goal).
Final Goal #29: Don’t get any more goals!!
Well, I need to update this as follows:
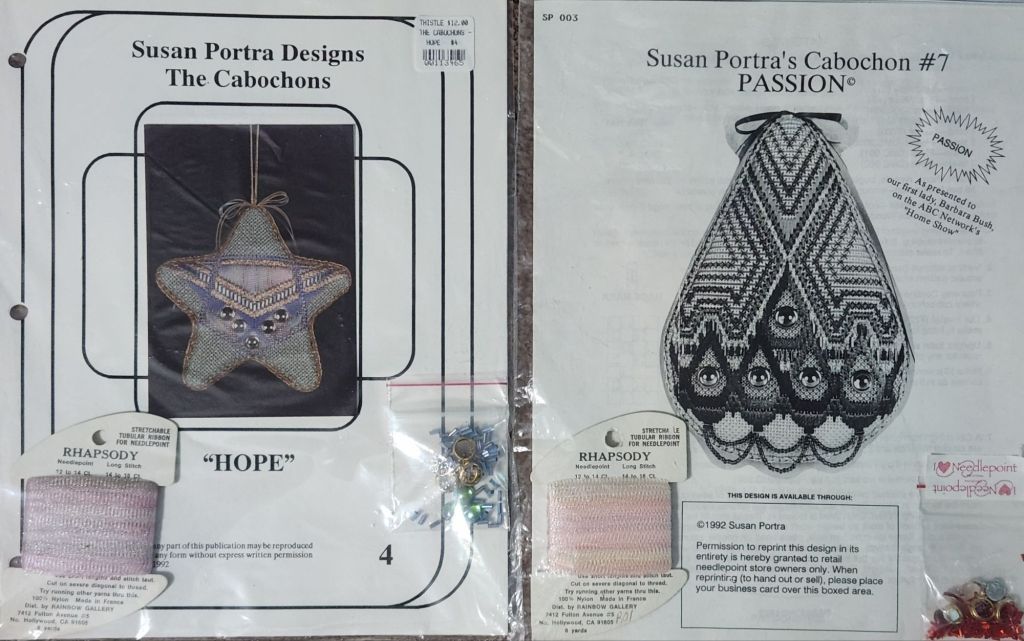
Goals #21-31 for 2025 are to kit the eleven pieces in The Cabochons series by Susan Portra that I have acquired. Thanks to a recent Ebay auction, I obtained 3 more.
Final Goal #32: Don’t get any more goals?? Or, should I just let this one go?
All of the kits have the bead packs. One of the designs has all threads (Love), and four of the pieces came with canvas. Oddly enough, one of the designs doesn’t say to use Rhapsody, but I’ve got to use Rhapsody in all of them. I was able to find 5 skeins of the now discontinued thread, Rhapsody, on Ebay and/or at Janna Needle Art. However, I will have to modify the threads to match the replacement color of Rhapsody I selected for 5 of the designs.
There are at least 2 in the series that I am missing: #11 and #12. I don’t know what they are called and have a search on Ebay to alert me if any Cabochons are posted. Does anyone have any idea what they are named and/or does anyone have them to sell?
I don’t think I posted the ones I got from Alex-Paras NeedleArts. Here are those and the other designs – all now ready for kitting.

To date, I have:
I bought some threads for four of the kits that are using the suggested Rhapsody thread from Karen at Nimble Needle in NJ. She gives a 10% discount to ANG and EGA members. And, she had the current issue of Needle Pointers available for people to look through right next to the front door. Nice of her to support ANG!
I do have to substitute DMC for Anchor and substitute for two discontinued Fyre Werks but I think there are Fyre Werks Soft Sheen threads that will work.
As I search for colored 18 count canvas and work on kitting them all, I will start on the Love design, which is done on white canvas and came fully kitted.
In 2021, my ANG Main Line Stitchers chapter stitched Rainbow Ribbons by Kam Wenzloff published in Nov/Dec 2019 issue of Needlepoint Now. We had a variety of colorways using beautiful threads from Color Complements. It was a fun project.

I am cleaning out folders in my computer and realized that I hadn’t posted my pillow. I had it finished at Needle Me in Havertown. It’s a purple overdyed Pearl with a gray Ultrasuede border.

Filed under: Arctic Inspirations Snippets Class, Serendipity - Stitching Club with Ellen Johnson
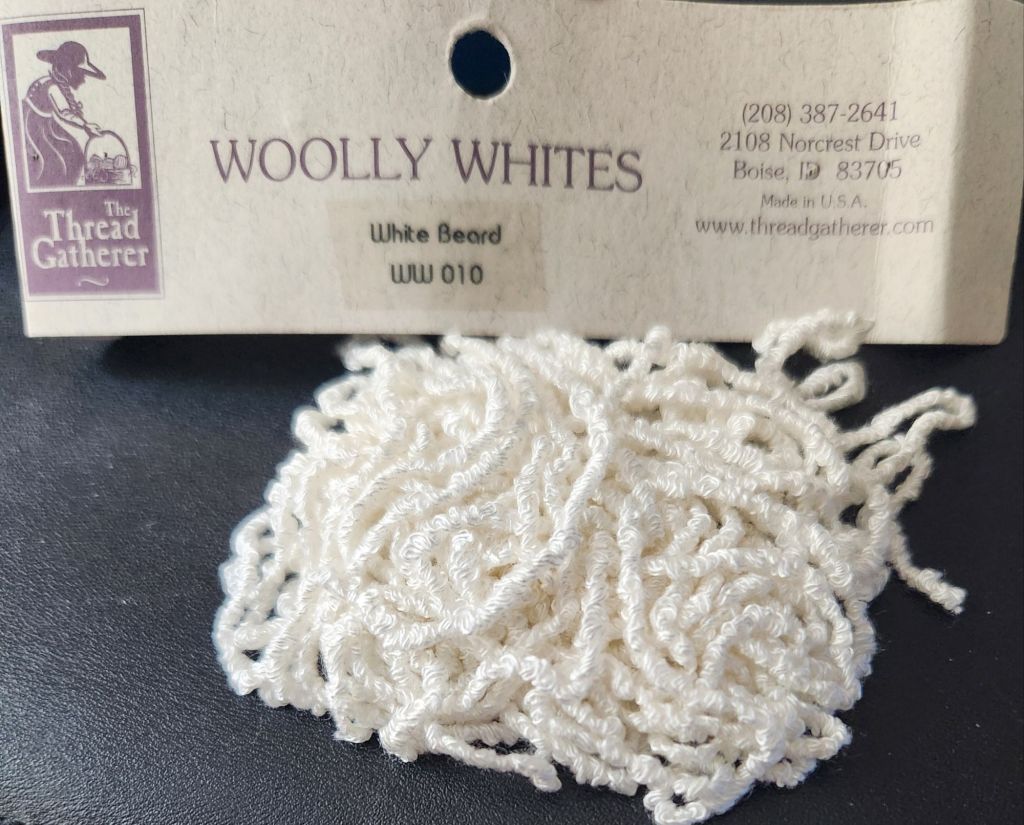
Ellen of Serendipity Needleworks had a 3-hour Zoom class on thread and stitch choices for winter/snow scenes recently.
I went through my full-to-the brim white/off-white drawer looking for threads for snow scenes. Here’s a thread (can’t remember where I found it) that would definitely be couched to your canvas. I haven’t used it yet.
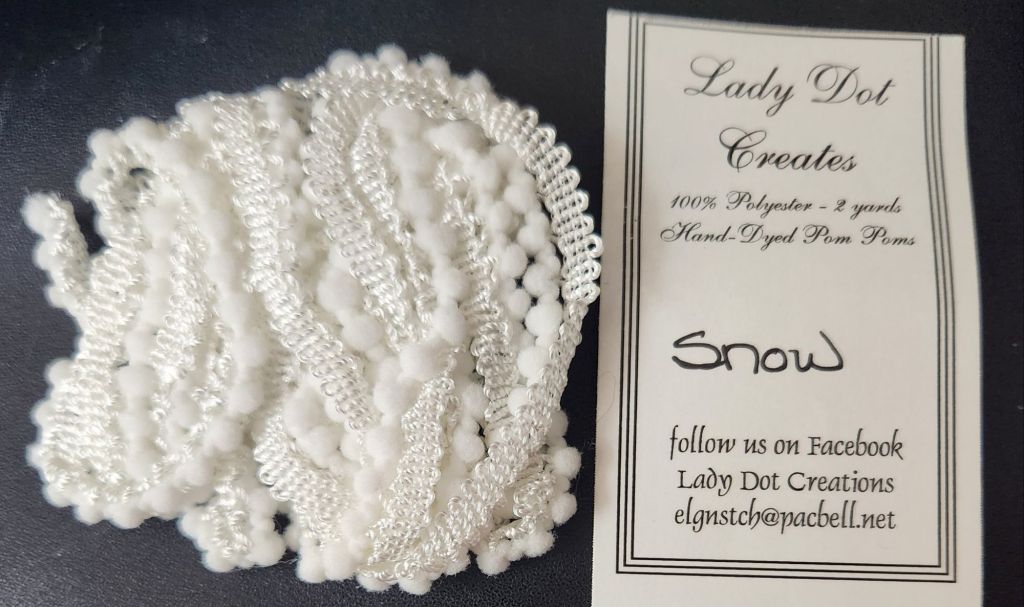
Here’s a thread that could be couched in place for a beard. Santa is always nearby with snow scenes. It looks like it would be great for anyone avoiding bullion knots.
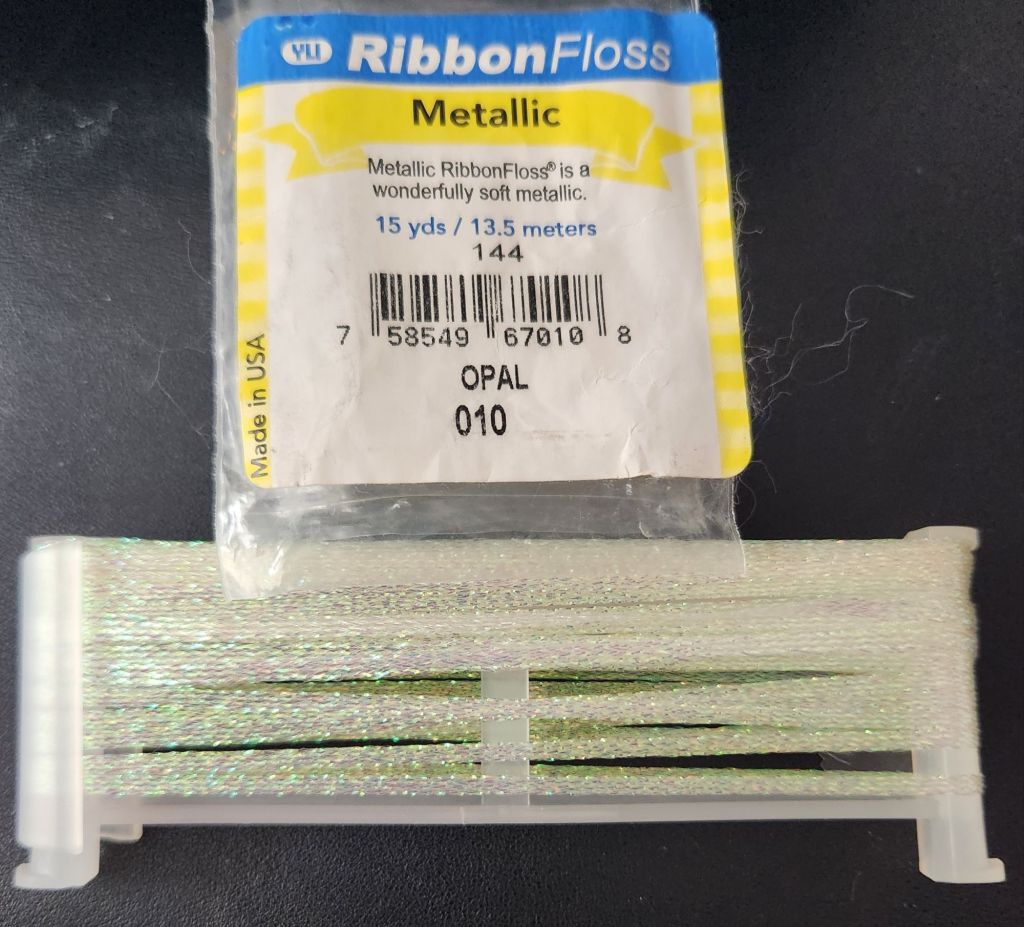
YLI woukd be an alternative ribbon to Neon Rays+ or Kreinik (neither are included in a photo).
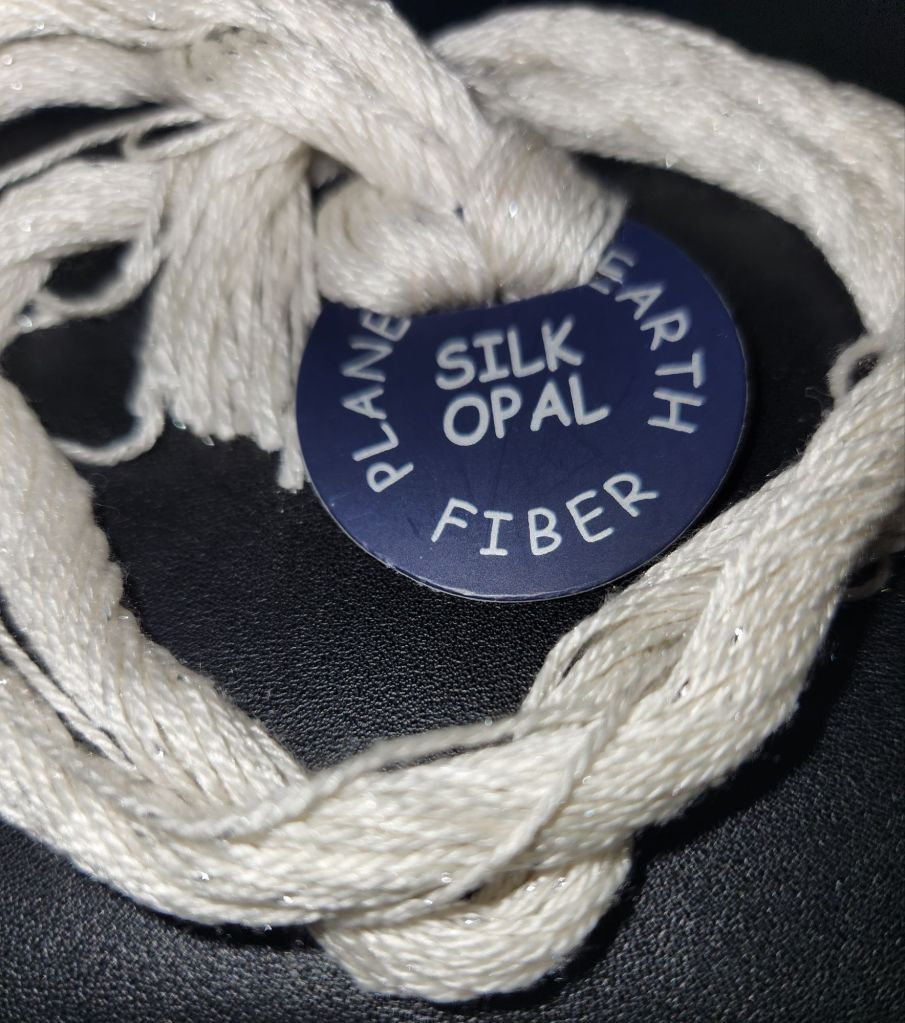
The PE Silk Opal (Cloud 097) has such a tiny amount of sparkle that I don’t find it’s very useful.
Nordic Gold isn’t worth the effort. It says it is very fine and easy-to-use, but it falls apart/unravels (for me anyway). Although this is not the best photo and I missed Flair too, I am not rephotographing.
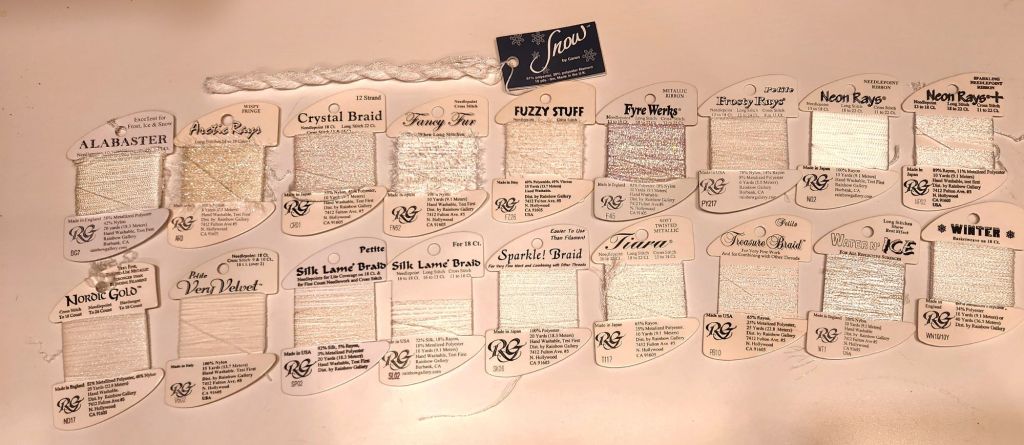
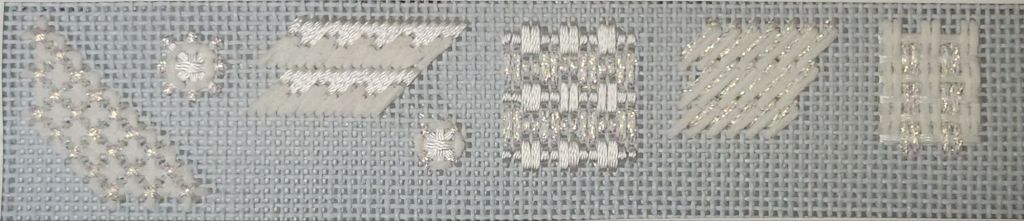
Using Neon Rays N02, Petite Very Velvet V602, and Crystal Braid CR01, I stitched from left to right: Double Straight Cross Stitch, large Tied Double Cross, Slanted Beaty Stitch, small Tied Double Cross, Double Parisian Stitch, Diagonal Brick, and Burden Stitch. I hadn’t seen the Tied Double Crosses (different threads would be better) or a Diagonal Brick before (offset rather than rows would be nice to try too).