Filed under: ANG Needle Pointer's Article, ANG Needle Pointer's Timeless Treasures From the Archives, Crescent Journey, Melita's Designs
The current issue of ANG Needle Pointers is chock full of good stuff, including an article in Timeless Treasures regarding a series, Design by Susan Dawson. She reviews principles of design and color over 5 issues.
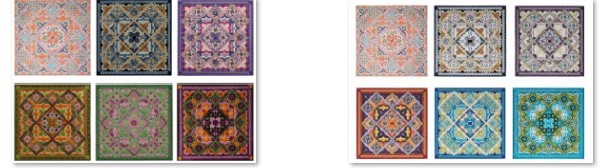
I presented a Contrast Talk based on the original and several new Crescent Journeys colorways from ANG stitchers. Learn why this is the same design, but each one looks different. Practically an optical illusion! Several of the new ones and other Crescent Journey pieces will be on display at Woodlawn Needlework Exhibit in March.
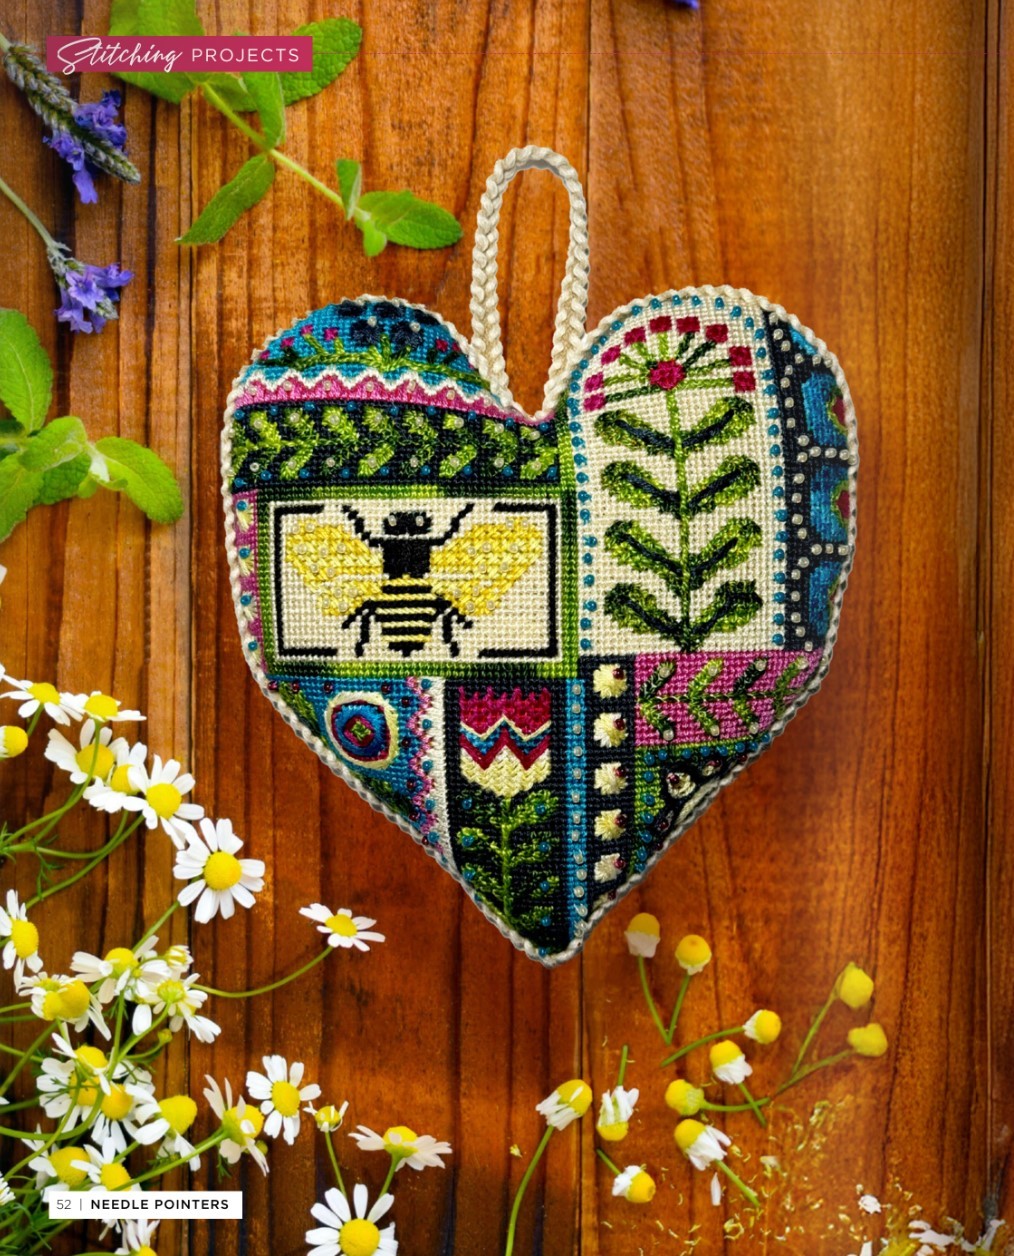
And, saving the best for last. Meghan from my ANG Main Line Stitchers Chapter stitched and created an excellent stitch guide for a Mindy canvas, Folk Heart. I did the diagrams, and her notes made writing up the stitch guide a breeze. For a relatively new stitcher (3-4 years?), she really excels. She did the finishing herself too. Her first attempt at that! Amazing!!
Filed under: ANG Central Jersey Chapter, Summer Fireworks by Ann-Marie Anderson-Mayes
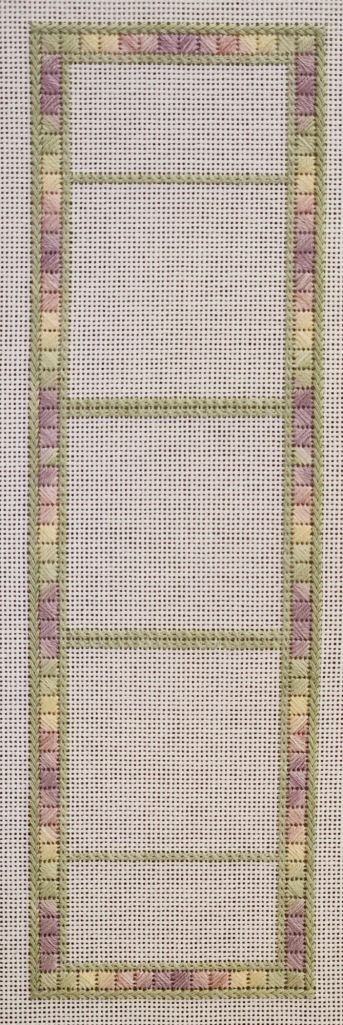
The ANG Central Jersey Chapter (CJC) meet and stitch on the 3rd Saturday of every month (from 10 am – 3 pm). Since I last joined them at the November 2024 meeting, I have picked up Summer Fireworks by Ann-Marie Anderson-Mayes occasionally when a small, easier piece was what I wanted to do.
In January, it was all I could do thanks to a good old-fashioned head cold that I got from my husband after holding it at bay for 2 weeks. We went through two batches of homemade chicken noodle soup.
I hadn’t noticed it, but Rosie L is correct, Ann-Marie’s hand dyed skeins match perfectly when folded in half if you cut at the knot. There is no need to search for the repeating color, allowing colors to line up perfectly in the Scotch stitch border.
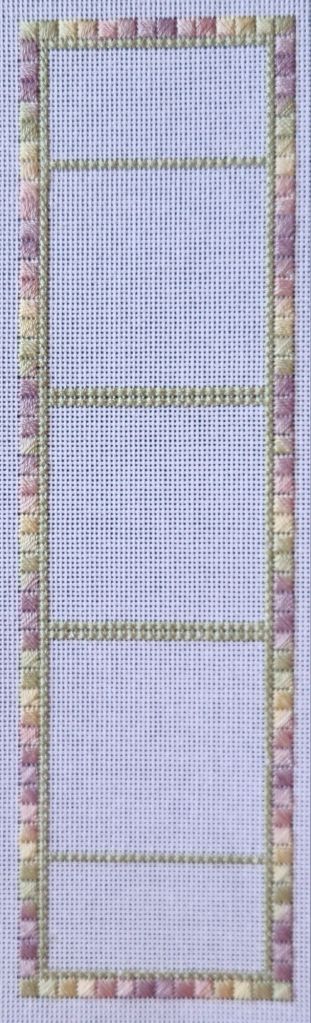
I didn’t make it to the CJC January meeting, but I did work on it an EGA Brandywine Chapter gathering yesterday where I started the outside Van Dyke border and finished it the next day during an Ellen of Serendipity’s 3-hour Zoom class on thread and stitch choices for snow scenes.
Filed under: Amanda Lawford's Christmas Angel
I blogged about Amanda Lawford’s Christmas Angel that I started in September 2023 periodically until I finished it in January 2024 https://melitastitches4fun.com/category/amanda-lawfords-christmas-angel/. In summary, it was for a woman who had started it 40 years ago and wanted it finished, but she just couldn’t find time to stitch and preferred to spend her leisure time elsewhere. So, I stitched it and she sent me a photo of it finished. I would have loved to see it on top of the tree, but I was happy to get any photo! It turned out great. She was thrilled, and so am I. Ignore the little piece of the background above her left wing that, for some reason, will not be erased even with Photoshop.

Filed under: 25 astitches in 25 Days, Serendipity - Stitching Club with Ellen Johnson
This exploration of 25 stitches was fun. I discovered a couple of new ones.
Day 21. Downward Diamond Ray Stitch
If you don’t work this from the top down, forget about it. This Weeks Dye Works, 2141 Lagoon, has a nice variation for leaves on a tree.
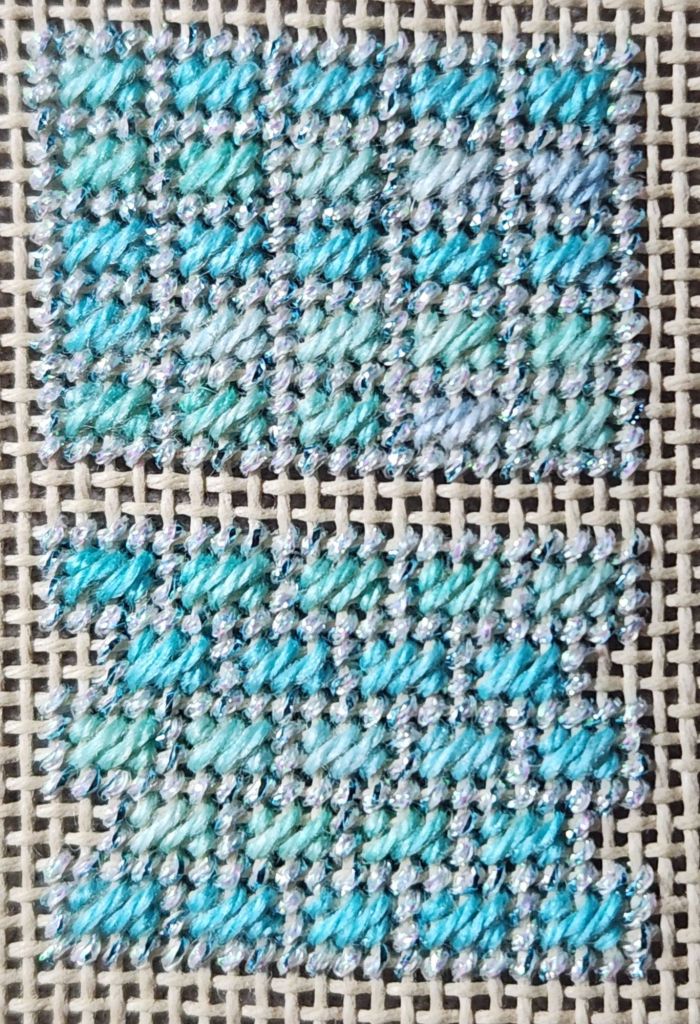
Day 22. Framed Cashmere Stitch
This is a pretty stitch using Impressions 181 Ocean Breeze and Kreink #8 Braid 1432 making it sparkle. I especially like it in an offset variation.
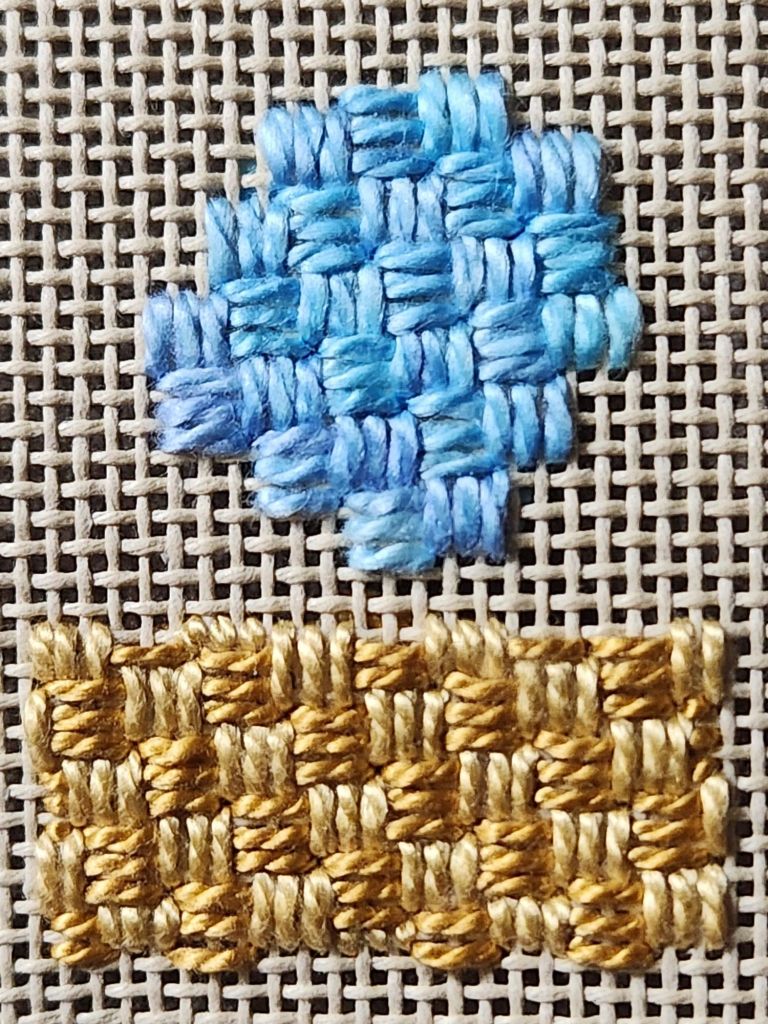
Day 23. Patterned Three Stitches
I see a basket would look great in this stitch with Watercolours 234 Celestial Blue. But even more so in two colors of DMC Pearl #5. Alternating both colors while moving left to right allowed me to work up from clean holes, so that was easier. But compensation on the rectangle was tough. I’m quite sure the bottom edge is correct and more sure that the top edge is wrong. But, this is just practice. So, I am not worried about it. If I add a little green stem, I would have a flower in a basket. Thanks to one of the ladies in the Serendipity community who called it a hydrangea.
Day 24. Skip Tent Stitch
I do like this stitch on a painted canvas for a background. I used a couple of Copic markers to color the canvas.
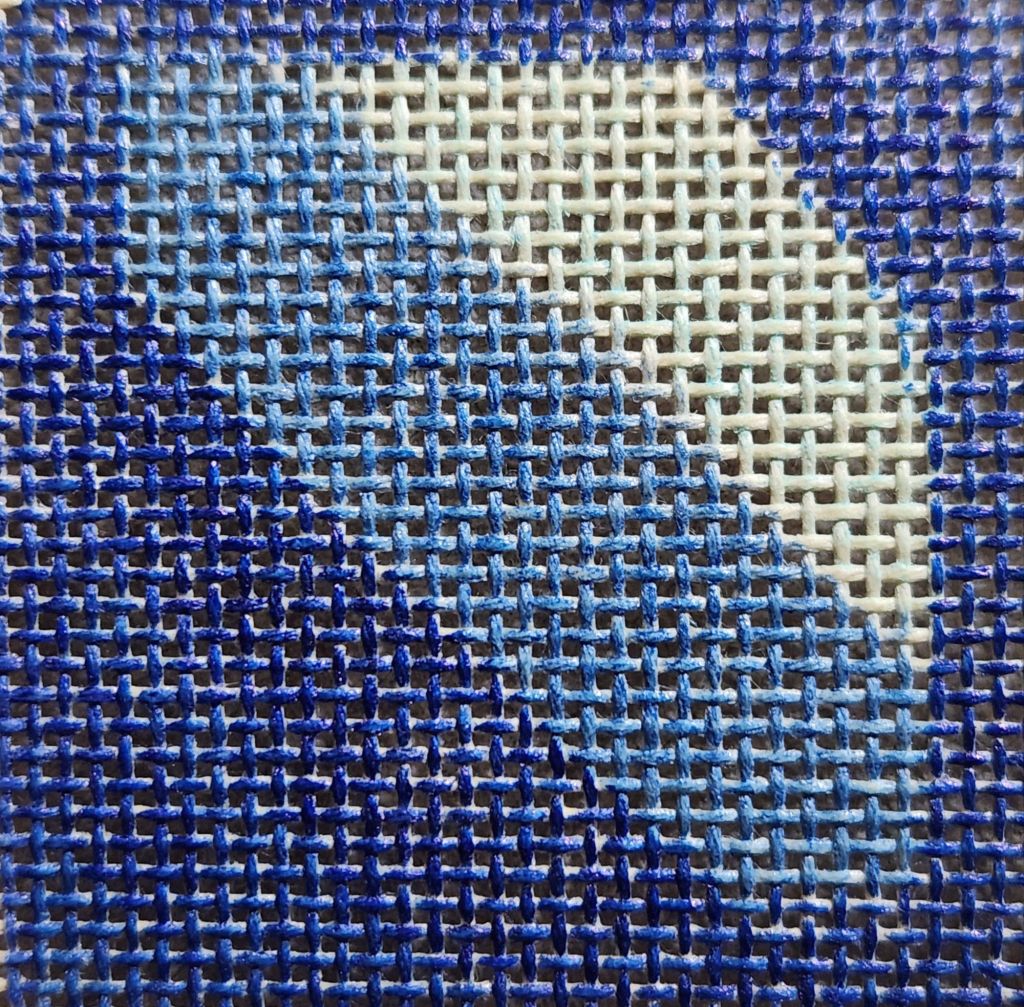
The tent stitch is small, and so it recedes for a good background stitch. And the paint shows through. I used Watercolours 234 Celestial Blue, which has some color change but not a whole lot.
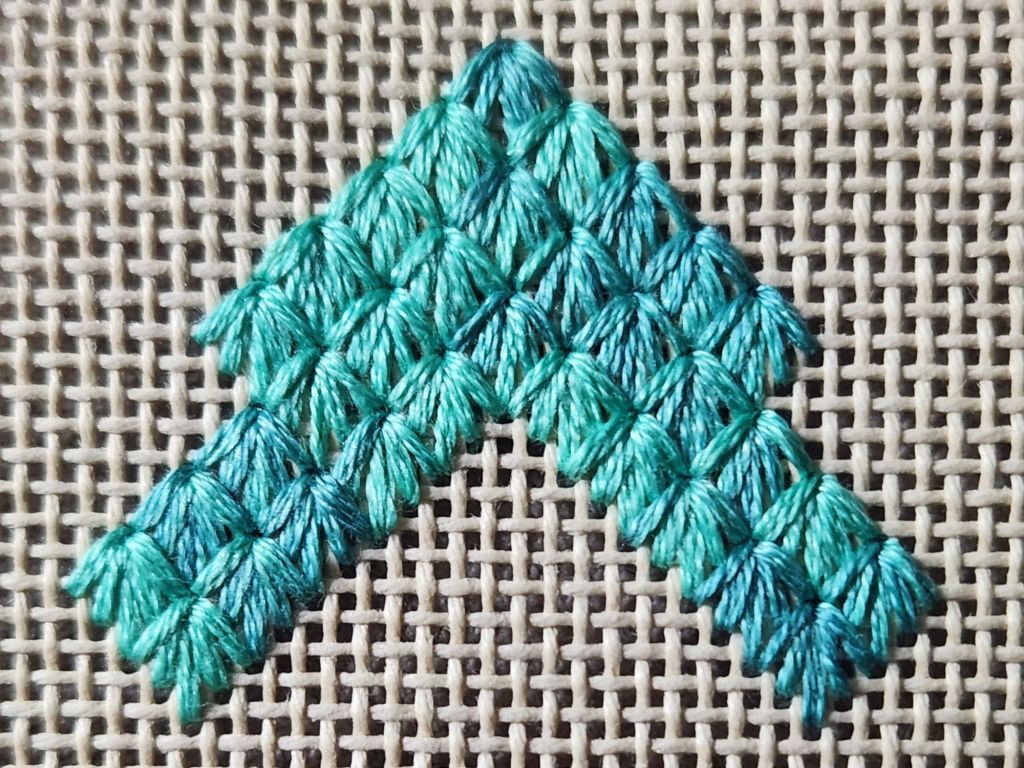
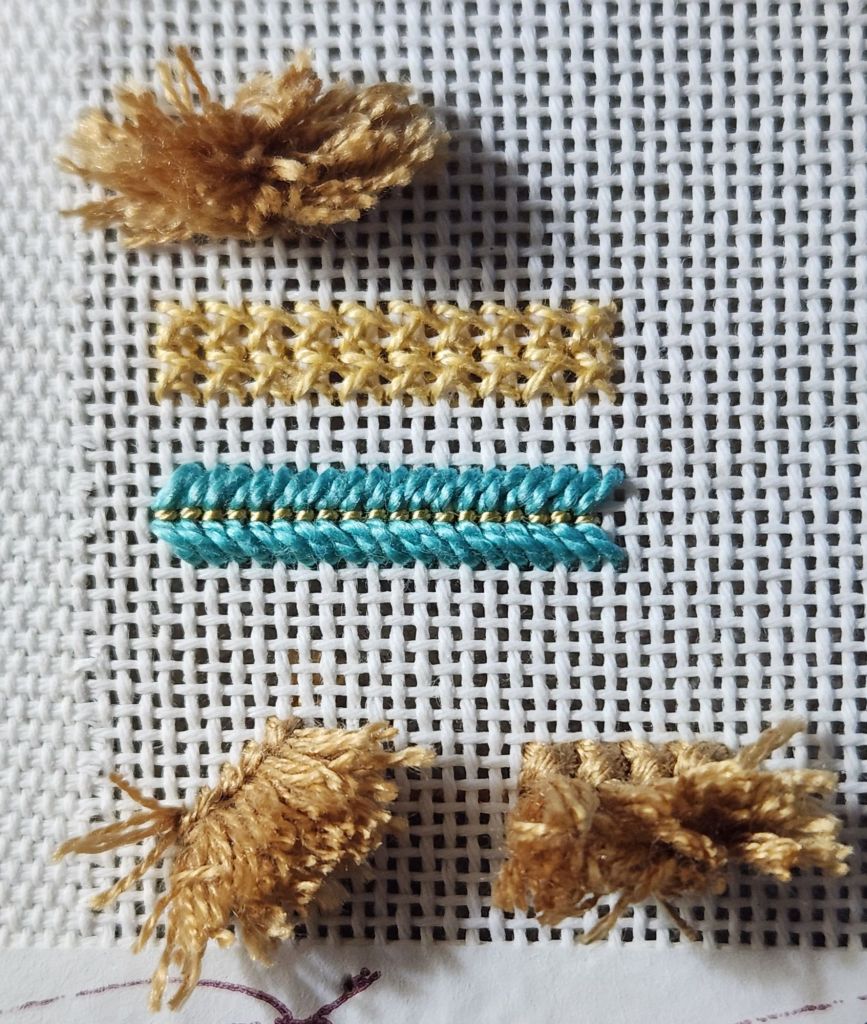
Day 25. Velvet Stitch
Another Turkeywork-like stitch. I don’t do much that uses Turkeywork, but it’s been educational to try these three methods over the last 25 days. Top left is Jump Through the Loop Turkey Work Stitch. The bottom left is Surrey Stitch. The bottom right is the Velvet Stitch.
There was a Zoom call today with some of the participants (77) who shared their progress. Lots of great color combinations. A couple of people did full squares of each stitch. More did partial samples. Some are taking longer to complete the process. There were a few that were so organized that they created a notebook to store diagrams, samples, and notes. My samples are mostly partial ones and stored in a zip lock bag, but that’s why I detail them on my blog.
The coolest one was from Deborah M, who used a geometric painted canvas with the different stitches in different areas. Very nicely color coordinated. Later, she shared a photo in the Serendipity community. I was able to get a better view of it and could see just enough to see it was an Eye Candy canvas, Juicy Fruit Puzzle. Doing 5 five rows of 5 stitches in a 1″ square was not where I wanted to spend my time, but I might have stitched the canvas she showed. I think I will be visiting this page for a future project when Ellen teaches different stitches.
Filed under: 25 astitches in 25 Days, Serendipity - Stitching Club with Ellen Johnson
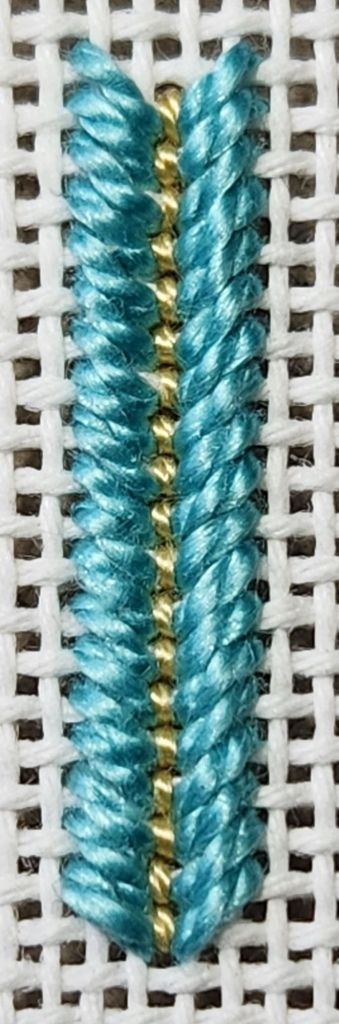
Day 16. Needlepoint Stem Stitch
DMC Pearl #5 for the outer portions and DMC Pearl #8 down the center.
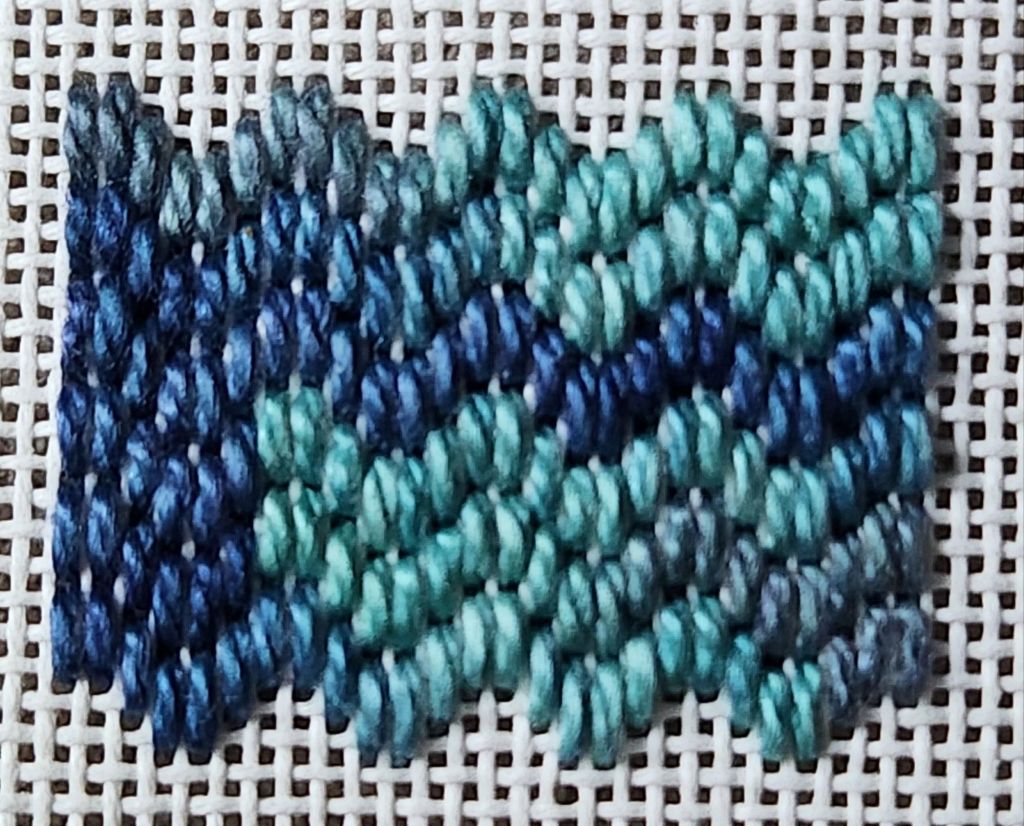
Day 17. Simple Bargello Line Pattern
Here’s a bargello pattern (over 3 canvas threads not the usual 4) using Watercolours 197 Monsoon for a murky water.
Day 18. 5 x 3 Darning Stitch
Also Watercolours 197 Monsoon for another murky water. It would be better if the canvas had been painted.
Day 19. Milanese Stitch
It probably has less movement when done in all one color but still would seem too busy for most backgrounds.
Day 20. Surrey Stitch
You can’t be loopy and try this stitch! It feels more secure than Turkey work. Except for that one strand, it stands up nicely.
Filed under: 25 astitches in 25 Days, Serendipity - Stitching Club with Ellen Johnson
Day 11. Old Florentine Stitch
DMC Pearl #3 for full coverage.

Day 12. Oriental Stitch
Here is Impressions 181 Ocean Breeze with Kreinik #8 Braid 1432 for water with movement and a little sparkle in the sunlight.
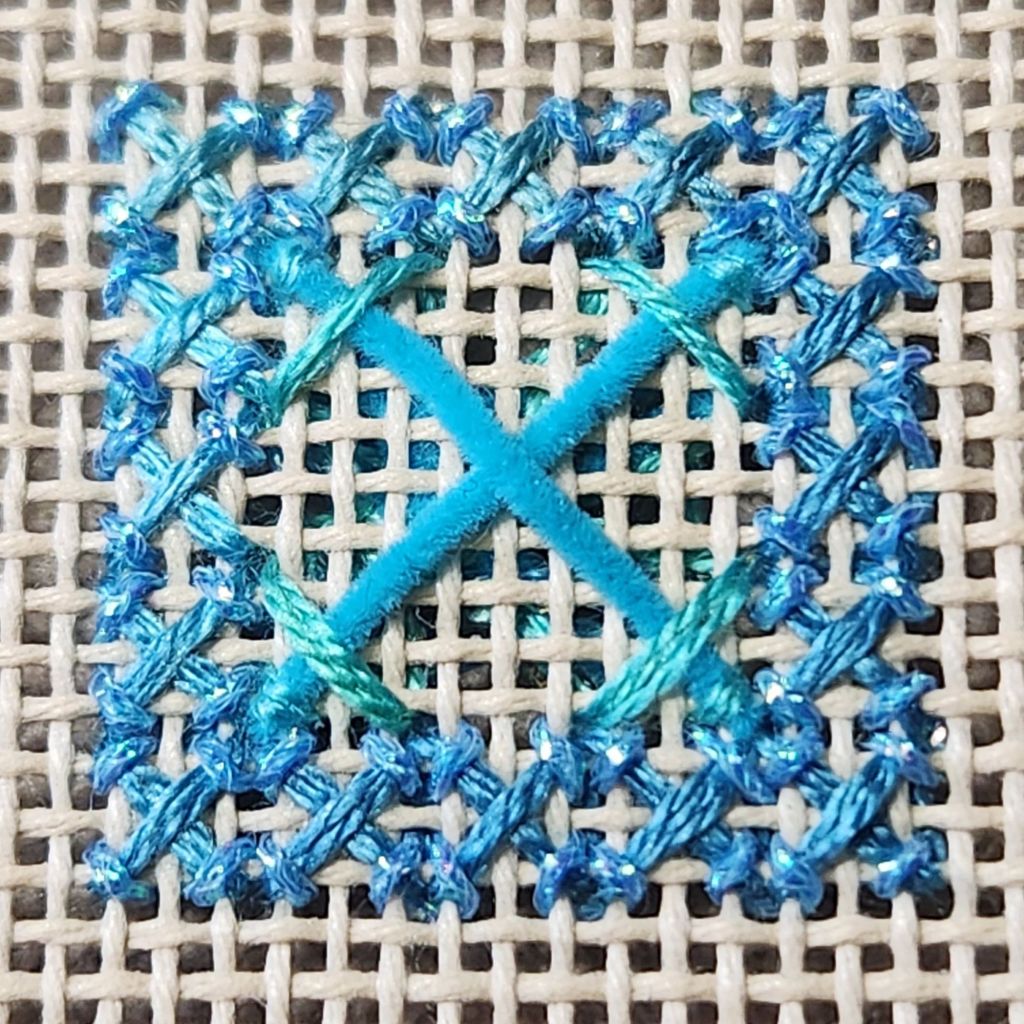
Day 13. Rice Stitch
Here’s a Giant Rice with Petite Very Velvet and Waterlilies framed by small Rice stitches using Waterlilies and Kreink #8 Braid.
Day 14. Tiny Diagonal Leaf
What a cute, delicate composite pattern. Here is Impressions 181 Ocean Breeze again, but with Kreinik #8 Braid 9732.
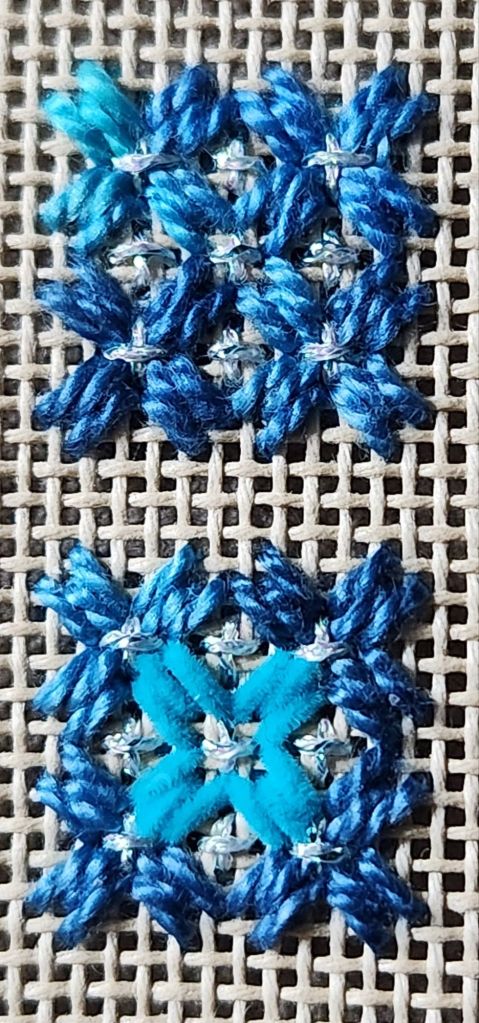
Day 15. Medallion Stitch
Another composite stitch pattern. All Watercolours Mediterranean with Kreinik #8 Braid 1432 and then a variation with Petite Very Velvet in the center surrounded by the same Watercolours and Kreinik.
Filed under: Books in My Library, Embellishments for Canvas by Mary Lou Helgesen, Needlepoint Books, New Twists on Needlework Embellishment by Howren and Robertson
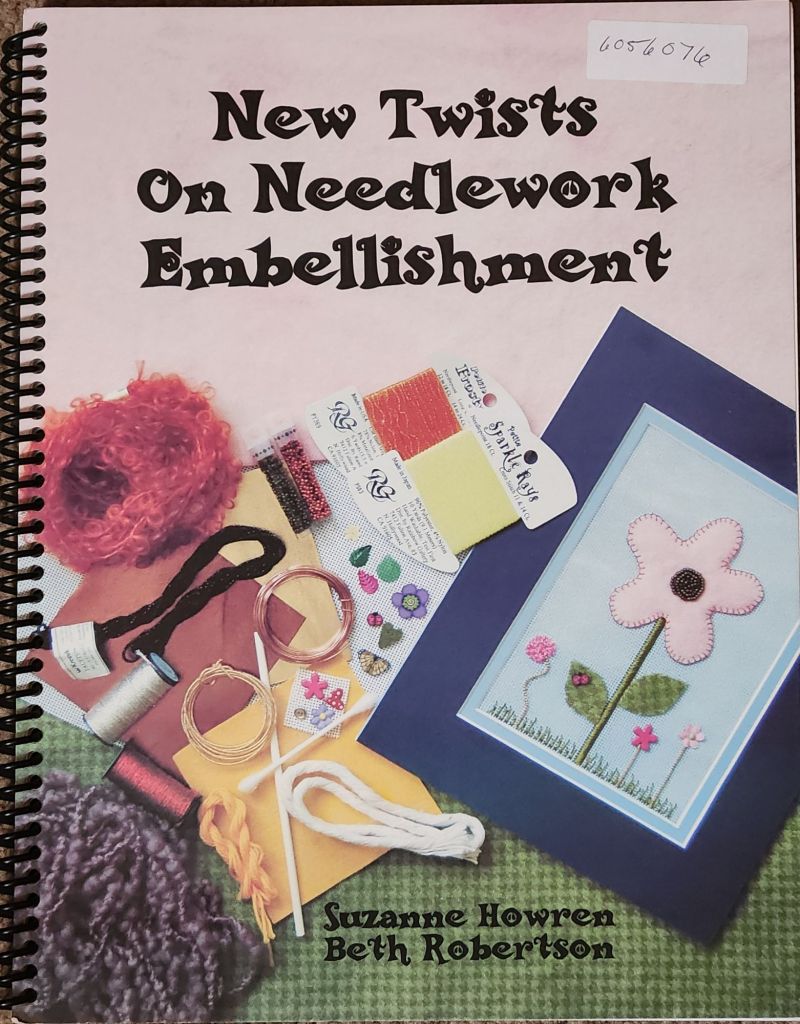
Two new books joined my library for Christmas. As you can see, they are focusing on embellishment for painted canvases.
New Twists on Needlework Embellishment by Howren and Robertson is well indexed. Ruching a variety of threads is discussed, although what they call ruched ribbon is more of gathered ribbon like that done in All That Shimmers.

Embellishments for Canvas by Mary Lou Helgesen is primarily for nativity figures but has an interesting use for a wide ribbon. Jacqui talked about ribbons at the New Jersey Needle Artists Chapter meeting this week and supplied us with several ribbons, including the wide ribbon in our kit. There is also a canvas pattern that turns corners, which should be fun to try.


Here’s the photo of the ribbon suggestions in the booklet. I couldn’t figure out how to weave around the French Knots on the wide ribbon or where I would use it, but couching ribbons would be easier to incorporate into a piece. I played a little with the other ribbons supplied by NJNA.

Filed under: 25 astitches in 25 Days, Serendipity - Stitching Club with Ellen Johnson
There’s been lots of participation among the members of the group that makes it more interesting. We see lots of variety without all the stitching.
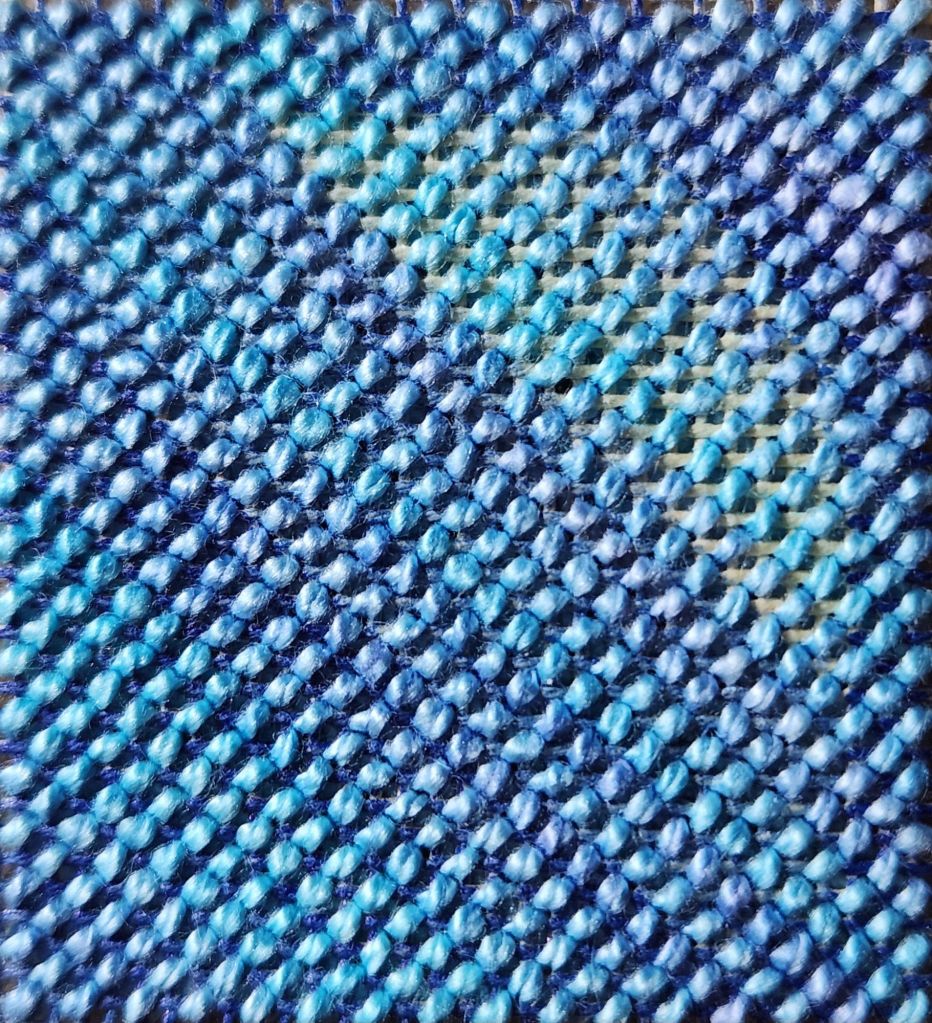
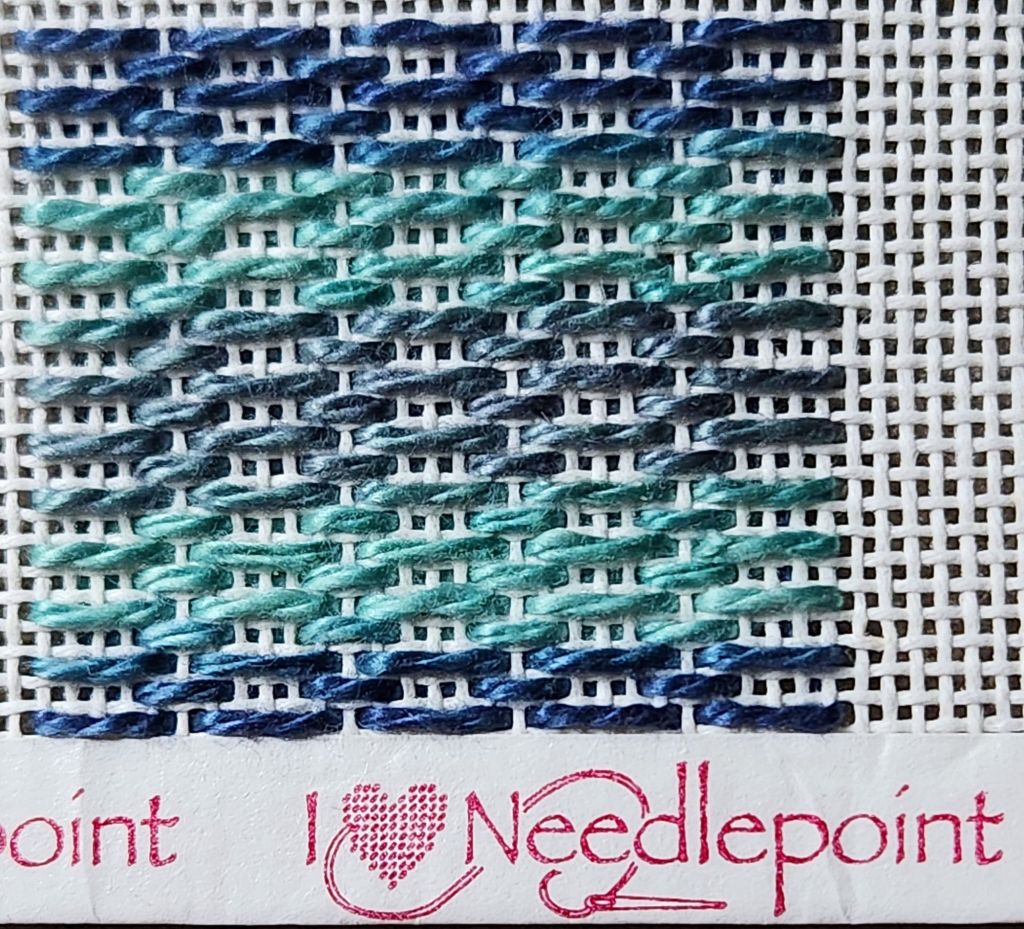
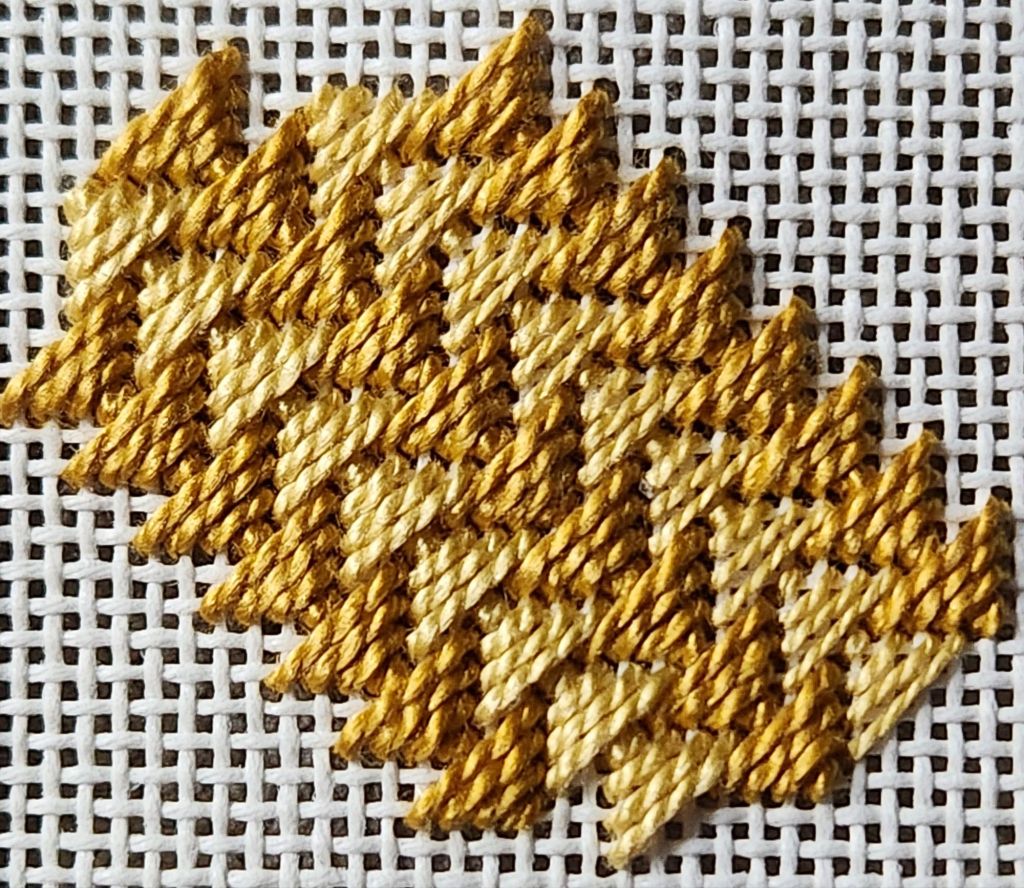
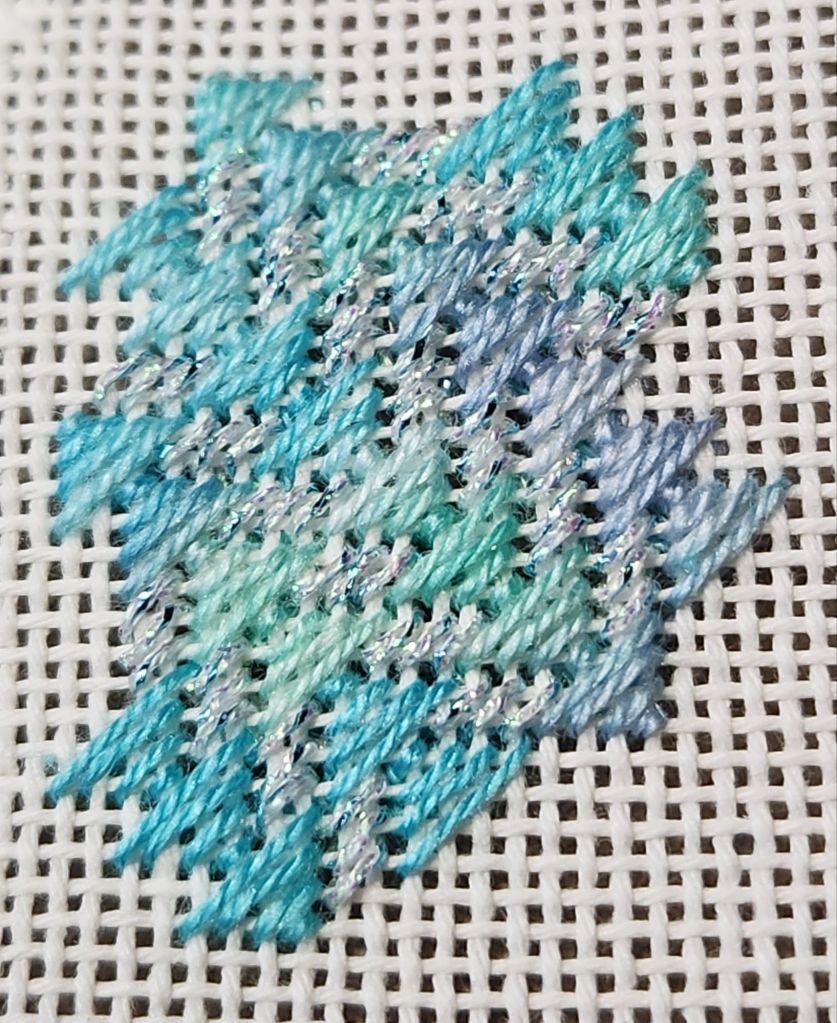
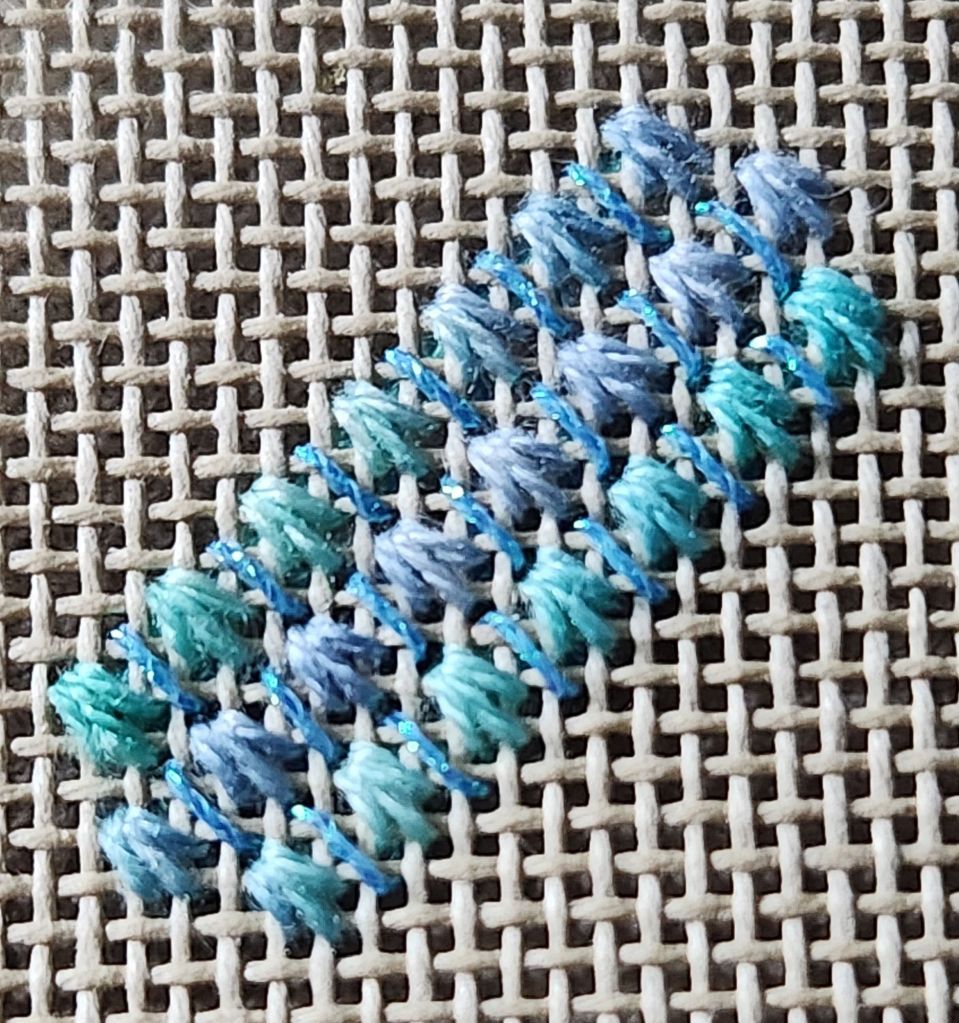
Day 6. Horizontal Twill Stitch
Playing with an old skein of Watercolours Mediterranean (hand written label and lot number but no item number) for today’s Horizontal Twill Stitch. I see an ocean and my husband sees a sky.

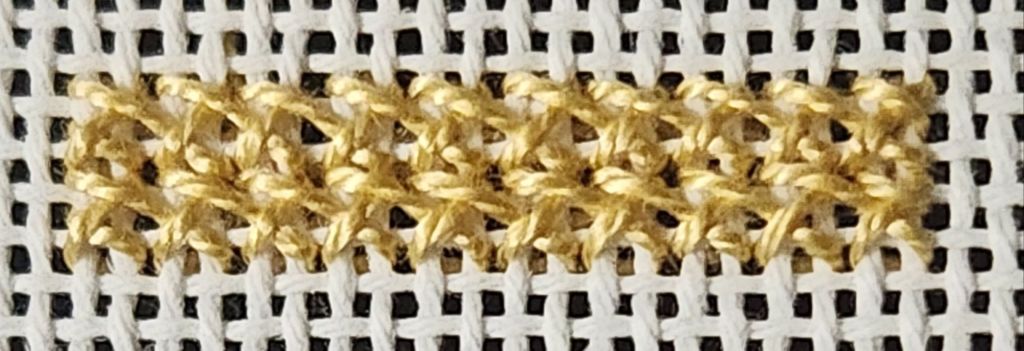
Day 7. Greek Stitch
Good texture to the stitch. I think this would be a tough stitch to compensate.
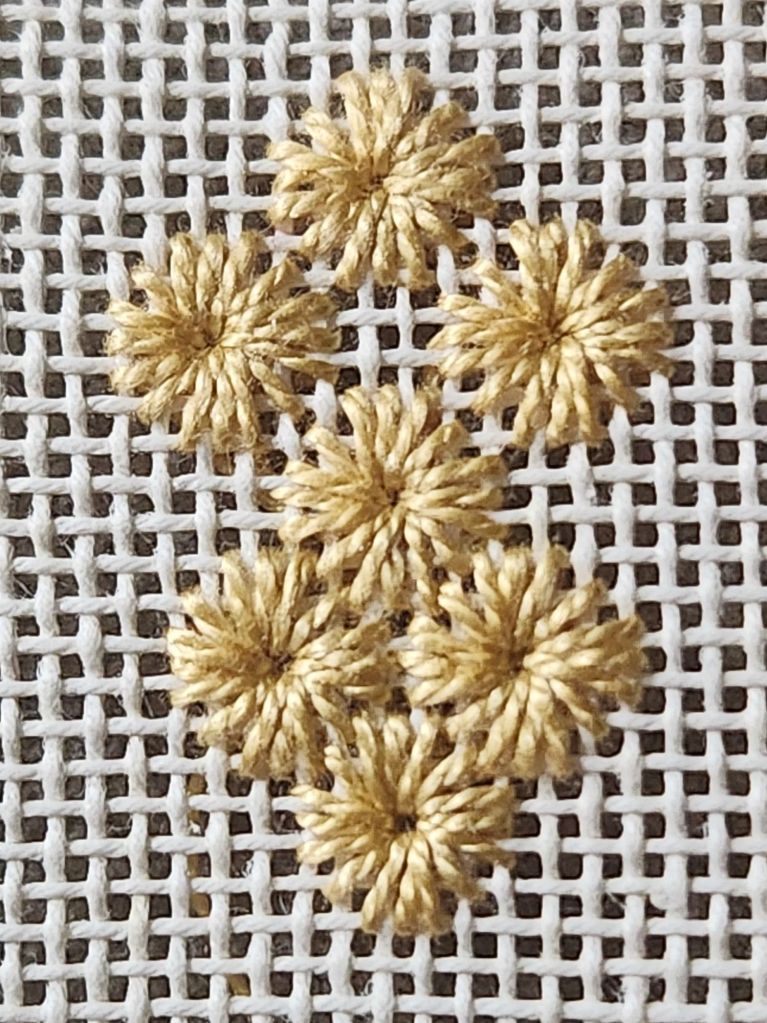
Day 8. Daisy Stitch
I like how they can nestle up next to each other.
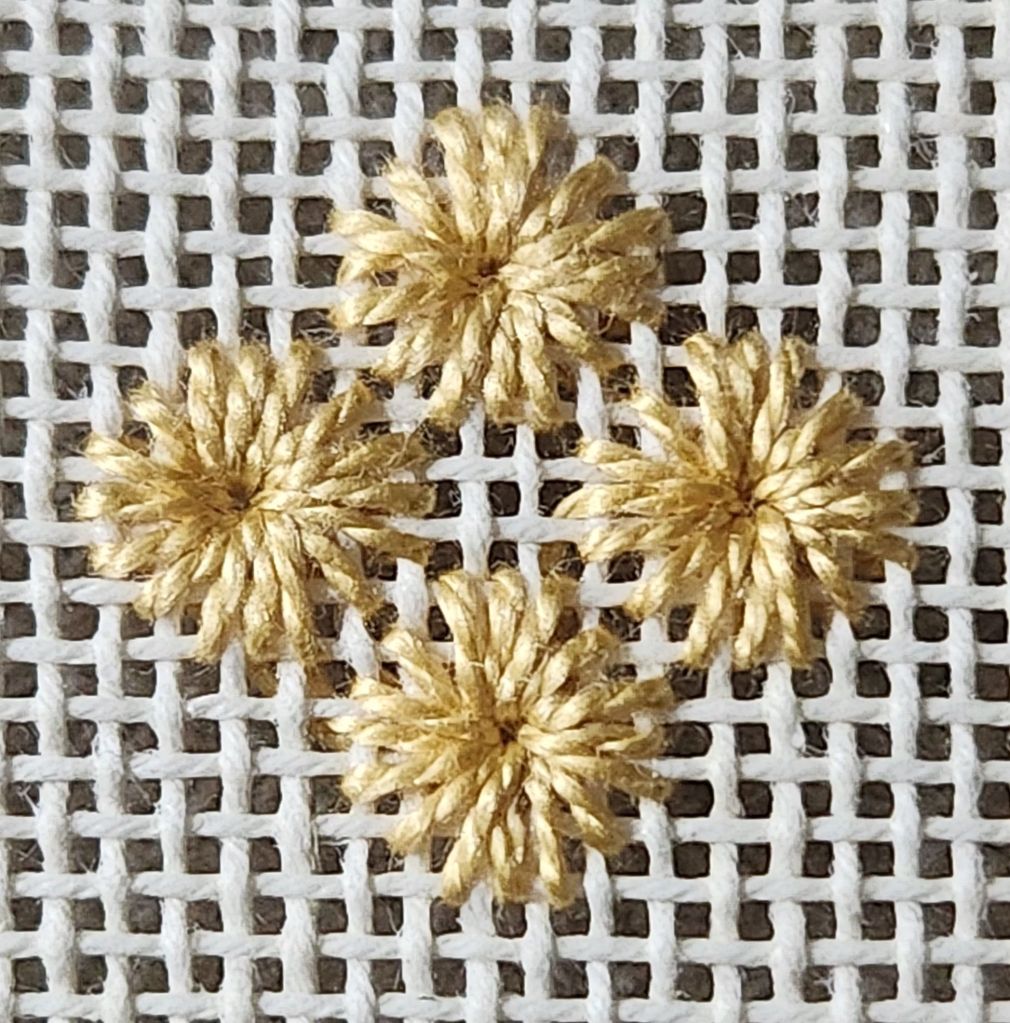
Someone posted a variation that nestles them even more closely. Randomly placed and different sizes would be good too.
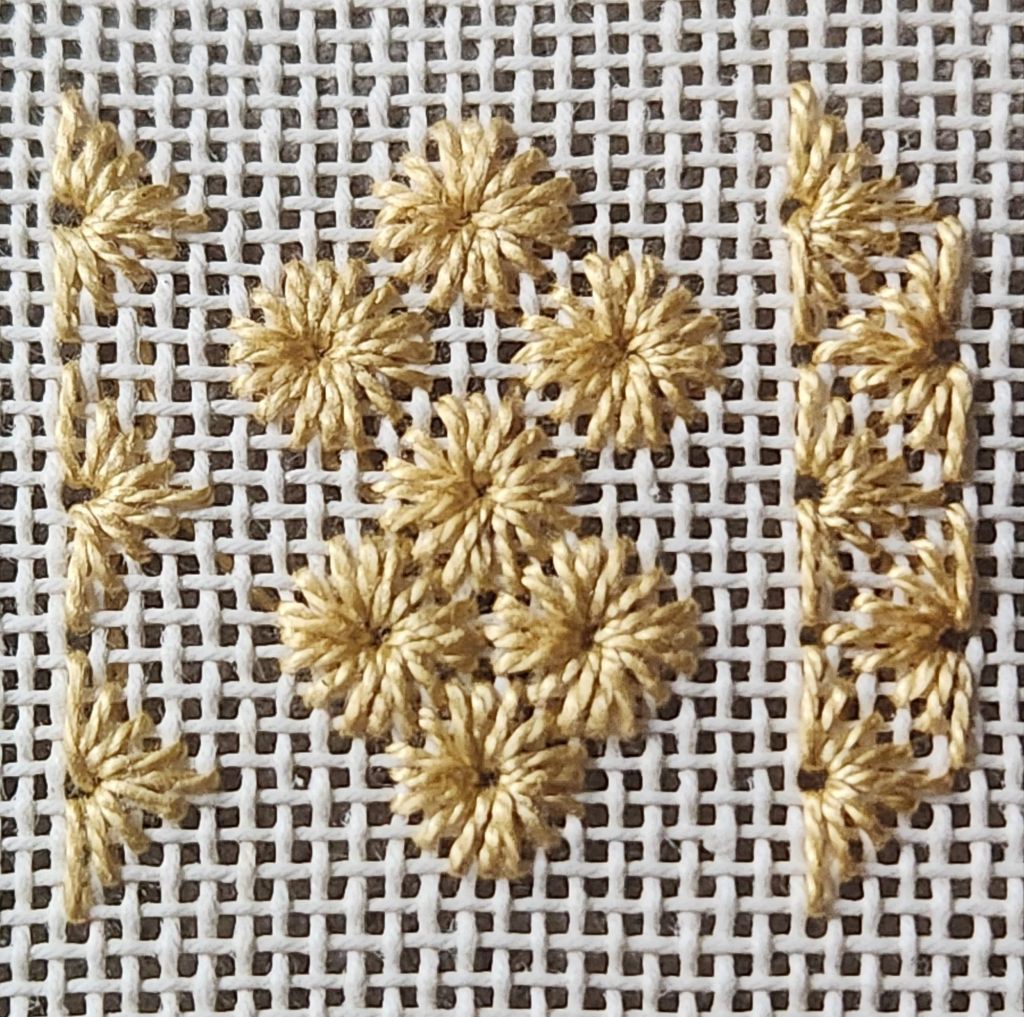
Day 9. Eyelet Rows Stitch
You could make a single or double fence around the garden of Daisys.
Day 10. Irish Stitch
Looks like a large brick stitch.

Filed under: 25 astitches in 25 Days, Serendipity - Stitching Club with Ellen Johnson
Ellen Johnson of Serendipity is encouraging members to participate in exploring 25 stitches over 25 days. I’ve got plenty of scraps of canvas for this challenge!
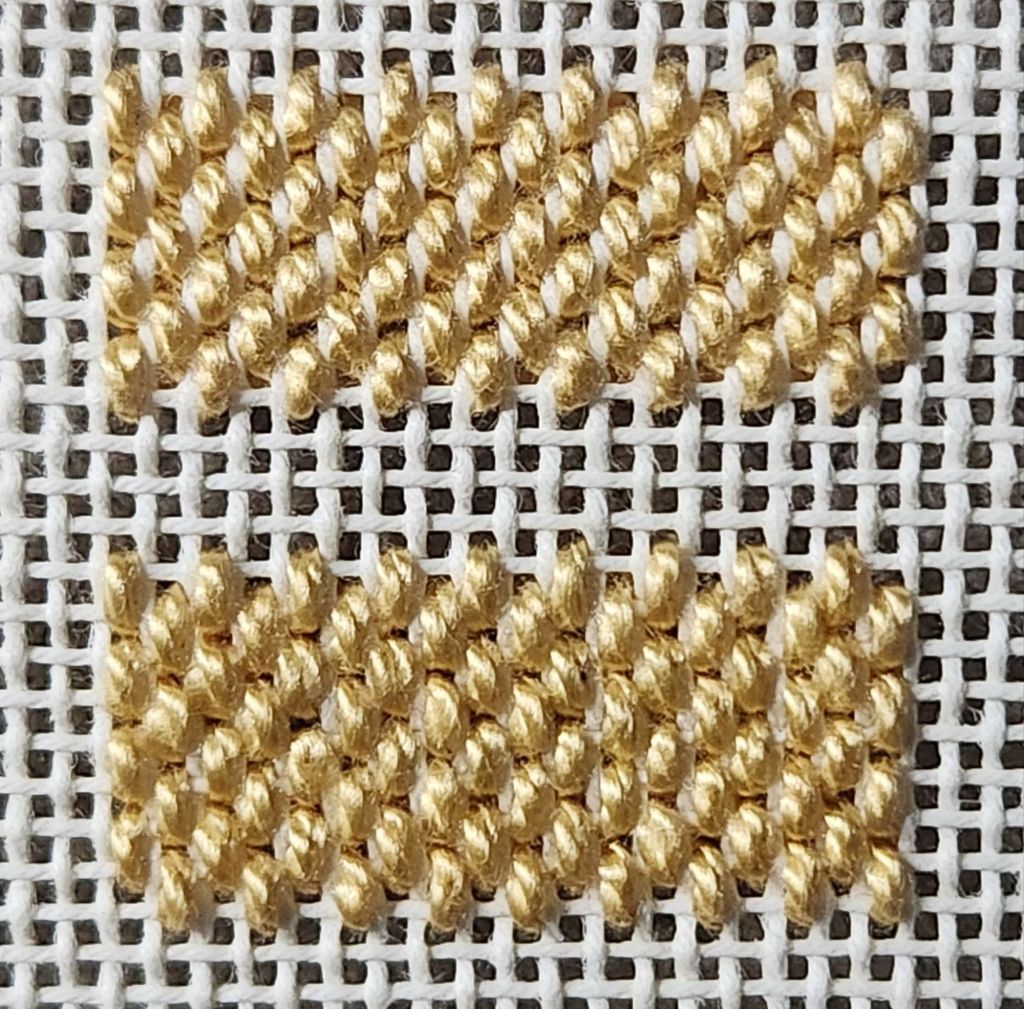
Day 1. Parisian Stitch
Here’s a variety of DMC perle threads on 18 count. If it was a colored canvas, #8 would allow some canvas to show which might be desirable, #5 allows very little to show, and #3 covers. Changing colors on rows is an option. Easy to compensate, especially good for backgrounds.
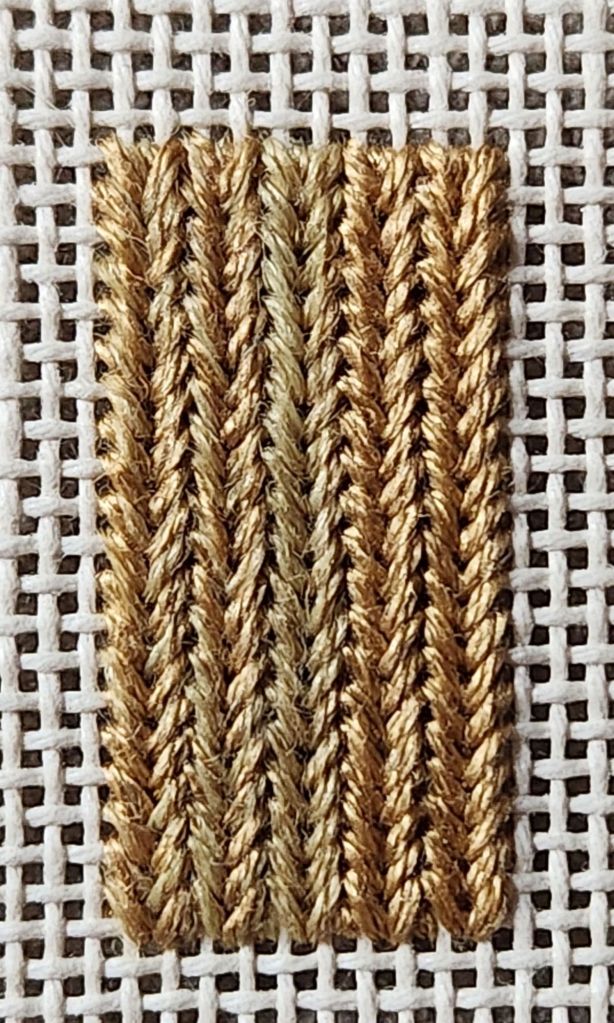
Day 2. Kalem Stitch
For the Kalem stitch, I used 1 strand of The Gentle Art Simply Wool with 2 strands of Soie d’Alger first 2 columns, 2 strands of Simply Wool in the 3rd column, and 3 strands of Soie d’Alger in the last 2 columns. You can clearly see the wool in the center as duller.
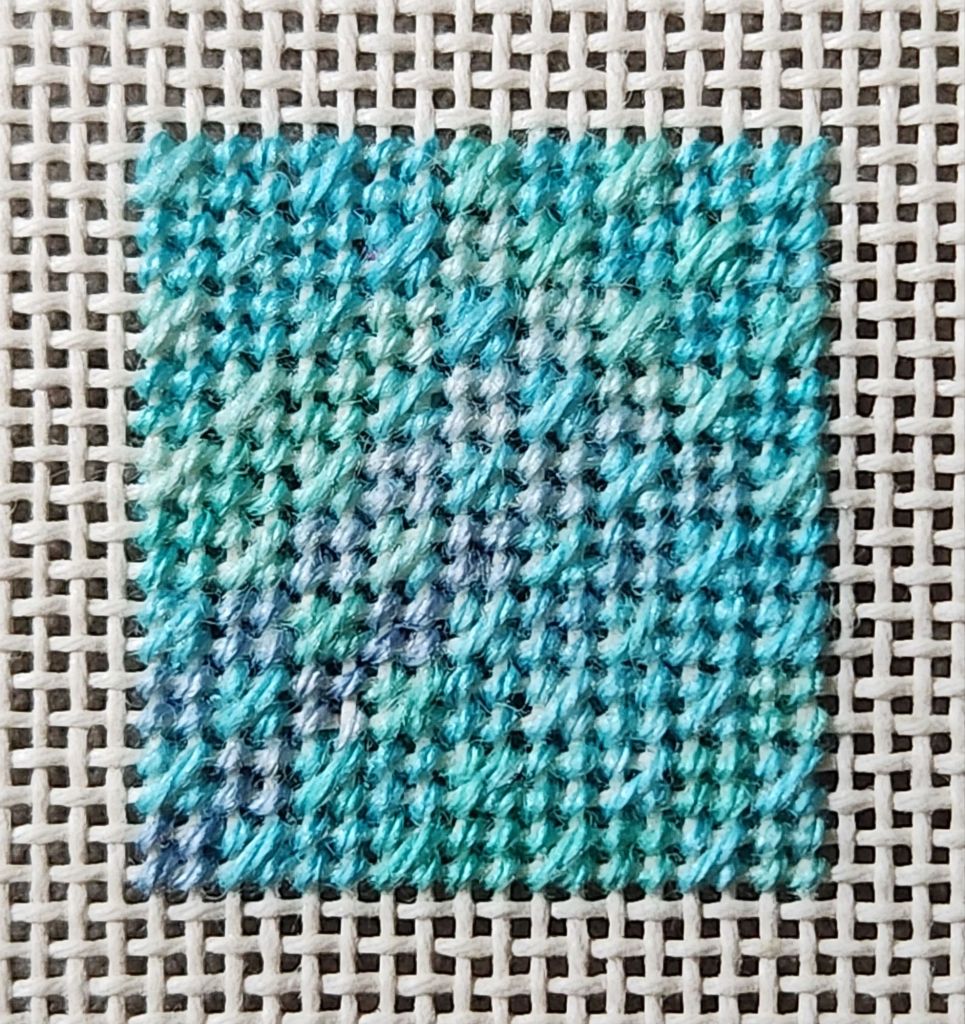
Day3. Checkerboard Mosaic Stitch
Here’s what 1 strand of Impressions 181 Ocean Breeze looks like. I worked the Mosaic stitches first and then filled in the tent stitches. It’s more striped than Checkerboard. Two different colors are needed to obtain the checkerboard appearance.
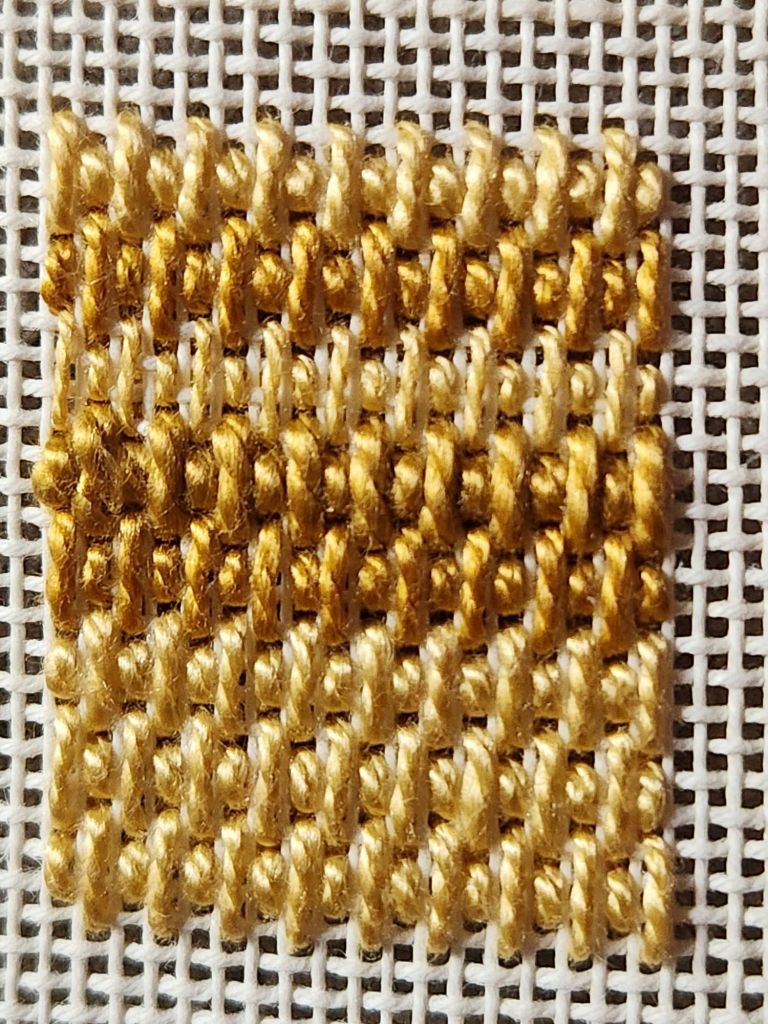
Day 4. Brick Stitch
One stand DMC #5 in 2 different paths. The top sample was stitched every other thread on each row. The bottom sample was stitched every thread on two rows. Coverage looks better on the bottom.
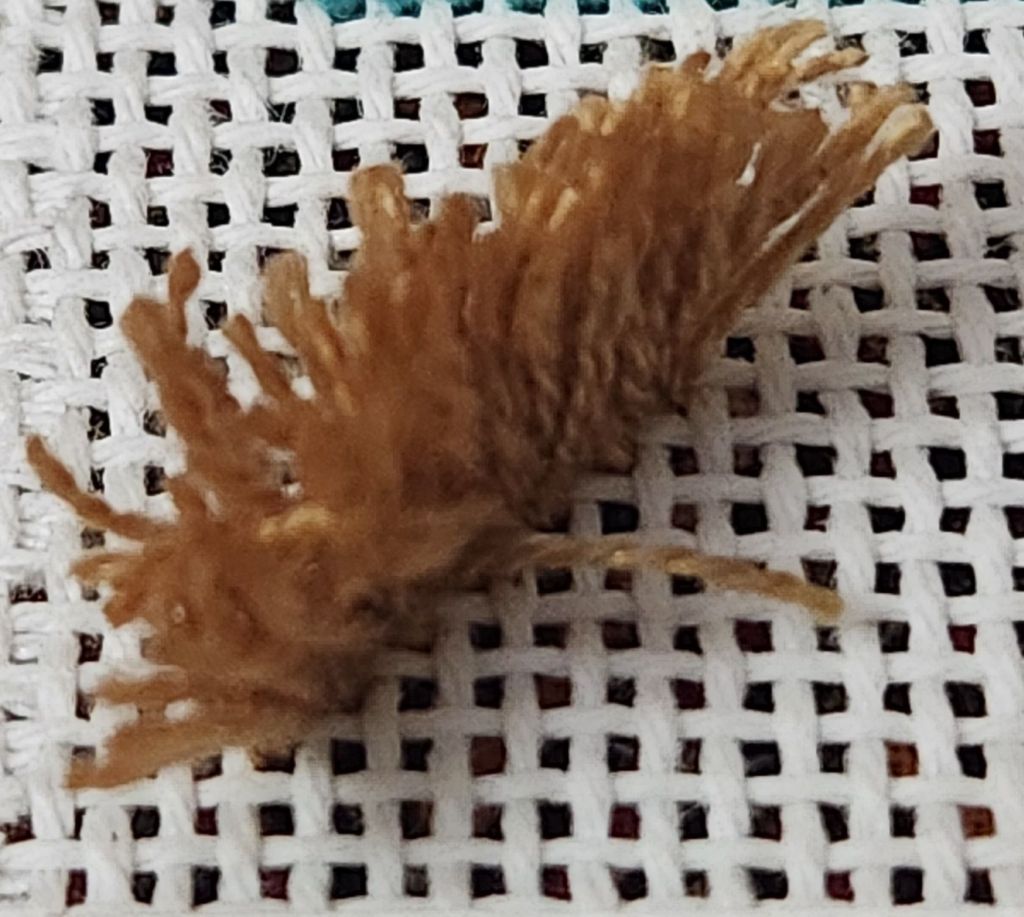
Day 5. Jump Through the Loop Turkey Work Stitch
I used a 12 stranded Soie d’Alger without stranding it in this small sample. It feels more secure than the way I’ve stitched it previously. I only did a small sample. It’s not one of my favorites but useful when you need something fluffy.

With multiple finishes over the past few weeks, it leaves me with a pile of threads to be stored away. I do it by color. What a mess! I wish I were disciplined to put them away after each project.
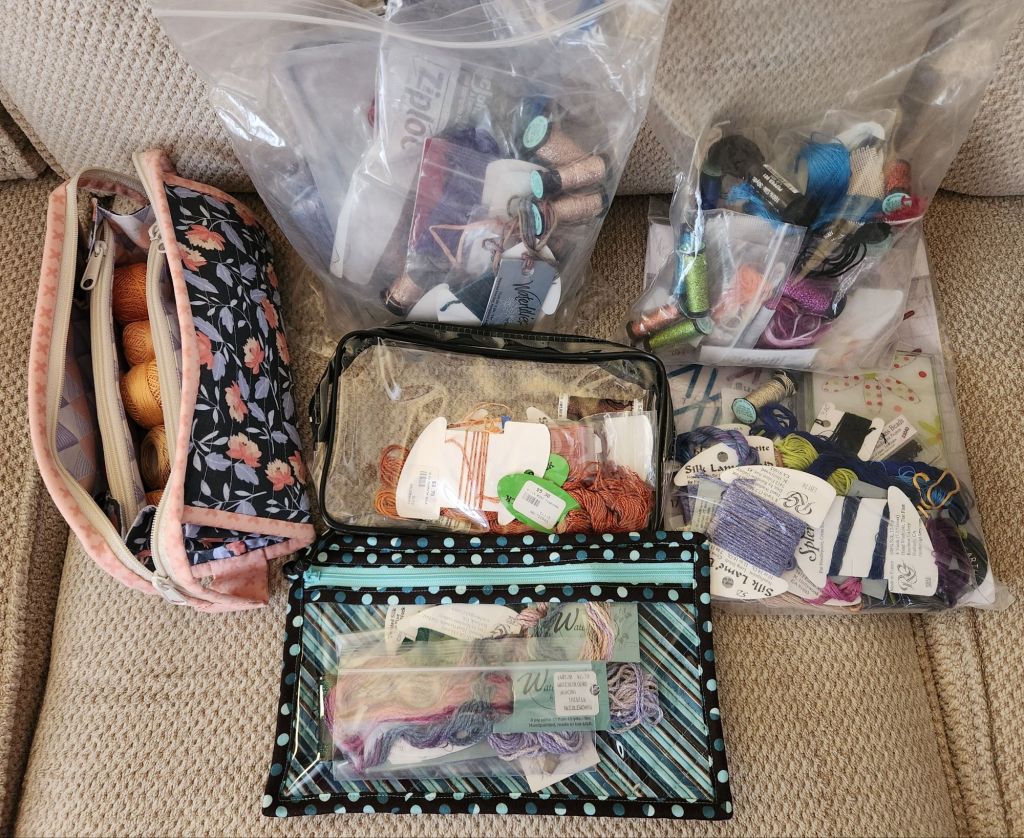
How do you manage your threads after finishing a project?
