Filed under: ANG Seminar 2024
During ANG’s Seminar, there is always Expo! night and I forgot to post about my purchases. Knowing that I was going home with 3 new projects, I couldn’t buy more. But, I can always use a magnet and a stitch book.
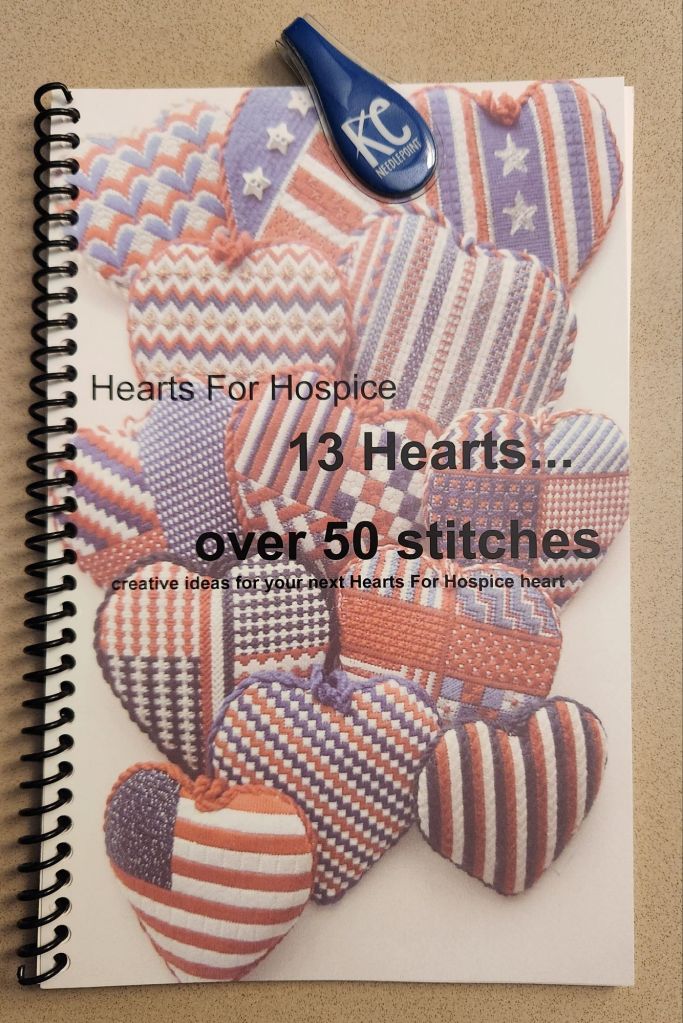
The fine folks in Kansas City with Hearts for Hospice had a table and had newly printed booklets for sale. It’s called 13 Hearts . . . over 50 stitches. Their fantastic story is inside. They started by providing a dozen hearts a month to one hospice to donating over 60 hearts a month to 3 local hospice centers. They have distributed over 5,000 hearts across 26 states and 4 countries. Very commendable.
Their suggestion to treat the hearts as a stitch sampler is excellent. Stitch, take notes, photograph, and send it to them for finishing. Some stitches you will like better than others but don’t rip, send it to Hearts for Hospice.
There are some interesting Nobuko variations and a dozen Cashmere variations. There is a Rhodes Heart and a very clever butterfly.
I’m sure you can order the booklets from heartsforhospiceofficial@gmail.com – great gifts.

Now, what did I do with that magnet? I look forward to finding it . . . one day when I am looking for something else!
Filed under: ANG Needle Pointer's Timeless Treasures From the Archives
The ANG Pine Tree Chapter (Maine) sponsored a series of three Zoom lectures by Susan Hoekstra in support of a non-profit heating assistance program by Penquis in Maine. The three lectures were:
April 10, 2024 The Elements of Design
May 8, 2024 The Principles of Design
June 5, 2024 Using Color Theory to Your Advantage
At the May lecture, I decided to see how well optical color mixing or pointallism would work with needlepoint.
So, I decided on a simple sunset scene (yes, I coordinated my needle minder magnet). You can easily see the red DMC #5 Perle 666 and yellow 973 have combined to create orange just as Susan explained. I am using skip tent basketweave.


As I was in the middle of stitching this, I was reading 8 articles on color and design written by Gene Wright. The 5th article mentions achieving optical blending through needle blending. The left side in my sample below uses 4 strands, and the right side uses 2 strands.

Join American Needlepoint Guild (ANG) to get access to more about this topic in the Timeless Treasures from the Archives article in the current issue of Needle Pointers (September/October 2024) and all the issues since the 1980s. Read about all the ANG member benefits at: Click here.
Filed under: General comments, Needlework and Textile Guild of Media, Technique Issues
I gave a talk about picking stitches to the members of The Needlework and Fiber Guild of Media earlier this month and here are my takeaway thoughts. I covered a lot in 40 minutes, but since then, I added a couple of more thoughts. I want to know where to find these when I need them and will be adding to this periodically as I come across any gems.
The non-stitchers in the guild (they do all sorts of various crafts such as needle felting, sewing, knitting, quilting, spinning wool, bookbinding, etc) were asking if we’re going to do a group project based on what they learned! I think a simple landscape would work well. This is a very creative group without the types of classes I’ve taken. So, I did stress technique is important although without a desire to become a Master Craftsman or plans to enter into a juried exhibit, it really is about enjoying what you do. If people want to work needlepoint in hand (I used to until I found out about bars), that is entirely fine with me. I’ve told them why I don’t. Some of this is applicable regardless of the medium.
Key Tips and Technique Issues (in no particular order):
• Basketweave area allows for a place for your eyes to rest.
• Color of thread: Light threads appear further away compared to dark threads that appear closer.
• Size of stitches: Small stitches appear further away compared to large stitches that appear closer.
• Odd rule is that odd numbered motifs (1, 3, 5, etc) in a design are more pleasing to the eye.
• Different stitches and threads can create varied texture (bumpy, ridged, smooth, etc).
• Direction of a stitch creates a different effect (water on a lake is typically horizontal; river flowing down a hill with a gradual slope probably has stitches at angles of 30° or less; a waterfall with a steep slope probably has vertical stitches or are 60° or more).
• Area should allow for repeats of 3 units or more (6 wide allows for mosaic and cashmere stitches but not Scotch).
• Companion stitches help create depth by using a smaller stitch such as Serendipity for further away areas, Criss Cross Hungarian for middle ground, and the larger Woven Trellis Variation for the closest areas.


• Composite stitches combine different types of stitches such as straight and cross stitches.
• If a stitch is fancy, use a simple thread; if a thread is fancy, use a simple stitch.
• Stitch diagonal stitches first if they will be next to straight stitches.
• Stitches are worked opposite of the direction you are moving (to get the proper pull). If a diagonal stitch is worked bottom left to upper right, then work towards the left. If a diagonal stitch is worked bottom right to upper left, then work towards the right.

• The direction of a stitch can be changed. In one color, the front of the canvas will look the same but done in two different colors or an overdyed thread, there will be differences.


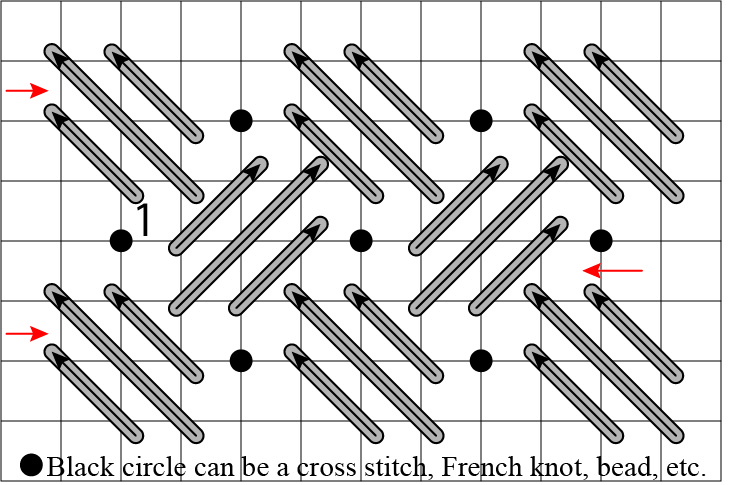
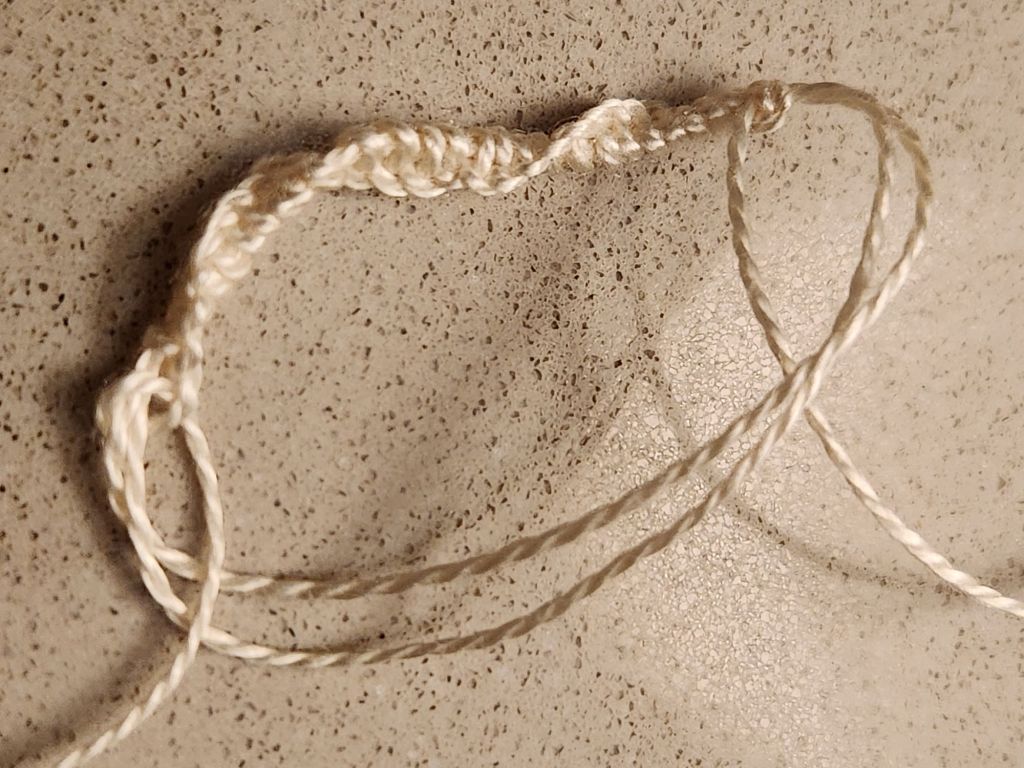
Did you know there are two ways to stitch Alternating Continental?

That link to ANG has changed since I diagrammed it (https://acrobat.adobe.com/id/urn:aaid:sc:VA6C2:3fba9f78-8199-4564-8b67-aec23e9a3779 and only ANG members have access to all previous Stitch of the Month projects).
Does it make a difference?

Yes. You can see the difference in carrying the thread below the hole (left) compared to not (right). Correct me if I’m wrong, but I believe the right side is more like how to work a blackwork pattern or a double running stitch.
Filed under: All That Simmers by Sundance Beads, ANG Main Line Stitchers Chapter
The metallic leaves are reversible, so you could vary the bend in the stems. I stitched through the round ends with 2 strands of invisible Sulky thread and then went through them again.
The yellow Frosty Rays was too thick to go through the round ends more than once or twice. So, the other 2 stitches covered the round ends. They are probably a little bigger than what was painted, but I wanted to see them when viewed from a distance.

For the stamen, I used French Knots (anther) on a Stick (filament) and am relearning flower anatomy in the process!

The inner round ends will get covered by the red flower. I am ready for tonight’s ANG Main Line Stitchers chapter meeting. We’re using a stitch guide by Sundance Beads.
Filed under: ANG Seminar 2024, Byzantium - Lorene Salt, Heart Swirls - Janet Zickler Casey, Treasures from the Great Lakes - Dawn Donnelly
Classes are over for me. The Jazz Museum and Negro Baseball Museum were great as was dinner with Linda at Bristol’s Seafood. A very tasty TAMARIND SOUR with Bulleit Bourbon, tamarind, lime started off the evening. A delicious lobster bisque was followed by Hong Kong scallops. The chocolate velvet cake was amazing. Bill was next door at BRGR Kitchen and Bar for a private tasting of 3 Irish Whiskey brands that had been blending in a little cask for an Old Fashioned – he said it was delicious.
So, I’ll go back to my regular posts now on my progress on these 3 classes and my other ongoing projects:
Byzantium by Lorene Salt (nothing too complicated but will take time, although some crescents are big and work up quickly)

Treasures from the Great Lakes by Dawn Donnelly (a few tricky elements I need to work on while they are fresh in my mind; the most different from my normal stitching)

Heart Swirls by Janet Zickler Casey (small and not hard, should work up quickly)

All That Shimmers by Sundance Beads (these are broken up for monthly chapter projects with ANG Main Line Stitchers chapter; ready for Monda’s meeting and the next area)
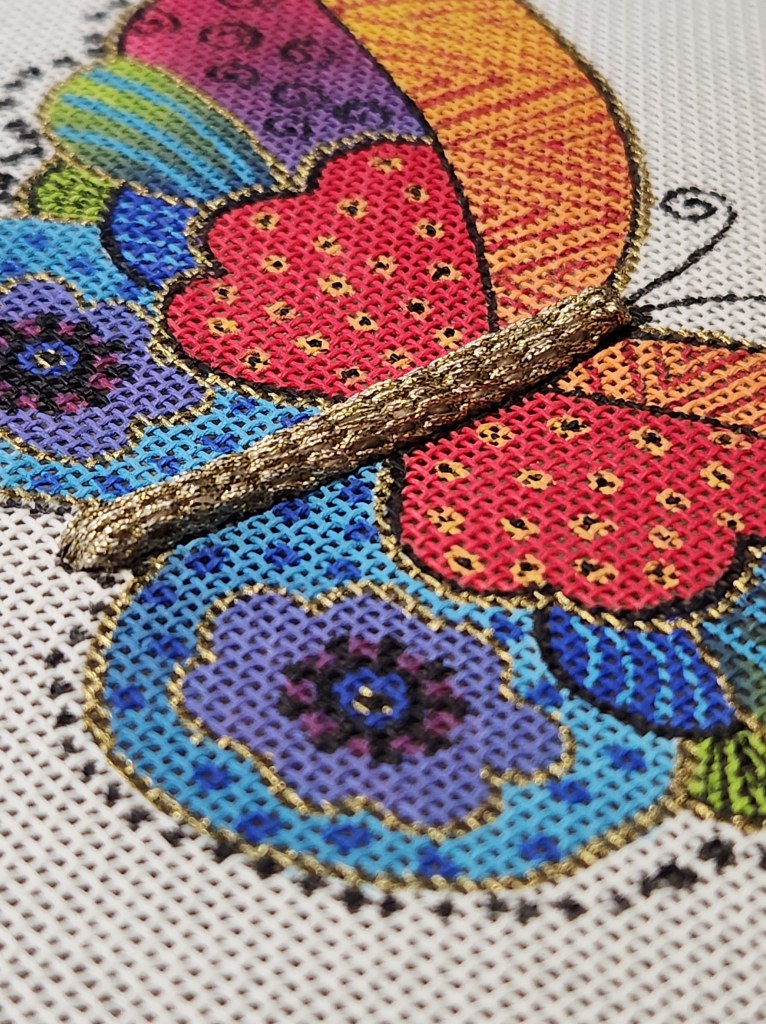
Rainbow Butterfly by Danji (Kristen and I have this in progress for ANG Main Line Stitchers chapter discussion; only my body is done on this painted canvas; I am working without a stitch guide and am tentative about what to do next)
Fibonacci Swirls by Olivia Hartshorn on Congress Cloth and canvas (this is broken up small areas as a monthly chapter project with ANG Main Line Stitchers chapter; oops, I’m behind schedule)


How do you rotate your pieces as you work? Or, do you stitch only one at a time?
Kristen, Bill, and I go out exploring an hour north of KC with a rental car to see:
*Glore Psychiatric Museum
*Patee House Museum
*Jesse James Home
It was 2010, my first seminar, when I had a 1/2 day class with Janet Zickler Casey, and I didn’t keep up with the pace of a 1/2 day class. Well, it’s 2024, and I kept up, but I still felt rushed. We got bogged down by area 2 because it’s not on the true diagonal. Since it’s only a 3 hour class and we had 7 areas to cover, we didn’t stitch the 6th or 7th. But, it’s all good because I need my light and comfy chair!

Linda M and I Ubered out to KC Needlepoint after lunch. It’s a huge store, good light, all painted canvases, and nice self finishing products. No counted designs. There’s Linda before we head inside.

We found Planet Earth leather coasters. I got 2 navy, and Linda got 4 black ones.

I got another magnet, and the Watercolours Sandstone skein has more color variation in it.

There were 5 taxes listed on the receipt:
Missouri State Tax (9.475%)
Missouri State Tax (4.225%)
Jackson County Tax (1.375%)
Kansas City City Tax (3.25%)
Jackson County Kansas City Zoological District SP Tax (0.125%)
Total: 18.45% in taxes. That’s crazy!
Our return Uber driver was very nice and acted as a tour guide, pointing out various areas as we returned to the hotel.
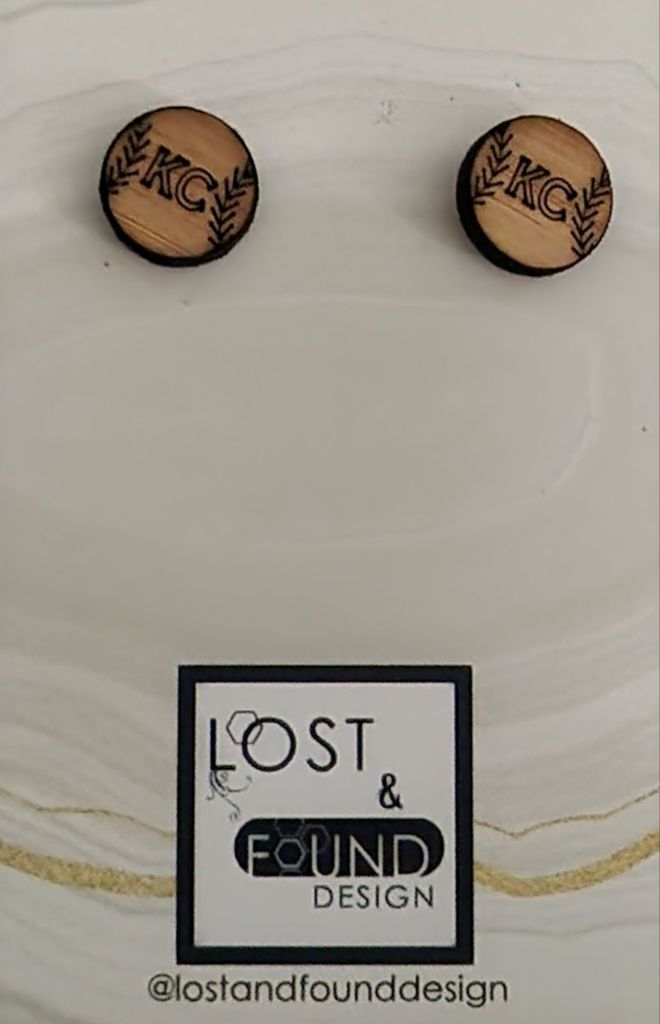
Dinner at the KC Royals ballpark tonight. Bill got me earrings for the game made by a local artist out of wood.
Can’t ask for a better day!
Filed under: ANG Seminar 2024, Treasures from the Great Lakes - Dawn Donnelly
We started out easy with some random eyelets, which are the bubbly results of a wave. Then, we placed our Petoskey stone, beach glass, medium-sized stones, medium large stone, driftwood, 3 shells, 3-5 small stones. And, we took a photo to refer back to for placement as we progress.
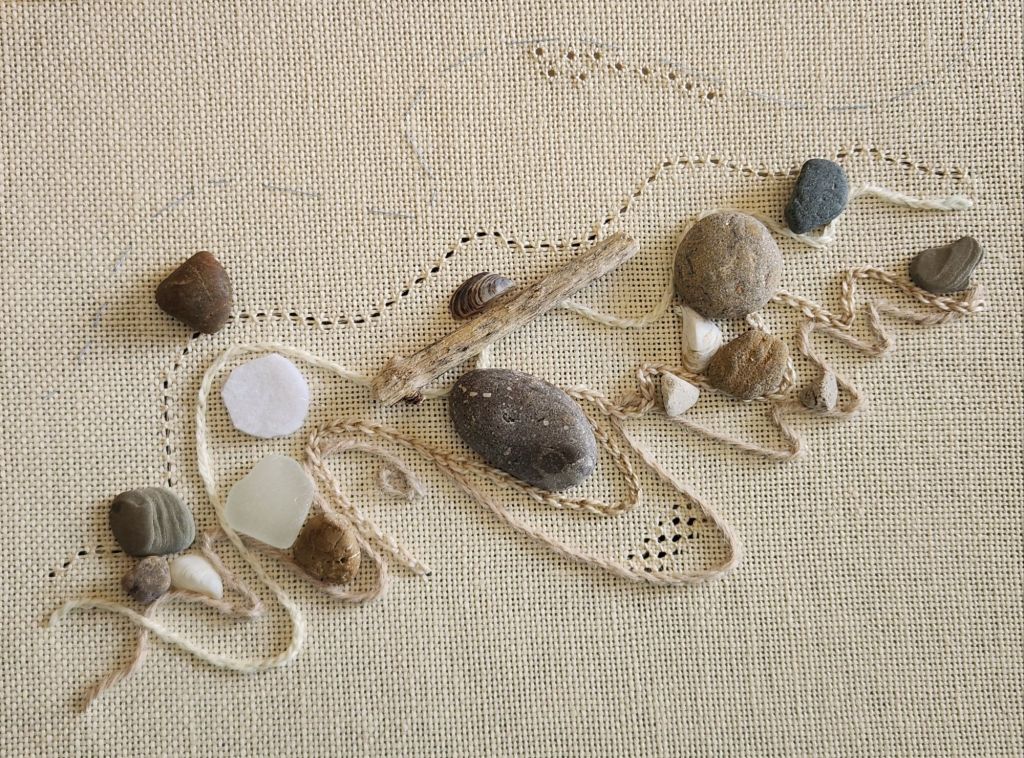
I got the Petoskey stone in place shortly after lunch!
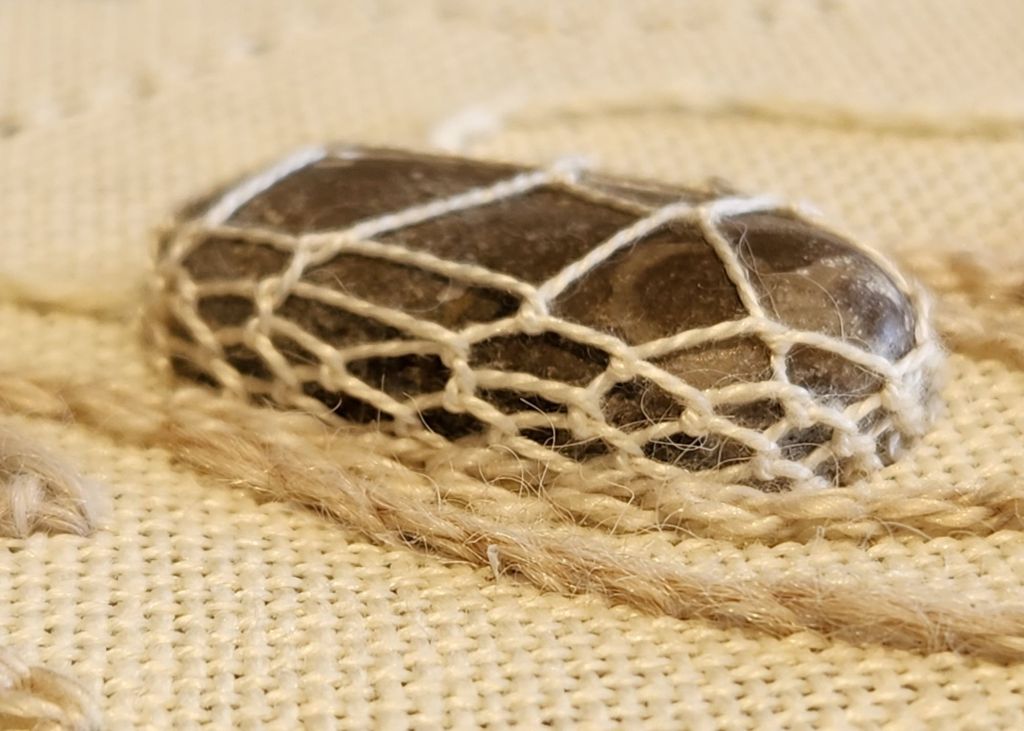
The afternoon was spent walking through the various ways to attach everything and several stitches.
The ribbed spider stitch is looking ok, but the portion of Watercolours Sandstone skein that I got has almost no variation of color in it and looks boring. I may buy another skein and redo it.
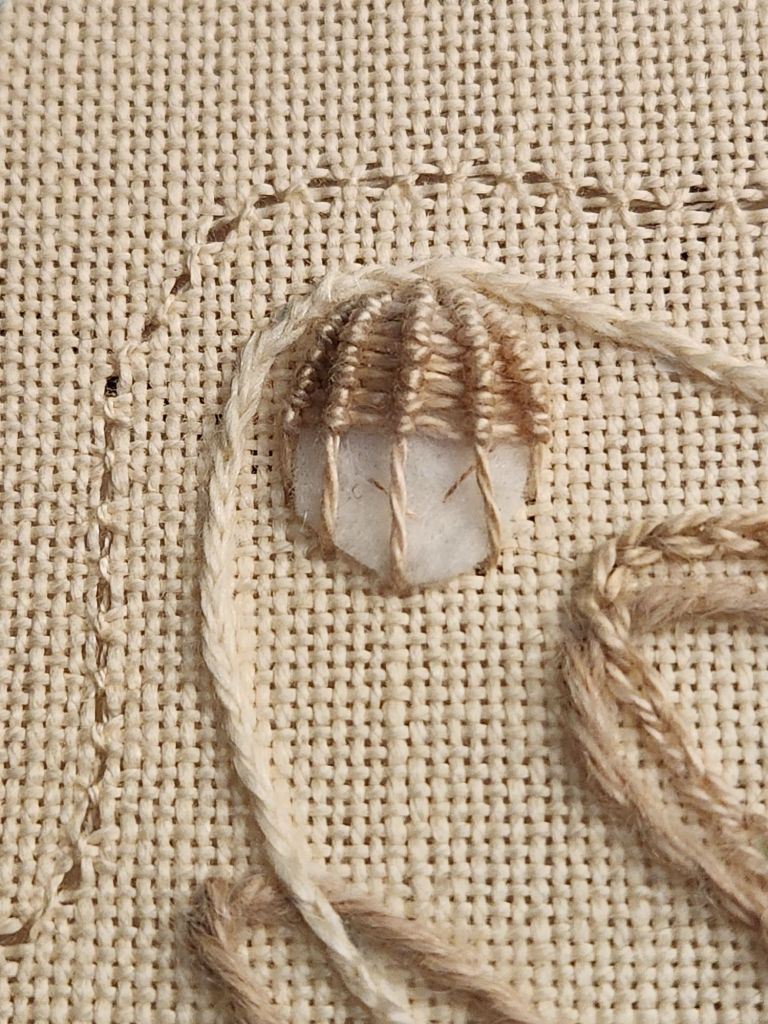
I practiced stitching a buttonhole circle on my 2 fingers. I’ll need to get to this piece asap once I get home and before I forget! Luckily, Kathy P from my chapter was in class with me, and I can ask her if needed.
Bill had the Duroc pork chops at the Golden Ox, in the Stockyard area. One of the top 3 best and largest portions ever. Too bad he couldn’t take leftovers home. I had the steak soup again (better than Anton’s).
Then, back in plenty of time for the Expo. I was happy to support the Hearts for Hospice by buying their booklet. I’m sure you can order them through heartsforhospiceofficial@gmail.com
KC Needlepoint has a table, and even though I’ll be going there tomorrow, I got a blue magnetic clip for the Kansas City Royals. We see them tomorrow, too.
Filed under: ANG Seminar 2024, Treasures from the Great Lakes - Dawn Donnelly
I’m glad I signed up for the Cork Linen because it pulls better than 18 count canvas.
We drew the lines on tracing paper, stitched over them, and pulled the paper out. Pulling the paper took time. Needed tweezers!
I had to stitch the second from the top row tonight after class to be ready for tomorrow’s class. The top basting line is just there, so we don’t stitch above it.

Good BBQ at Jack Stacks tonight, but I still think Rib Rack in Philadelphia can’t be beat. I’m beat, though!
I put in the two tent borders to be ready for our second class after dinner last night since it was still early, and I was too full to lie down. But, I must have misheard because we counted off the outer border. Oh well!
In class, I spent time color matching threads, cutting, and stitching the large swirl and corner mock Chilly Hollow stitch. Worth it!

I enjoyed Lorene Salt and am enjoying stitching this piece. I’m surprised that the stitches weren’t that complicated. You do have to count. Check and double-check.
