Filed under: ANG Main Line Stitchers Chapter, Razzle Dazzle by Ann Strite-Kurz
At the January 3rd Saturday Stitch-in with a few members of my ANG Main Line Stitchers chapter, Linda M helped several of us select our own colorways for Razzle Dazzle by Ann Strite-Kurz. Linda has already started stitching and that helps to have an understanding of where the threads will be in relation to the others.
I selected an eggshell canvas and fall colors based on Watercolours 123 Spice. I’m waiting on my DMC #8 Pearl before getting the thread photo.
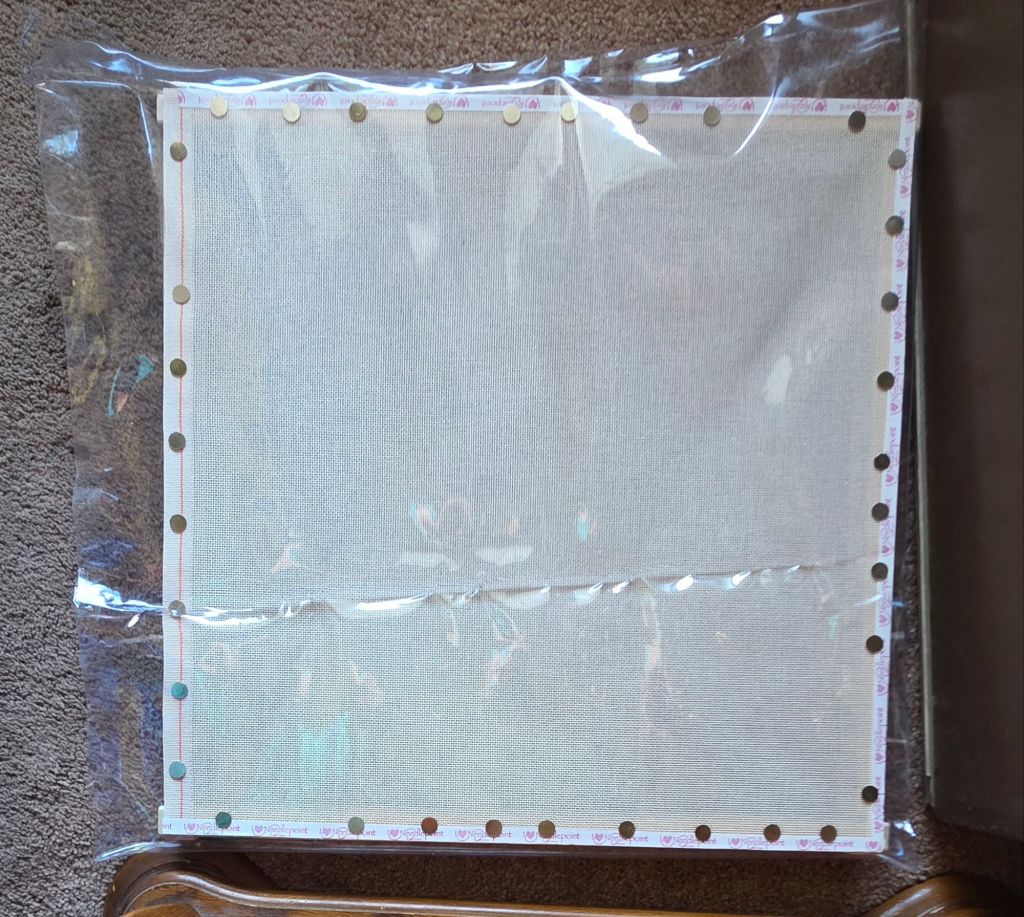
After putting my canvas on 18″ x 18″ Evertite bars, I realized that I didn’t have a project bag large enough to hold it. So, I recalled that I had purchased a large sheet of vinyl (from Joann’s) and knew I had used very little of it and am likely to use very little of it.
I cut it so that one of the creases would be at the very bottom and one ended up at the very top for a slight flap by chance. But there is a crease on each side that I didn’t bother trying to get rid of. I read that you can place parchment paper on top of the vinyl and iron on low heat. But it’ll be fine like this. I am going to work in the well anyway because Linda says 18″ square bars make it a little tight for ending threads around the edge.
It was a perfect width of vinyl leaving me still enough for whatever else I might need it for in the future. The bag doesn’t have a handle but this size project doesn’t need to travel. I will need my comfy chair, light, and quiet because counting will be so important for Razzle Dazzle.
Nothing fancy was used to make the bag, just clear packing tape to close the sides. Here is the ‘Rough and Ready’ Bag.
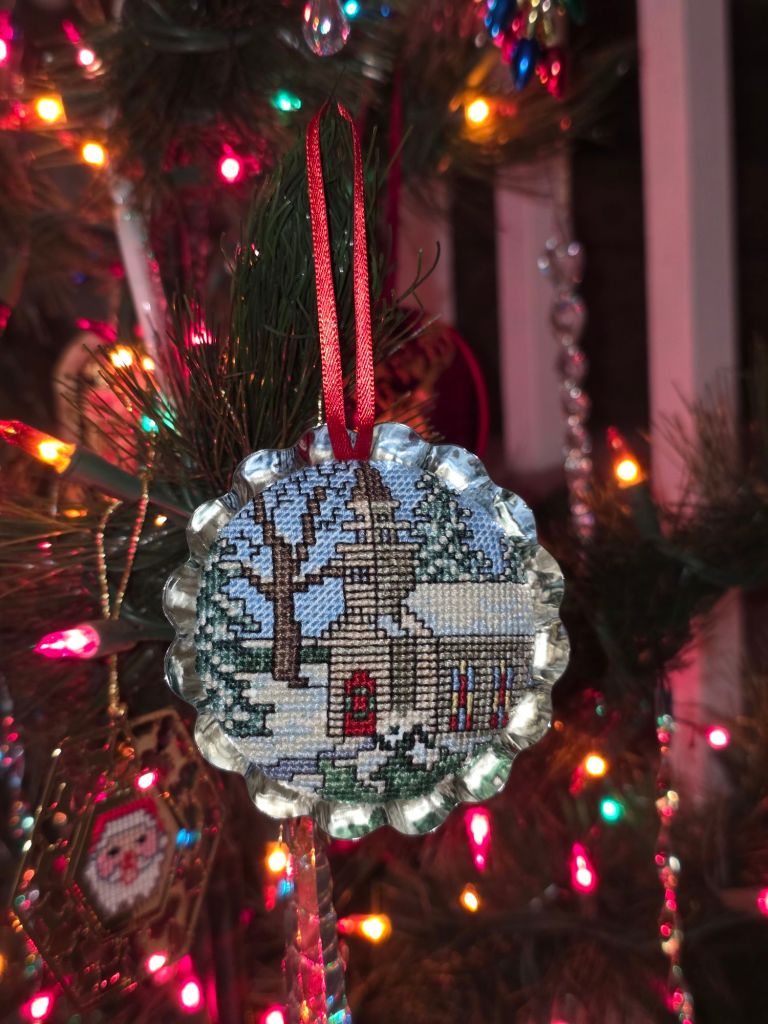
At ANG’s 2025 Seminar in New Orleans, the local ANG Streetcar chapter had a table with a partially stitched Dorothy Lesher piece and this ornament. Because the canvas is marked CB6, I know the proper orientation but still not the designer. Any ideas?
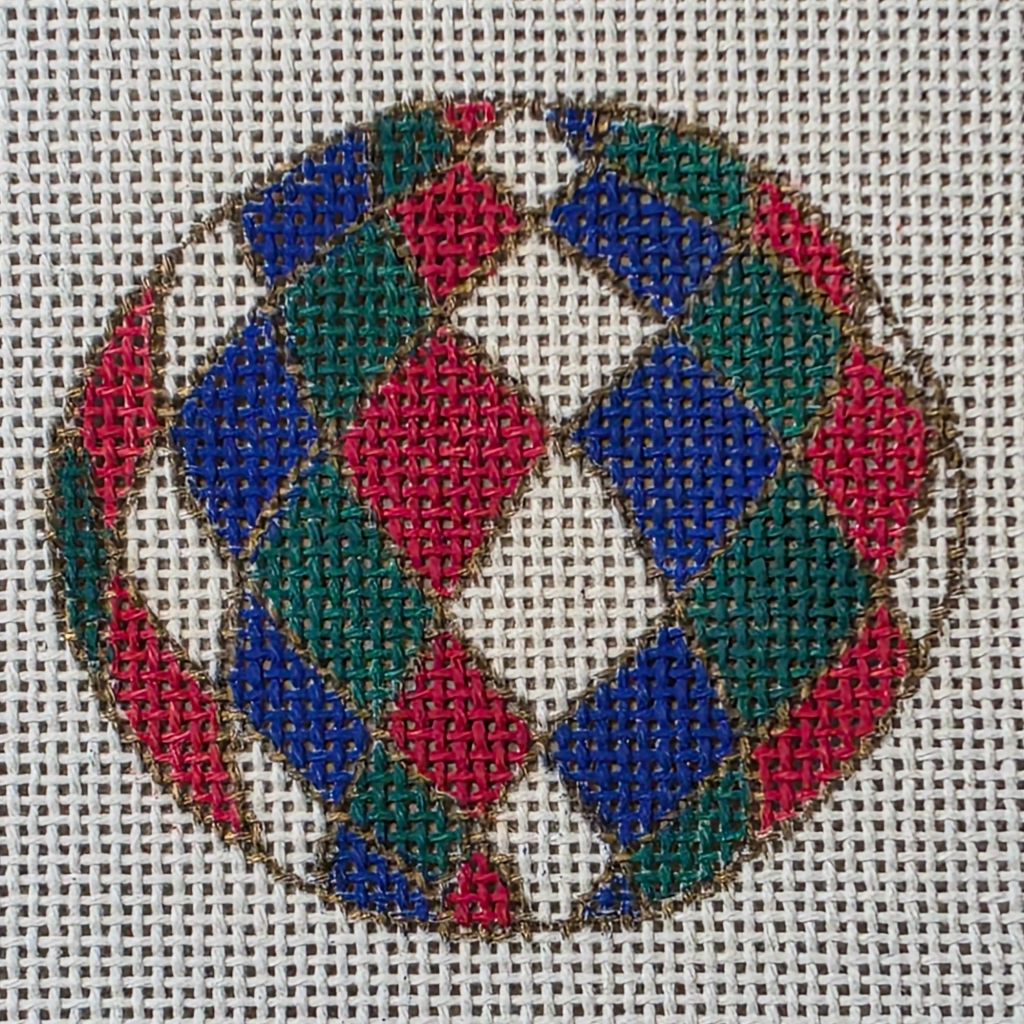
Since it is a small 2.5″ round, I am following the 1-3-5 rule which I learned from Mary Shipp and have heard Ellen Johnson of Serendipity discuss as well. I selected one stitch (Nobuko), three thread types (polyester blends, metallic, and silk/wool bends), and 5 colors (red, blue, green, gold, and white). Specifically, a red Silk Lame Braid for 18 count SL08, a blue Entice E212, a green Impressions 5081, and a white Impressions 0057 (all in my stash).
I knew I wanted to switch directions on the Nobuko for the left and right sides but couldn’t decide on what to do in the middle. So, I decided to use an Upright Nobuko. I started with over 1, over 3, alternating and realized that was an upright Mosaic. So, I went to my books and found this unnamed straight stitch in Desert Island Stitches Volume 1, page 55. Perfect. I have dubbed it the Upright Nobuko Variation.
The areas are small and having to leave the gold grid open made maintaining the pattern a little tricky but doable.
The gold thread used to outline the shapes is from some kit in a baggie that’s labeled Color Twist Dark Gold. The finisher (me) prefers an outer border of basketweave. I used Kreinik #8 Braid 002J. It’s looser but should make finishing easier. The outer circle of cord is couched into place with one strand of Kreinik Japan Thread 002J.
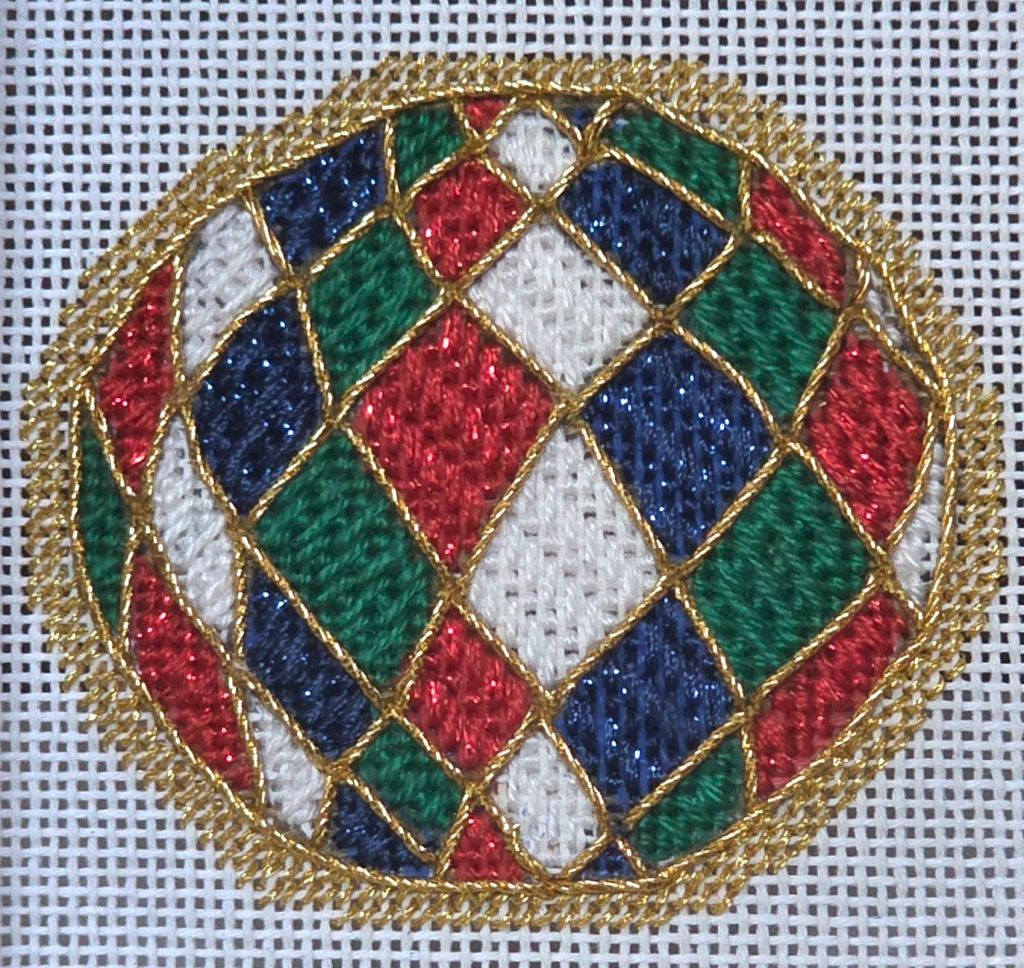
I see a couple places that could use a stitch along the edge. Then, off to the finisher!
Filed under: Uncategorized
This was one of my Christmas presents and I got the threads at Fireside Stitchery on Saturday. They don’t have Gold Rush 14 but my stash had a purple that should work just as well.
Once I got home with the threads, I pulled out my stash of Watercolours and found 088 Mountain Meadow that should substitute for the Overture V114 which is a retired color consisting of greens, yellows, and peaches. Mountain Meadow also has some pinks which I can cut out or nor depending on where it is going.
The Cabochons are my travel counted pieces. This is my home counted piece to work on when I need a break from my Project Runway adaptation piece. But, I also need to get Florentine Fancywork done before March which is when we start Razzle Dazzle.
Since this is bargello, I am using a brown canvas that will not show as much “dandruff” or canvas showing through if full coverage is not as complete as expected.
The bars Toni suggested were 14,” x 16″. My canvas stash had 14″ x 17″ and I had those bars available. The design size will be 6.5″ x 8.5″. Now, I have too much space on each side to end threads. So, I moved it down an inch. Still plenty of room and easier to reach.
Before I started the fun part of stitching this, I am going to work on Project Runway. It’s already January 5th!
And, there are two pieces that need finishing, one of which is a Cabochon. My rule is each one must be finished before starting the next. And, I broke that rule by starting Hope. So, I’ll get back on track with finishing before starting this piece.
Oops! I was missing Rainbow Tweed RT66 and was going to figure out what to use when I got there but I just found it in a bag of threads I inherited from Mary’s stash (member of Needlework and Fiber Guild of Media)! Thanks Mary.

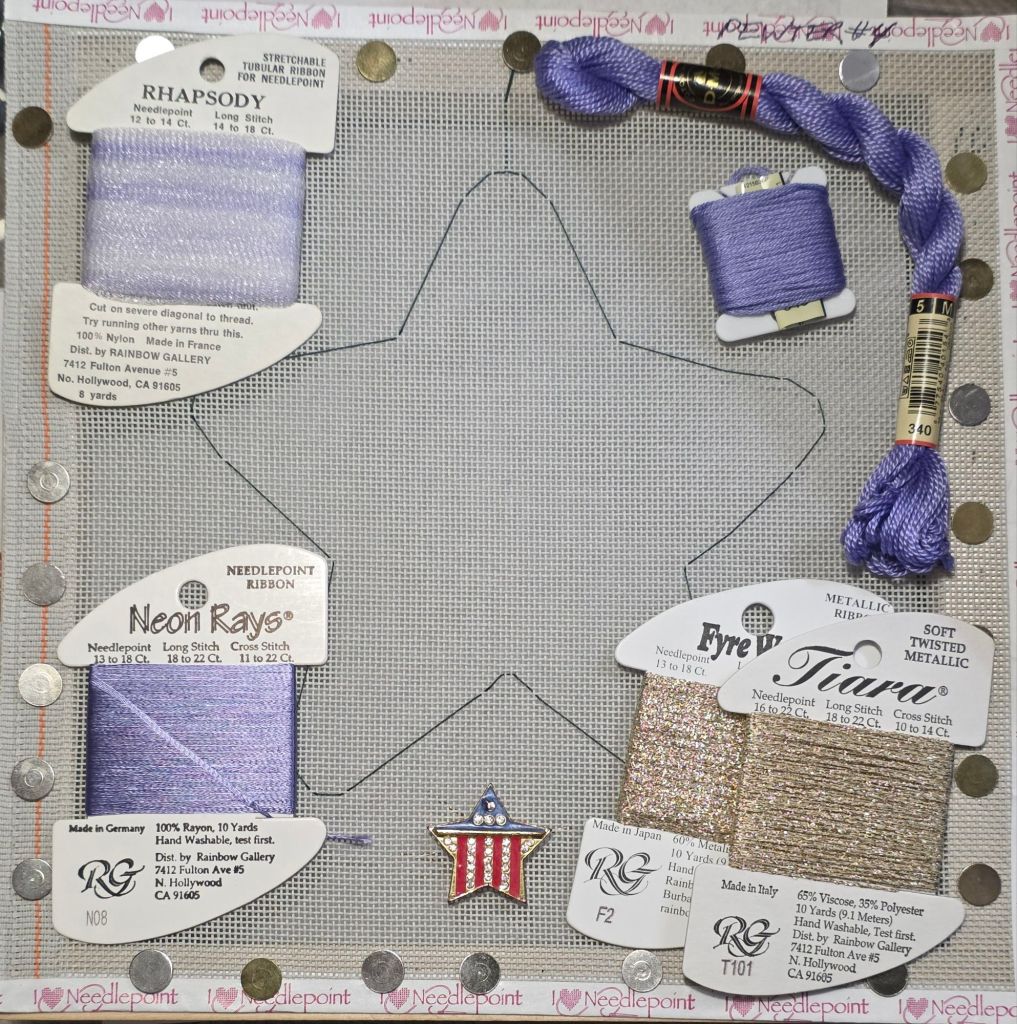
It’s rather appropriate that the first of the Cabochons by Susan Portra to start in 2026 is Hope since I am hopeful that I will complete the series this year. It’s actually the 4th in the series (still missing 11 and 12 if anyone has a lead on how to get them).
Hope is supposed to be on a gray canvas using Rhapsody R04. My canvas is called pewter, a type of gray that looks great with this Rhapsody. Although my card of Rhapsody is not numbered, it goes great with Neon Rays N08 which is in Susan’s original colorway. I am switching out Anchor Floss and Pearl #5 for DMC threads.
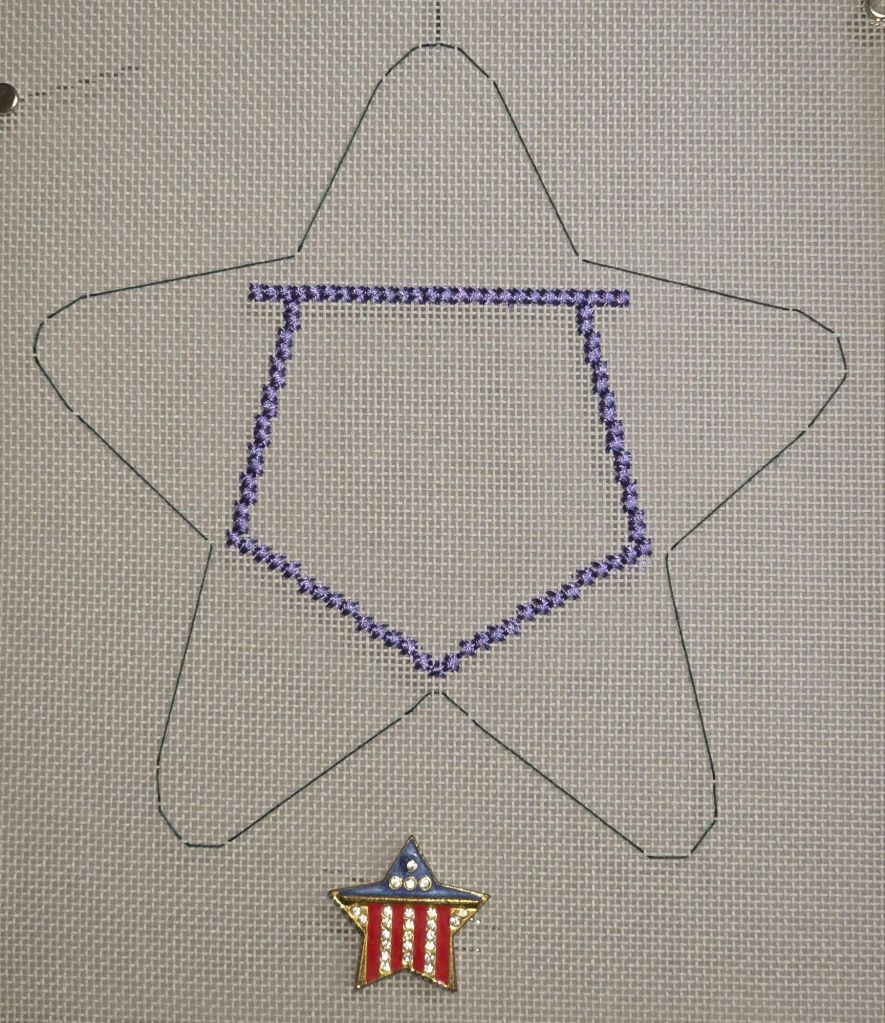
The basting of the outline was done last night. I did get the top row of 26 cross stitches in at our ANG Main Line Stitchers chapter Stitch-in today but I was convinced to rip them out because I had not done that many and they had not been done according to the instructions. The top stitches of the cross stitches are supposed to point to the center. I had spent too much time shopping and talking to restitch them there. And, I had forgotten to get my unstitched starting photo.
So, this was my progress during the Saturday night football games.
Filed under: General comments
It’s that time of year to review what I accomplished over the year and reflect on what’s lies ahead in my needlepoint journey. This year I am thanking you for being one of the 11,300 interested visitors of my blog. That’s quite a jump from previous years.
Last year I wrote about my 2025 goals and that is where I will start my review of this year. Happily, I accomplished most of them. I won’t repeat all that here but I did update last year’s post with links to those goals that were completed. Check them out at https://melitastitches4fun.com/2025/01/01/2024-year-in-review-a-look-forward/
The 30th goal was not to get any more goals which was/is/will always be impossible. But, of the 29 doable ones, I only did not do:
- Goal #3 something like Jan Huling’s beaded pieces
- Goal #9 rug hooking with Katie Kriner from The Bee and The Bear
- Goal #12 Scarlett’s Stitch Gothica’s Skull & Succulent piece (stumpwork)
- Goal #18 Project Runway with Dawn Donnelly (adaptation and a surprise)
Only Project Runway is important to me at this point and I have made good progress. That will be my January priority since it must be done by March.
There are a few projects that I will be doing/want to do in 2026 including Razzle Dazzle by Ann Strite-Kurz which our chapter starts in March, Florentine Fancywork by Toni McKelley, Golden Candles by Toni Gerdes, and the rest of the Cabochons.
I’m also planning to go to 3 seminars (NAN, ANG, and EGA). I know I have 2 classes at NAN (National Academy of Needlearts): Exploring Needlelace with Diane Clark and Magical Color with Jennifer Riefenberg in Warm and Cool colorways. At EGA, I hope to get in Laura Smith’s Going Places: Hands-On Design and Color. I’m waiting to see the Jan/Feb issue of ANG Needle Pointer’s to decide on those classes.
The ribbon class at Fireside Stitchery in April with Tamara Abdee should be interesting. She does lovely work and am curious about her and learning her techniques.
Ideally, I would like to finish a few of my oldest unfinished counted projects begun in a class setting:
- Rozashi – Patterns in Blue and Green with Margaret Kinsey (Aug 2016)
- Fire and Ice with Toni Gerdes (Feb 2017)
- A Toast to Tiffany with Kay Stanis (Aug 2019)
There is no way that I’ll say all those are goals! They are options. Paths along my journey. Along with some finishing, it’ll be a busy 2026.
But, I haven’t finished reviewing 2025 yet. I addition to the goals I did accomplish, I also led/spoke about:
- Festive Fireworks (my design in ANG Needle Pointers July 2017) to the ANG Shenandoah Valley chapter via Zoom
- Ort Boxes by Marilyn Owen for ANG Main Line Stitchers
- Making round coasters with cork bottoms for ANG Central Jersey Chapter (CJC)
Other projects that I hadn’t plan on but stitched included:
- Daisy Delight Box with Mary Alice Sinton via Zoom
- Winter Lights by Jennifer Riefenberg with ANG CJC
- Morning Glories by Lani at Sue Parson’s Finishing class
I visited two needlepoint stores new to me:
- Threads Too Needlepoint in NJ
- Stitching Fox in NC
I was busy participating in my EGA chapter projects including a cross stitch needle book, Zokin, porcupine quill, chatelaine, and pin cushion.
The Needlework and Fiber Guild of Media covered a variety of topics but the icicles were the most fun.
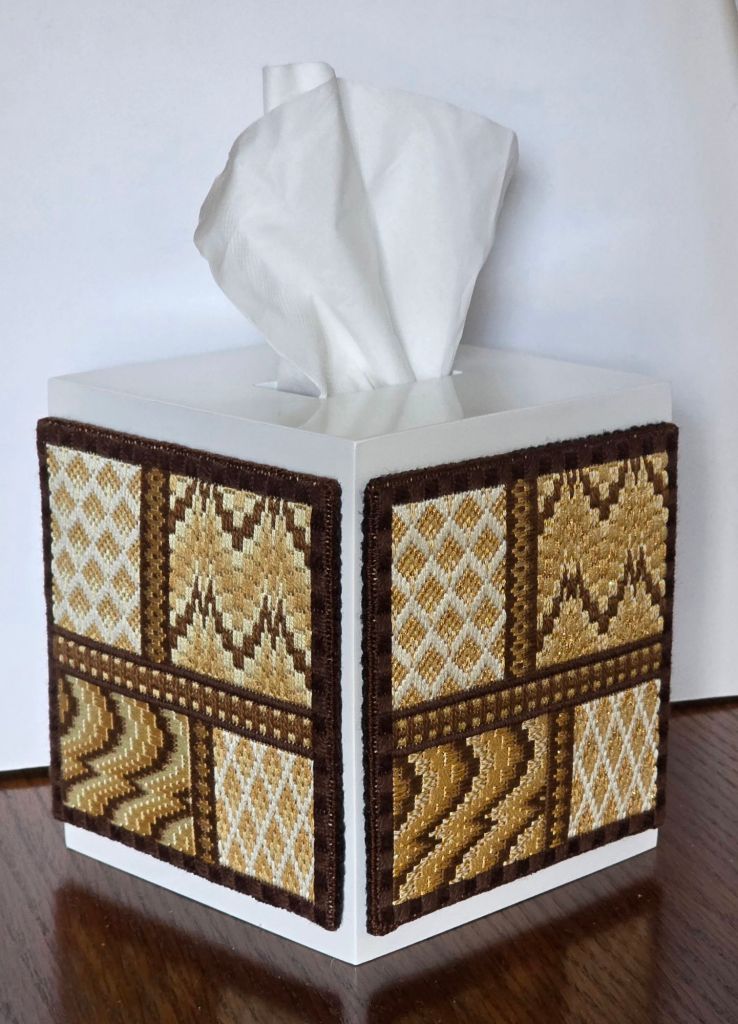
I used a few stitched designs to adorn tissue boxes this year. In the September-October 2022 issue of Needle Pointers, I stitched two Bargello Samplers designed by Gail Stafford once in stranded threads and again in sparkly threads. I added a binding stitch border as I attached a black felt backing (with a piece of magazine board for stiffness) and attached it with strips of a double stick archival tape. It went as a 2-sided tissue box for a Christmas gift for my brother John and sister-in-law Sher. Eventually, they may get something in browns and golds for the other two sides so they can rotate it periodically.
I think that about covers the highlights of 2026 and shares most of what’s ahead in 2026.
What’s ahead for you?
Happy New Year and enjoy your stitching time!
There were 9 bags of montees, pears, seed beads, rocailles, and bicones in the Nautilus kit by Kay Stanis. This didn’t get done in one sitting because working with 2 strands of invisible thread (supplied by Kay) was not easy either. This took alot of beads!
Kay doesn’t say what brand of invisible thread she supplied but it knotted up several times (maybe because it was wound up on a small metal spool) and I needed mine for one last area. I am done and thrilled with it. The clear seed beads allow the underlying aqua to show through just enough. And, I really like how it becomes more aqua near the top.
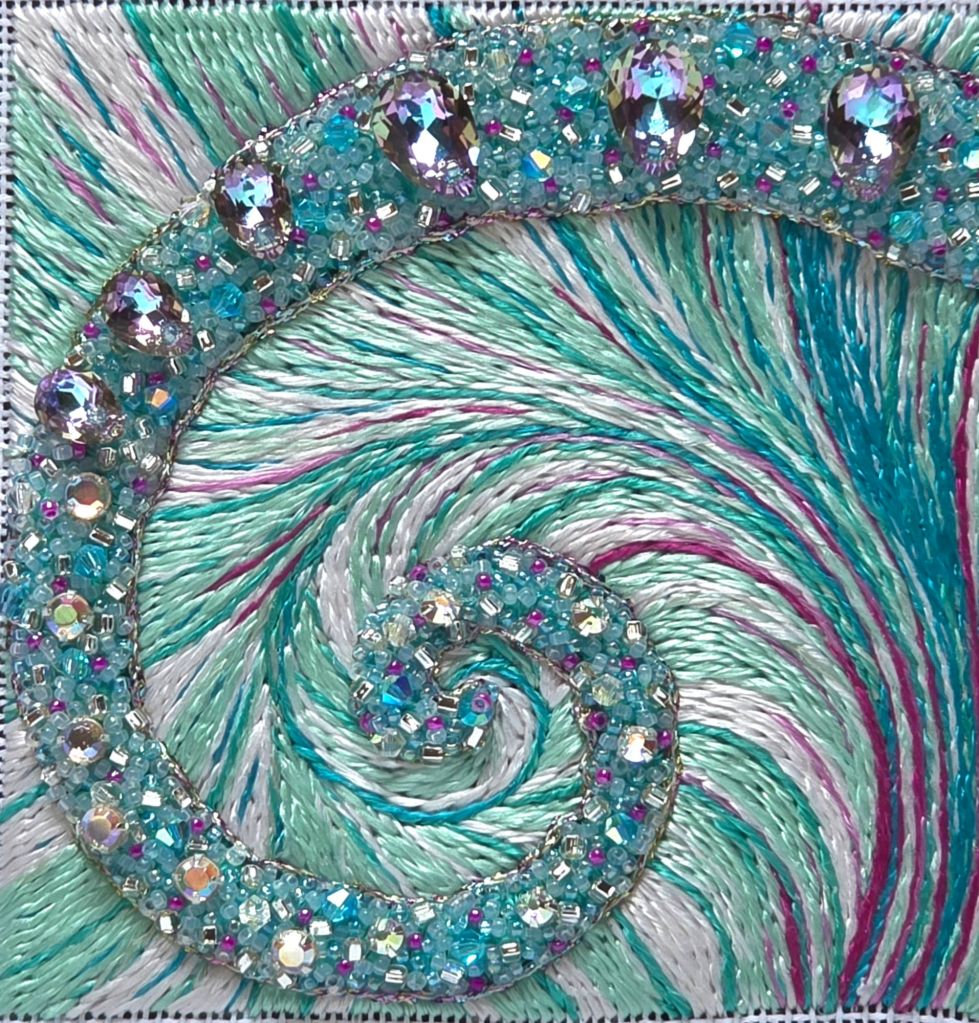
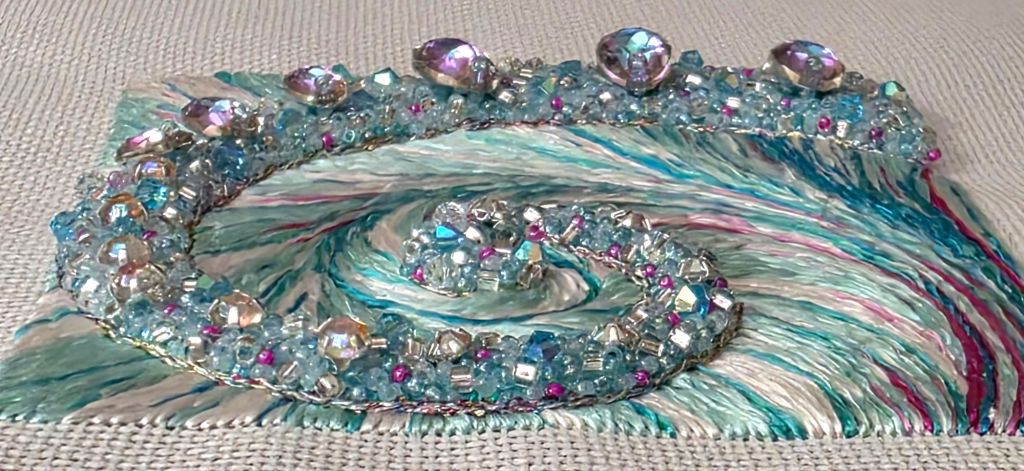
Here you can see the depth better.
There are still beads leftover. They would make a lovely name tag! I have plenty of alphabet books. For now, I will enjoy my last finish of 2025 and completing Goal #20.
This church ornament by Cross My Heart, Inc was a destashed item from Sally that I took out to have a small piece to work on periodically. The company is still online at EverythingCrossStitch(.com) but this kit is from 1992 and no longer available.
Having not done a cross stitch kit in years, I had forgotten that the threads come all together. It took some time because the greens are quite close but I separated them onto a couple of floss organizers.
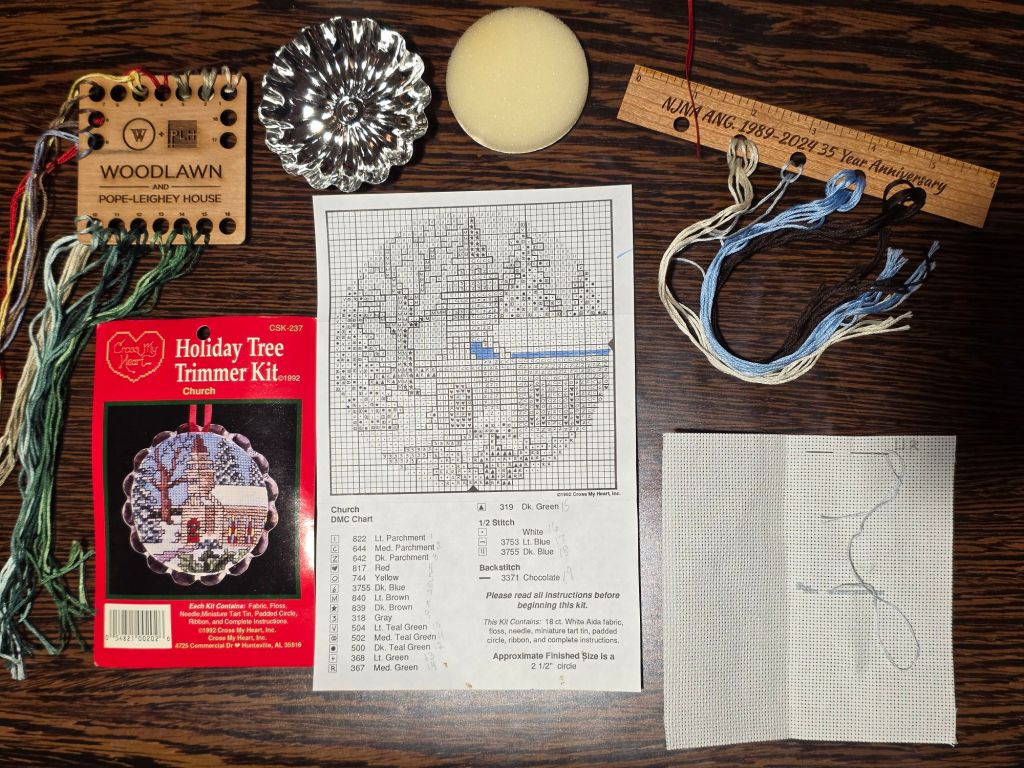
I made a copy before marking it up further and enlarged it. Only the outlining in backstitch remains.
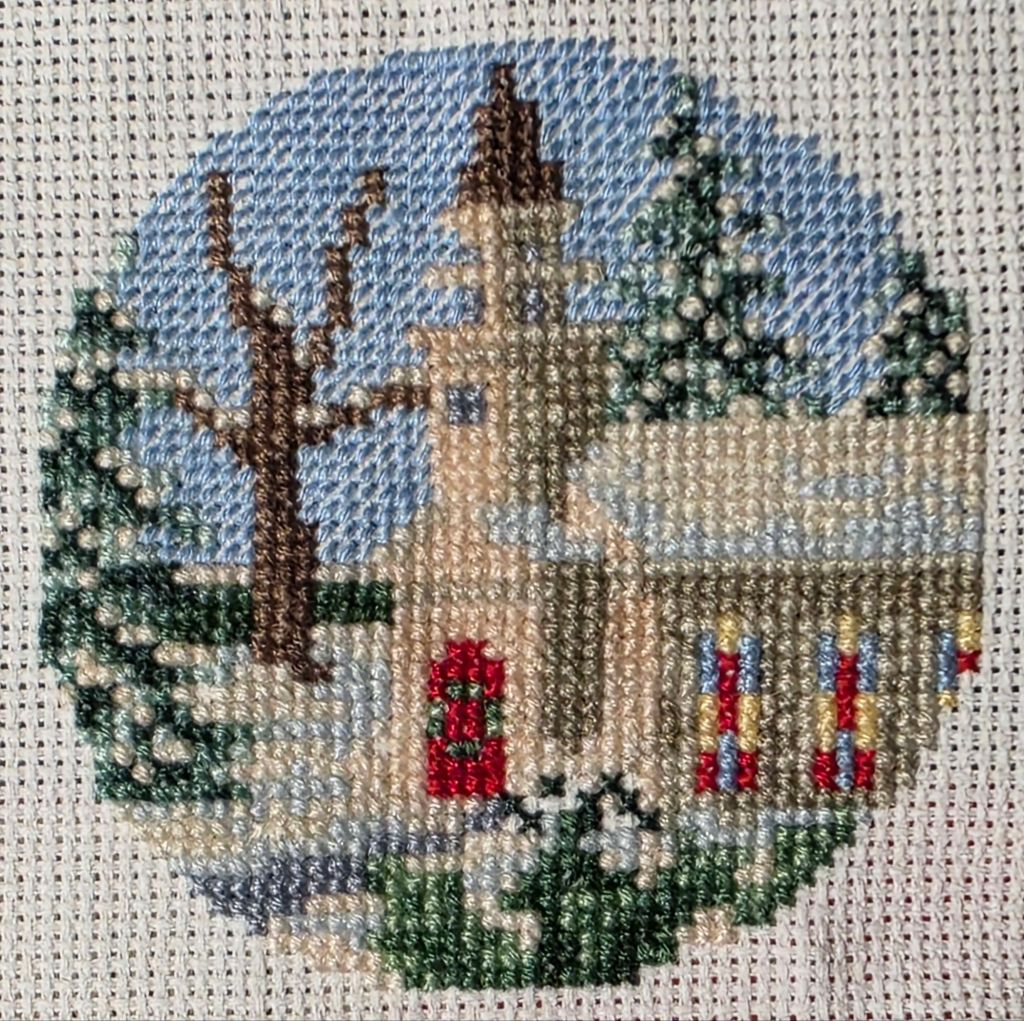
You can see how the outline helps define the shapes. While the overall design was evident, now it pops. Very easy finishing. After attaching the ribbon, some E6000 around the back edge adhered it to the metal tart tin. Cute idea!
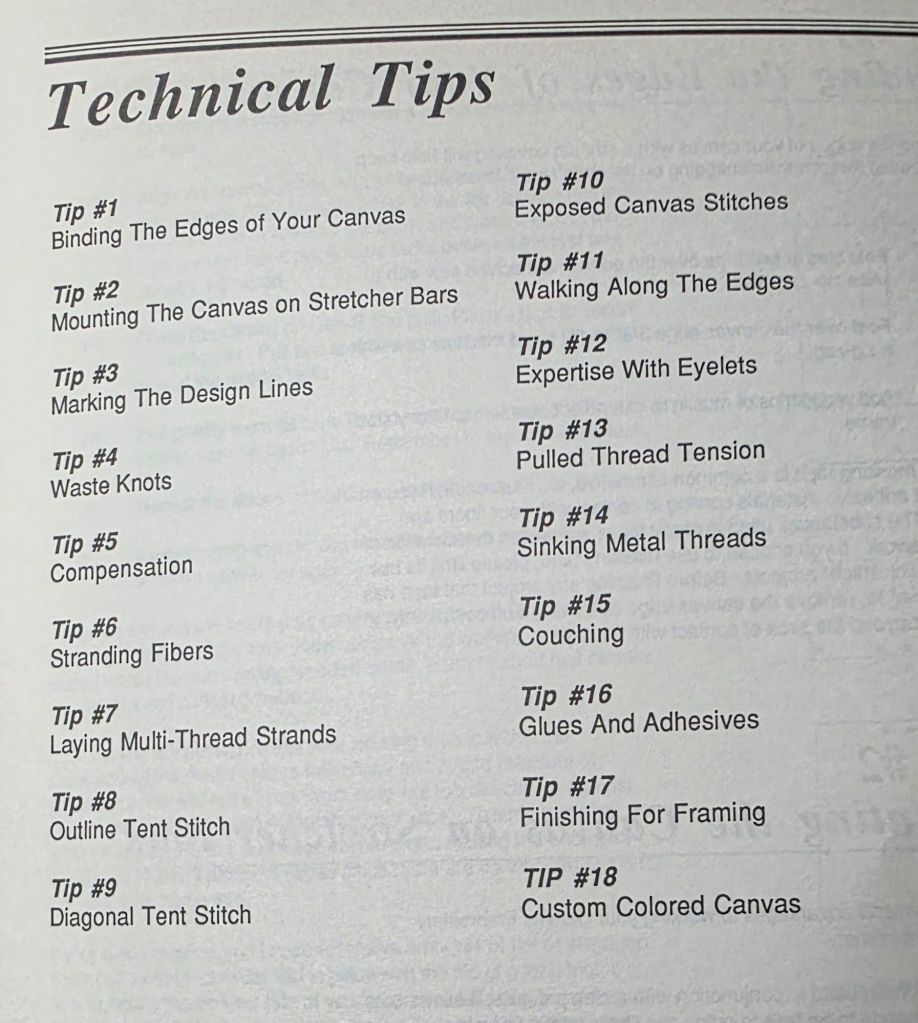
Filed under: Books in My Library, Needlepoint Books, Stitchery Under Southern Skies by Mary Anderson and Debbie Deem
I know I read several of Debbie Deem’s article s from old issues of ANG Needle Pointers for an Archives article on design. This booklet, Stitchery Under Southern Skies by Mary Anderson and Debbie Deem, must have been mentioned but I can’t remember why. Again, I found it online a few months ago, Bill put it away when it arrived, and I forgot about it.

It’s technically not a “needlepoint book” as you can see from the Table of Contents because it has 11 projects. But, I gleaned some interesting things from it. Ruth Cameron explains how to use one color of stranded threads to create depth and contrast. Mary Anderson diagrams Smyrna Cross Variations. Susan Porter created an interesting Mosaic Border with a Running Stitch Accent. That’s what popped out on the first pass through the booklet.
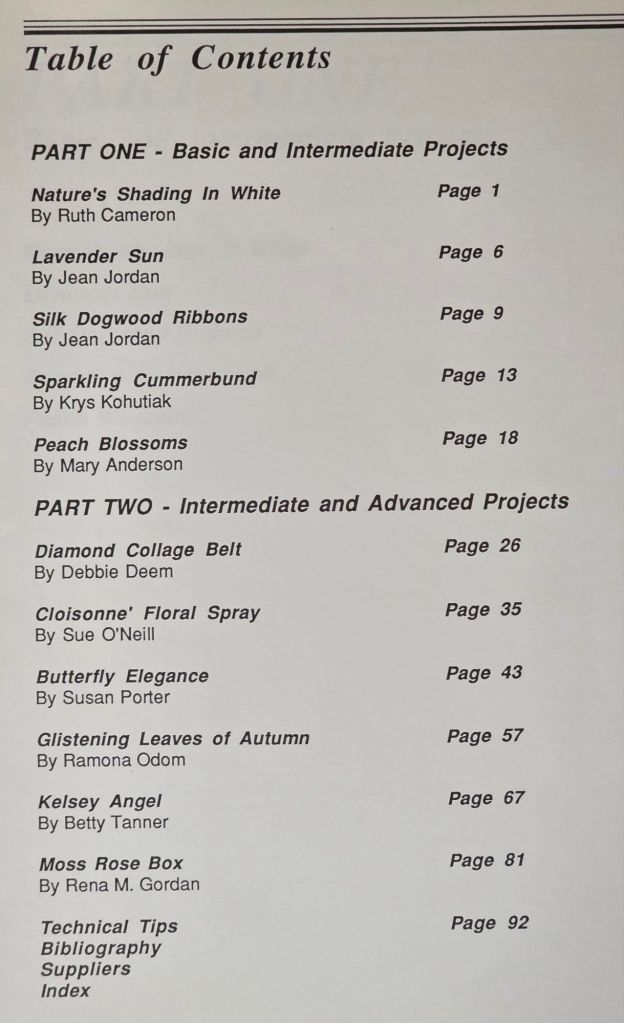
It ends with 18 tips. One was using a #16 or #13 needle to make eyelet holes consistent. And, the couching procedures are interesting. Couching over a thread is common enough but into the sides and down the center of a thread offers some variety.
Filed under: Florentine Fancywork by Toni McKelley, Other People's Designs
Florentine Fancywork by Toni McKelley was an ANG Correspondence Course years ago but I didn’t get it and regretted it. So, I put a saved search on Ebay quite some time ago and forgot about. Back in June, I got notified that the instructions had been posted and I bought it. When it arrived, I asked my husband to put it away for Christmas. Again, I forgot about it! What a wonderful surprise to open it today. That’s definitely going to be on my must stitch list for counted pieces in 2026!
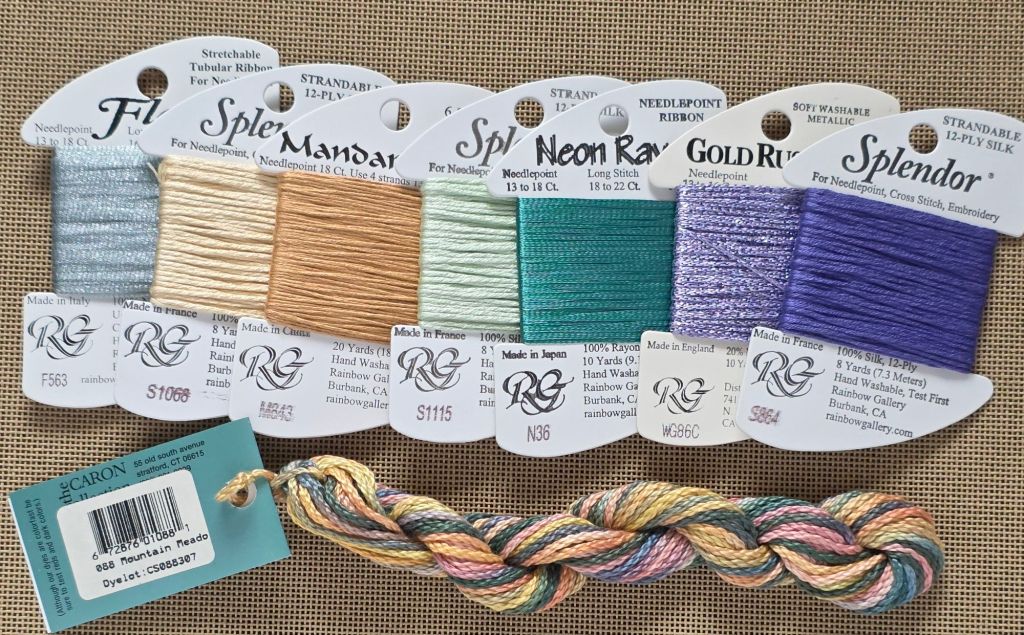
Toni used Rainbow Gallery Overture which she calls a space-dyed thread! Haven’t seen that term before. It’s what I call overdyed. And, it calls for V114 Victoriana that has been discontinued! Of course. Toni uses segments of it in the border but not everywhere. Apparently, it has greens, yellows, and peaches according to the text and photos. I have one card of Overture that isn’t V114. But, the separated strands are slightly thinner than strands of Watercolours. Since I have lots of skeins of Watercolours and coverage will be better, I will switch to one or two skeins of Watercolours.
There is also Rainbow Tweed RT66 Leaf Green which is still available but I think I’ll stay with Watercolours.
First, I will pull the solids. Flair, Mandarin Floss, Neon Rays, and 3 Splendors are all available at Fireside Stitchery which I can pick up on Saturday January 3rd at our rescheduled December Stitch-in. That leaves Gold Rush 14, WG53C, Violet Blush that is not available at Fireside Stitchery but is still available elsewhere. I do have Gold Rush 14, WG86C, Lilac that is a bit darker but might work just fine. Once I obtain the solids and decide on the Watercolours, I will decide on the Gold Rush.
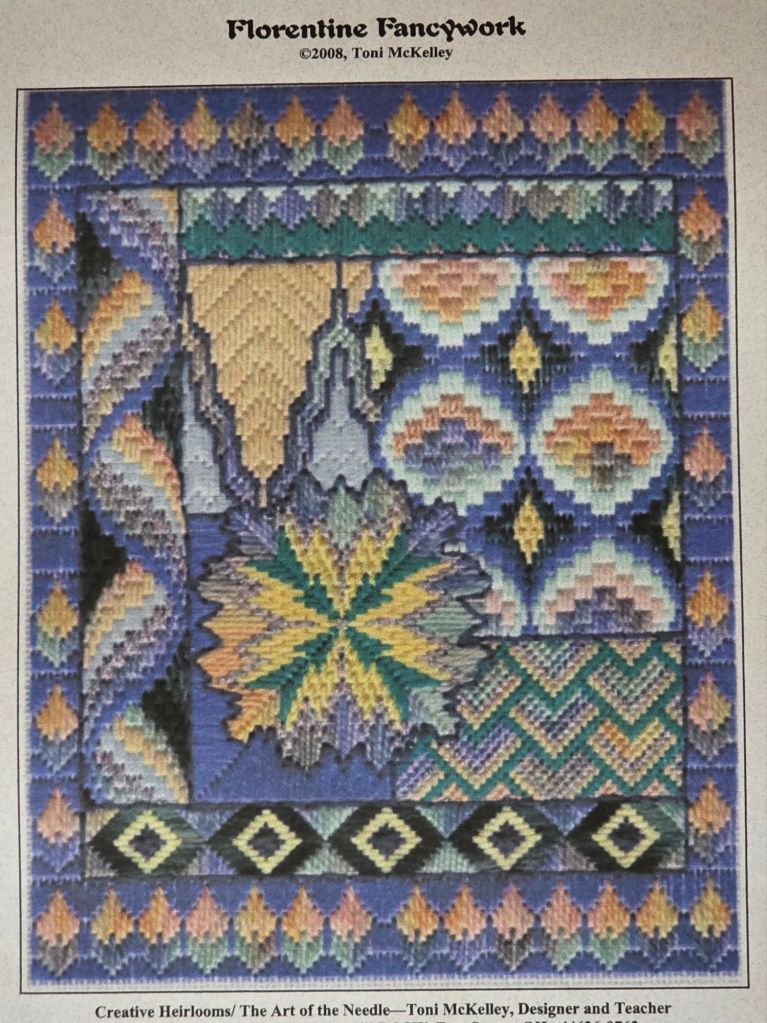
Very pretty design combining the various bargello patterns together.
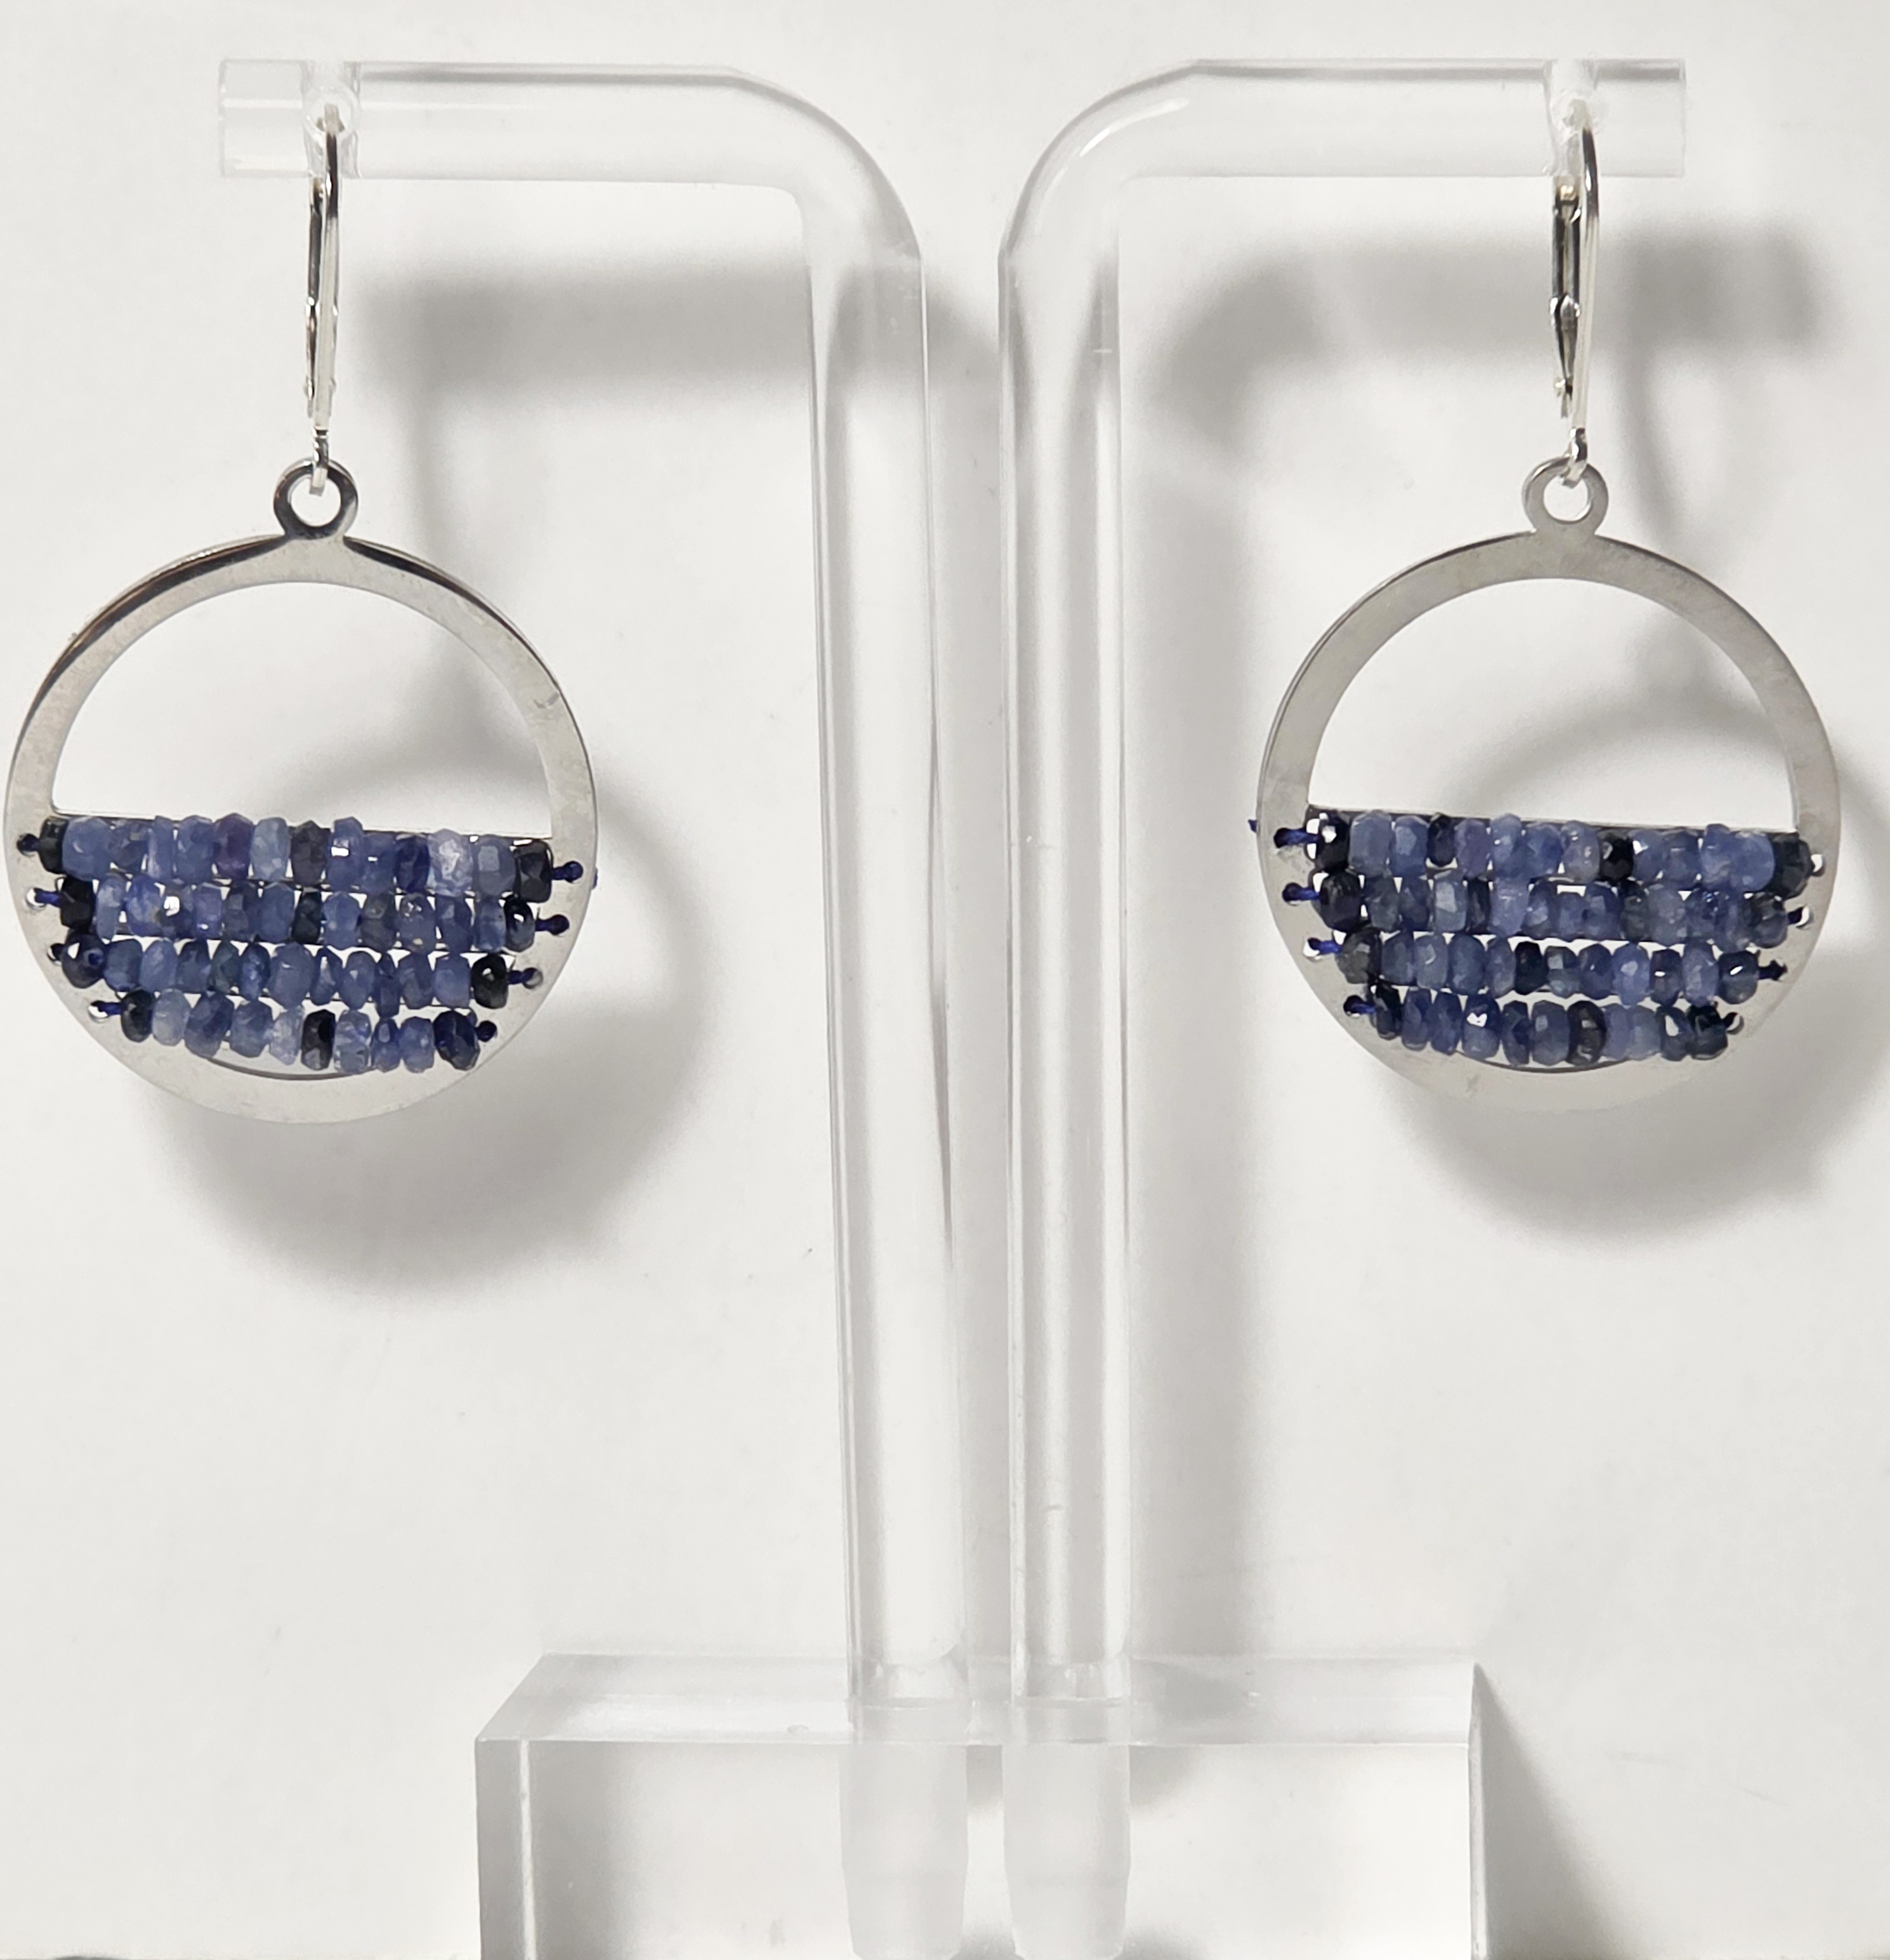
As a reminder, these natural, hand-faceted, rondelle gemstones in small (around 400), medium (around 100), and large (24) in each of these colors: Royal Blue Sapphire, Yellow Sapphire, Ruby, and Emerald were obtained at the Bead Expo in 2011. It took me awhile to find a bead cord that would work with them.
The teardrop ones I made (https://melitastitches4fun.com/category/jewelry/gemstone-earrings/) used about 140 small gemstones (5 columns), these used about 100 (4 rows), and there are still about 70 left! And, I haven’t used the medium or large ones yet at all although I have experimented with some options!
This pair of earrings used the Royal Blue Sapphire beads on Perlseide blue #2 bead cord (natural silk thread with a needle attached from Blue Santa Beads) on a silver round bead frame (from Michael’s).

These were my hand made gift to Linda for Christmas. She was very happy with them.
And, I am thrilled with the ByAnnie Travel Essentials Organizer in a fabric that matches the Bowl Me Over Bag from 2023 that Linda made for me.

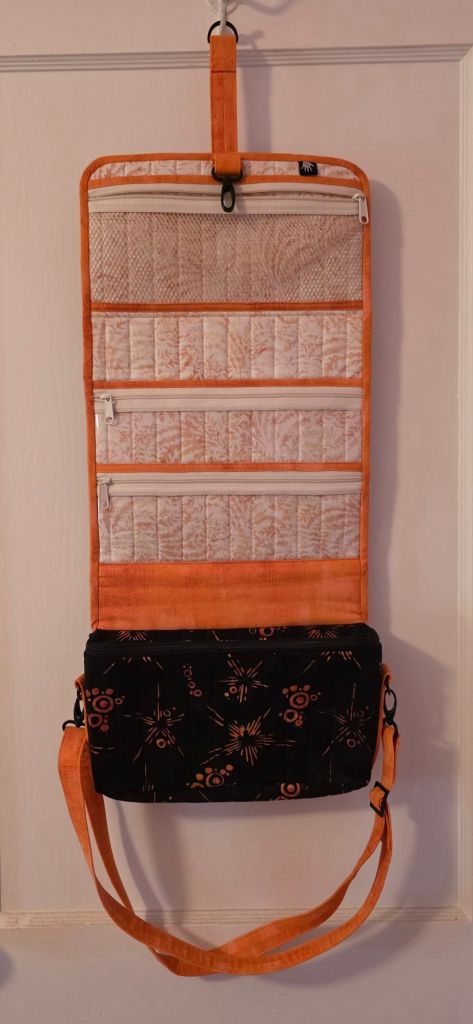
It’s great and is perfect for storing my cords and fabrics for finishing. The A Place for Everything ByAnnie bag was filled to the max! So, now I have them in here with the duplicate cords in the other bag. I love it!
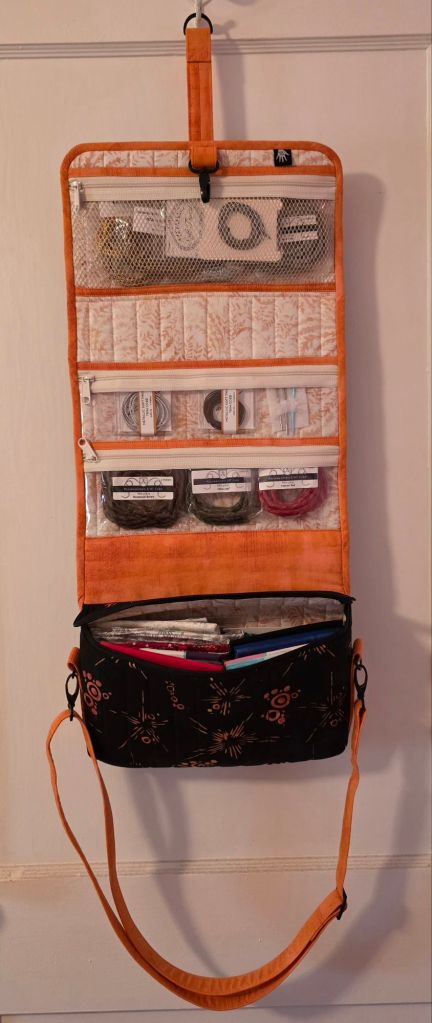
I enjoyed getting organized since I have several pieces to finish – hopefully, I can find time this weekend or next week.

