I showed my leaf from Catherine Jordan’s class, Nature’s Palette, to members of my Fiber Guild last month and this month they are going to try it.
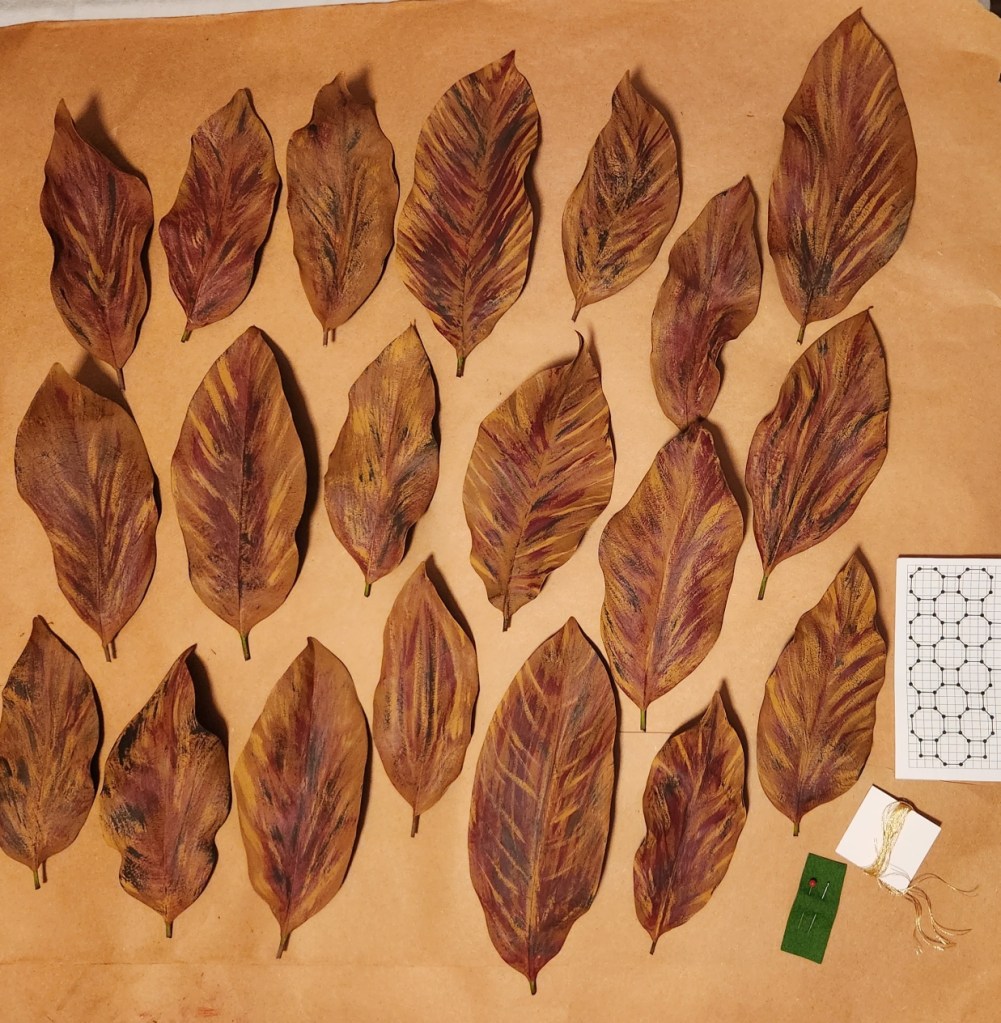
After I got the correct acrylic paint (do not use acrylic textile paint on anything other than fabric), I painted Magnolia leaves for members of the Needlework and Fiber Guild of Media. Much better.
I am not handing out Catherine’s instructions because they are not an EGA chapter and they don’t need to make it reversible. I am giving them verbal instructions, a pattern I worked up, a pin, needle, gold thread, and a painted leaf.
I’m quite happy with how the leaves turned out! My husband’s favorite is the large one on the top center row.
We meet at the Media Arts Council on the second Tuesday of the month at 7 pm. So, this month we meet on election night, November 8. Be sure to vote first and join us for something fun. If you use any kind of fiber, then you will find this an interesting mix of artists sharing, learning, and inspiring each other.
Filed under: Books in My Library, Father B's 21st Century Book of Stitches, Needlepoint Books, Sharon G's Simply Essential Needlepoint Stitch Explanations
These two books are grouped together simply because the author’s name is identified in the title.
Father B’s 21st Century Book of Stitches is by The Reverend Robert E Blackburn, Jr. I have the Sixth Edition from 2000. He passed away in 2000 but I didn’t know that and thought I was meeting him at a class held by Orna Willis at her studio. It turned out to be a different Father B! An excellent stitcher, a fellow Duquesne alumni, and we still keep in touch. What are the odds of two Father B stitchers?
Back to the book. There are 353 stitches some of which Father B created himself. So, many are unique to this book and interesting. He had a needlepoint shop in the basement of his church with threads, canvases, and books. He published articles Needle Pointers, Needlepoint Today (I don’t know that one), and Needlepoint Now. He also designed – many published through Rainbow Gallery and some can still be found online at eBay or Etsy (google Father B needlepoint designs).
The organization of the book is a bit odd. There are chapters but the headings are difficult to find (all uppercase letters as are the stitch names in the same font size). They are as follows: The Outline Stitches-pg 1, The Gobelin Stitches-pg 12, The Slanted Gobelin-pg 47, The Brick Stitches-pg 88, The Hungarian Stitches-pg 115, The Scotch Stitches-pg 135, The Cross Stitches-pg 150, The Star Stitches-pg 203, The Eyelet Stitches-pg 208, Miscellaneous Stitches-pg 239 including what he calls Filler Stitches-pg 268 (mostly open background stitches), The Border Stitches-pg 300, Oriental Diaper Patterns-pg 331, and Miscellaneous Stitches II-pg 344.
Within each chapter, stitches are usually listed alphabetically and the Index at the end has all stitches listed alphabetically. But so many are names that I do not recognize that I have to go through them. I am hoping that by identifying the type of stitches in each chapter that will make it easier to find a stitch type. He talks about each stitch sometimes suggesting a thread type or how many colors to use. Most stitch paths are not numbered but he often discusses how to work the stitch.
I have not seen the new Father B book by Suzanne Howren but Janet Perry reviews it (https://nuts-about-needlepoint.com/a-father-b-sampler-book-review/) and it sounds good.
Sharon G’s Simply Essential Needlepoint Stitch Explanations (SENSE) was published in 2010 and was intended to be the first in a series but I have not seen more. It is interesting that the organization is totally different from many stitch books. “SENSE” has 3 sections: Stitches with very low texture and minimal pattern, Stitches with medium texture and no diagonal flow, and Stitches with a well-defined diagonal flow.
Sharon G was a painter of needlepoint canvases and probably enjoyed and encouraged the use of lighter coverage so the artist’s paint could shine through. That’s actually one of the reasons why I haven’t done a lot of painted canvases. Why spend that much money for a beautiful canvas just to cover it completely with thread!?! So, I was happy that I had the opportunity to take a class with Sharon G for her canvas, 5 Vases with Curly Bamboo. She suggested some wonderful stitches and threads. I’m also happy that Linda and Beth stitched up the canvas a couple of years ago using other stitch guides. It was great to have the comradery of others stitching the same piece and see the variety of stitches in the 3 approaches. It was the subject of an article in Needle Pointers (Jan/Feb 2021) and all 3 were included during our virtual online exhibit (https://youtu.be/Ley3vbrjE4s). This piece now has center stage in my living room.
Sharon G also has a small paragraph discussing the stitch. I do like non-directional background stitches and just learned that the T-Stitch was named after Tish Holland who was one of two original partners in Sundance Designs. Did you know that T stitch which is worked on the vertical or horizontal intersections will change the texture due to the weave? One will be heavier and one lighter. The vertical intersections are higher and will be a heavier texture and horizontal stitches lie lower and will be slightly less texture.
Both books are small 5.5″ x 8.5″ but Sharon’s only has 68 stitches. I created my own index when I read through the book once before by writing down what stitches were recommended for different types of areas. She has stitches for backgrounds, buildings, Christmas, clothes, faces, feathers, fish, fur, grass, moon, quilt, roof, sky, snow, street, sun, upholstery, and a wall.

JP’s Orchid and Bamboo canvas is the companion piece to JP’s Bird of Paradise canvas that I finished last year.
I got stalled after finishing the Bamboo Panel which used 2 strands of a beige Splendor in a very open stitch (Railway Woven) allowing the shading from the painted canvas to show. I used Interlocking Gobelin for the stalks and random or long/short for the leaves. Same as the companion piece. So, no surprises here.
I am determined to finish this piece in 2022 and getting caught with posting my progress up to now is getting the the piece out of the project bag. The thread I selected initially for the flower, Silk Lame Braid for 13 count was too heavy and I wasn’t getting the angle correct for the stitches suggested in the stitch guide. So, I have regrouped. A little over a week ago, I selected new threads and a stitch – more on that later but hopefully soon!

Filed under: ANG Main Line Stitchers Chapter, From Dawn to Dusk by Textured Treasures
The other piece that my ANG Main Line Stitchers chapter is starting is From Dawn to Dusk by Textured Treasures (you can find them on Facebook). The full design is 12 motifs done on 18 count canvas. But, they also sell the instructions in batches of three done on 28-count on Quaker Cloth and four motifs individually (count unknown). I’m working on some sort of linen.
I bought them in batches of three because I have too much to do to commit to the larger design. I’ve selected my own colors – fall colors – my favorite season!
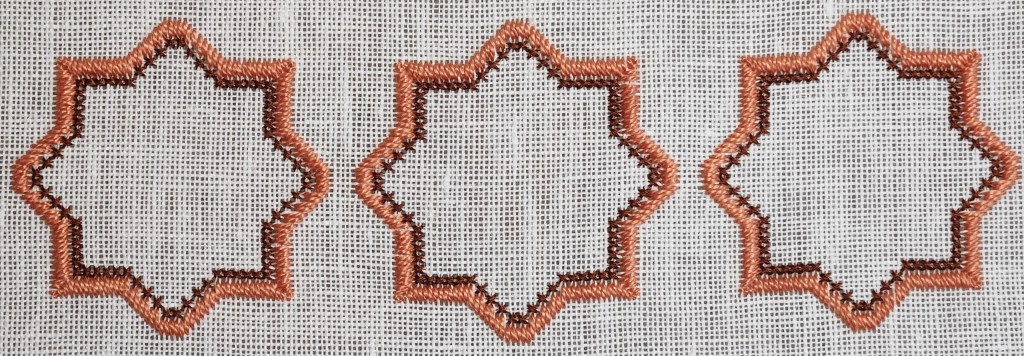
I’ll wait to stitch the centers until the others get to the motifs that I want to stitch. In the meantime, I will stitch the outer areas.
Filed under: ANG Main Line Stitchers Chapter, ANG Stitch of the Month, 2008
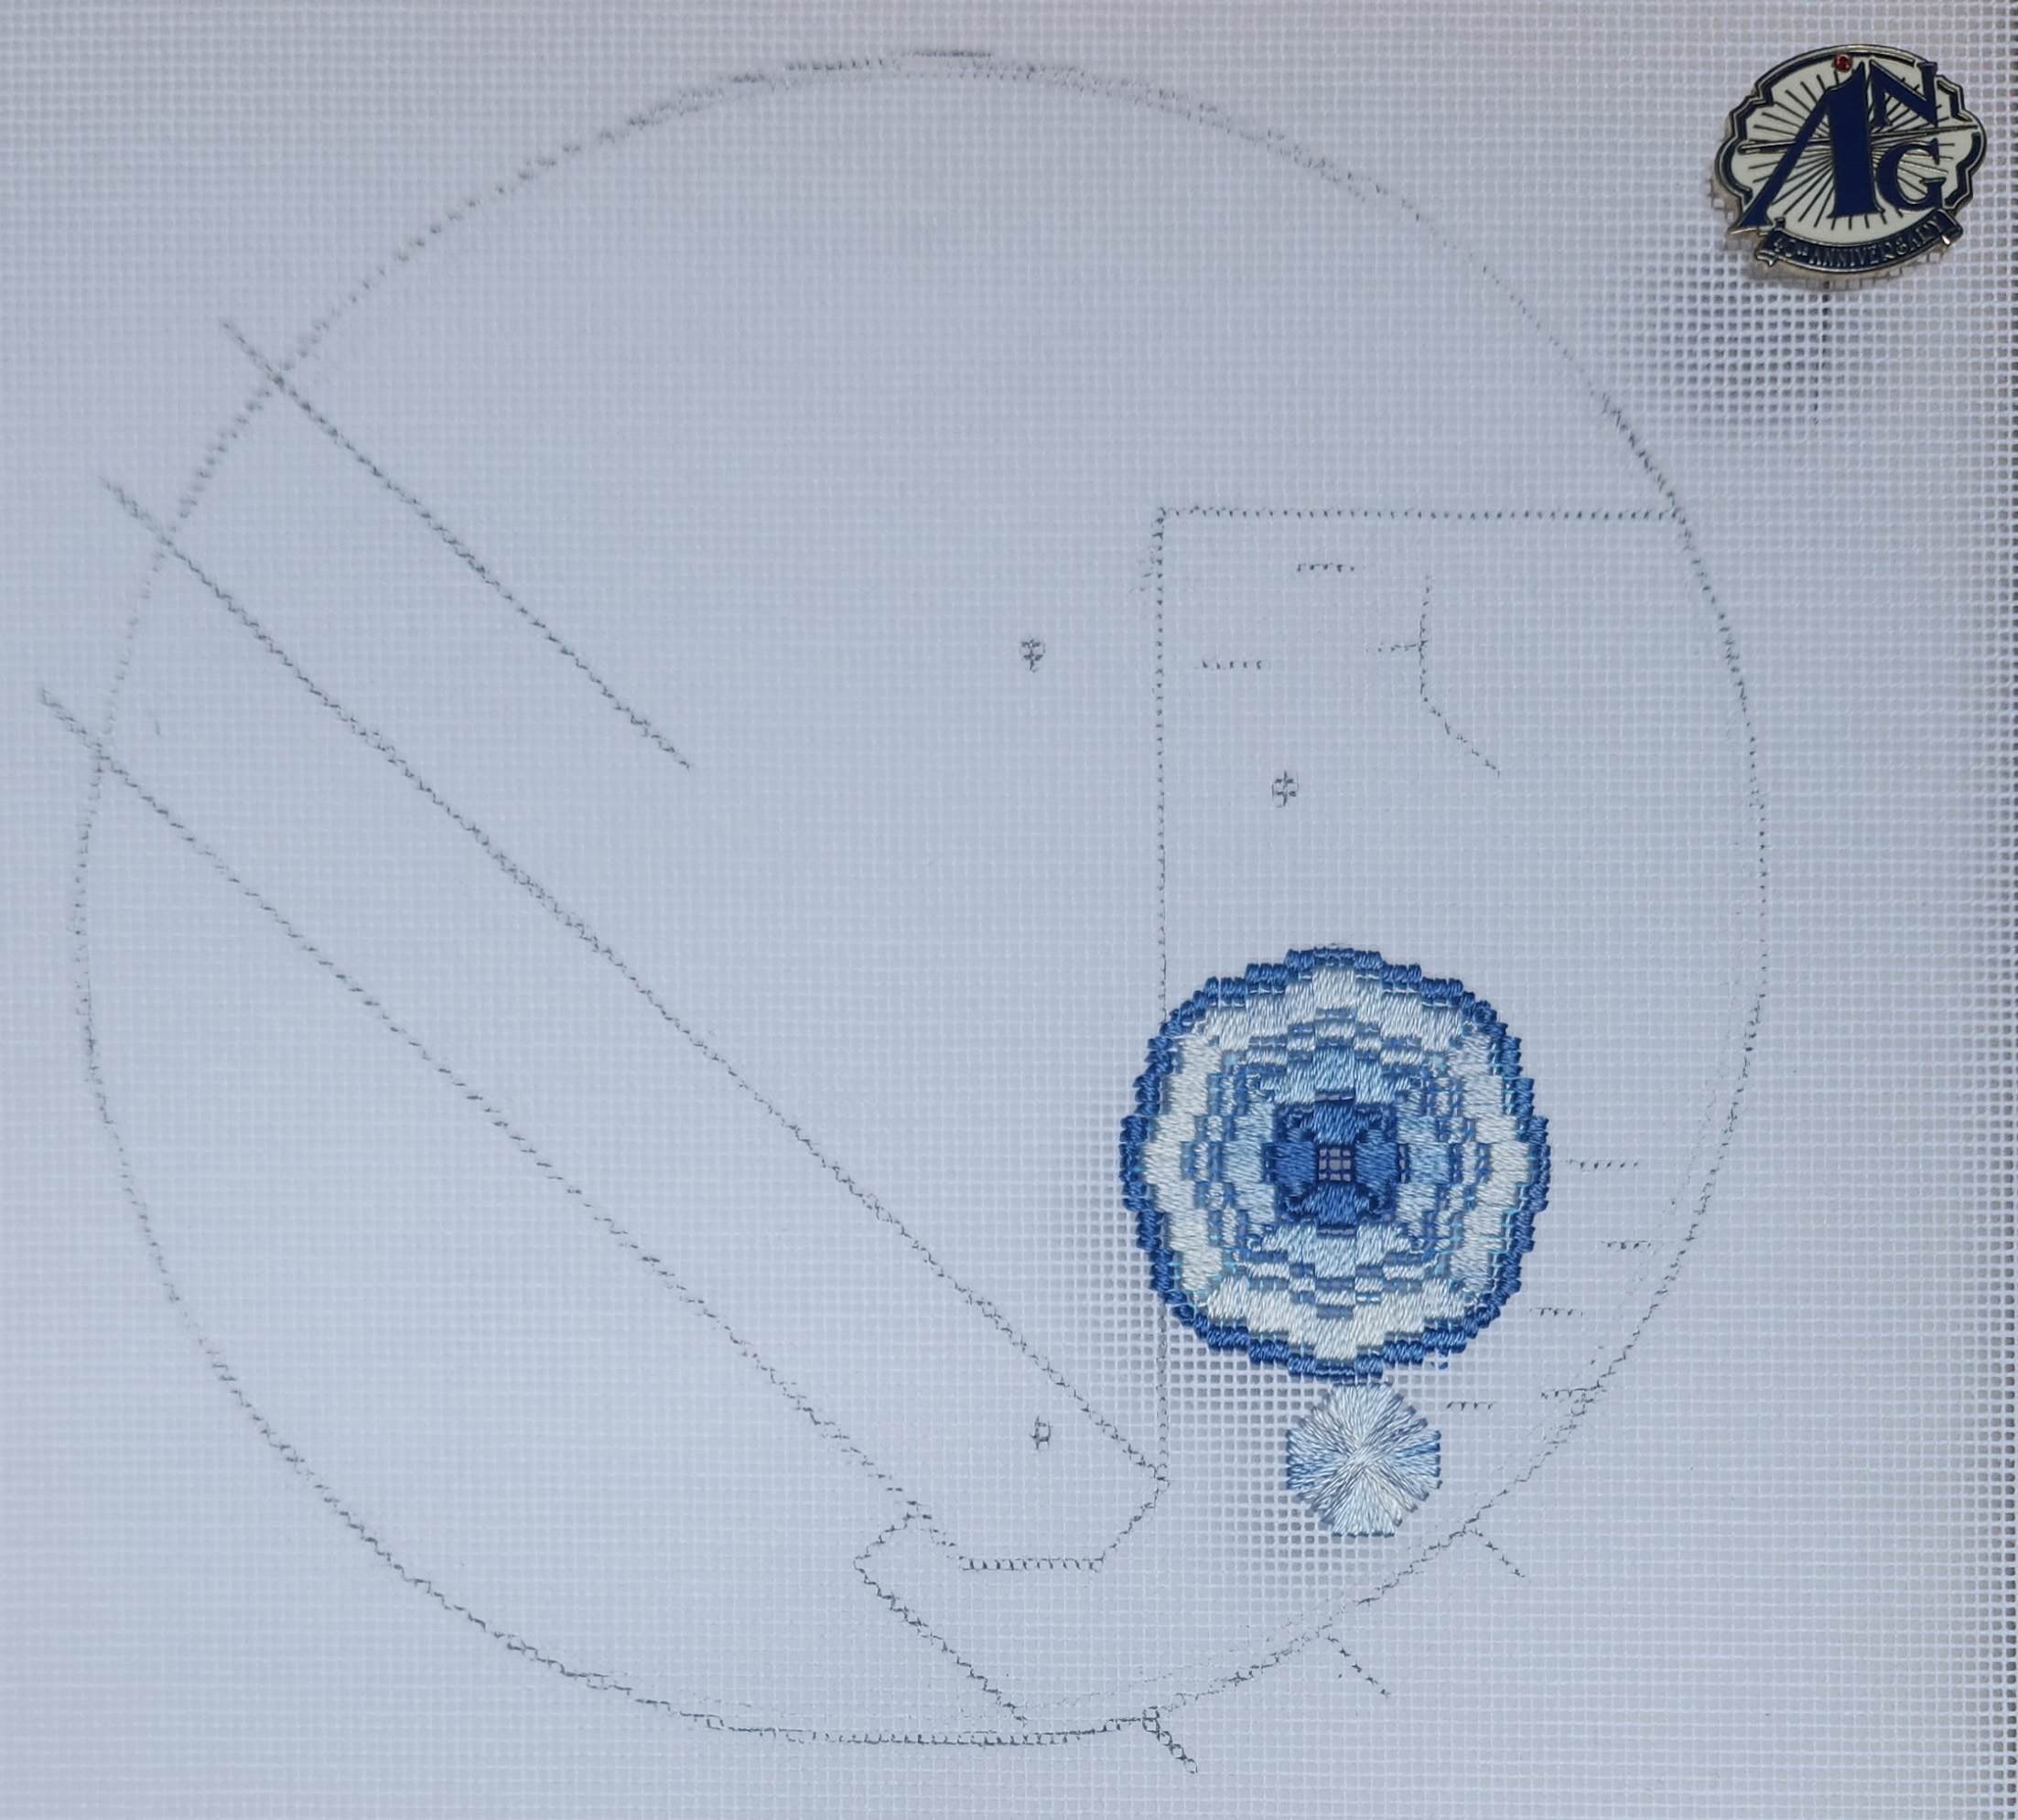
My ANG Main Line Stitchers chapter has started Circles by Lois Kershner, the ANG 2008 Stitch of the Month. It is one of 2 counted projects for the year. We have more members than ever (35 and 18-20 show up in person and on Zoom). So, we (the chapter Board) thought that a couple of projects would be needed to appeal to more members. We have 9 people working on Circles and 10 on the other piece which will be the subject of another post. And 5 people are working on both (yes, I am one of the 5). So, we have 14 people participating in ongoing projects which is quite good. We have a third ready to start in a few months.
It’s great that alternate colorways are shown for Circles. I am using blues although not the ones listed in the Material List for the original colorway. I have a whole pack of threads of Chameleon, Shades of Africa, Two Oceans which consists of 5 skeins from light to dark and each overdyed that I picked it up at Half Moon Handwerks in Camp Hill, PA. They have lovely fabrics and some needlepoint supplies. I thought about using these for another project but I don’t like laying these threads because they are too slippery. They are such pretty colors but I don’t like fighting with the threads. However, ironing them helps some and I will use them for this project and be done with them!

Lois recommends painting some areas of the canvas. I already had 2 blue Copic markers and picked up 2 more darker blues. I tried “stitch painting” the 4-way Bargello pattern but I didn’t get it exactly correct – close enough anyway!

The circular Rhodes would not fit within the 7″ circle based on the template provided. So, I studied the other stitched samples. The Mango Sorbet kept the same size and placed it directly under 4-way Bargello, the Creamy Peach seems to have shifted a few elements, and several did not stitch it at all. I can’t understand how Lois got the larger one to fit with the template she provided. But, no worries! I adjusted it to a smaller circular Rhodes which is 5 wide and not 7 wide on each edge. With this smaller version, you would drop down 12 not 16 from the bottom center edge of the 4-way Bargello to start at the number 1 stitch. That still allows it to be offset which I prefer.
The project and threads fit perfectly in a bag made by Linda from a blue fabric with circles in it! How perfect!?! I’ve got the ANG needle minder with blue in it too.

Filed under: ANG CyberPointer's Chapter, ANG New Jersey Needle Artists Chapter, Hearts of Gold by Michele Roberts
It took about 2 months to get back to finishing the other 2 Bargello ornaments from Hearts of Gold by Michele Roberts (an ANG Correspondence Course). It’s available under Distance Learning on ANG ‘s website. Michele’s are all done using only 4 gold threads so they are all color coordinated. Mine are all different colorways for seasonal display. Tedious work but I completed the finishing on them! This time I used a binding stitch.
I had pulled out my Kreinik Custom Corder. It’s loose but ok for the hanger. Since my threads were already cut, they weren’t long enough to go around the whole heart. Step 1 is to interlock the 2 threads. Step 2 is wind. Maybe I didn’t twist enough?

Step 3 is to remove from cord maker, bring both ends together, and allow them to twist together. It was tighter initially but then loosened during that process. Since even 2 lengths weren’t working, I abandoned the cord maker.
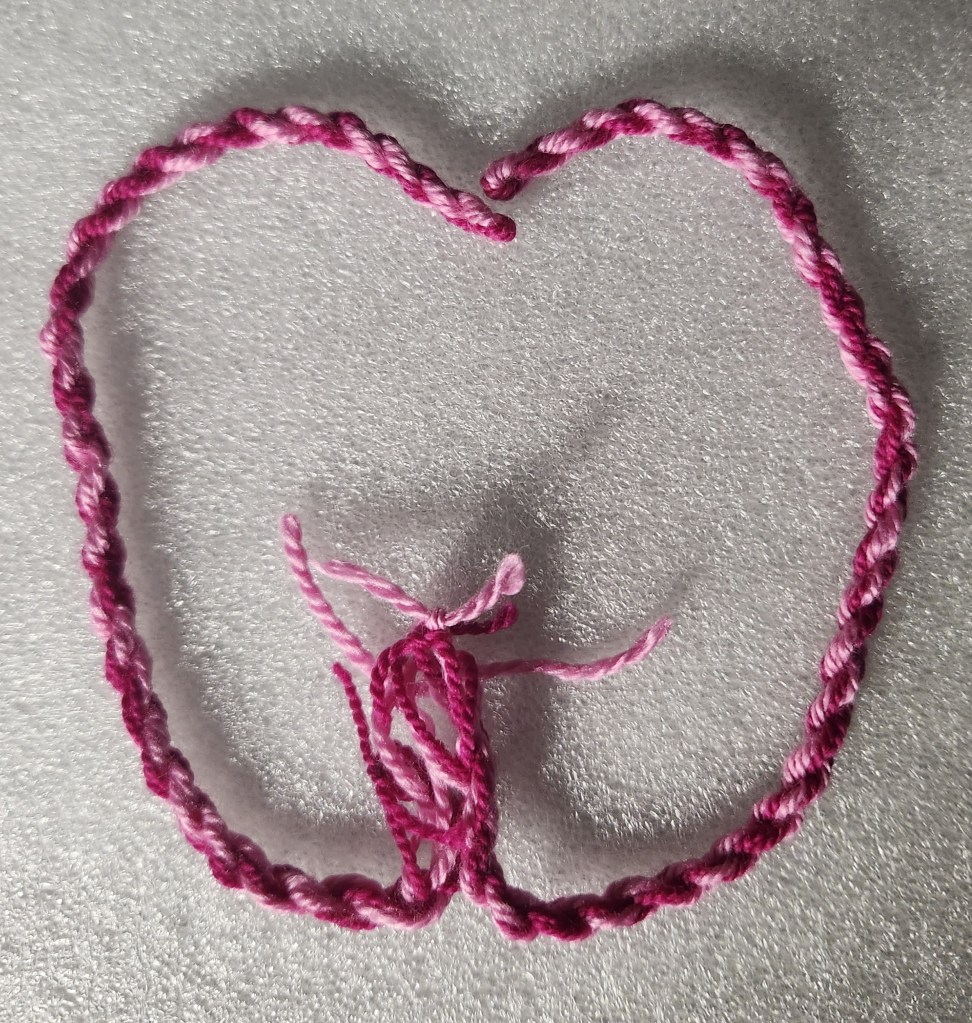
There was still a decent gap between the back and front due to a 5 mm soft foam core that I used. So, I went with a “binding” stitch and it took way longer than I am sure a professional finisher would take to do it. Bending the monocanvas back results in a less than desirable rounded shape. But, that stitch covered the gap and turned it back into a smooth heart shape. I prefer stitching over finishing but am happy with these.

Filed under: ANG Chapter Book Projects, Embroidery Guild of America, Flutterby by Kurdy Biggs, Rings on Her Fingers with Kay Stanis, Seminar 2021-Chicago
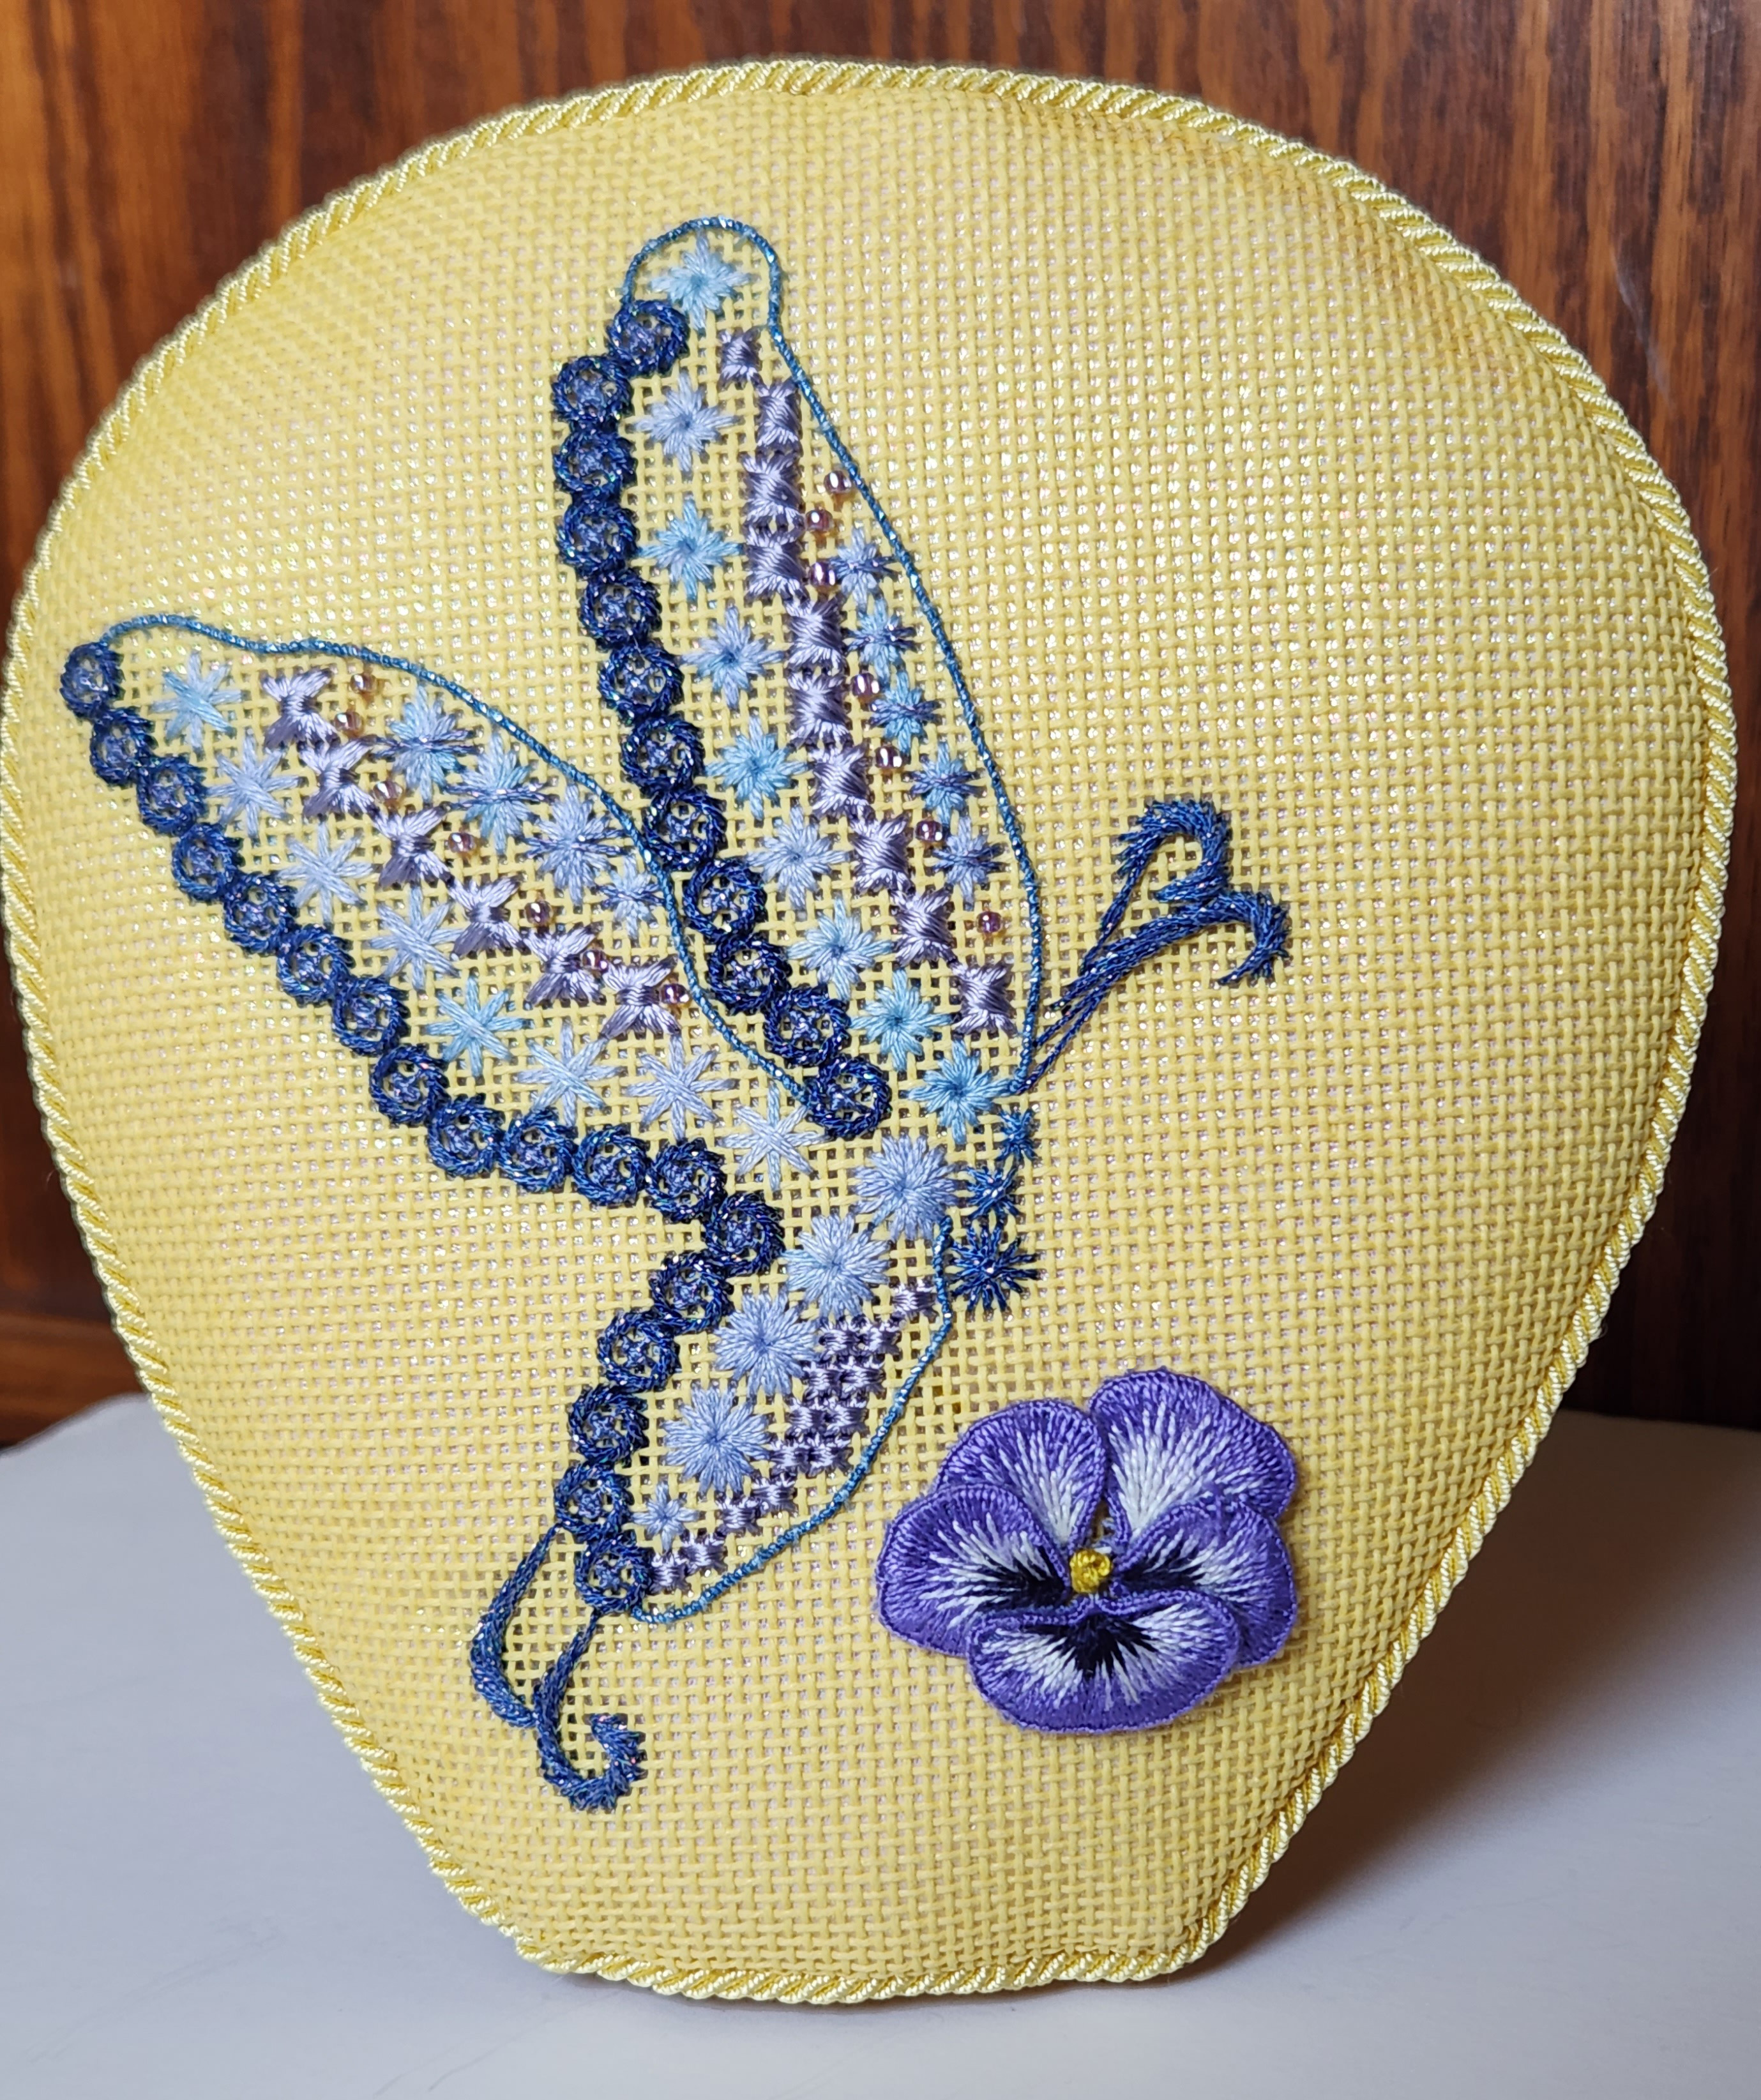
It’s been awhile with the finisher but worth the wait. The Mauve Pansy that I stitched for the EGA class Rings on Her Fingers designed by Allison Cole and taught by Kay Stanisis has Flutterby flying around it which is designed by Kurdy Biggs from ANG’s 2017 Chapter Project Book. There is an iridescent yellow lamé behind the canvas and an acrylic stand is inserted from the bottom.
Filed under: Embroidery Guild of America, Mid-Atlantic Region, Nature's Palette THaP - Catherine Jordan
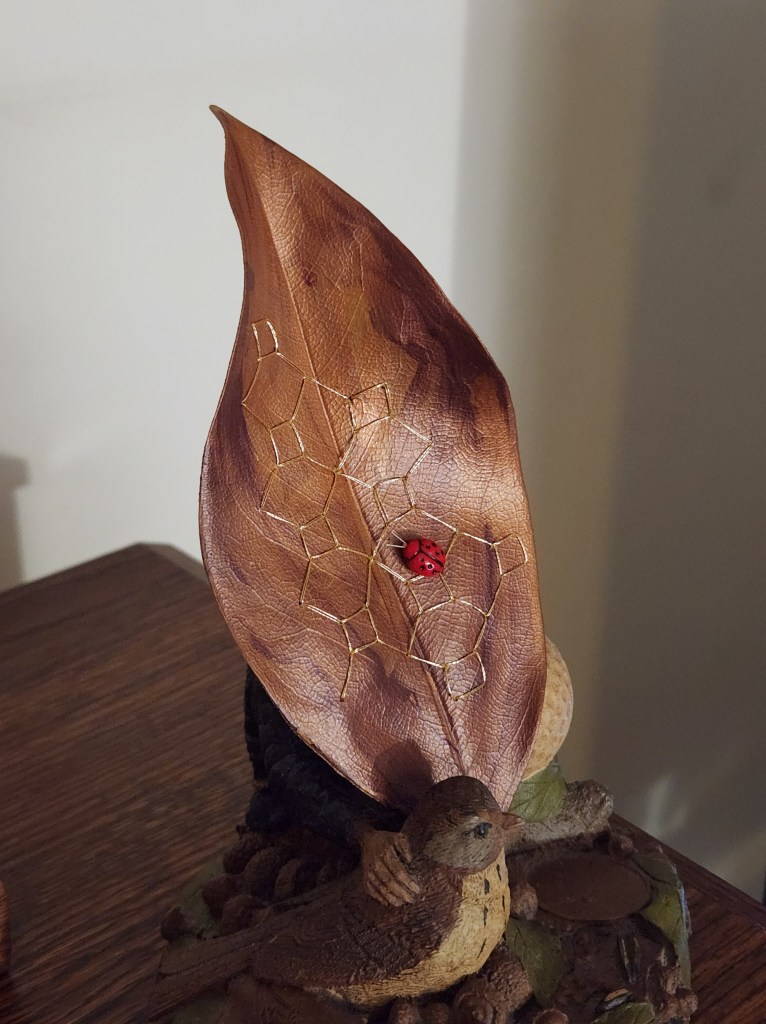
The 2022 fall Take Home a Project (THaP) class, Blackwork on Nature’s Palette by Catherine Jordan, was today across the bridge in Mt. Laurel, NJ.
It was a full class and my first attempts were not good. I’d only done one small square of Blackwork quite some time ago. I was getting nowhere and finally asked Catherine what was I doing wrong. It turns out I was trying to do this on the diagonal. So, I grabbed a new Magnolia leaf (she brought extras – I actually will do 3 of these). The second leaf went easier on the front but it is not reversible. The lady bug is a cute embellishment. I will try the diagonal one again and a reversible one.
They were painted beautifully with acrylic paints. I grabbed about a half dozen green ones because I will offer to teach this to the Brandywine chapter. That’s the purpose of THaP. It’s like the ANG Chapter Project Book.
I taught the Overdyed Spools to the group last year and several of them commented on how their chapter members enjoyed it and several chapters have it scheduled for 2022 and 2023.
Filed under: Embroidery Guild of America, Mid-Atlantic Region, Overdyed Spools THaP, Petite Projects, Seminar 2022-NYC
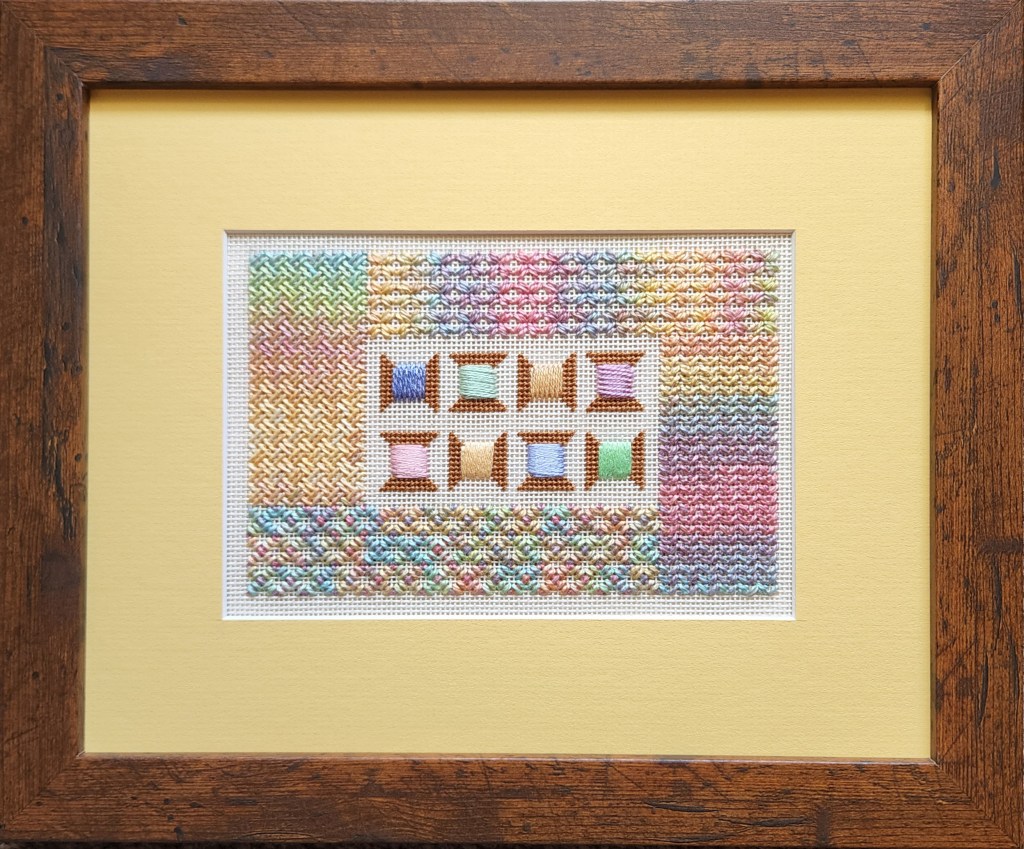
Overdyed Spools was released today as an EGA Petite Project (https://egausa.org/new-petite-project-overdyed-spools/)! I taught it at the Mid-Atlantic Region (MAR) Fall meeting in October 2021 and since then, at least 6 chapters have or will be teaching it to members. I have been getting photos by text and email showing me another one finished periodically – so cool. A couple of people changed the stitch to have the color flow differently which was wonderful. And, the center changed to 3 larger geometric shapes – so original.
Then, thanks to Jana (dual member) from the EGA Great Lakes Region (GLR) for asking if that region could share the design with chapters. Since ANG has the project in the 2017 Chapter Project Book (still available), I figured that maybe EGA would be able to share it through their Petite Projects which are smaller projects also intended to be used by chapters and/or regions as scheduled programs. Since I created diagrams for the Petite Projects, Favorite Medallion #1 and Technique Basics, working with Carole and Harriet, I knew who to contact. And, it was quickly accepted.
This is my newest colorway which is the one I used for demonstration for class and finished afterwards. You may have seen it at the EGA Seminar in NYC this summer as a “Coming Soon” piece – it’s here now!
Filed under: Lady Sybil
This is one of my favorite outfits from Downton Abbey and I wanted Sybil to join the family of pieces designed by Gay Ann Rogers based on other Downton Abbey photos. So, I designed this after stitching Gay Ann’s other 4 designs. Thanks to Gay Ann for her inspiring pieces.
The harem pant outfit is a Paul Poiret inspired costume. The design features 3 nested Jessicas, wrapped sheafs, and padded crescents.

