Filed under: ANG New Jersey Needle Artists Chapter, ANG Seminar 2021, Secret Window by Kurdy Biggs
Instead of a typical New Jersey Needle Artists (NJNA) Stitch of the Month project where we all meet to stitch the same project in different colorways and since some of us are remote members, several of us formed a “KBZ Group” who will stitch Kurdy Biggs projects during the year and meet monthly on Zoom to discuss progress and challenges of her lovely pieces.
I suggested Kurdy Biggs specifically because of Secret Window which I had not started since getting it in the fall during ANG’s 2021 Virtual Seminar. Kurdy’s husband made the wood frame and that came with the kit.
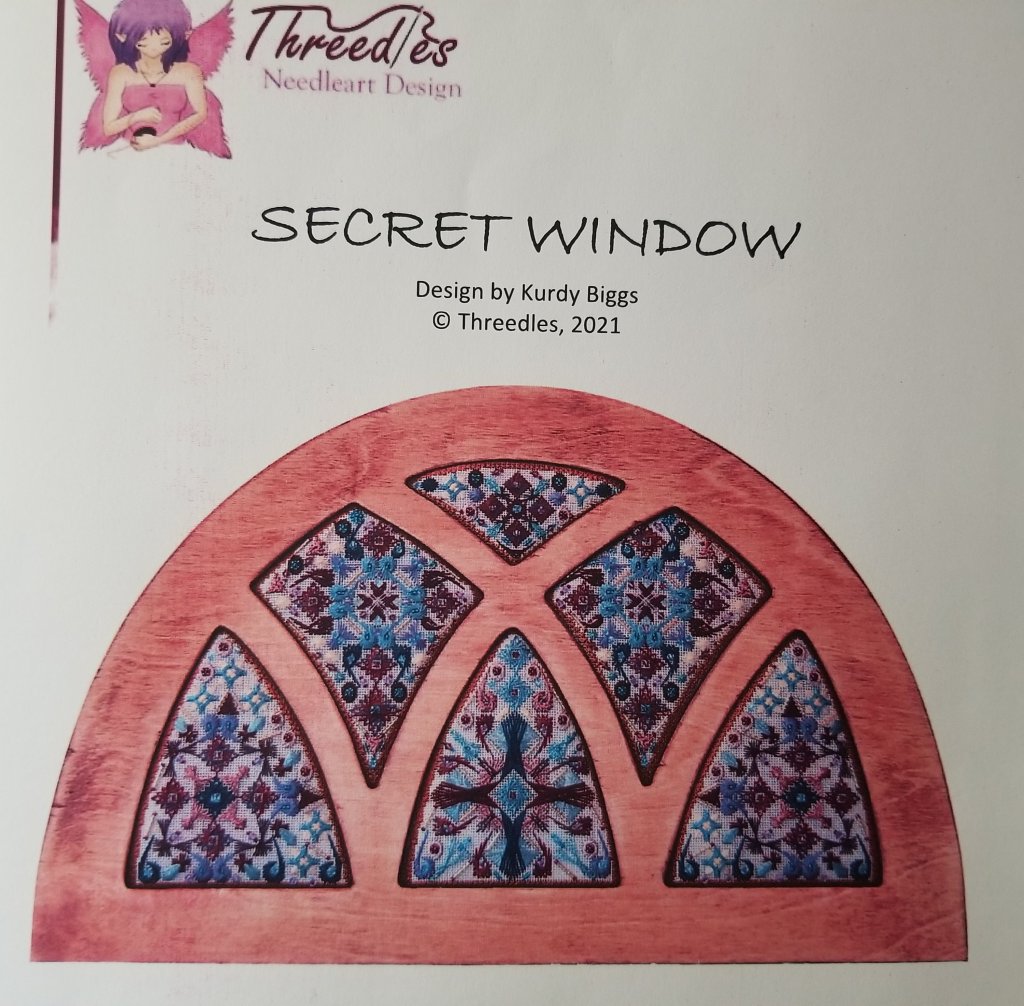
For multiple reasons, I have decided to stitch this on a single large piece of canvas and am having a custom Cathedral-shaped made for it. That may raise questions but all will be revealed in time. Since it will take time to stitch this, you’ll just have to check back later.
There are 6 sections and each one is outlined in a double row of Smyrna stitches. That will be 1,525 Smyrnas. While the number of Smyrnas is large, what seems even more daunting about them is that Kurdy gave us 2 cards of Splendor which is 8 yards each. Splendor has 12 plies and I am using 2 plies! I can’t imagine using all that Splendor for these.
One thing became clear is that I can only stitch so many Smyrnas at a time. And, I can’t have the TV on because I have to pay attention to where I am on the chart. In order to keep track of where I am along the Smyrna border, I am using a yellow marker to color the completed stitches (like I used to do when following a cross stitch chart). Very useful. I also worked up along one side with one length of thread and then the other side checking against each side. Getting the border correct is crucial to fitting the interior motifs. So, in the morning while my husband reads his morning papers (paper and online), magazines, and/or books, I am working on Smyrnas. So far, no ripping but a long way to go!
If you look at the image provided by Kurdy, the Smyrna border looks reddish but Kurdy says, “if it looks different that is due to monitor setting or the photo settings”. In the directions, she does mention that the thread color was selected to match the wooden frame (which is not at all red in person – it is a very light colored wood). The Splendor is a yellow/gold. The canvas color is French Blue (barely colored). This center bottom area is 4″ wide at the base and 5″ high.

Over the coming months, I will appreciate the support of like-minded stitchers including Noelle, Jill, Jackie, Brenda, and Linda! That’s who are the KBZers so far. They are doing other Kurdy Biggs projects including the perforated paper ornaments available from ANG Workshops through January 31. Kurdy has lots of lovely designs.
I was fortunate to be on an EGA-sponsored Zoom lecture given by Claudia Dutcher Kistler on the History of Perforated Paper Needlework 1840 – 1900 this past Saturday. Claudia has quite a collection and is very enthusiastic about the topic. Quite interesting.
She has a couple of websites: Bristolsamplers.com (not paper samplers); Dutchtreat.com & perforatedpaper.net (both paper related). Most of her pieces with descriptions & some history will be found on the website with .net & she sells on the .com website. Sheets of perforated paper in 14 and 18 count are available. Mill Hill makes 14 count 9×12 sheets (google perforated paper to find a variety of sources).
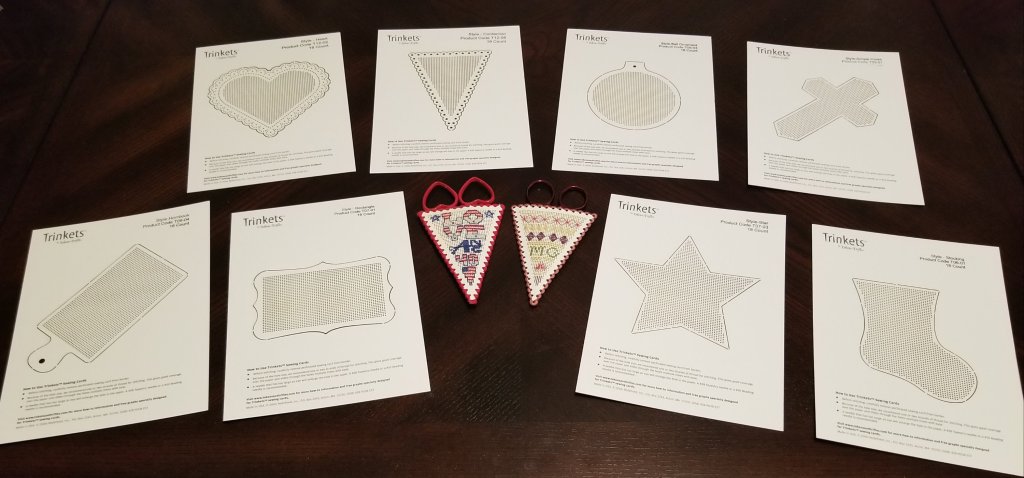
I have stitched on perforated paper before for a color wheel on sheet of 14 count. The scissors sheath for both designs in the photos below are stitched on 20-count Confection Perforated Sewing Cards from Tokens and Trifles. They also had some designs on 18 count but all have been discontinued.
It took some digging through my stash to find these and had no idea I had purchased so many different shapes while they were available (around 2010). Glad I did! While these were available, they also posted graph paper of some of these shapes to work out designs before stitching and I printed them.

So much fun stuff in my stash! I never need to buy anything else but I probably will anyway.
Filed under: Books in My Library, Stitches For Effect and Stitches To Go by Suzanne Howren and Beth Robertson
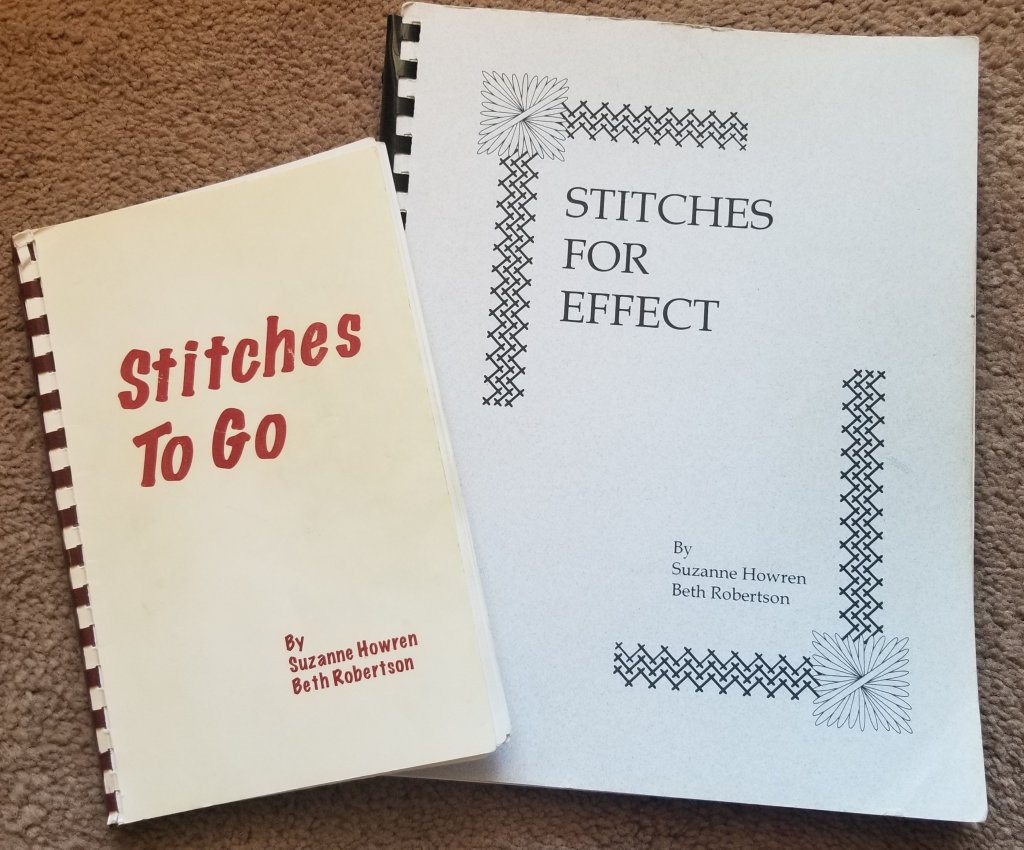
Except for The Needlepoint Book which was discussed previously, I’ve probably mentioned these books by Suzanne Howren and Beth Robertson more than others.
Stitches For Effect has 4 indexes including a thread index (some are probably not available now), a stitch index (in alphabetical order), an effect index (such as trees, roads, sky, etc), and a general index. Can’t say I ever used the thread index but I skimmed through it to write this review looking at just threads I use most. Occasionally, an equivalent weight to a pearl cotton is stated and that can be very helpful to save time practice stitching with a thread. I discovered that if you use 6 plies of stranded cotton, then you could use 3 strands of Floche (2:1 ratio). I have not tried combining Kreinik #8 Braid with 3 strands of a coordinating stranded cotton for a subtle shimmering effect which sounds like a good idea (stranded silk would probably work too). I will have to look more carefully next time I use Impressions because it is a 50/50 woll/silk blend and the two fibers reflect light differently creating depth. There are conversion charts to indicate a suggested number of strands/plys for use on canvases/fabric of different sizes including: 13/14, 18, 22/24, and 28. The diagrams are next to a paragraph discussing what ground, threads, and effects are good for that stitch diagram. Very interesting to read and they are excellent diagrams.
I never bought More Stitches for Effect and Even More Stitches for Effect although getting the indexes would probably be useful. Do you have and like either of these books? I’d be curious to know.
The second one of theirs I did get was Stitches To Go which contains every stitch in the three books I mentioned above. Although it doesn’t have any of the indexes, it is always by my side!
Filed under: Books in My Library, Needlepoint Books, The Needlepoint Book by Jo Ippolito Christensen
I’ve probably mentioned The Needlepoint Book by Jo Ippolito Christensen this book more than most others. Everyone has there “Go To” books. This is always within reach.
The Second Edition remains my preferred edition mainly because it is lighter to hold and most importantly I have added notes next to the diagrams that I want to keep. Part 1 covers basic information, procedures, and stitching techniques. She offers suggestions for left-handed stitchers since most diagrams are written for right-handed stitchers (turn the diagram upside down). Part 2 covers design and color. These topics are books in and of themselves but Jo covers key points clearly. Part 3 covers putting everything together such as my favorite tip (on page 108 – Mixing Stitches) to stitch diagonal stitches before straight stitches when they share holes. Part 4 offers stitch diagrams and stitched samples (all in black and white). The stitches are divided into chapters: straight, diagonal, box, cross, tied, eye, leaf, line, decorative, and open. At the beginning of each chapter, a grid is presented to show characteristics of each stitch such as would it be good for a background stitch, accent stitch, shading, would it snag or not, does it have texture, does it create a weak, medium, or strong pattern, and more.
The Third Edition does have the same great information including how to mix stitches on page 148 and four new chapters, and 225 new illustrations including 62 new stitches. Since some images are not as good as in the Second Edition, 75 of the stitches were restitched and rephotographed to replace the less-than desirable photos. The main difference is more information covering color and design issues under the chapter title Interpreting the Painted Canvas although much of it really applies to those principles in general not just for painted canvases. Parts 1 – 3 covered 132 pages in the Second Edition and now covers 202 pages of information. Part 4 reorganized a few diagrams, added new ones, and offers the same great charts at the beginning of each chapter.

Filed under: General comments
As we enter the third year of the pandemic, coronavirus variants are still causing havoc and I must comment. The saying “History repeats itself” is so true. The 1918 influenza epidemic (which began in January) had 4 waves of infection and finally became less deadly causing ordinary seasonal flu (which can still cause severe illness and death). Luckily, thanks to the vaccines including booster doses, it’s not causing as much severe illness and my husband and I are back to some traveling (by car not planes), dining in restaurants, and meeting others in person. We love it that proof of vaccination has been and is being required in various venues and starting Monday in Philadelphia restaurants. Since we are in the fifth wave, more than likely due to vaccine hesitancy among too many people, this virus will continue to circulate through at least 2022 and probably beyond. We will learn to live with it as we do the flu. Luckily, again thanks to therapeutics being developed, illness caused by the virus will likely reduce the chance of progressing to severe disease. The government and the pharmaceutical industry have really stepped up to the difficult tasks of developing a vaccine and recently an effective treatment. Was everything perfect – no – but so many individuals only need to get the vaccine and wear a mask – how simple for the individual.
In 2021, I posted 74 times which is the exact same number as posted in 2020. The only other years that I posted the same number, 70, was in 2015 and 2018. The fewest at 54 was in 2017 during my first year of retirement and the most at 85 was 2019 with little else to do due to the onslaught of coronavirus. My blog saw a few more visitors than last year, a little over 7,200 visitors, and still from all over the world. Thanks again to everyone who visits especially those who comment, send a comment via email, or tell me in person that they enjoy reading my blog.
Connecting with people is one of the things about needlepoint that makes it wonderful. I did that this year not only through my blog, but I joined New Jersey Needle Fest after missing it in 2019 because I was on a stitching cruise and due to coronavirus cancellation in 2020. It was a wonderful day. And, I am looking forward to the expanded 2-day format in May 2022.
I also attended my first EGA Seminar in Chicago and saw half of some familiar faces (we were masked) and met many new people. Preview alert: Gail Stafford encouraged us to go home from her EGA Seminar class, Overdyed Thread Notebook, and make a sampler which has resulted in two small samplers using overdyed threads which I hope to share in 2022. Two other EGA classes will be discussed in a minute.
Susan Hoekstra taught Teaching Needlework 101 virtually in 2020 which came in handy this year because I taught Overdyed Spools to a group of 31 EGA Mid-Atlantic Region members, half of whom will return to their chapters to teach it to their chapter members. It was a good experience and I would do it again. But, a lot of work goes into teaching just as a lot of work goes into “finishing” a piece. Stitching, designing, and diagramming are more fun than work – for me anyway! The ANG Seminar was online and on Zoom this year where Susan Hoekstra taught her class Interpreting Color Theory which used our painted canvases as a teaching tool and allowed me to finally finish a small seashell. There is a lot to learn about color! The other ANG class made the To Do list will be discussed at the end.
After our trip to Woodlawn in March which is always enjoyable, I also connected with Anita B who designed and stitched Women From the Dawn of Time – A Tapestry of Female Trailblazers Throughout History, my husband’s favorite piece this year. A note by Anita’s piece at Woodlawn mentioned that she was selling her design on a shirt and Bill filled out a paper requesting more information and she replied. We chatted via email and eventually I created the first pictorial draft of her booklet which she has since self-published. She sent me a final copy (actually twice because USPS is not what it used to be but I will not get started on that subject). In her booklet, she acknowledges my contribution and even Bill for introducing me to Anita and for being her first “customer” of her invincibles.threadless.com shop (we got a T-shirt, small bag for travel, and a shower curtain; Anita sent us 2 travel coffee mugs as a thank you for my efforts). Woodlawn does a great service by allowing that exchange of information with the exhibitors. And, for a second year, Woodlawn offers photos to be viewed online for a month. You can still view them through January 6, 2022. Purchase tickets at: https://tinyurl.com/VirtualNeedleworkShow
Since I am also learning Photoshop in addition to Adobe Illustrator to help Needle Pointers over the past year, I was able to help Anita. One thing leads to another. I’ve worked on diagrams for about 8 projects for Needle Pointers and started writing or modifying text (depending on what is provided) to accompany them. Preview alert for ANG: There are lots of articles and projects coming in 2022 but the one with 3 stitchers is particularly of interest to me. Can’t say more. Preview alert for EGA: My work on Needle Pointers prompted EGA to reach out for help with diagrams for a project that is being pilot stitched now.
In Jan/Feb 2021, Needle Pointers published A Tale of Two Stitchers (actually was Three Stitchers) featuring Vases with Curly Bamboo which I stitched with 2 other members, Beth and Linda, of the Main Line Stitchers as part of our painted canvases discussions. Instruction for Tahitian Treat appeared in the Mar/Apr issue and from June through August, Meg W posted her progress with Tahitian Treat on Needlepoint Nation creating quite a buzz! I heard some people joined ANG to obtain the instructions and that Karen at Nimble Needle in NJ had gotten several orders for the threads. Meg’s enthusiasm was wonderful. An errata sheet was issued to revise one diagram and adjust the number of skeins needed (https://cdn.ymaws.com/www.needlepoint.org/resource/resmgr/needlepointers/tahitian_treat_errata_2021_m.pdf). And, the Sept/Oct issue shared information and the link to the ANG Main Line Stitchers chapter online needlepoint exhibit which is still available to view at
https://mediaartscouncil.org/mac-gallery-guest-artist-mainline-stitchers/ Many thanks again to Stephanie and Media Arts Council (MAC) for their support. We shared much more than we could have in person. Preview alert: Watch for an in person needlepoint exhibit in 2022 featuring a local artist and hopefully a few of our pieces! MAC has a new location in Media right on State Street and I wish them all the best.
My first publication in Needlepoint Now, Prime Examples, appeared on the back cover of the Sept/Oct issue. That was exciting! Preview alert: Watch for an another design to be published in 2022!
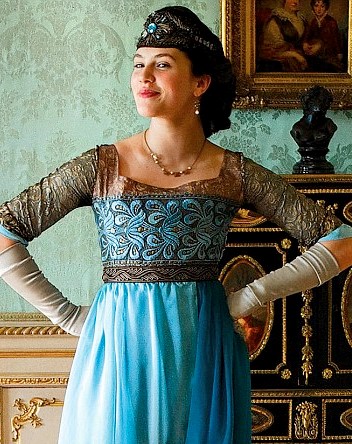
I finished stitching 11 counted projects including Rainbow Ribbons by Kam Wenzloff with Colour Complements threads from Needlepoint Now; Star of Stitches by Kathy Rees from ANG’s 2020 Stitch of the Month which is going to Woodlawn in February for the month-long March exhibit; Flutterby, from the 2017 ANG Chapter Project Book by Kurdy Biggs, which is buzzing about My Mauve Pansy (not back from the finisher yet), a small Tree Ornament by Vicky Witterschein (taught via Zoom through the New Jersey Needle Artists). And, all four Gay Ann Rogers Downton Abbey pieces were finished: Lady Edith, Lady Mary, Cora, Countess of Grantham, and Violet, Dowager Countess of Grantham. Preview alert: I’m about ready to start stitching my interpretation of Lady Sybil (the youngest sister) based on this photo. I’ve got the threads and am very pleased with the design which I’ve worked out on my computer.
The last 2 counted projects were completed with the same thread line called Beautiful Stitches from Ann-Marie Anderson-Mayes in Australia. They were Orchid Lady by Mary Knapp (a Cyberpointers project from 2021) and my final finish of 2021 which is Starburst by Patricia Hartman (from the 2013 Chapter Project Book and was a Main Line Project years ago).
Four years after I began JP’s Bird of Paradise & Bamboo at the 2017 ANG Seminar in the Embellishment class with Cynthia Thomas, it was finished! A 2022 goal is to finish the companion piece, Orange Orchid & Bamboo. The other painted canvas I finished was Swirling Leaves, a Dream House Ventures painted canvas, with a stitch guide by Janet Perry’s class begun even earlier in 2015!
These are neither counted projects nor painted projects exposing me to stumpwork with My Mauve Pansy, a 2021 EGA Seminar project designed by Allison Cole and taught by Kay Stanis; ribbon work with Annette’s Bouquet designed and taught by Deborah Mitek also at the 2021 EGA Seminar; and needle felting with Watering Can designed and taught by Vicky Witterschein through a Zoom class with New Jersey Needle Artists. All were enjoyable projects but I still prefer counted projects.
My ANG Main Line Stitchers chapter is stitching various colorways of my design, A Spring Sampler. Linda and I found it challenging and fun to help people pick threads. Based on our experience, I added more tips to selecting threads for a Zoom presentation to EGA’s Philadelphia Area Chapter in advance of them selecting threads and stitching it in February/March 2022. I enjoyed the opportunity to join two EGA members on a Rittenhouse Run to select threads and we may do another run in January with more members.
I passed Step 4 for the bargello design of the EGA Master Craftsman with distinction and it was on display along with my Steps 1, 2, and 3 at the EGA National Seminar in 2021. Other people from the various Master Craftsman programs were displaying theirs too. It was an amazing collection of interesting pieces. I wrote up the instructions for Bargello Bowls from Step 3 and two members of the ANG New Jersey Needle Artists will be stitching that in 2022.
I did not send Step 5 in for review in October. It is demonstrating the technique of applique and I needed extra time after discovering that the applique must be a smaller count ground than the main design. That tops my To Do list along with Lady Sybil and Orange Orchid & Bamboo. Joining that list is a couple of new projects not started yet including Secret Window by Kurdy Biggs (from this year’s ANG virtual Seminar) and Razzle Dazzle by Ann Strite-Kutz which was a gift from Linda from the ANG New Jersey Needle Artist chapter.
That covers everything except to send you best wishes for a Healthy and Happy New Year!
Filed under: ANG Chapter Book Projects, ANG Main Line Stitchers Chapter, Starburst by Patricia Hartman
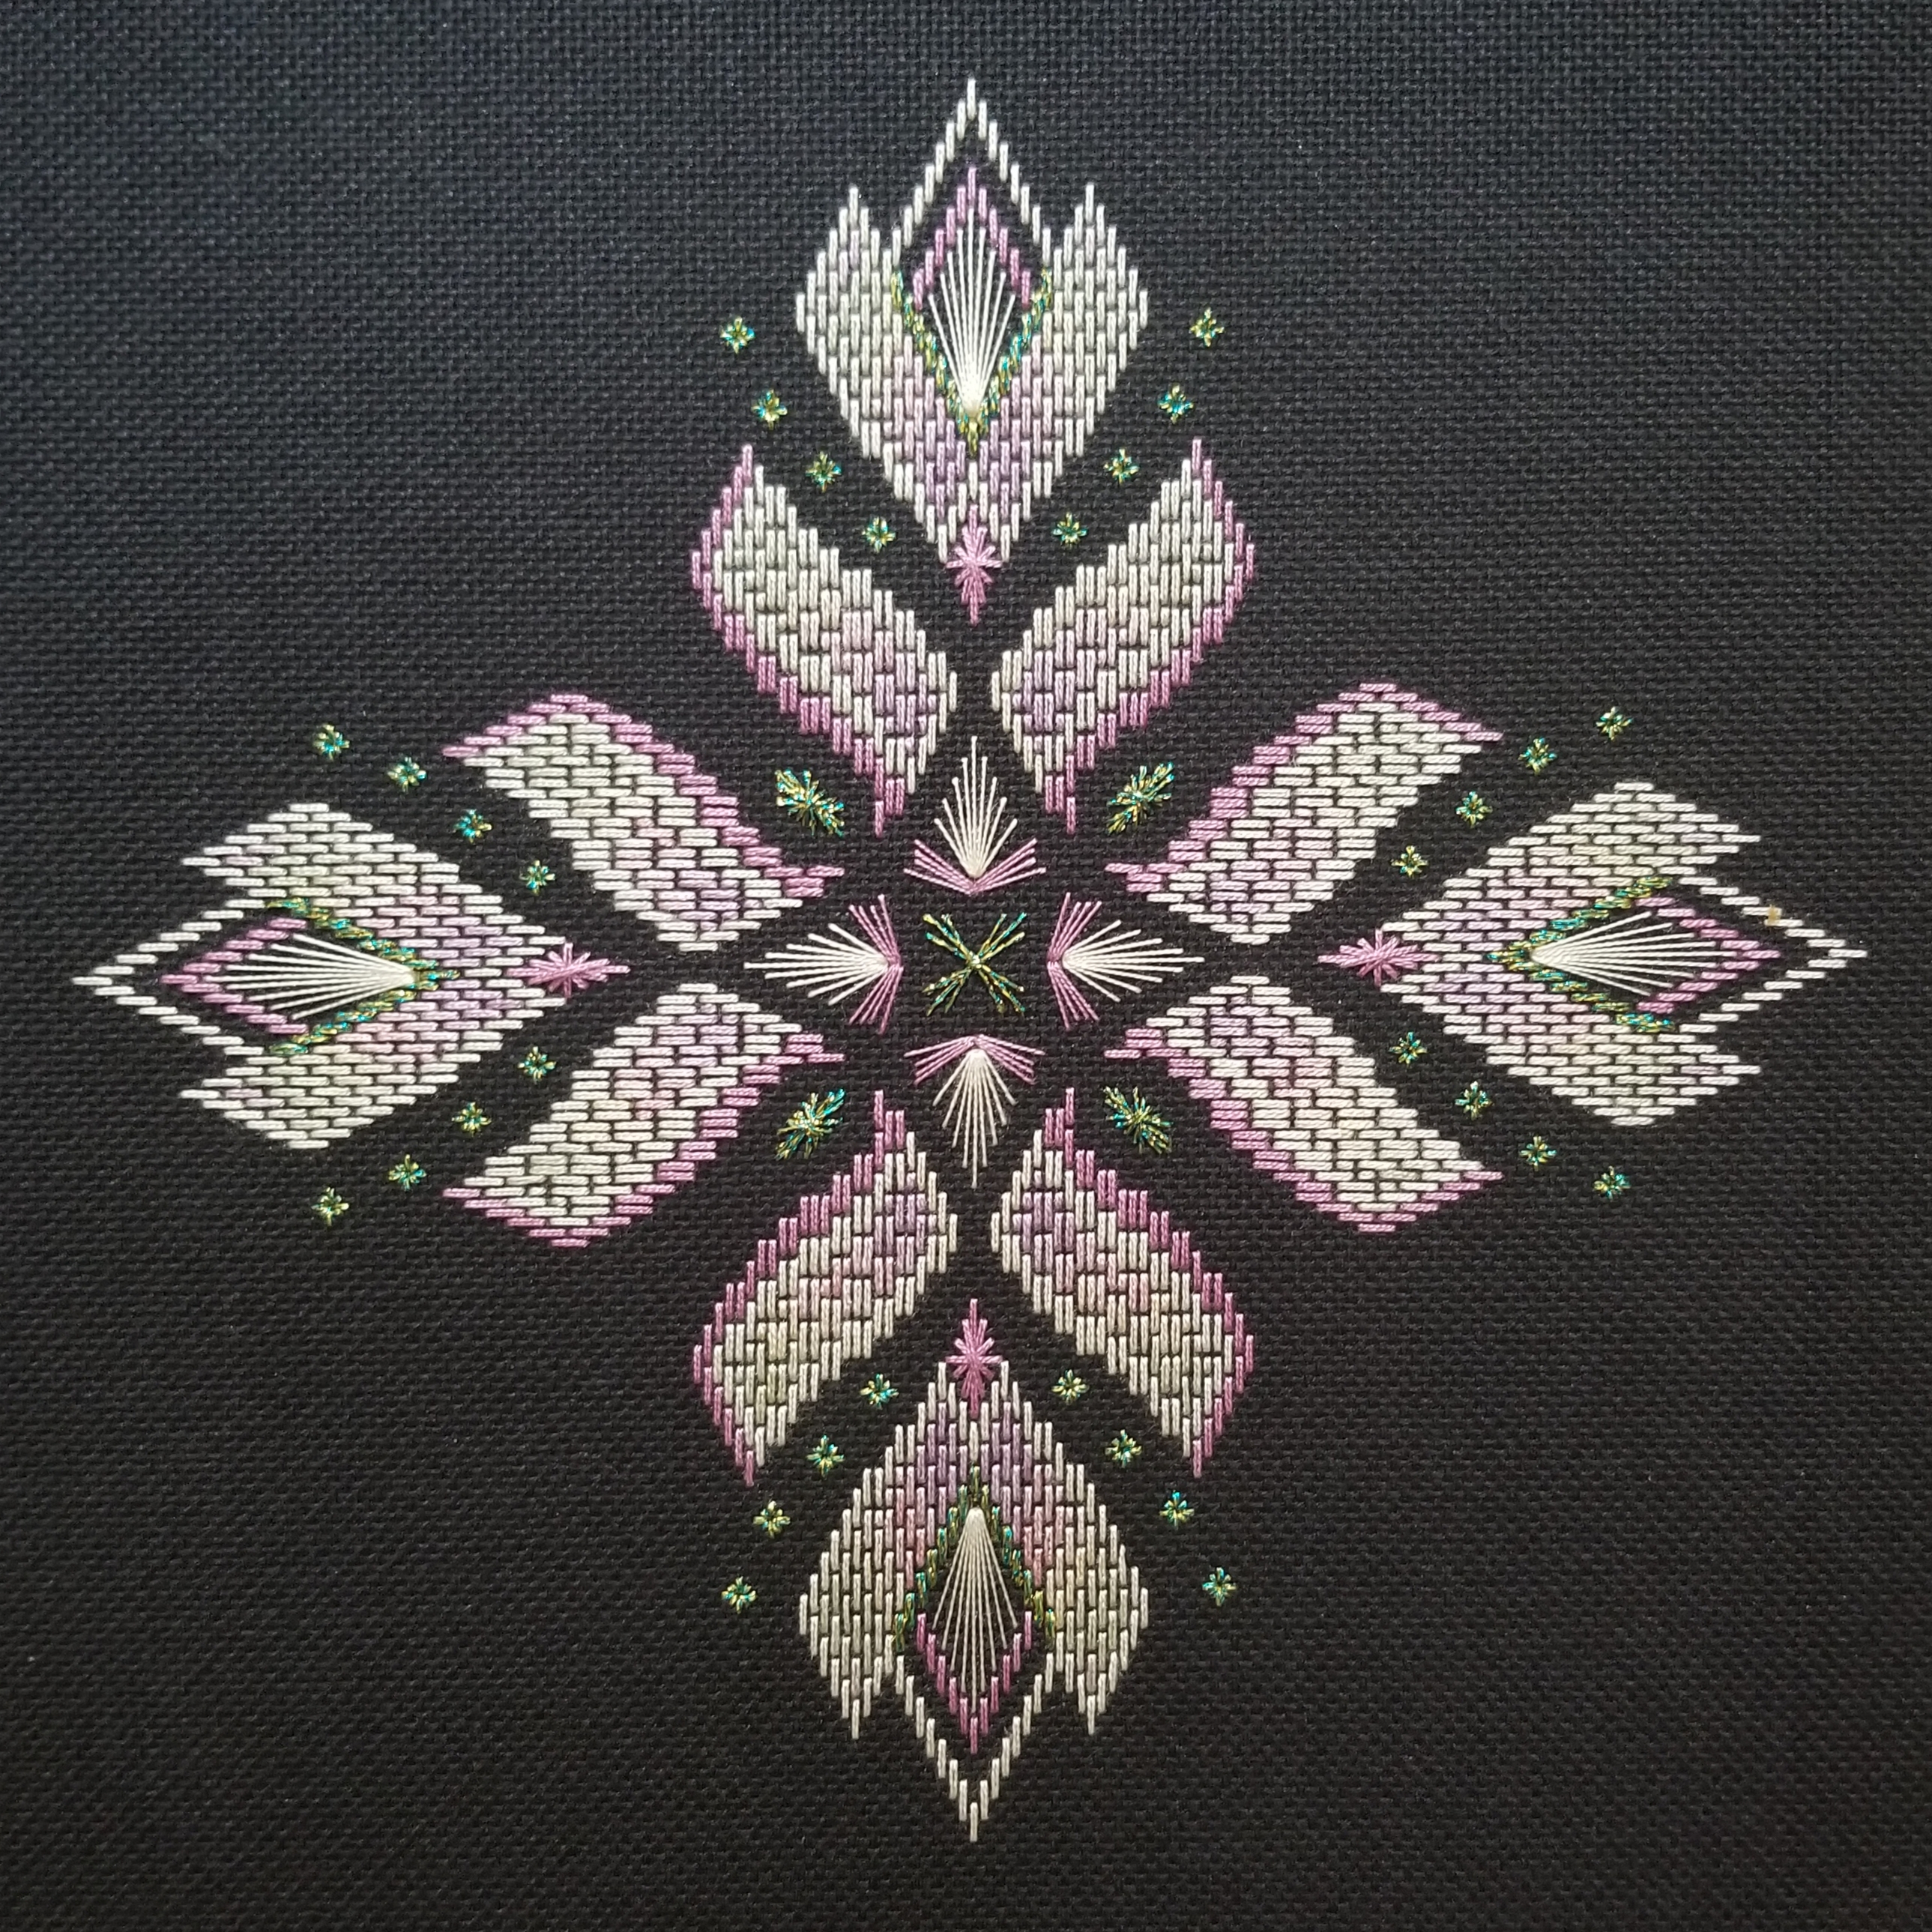
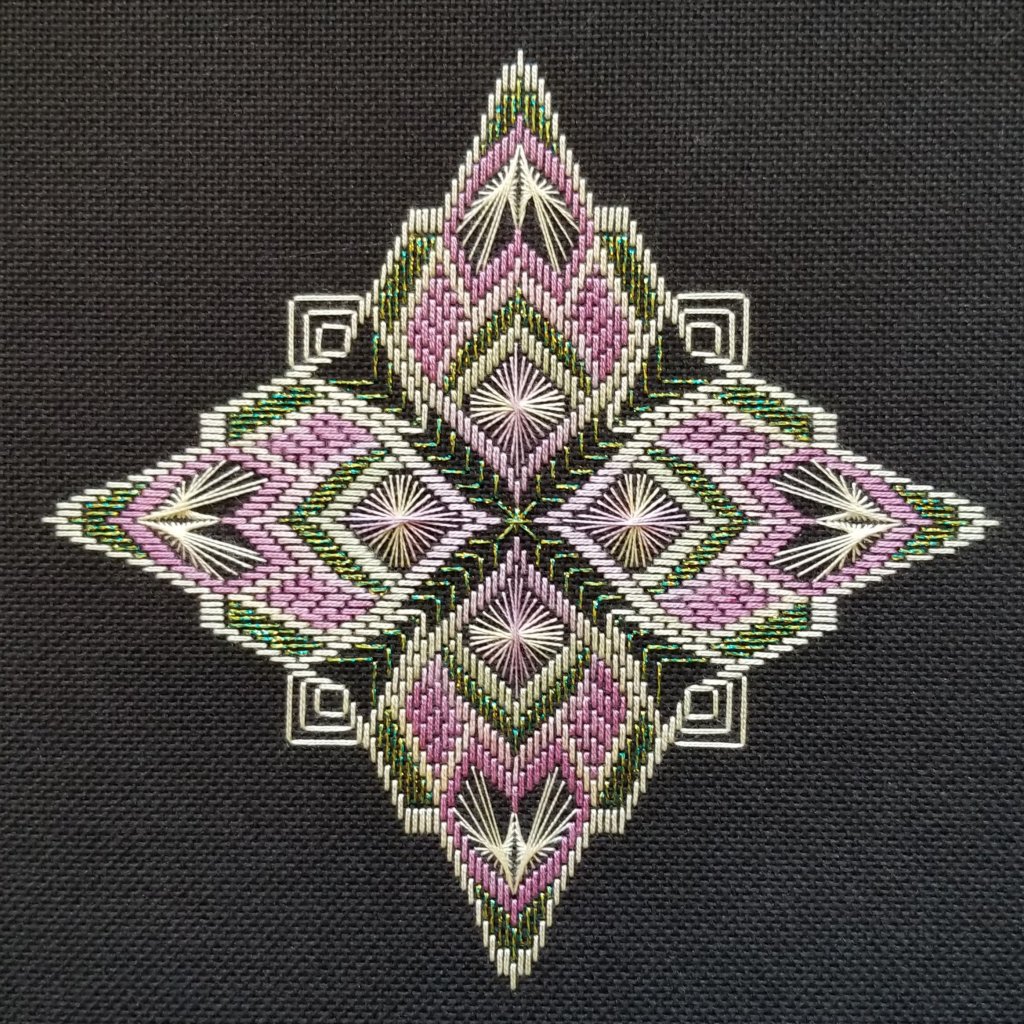
What I am calling the companion piece to Orchid Lady by Mary Knapp is Starburst by Patricia Hartman. They are both on black Congress Cloth using Heather as the key overdyed thread in my kit from Ann-Marie Anderson-Mayes from Australia. The others at ANG Main Line Stitchers are stitching Anne-Marie’s design, Celestial Twist, with her threads.
Oddly enough, the same 4 threads are all I need for this piece and I have plenty.
I love the movement of the 4-way bargello pattern. Very appealing design. It was in the ANG Chapter Project Book in 2015 and we did it as a project but I didn’t have time then. So, now I’m doing it. It looks like it’s bursting out from the center!

Filed under: Books in My Library, Needlepoint 202 by Ruth Dilts, Needlepoint Books, Shapes of Needlepoint Circles, Squares, Triangles, Rectangles - Series I by Sandra Arthur, Shapes of Needlepoint Corners, Hexagrams, Ovals, Parallelograms - Series III by Sandra Arthur, Shapes of Needlepoint Diagonals, Horizontals, Verticals - Series IV by Sandra Arthur, Shapes of Needlepoint Diamonds, Hearts, Octagons, and Stars - Series II by Sandra Arthur, Tisket, Tasket, Lots and Lost of Baskets by Sandra Arthur
Books are always appreciated! And, I’m sure I’ll enjoy these.
In May 2012, I donated quite a few books in an effort to make room available for what turns out to be more books (https://melitastitches4fun.com/2012/05/20/books-no-longer-in-my-library/). I still have (probably) more books than I need or use. Then in August 2012, I started a post of “Books I Am Keeping” but never completed that draft. That was almost 10 years ago! Well, I think I’d like to resurrect that idea and discuss books I do own. So, this is my first post to begin a series of book reviews.
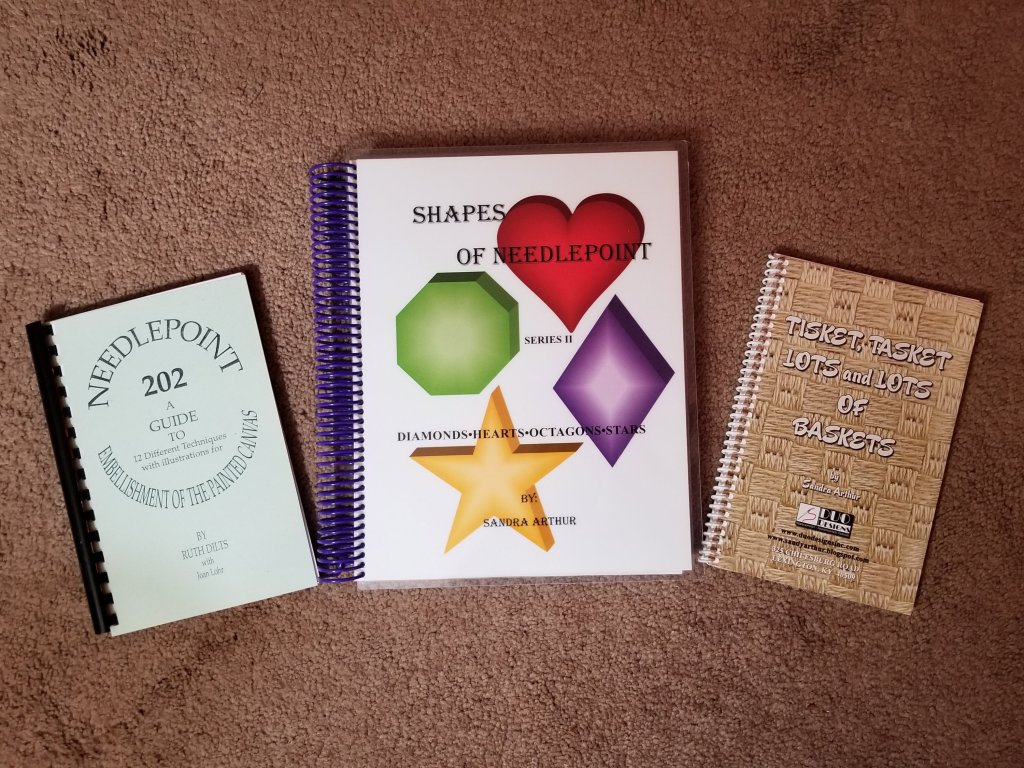
Needlepoint 202 A Guide to 12 Different Techniques with Illustrations for Embellishment of the Painted Canvas by Ruth Dilts intrigued me because my ANG Main Line Stitchers chapter has been discussing how to stitch painted canvases. I’ve not read every page but I found the discussions of thread painting and tufted couching particularly interesting. The book (from 2007) provides stitch guides for 12 painted canvases of which I easily found 4 are still available (online google search) including: Baby Carriage by Cooper Oaks, Moose in the Birches (Oval) by Kathy Schenkel, Slavic Doll by Shelly Tribbey, and Grape House Gingerbread House by Susan Roberts. The stitch selections for all the canvases are still interesting to read. I liked the thread blending for the shading of the Water Maiden by Terry Medaris (Sundance Designs). That canvas doesn’t appear to be available but the shading on the painted canvas is seen quite often and is similar to that seen in Madonna #2 by Terry Medaris (Sundance Designs). There are 42 stitch diagrams in addition to the technique diagrams. And, Ruth discusses aspects of 32 threads used in the models. I didn’t know that the twist of Splendor is tighter than most silks making it easier to use and unlikely to snag on your fingers/hands (unless they are really rough). I haven’t read too many stitch guides for painted canvases but what I have read are presented in a table with columns for Area, Thread, and Stitches. Ruth writes conversationally rather than in a table format which I found made for more of an enjoyable read.
Shapes of Needlepoint Diamonds, Hearts, Octagons, and Stars – Series II completes my collection of Sandra Arthur’s series of 4 books covering all different shapes. I love that Sandy indexed them by shape and by thread count. However, they can be adjusted to fit the space you have available. The diagrams are large and easy to read. Google duodesignsinc and look for the tab for books and you’ll see details of each 100-page book and examples of the diagrams. Past Christmases brought the others in Sandy’s Shapes of Needlepoint. So, I might as well include them in this post as well. They are: Circles, Squares, Triangles, Rectangles – Series I; Corners, Hexagrams, Ovals, Parallelograms – Series III; and Diagonals, Horizontals, Verticals – Series IV.
While waiting for my husband to golf at Shipyard on Hilton Head last month, I pulled up a chair to the book table at Needlepoint Junction (basically just across the street in a mall) and found Tisket, Tasket, Lots and Lots of Baskets by Sandra Arthur. I have an idea about baskets that I’d like to pursue at some point. Sandy really captures the art of basketry. I hadn’t see this book on her website or in her Etsy shop. So, this was a must have!

Filed under: Uncategorized
It was 2 years ago when I got a lovely project and matching thread bag from Linda who excels as a needlepointer and quilter! I do enjoy being a test recipient of new designs. This, “Sew Together Bag” has the same fabric making for quite a lovely set!
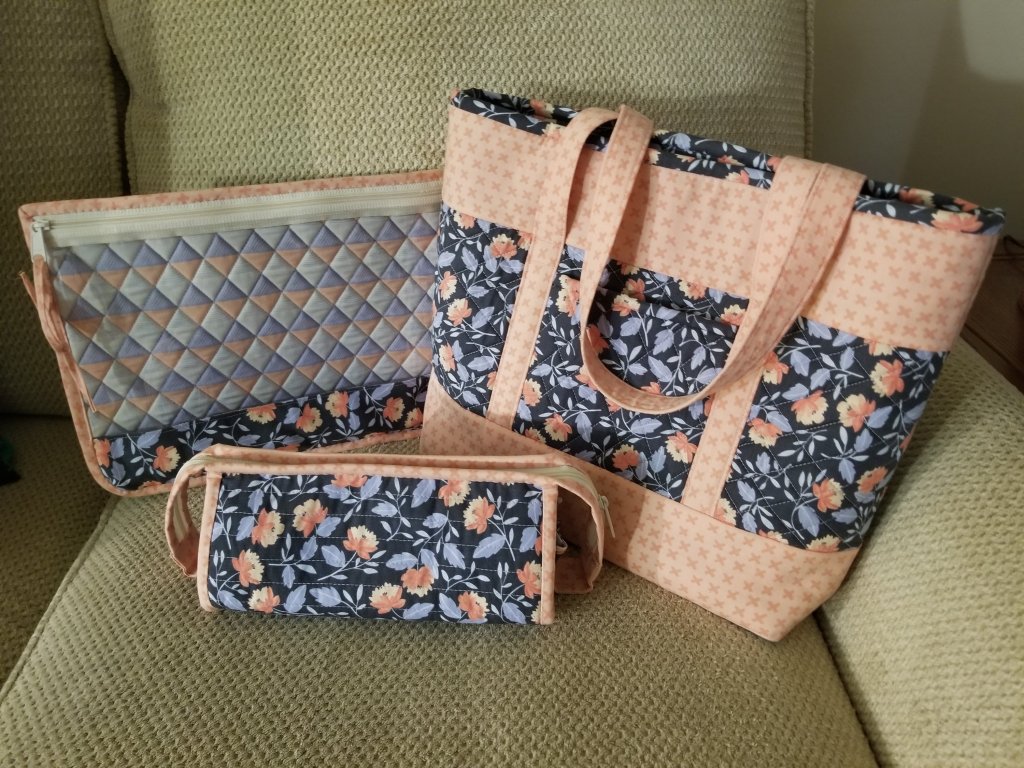
There are 4 open pockets, 3 zippered pockets, and a zipper to close up with two carry handles! It’ll hold tools, threads, or both! It fits nicely inside the matching project bag. Linda even included a lovely selection of threads. I can sew a button back on but that’s it. This looks very complicated to put together. Thanks again Linda!

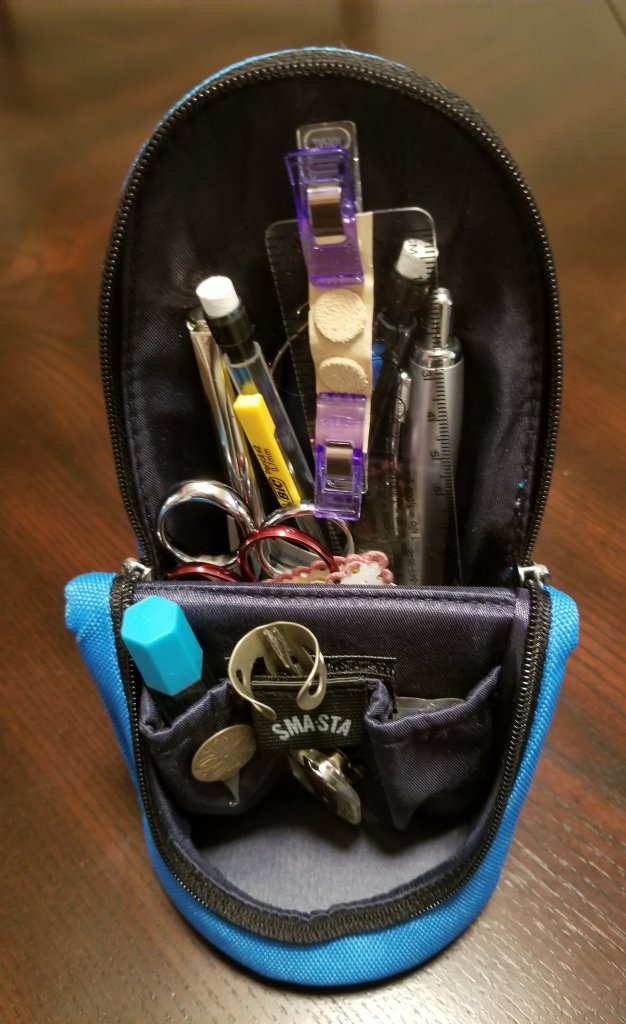
By finally exchanging Christmas gifts with Linda, I can now use my Smasta! It’s a fantastic travel tool tote because it zippers open and stands up to show all your tools and have them ready at your fingertips. I saw someone using it at the EGA Seminar and ordered one for me and one for Linda. Not as pretty but hopefully as useful and she didn’t already have it!

Filed under: ANG CyberPointer's Chapter, ANG Main Line Stitchers Chapter, Orchid Lady by Mary Knapp
Heather is the key overdyed thread in my kit from Ann-Marie Anderson-Mayes in Australia for Orchid Lady by Mary Knapp on black Congress Cloth. The others at ANG Main Line Stitchers are stitching Anne-Marie’s design, Celestial Twist, with her threads.
The 4 center Rhodes used 4 strands from the overdyed skein with the away knot placed the same distance from the starting hole. Since I rotated the canvas as I stitched, the green fell in the center long stitches in a circular position.
An Amadeus that share the center holes can be tricky on the second side unless you hold your working thread off to the side so you can see the holes for you to insert needle into and then pull the thread taut. A huge help especially on black Congress Cloth! I decided to make these and the outer bargello border yellow.
There is plenty of threads for the next piece.
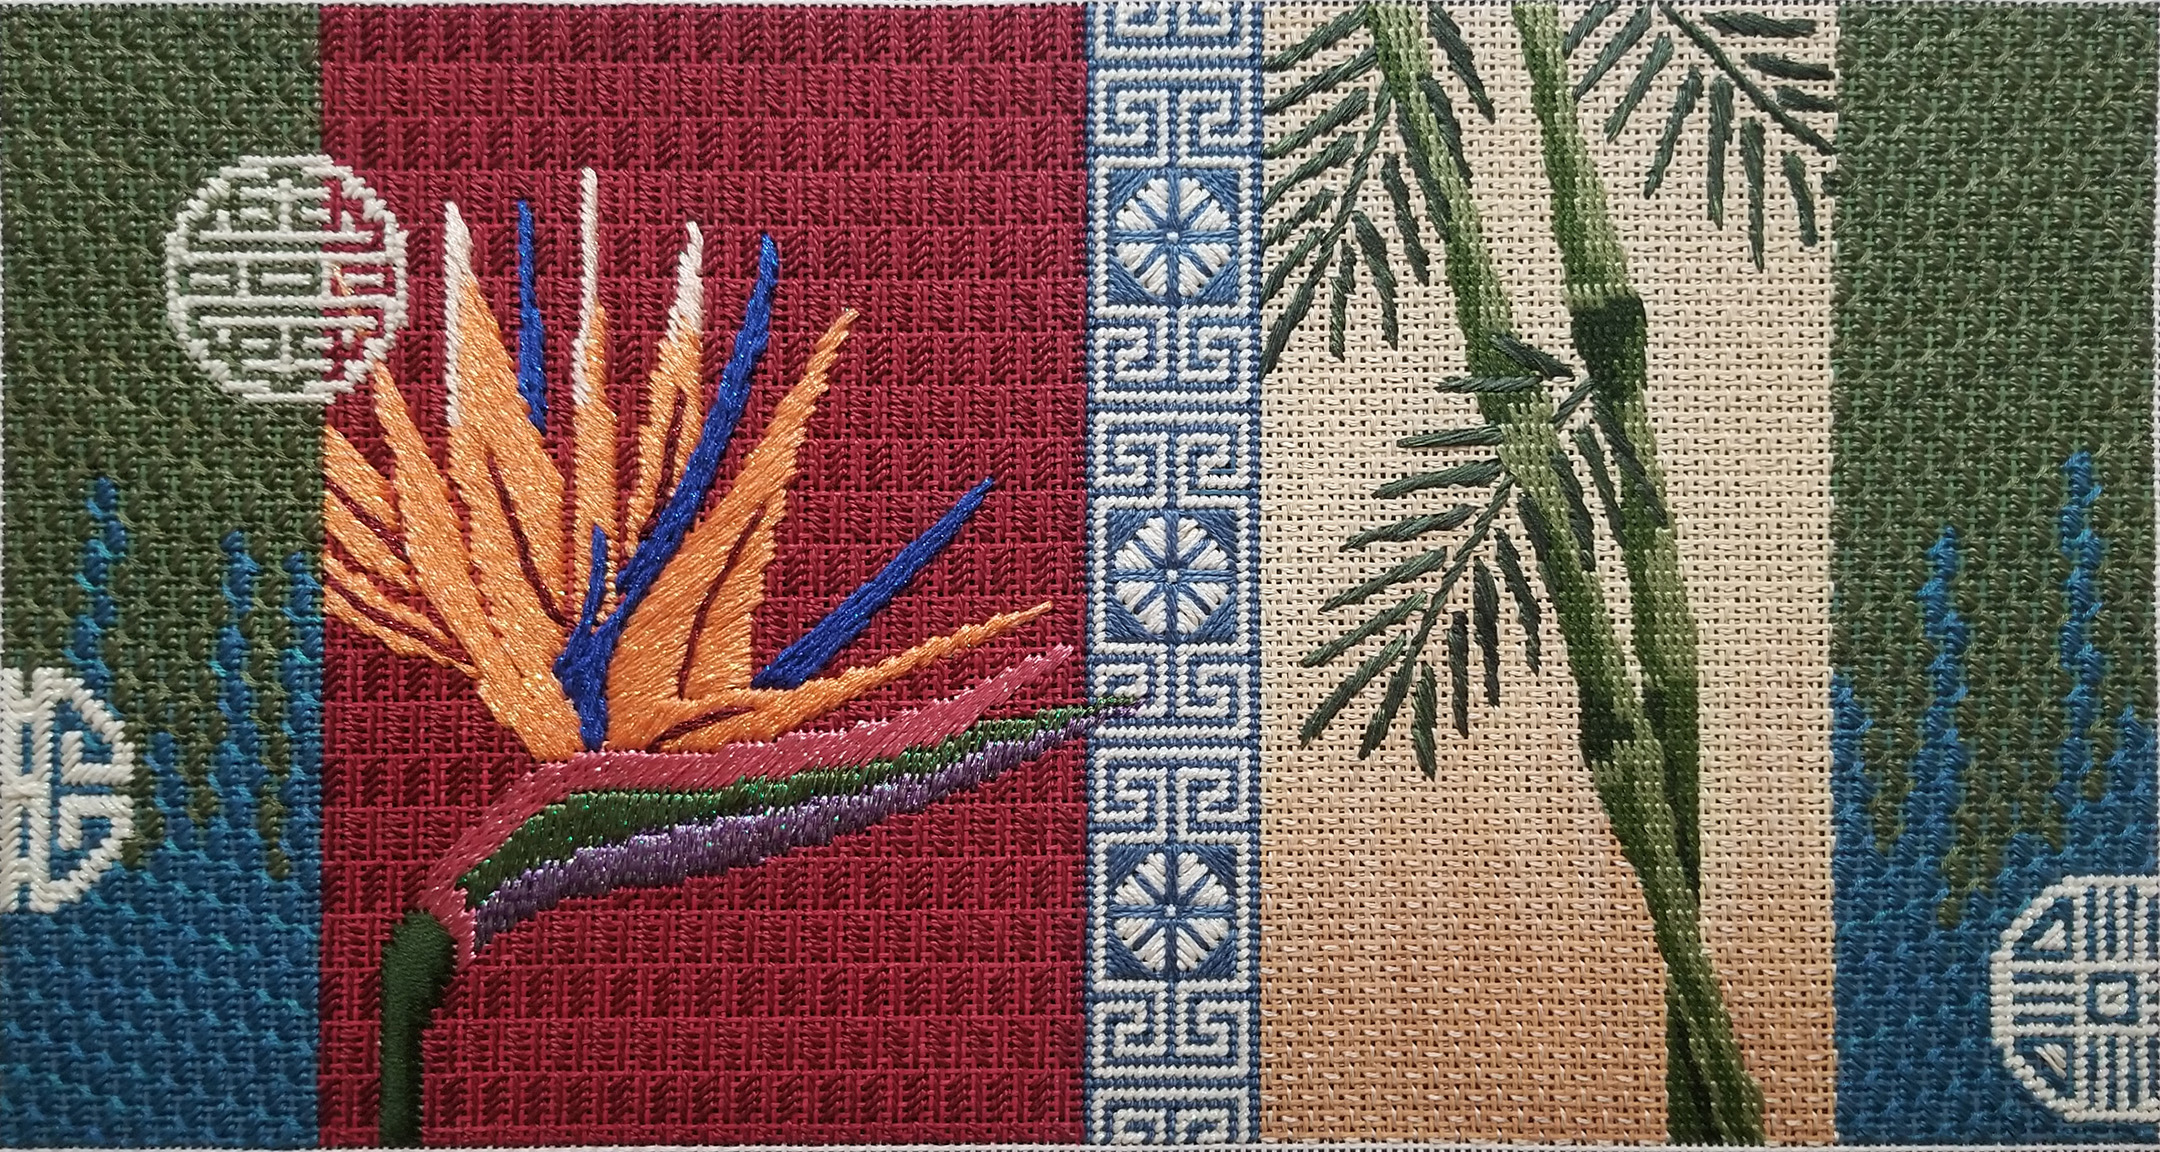
Filed under: ANG Main Line Stitchers Chapter, ANG Seminar 2017, JP Bird of Paradise & Bamboo
Sometime before March of 2016, I had purchased JP’s Bird of Paradise & Bamboo canvas at Gazebo Plus in New Hope, PA (sad to say, it has since closed permanently). In March of 2016, I found a companion piece at Waste Knot in Arlington, VA, JP’s Orchid & Bamboo with almost the same motifs.
My opportunity to begin them came with the 2017 Seminar where Cynthia Thomas was having a Painted Canvas Embellishment Class. She was gracious enough to address the additional panel on the second canvas for the orchid since I wanted to have them match as much as possible. The Bird of Paradise is done now thanks to our painted canvas project at ANG Main Line Stitchers and Beth for stitching the same canvas. Beth used threads and stitches suggested by Betsy at Fireside Stitchery (although I’m not going to post her piece here, I will mention some differences). Beth actually finished before I did! So, I had to buckle down and get ‘er done for this month’s meeting! Members of our chapter continue to enjoy our canvas discussions during our MLS monthly meetings.
I forgot to post this last month. So, here are the final discussion points.
Bird of Paradise Panel: Both stitch guide writers, Betsy (for Beth’s) and Cynthia (for mine), selected the same pattern but oriented it in the opposite direction. Isn’t that amazing that of all the stitches, they selected the same one. Both threads are red although Beth used a very slightly overdyed cotton floss and I used a solid perle. Both pieces highlight the lovely colors in a Bird of Paradise. Beth used all Vineyard Silks for the flower and Rainbow Linen in tent stitch for the stalk. I used all sparkly threads for the flower and Needlepoint Inc Silk over a padding of Very Velvet for the stalk.
Center Blue and Beige Panel: Beth stitched this center panel in all tent stitch as had been done for the 3 larger coin motifs on the outer left and right panels. On this panel, a little sparkle is added by using Neon Rays+ and Silk Lamé Braid (rather than the beige ThreadworX for the 3 larger coin motifs). I stayed with the same beige Kreinik used for the 3 larger coin motifs and also used Vineyard Silk for the blue areas. I stitched mostly tent except for 3 square motifs where I used diagonal stitches to fill in the area.
Bamboo Panel: Beth transitioned from a light ThreadworX overdyed thread to a darker Sampler Thread overdyed thread using the Nobuko stitch for a full coverage. I used 2 strands of a beige Splendor in a very open stitch (Railway Woven) allowing the shading from the painted canvas to show. I used Interlocking Gobelin for the stalks and random or long/short as did Beth for the leaves.
So, how long will it take for me to finish the other one? I hope to finish it in 2022. They will be a set of pillows and probably my last pillows for quite some time! Have you seen the Dr. Rick commercial with the pillows? Well, that woman will be me and my husband will be Dr. Rick if I don’t stop with the pillows (do a google search for youtube dr rick pillows – makes me laugh every time)!