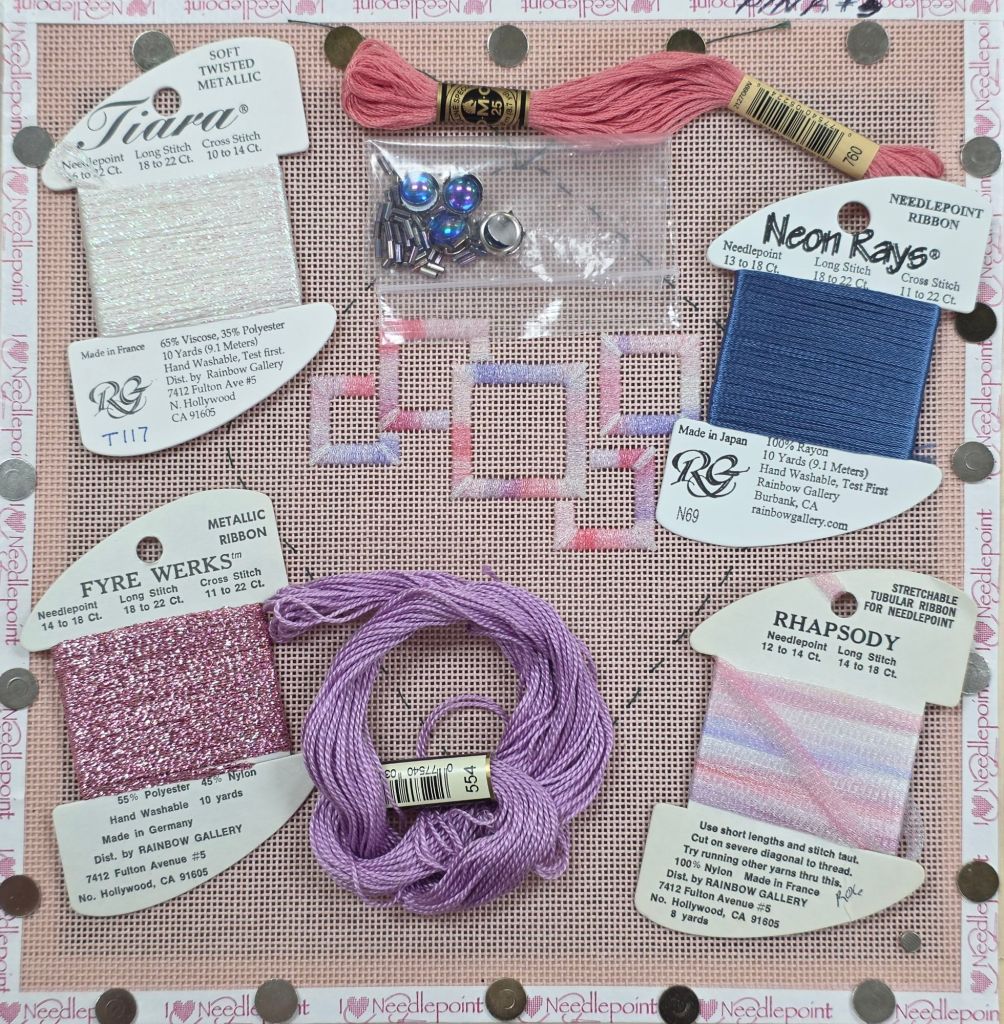
Peace is the third in The Cabochons series by Susan Portra. It’s on a light pink canvas but the blue and purple save it from being too pink.
I forgot to get a photo of the threads first. So, you see the Rhapsody boxes.
Our ANG Main Line Stitchers chapter Stitch-in was Saturday at Fireside Stitchery. There were 3 men stitching and not either of the 2 guys from our chapter!
Linda and I searched for red threads for Bring the Joy Santa that is a painted canvas the chapter is working on. Then, I started looking for threads for a counted project we’ll be starting in March but couldn’t decide on anything. Then, I got to stitch the Fyre Werks into Peace which was easy enough.
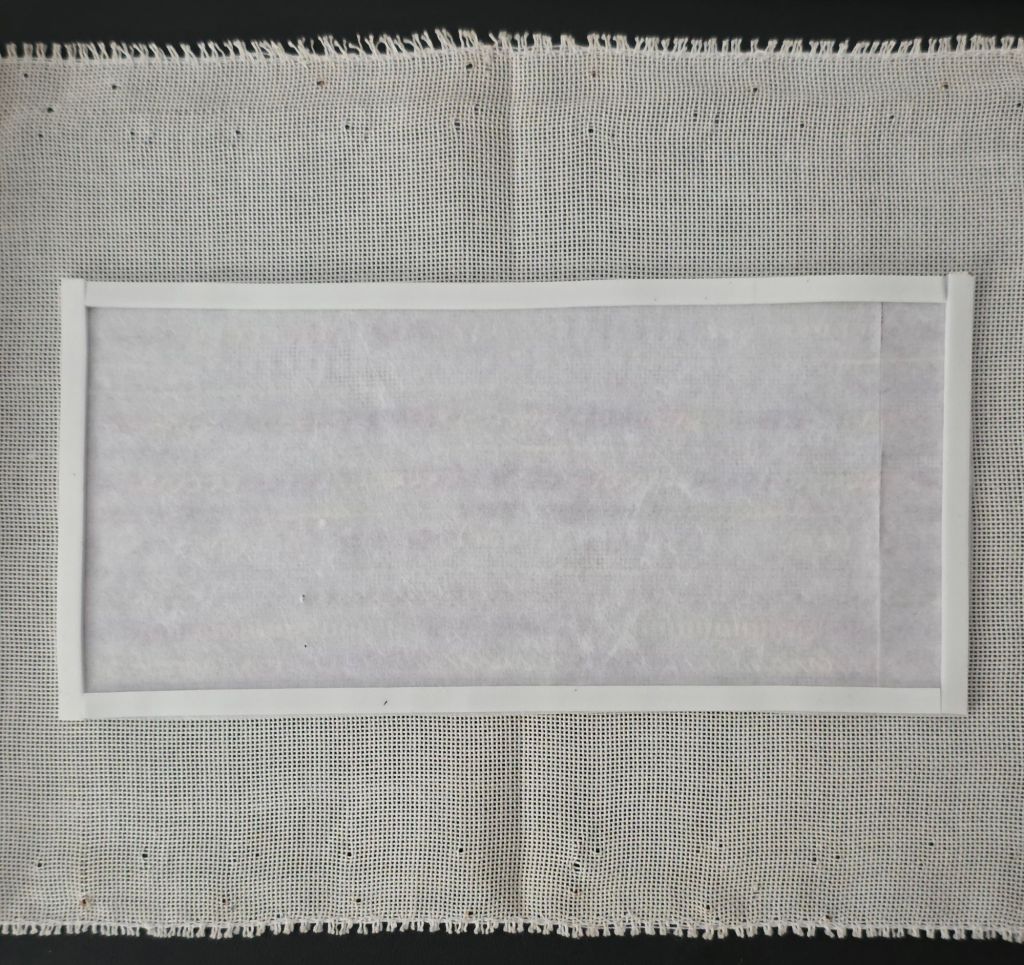
Shortly after I got to the blue tent stitches, I realized that the basted border wasn’t going to hold the entire design as charted. I had to move the motif down by restitching the basted border. Luckily, I had enough canvas to move the border up 6 canvas threads. By then, it was about time to head home anyway. Four hours flew by!
Here’s the rebasted border and my progress.
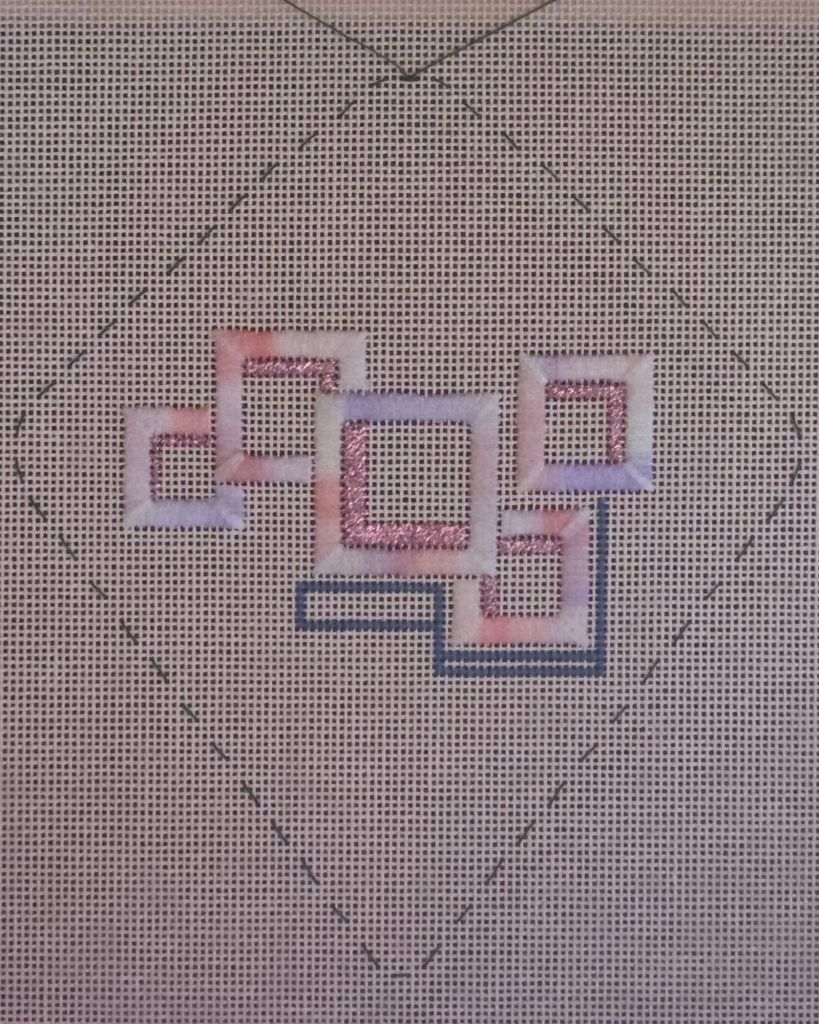
Counting the tent stitch blue border requires more concentration than a Stitch-In allows with our conversation and distractions of lovely painted canvases and walls of threads!
Filed under: Daisy Delight Box with Mary Alice Sinton, Embroidery Guild of America, Fauquier County Chapter
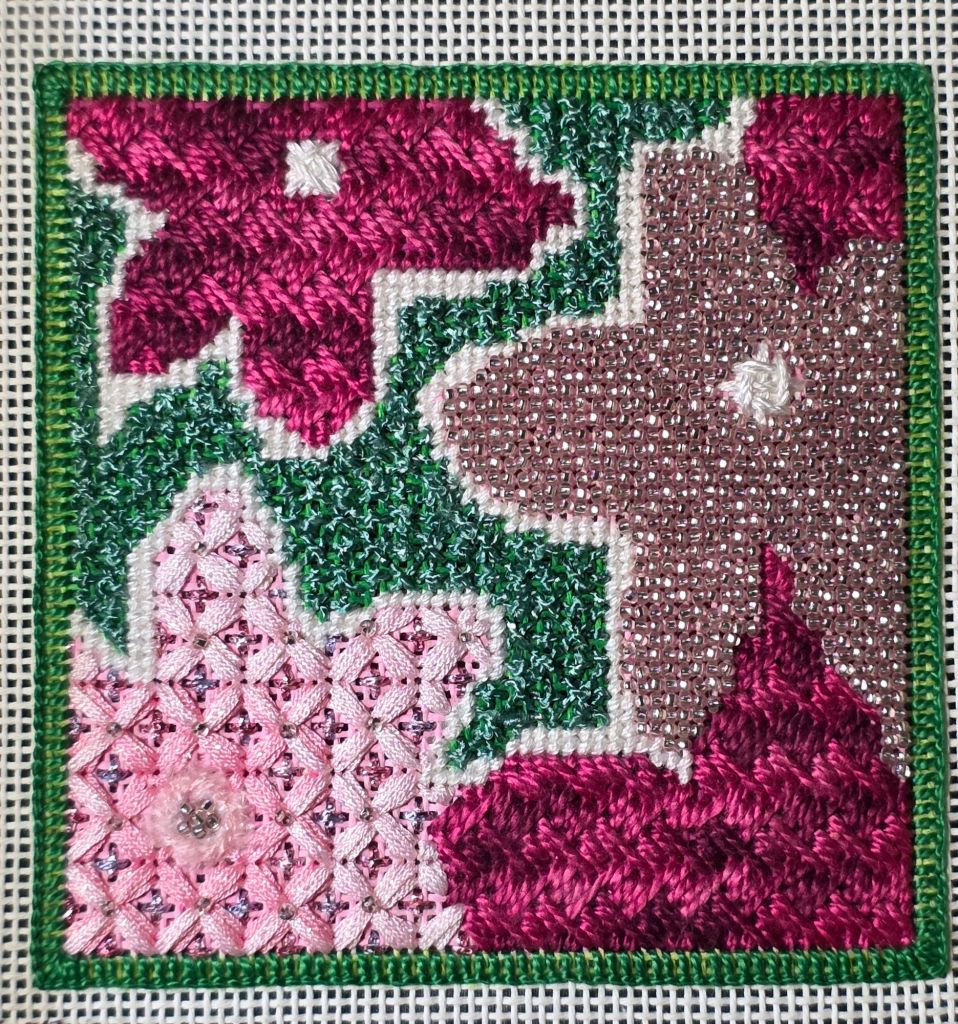
After saying that I needed to lighten up on the beads, I didn’t. The blue/white and white/red in the right are loaded!
The pointed tip thin petal pink/white flower is less believe it or not. You can see fabric showing through the beads on the petals. The center is supposed to be padded. The white and the contrast to the skinny petals makes it looks bigger.
I like the flowers looking like they are in full bloom. So, only the pointed tip thin petals flowers are lighter.
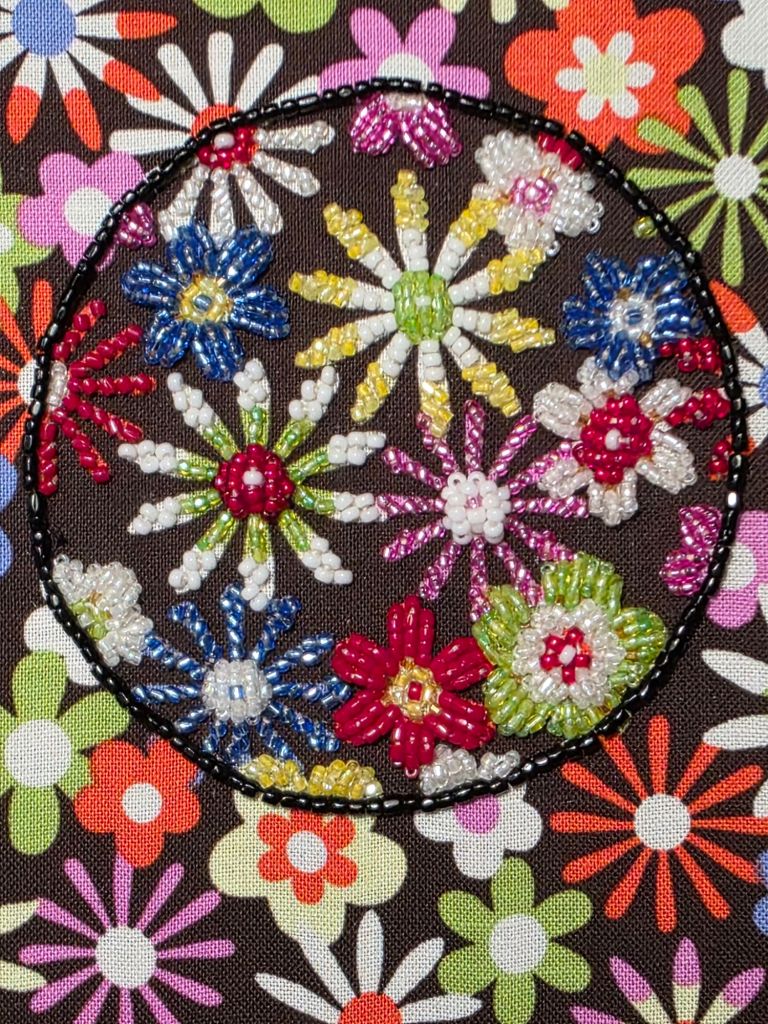
Since this is working up quickly and is such fun to watch bloom, I am going all the way to completion.
Next up is background and finishing.
Filed under: Embroidery Guild of America, Mid-Atlantic Region, Nature's Palette THaP - Catherine Jordan
Catherine Jordan led Nature’s Palette a few years ago at an EGA Mid-Atlantic Region meeting (https://melitastitches4fun.com/2022/09/17/thap-class-blackwork-on-natures-palette/). Catherine let us take extra leaves she had painted (acrylic paints). When I went to the two Guilds (I was so busy there are no pictures from either class), I had more fun painting the leaves than stitching them (https://melitastitches4fun.com/2022/11/02/painted-magnolia-leaves/). Catherine had given us a reversible blackwork pattern that was way above my pay grade.
Finally, I finished my second leaf which is just a grid and the third leaf has one small motif used in the first leaf.

It does make me happy to finish this. I glued (E6000) wooden dowels onto the back of each leaf and placed them in a vase for fall decor.

Filed under: Daisy Delight Box with Mary Alice Sinton, Embroidery Guild of America, Fauquier County Chapter
It’s not a race! That what Mary Alice Sinton told us when she showed the progress on another student’s Daisy Delight Box during the afternoon session. Good thing because I felt like I was all thumbs in the morning especially using the Koma but I think what I did by the end of class looks good. I understand how to use the Koma and just need to focus.
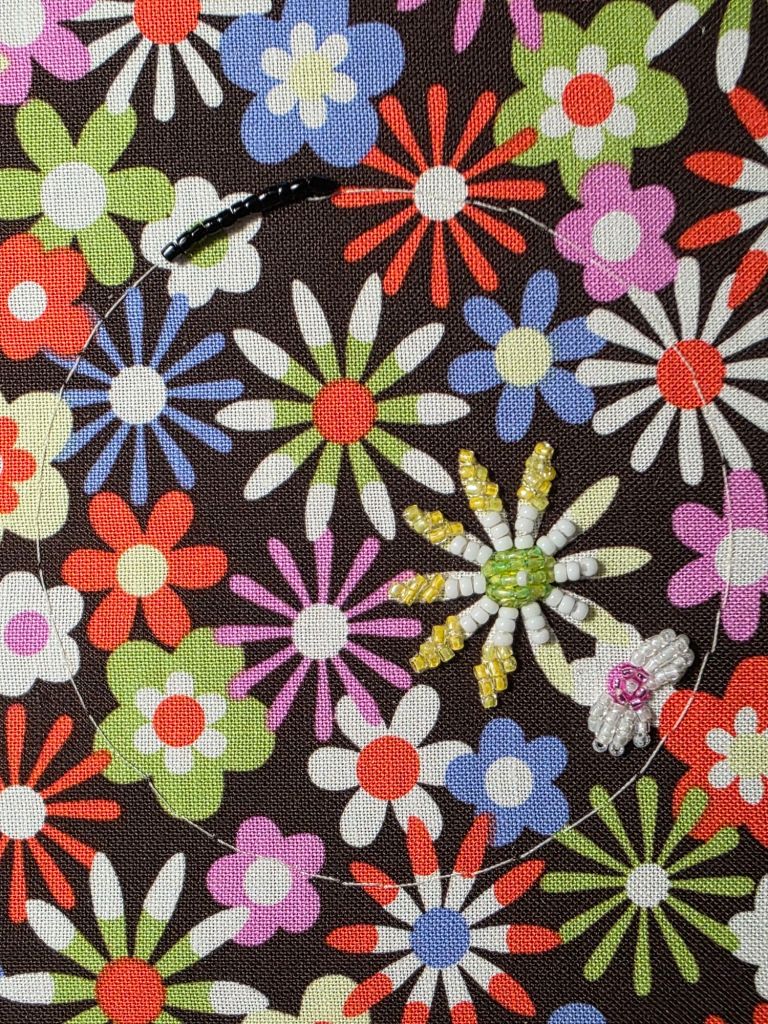
Mary Alice’s critique was that I don’t need to cram the beads together to cover all the fabric. So, I will continue on these flowers as I started but will adjust going forward.
First, I needed to finish the border of black tri-cut beads. I do love the Koma for couching beads! It took some practice and getting used it but as I neared the end, I would have liked to have more to do! The flowers don’t need the Koma.

Filed under: Daisy Delight Box with Mary Alice Sinton, Embroidery Guild of America, Fauquier County Chapter
Monday’s Zoom class (10 am – 5 pm) is Daisy Delight Box with Mary Alice Sinton sponsored by the EGA Fauquier County Chapter. It’s been awhile since doing an all day Zoom class but it looks like it’s going to be fun. This was not one of my 2025 goals but I wanted to try this entry-level piece of Japanese Bead Embroidery and there is nobody better to teach it than Mary Alice.
Ample materials have been supplied. The satin round box is also called a Minaudiere. The lovely floral 100% cotton fabric is called Flowers Aplenty by Michel Miller. The beads are a variety of Tri-cut and Seed beads (looks like way too many for the 3″ diameter round top). There are 2 sizes of Japanese needles (really tiny things-no extras-so I must not lose them), needle threader (a must have), and Gutermann threads. I’m guessing the brown felt is a mini bead tray (under the 2 spools of thread). I purchased (extra) the Japanese Beading Koma made by her husband John (wooden spool with a black band wrapped around it tightly) although Mary Alice will teach the class in a manner that doesn’t require using it since the sponsoring chapter wanted to keep costs down. But, I want to give it a try.

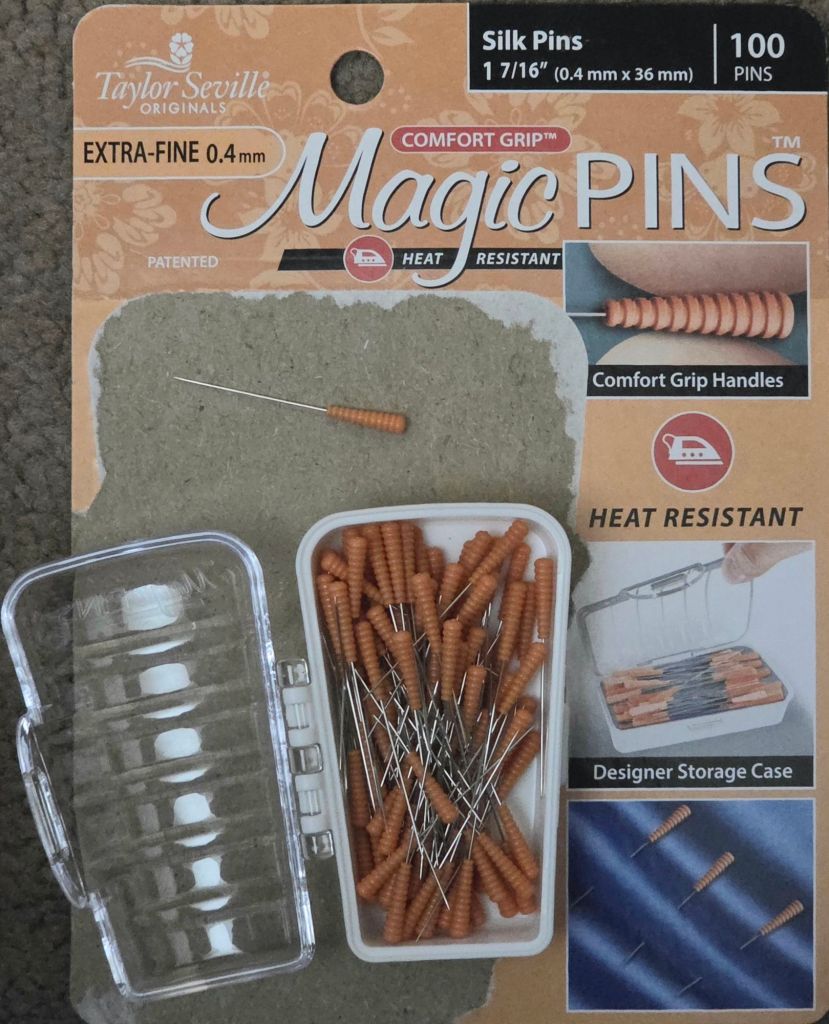
Not having Joann’s anymore or quilt shops near me has me relying on Michael’s but their online inventory let me down for silk pins. The silk pins are supposed to be very fine so as not to leave holes in the fabric when pinning through it. So, I ordered these on Friday and had them on Sunday. These are extra fine at 0.4 mm and I like the comfort grip feature. Cute storage case too.
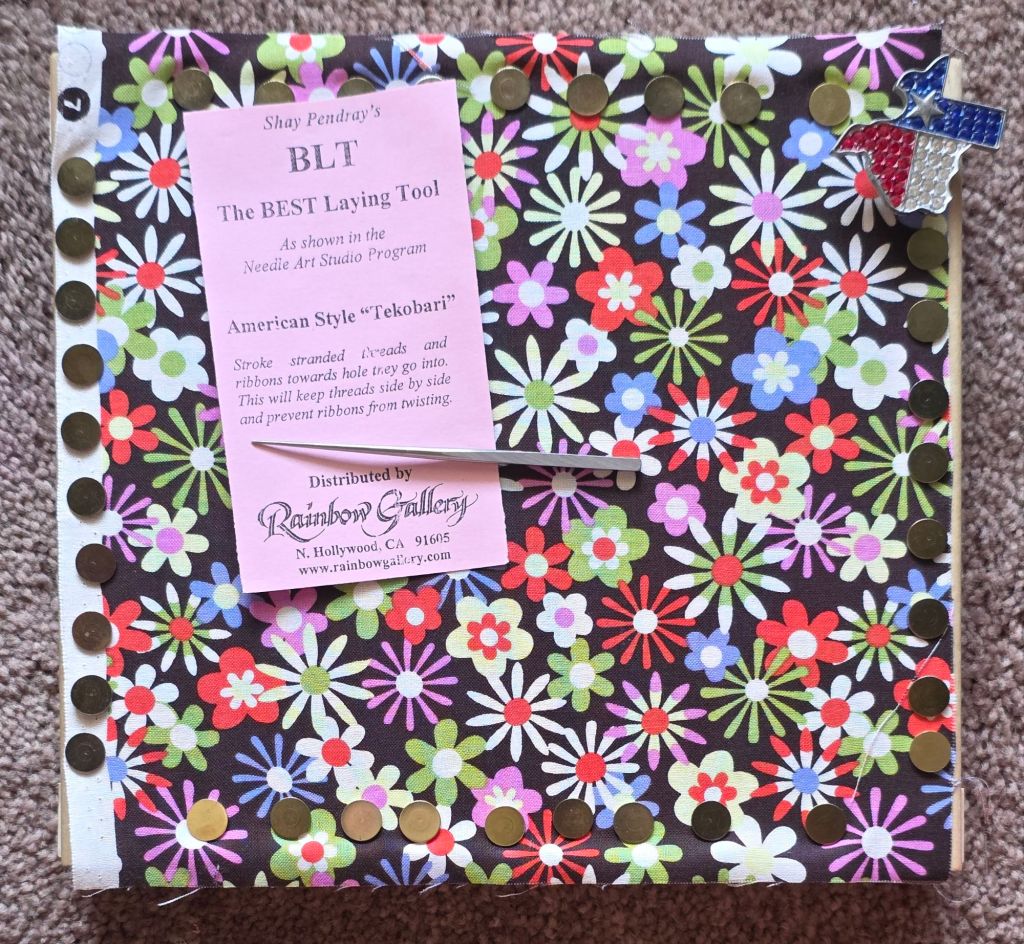
I don’t have an awl or a real Tekobari tool but I was able to find my BEST Laying Tool (in my 3rd tool tote not counting my travel tool kit). Inquiring minds might ask why 3? Stuff I use very often, is in a bag within arm’s reach next to my stitching chair. Stuff I need often enough is a short walk away from my stitching chair in a lovely tool tote that Linda made. And, stuff I rarely use is my 3rd tool tote in the basement. I prefer my fancy trolley tool for laying threads at home and the standard Trolley Tool for travel. My fancy laying tool is not even in one those totes just mentioned. That is in my Ort Box with a Twist which is next to a large coffee cup (thanks again Linda) on the top of the table within arm’s reach of my stitching chair! My happy place.

I’ve read the directions several times, placed the fabric on Evertites (very taut), placed my Texas Lone Star needle minder on the frame, and am ready for class! Mary Alice has such clear instructions that I’m resisting the urge to baste the outline and create the border using the Vertical Horizontal Technique.
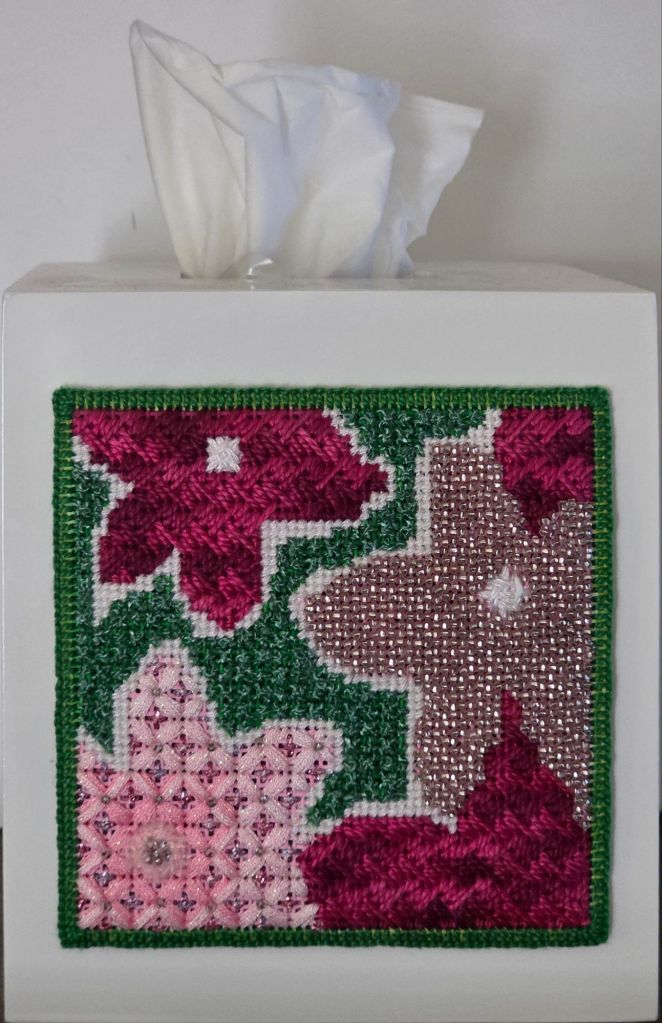
I finally decided what to do with Floral Fantasy, a small (4″ square) painted canvas by an unknown designer. After placing a buttonhole border around the design DMC Pearl 5 in green DMC 700, I whip stitched a piece of ultrasuede backing to it.
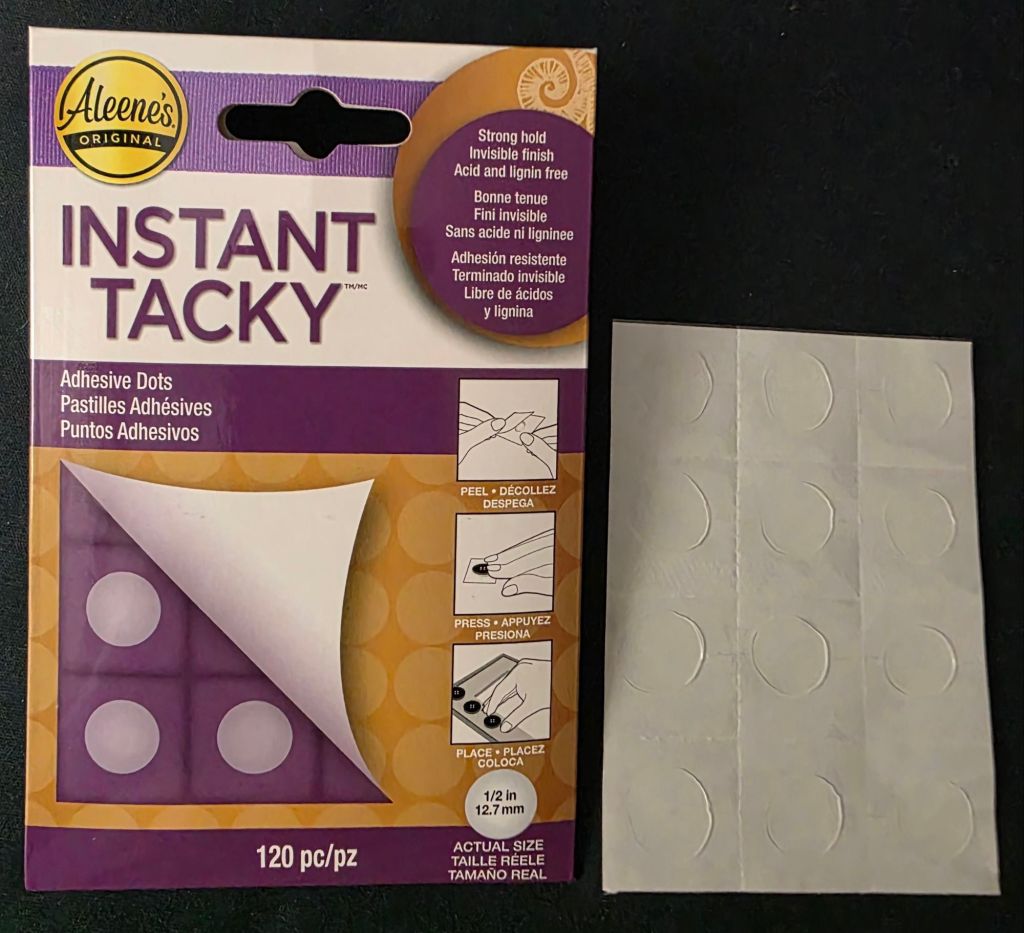
I held the ultrasuede in place with 4 Instant Tacky dots from Aleene’s as recommended by Ellen Johnson of Serendipity during her recent finishing class. Since they are acid and lignin free, I placed them on the back of the needlepoint (one near each corner).

The scary part is always cutting the canvas close to the stitching without cutting the threads. But, I did it. The trick is to squish the edge of the buttonhole towards the design before snipping slowly. Then, after all sides are cut, push it back towards the outside.


After placing 4 more pieces of Aleene’s tacky dots on the back of the ultrasuede in the corners, I attached it to the tissue box for our guest bedroom. I’m not worried about the tacky dots leaving a mark on the ultrasuede since I could easily remove the ultrasuede from the piece and reattach a new backing. Even with all those beads it’s not heavy.
I ran out Craf-tex and wasn’t finding it without a fusible interfacing. So, Linda suggested Peltex which she prefers over Craf-tex anyway. Michael’s wasn’t showing any brand in-stock near me. So, I went with Pellon sew-in stabilizer that I was able to find at Hobby Lobby in NJ (got their last yard and on sale) allowing me to continue on my finishing frenzy! It feels like the same weight as the other “heavyweight” one I’ve been using and is the same thickness.

This cabochon was stitched by the end of July but was waiting for me to get motivated to do the finishing. I try not to use glue (messy) and lacing across tab to tab as most finishers do doesn’t thrill me because it loosens easily. But, by lacing into the stabilizer, I can cinch it in place after every couple of tabs.
I had this piece of fabric from Linda along with 2 other fabrics that are actually earmarked for another design utilizing fabric applique that I have one my To Do List. It’s perfect for this ornament and I still have plenty. Aleene’s Instant Tacky Dots are fantastic! I placed one in the inside of the fabric to hold it in place on the magazine board, two dots on the felt that is slightly larger than the board and sewed around running stitch to gather the fabric together. That’s made my finishing so much easier! Making the piece of felt slightly larger made stitching the two sides together easier because the magazine board didn’t get in my way as I attached the cording.

Once my husband was available to be my stationary hook, I made cording with 4 lengths of DMC #5 Pearl 356 used in the design. The loop was done first and attached to the ornament side of the stabilizer. That’s another lifesaving tip! It makes starting and ending the exterior cording so much easier. And, the loop doesn’t twist when it hangs. I was lucky that my stash had the matching DMC Floss 356 to attach the cording.
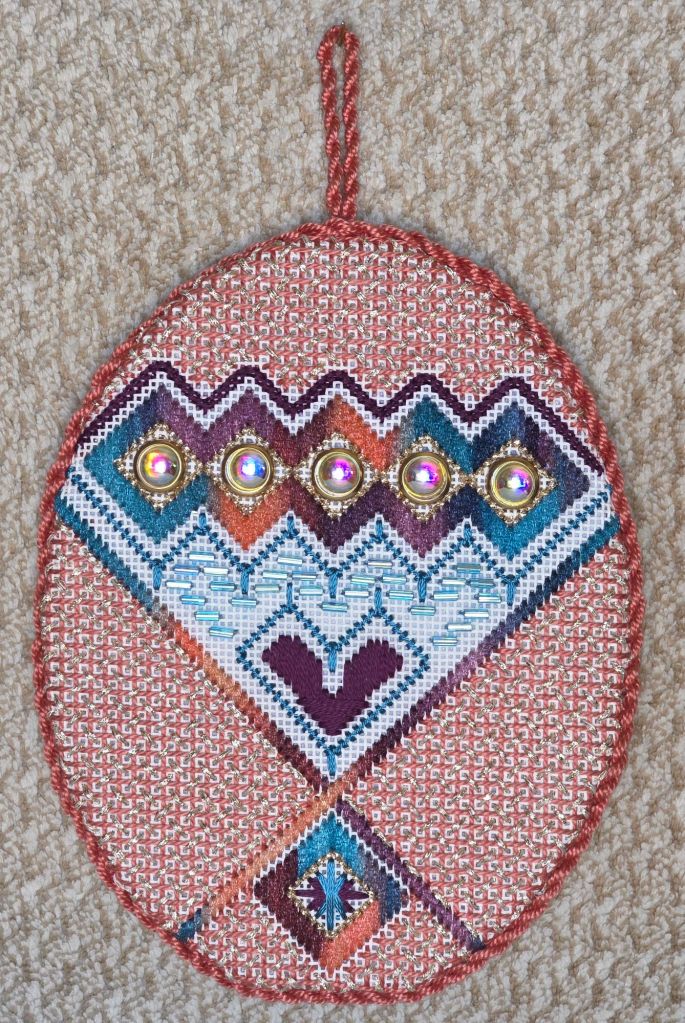
I don’t think anyone would find where I started and ended the outer long cord. That’s usually been a problem but this one worked perfectly. Finishing still takes time but what doesn’t with needlepoint! At least I no longer dread the task. And, I am thrilled to say these Cabochons are some of my best finishes.
In my last post, most people queried said to place the Cabochons on the bottom half. Well, by the time I did the finishing, I had forgotten about that and finished it the way I’d been thinking it should be finished-with them on the top.
Filed under: Brandywine Chapter, Cross Stitch and Beyond by JoAnne Westerhaus, Embroidery Guild of America
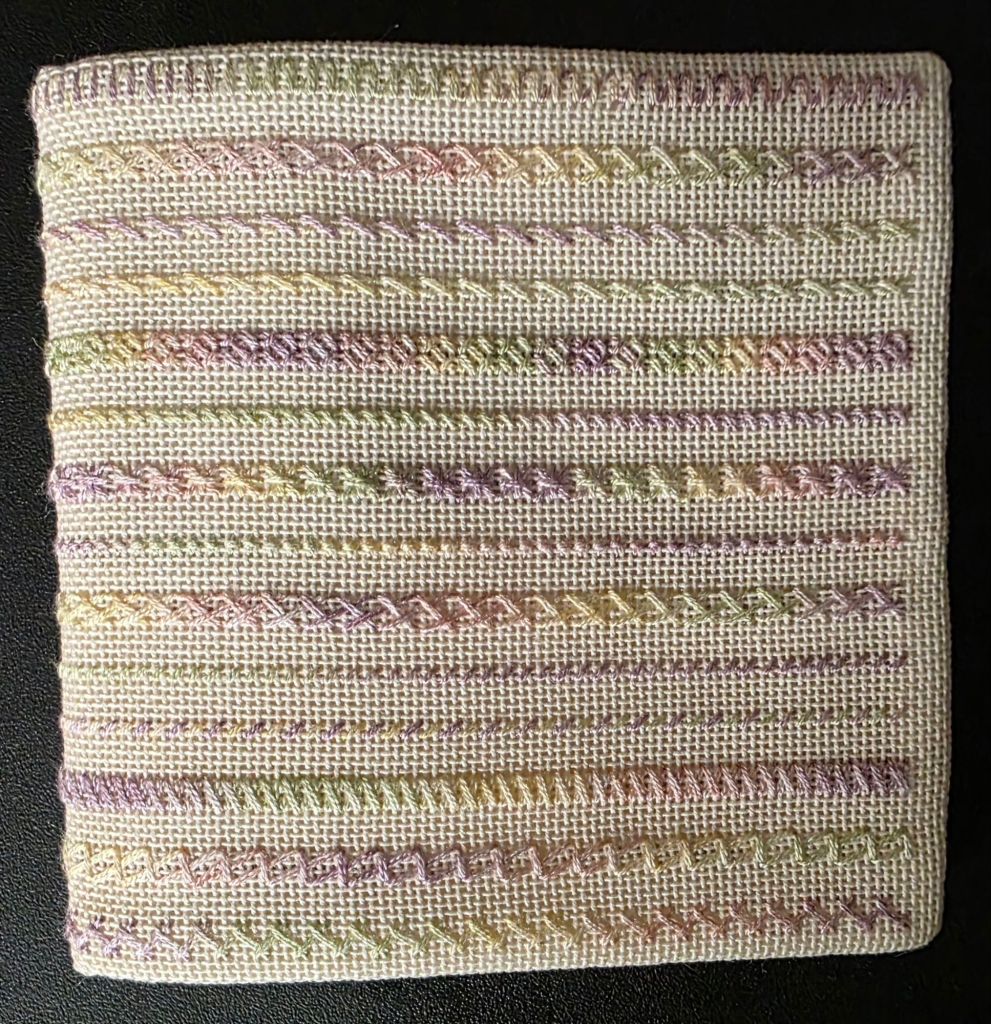
I’d picked up Cross Stitch and Beyond by JoAnne Westerhaus (with some additional rows) off and on over the last couple of months.
EGA Brandywine Guild held our Quarterly meeting last Wednesday and I stitched rows 9 and 10 there and finished it during the baseball playoff games. I have stitched the Montenegrin stitch (row 13) before but have done it differently.
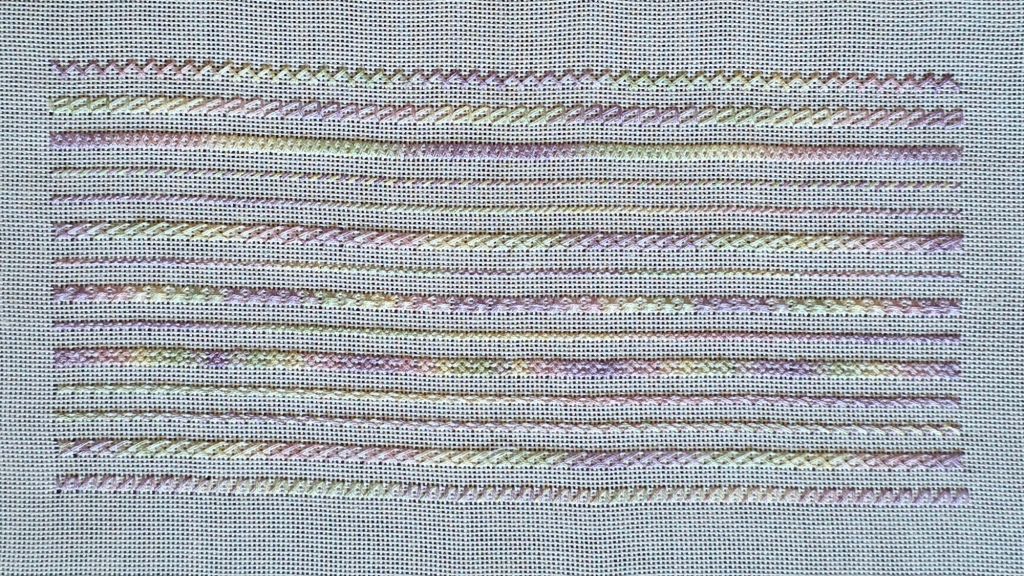
Then, I finished it into a thread bed. That is a place to lay to rest some working threads until you need them again while working on a project. Patrick made his into a thread bed and it looked like a great idea and useful.
I make up my finishing as I go and use what supplies I have on hand. This is just for me!
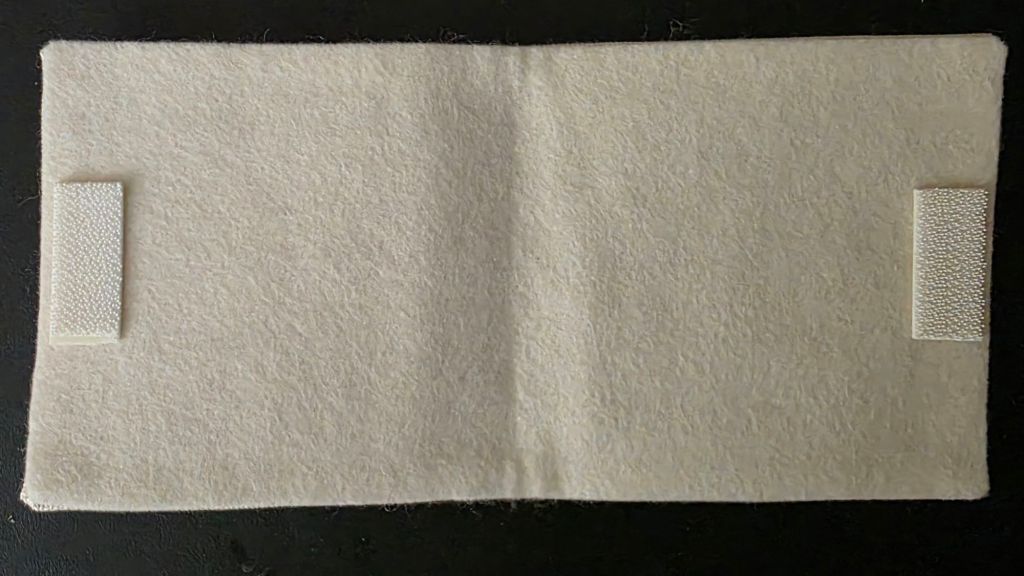
I didn’t want anything too thick. This peel and stick backing is super thin and been in my stash for years! I cut one large piece and had a strip left over that fit perfectly on the end. And, I added an edge of double sided foam tap that’s also been in my stash for years.


The Congress Cloth folded over and came together in the center. It was meant to be!

I trimmed, folded, and glued the ends in place with Aleen’s Super Fabric Adhesive.

I used this double stick fusible web (the last one in the package).

I cut the fusible web and felt to size and attached white Command Strips rather than Velcro because my Velcro squares were black. I wanted white and these link together really nicely whereas Velcro rips the one side apart. So, I’m glad I used what was available.
Is it possible the fusible interfacing is old and not working well? Also, I was not happy with the puckering in the fold area. Any recommendations for next time on how to not to get any puckering?

I sewed around the edge using Coats and Clark Quilting & Piecing 35 wt thread. While I was at it, I tacked the Command Strips in place using a really sharp leather needle and a thimble being very careful not to jab myself. It’s much better now.

Here are a couple of threads ready for bed. You can leave needles threaded because the lining is felt (not craft felt which isn’t good for needles).

Now they are tucked away for bedtime!
Filed under: ANG Central Jersey Chapter, Winter Lights by Jennifer Jennifer Riefenberg
Jennifer Riefenberg put together a lovely design in Winter Lights. I am glad I left the candles and flames for last.
Once I got 3 magnets positioned on the canvas properly for Candle 1, I was able to park needles/threads alternating from the laid foundation thread to either one of two cross stitches. It took some concentration.
I learned how to compensate a Rhodes fan on Candle 2.
Candle 3 (on the right) is my design because I trimmed, burnt, and over trimmed the piece of mesh tubing Jennifer provided (what’s left is shown in the border of the canvas on the left). And, truth be told, I tried using it but I didn’t like the mesh anyway (did I burn it accidentally but subconsciously on purpose). So I improvised and mimicked the crosses of the mesh and love it. I placed 4 strands of Sulky Holoshimmer 6017 vertically in the center and placed 2 long strands of Tiara T117 on each side. Then, I criss-crossed twice with Petite Treasure Braid PB10 and once with 2 strands of Sulky Holoshimmer 6017.
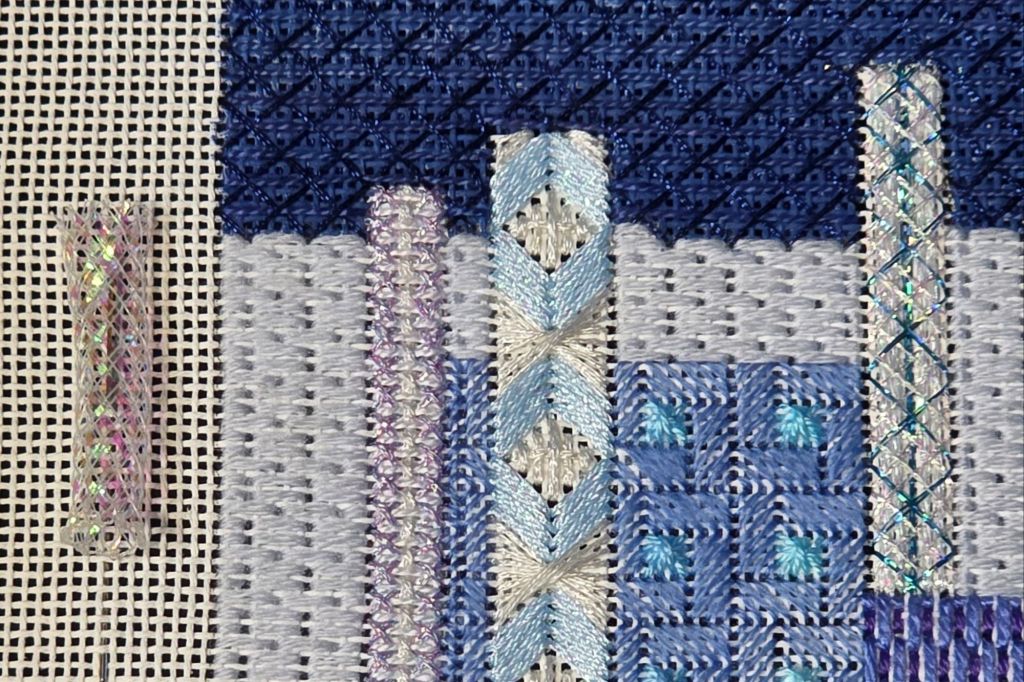
The little dimples make Candle 4 interesting.
I also love the center Candle 5 even though it took 2 tries to get correct. I was off one canvas thread in the 5th of the 10 paths.
Jennifer is correct to suggest laying, couching, laying, etc across Candle 6 so you can see the holes as you stitch. That’s probably true whenever couching.
Offset crosses in Candle 7 were something new to try.
I figured out how to compensate a Waffle Stitch for Candle 8.
And, oblique crosses finished up Candle 9.
The outlining of the candles and flames were stitched as the Phillies went up in flames exiting the playoffs with little offense and a ridiculous blunder. Finishing this lovely design was the highlight the day!

Filed under: ANG Seminar 2025, Nights in White Satin by Jennifer Riefenberg
Nights in White Satin by Jennifer Riefenberg was fun to stitch although several areas had some tricky compensation to work out. The soft pale blues with neutral colors is very calming. That completes Goal 21.
Both Howard L and I shared out finished pieces at the San Bernadino Chapter’s Show & Tell this month.

There are 8 goals left for 2025 and it’s looking like a few will carry over to next year which is OK especially because I did some other pieces throughout the year.
