Filed under: Uncategorized
Gail Stafford’s Landscape Features class began officially on Friday.
Before Friday’s class notes came out, I wanted to make a 2″ test of the three Weeks Dye Works threads using the random Satin stitch. I’m using Copic markers rather than paint to cover the canvas.

I can see the value of stitching in a real design as Gail suggests rather than this type of swatch stitching because I don’t think I learned much, except I like the colors together and think thread blending these would make an interesting sky. Perhaps a storm moving in using the left and right threads. A sunrise using the left 2 threads.
So, I moved to the line drawn canvas to test stitches on a painted area and unpainted area this time with Impressions. Before I covered all the paint on the left half, I decided to change to a random split stitch which smoothed out the appearance. I stayed with split stitch on the non-painted center right area and then returned to the Satin stitch on the far right side. The paint definitely makes a difference now. I can visualize what the lighter coverage as from the swatch with the light coverage of the Impressions.

As you can see, I painted half of the distant trees and water and one of the bushes to test more stitches. I don’t have another green marker to color the grassy area (yet).
A few months ago, I joined Ellen Johnson’s Stitching Club in order to learn to “read” my Rainbow Butterfly canvas better (more on that another time).
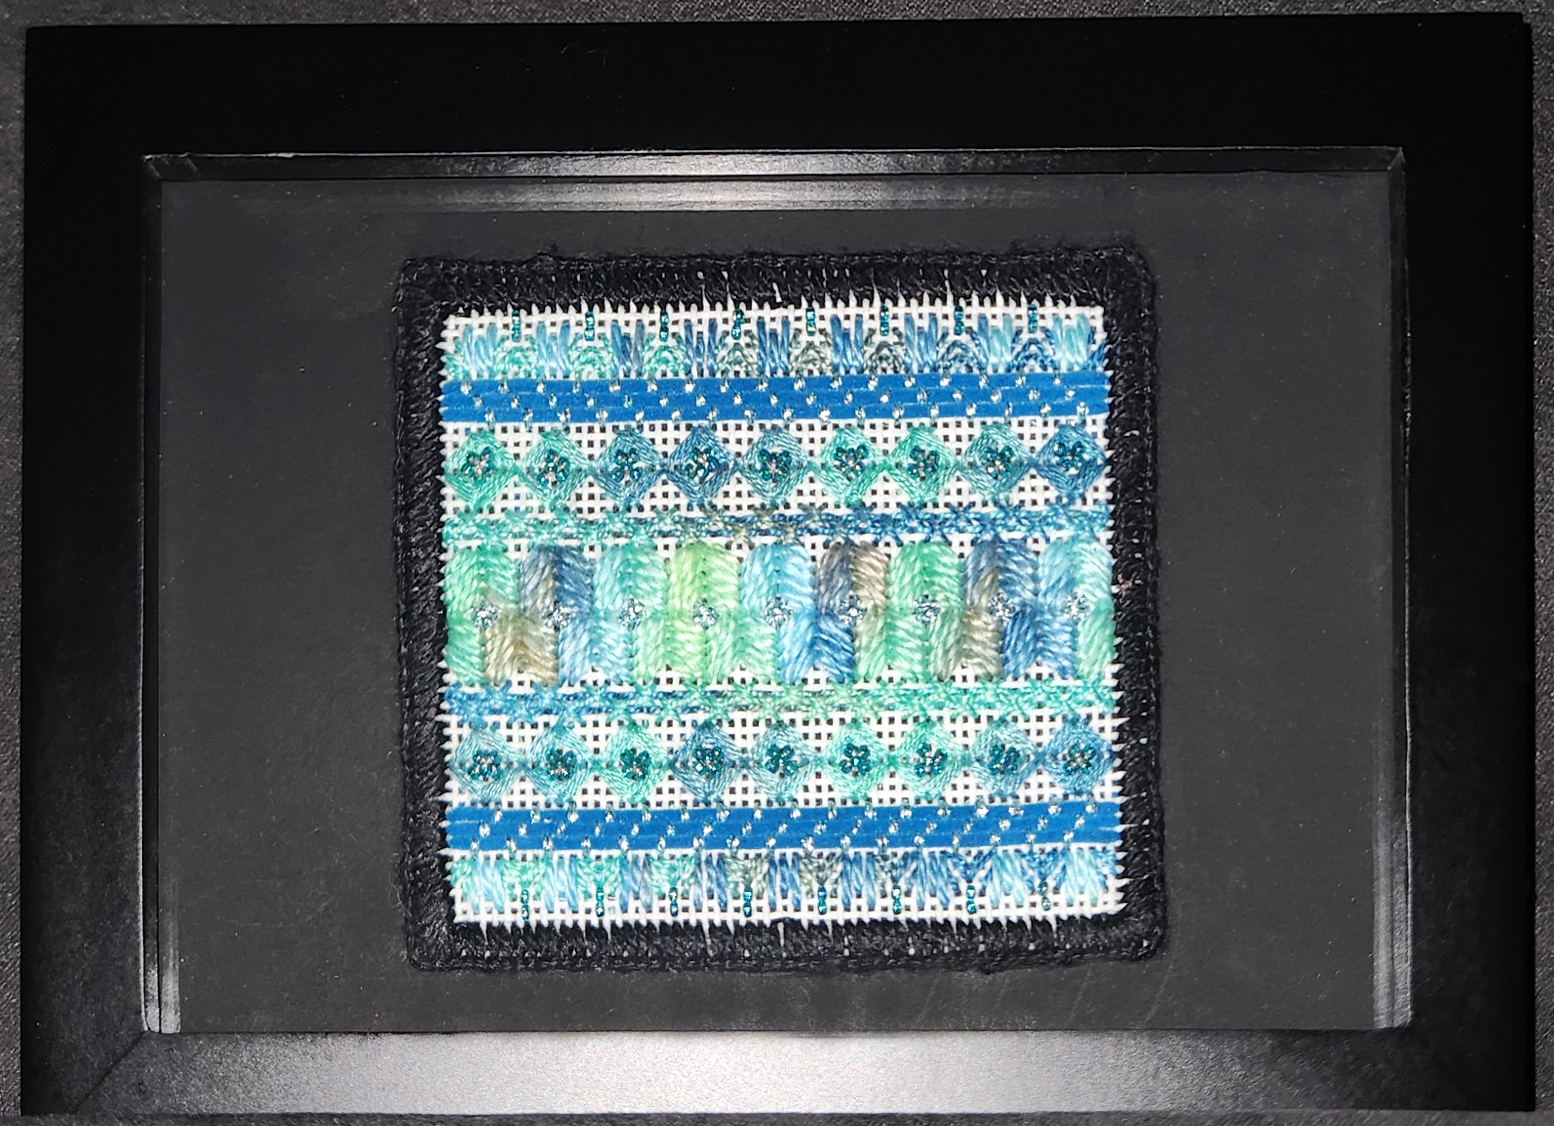
A month ago, Ellen held a 3+ hour Compensation Class online that I joined and stitched along. I had to make this a tad more complicated because it was for all skill levels and I prefer a challenge. So, I divided a circle into 7 areas, knowing that I would make it into a coaster.
Note to self: My template coaster is a retired coaster in a drawer in the living room. It’s 3.5″ in diameter. They do sell 4″ rounds online. There are quite a few round 4″ painted canvases, but I knew I wanted to cut the cork to my size.
I used stitches Ellen suggested, including the Cashmere and Pavillion Diamond stitches (each are in 2 areas), Alternating Scotch stitches. I added the Interlocking Gobelin and Horizontal Kennan stitches.
I placed Craf-tex inside (it is machine washable, and so I figure it will be OK for absorbing moisture from glasses).

I tacked the tabs taut and into place through the Craf-tex with my trusty Sulky Invisible thread. Two stands with 2 tacks per tab.

I found a roll of 1/8″ thick Cork Liner with adhesive backing (where else but Amazon). I used Ultrasuede for the first 2 coasters, and they are doing well, but I think cork is going to be better. Now, I have 2 rolls of cork. That’s got to be a lifetime supply!

You can just see the dark blue thread that I glued in place (Aleene’s glue) along the very small space between both halves.

I love it! And, I finished it yesterday before today’s class, which was all about backgrounds.
It got a workout for our Friday night pizza and beer.

In case you are wondering, no, we are not bikers! How we came to be at a bikers 10th annual festive, we can’t remember. But, we had to get the mugs from wildbill’s soda! We do remember they were filled with root beer, which was delicious, and the mugs were great, keeping liquid cold longer because of the metal.
The instructions for A Stash Sampler have been sent out to those who registered (registration remains open for the 5 days). The 5 stitched pieces that I made into two bookmarks and framed the others have been posted along with Day 1 discussions have been posted.
Jennie who tested the instructions made a fantastic snap tray in a festive red, white, and blue – a little larger than mine and squared up. Gretchen also tested the instructions and made a very bright, happy bookmark for a June birthday gift (with leftover threads from Beautiful Stitches) and a very elegant colorway for a hospice heart. Lovely. I’m so happy they adapted the instructions to make alternate shapes.


Filed under: ANG CyberPointer's Chapter, Landscape Features: A Notebook Class - Gail Stafford
The kit for Gail Stafford’s Landscape Features: A Notebook Class arrived about a week and a half before class is scheduled to start on May 3. Gail held a Zoom class on Saturday to talk about how the online class works through through groups.io. Four lessons drop on the next 4 Fridays. Yes, I was double booked on Saturday! Linda and I found another room to join the Zoom call during our Stitch-in.
I got to see a few people I haven’t seen in a while and knew several people from other online classes (Mary and I have taken at least 4 online classes together), and Sharon from NJNA. There were a few new people to Cyberpointers, too.
This was the Workshop description from the host chapter, ANG Cyberpointers:
Create your own reference notebook in this class designed for the individual who wants to explore stitches and overdyed threads and their use in landscape designs. The focus of the course is to use a variety of stitches and overdyed threads to create stitch samples of sky, water, trees, leaves, and bushes for future reference. The kit includes a line drawn canvas with two landscape designs. This allows the participant to try sky stitches in the sky area, water stitches in the water area, and other stitches in appropriate locations. During the class, participants will paint portions of the canvas to prevent the canvas color from showing in certain areas and allow the stitcher to use threads that give less canvas coverage.
You can doodle stitch on these diagrams or create a mini landscape. As Gail said, once you buy the canvas, kit, and instructions, you can do whatever pleases you. I do have paints, but markers will work just as well and be easier.
Looks like fun. I am ready!

Filed under: All That Simmers by Sundance Beads, ANG Main Line Stitchers Chapter
Kristen, from ANG Main Line Stitchers chapter, is leading All That Shimmers using the stitch guide by Sundance Beads. We got a discount ordering for a group through The West in Arizona. The kits came with the beads and ribbons, not the threads. Kristen stitched this in advance of the chapter.
It’s not a large piece at 7″ x 5″. Sundance shows it displayed as a 5×7, but I think the balance of stitches will be better displayed as 7×5. We’ll see.
I didn’t take a photo of all the stuff (threads, beads, metallic accents, raffia, and ribbons) that goes on the canvas prior to getting started, and I didn’t get a photo prior to stitching the borders! I was delayed because I switched to all Kreinik #12 Braid thanks to my stash and Linda’s!
You may notice that I’m working in the well, as Kristen suggested, because there’s only about an inch and a quarter around the design. That makes ending threads too difficult.
I’m only going to share photos of the fun beads and metallic accents as I use them, which is why we selected this project.
For Ribbon 1, we use Size 11 beads and MA005 Gold Coil.

I rediagrammed the pattern for the overdyed blue and ecru threads by shifting it slightly because I didn’t like where the metallic accents fell. It is now symmetrical, and that makes me happy!
Then, I also revised the suggested stitch surrounding the bead from a 3×4 rectangle to a hexagon that nicely nestles the metallic accent. Rather than using a Silk Lame Braid as called for, I’m using a Kreinik Braid #8 that matches the color Kreinik used in the border.

To aid centering the accent in the hexagon, I went down into the adjacent hole from where I came up. I used a doubled length of Sulky Invisible thread that started out with 2,200 yards. I doubt I’m below 2,000 yards yet – a lifetime supply!

Appropriately, I finished Ribbon 1 at today’s ANG Main Line Stitchers chapter Stitch-in.
Beginning on May 2 for 5 days, I am leading the Cyberpointers meeting program, A Stash Sampler. Read all about it at https://www.cyberpointers.org/?p=9555
I finished the Ocean Breeze Sampler into a bookmark.


If you’re not a member of ANG, go to needlepoint.org and join National. Then, join a local chapter (find one listed by state under Chapters), Cyberpointers (Cyberpointers.org), or both.
Hope you join Cyberpointers for the program, discussions, or both.
Filed under: ANG Main Line Stitchers Chapter, ANG Needle Pointer's Article, Five Vases with Curly Bamboo, Vases, Sharon G
I can’t find what should have been my final post about Vases with Curly Bamboo by Sharon G showing mine framed and letting you know that Linda M, Beth T, and I from ANG Main Line Stitchers submitted our canvases to Needle Pointers for The Tale of Two Stitchers (in this case three) series of articles.

The article discusses the roundness and light reflection. During our meeting discussions, we focused more on the degree of coverage based on a stitch guide and threads from Sharon G (my canvas) and Amy Bunger (Linda). Beth used a combination of those stitches or selected her own stitches after hearing and seeing the discussion.
From class notes and Sharon G’s stitch guide, it was clear that Sharon wanted the canvas to show through. In fact, Sharon G gave 2 Diamond Ray options for the Green vase. I did not use the alternative option with an even more open lacy look. The Burgundy and Blue vases both used single strands of silk floss in between the canvas threads which allows the coloring of the canvas to show through. The Gold vase has the fullest coverage and is the only one of the 5 vases to use 2 colors of thread to enhance the shading. The Cinnamon vase uses the most multi-step composite stitch pattern of the five vases.
When Linda asked Amy Bunger about her approach to this canvas, said, “My approach to designing a stitch guide for any canvas is to attempt to keep the mood, depth and flow of the original design. This design shows a more formal mood in the vases and border with just a touch of whimsy in the curly bamboo. It was easy to determine which areas of design should come forward versus recede and where I should keep a balanced upright appearance versus a slanted or diamond pattern.” Amy’s stitch guide allowed even more of the shading of the vases to show through especially on three of the vases (Green, Burgundy, and Gold). The composite stitch used on the Blue vase was more open than the Cinnamon vase composite stitch which has the fullest coverage.
From the unstitched canvas, you see the light source coming from the upper left corner. The T stitch and the very light blue silk floss for the background selected by Sharon G reinforces the issue of the light source. She said, “I chose a very delicate almost invisible stitch for the background. I thought of a few others, but did not want to detract from the vases. In my mind, simple equals elegant. I think the very light blue can represent the vases resting on a window ledge.”
For the border, Sharon G introduced black within her multiple rows. From the ANG Stitch of the Month 2005 – October, we know Sharon G’s view on borders, “I love to contain my designs in an elegant border made up of a combination of stitches. This allows a bit of containment for the design. For framed pieces, a border allows the eye to be drawn to the needlework, rather than to the frame.” Beth and Linda followed the coloring of the painting. However, Beth selected a more textured look with all threads and while Linda used beads and thread to complete the border.
If you are a member of ANG, you can see the other 2 canvases in the article published in the Needle Pointers Jan/Feb 2021 issue. Better late than never – right!
If you’re not a member of ANG, you should be – go to needlepoint.org and join. Then, join a local chapter (find one listed by state under Chapters), Cyberpointers (Cyberpointers.org), or both.
Beginning on May 2 for 5 days, I am leading the Cyberpointers meeting program, A Stash Sampler. Hope you join us for the program, discussions, or both.
Filed under: ANG New Jersey Needle Artists Chapter, Embroidery Guild of America, General comments, Ruby Razzle Dazzle by Ann Strite-Kurz, Seminar 2023 - Boston, Threads, Understanding Color Relationships: Luster and Luminosity with Patricia Goaley
I’ve got a lot of small stuff to finish. I decided to get back into the swing of it with new coasters for us.
For Bill’s coaster (on the left), I folded over along the edges and tacked them into place with invisible thread. Details on how I stitched the 4 corners differently are at: https://melitastitches4fun.com/2024/03/02/manipulating-overdyed-threads/
For mine (on the right), I folded over along the edges and practiced the buttonhole stitch. I used black DMC Perle #8 and could have used #5 because some canvas is showing through. The design is from a class on Color and Luminosity with Pat Goaley during the EGA Seminar in Boston (more on that at https://melitastitches4fun.com/2023/09/03/ega-seminar-class-2-understanding-color-relationships-luster-and-luminosity-with-patricia-goaley/).
For both, I glued black ultrasuede on the bottom using Aleene’s Fabric Adhesive.

Next up is a blue sample from Razzle Dazzle by Ann Strite-Kurz that I made into a bookmark. More on this at: https://melitastitches4fun.com/2024/02/16/ruby-razzle-dazzle-by-ann-strite-kurz/
I used black DMC Perle #5 this time to make the buttonhole edging across 3 canvas threads. It has less white showing. I didn’t fold back the edges to make it a thinner, lighter finished piece (compared to the coasters that have the edges folded over). Then, I cut very slowly, carefully, and close to the stitching without cutting the threads. Here’s the back before covering it with a dark blue ultrasuede.

Again, I glued a piece of ultrasuede to the back (Aleene’s). I placed the glue all along the edges so that the glue touched only the DMC Perle buttonhole stitching. The width of three canvas threads accommodated a nice amount of glue.

It’s thin enough for a bookmark. A pretty one too!

Filed under: ANG New Jersey Needle Artists Chapter, Tumbling Stripes by Marilyn Owen
In March, Jacqui from New Jersey Needle Artists continued Tumbling Stripes by Marilyn Owen by going over Stripes 5-7 (counting from the center out).
Initially, in Stripe 5, I thought I would use Kreinik #4 Braid on the smaller count Congress Cloth, but it was too thin. Luckily, I had the same color light blue 194 in #8 Braid. I did cut back on the number of strands from 3 to 2 for the dark blue floss (820). Working 2 needles, as Marilyn suggested, went well.
I stayed with the number of strands recommended for 18 count for Stripe 6.
Stripe 7 has Smyrna stitches using Kreinik #4 Braid in the same color as the surrounding floss (back to 194). So, the inner and outer stripes are solid, with the middle stripes containing all the tumbling movement.

All caught up for Wednesday night’s meeting!
Filed under: Cardinal Ornament - Liz Kisielewski, Embroidery Guild of America, Mid-Atlantic Region
The EGA Mid-Atlantic Regional Spring Meeting occurred this past weekend in King of Prussia sponsored by the Philadelphia Chapter (no, I am not a member!). They did a lovely job. Teacup pincushion favors (one per table) were awarded to half of the class participants (two per table but not me). There were about 24-26 students. There were table favors, one per table of 6 people, at lunch (again not me). They handed out large carry bags and a snap tray to everyone.


The Cardinal Ornament class was designed and led by Liz Kisielewski. It is 6.5″ x 4″ and made from wool felt (6 colors), floss (3 colors), and stuffing. You know how sometimes you just need the right person to show you how to do something. Well, I finally understand how to do the buttonhole stitch. I was always trying to work it left to right but on the top edge. Liz showed me working it left to right on the bottom edge. It works so much better for me!

This was a Take Home a Project (THaP) class which means most of the students are going back to their chapters as teachers for this project. Instructions are free to chapters to use. The kit materials are supposed to be $10 or less so it is an affordable price. My EGA Brandywine Chapter has a Board meeting on Tuesday (I am a co-VP for projects) and I wanted to have it done. I will teach it if they decide to do it.
The branch was done during class. I almost forgot to add the hanger but thanks to my neighbor for reminding me to add it and thanks to tweezers (and Linda for giving them to me), I was able to get it through an opening between 2 stitches. Phew!

The Cardinal worked up quickly during a Phillies game later that day. Because there are only a few red stitches on the black felt, she didn’t have us switch threads. I used a black marker on those couple of stitches.

Sunday basketball allowed me to complete the ornament. I found a perfect bead for the eye. I couldn’t see the French knot that was on the demo bird because it was black on black. But, the bead has just a tad of light reflecting off it to be seen. It really wasn’t a difficult project. Needlepoint pieces take so long that doing something with more immediate gratification was fun. And, the 3D effect is much more apparent on this than on needlepoint. I won’t seek felt projects out, but it’s always fun to try something new.
I bet the gang on Tuesday night at the Needlework and Fiber Guild of Media will enjoy seeing this! The group meets at the Media Arts Council in Media, PA at 7 pm on the second Tuesday of the month.

