The 4-hour workshop for A Spring Sampler with EGA Brandywine Chapter on this past Friday wasn’t nearly long enough to get much of a dent in the piece! The original design is 12″ wide by 9″ high on 18 count. I’m doing 5″ wide by 9″ high on 18 count. As I suspected, the overdyed thread doesn’t have much variation in colors. Patrick and Nancy’s overdyed thread choices have good color change.

This center band is probably the most complicated band. It is a motif from a design class I took with Kathy Rees. I did talk through a few more bands, and we decided to wait until January for our next meeting.
I continued on the band as we watched a World Series without the Phillies.

Filed under: Uncategorized
A few members, including Patrick, Lisa O, Nancy, Joanne, Kate, and Sue, from my EGA Brandywine Chapter, are getting together Friday for the first of two 4-hour workshop sessions. Brenda is working on hers at home in Delaware. I did see Brenda’s at NJ Needle Fest, and it looks great.
I put some threads together to stitch a smaller sampler as we work through the bands. My second sampler will be 5 inches wide (not 12) and 9 inches high. My biggest concern is that the Gloriana overdyed thread 151 Cinnamon doesn’t have a lot of variation in it.

Instead of beige for the Neutral bands, I went whiter.

Filed under: 2023, Medusa Sea Jelly by Kim Griffin, Needle Artists by the Sea, New Jersey Needle Festival
Not much got done on the Sea Jelly the weekend of the Kelly Starke finishing class. Sue, Buff, and I stitched some Friday afternoon when we arrived but then chatted with Rosie, and we were too tired after the Saturday class – plus we were watching the Phillies win Game 1 of the playoffs against Atlanta!

This weekend, I was back in NJ and stitched on it during the 2023 NJ Needle Fest. This year, we’re at The Historic Women’s Club of Glen Ridge. Buff, Beth, Patrick, Lori, and Kathy D from ANG Main Line Stitchers chapter and Kathy’s sister, Veronica, shared a table.
We were right next door to 3 tables for the ANG NJ Needle Artists chapter. I enjoyed seeing what they were working on, including Jill’s neutral blue colorway of Crescent Journey. And it’s great to see Brenda from Delaware again. She brought A Spring Sampler and likes her colorway that Linda helped her pick out. It’s looking good.
Walking around the tables, there was more cross stitch pieces than canvaswork, but I did recognize a Laura Perin piece and saw a Toni Minieri piece.
Between chatting and visiting other tables, I did find time to complete the stitching on the exumbrella on Day 1. The beads will be added later.

On Day 2, I got most of the light blue pearl thread in the water stitch done. It wasn’t nearly as crowded on Sunday. Buff, Lori, and I joined Brenda and Dee from NJ Needle Artists for a nice day. It was much easier to talk and we were nearer the windows. The rest of the blue pearl was completed during the Sunday night Eagles football game, but compensation around the jellyfish was tough.

There are a couple of mistakes. One can be covered by a sequin. The other blends in well enough that it won’t bother me. Had I seen it sooner, I could have fixed it. I realize now why it happened. I miscounted from a compensation stitch. Oh well!
However, the larger issue wasn’t evident until I started the fill stitch. That’s when I realized that I hadn’t done the water stitch as diagrammed. Then, I looked closely at the photo I’d taken of the original piece at the EGA Seminar, and I’m sure that I stitched it the way the designer stitched it. So, I am leaving it and would have left it anyway because either way would have looked good.

Kim verified that the stitch diagram differs from how she stitched it (same as me) but agrees that either would work.
Filed under: Uncategorized
My EGA Brandywine chapter meeting is tomorrow, which reminded me that I hadn’t posted about the comments received on my Step 6, Fireside Sampler.
Prior to the EGA Seminar I was sent my certificate for accomplishing the 6 steps of the EGA Master Craftsman in Canvas and I purchased the pin which I can wear with my name tag.


At the opening banquet, a red rose was presented to us (one of the other two women were present at the banquet).

It was fun to see all the pieces on display and interesting to see Lois Threlkeld’s pieces – very nice. One of hers, the Bargello Sea Turtle will be a class next year at the EGA Seminar.
One of my teachers, Patricia Goaley, mentioned that my Fireside Sampler was one of three selected to be discussed at the Judge’s Forum. I was out touring Boston with my husband, but my teacher, who is also a judge, gave me a preview telling me that my stitching was impeccable, and the rug was demonstrating a luster and luminosity effect beautifully. A couple of suggestions Pat had were to make more contrast between the background and the mirror and to make the flames more 3D – very valid comments.
Heather was present at the Judge’s Forum and also heard that the flames were too stylized for the otherwise realistic piece. My husband didn’t like the flames either, and I might have changed them, but I was trying to use a Bargello pattern since Step 6 was supposed to demonstrate combining previous steps. A shisha mirror was suggested by the judge, which I had thought of but wasn’t sure if it was allowed (still don’t know). The judge loved the bricks (very realistic) and shading on the rug.

I wanted to repair a handle on one of our favorite grocery bags. It’s a promotional bag (for Augmentin) from GlaxoSmithKline (the company that I retired from). So not only is it sentimental, but it works great because it’s sturdy, vinyl, and large.
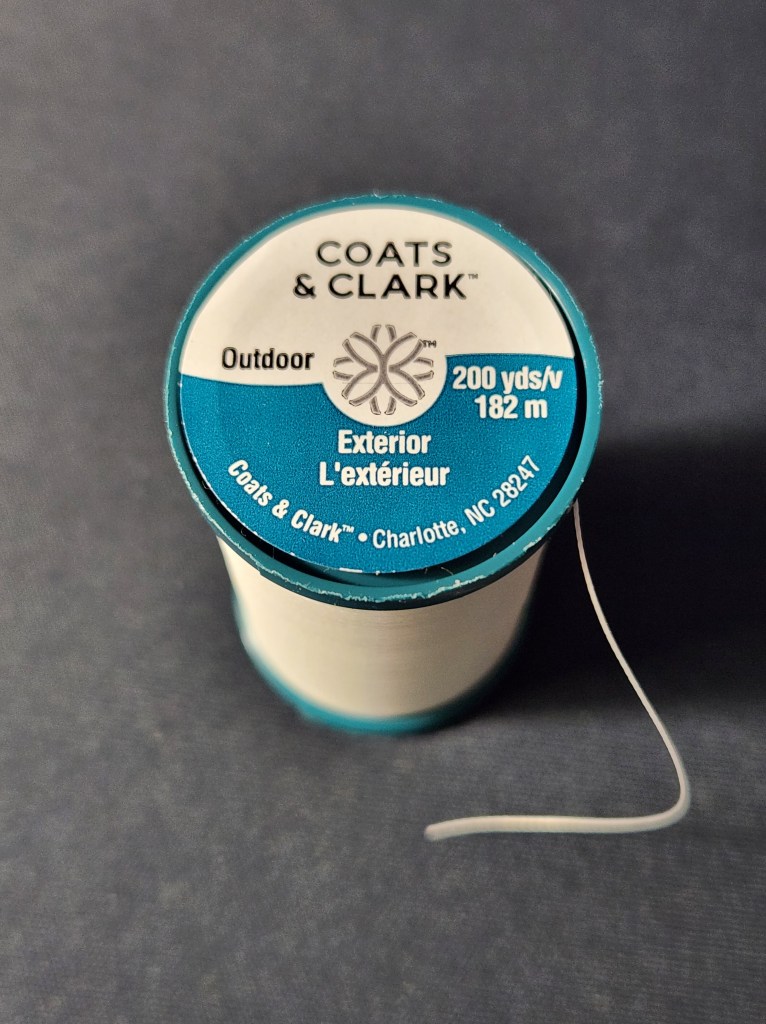
The clerks at Joann Fabrics recommended an upholstery thread as the strongest thread they sell. Maybe the numbers on the spool mean something, but I don’t know what. I’ll probably use this when making cording instead of a 6 lb fishing line recommended by Kelly Starke. The fishing line wasn’t easy to see or tie.
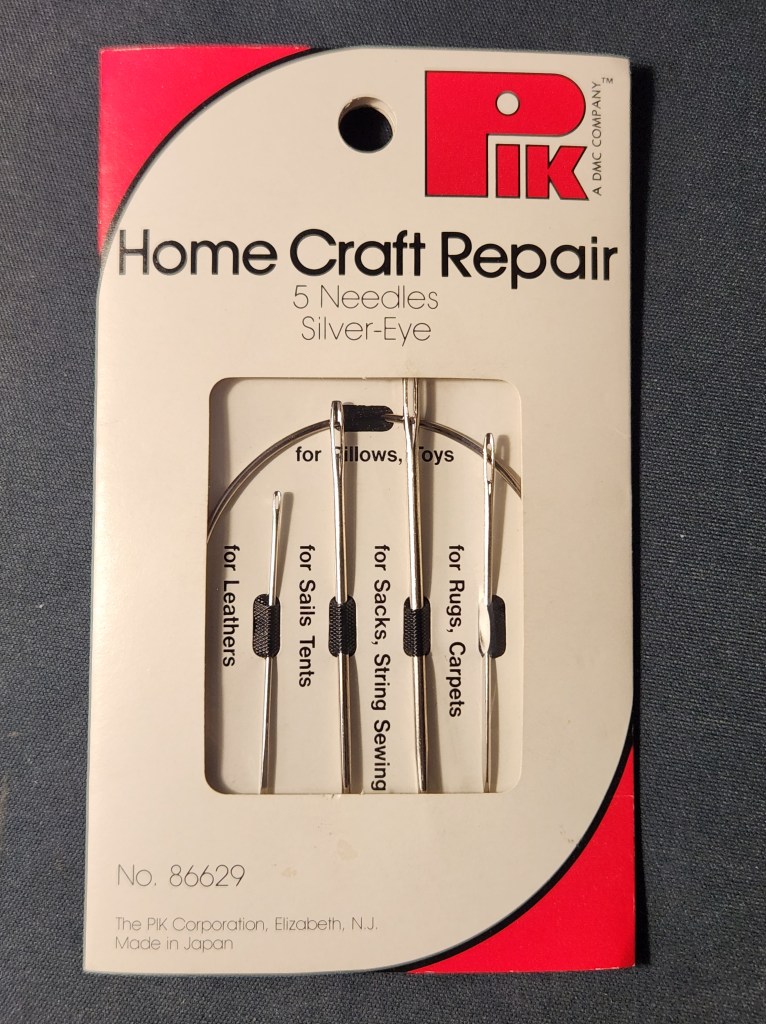
It was also an opportunity to use the needle for leather from this kit of needles. I don’t know how I got this package, but I got to use it for the second time! That’s practically a pointed blade with an eye for the thread. A couple of months ago, the thread broke on a small key holder sewed in place in Bill’s leather wallet. A shoe repair guy said it couldn’t be fixed. I knew I could fix it since I had a needle designed for use with leather. I don’t recall what thread I used, but it was fixed!
Filed under: ANG New Jersey Needle Artists Chapter, ANG Seminar 2019, Finishing Class with Kelly Starke, Thread and Stitch Manipulation with Cynthia Thomas
The church venue canceled (due to a congregation death) a few days before our finishing class with Kelly Starke, but Jacqui recovered by getting her craft room where she lives. Crisis averted, but organizing workshops takes resilience!
Since it was further away than the first place, I couldn’t hang with Rosie for the morning. I went armed with my Medusa Sea Jelly to keep me occupied. Although I didn’t sign up for the morning “round” class, Kelly asked me to sit in and listen since I was there anyway. So, I have plenty of Sea Jelly left to stitch for NJ Needle Fest.
Kelly has almost 70 videos on YouTube (not all on finishing)! I’ve seen the one she did for Layer of Leaves. It’s long at 3.5 hours but has some excellent tips. She goes over everything twice, finishing 2 ornaments in that time. Doing the finishing in 3 hours in person was more fun, and the time flew by. I peeked over people’s shoulders and took notes in the first session.
She had personal totes full of the tools we’d need! With 12 people in the class, she didn’t sit once. And, she had a helper, Robin. They were so organized and helpful. Kelly has “Mom” hearing! She didn’t miss anything.

Her handout has great pictures of each step. These are key points I want to remember:
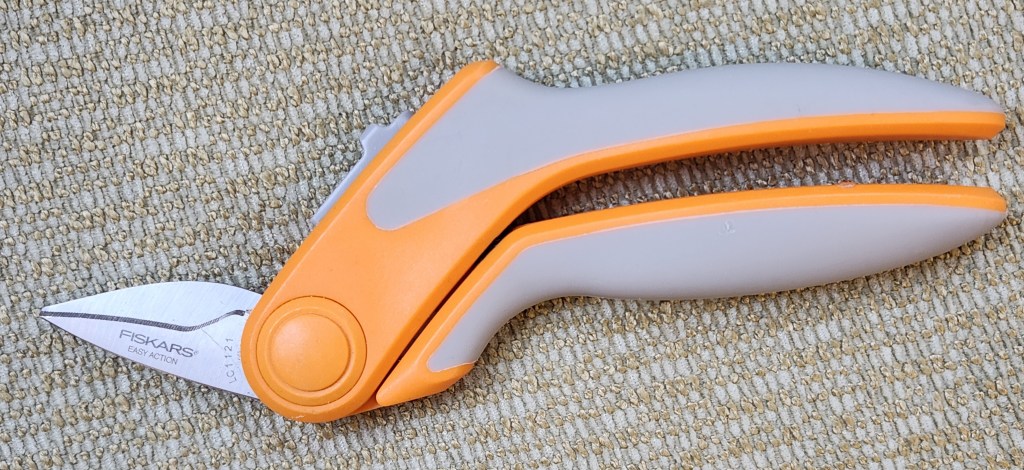
Cut up to edge in triangles (point into canvas) using short scissors, quilting nip scissors. I won’t mind adding another pair of scissors to my finishing bag. For an irregular shape, start at the indented areas.
Figuring out where to cut seems like the hardest decisions of the day because you can’t uncut! Here is my bell before an after (with the foam board in place) some trimming to reduce bulk near the top center.


A square seems the easiest. Interestingly, Kelly thinks light bulbs are one of the tougher shapes.
Trace outline on 1/8″ thick foam board. Use 1/8″ scrap to mark inside around shape to make the board 1/8″ smaller. No photo copying of the stitched piece is required to make outlines. That will save some time that I have spent copying and cutting paper.

Bevel edge on side of foam board touching the canvas/fabric. I did the bevel on the wrong side and had to recut it.
Making cord using an electric cordless drill (has to be able to turn right and left) is going to make a tighter cord than the Kreinik cord maker. That is a problem I have had. But, I doubt that I will get a drill. I will probably try twisting with the Kreinik cord maker much more than I’ve done previously. Later that night Sue commented that putting a weight in the middle of the cord serves to make the reverse twist when cording with Kreinik Cord Maker according to their instructions. However, Kelly has a video showing her twisting the cord by hand. I’ll probably try that too.
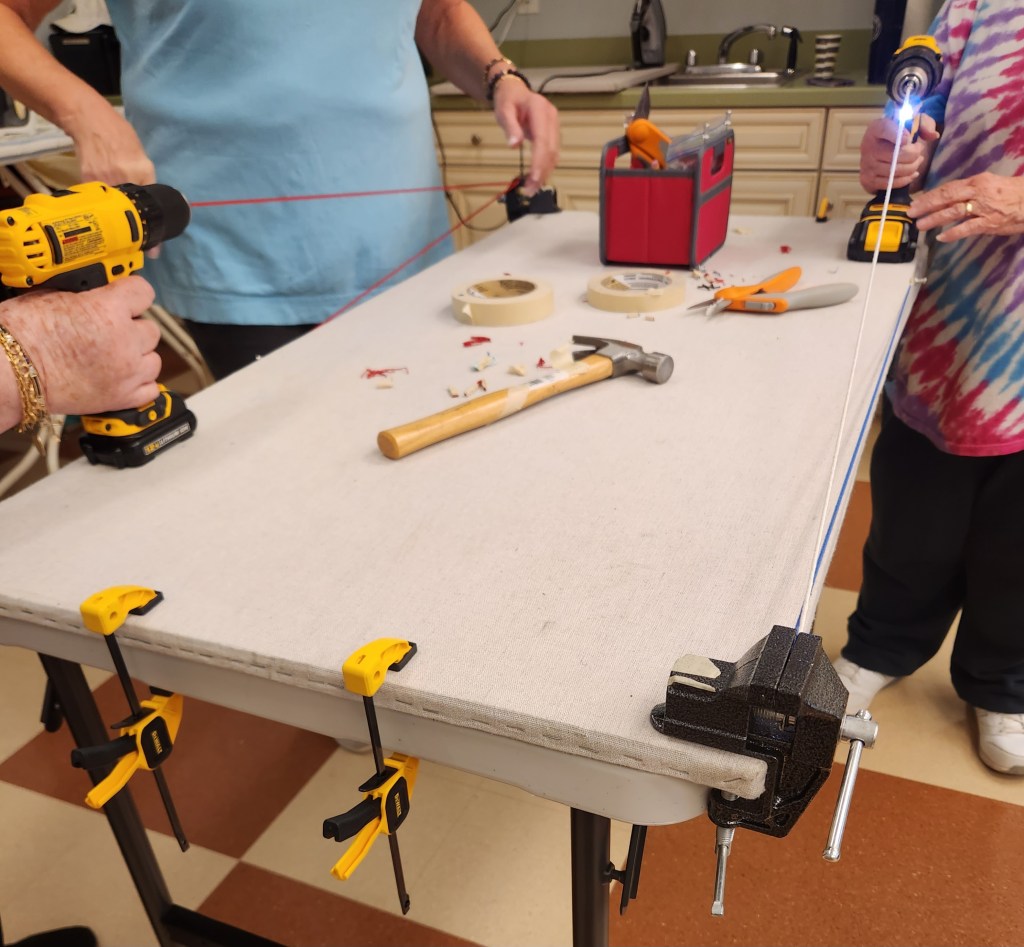
I used Silk Lame Braid 13 count. That and Kreinik can be used but have a greater tendency to break. So, Kelly used Pearl Cotton mostly. My cord turned out great!

I think I still have a glue gun in the basement – hot glue dries fast but it’s messy and I really don’t have a good workspace. I may stay with Aleene’s Super Fabric Adhesive (supposed to be fast drying and permanent) or try Fabri-Tac (Kelly used it for gluing cording in place).
The cording is cut to a point to prevent twisting where the loop starts wrapping around the edges (unless where you want the cord can’t accommodate a lot of cord in which case you make a separate cord for the loop and merge in a different area which is what I did for my bell).

To be safe, stitch loop in place to reinforce glued area (that spot gets the most stress on an ornament). I do think high heat might compromise the glue but Kelly has been doing this for 20 years. Gluing the cord is much faster than stitching it. Glue isn’t touching any needlepoint at any time. And, Kelly has a video if you prefer to stitch the cording in place.
I highly recommend getting her to come to your chapter for a finishing class on rounds followed by irregular shapes. Each class was 3 hours with a lunch break. Set up and clean up time made for a long but productive day.
My Bells of Scotch originated from the Thread and Stitch Manipulation 2019 Seminar Class with Cynthia Thomas. We were supposed to take a stitch, make it smaller, larger, turn it, and combine it in different configurations. There are partial Scotch stitches, 2 Elongated Scotch stitches at the top, and Scotch stitches not on the diagonal. If I were to do this again, I would make the clapper all gold. The gold surrounding the bottom center motif isn’t prominent enough. I love the fabric I found for the back. If there are any campanologists reading this post, please comment!


Addendum: Michael’s might have 1/8″ thick foam board, but you have to ask for it at the Framing Dept. I ordered some from Ebay.
Filed under: ANG Main Line Stitchers Chapter, From Dawn to Dusk by Textured Treasures
I got the 3 designs from Dawn, a portion of a larger From Dawn to Dusk done on Cashel linen or Lugana, framed by Jim at Repenning Fine Arts in Audubon, NJ. It needed a custom cut mat, which he said wasn’t easy, but he did a fine job. I need more wall space!
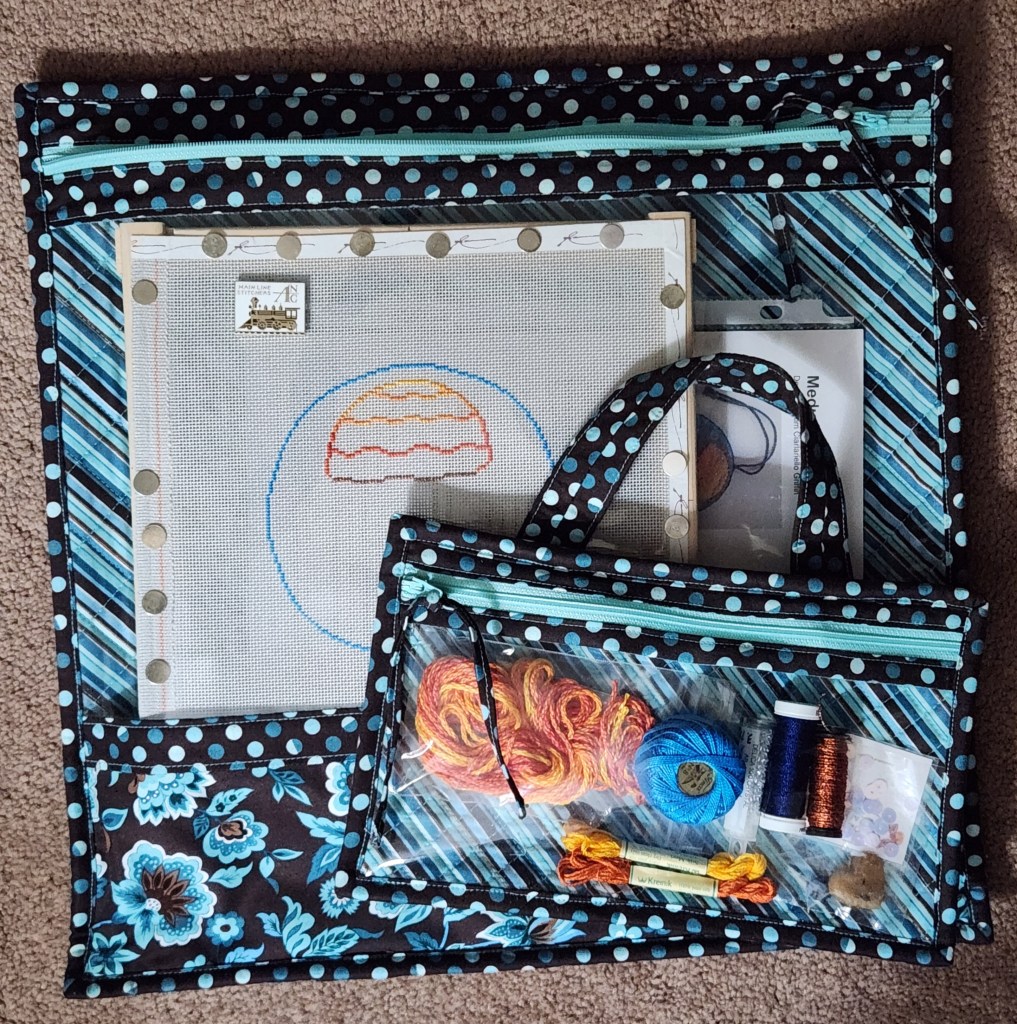
The outline of my Medusa Sea Jelly is ready for my October weekends in NJ.
I was all set to use my stash for this 5″ round as Kim (the designer) suggested when I stopped in Nimble Needle in NJ. I liked the orange one Kim had done (see a previous blog showing 2 other lovely colorways). The only orange Watercolours in my stash was 208 Tangerine which has a very slight variation of color and probably would have been fine until I saw Watercolours 280 Calabasa hanging on a peg calling to me! It was perfect. My stash drawer always has room for one more skein! The rest of the threads are from my stash. It doesn’t take much thread.
I’m going up to join NJ Needle Artists for a finishing class with Kelly Starke (we’ll probably stitch one evening sitting around) and later in the month to NJ Needle Fest. Both adventures are with my usual roommate, Buff. Sue is hosting us for the weekend of the class, and the Marriott will be our resting place for NJ Needle Fest. I am not thrilled that the event is not at the hotel. It’s not as convenient, but I digress.
This will be the primary stitching project that I hope to finish. I find it best to prepare a piece for these stitching events so that I don’t miscount on the tough parts while talking.

Doesn’t it and the threads look wonderful in this lovely color coordinated blue Floral Project Bag “by Linda”. Maybe this is why I have multiple projects ongoing – so I can use these beautiful project bags!?!
Filed under: Embroidery Guild of America, Pomegranate Heart by Melissa Sherbring, Seminar 2023 - Boston
More Ceylon/Ladder stitches for the outer heart. Glad to say now that the Ceylon/Ladder stitches got easier. Leaving more slack is good. It also allowed me to get rid of the magnifying glass. But, I could only do about 4 threads (18″) before having to take a break for my eyes. This seems much more tedious than canvaswork. I was pleased with the consistency of spacing for the rungs and the angle achieved turning the rounded sides.

We were given 2 options for the pair-wrapped ladder. No way was I going to try French Knots with this passing thread like Melinda’s pilot stitcher did. I stuck with the original teacher’s choice of wrap 2 skip 3.

The Woven Laidwork wasn’t too bad. I managed to use longer lengths of the silver passing thread. It took some effort to make straight lines. Melinda’s is tighter than mine, but I will take straight. I worked the Stem stitch left to right to outline all edges. I did start that (can you see where) in this photo. It covers up any imperfect areas along the edges.

For Stem stitch, which if you work from left to right (for right-handers) and right to left (for left handers), always keep your working thread below your needle. For Outline stitch, always keep your working thread above your needle. This is supposed to make it easy to remember: Stem=under and Outline=over (O=o). It’s completely done in this photo and ready for finishing!
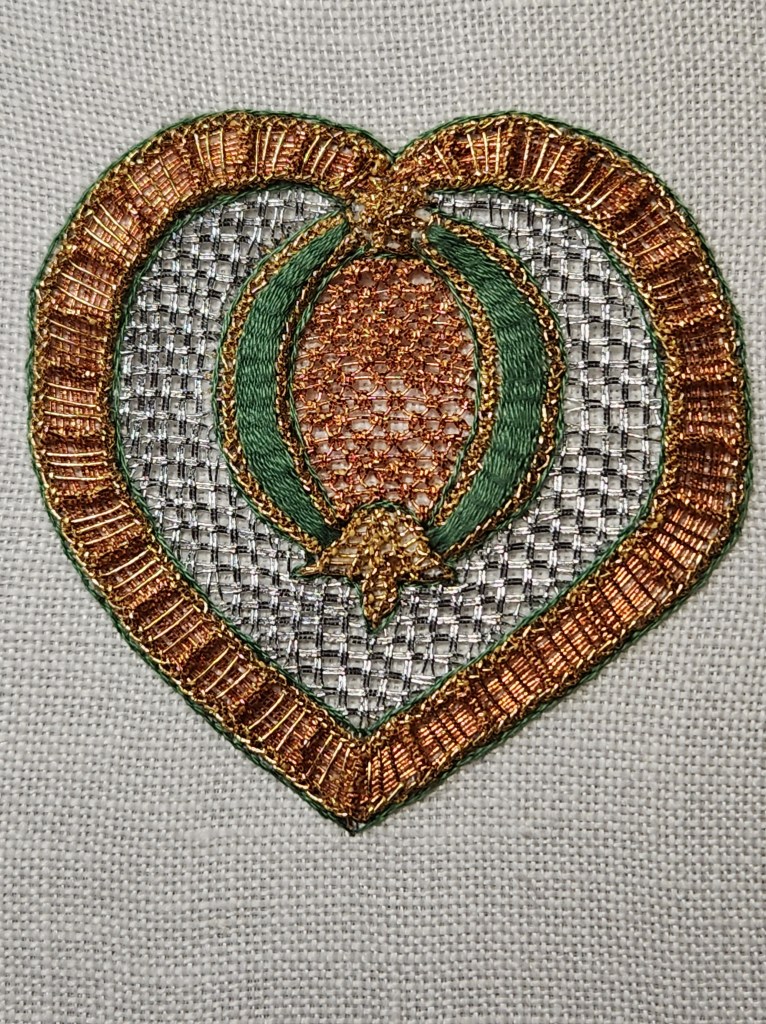
This is actually upside down because the crown upside down. I will finish it with the crown uprighted. Since it is a heart, I am posting this today, October 3, to mark our 36th Anniversary!
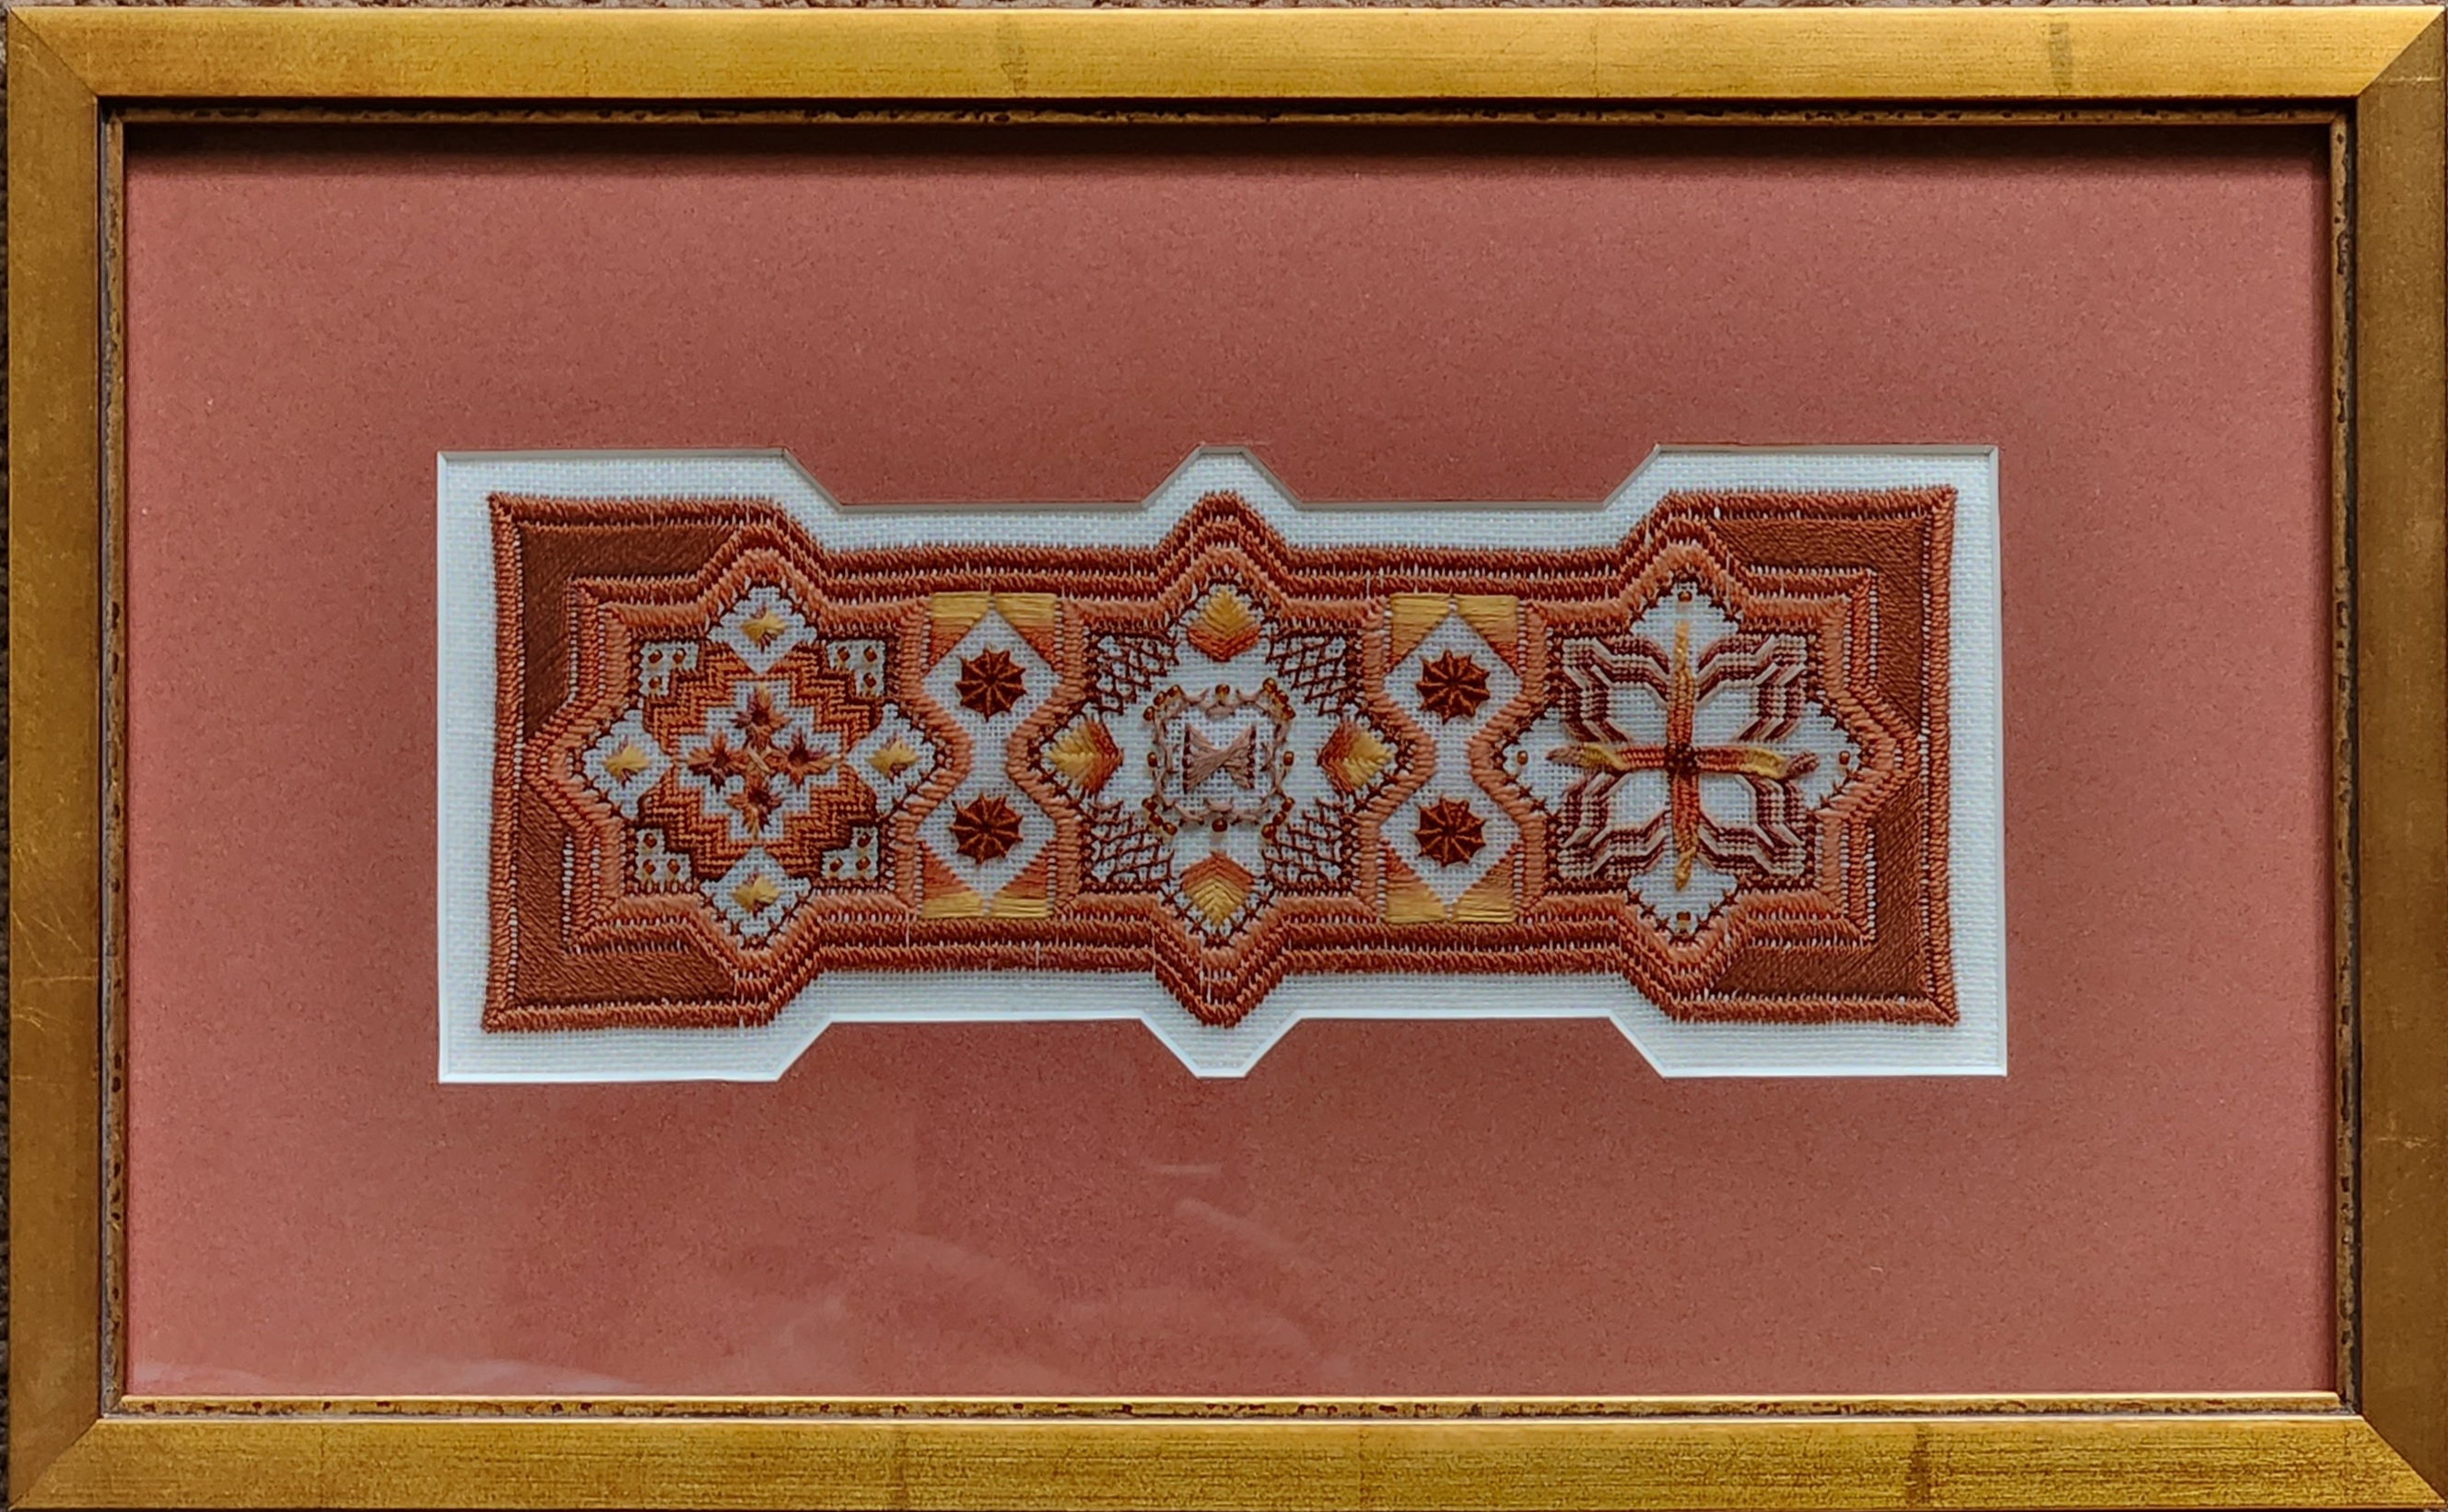
I have certainly been remiss in posting my framed pieces. This is Mesa Triangle with Kathy Rees finished by Frames Plus in Feasterville, PA. It uses a batik fabric applique as the focal point. As I stitched, I realized that while this is not a symmetrical design, there are components within the design that I made symmetrical by manipulating the overdyed threads. It is very subtle and you may not notice it but it made me happy.

