Filed under: ANG Chapter Book Projects, ANG Keystone Garden Chapter, ANG Main Line Stitchers Chapter, Chapter Book Project, Jeannie's Windmills
Both my local ANG chapters, Main Line and Keystone, are going to do the Chapter Book Project, Jeannie’s Windmills, by Pat Mazu (http://needlepoint.org/CPB/images/Project-4—Jeannie’s-Windmills.jpg). And, I volunteered to lead it for each group.
I picked up the threads from Karen at Nimble Needle – love the ANG 10% discount she gives! Even so, I’ll keep track of the amount of thread needed & we may make mini kits for folks to keep costs down. We can get 5 kits from the bag of beads. And, we’ll split up a spool of beading thread. It doesn’t seem like this piece will use a ton of thread. And, as Pat suggests, this makes a great stash project. Some may opt to go that route.

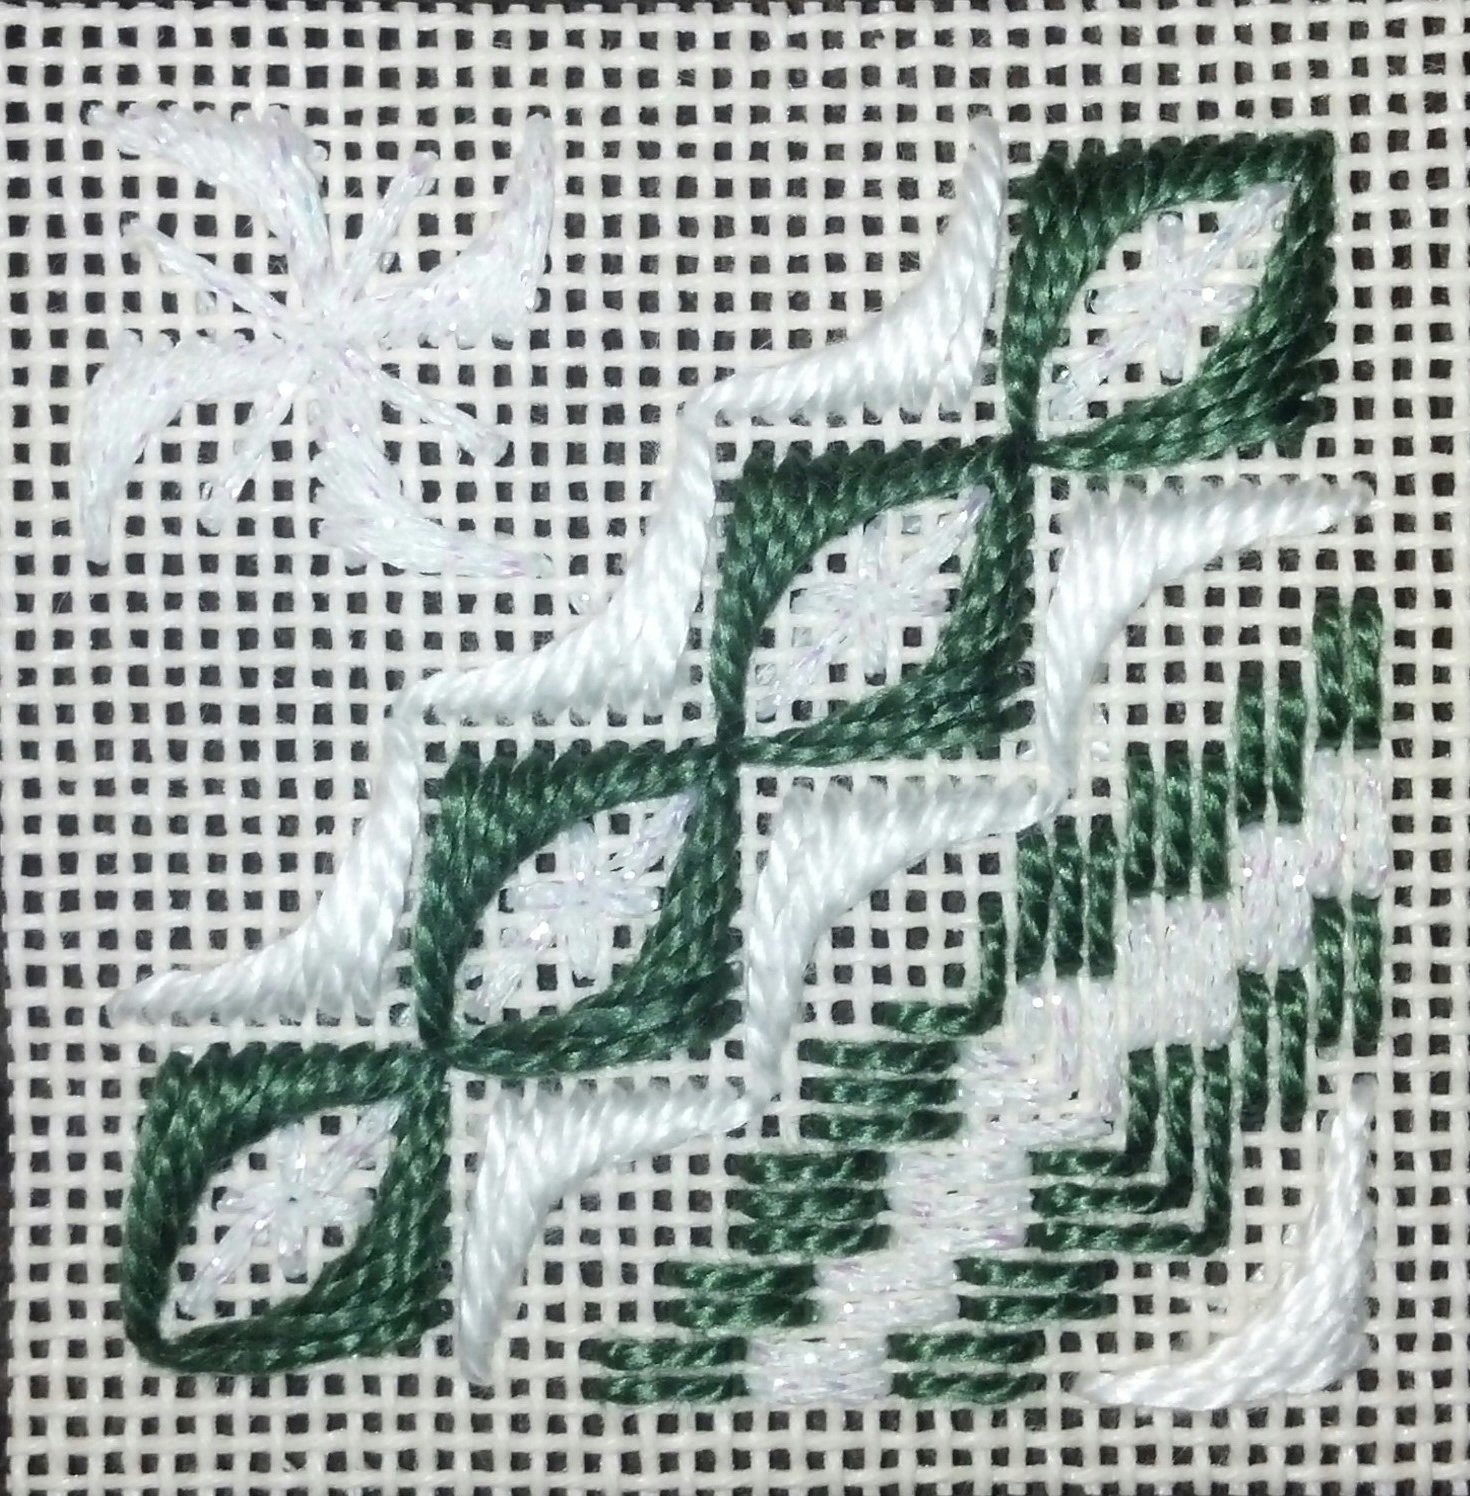
Initially, I was going to jump in with both feet today until I decided to practice the crescent stitch. And, I’m glad I did. I kept missing the 3rd hole because I couldn’t see it do to the angle & because the thread covers the hole from the bottom. So, I practiced until I finished this little guy (2″ square).
Filed under: "Faux-Berge" Orange Tree Egg by Michele Roberts, ANG Seminar 2014
My pre-stitching packet for “Faux-Berge” Orange Tree Egg arrived last weekend. I stitched most of it Thursday night & finished it tonight. It is a 4-way Bargello pattern done with a beautiful dark green Neon Rays Plus (NP32) that has a subtle sparkle to it.
It is a shame to cover most of the circle up with beads. But, I am grateful to the pilot group who suggested students get that part done before class because you can’t apply any beads until the Bargello is finished. It is really exciting to think this (http://needlepoint.org/Seminar-14/classes/images/12716-Faux-berge-Orange-Tree-Egg.jpg) can get done in one day by doing that pre-stitching although I am not a fast stitcher & will not rush it just to get it done.
While this picture may not be particularly exciting, Seminar in Chicago is only a month away & that is very exciting!!

Filed under: ANG Keystone Garden Chapter, Triangle Santa Ornament by Peg Dunayer
The instructions of Peg Dunayer’s Triangle Santa ornament called for a satin stitch for the hat trim but the picture used a more decorative stitch. I decided to try a new stitch after thumbing through Stitches To Go by Suzanne Howren and Beth Robertson. It is the Triple Cross Stitch done over 4 threads wide as shown in the diagram but vertically over 5 threads. As you may have noticed in the last posting, I layer some threads to give the trim some height. And, thanks to the stitch, it created a layered effect. It is also non-directional and filled the space up fully.
And, rather than leaving the threads of the mustache in a figure 8 as shown, I cut the ends. I also layed a thread below the satin stitch for the eyebrows for some height.
Now, I’m ready for our September class at Keystone when we learn some finishing techniques and do some braid making!

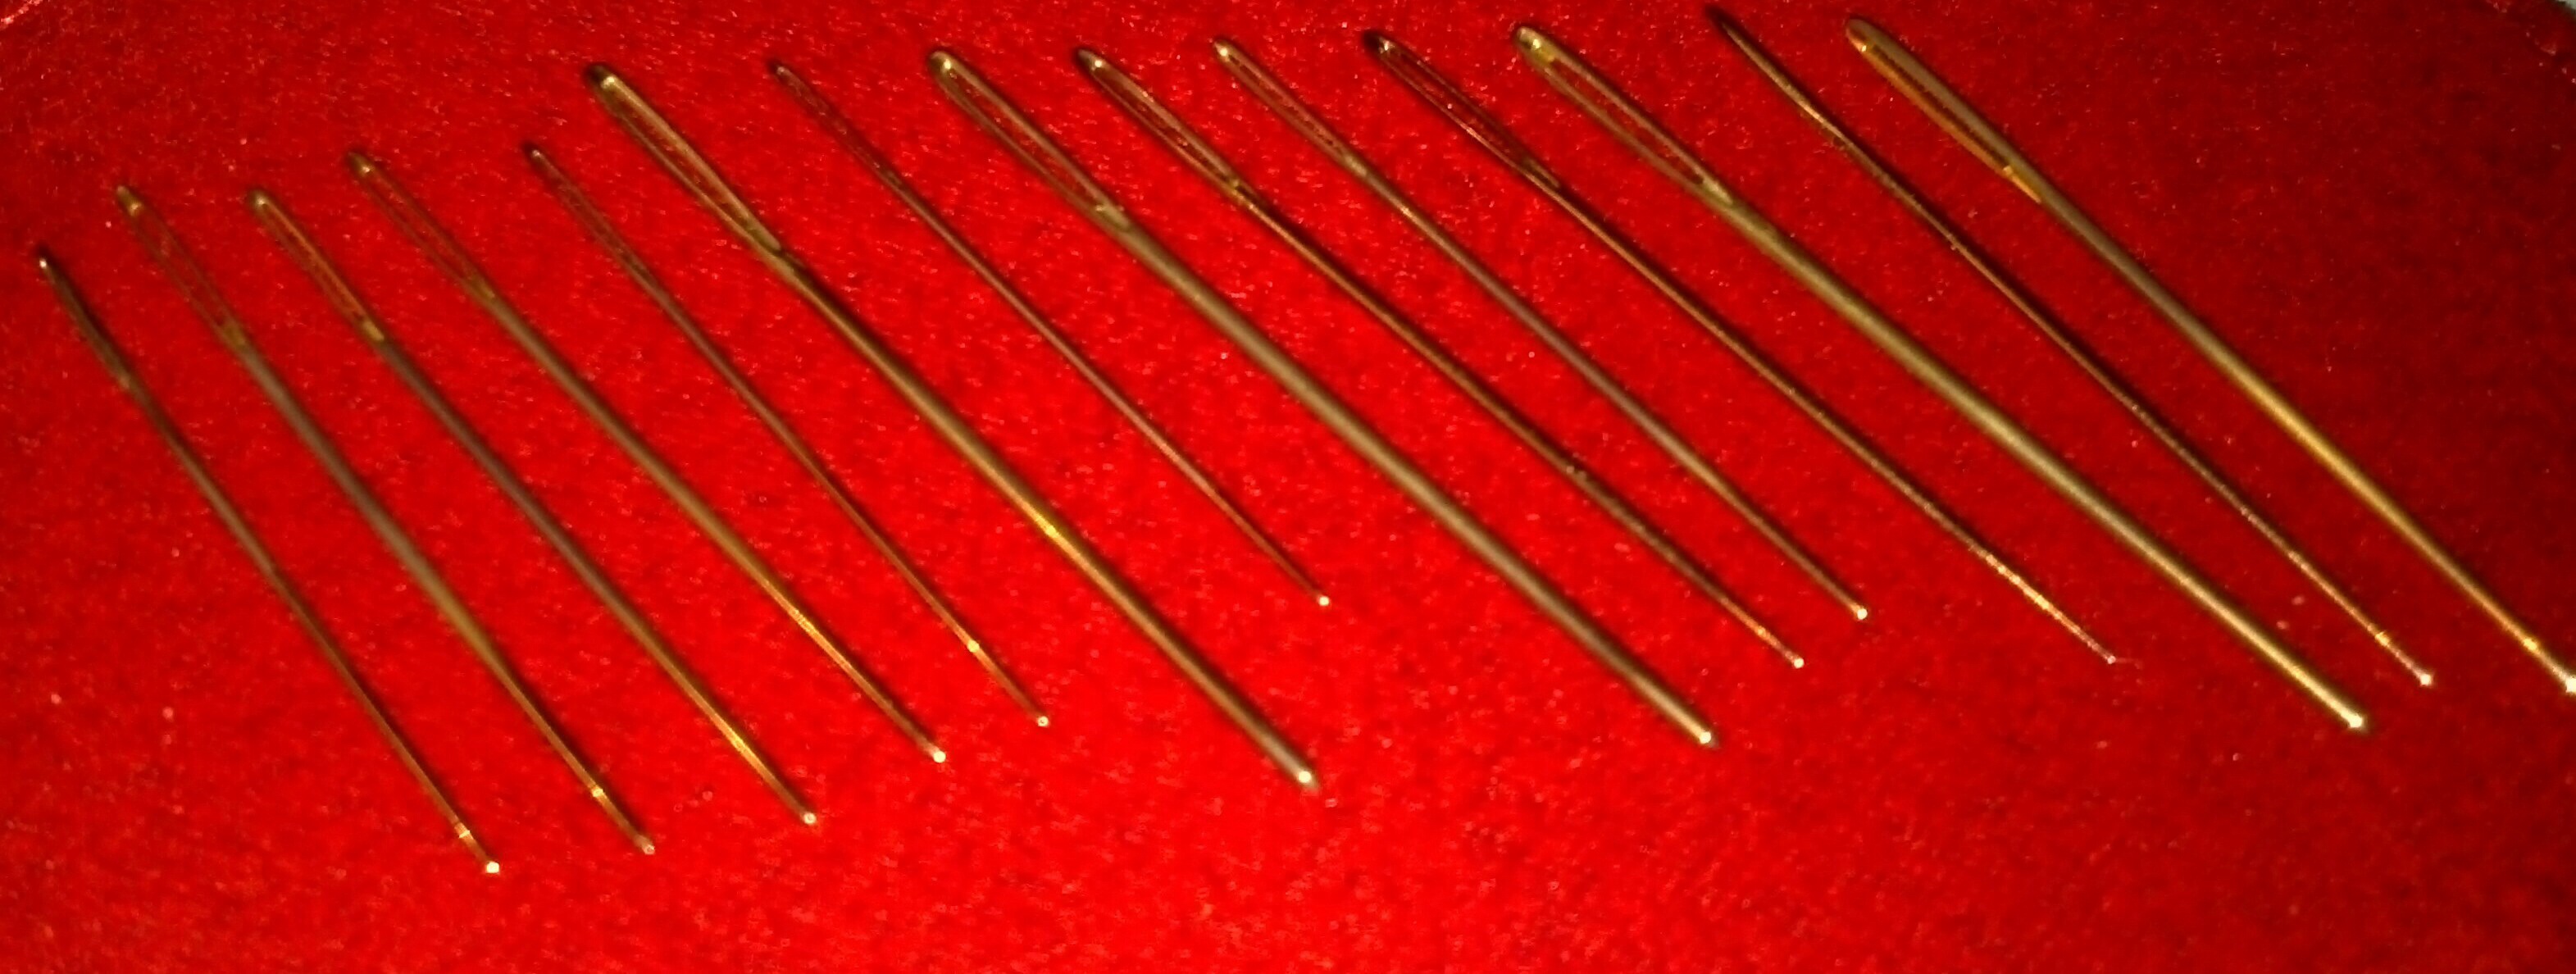
I finally went through my needles and am throwing away the old ones of which I had a good number of bad ones. Since I don’t have a “sharps” container, I decided to google disposing of sewing needles. Once site recommended wrapping in a rubber band and placing that bundle into a disposable receptacle such as an empty take out box, makeup compact, or pill bottle. Keeping them contained prevents them from poking out of the garbage bag.
As I do this, in the spirit of Hari Kuyo, a Japanese festival of Broken Needles that has been celebrated for over 400 years, I will ask for improved skills, acknowledge my work over the past years, and thank each for their help and service. Hari means needles and Kuyo means memorial service. Traditionally, they were stuck into tofu and floated down a river annually. The tofu served to soothe the needles after their labor and protect from the points of the needles from doing harm. Read all about it at http://issuu.com/audsomee/docs/hari-kuyo
Since no sewing takes place on this day, I picked a good day to celebrate my needles because we are heading out to watch Monty Python live (Mostly), a 3-hour Fandango event with our Delaware friends, and dinner. Early birthday present for Bill!
Marilyn designed a name tag that identifies all our various ANG Distance Learning programs/roles including Stitch of the Month for herself, Chapter Project Book for Sue, Cyberworkshop for Chris, Workshop by Mail for Cathie, Pilot Stitcher Coordinator for Vicki, Distance Learning Coordinator for Denise, and Correspondence Course for me.
I got the stitching done a few weeks ago but was a little hesitant to do the finishing although she also provided instructions. So, this morning (with my husband out golfing & the TV off) I spent time going over the directions, made a trip to Jo-Ann’s (for sewing thread to match the backing), and put it together this afternoon! Marilyn was kind enough to send us all the same color green Congress cloth, Skirtex, fleece, and 4 pony beads. Chris was also fantastic to send us all the same color green Ultrasuede for the backing.
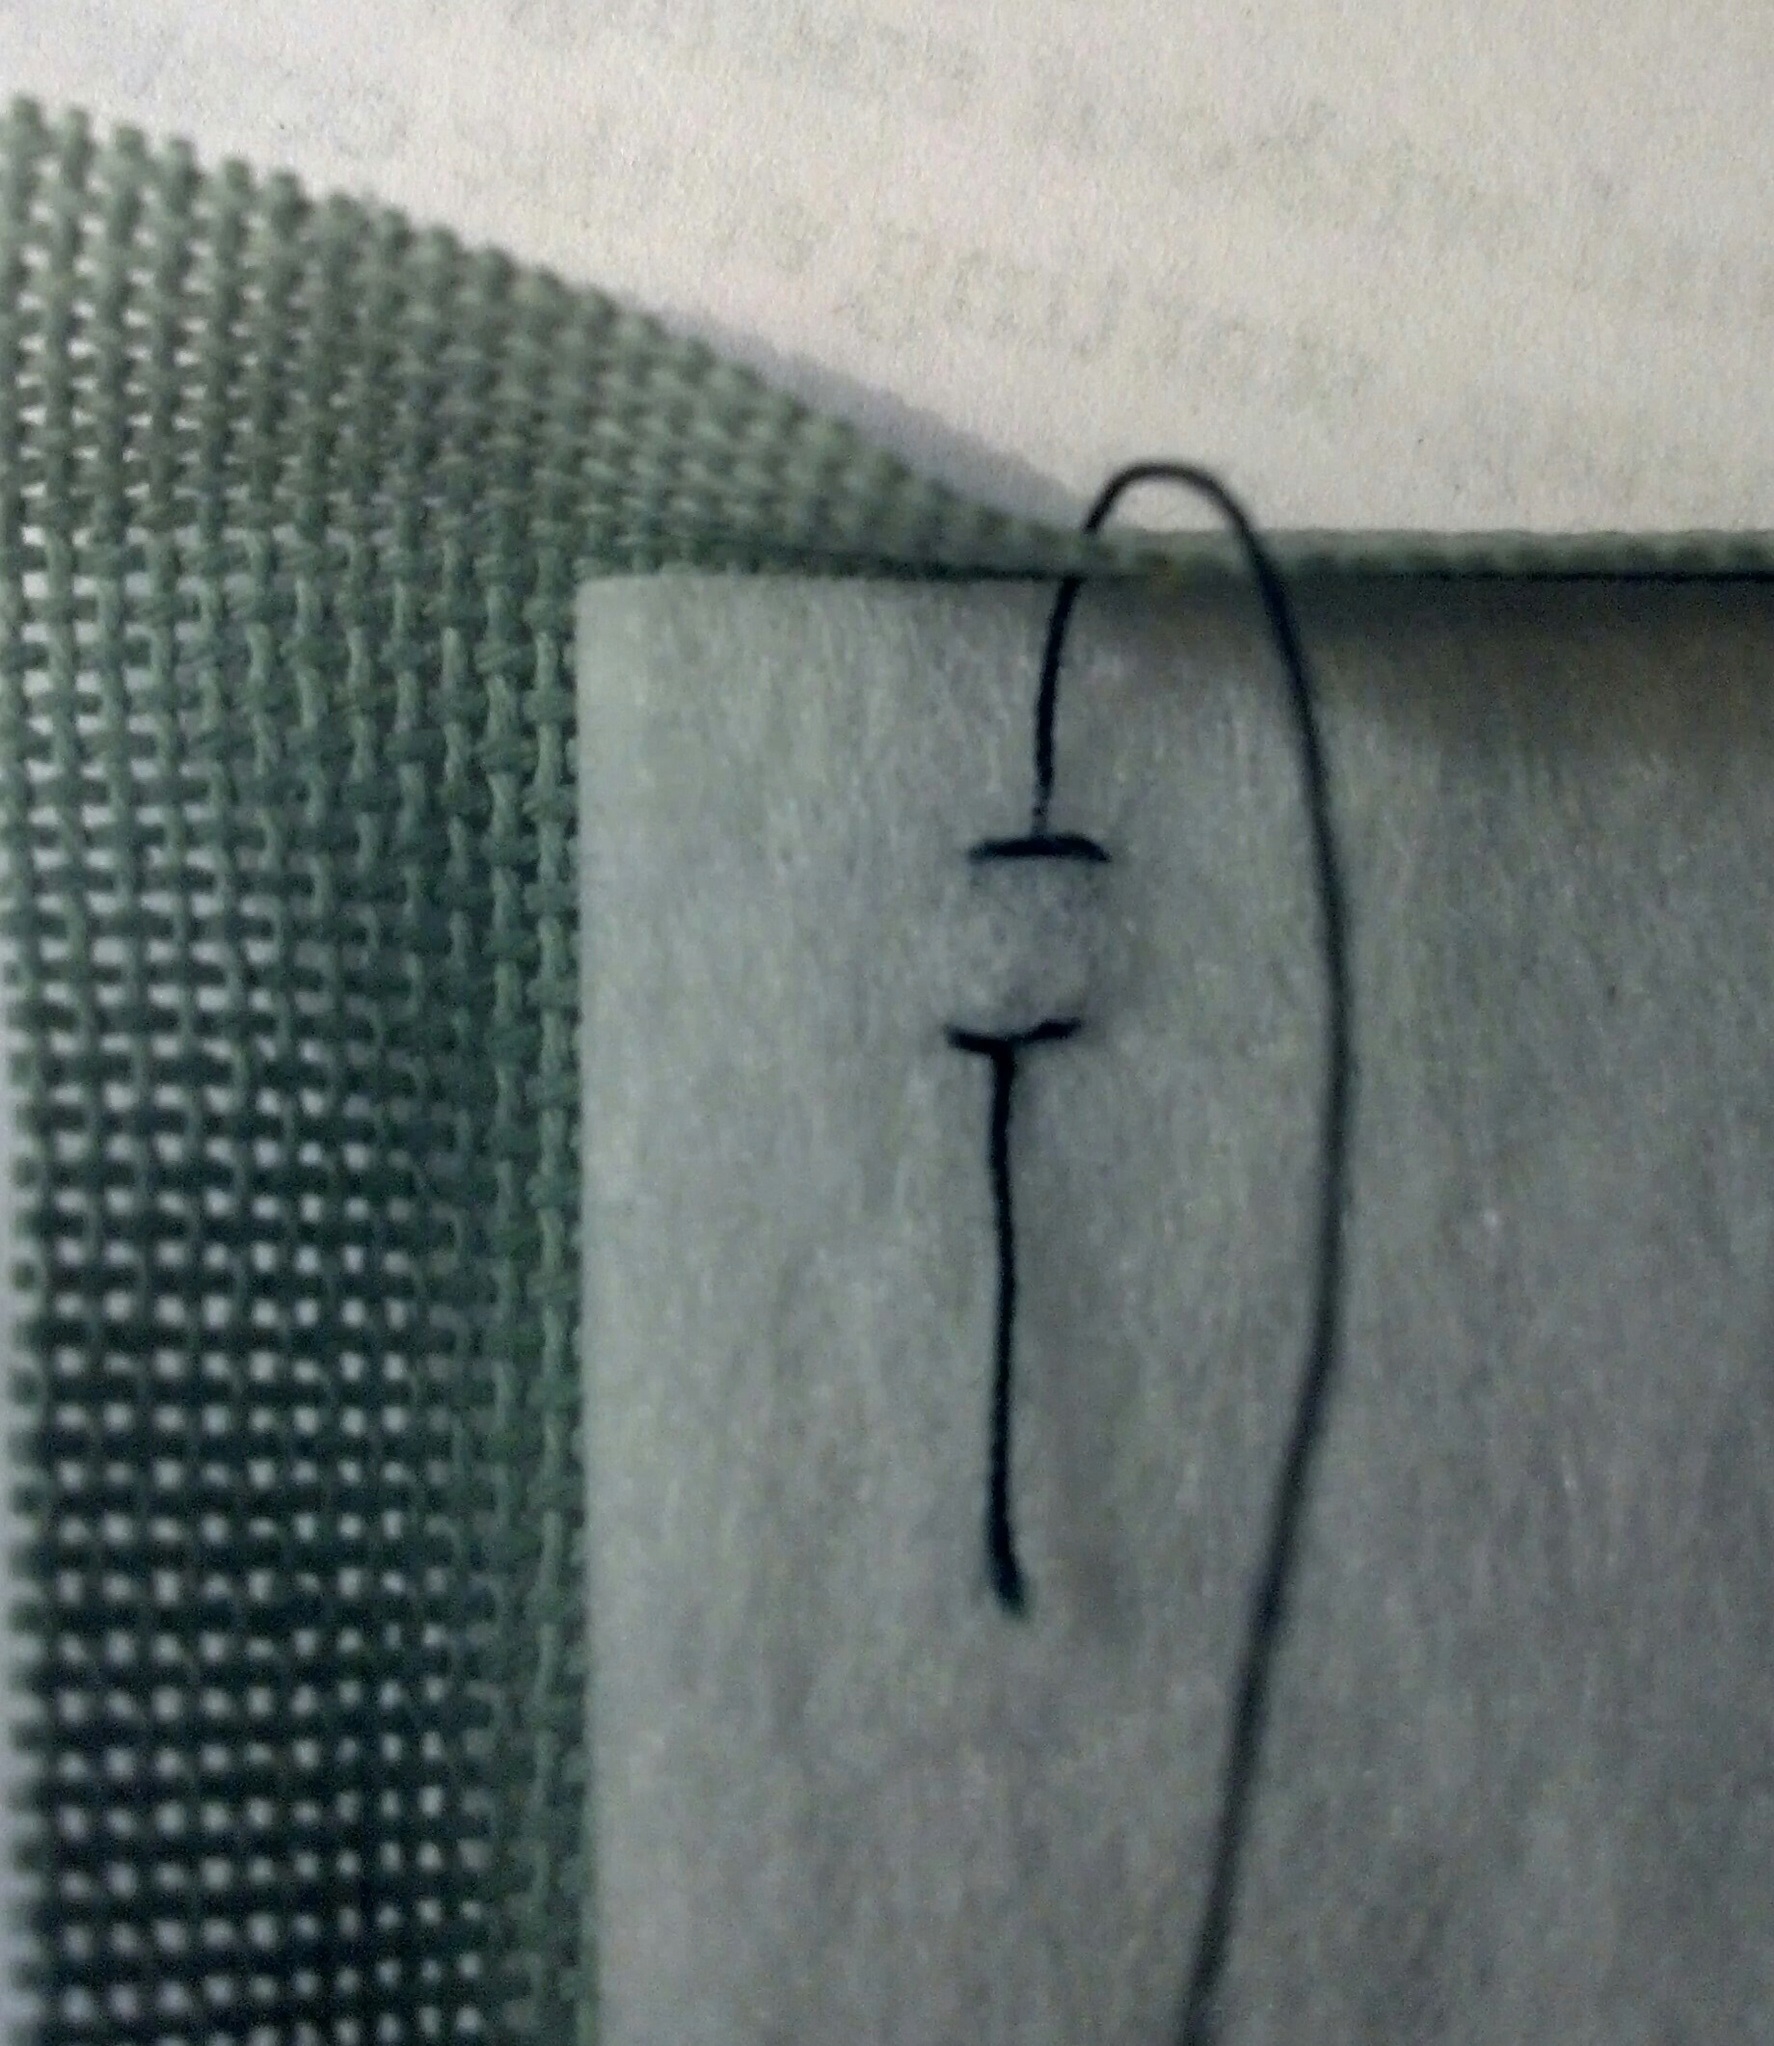
I had never heard of or worked with Skirtex before which is a stiff interfacing but is still flexible. I love it – it is very light. And, I discovered that it served well as a place to begin the thread. That way it wasn’t anchored to and carried through any of the back of the stitching which could show through the front.
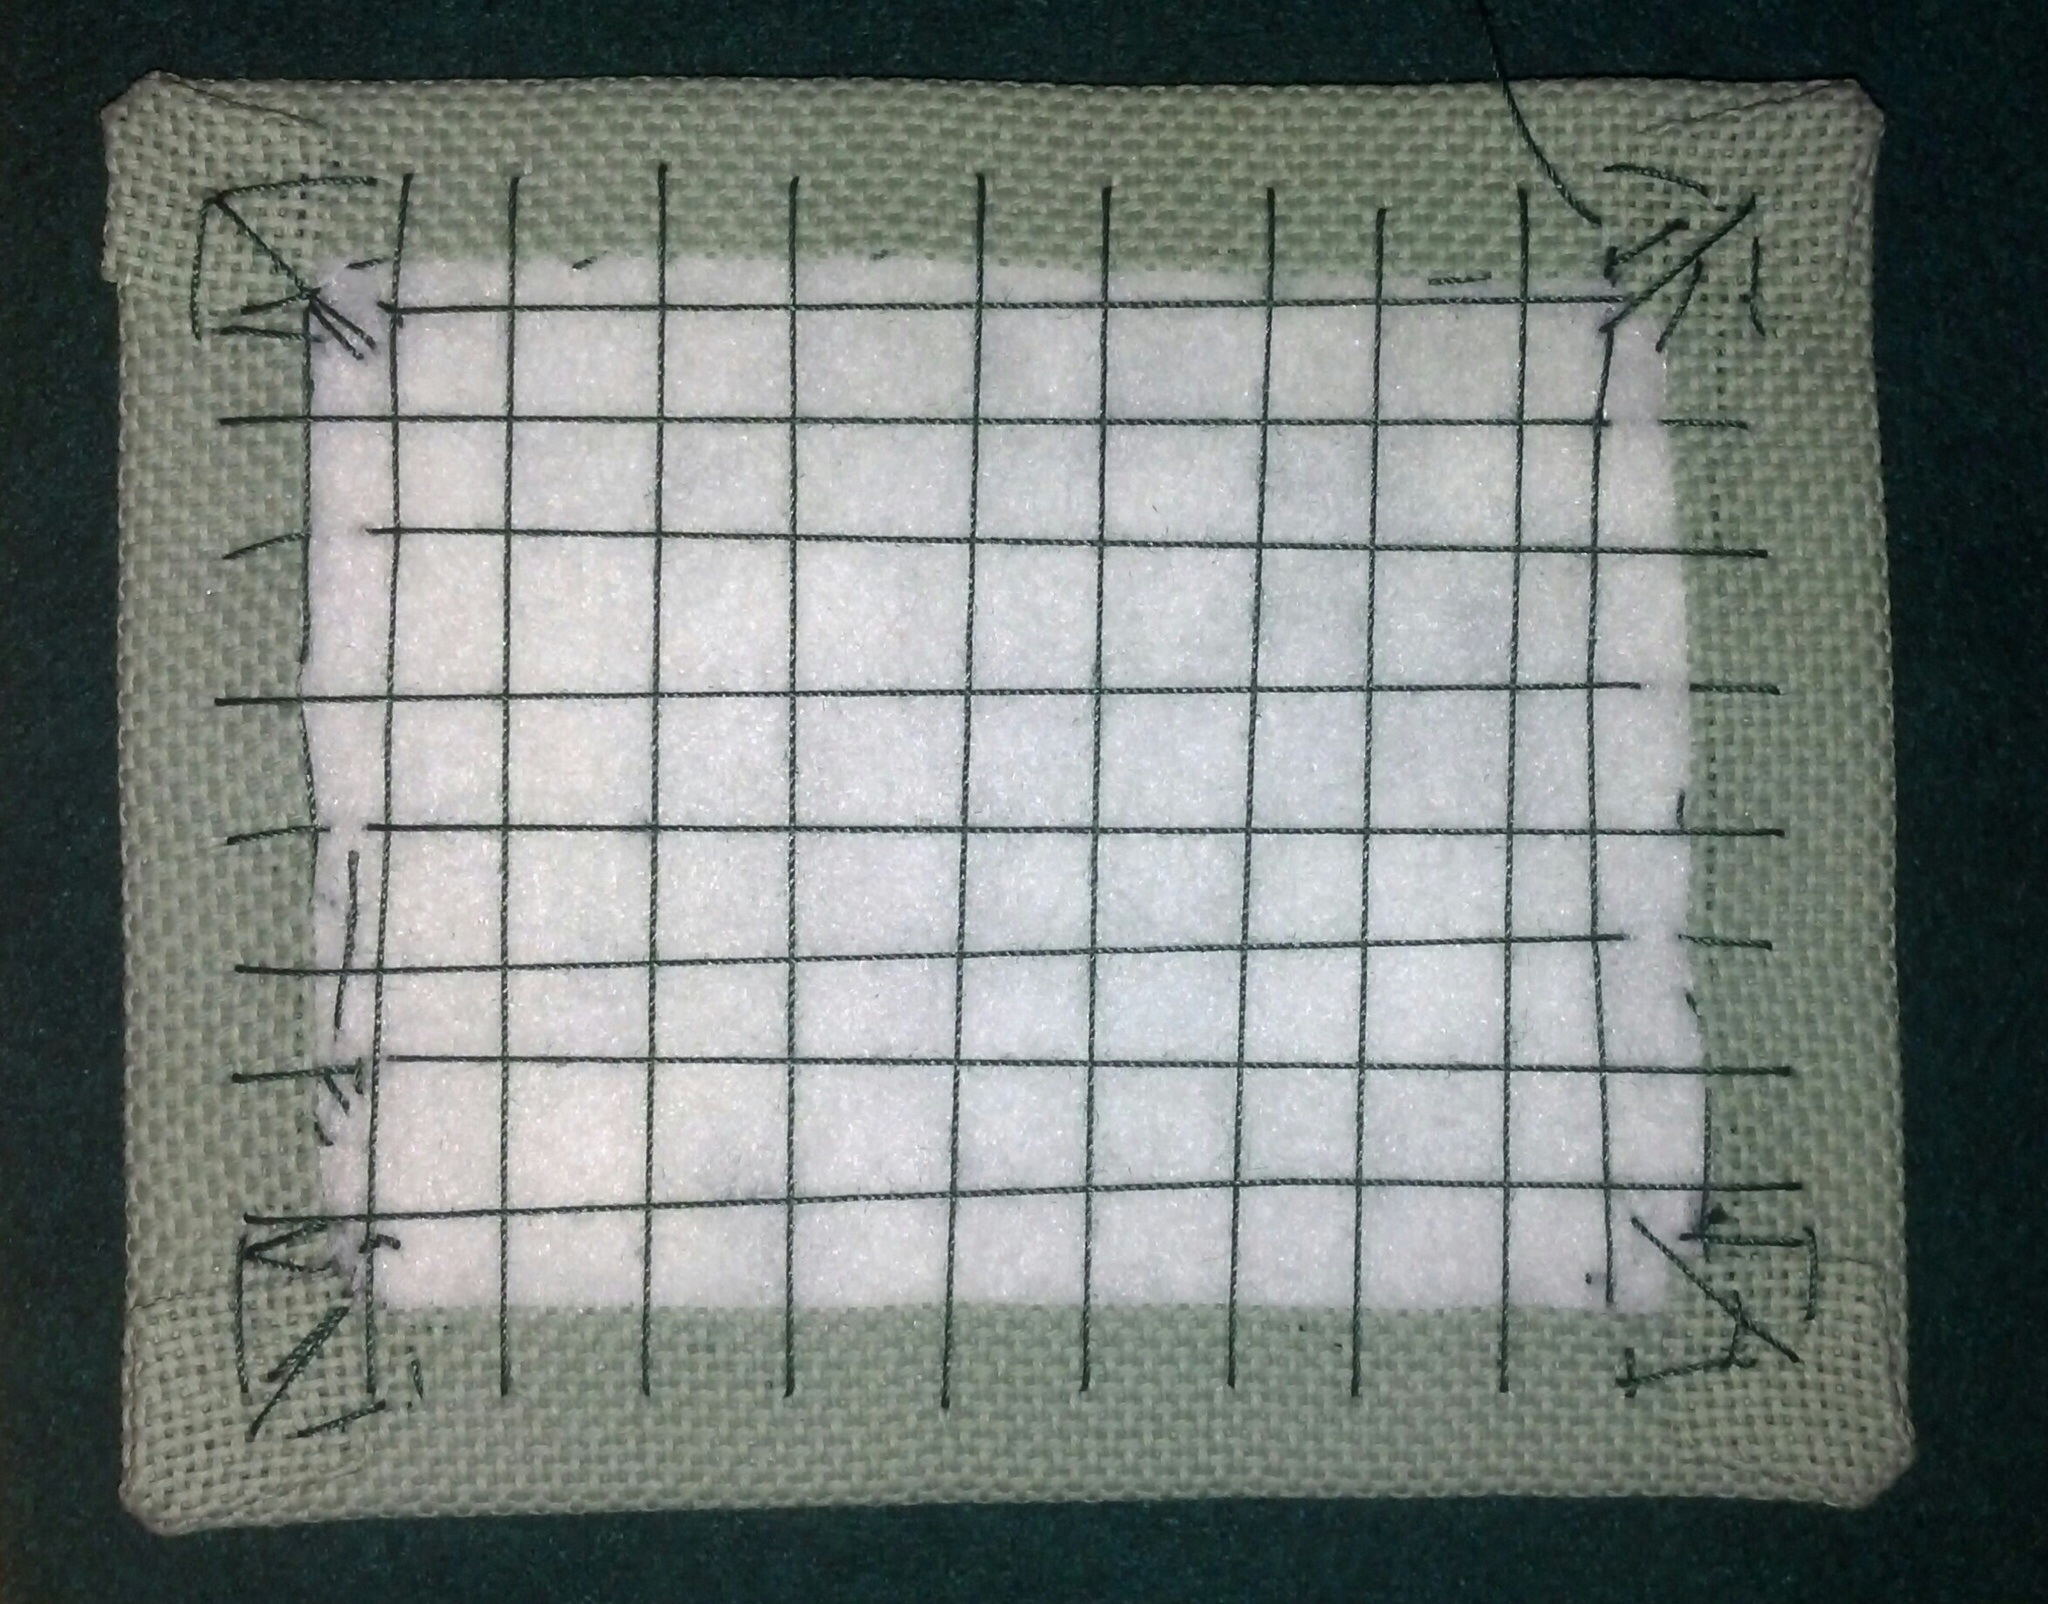
Then, I cinched lacing stitches into the Skirtex to make it taut and take some stress off the Congress cloth (shown loose in the picture so show how I stitched). I don’t think I’ve worked on Congress cloth until now. It was stiffer than I expected more like monocanvas just a larger count (24 threads per inch). 18 doesn’t sound that much different from 24 but my eyes think so! I’ll stick with 18-count canvas but I can say I have worked on Congress cloth & could if needed.

I mitered the corners differently. Marilyn’s were done as described in The Needlepoint Book” by Jo Ippolito Christensen but I don’t think it makes a difference in this case. It just folded my way so easily.


All the lacing stitches went into place easily enough. You just can’t pull too tight because Skirtex is flexible and it could bend. Marilyn reminded us to pack it carefully – she thinks of everything!
The Ultrasuede is fantastic to work with. When I made Marilyn’s Ort Box, I used something like suede that I picked up at Jo-Ann’s but the edging frayed. This was fantastic & had no fraying edges. And, I used the Fiskars Razor Edge scissors (that I learned about on the ANG Yahoo group email list) to trim the sides to fit. Those scissors are wonderful – no wonder they have been around more than 130 years. I used an overcast stitch about every 4 threads as Marilyn recommended. No need for a fancy stitch because the edge will be covered by a decorative braid.

Since I really don’t like anything around my neck and wanted it as light as possible, I didn’t use any fleece (for a softer look) although that is light as well. I did add the extra piece of Ultrasuede as pocket on the back for my room key. That still should be light.
Because I don’t have a machine that makes braid, I was glad to find a green braid at Jo-Ann’s that will work fine & I’ll attach it another day. I probably won’t post the front of the name tag until seminar. So, look for the ladies with the green tags & say Hi! It’s wonderful to put faces with names.
It is just a little over a month away before we’ll be in Chicago! And, I am so happy that I sat down & did this today because my pre-work arrived today! It is possible that by stitching the background ahead of time, we can finish Michele Roberts'”Faux-berge” Orange Tree Egg during class. I sure am looking forward to seminar!
Filed under: ANG Keystone Garden Chapter, Triangle Santa Ornament by Peg Dunayer
With the polar vortex swirling, what better time than now to be stitching Triangle Santa from Needlepoint Now (Nov/Dec 2007) designed by Peg Dunayer. It is the Christmas in July project from my ANG Keystone chapter. It is a cute little ornament that is a fantastic “stash buster”. My threads are:
Red: Sampler Threads Claret 0310 (shoulders) and Cherry Wine 0330 (hat)
Dark blue eyes: Needlepoint Inc Silk 823
Flesh: Kreinik Silk Mori 3042
Cheeks/nose: Kreinik Silk Mori 3045
White beard: DMC Perle 5
White moustache & brim of hat: Fuzzy Stuff FZ15
I couldn’t decide on Cherry Wine or Claret for the red overdyed thread from my stash. So, I put both in the project bag. When I stitched the hat, I decided the lighter Cherry Wine would be better & thought 3 threads provided enough coverage on the 18 count canvas.
Then, I stitched the beard and layed a few base stitches to give the brim of the hat some depth. I am probably going to do a different stitch than the satin stitch that is suggested but am still thinking. Any suggestions anyone would like to offer?
When I went back in my bag to get thread for the shoulder, I grabbed the darker Claret quite by accident. And, I saw a note that 4 threads are recommended for use on 18 count. In the meantime, I’d seen an article on “dandruff” and decided this was an example of that. You can see the hat has speckles of white canvas showing through but the shoulder has almost none.


So, I went back to the hat and added 2 threads of the darker Claret on the hat outlining the Byzantine stitch. Then, to lighten up the shoulders, I outlined them with 2 threads of the lighter Cherry Wine. A definite improvement and lesson learned about thread coverage.

Filed under: Uncategorized
The sandals/canvas are designed by Birds of a Feather (BF413). They are size 39 European or an 8 in US. I did the stitching and have donated them to the auction for this year’s ANG Seminar in Chicago. They will be available at the silent auction. So, if you are a size 8 OR are looking for a gift idea for a friend or family member – start asking now who wears size 8 & make these a birthday or Christmas gift. I hope you take a look for this item at the silent auction!!
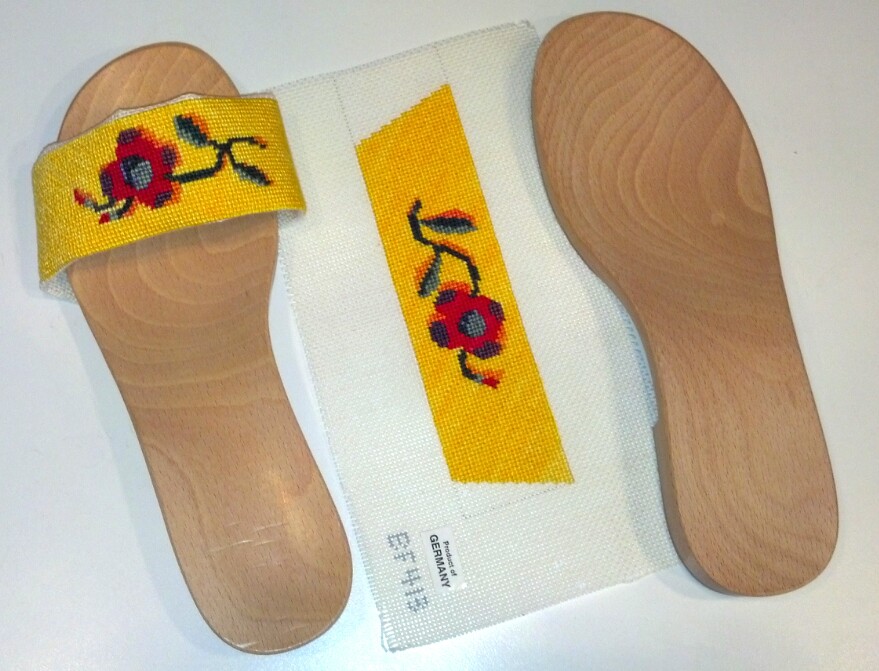
And, Rittenhouse Needlepoint donated the finishing – didn’t they do a fantastic job! Thanks again to them!!

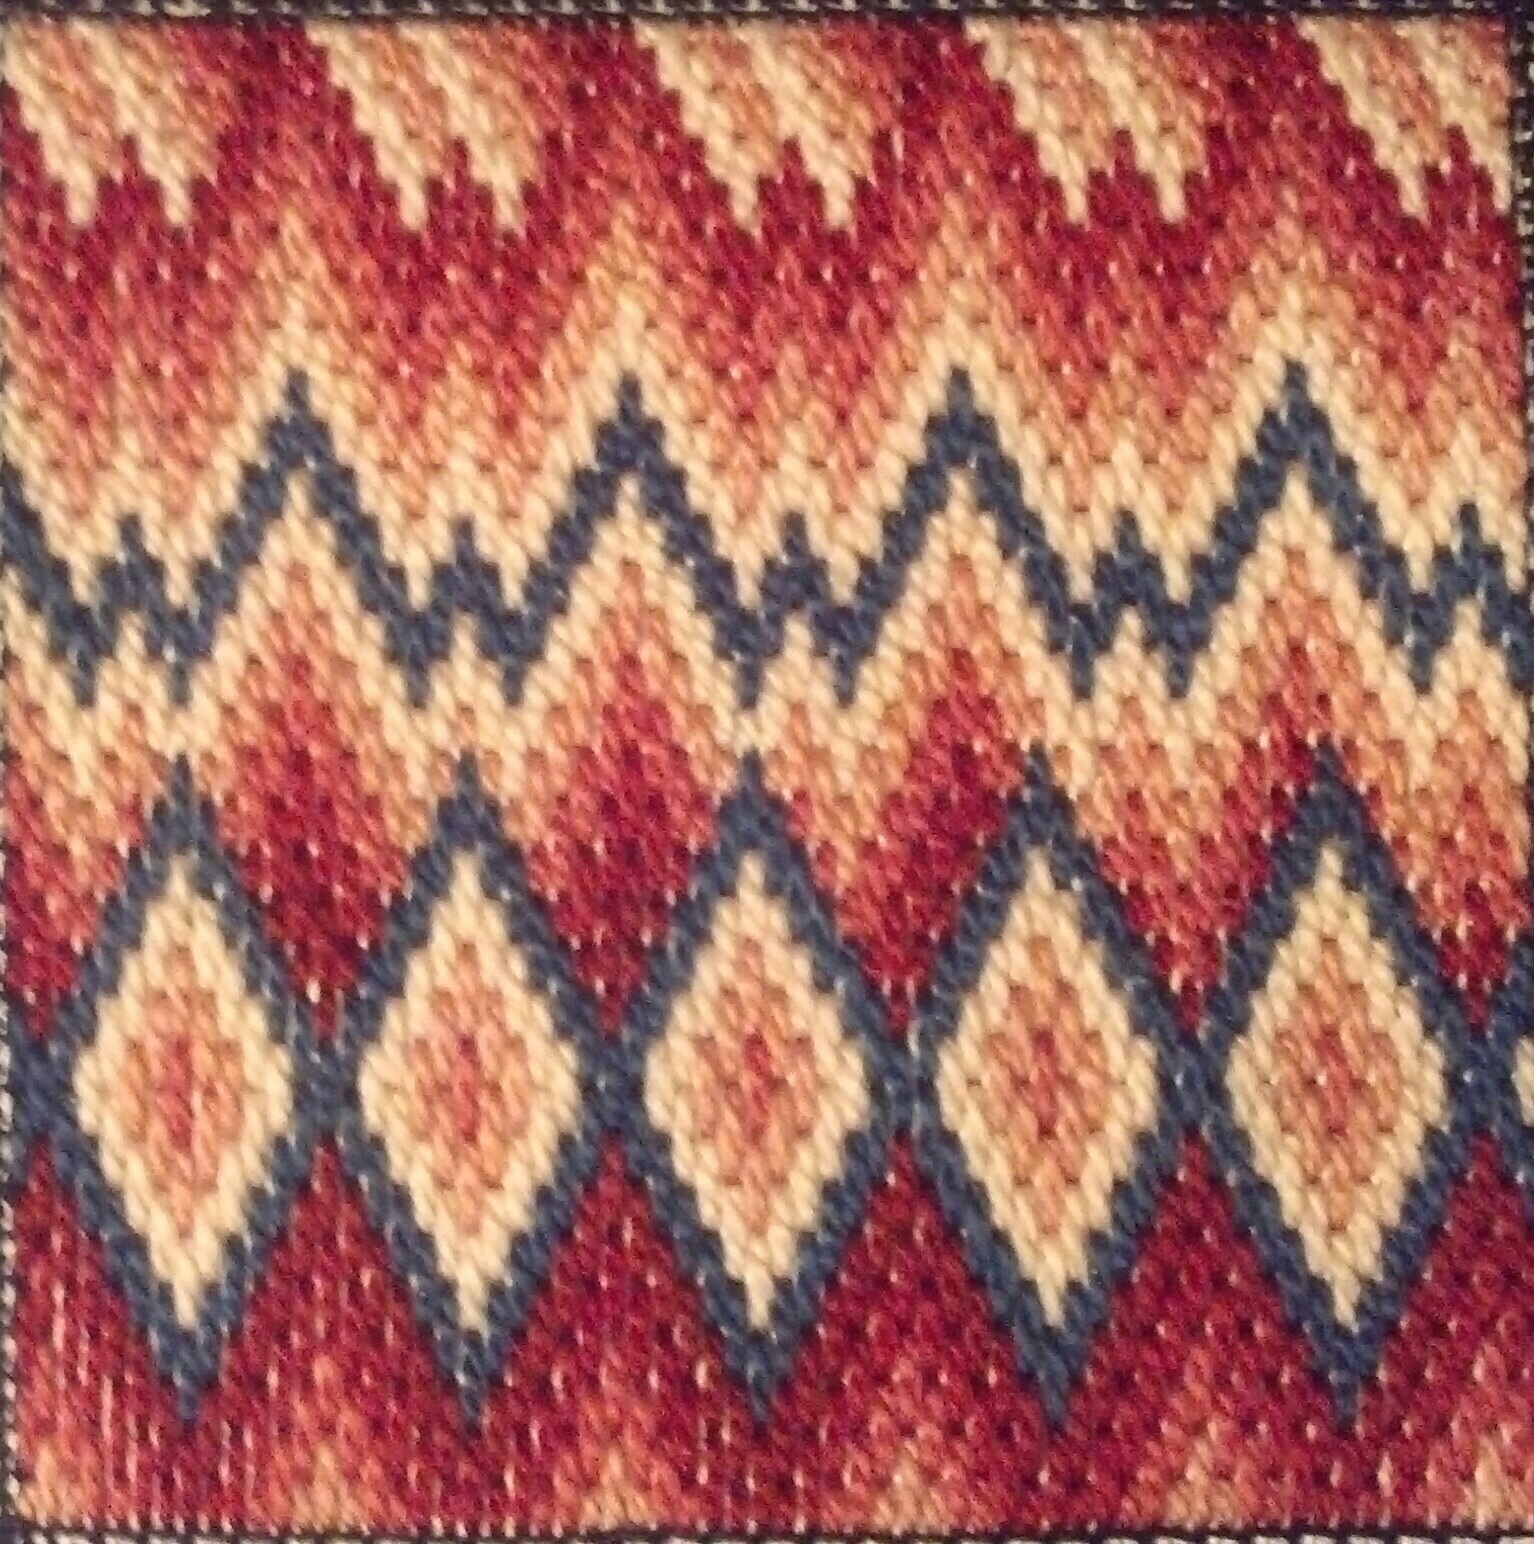
This stitched design used both blues. It works! But, I must say, it happened again. I had a heck of a time following my own pattern. It didn’t help that my color markers were random. But, I finally decided it was better to work the dark red rows along the middle then do the light red above it before tackling the blues.

Liz provided great insights into Bargello. This was a fun project & the booklet will remain a great resource.

I finished the last of the two sections, 3 and 8, to place them in bookends. I enjoyed the project although I did find following the patterns more difficult than I expected probably because I was too distracted by work and by watching TV when I stitched. But, they turned out fine. It certainly wasn’t the instructions from Liz Morrow – they were clear and very detailed. It is a great resource on Bargello. And, I have been inspired to try my own small design now! That’s as much my goal for doing a project – learn & grow.
The pattern had either an M or a W depending on which way I inserted the design. Since I gave these to my husband, Bill aka William, it appears as follows:


I like the collage type frames & decided that these individual pieces would look great in one. And, it saves me a ton of money. Framers do excellent work but they are so expensive.

I still have 2 more square designs to stitch & they will fit in bookends! Yes, I still have more of them (I couldn’t resist the sale).
