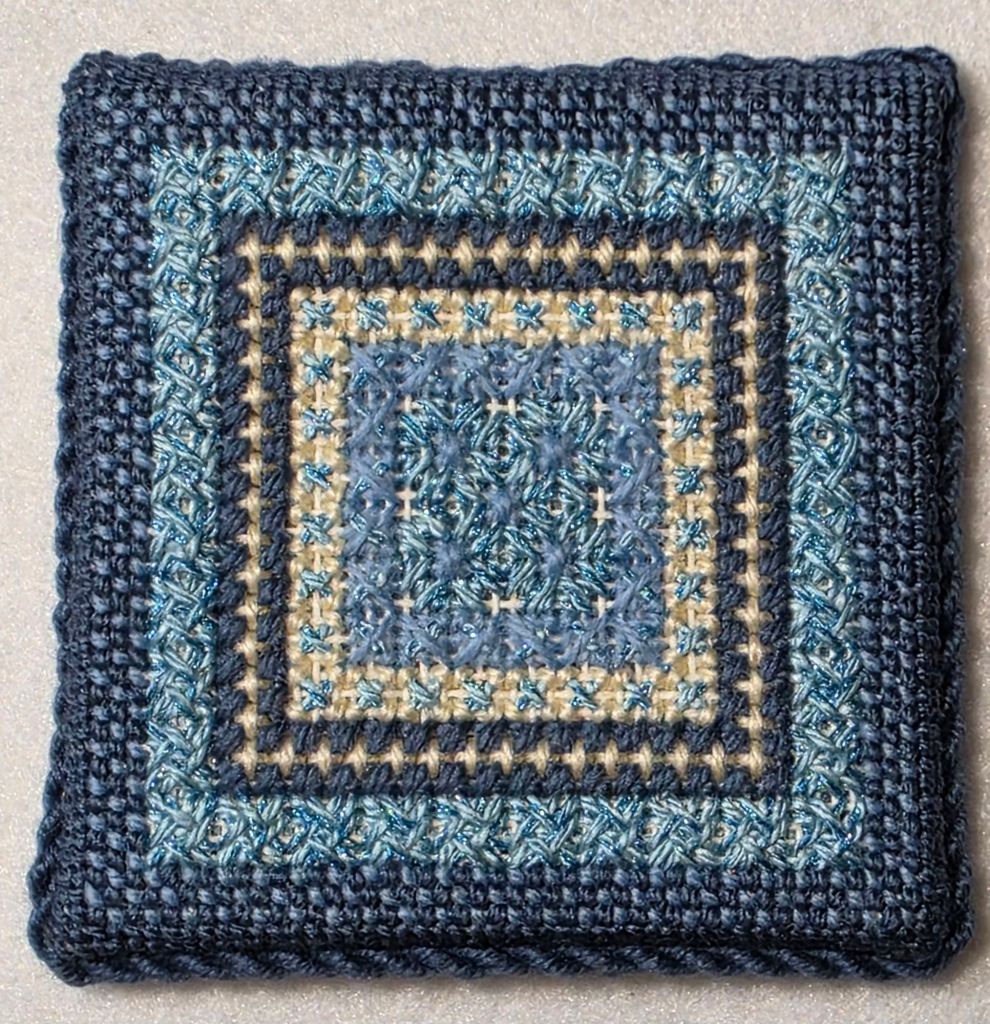
I finished the ornament Love, 5th in the series from the Cabochons Series by Susan Portra.
This time, I did it differently. I used a running stitch and cinched it around the magazine board. With the rest of the thread used as lacing to keep it snug.
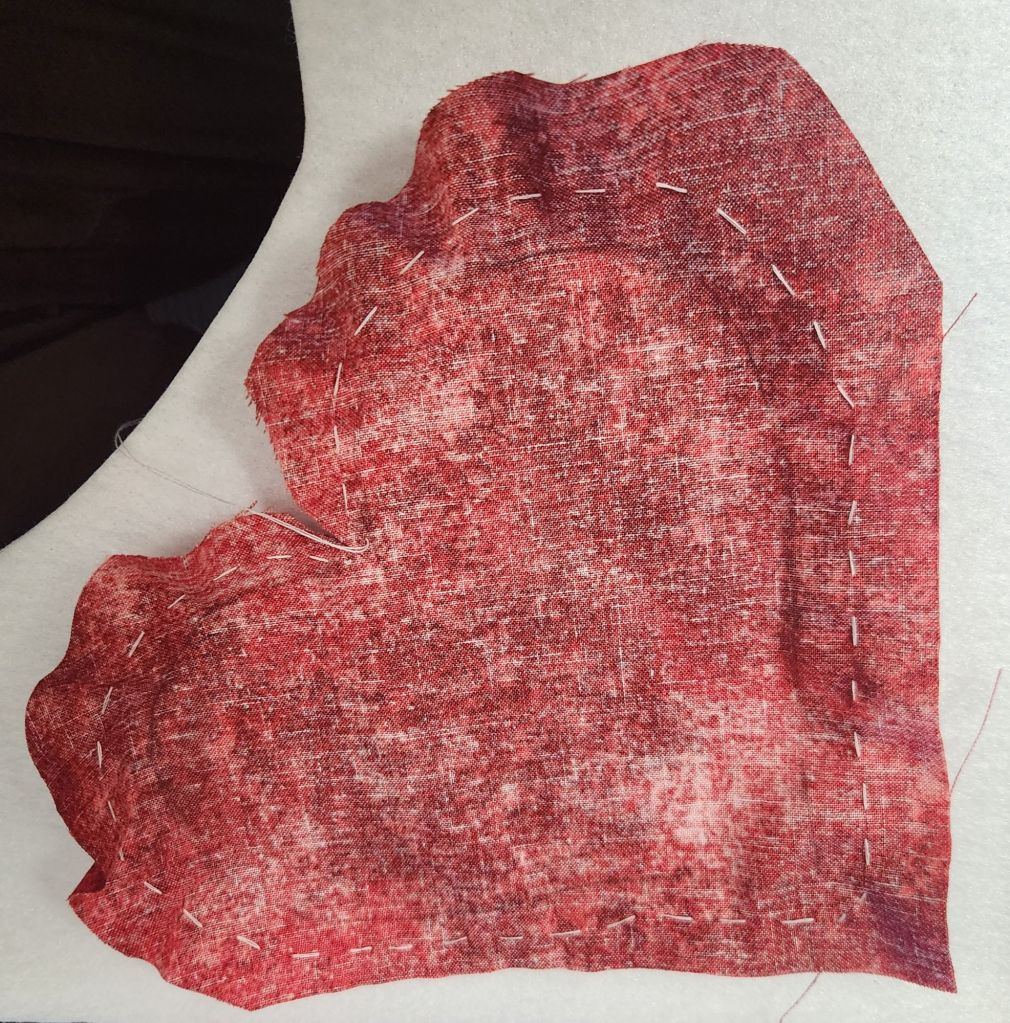

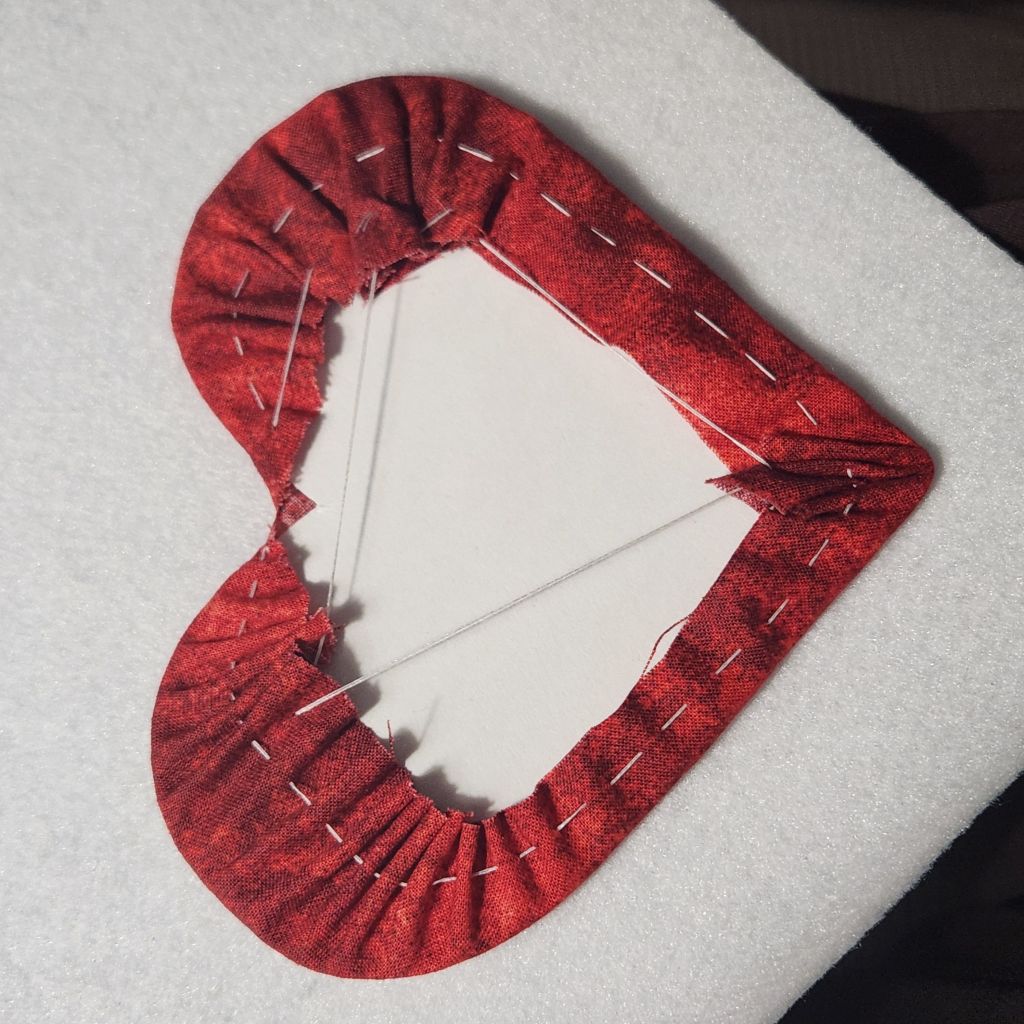
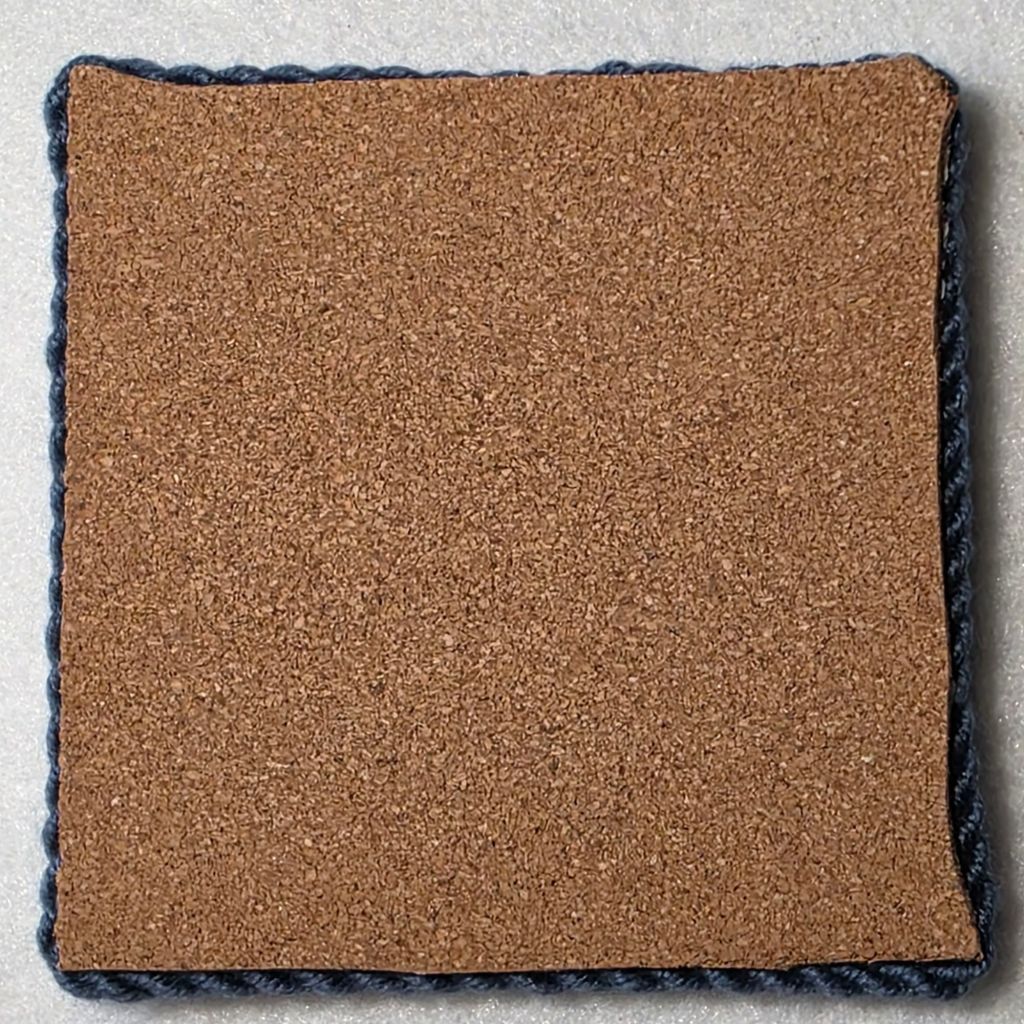
I added some Craftex as padding. Then, I glued it to the back of the front in a few spots with “Super NEW GLUE” by Euro Tool, Inc. that I picked up at Blue Santa Bead. It’s a small bottle and easy to control. It dries fast and firm.
I had enough of the DMC #5 Pearl 350 and Tiara T115 to use 4 strands of each to make the cording. I stitched the cording to the Craftex before gluing the cording into place while pinching the 2 sides together. I went back and stitched the cording in a few places to be safe.
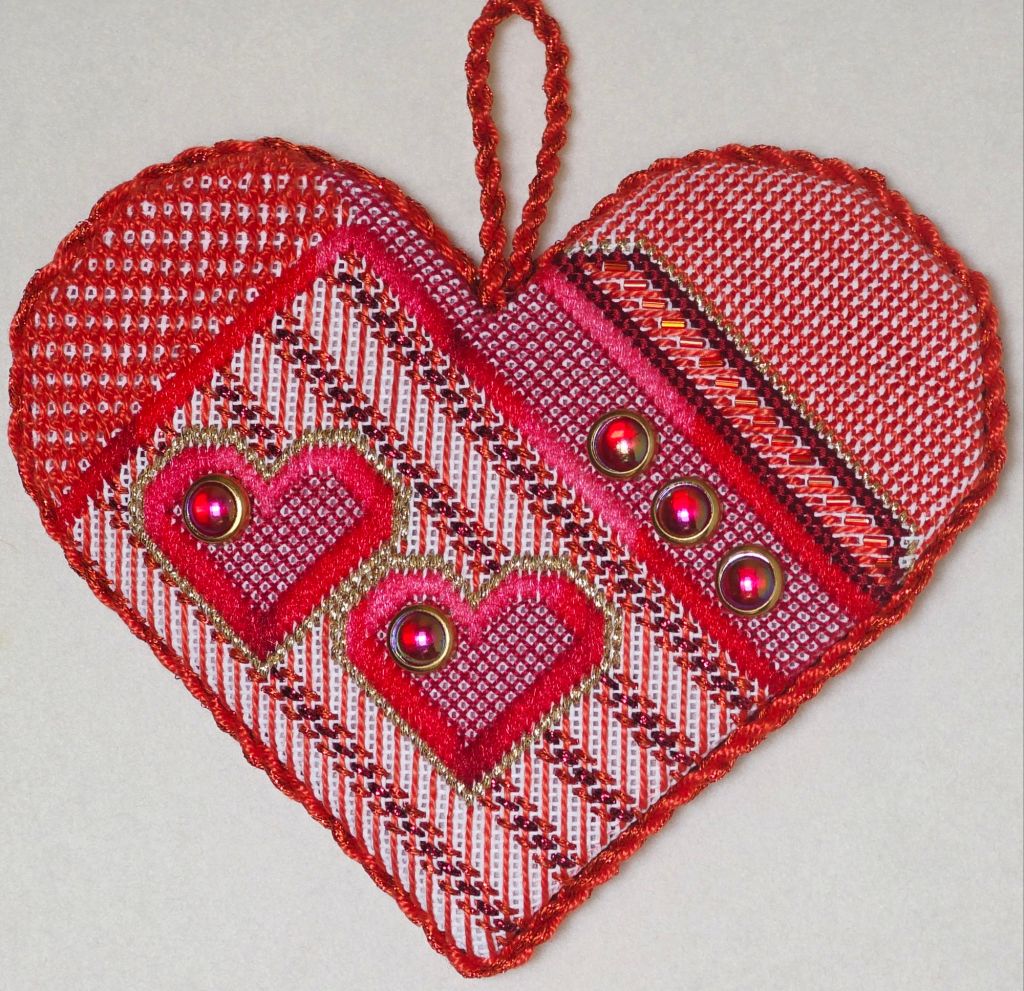
Goal #21 stitched and finished! I decided to finish these when I take them off the stretcher bars so they don’t get jostled or the stitching skews once removed. Plus, finishing all ornaments together sounds like a worse option.
Filed under: General comments, Painting Needlepoint Canvases with Fancywork Finishing
In 2020, I took a painting class with Nancy of Fancywork Finishing on Zoom. I think she may have retired since her website is not active. I painted and stitched a similar original design on 13 count (https://melitastitches4fun.com/2020/11/05/painting-needlepoint-canvases-with-fancywork-finishing/) and on 18 count (https://melitastitches4fun.com/2020/12/02/second-coaster-stitched/). I wanted to find red leather coasters. So, I put them away until I found them.
In September 2024, at KC Needlepoint, I finally found leather self finishing coasters with 4″ square openings. The red wasn’t the same red so I went with a very dark blue. But, when I got home, I couldn’t find the stitched pieces.
Finally, I found them last week while looking for something else! But, the stitched pieces were 3 and 15/16 x 3 and 7/8 on the 18 count canvas and 4 and 1/8 square on 13 count. So, I had to find the proper yellow and add a row on two sides of the 18 count canvas. I lost the outer yellow border on the 13 count canvas. Oh well!
Boy, that was tougher than I expected. Getting the paper off on the first coaster took tweezers to get it out from under the edges. The second one I nudged better and slower so the paper came off in one piece.
I had to cut right up to the stitching on the 13 count canvas and use one tool to lift the edge and a second to shove the canvas underneath. I was afraid the stitching would unravel, but it was fine. I lost most over the outer yellow border, but that’s ok. Both are on and not going anywhere!
So, here are the finished coasters. I had not included this on my list of 2025 goals because I didn’t know that I’d find them. Bill picked the one on the right on 18 count for his.
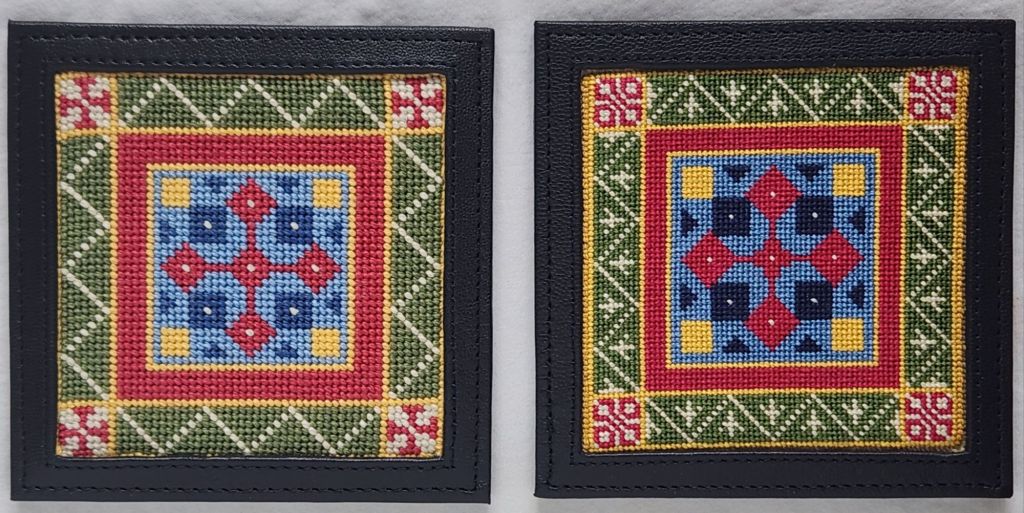
We’ve got enough coasters now! So, I’m thinking that I will find an acrylic tissue box that I can insert 4 sides. Does anyone have any sources?
The Craftery PA in Perkasie (1 hour north of Philadelphia) has an event on June 14 (forgot to post this for the April event). They feature carefully curated, artisan handmade items, antique and vintage finds, fresh flowers, original art and more.

The Mid-Atlanic Fiber Association (MAFA) 2025 Conference will be held at Millersville University, Millersville, PA in June (26-29). https://mafafiber.org/conferences/mafa2025/ In the meantime, they are active online (classes, movies, book club, and more).

Maker Festivals featuring Bead Fest returns to Lancaster, PA August 1-3, 2025, along with a fiber arts community! The festival lineup will have thousands of fiber artists, and jewelry makers! https://www.makerfestivals.com

Save time in September for two Fiber Festivals in Pennsylvania. The front and back of the brochures are below. More on their websites.
September 6 – 7 in New Milford, PA for the Endless Mountains Fiber Fest. That’s about 3 hours north of Philadelphia.
September 20 – 21 in Allentown, PA for the Lehigh Valley Fiber Festival. That’s about 1.5 hours north of Philadelphia.


November TBD, 2025 (Fri, Sat, and Sun): Jockey Hollow Weavers Annual Show and Sale in Brookside, NJ (about 1.75 hours north of Philadelphia). Unique, one-of-a-kind handmade gifts, scarves, shawls, yarn, baskets, towels — lots to enjoy.
https://www.jockeyhollowweavers.org/annual-guild-sale
Filed under: 2024 Summer Stitch Camp, ANG Central Jersey Chapter, Making Coasters, Serendipity - Stitching Club with Ellen Johnson
Sharon B, the President of ANG Central Jersey Chapter, requested that I demonstrate how I make a coaster with the cork bottom at the May meeting today.
Last month, members were given pre-cut round Craftex and cork with a self-adhesive side. They were given 18 count canvas but no particular design. Three members were ready to finish theirs and a half-dozen more listened and watched.
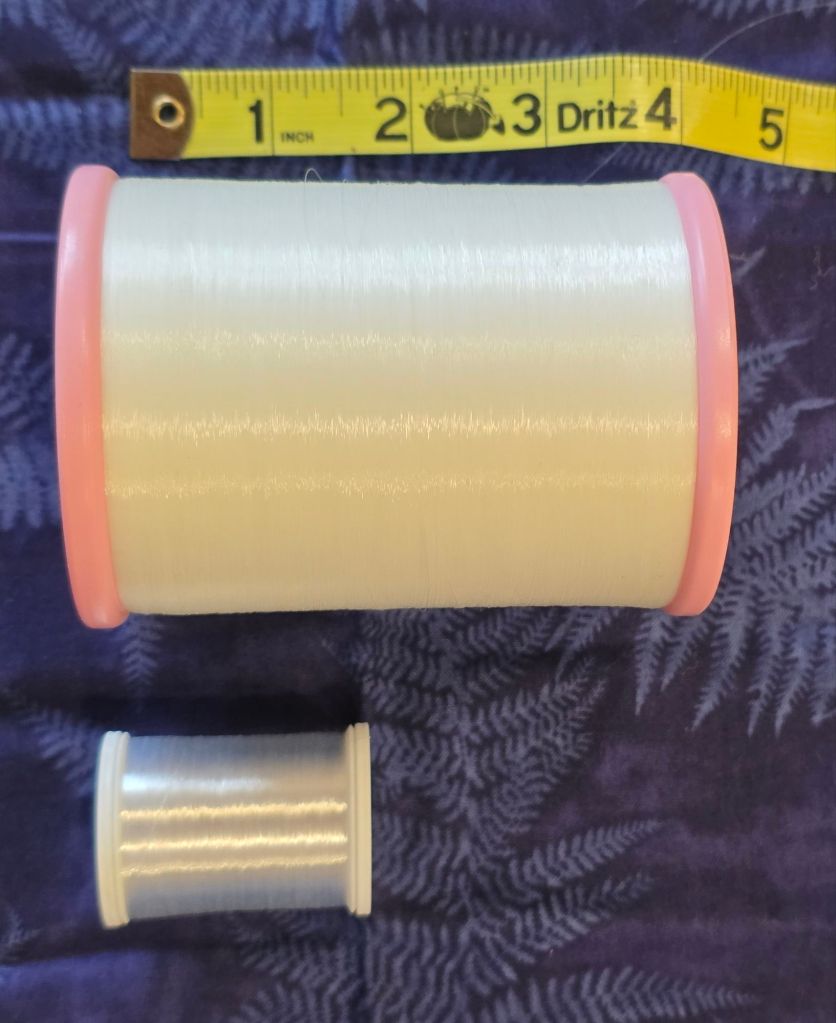
Besides the stitched piece and the piece of cork and Craftex that Sharon provided, scissors to cut canvas and any thread to attach the canvas to the Craftex is all that is needed (it won’t show). I brought a spool of white outdoor 100% poly thread by Coats & Clark. I also brought my lifetime spool of invisible thread but Janice M brought her spool of invisible thread that is big enough to be a lifetime supply for everyone in the chapter! I have never seen a spool so large.
I brought my Kreinik cord maker to add a cord between the top and bottom layers (which is optional but I like to do it). The threads typically match the one used in your design. I talked about attaching the cording by stitching and with glue. You need three times the circumference plus extra for starting and ending. Stitching is technically preferred but it is only a coaster! I brought the best glue I’ve found to date, Super NEW GLUE” by Euro Tool. My fingers even got stuck together – almost. It’s great glue.
The process is almost the same as I described here: https://melitastitches4fun.com/2024/05/04/compensation-coaster/
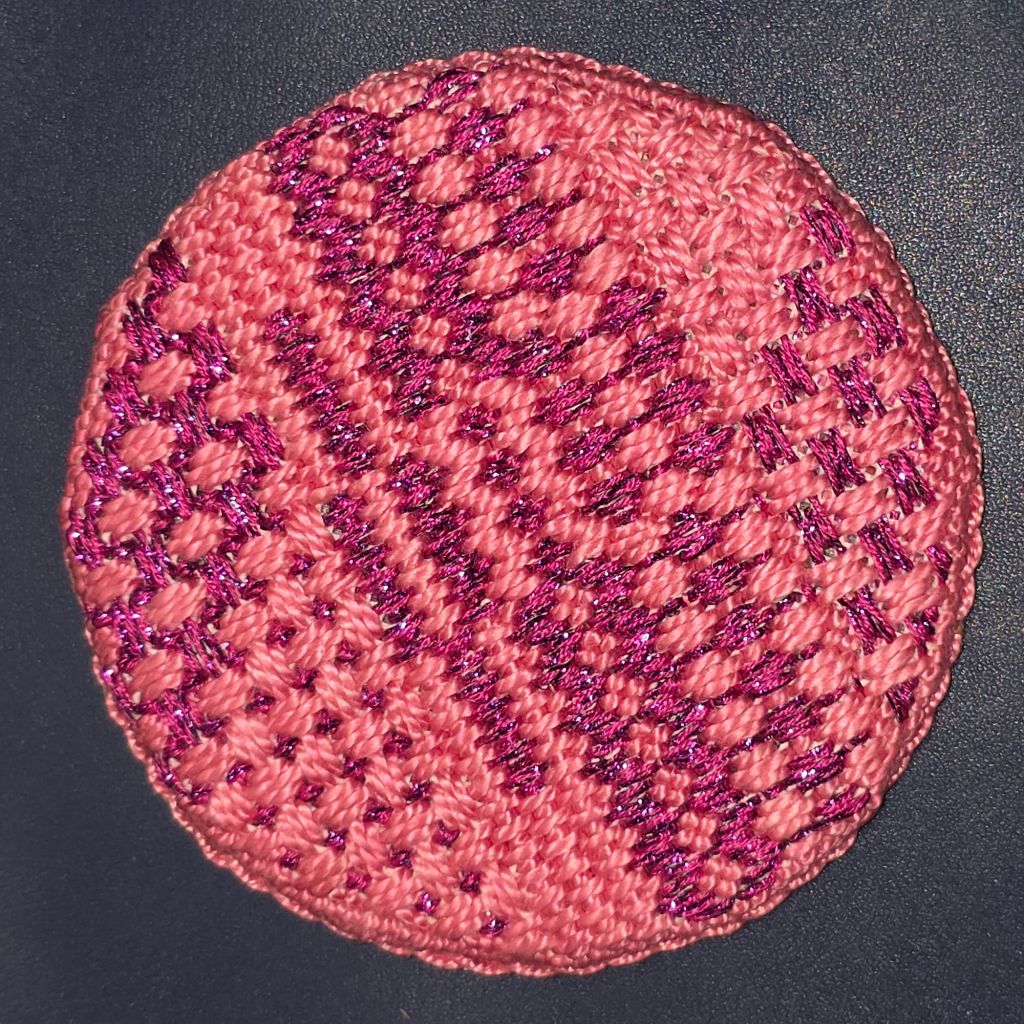
As I told them, I almost never do finishing the same way twice. I demonstrated a round using my pink coaster (https://melitastitches4fun.com/2024/07/14/2024-summer-stitch-camp/).
This time, I tacked the Craftex on the back of the needlepoint with invisible thread in 5 places. Then, I used 2 strands of the outdoor thread and laced each tab to the Craftex crossing to the opposite side as I moved around to various tabs. I glued the last half dozen tabs. I wanted to show how quick and firm the glue dried.
I only showed how to cut the blue square (https://melitastitches4fun.com/2024/07/18/summer-stitch-camp-square-coaster/) and I finished it later that night.
That’s when I remembered one way I avoid a knot on the cording which would create an unwanted bump which isn’t good for a coaster that needs to be flat. I put a piece of Scotch tape on the end with the knot and cut through the tape. It worked great on my thicker blue cord.
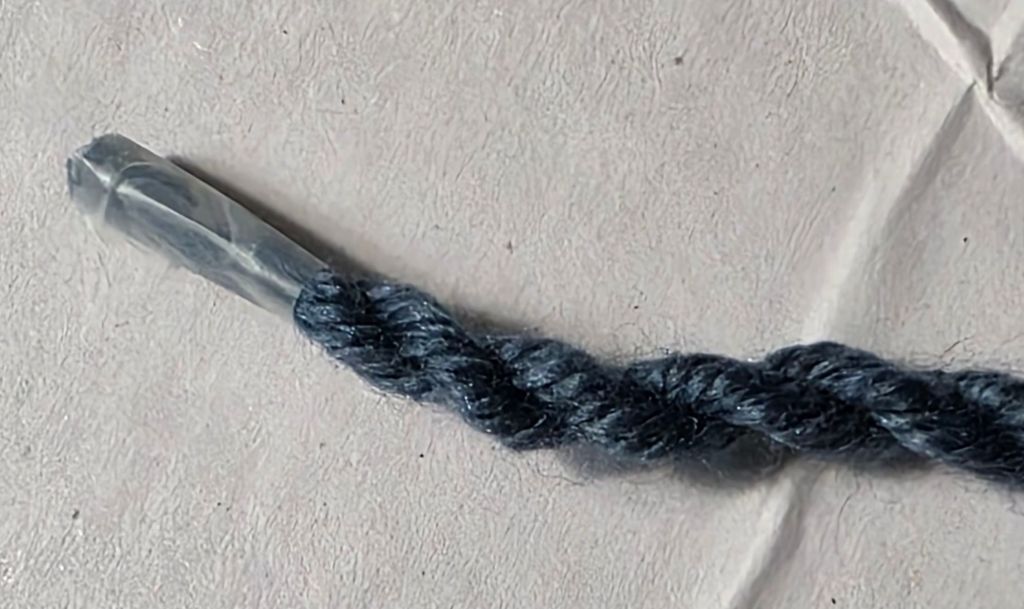
And, I was able to nudge the 2 cords together so you almost can’t see it. Can you see where the ends overlap?
Here’s where.

The corners kind of stuck out but since I cut the cork to shape, it worked out just fine. I just traced the shape and then cut the cork.
I used glue to attach the cording along each edge and at the corners. It looks great!
Mine will be the pink one and the blue one will be Bill’s.
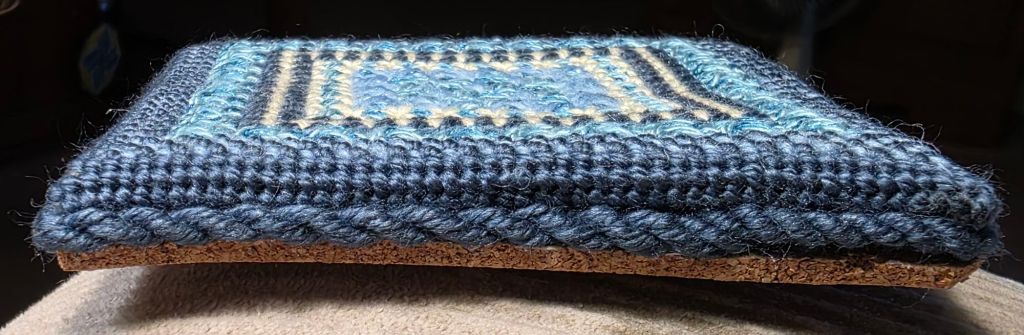
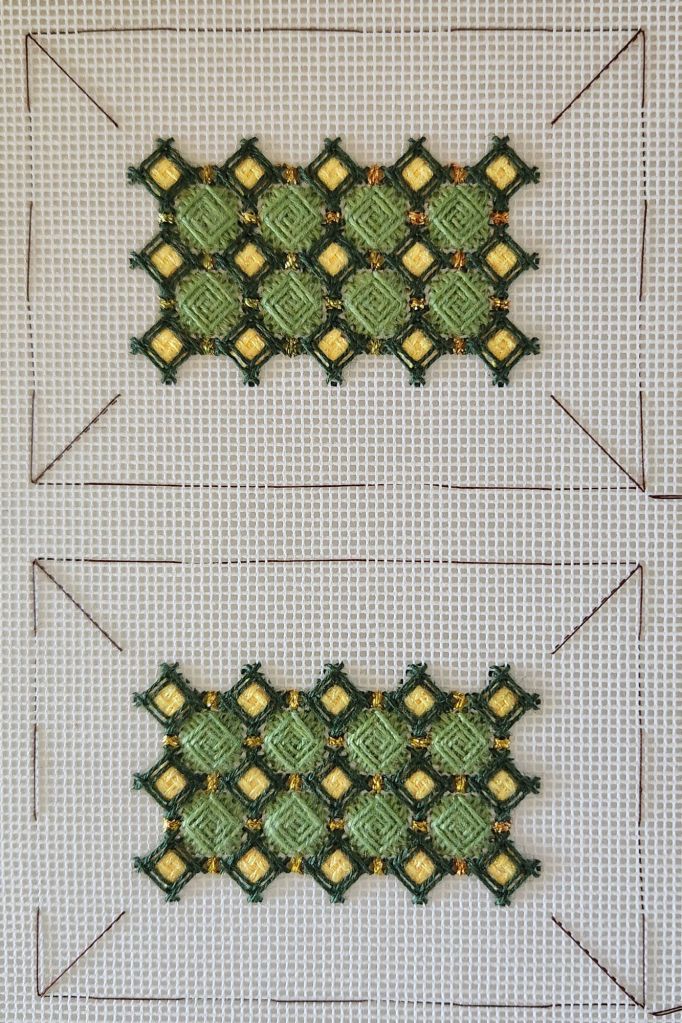
Here’s where I am up to on both ort boxes. These ort boxes have good lessons on how to have thread not show through canvas.
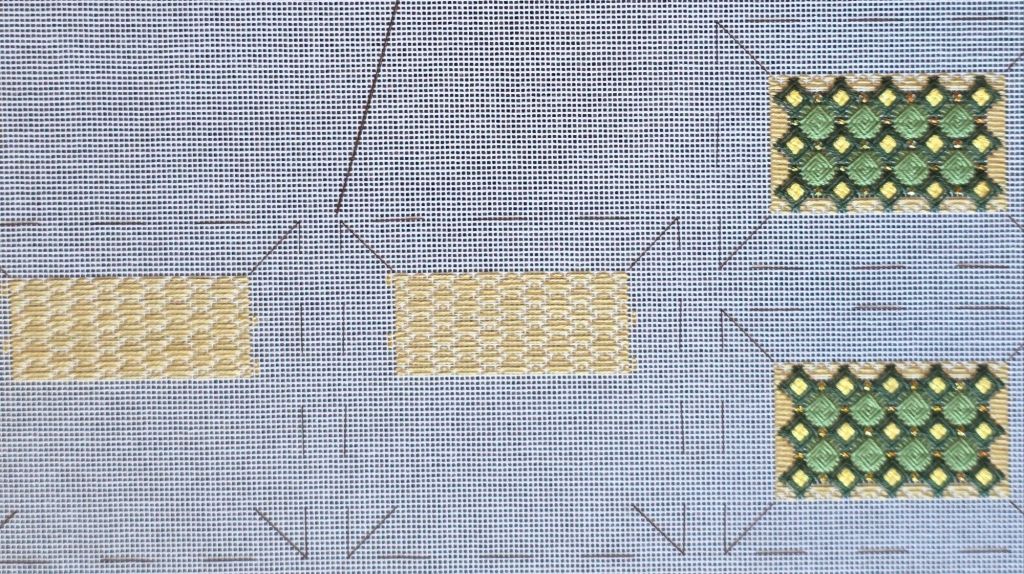
There are 2 sides each like this one.
And, love how my color wheel folding ort box is shaping up. The blackwork pattern is next.

Even for members not stitching the project, there are lessons to learn. This shows when and why to use locking or tacking stitches especially when traveling to the next motif.

Next month, everyone can give blackwork a try!
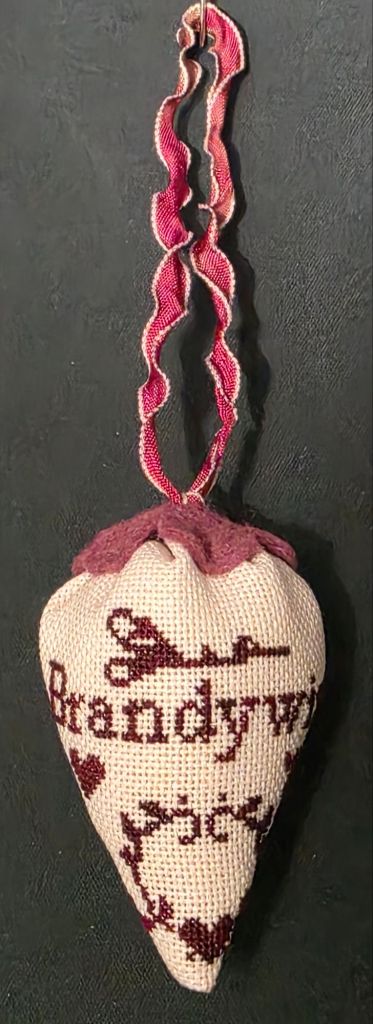
Filed under: Brandywine Chapter, Embroidery Guild of America, Strawberry Pincushion
Today, in the rain, Patrick and I were pleased that 10 members of our EGA Brandywine Chapter joined us for today’s project.
Patrick created the design which was distributed last month. Several had finished stitching it while others were still working on it.
Mine was the smallest (about 2 and 3/8″ x 2 and 3/4″). I used Lugana (28 count in an Angel Blush that is slightly pink) and stitched over one canvas thread.
Patrick led us through making it into a strawberry. He and JoAnne had stuffing. We also could have used walnut shells she brought! Patrick had a variety of colored felt and ribbons. He also had buttons we could have used. Here’s mine. It turned out great!
Filed under: ANG Needle Pointer's Timeless Treasures From the Archives
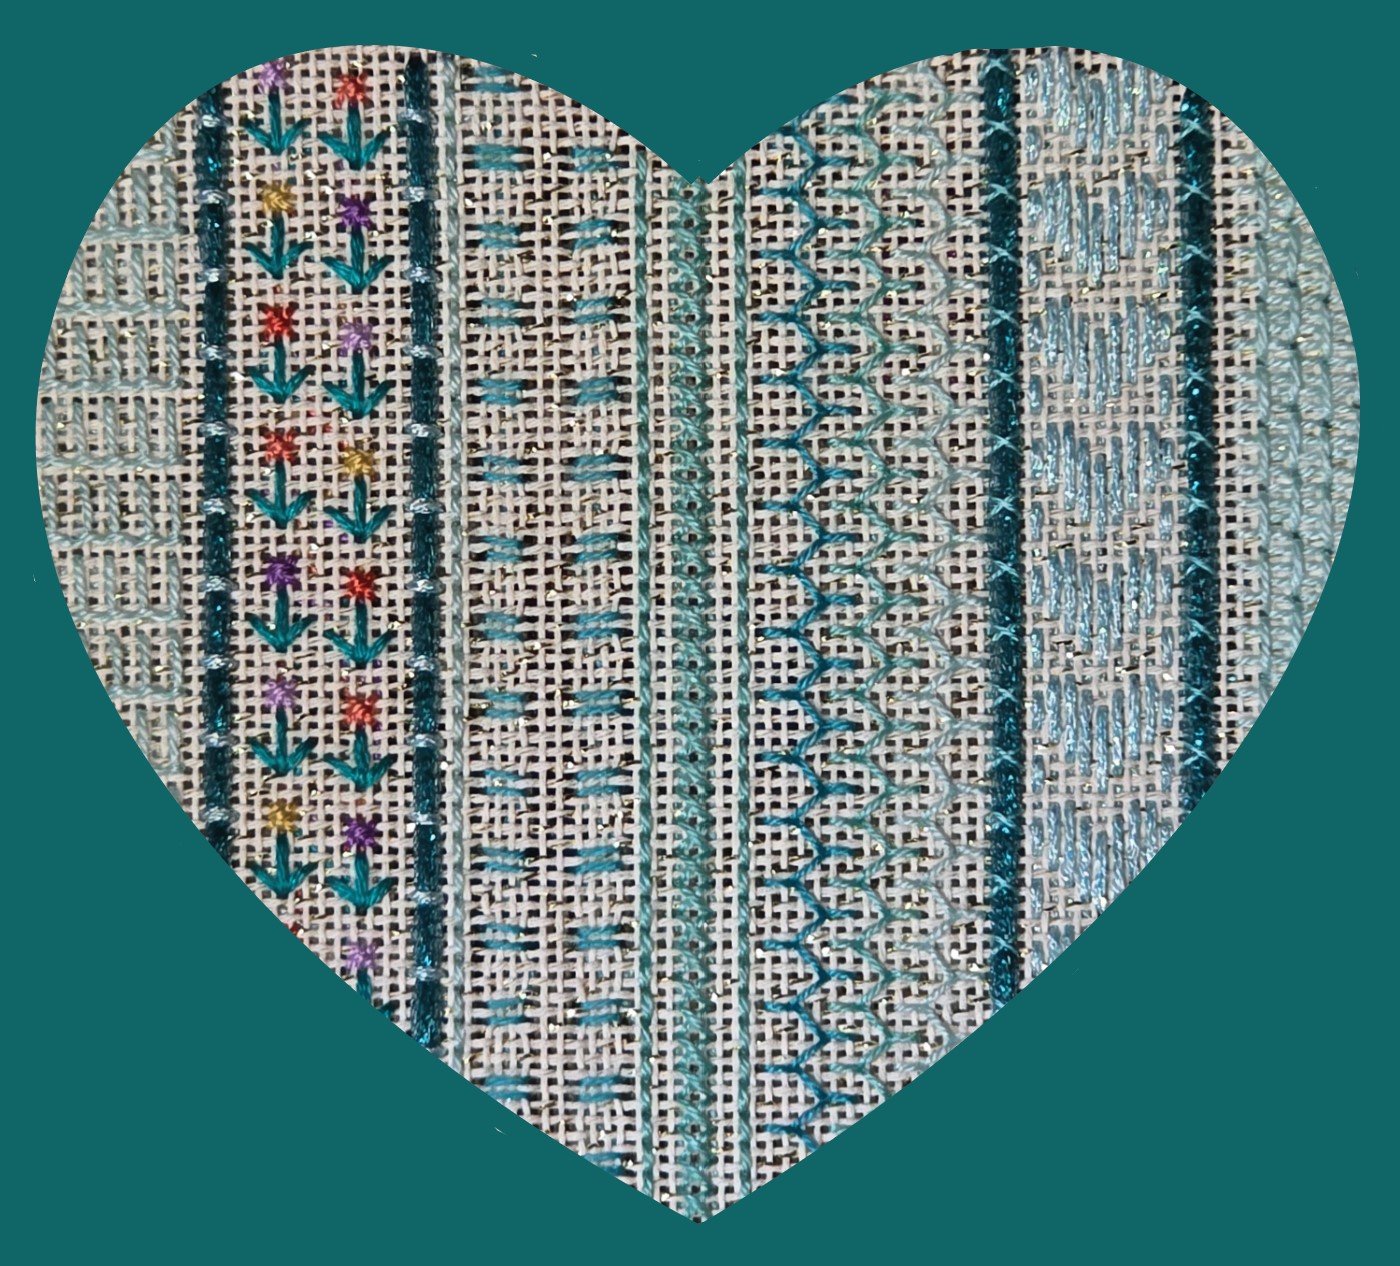
Besides the Hearts of ANG series discussed in the previous issue of Needle Pointers, many hearts have been featured over the years. Here’s my version of Spring Hearts and Ribbons Fantasy by Joan Scrutton. Read all about the one modification and the other heart projects from the 1980s in the May/June 2025 issue of Needle Pointers under Timeless Treasures from the Archives. You have to be a member of ANG and there are lots of reasons to join (https://www.needlepoint.org/page/MembershipOverview).
New photo using Samsung S25 Ultra with optical zoom (better than the one in the magazine).
I am caught up with last month’s suggested areas to complete. It’s always hard to figure out a pace when so many people are involved. At least two people are already to cut and assemble and others have paced themselves with stitching on other pieces.

I’ll post my next areas after our meeting. I still have some more to work ahead on the Folding Ort Box for the next ANG Main Line Stitchers chapter meeting on Monday May 12. Luckily, this weekend is The Truist Championship PGA Tour being held at the Philadelphia Cricket Club in Philadelphia.
Filed under: General comments, Serendipity - Stitching Club with Ellen Johnson, Spring Stitch Challenge, Tips
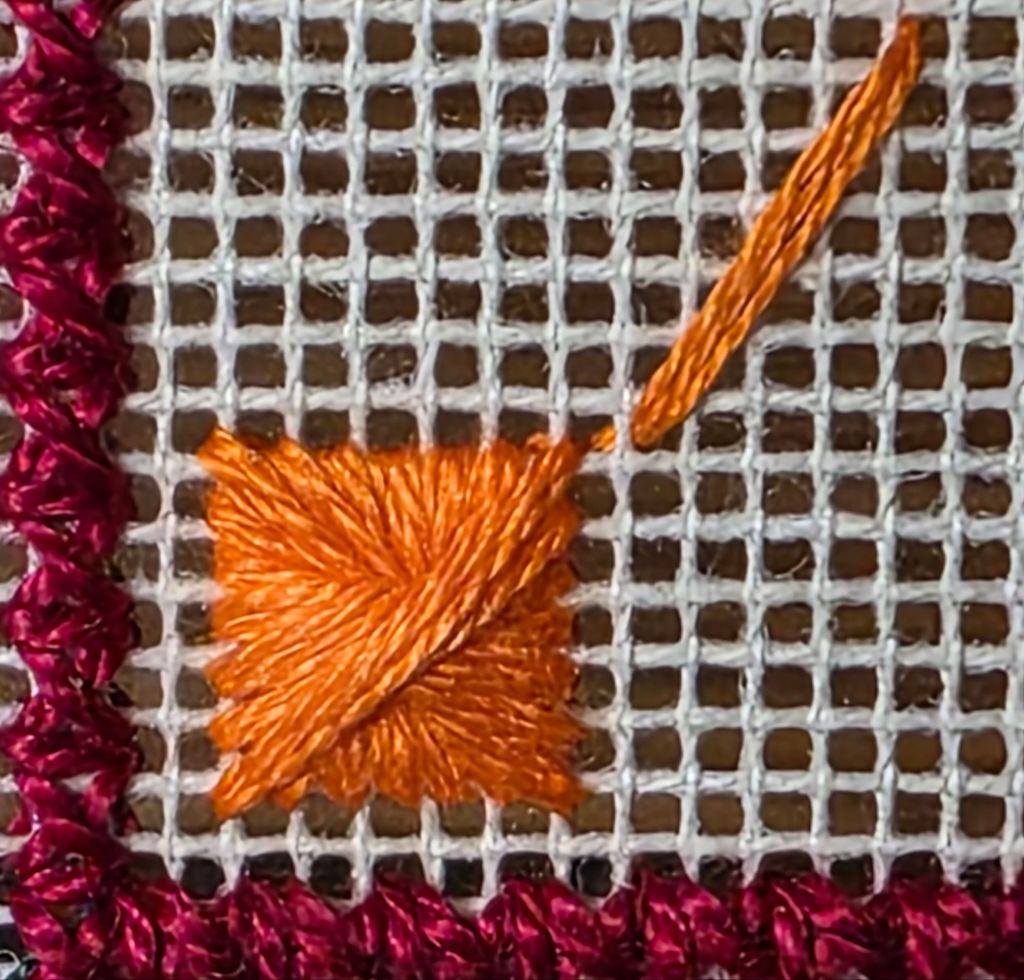
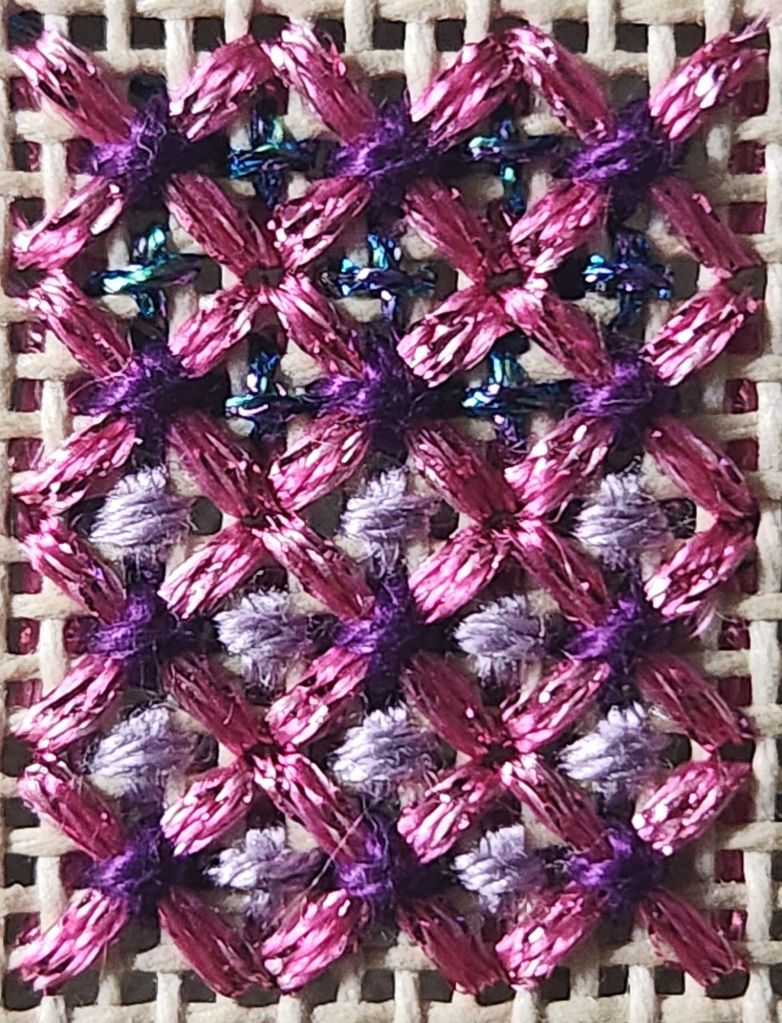
Ellen of Serendipity challenged us to stitch the Trellis Cross stitch in 2 different ways and compare results.
In this stitch sample, I used a pink Neon Rays+ as Step 1 for the large cross. For Step 2, I used dark purple DMC Perle #8 over the Neon Rays+ intersections. Then, on the top half, I filled in with blue and purple Kreinik Braid #8 which added too many colors, too much sparkle and left exposed canvas. If this was a painted canvas, exposed canvas might look better. On the bottom half, I used 4 strands of Splendor in a light purple. So, using 2 purples looks better to me. And, there is less exposed canvas which looks better too. Zooming in on the stitching shows more canvas than looking at it at a normal distance.
Here’s the photo with my old phone.
Here’s the photo with the new phone.
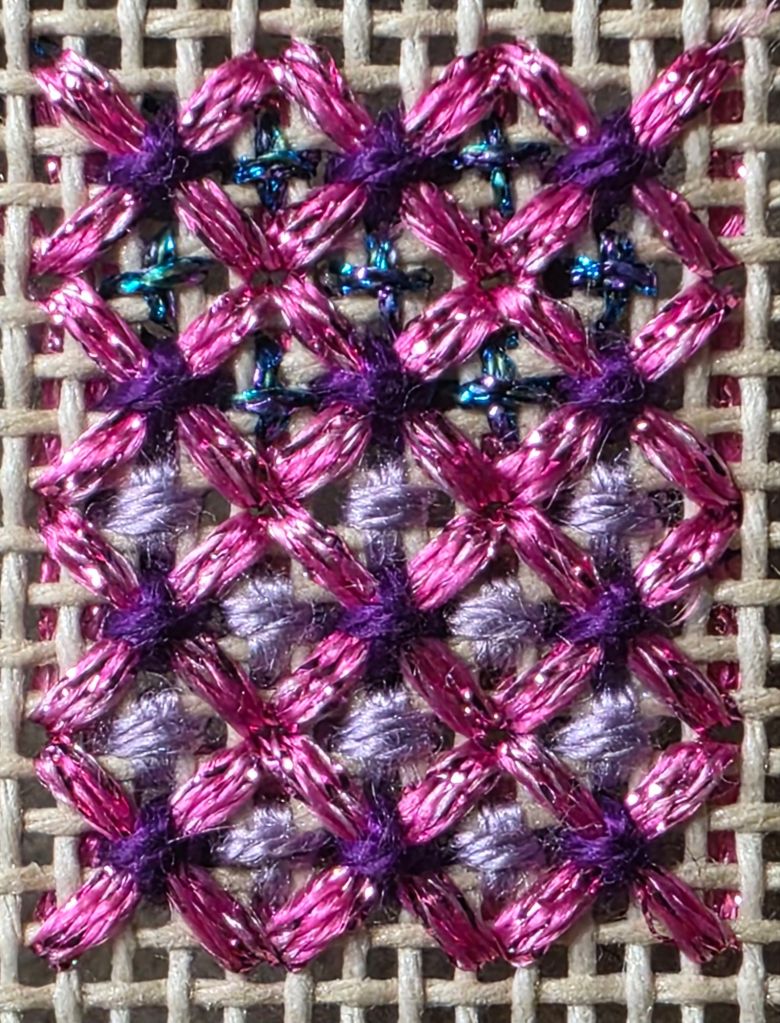
I don’t pretend to understand the specs they list but the new Samsung S25 Ultra has optical zoom vs the old digital zoom (S22+) which is what I have been using. They explain it at: https://www.samsung.com/uk/mobile-phone-buying-guide/samsung-galaxy-s25-camera-specs-explained/
Quite a difference in clarity!
I thought I could handle the transfers (Bill and I have to upgrade together) but it took maybe 2 hours on the phone (and I was following instructions quickly) and a short second phone call to complete both phones! I had a very helpful young lady on the first call. These phones better last for a long time. I don’t need to do that again any time soon. I might just reshoot some (all?) of my needlepoint pieces some rainy day.
Some explanations have come in from someone more technically savvy than I:
Optical zoom means they have added another lens so that the light is bent (in complicated ways) on its way to the camera sensor to provide the additional detail.
Each of the little circles on the back of my phone is a different camera and lens. The phones don’t really have “zoom”, but rather 2 to 5 separate cameras. My old phone only had 3 cameras. There are options for 0.6X, 1X, 2X, 3X, 5X, 10X, 30, and 100 magnification that the various cameras provide. As soon as I use my fingers to zoom between sizes, I go back to digital zoom. That would be better to do in Photoshop.
Wow. That’s so much great info!
Here’s I took a photo at 30X. The one with the new phone I already posted was at 2X or 3X. According to the megapixels I discovered in the details of the photo, this new 30X one has 10MP while the other one has 6MP and the old phone had 5MP. It should be even better. The lighting is different and my hand may not have been asked steady.
Filed under: Serendipity - Stitching Club with Ellen Johnson, Spring Stitch Challenge
Ellen at Serendipity is having a Spring Stitch Challenge. I’d stitched Day 1 through Day 4 stitches previously. So, I was sharing photos of the finished pieces instead of stitching 1″ samples to share. My blog is my stitch journal!
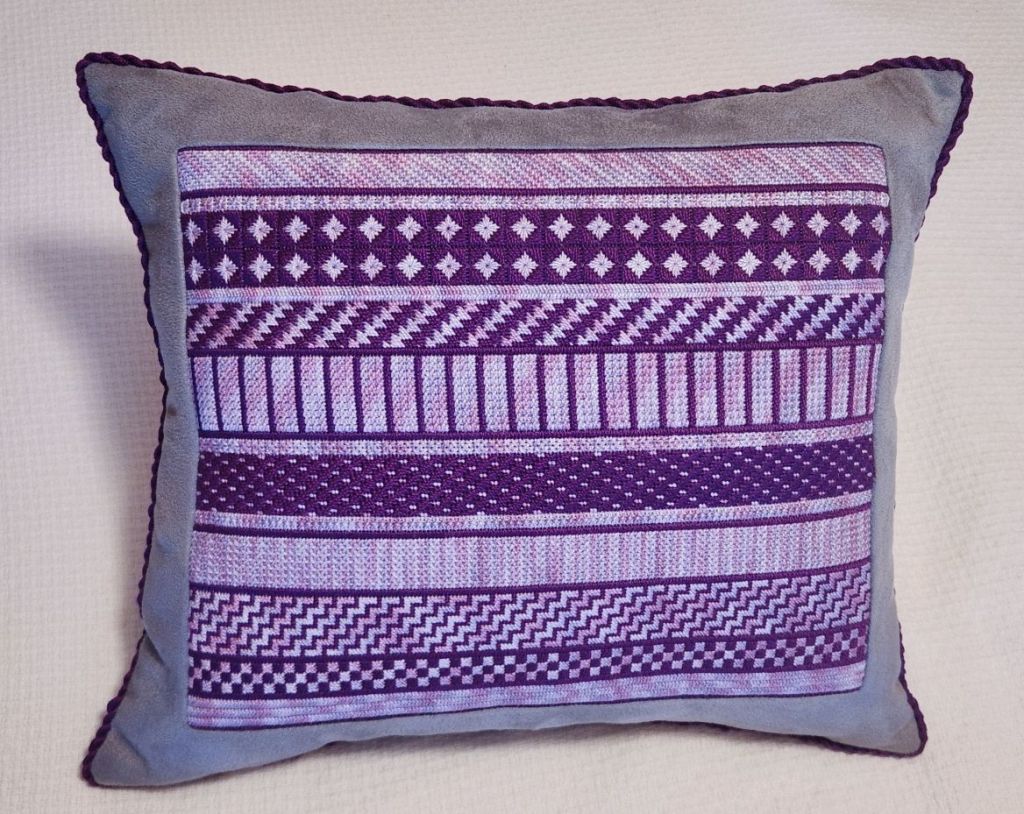
But, I didn’t have any pieces to share that used the Stardust stitch on Day 5. I came close in Rainbow Ribbons by Kam Wenzloff (Nov/Dec 2019 issue of Needlepoint Now) that used the Souffle Stitch. It’s 6 bands up from the bottom in my pillow.
So, I tried the Stardust Stitch. Compensation is tough! I tried it with Wildflowers, an overdyed thread, and Kreink (upper right corner), all solid Impressions with Kreinik (upper left), and two solids, Impressions and Perle #8 with Kreinik (bottom right). Then, just to see the differences, I did the Souffle in solid Impressions with Kreink (bottom left). Souffle is easier to compensate but not by much. They share the same basic pattern but the relationship to the previous row differs.
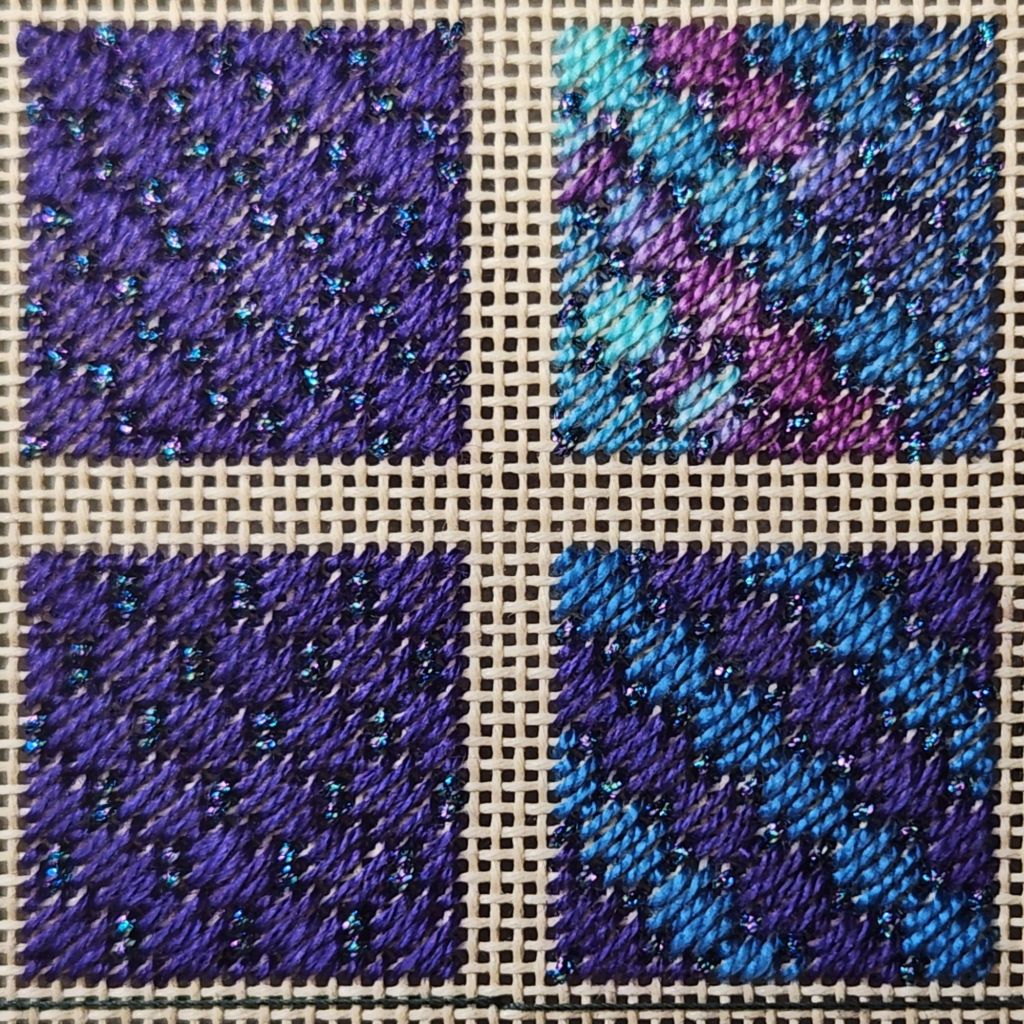
They would make good companion stitches in a piece where you want something similar but different. Both stitches are in Painted Canvas Embellishment: An Idea Book by Carole Lake and Michael Boren.
I added a basketweave border, a buttonhole edge, and cut it out (3.25″ square). I got some peel and stick black felt by Creatology given to me recently. I simply cut it to a 3. 25″ square and applied it to the stitching. I will use it as a bookmark for one of my stitch books. Craftex would have made it too thick for a bookmark.

