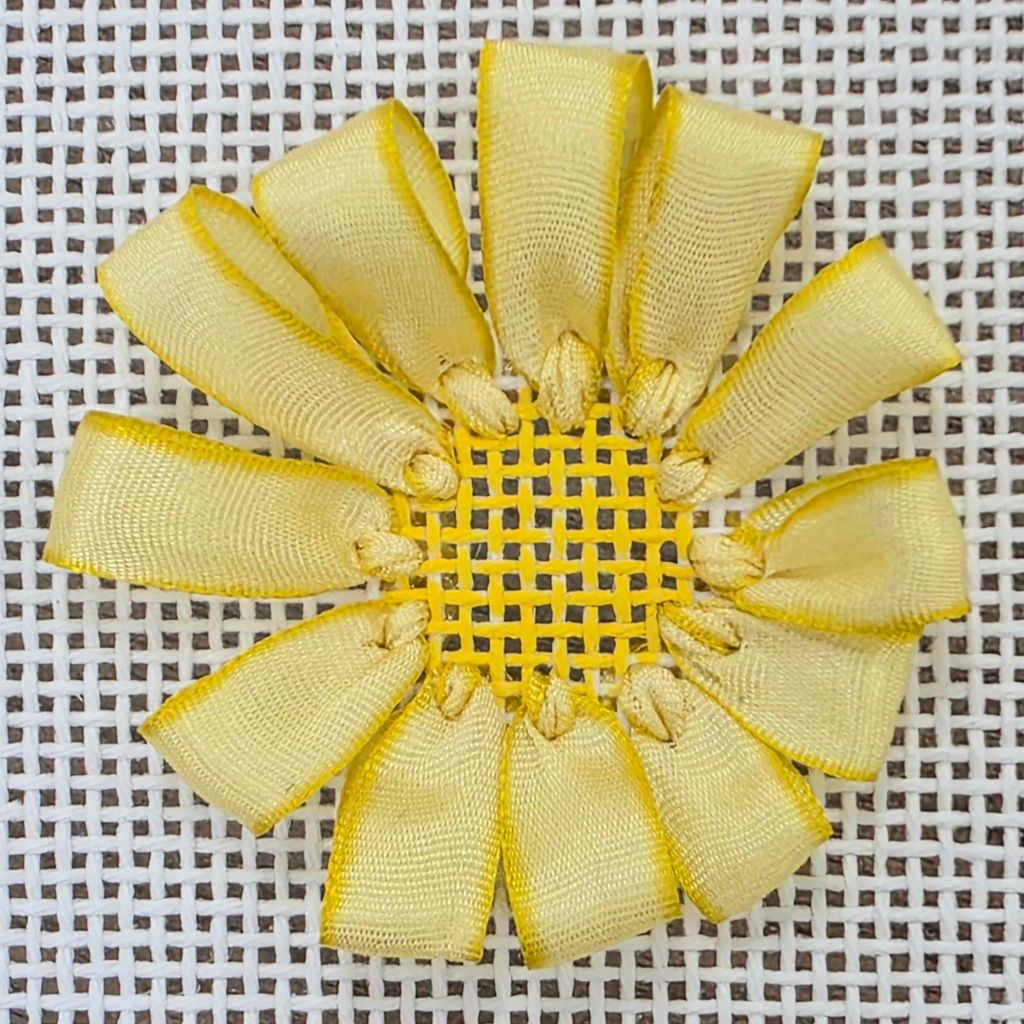
Day 2 of Spring Lollipop Garden by Tamara Abdee started with the Loop Stitch Flower.
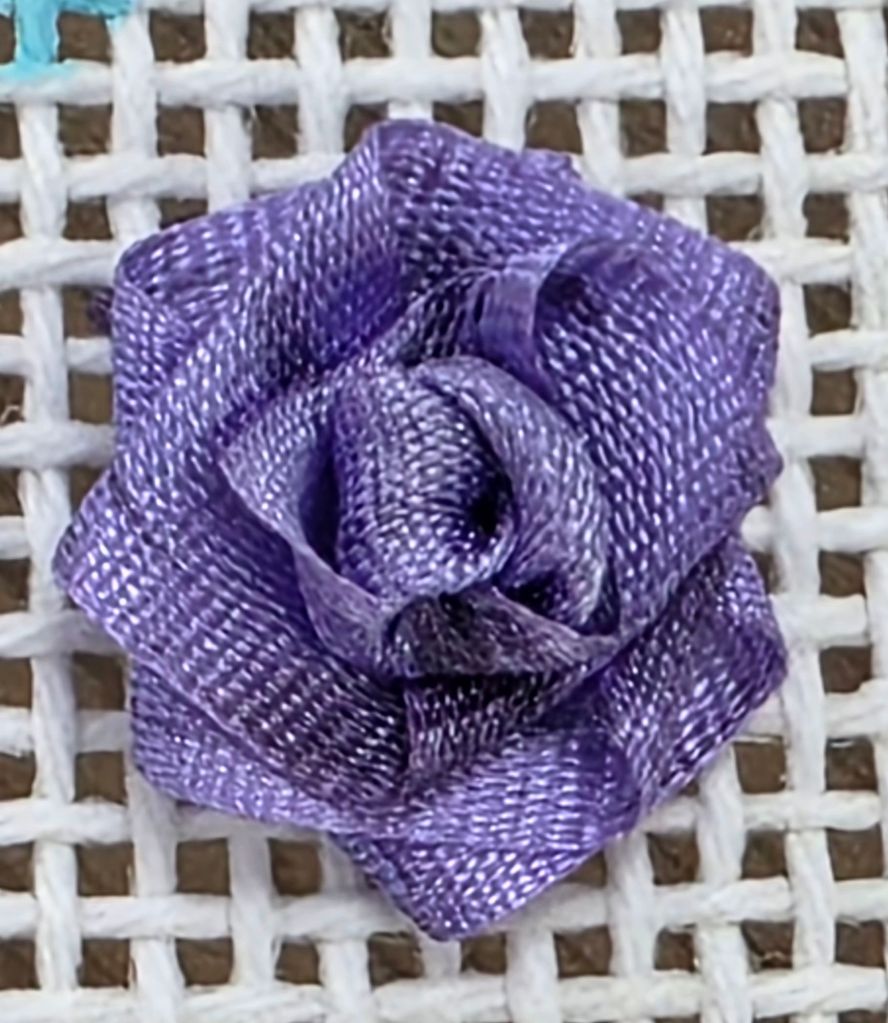
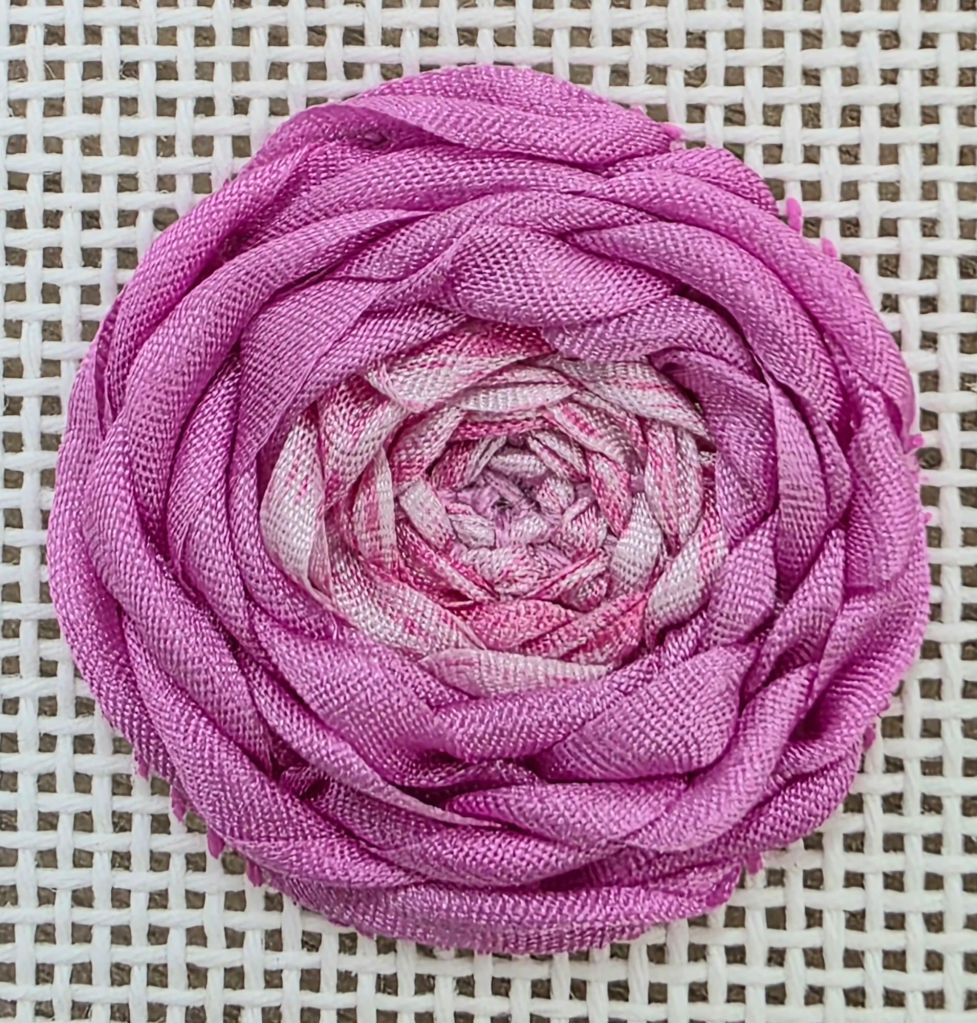
The French Knot Ribbon Rose is Lynn’s variation of the one Tamara teaches. One of the most beautiful, delicate roses I’ve ever seen!
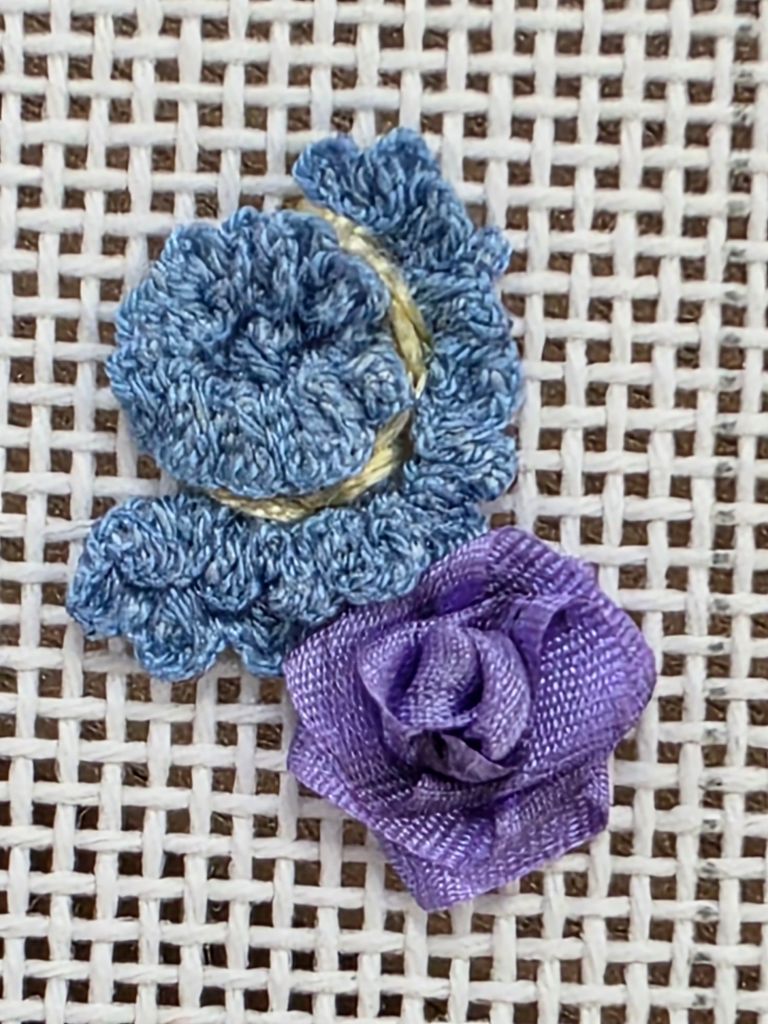
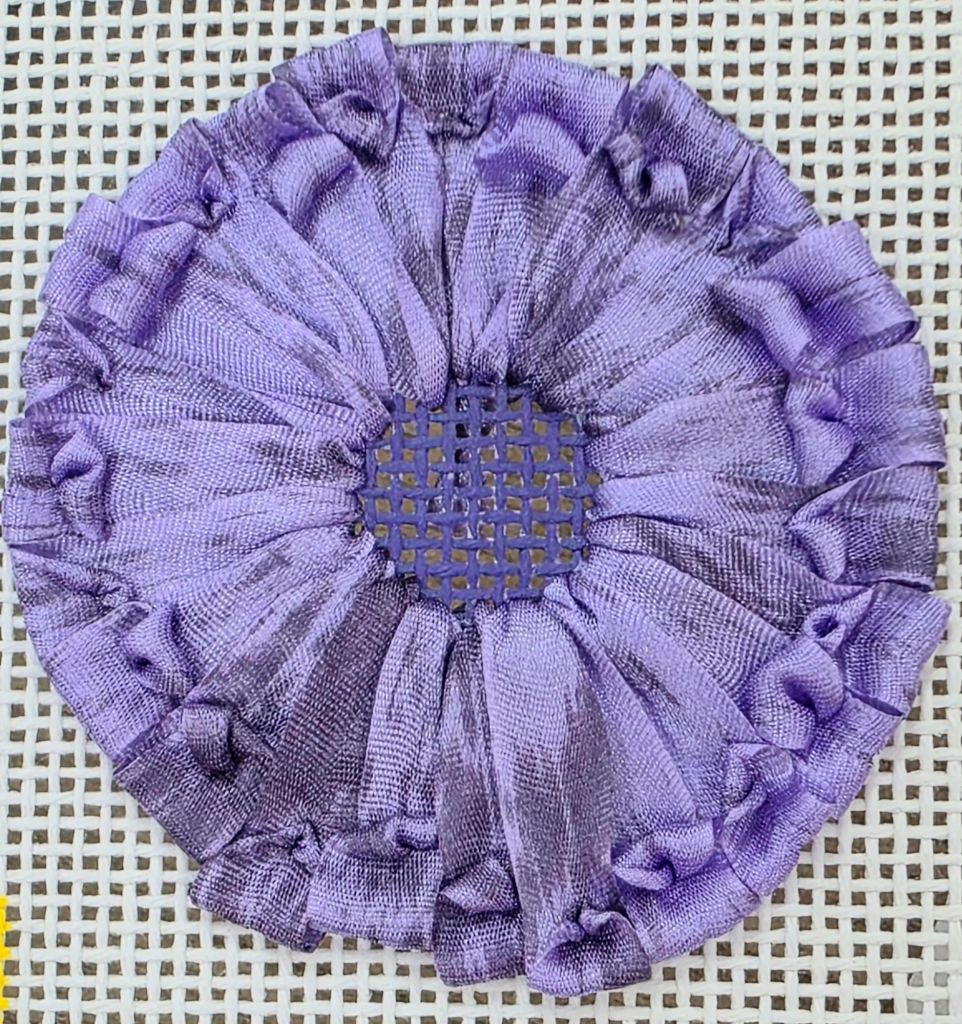
Next to it, I added a flower with rouched Soie Tissee by Silk Road Fibers. It is my own crunchy version of whatever flower you want to call it!
Ali, Lynn’s daughter, was very supportive during class on both days. She even volunteered to iron our ribbons! Such service!! Lunch both days were supplied by Fireside Stitchery. Nothing fancy but plentiful, healthy, and delicious. There’s an extra large table that we were all able to fit around and enjoy lunch away from our work areas.
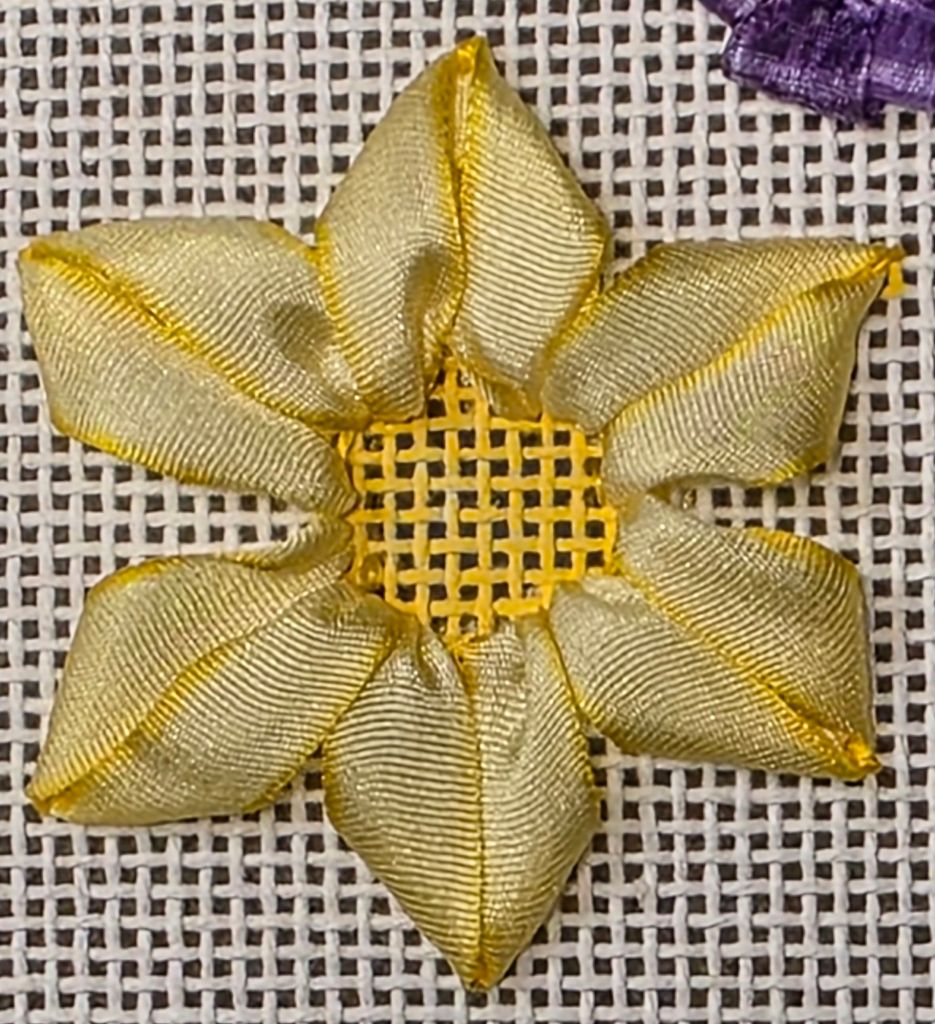
Right after lunch, we worked on our Daffodils. We used a Tilli Tomas ribbon which creates a lovely effect because the edges are a slightly darker color.
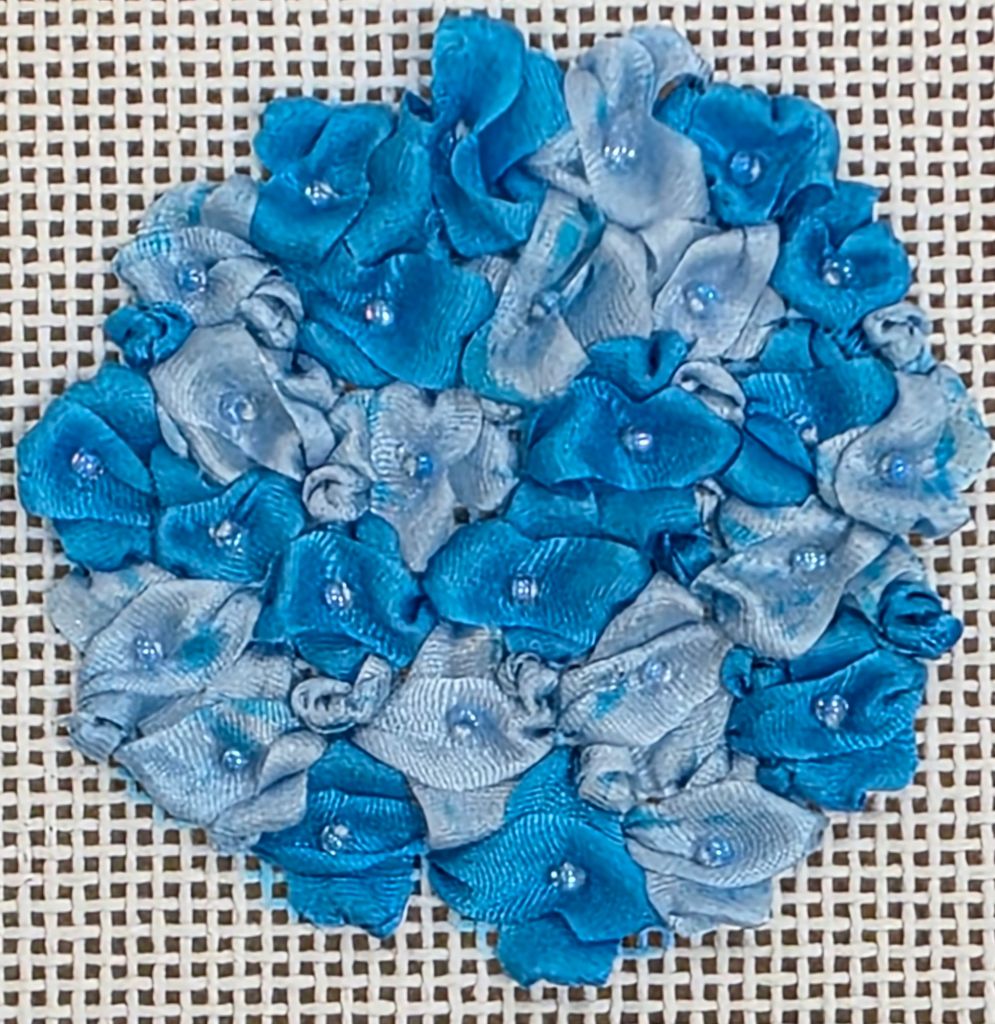
The last of the afternoon was spent finishing whatever we wanted to do. I elected to finish my Blue Hydrangea (with a couple of French Knots and Colonial Knots to fill in the little spaces). Some class members shopped but I will be back on the 25th and 30th for Stitch-ins with ANG Main Line Stitchers and EGA Brandywine.
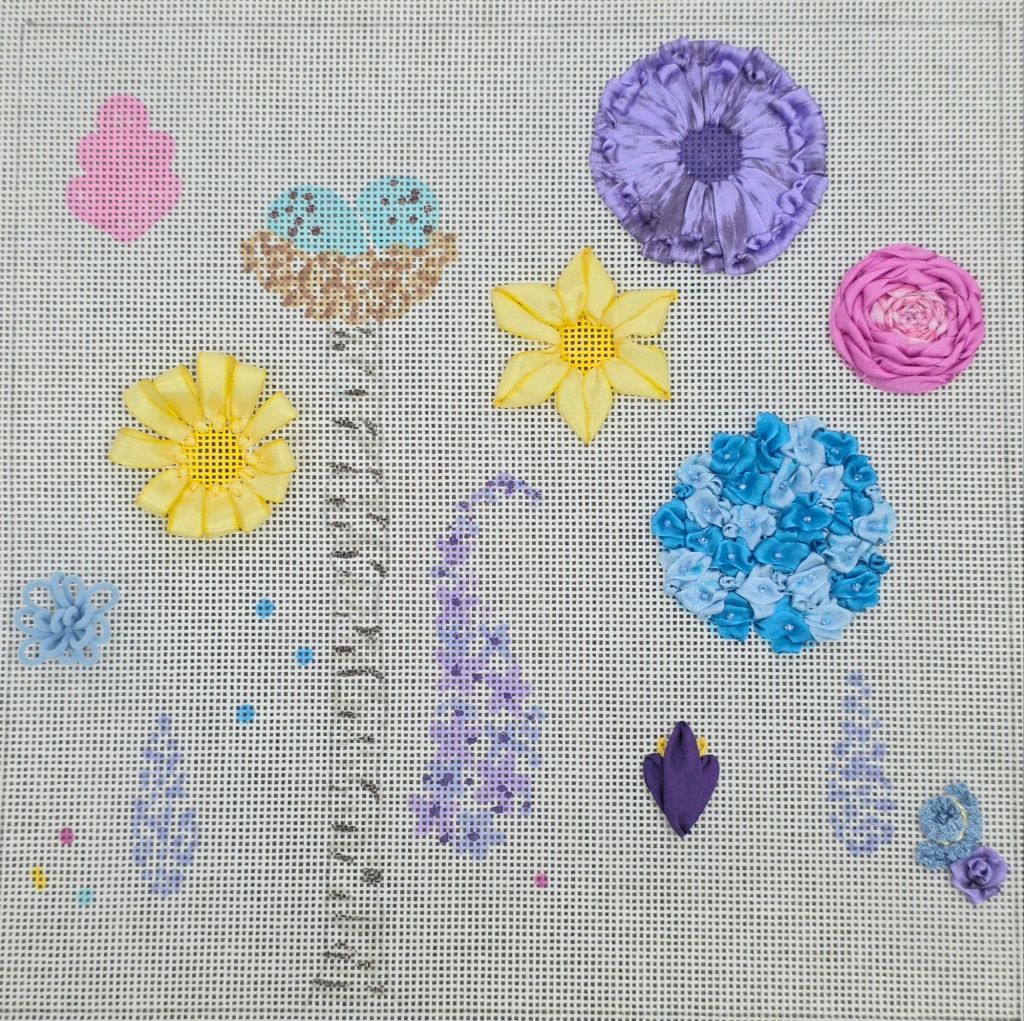
So, what does the canvas look like by the end of our 2 days? It looks like I’ll be doing 5 more big flowers, several small sequin ones, leaves, stems, a Birch tree, a nest, Robin’s eggs, and some background motifs. This will be fun.
It sounds like Tamara will be returning to Fireside Stitchery at some future date. In the meantime, while we don’t have stitch guides for specific painted canvases, we have been given enough instruction to tackle one.
What a lovely display by Tamara Abdee as we walked into the classroom area at Fireside Stitchery. There were 2 tables all ready for us. I signed up for Spring Lollipop Garden. But, Tamara is teaching 3 different designs for 12 people. She filled two 2-day classes. Four other members from our ANG Main Line Stitchers Chapter are there including Lynn (and store owner), Kathy P, Pat K, and Karen P. I think we’ll be getting a new chapter member too!

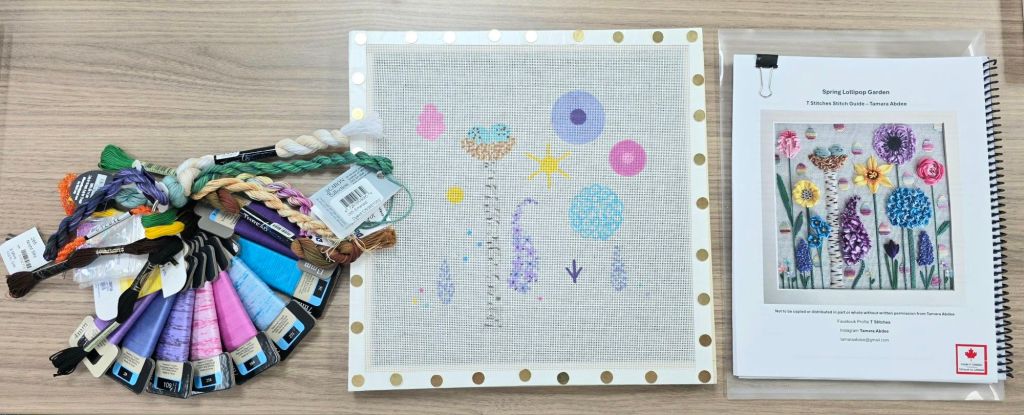
There are 9 different ribbons, 13 threads, and 10 bags of beads in the kit! The canvas is partially pre-painted by Tamara.
I love my Twisted Spider Web Rose. It is a 9-spoke rose (but was supposed to be 7) because I had 8 when I started weaving the ribbon (but it must be an odd number). So, I squeezed the 9th in on the right which you can tell now that I have told you but had I not, you probably wouldn’t have known. Can’t see it? The right is slightly tighter than the left. I also practiced adding extra on the left side only.
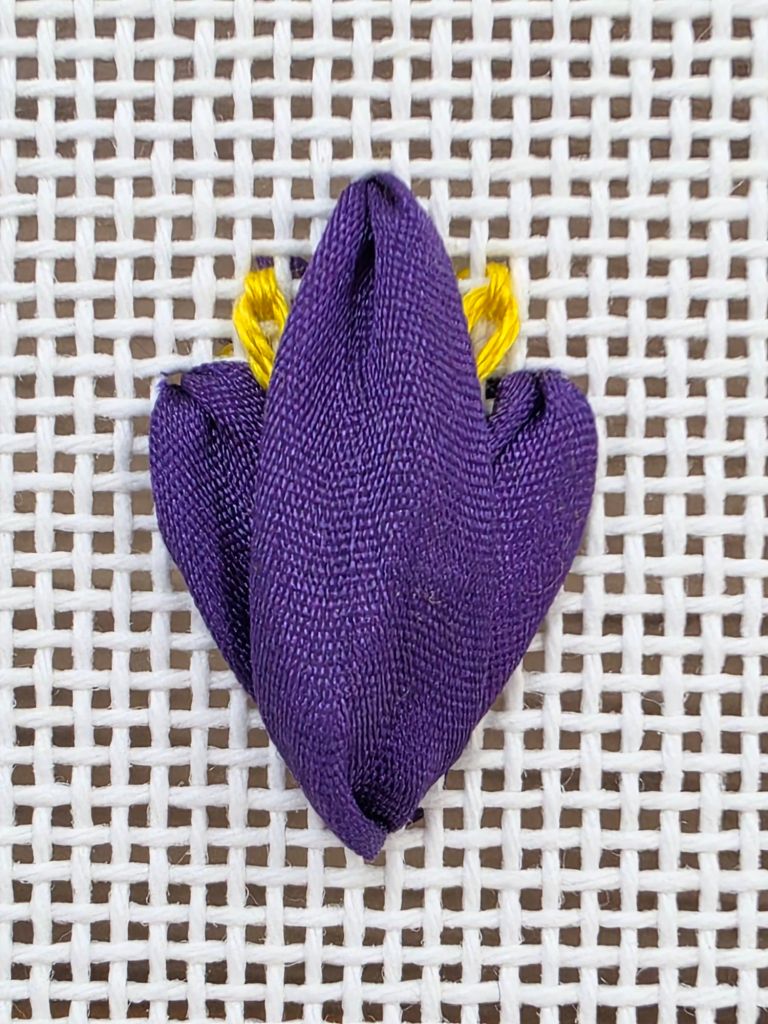
The Crocus used the widest 13 mm ribbon. And, Lynn placed 2 more next to the one which I may do as well.
Varying the length of the stitches in the Anemone was the hardest part.
The Velvet Loop Flower done with Very Velvet was an extra flower I squeezed onto my canvas. Some stitches repeat in each of the 3 designs but in differ in color. This flower is not in mine but she taught it to all of us. I may add beads or a sequin.
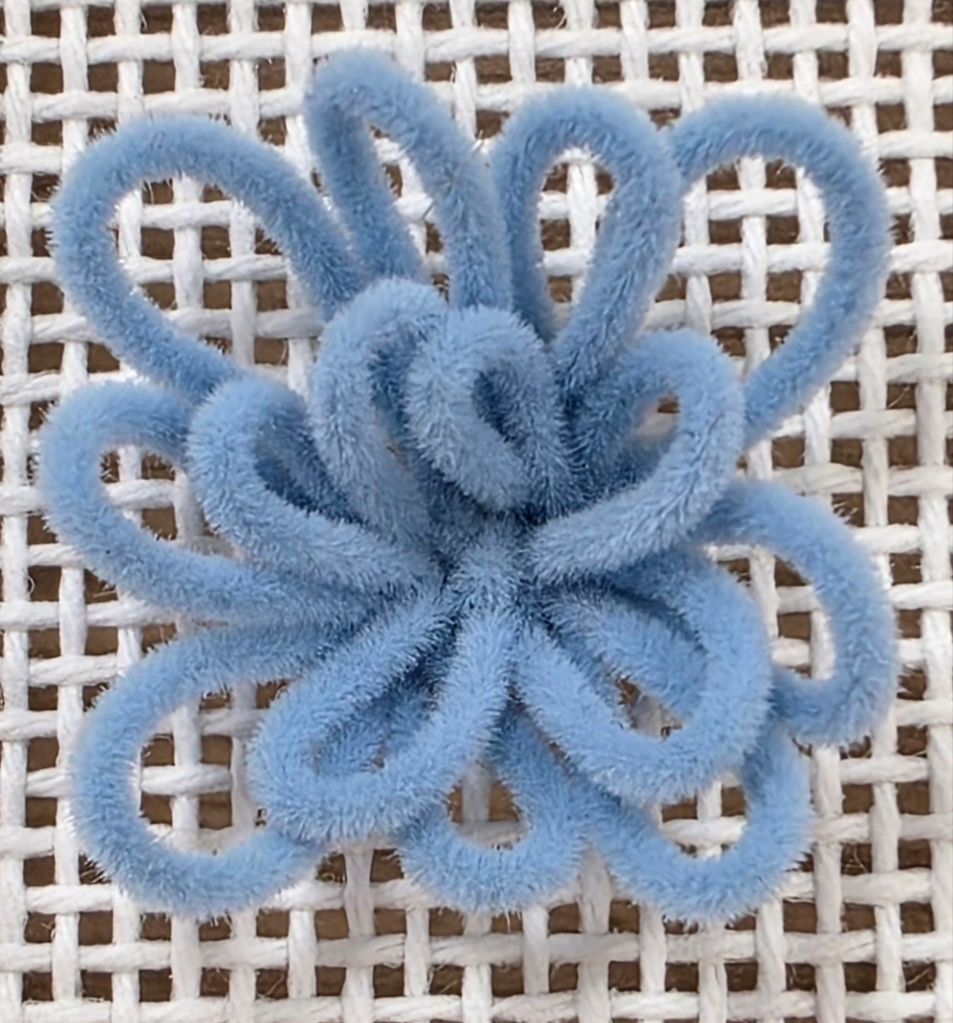
The blue Hydrangea is going to be fantastic once it’s done.

I will wait to share my progress on the full canvas until after tomorrow’s class.
Tamara is an excellent teacher and is imparting wonderful tips in addition to sharing her ribbonwork techniques!
Filed under: Books in My Library, Embroidery Books, Swedish Weaving Pattern Directory by Katherine Kennedy
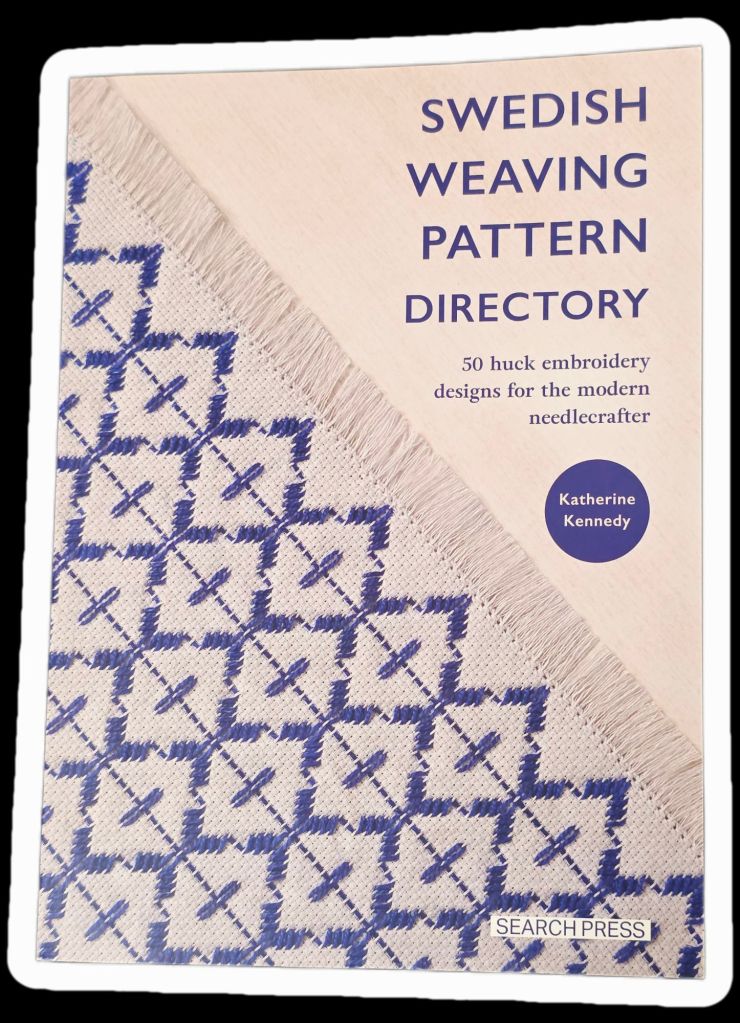
Thanks to EGA Brandywine Guild, I explored Huck Embroidery. I’m glad I bought the book, Swedish Weaving Pattern Directory by Katherine Kennedy, before leading the group.
The first 20 pages allowed me to sound like I knew something!
We didn’t get past the straight and slant stitches but our youngest member (20s!), Courtney had a sample of the various loop stitches. She was very helpful getting folks at her table to get it right.
I find this needlework form particularly appealing because of the symmetry of the patterns, it works up quickly, and is easy to finish.
There were towels leftover from the session and I will definitely be doing a few patterns from this book.
Filed under: ANG Main Line Stitchers Chapter, Razzle Dazzle by Ann Strite-Kurz
Thanks to the Masters weekend (golf), there was lots of time to stitch and it made the Smyrnas easier to get through.
All ready for the next area. Linda M from Main Line Stitchers has finished hers ahead of us in order to walk us through the project over the next few months. The upright interior portion of the center area is the topic of tonight’s meeting along with progress 6 members have made on Songbirds, a painted canvas (each is different). Of course, we’ll have Show & Tell.
Next up were The Wheels in Florentine Fancywork by Toni McKelley. They were fun and easy as Toni said they would be.

Filed under: Brandywine Chapter, Embroidery Guild of America, Huck Embroidery Towel
Maureen C has done a wonderful resurrection of the EGA Brandywine Chapter’s website. It was abandoned by a member who got ill and it took quite some time (a few years) before we could get it back and find someone capable of taking it over. So, I suggest chapters have multiple people capable of handling your website and who have access approval as back-up.
There is a list of upcoming and past programs for the EGA Brandywine Chapter under Prgrsms tab at https://share.google/srCSue0YtEEpS01aw. You can also see recent Show and Tell pieces under the What Members Are Making tab.
We did Huck Embroidery yesterday, crayon transfer in May, and Or Nue (a Brenda Kocher design similar to one I stitched previously) in June. More on that another time.
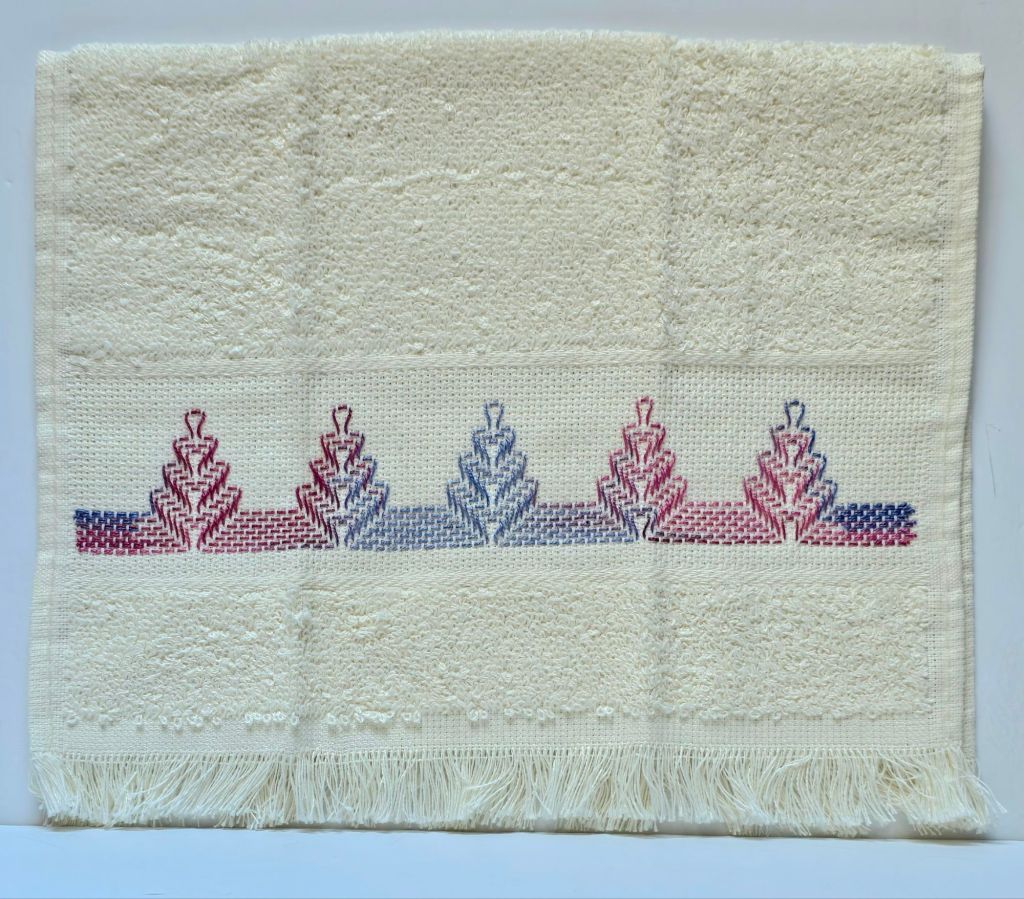
Thanks to Linda M from Main Line Stitchers chapter who donated her stash skeins of DMC Color Variations. I’m looking forward to seeing everyone’s towels.
Filed under: ANG Main Line Stitchers Chapter, Razzle Dazzle by Ann Strite-Kurz
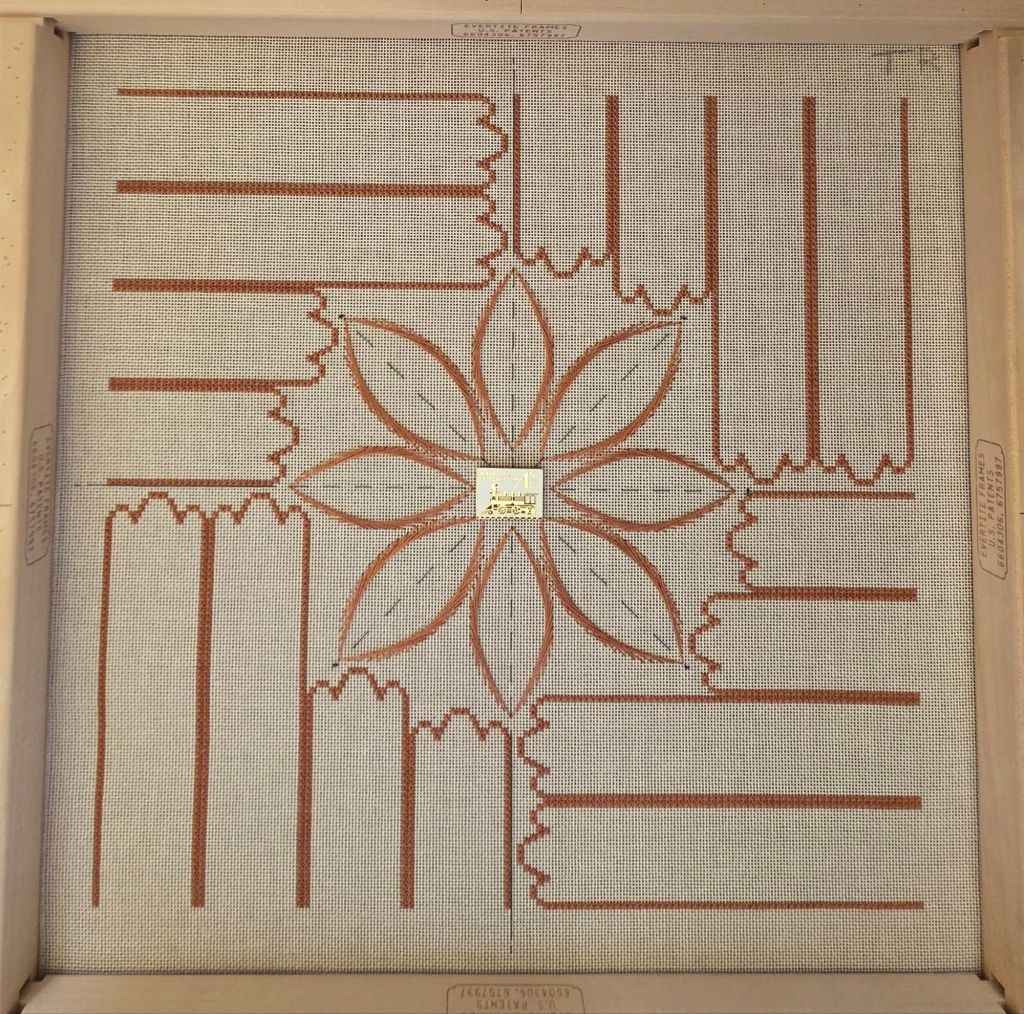
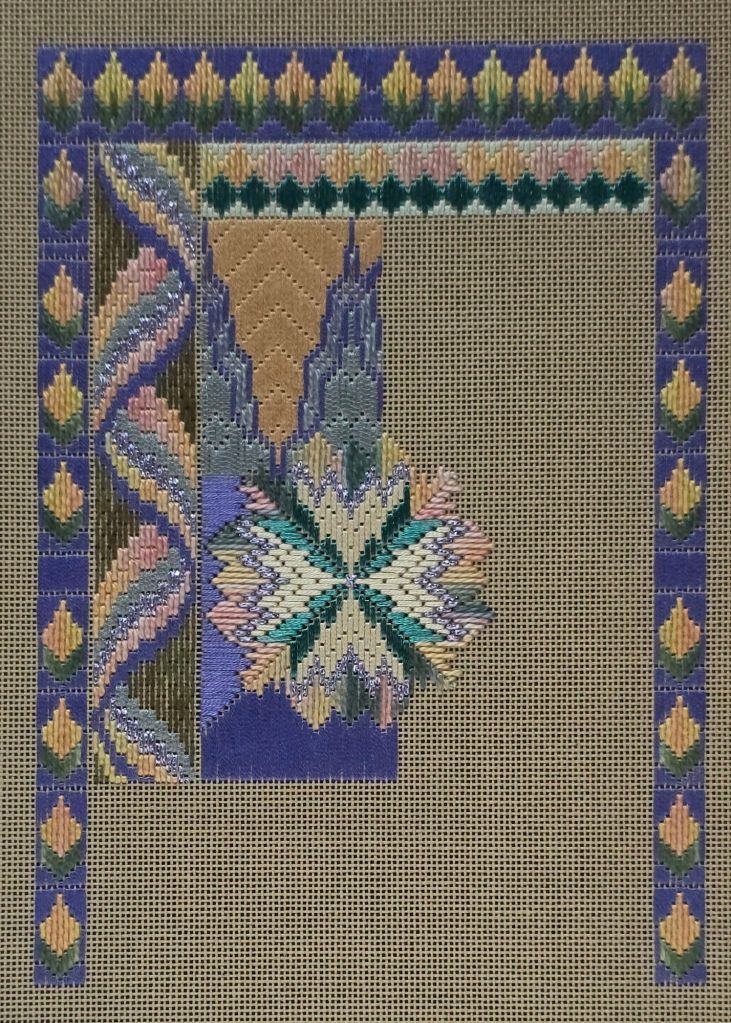
In the ribbon borders of Razzle Dazzle by Ann Strite-Kurz, there are 277 Smyrnas in each of 4 quadrants for a total of 1,108. So, here is the first quadrant done.
The tops edges requires some thought but the rows do not. So, I’ll have to break it up by other projects because it is too monotonous once you get to the straight rows. Hopefully, these will be done in advance of our April Monday meeting with ANG Main Line Stitchers on the 13th.
In my opinion, the Starburst in Florentine Fancywork by Toni McKelley is the focal point. It’s interesting that the solid purple is adjoining only on two sides.
I had hoped to finish this project in March. So, I am glad that the New York City Skyline in Florentine Fancywork by Toni McKelley worked up quickly.
There was a little blue gray portion of Watercolours next to a light purple already color matched (although I have no idea what piece I used it in and a search in my blog didn’t identify it). I had plenty for this small area.
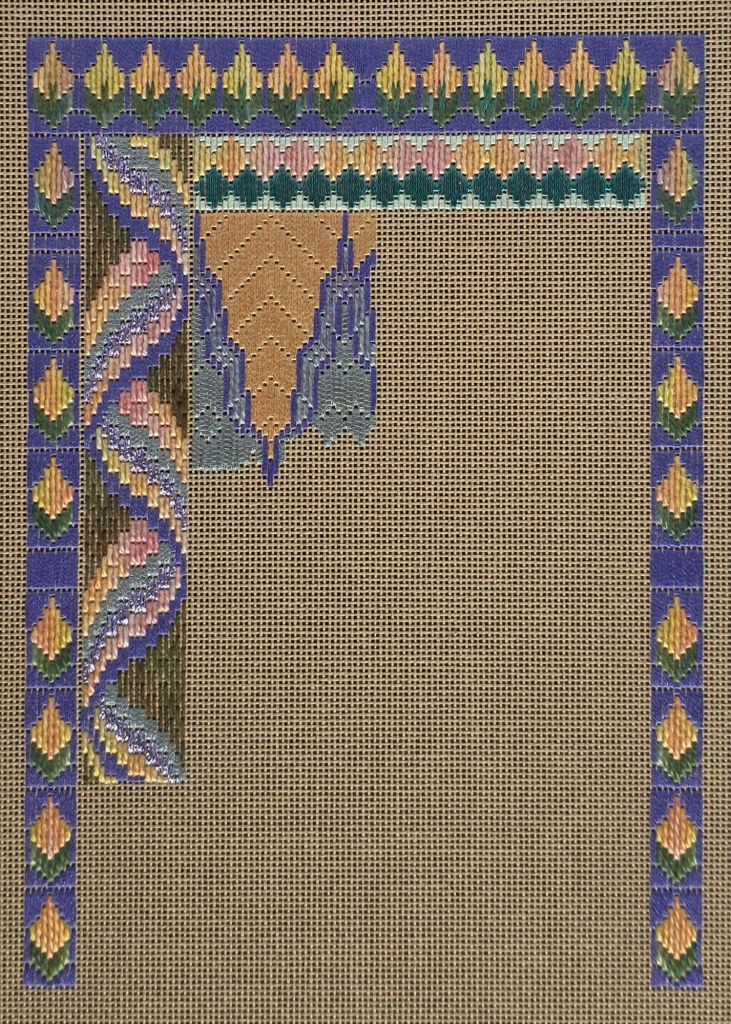
In between areas, I will work on the Smyrnas in Razzle Dazzle.
Filed under: ANG Main Line Stitchers Chapter, Razzle Dazzle by Ann Strite-Kurz
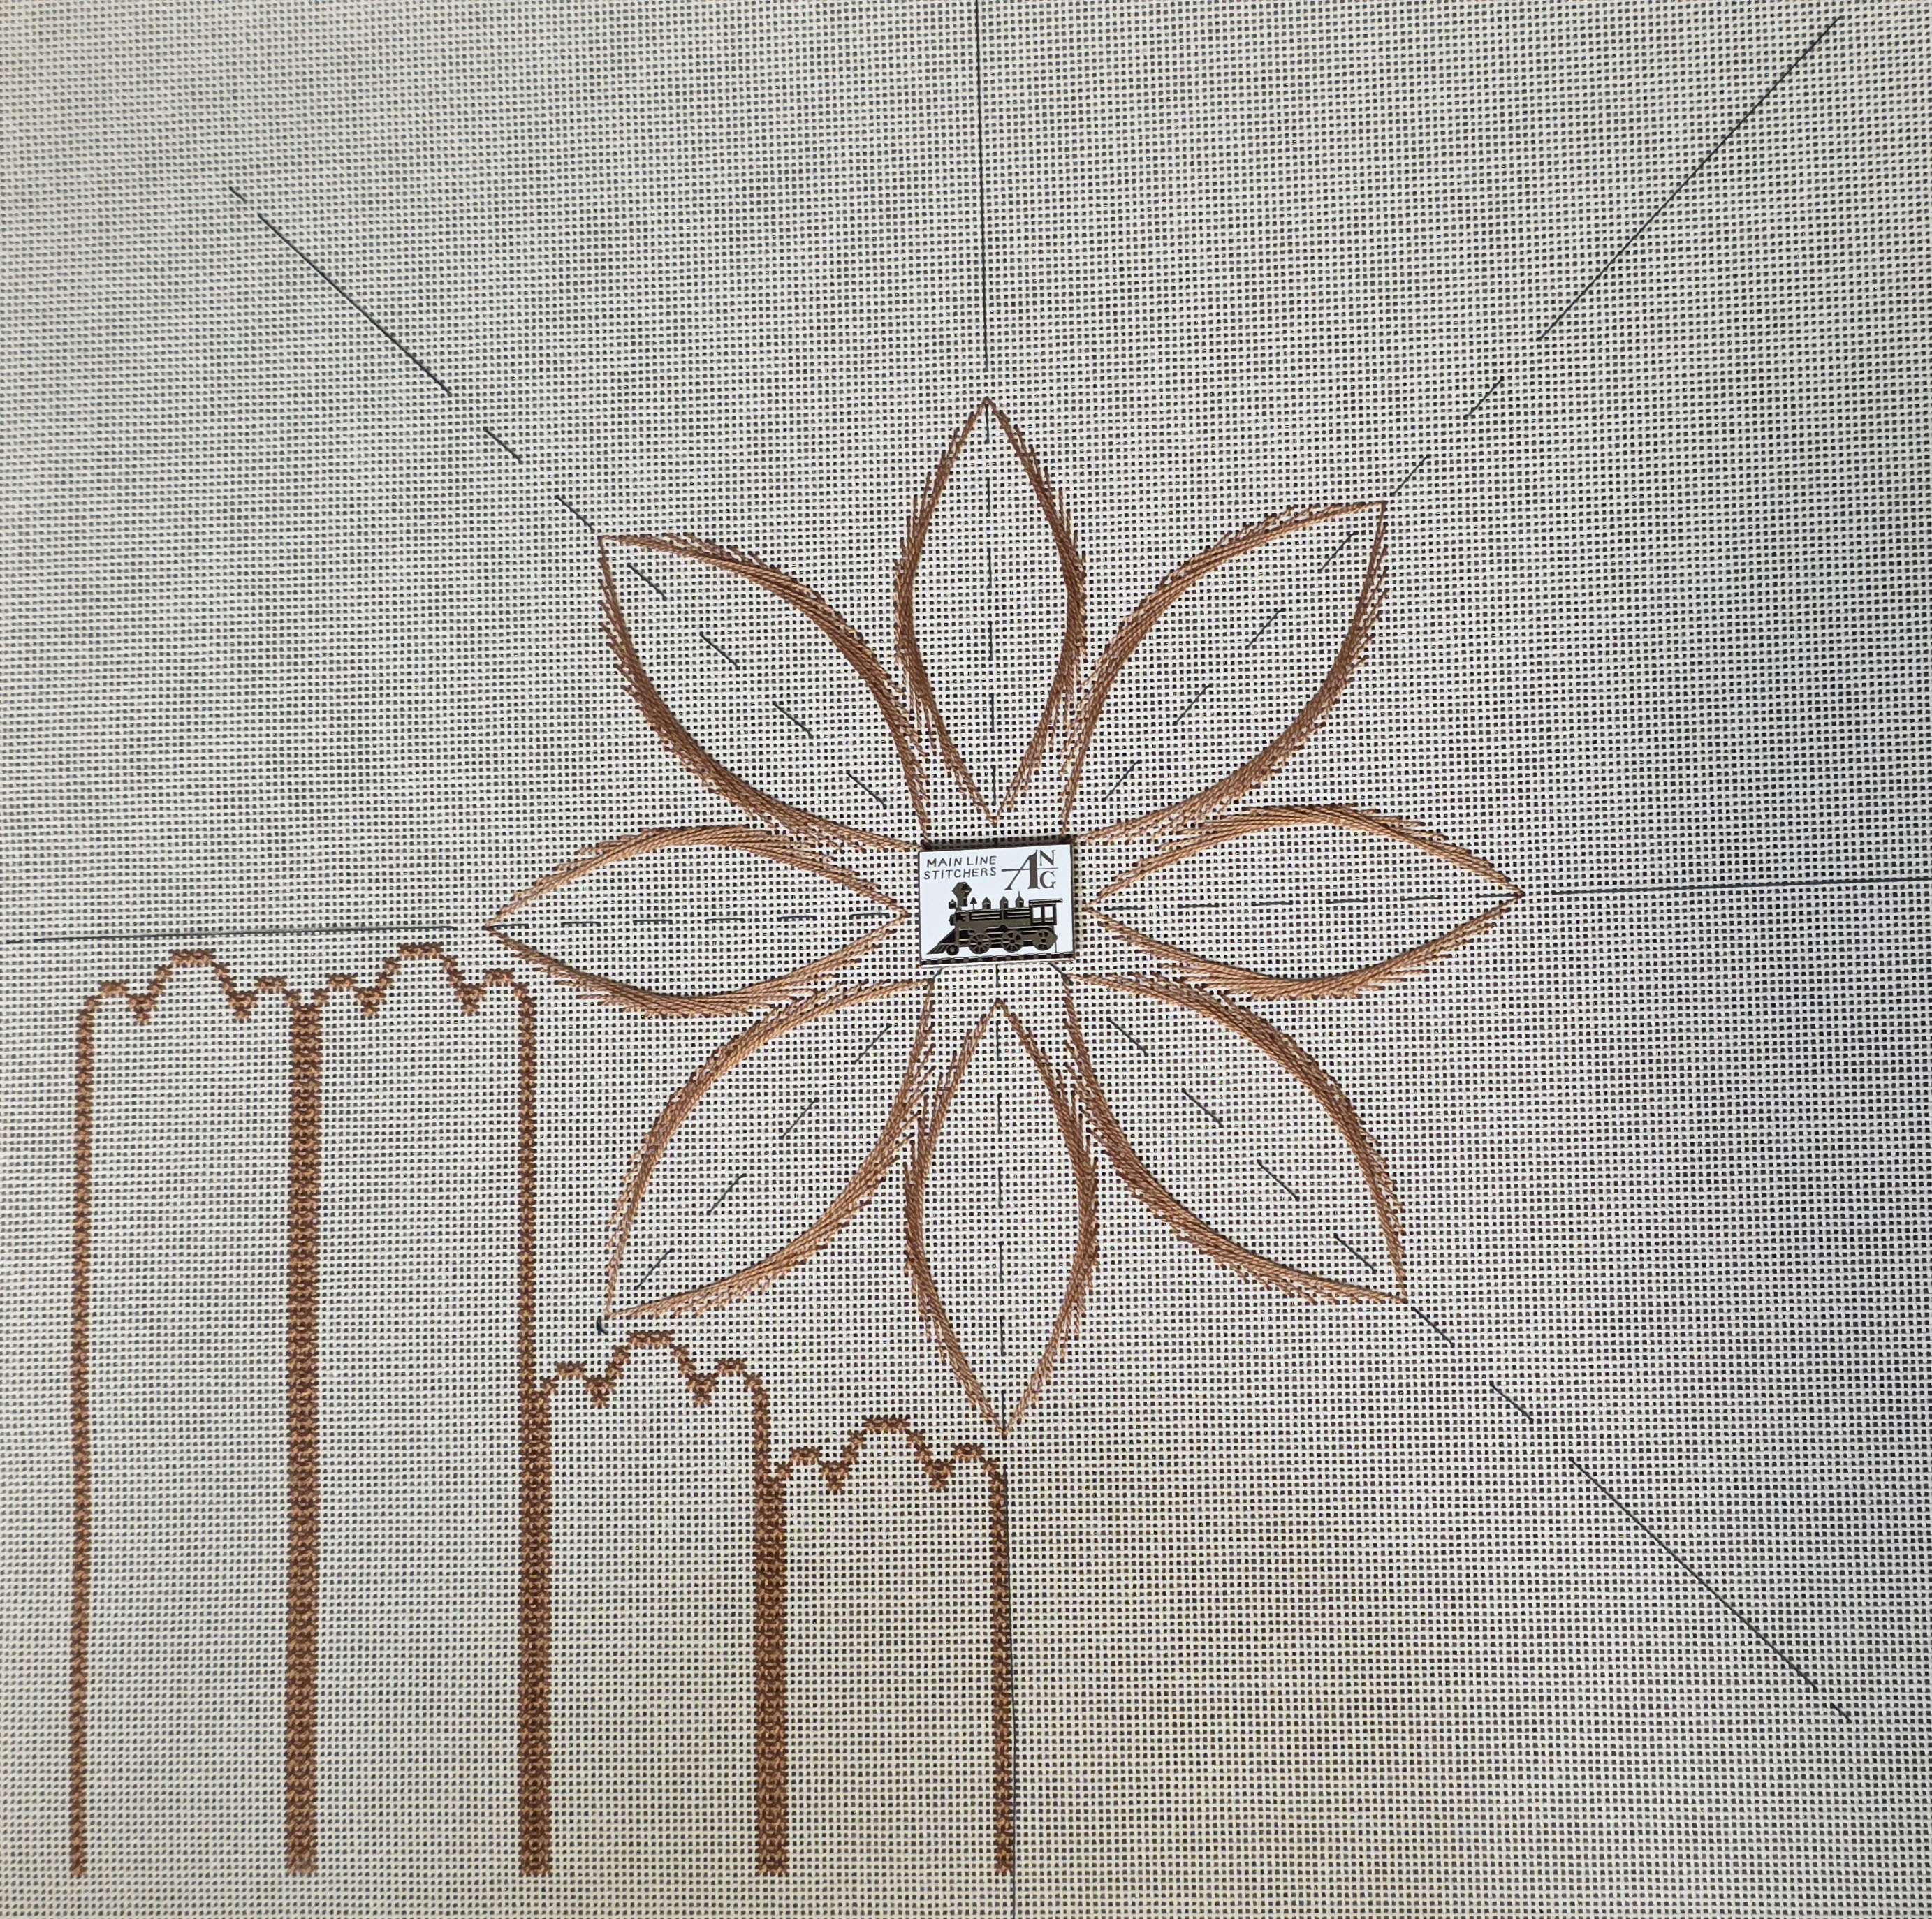
With careful counting and checking the location of stitches compared to other reference points, I made it through without too much undoing. You know quickly when the count is off. Having the basting lines were very helpful too.
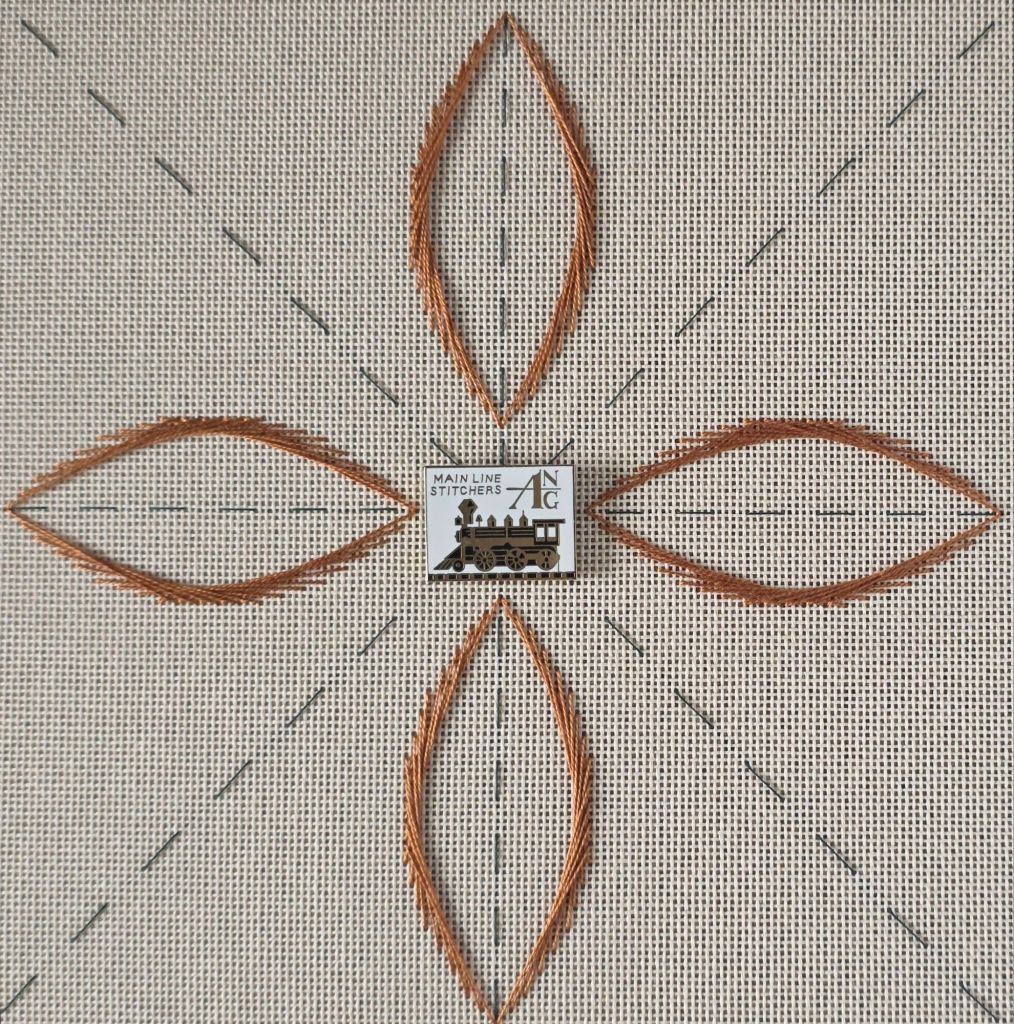
The first one took the longest and then by the third one, muscle memory (yes, I still have some) kicked in and they got easier and quicker. Not that I hurried because getting these correct is key to further success.
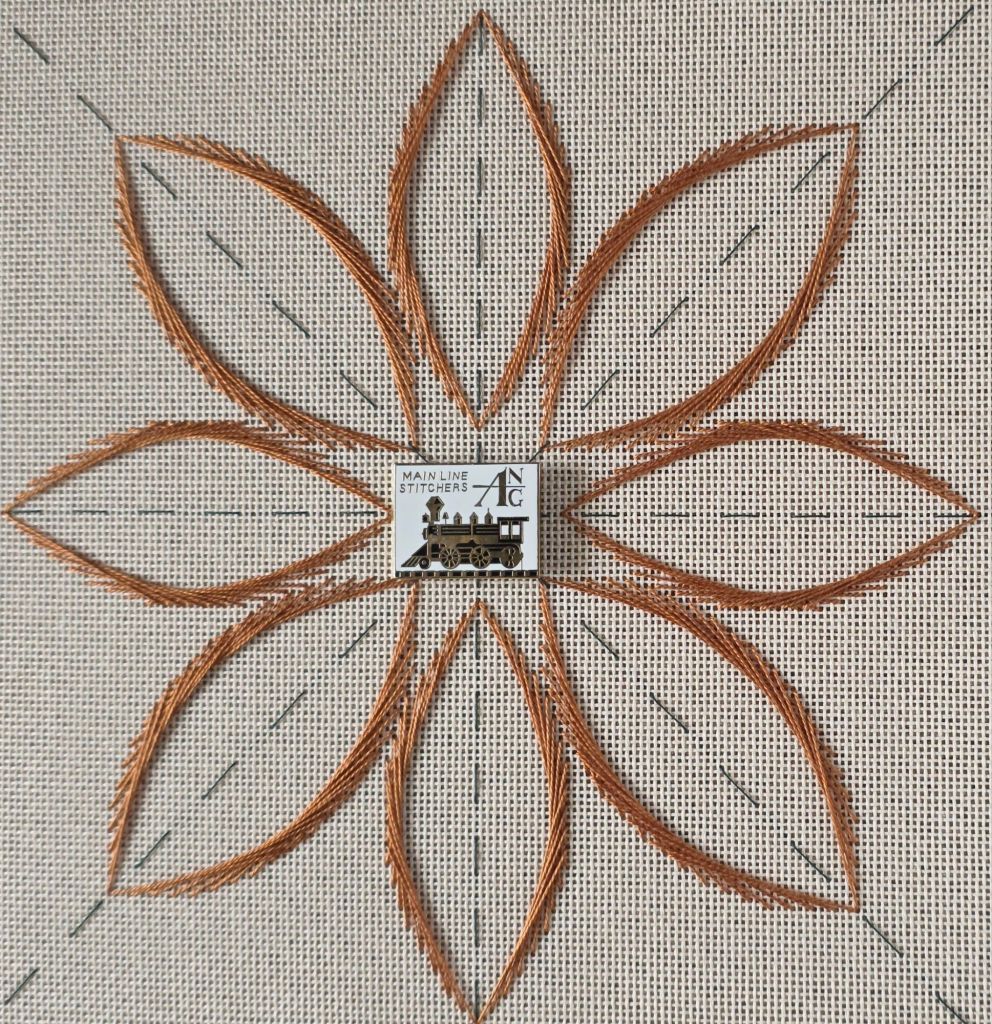
The diagonal ones seemed even easier. Here are the completed outlines forming the center Rosette.
I worked out where to use pin stitches to start and end the threads (inside of where the first stitch goes down through the canvas).
Hopefully, other ANG Main Line Stitchers Chapter members are making out as well.
