The first design from the Cabochons Series by Susan Portra is Joy (Love is the 5th that I stitched first).
Initially, I didn’t find Rhapsody R13, which is what it called for. The one I did acquire doesn’t have the tag on it but is really pretty. It has dark burgundy rather than purple running through it with the mint green and royal blue that was called for. I lucked out that the recommended Fyre Werks and Tiara go really well with this Rhapsody. Rhapsody is used in each design in the series and is a discontinued Rainbow Gallery thread.
I ended substituting 3 other threads from my stash:
- DMC Floss 796 for the royal blue Anchor Floss 123.
- Pepper Pot Silk Beet 20 for the dark purple Neon Rays N09. I thought Neon Rays was an odd choice for a single row of tent stitches anyway. And, this color is perfect with this Rhapsody.
- Vineyard Silk Classic Aruba C-077 for Anchor Perle 187. The thread gets couched into place by Fyre Werks, and these 2 threads look great together.
This is stitched on a lovely aqua canvas.
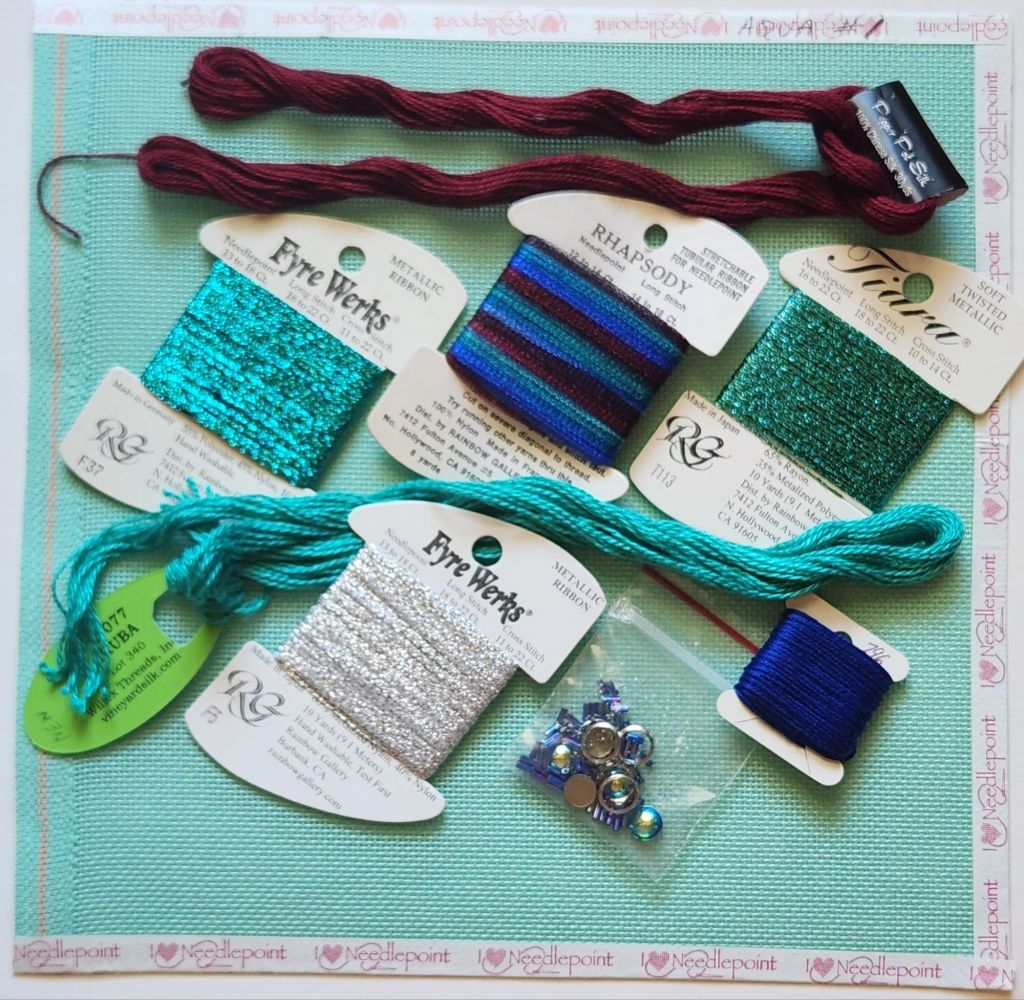
Before I started it, and thanks to Jacqui C from New Jersey Needle Artists Chapter, I got Rhapsody R13 and R18 and Fyre Werks F42. I like the one I have better than R13 in this heart, but I like R13 better than R04 in Hope (4th in the series). And, I like R18 better than R24 in Charity (2nd in the series). Now I have 2 extra cards if I find instructions for the missing 11th and 12th designs in the series. I’m still keeping my fingers crossed! If anybody knows what they are named or look like, please let me know.
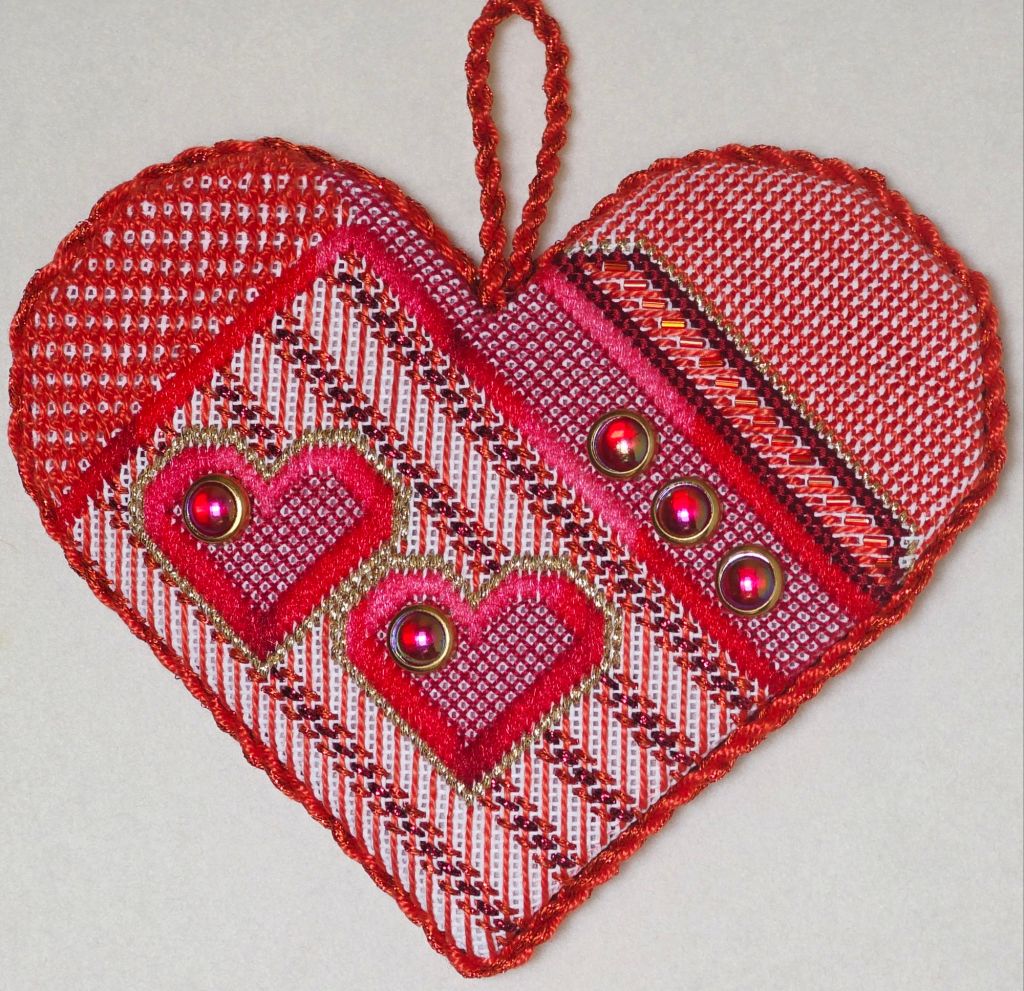
Here Joy is stitched. It’s almost 5.5″ wide x 6″ tall.
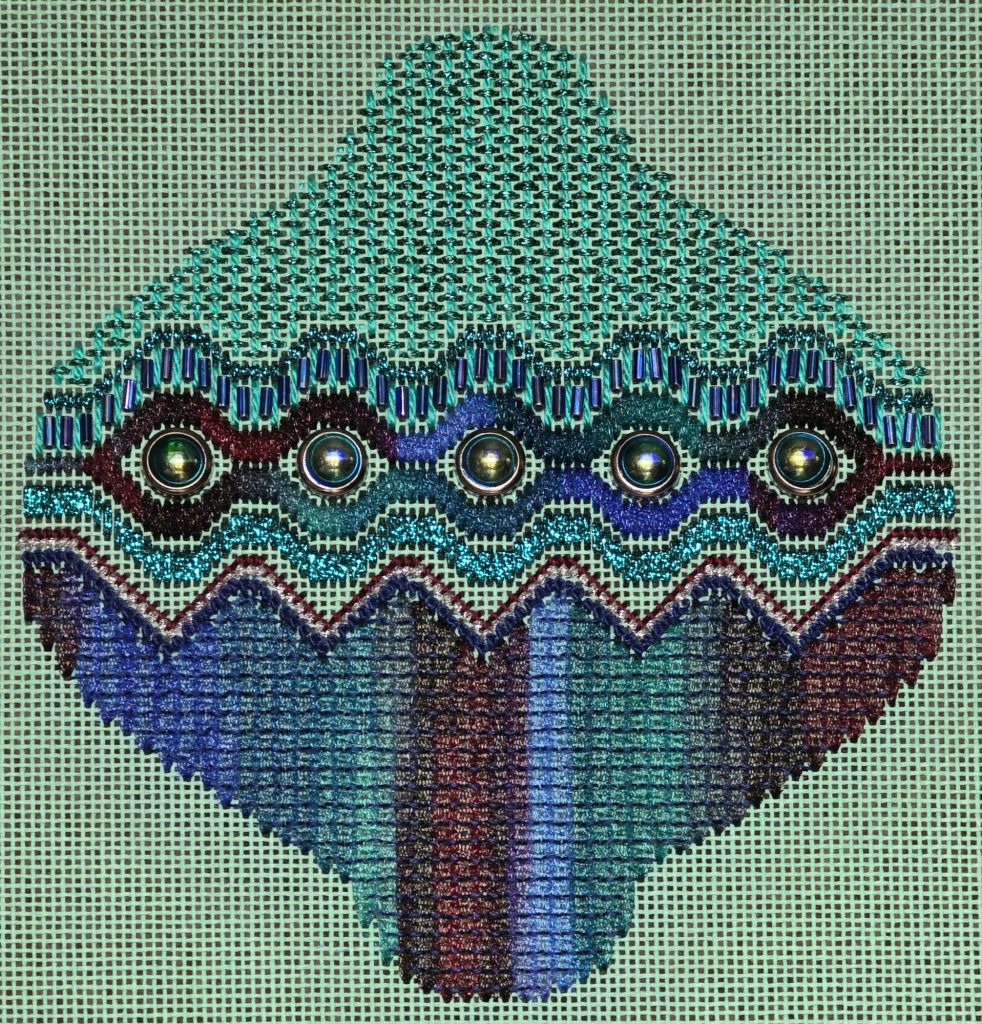
I couldn’t use the Vineyard Silk C-077 for the cording because the skein had been cut. The length was just short of what I needed and it didn’t twist nicely. So, my stash came through! I had a partial skein of Twinkle 300 Malachite that works great. And, I had Splendor S880 to attach the cording to the canvas. Looks great.

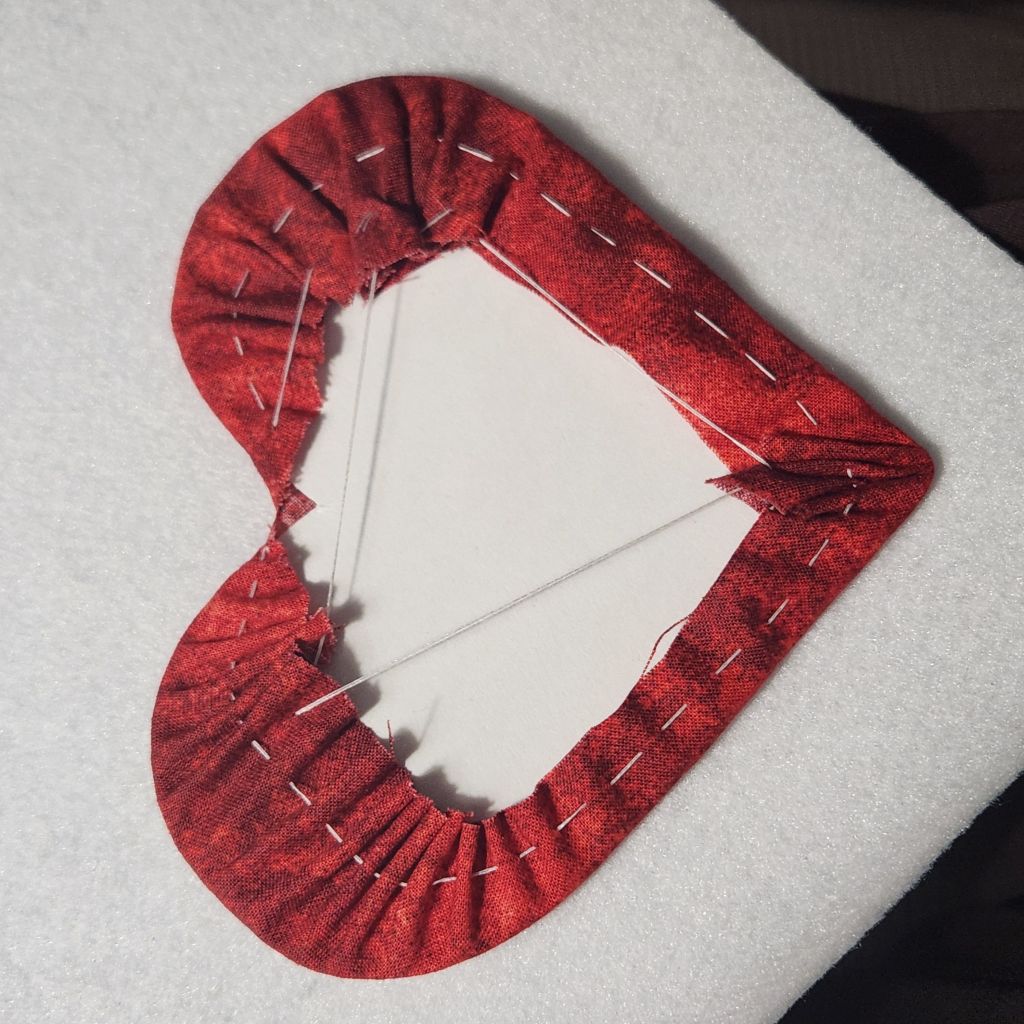
I bought Loops and Threads, a 100% cotton fabric from Michael’s. It worked great on my ornament back. It comes in a wide variety of plain and patterns. FYI: Michael’s also had bolts of fabric. But, not being a fabric person, I didn’t really look them over. These small packs are $1.99 and big enough to get a few ornaments out of it.

I did the running stitch about 1/2″ inside the edge, gathered the fabric, laced it up to stay in place. I cut it large enough to create some padding but it wasn’t enough so I used wool felt for more padding. I sewed the cord on (no glue). I attached the short loop to to Craftex. This time, I tucked the long piece of cording up inside next to the loop and ran the cord across the back of the loop, attached the cording all around the ornament, and passed in front of the loop and tucked it in next to the other side of the loop. I said I never do the same thing twice!

Filed under: Bargello - A Pattern Book by Golden Hands, Bargello Books, Books in My Library
Bargello – A Pattern Book by Golden Hands, 1972


The 3-D boxes and hearts are the 2 patterns I like.
The canopy bed-hanging and caftans are way over the top but I like the design wrapped around a trash can. There are finishing instructions for a hairband, belts, bags, seats, stools, and even slippers.
Filed under: Bargello Books, Books in My Library, Florentine Embroidery by Barbara Snook
Florentine Embroidery by Barbara Snook, 1967
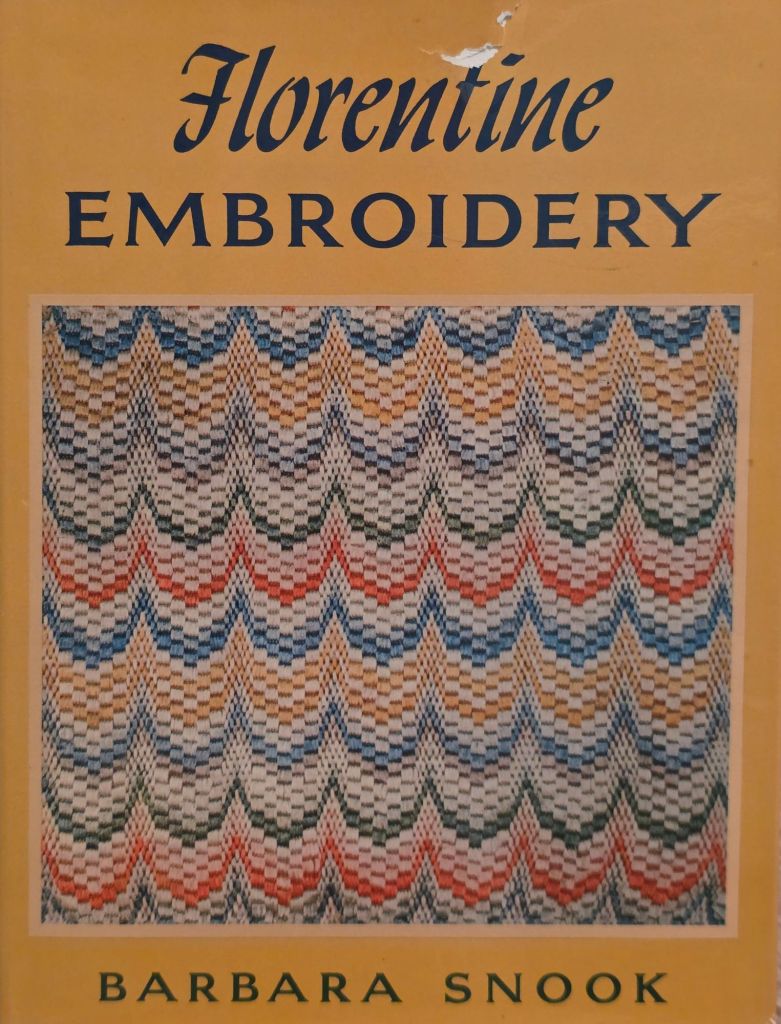
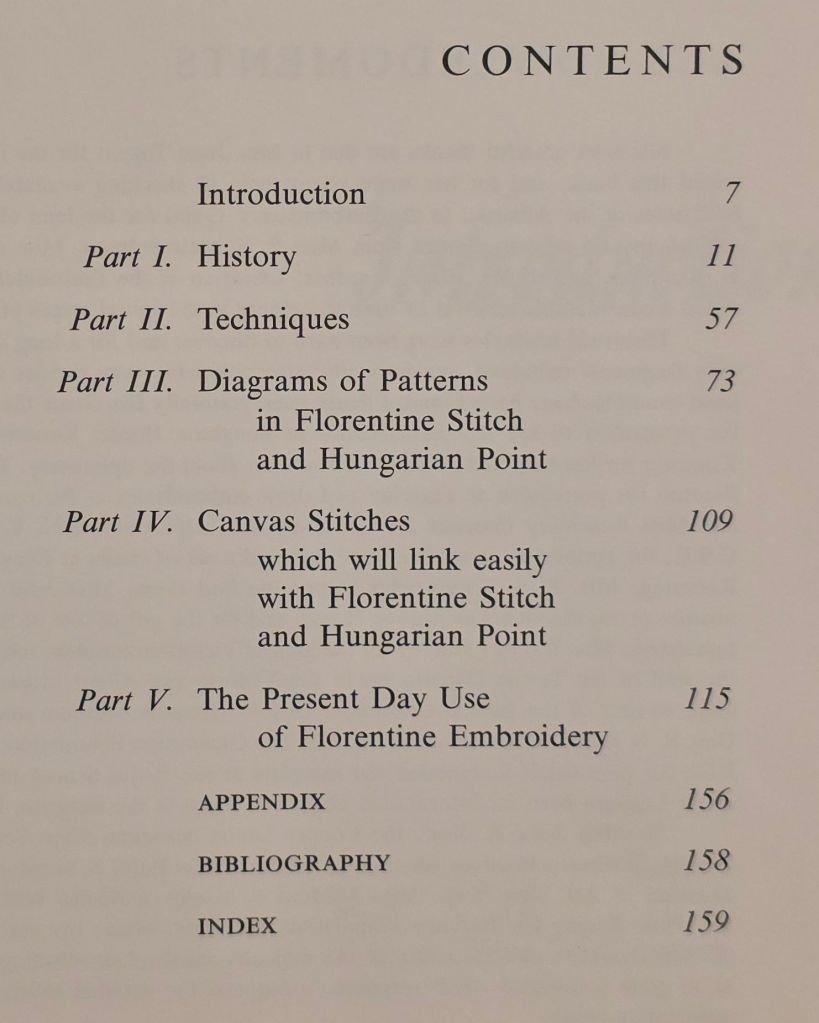
Lots of diagrams of some great patterns. I’m just not a fan of the cross-stitch type of diagrams. I do like seeing the bargello patterns combined with other canvas stitches.
Barbara’s other book, The Craft of Florentine Embroidery, also from 1967, is on the Bibliography from EGA’s Step 4 Master Craftsman (but I don’t have it).
Filed under: Bargello - Florentine Canvas Work by Elsa S Williams, Bargello Books, Books in My Library
Bargello Florentine Canvas Work by Elsa S Williams, 1967


This book is on the EGA Bibliography for Master Craftsman Canvaswork, Step 4.
There are no diagrams but the photos are clear enough to follow. Color combinations are included for each pattern although they are easily changed because you use shades of various colors. This book has a floral medallion done in basketweave in the center of a bargello pattern. That is a great idea.
These are natural, hand-faceted, rondelle gemstones similar to ones used in the Royal Blue Sapphire earrings (https://melitastitches4fun.com/2025/05/01/royal-blue-sapphire-teardrop-earrings/).
These are Yellow Sapphire for Debbie and Ruby for Mona, our Delaware friends.
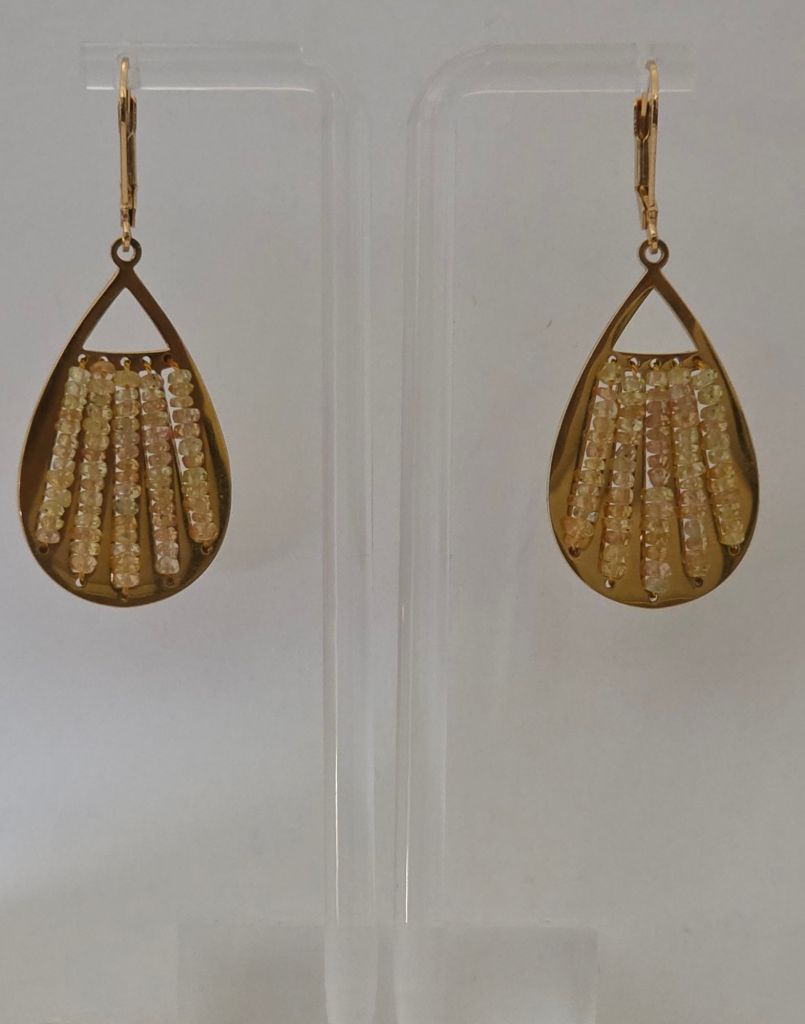

I’m not done yet! I’ve not used all the small gemstones or touched the medium and large gemstones yet. But, I have to find a different bead frame for the larger ones. They sparkle in the sunlight. I’m very happy how they turned out. And, there are Emerald gemstones to use too!
Such a lovely note and package arrived today. I love these anniversary gifts as they are extra useful as rulers or measuring tool. Quite an accomplishment- 35 years as a chapter.

A few Christmases ago, my sister-in-law, Sher, gave me a wooden cutting board on which she had painted a bluebird because I had raved about how good it was when I saw her post it on Facebook. I knew she was crafty but hadn’t known she studied art or painted!

Since Sher had made three similar bluebirds, I used Photoshop to morph my favorite face on my favorite body. And, after taking several classes on how to paint on canvas, I was ready to paint and stitch it for her Christmas gift.
Step 1. I made a line drawing using Vellum tracing paper. This allowed me to focus on the main elements of the design.

Step 2. Initially, I was going draw the tracing onto the canvas. Instead, I placed Congress Cloth on top of the photo. I could see the photo clearly when it was on my light box. My first attempt was heavy on the paint and holes got clogged.
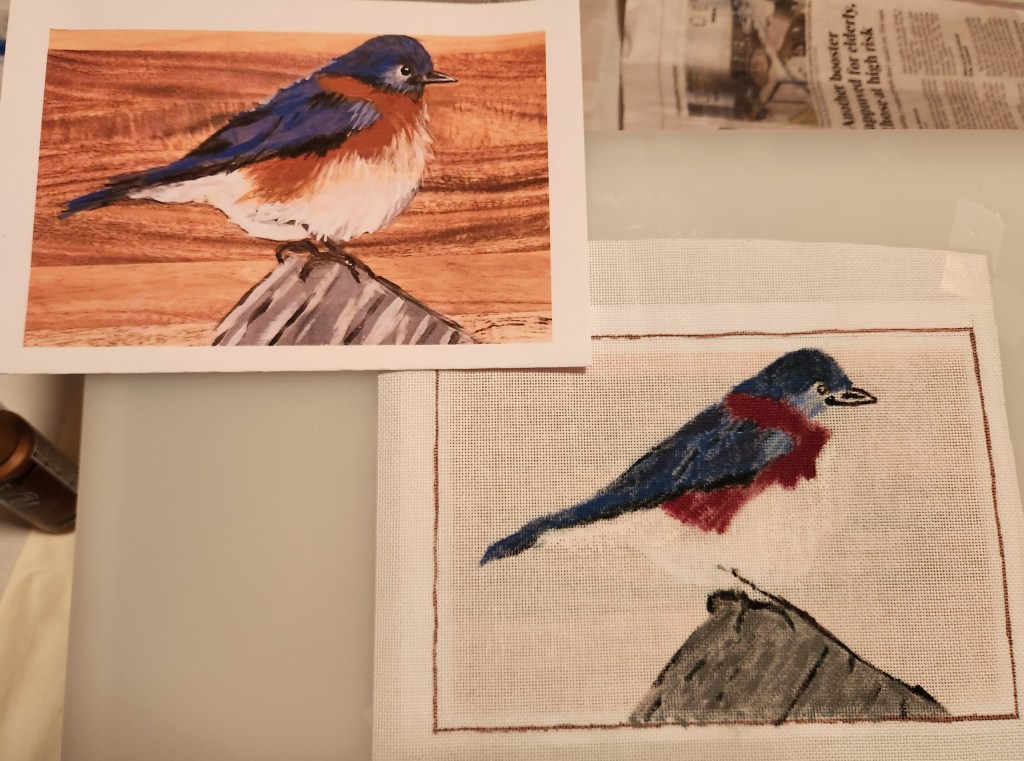
Step 3. In my second painting attempt, I used less paint and waited for each color to dry before starting on the next. I didn’t try to get the exact coloration of the bird’s feathers onto the canvas because I knew I’d cover them completely with threads. I especially loved how the background turned out.

Step 4. I selected threads and a stitch for the log. The grays are Cosmo, a 6-strand cotton floss in 3 values of grey (from dark to light, including 2154, 153A, and 2151) and black DMC 310 for his perch (3 strands). The stitch is from Patchwork of Peace (page 68), which I saw stitched on Facebook’s Virtual Notebooks by Meg W. The pattern created a bit of a vertical appearance, but from a distance, it is ok.

For his feet and leg, I used Trio T12 Black with an outline stitch.

Step 5. I definitely wanted to do the background first in case the feathers needed to cover that up some along the edges. The background is a brown wooden board. I love how my painted canvas turned out. So, I don’t want full coverage.
I tested a Woven Trame (too heavy), Woven (the holes show more than canvas), Alternating Oblong Cross Trame (some canvas would show but still heavy), a Horizontal Wave Double Running Stitch (photo makes it look more open than it actually was and it was tough to see the holes with brown thread on brown canvas), and finally the Horizontal Wave Running Stitch without the short stitch (from Sandra Arthur’s Shapes of Needlepoint Series IV page 46). It is open so my painted canvas will show through.
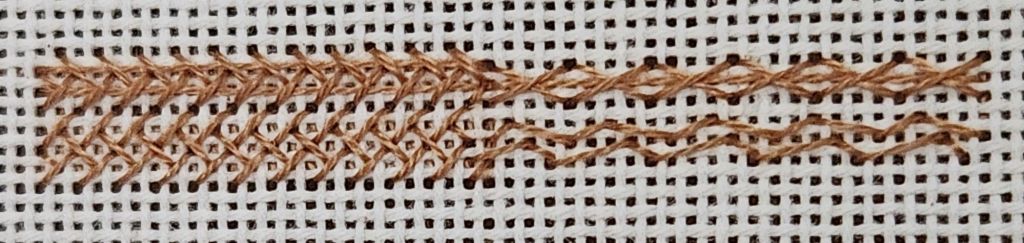

I had intended to use 5 different values of browns to follow my paint coverage. I realized that it would be difficult to switch threads so often. Then I remembered that Amy Bunger (in her DVD #6 Barely There) suggested matching the thread to the middle value of a shaded painted area and used the same stitch throughout. Here are the top 10 rows and the right side stitched.

It really evened out the paint and allowed the painted color variation to show through. I couldn’t be happier with the result. But, the background seemed to take forever to stitch.
Once I got to the bird, I stayed with it and was done in about 5 days of concentrated stitching (thanks in large part to the US Open for keeping my husband occupied for 4 days!).
I used Splendor threads for the bird’s body using 1 white, 3 grays, 3 blues, a brown, and a rust. I used 2 strands in the needle varying the combinations: 2 black, 2 bright blue, 1 black with 1 bright blue, 1 black with dark gray, etc. A couple of other threads for the leg and beak.
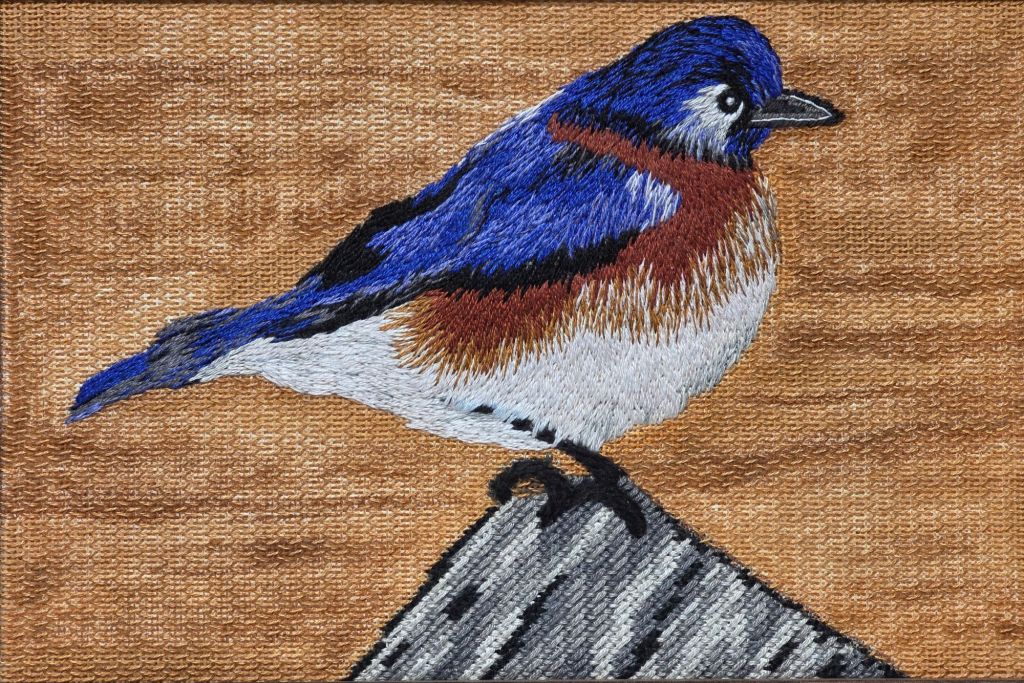
It flew off to the framer, Jim at Repenning Fine Arts in NJ, so it could head west to St. Louis for the ANG Exhibit at Seminar. That was the first of two exhibits he would enter before heading north for it’s permanent nest. I’m very happy with how it turned out!

It was in the Adaptation category in the exhibit. No ribbon but good scores and good feedback from the Judge in the critique:
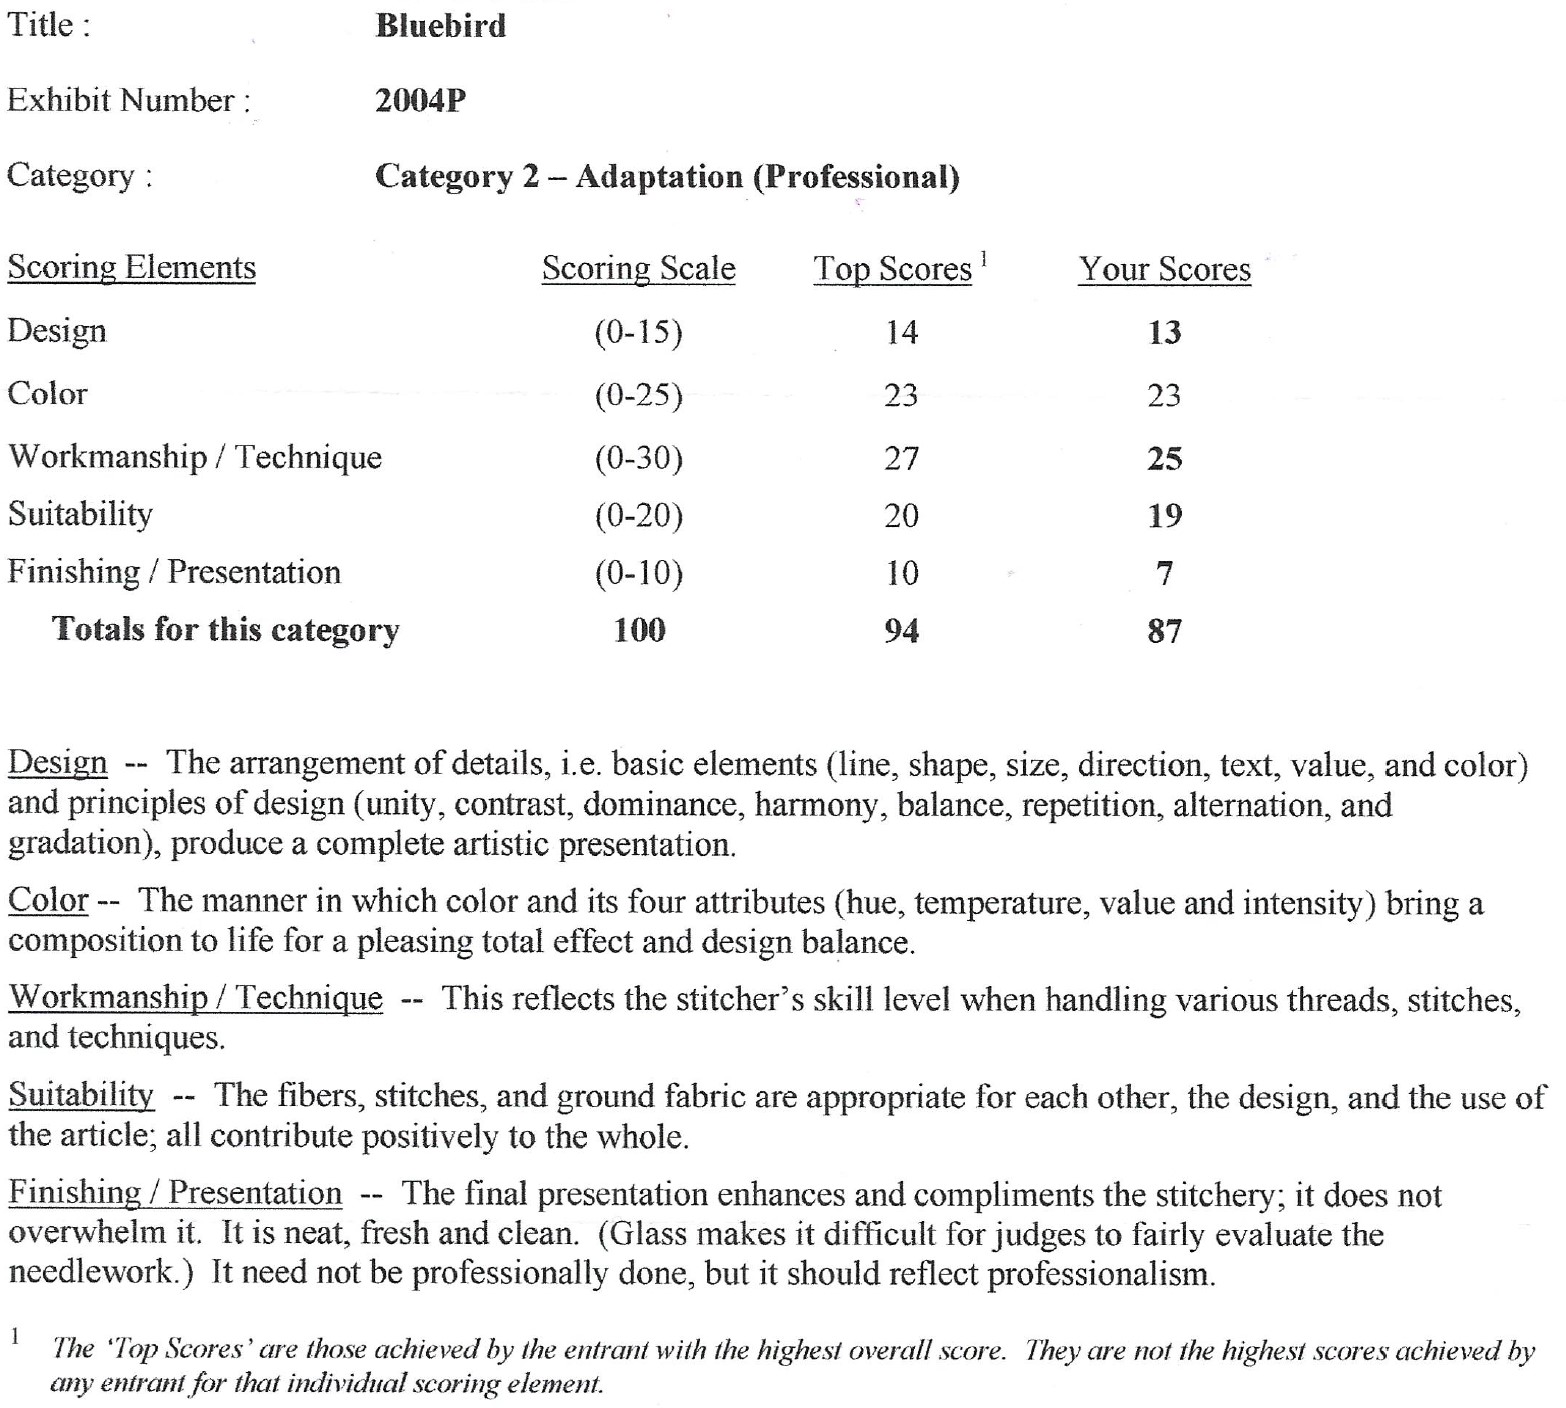
• Ordinarily some of my comments would have been about the line of the back of the bluebird could have been smoother. But then I realized that your depiction was truer to what had been painted, which is more important. Bluebirds may not be as dark of a blue as your sister-in-law painted him but we felt that you wanted to replicate her painting as much as possible in tribute.
• Your threadpainting was successful in transitioning from the darkest of colors to white. In the front of the breast, the transition was a bit more abrupt than on the side (middle) of the bird.
• Your threadpainting of the blue feathers was successful in the way you added the nuances of the different colors in those feathers. The success of the stitching of the feathers is in following the line of flow of the feathers from the breast to the tail. The line of stitches in the breast area follows the flow from the top of the breast to the lower part.
• Transitioning from the breast area to the midway area was not as smooth as it was from midway to the back area. The flow of the line of stitches truly followed the line of the body when going from the middle to the tail. Slanting some of the rusty brown stitches a bit in the middle areas would help a viewer to see a better flow.
• Using an open stitch allowed the shades of the background to come through in a much better way than if you had completely covered the ground fabric with stitching.
• Looking at the overall presentation of your piece, the bluebird might have been happier with a bit more space above his head. Adding some more background above the bird and less rock below would have helped. A less heavy frame would also have improved the presence of the bird.
It was really special that Patty, the editor of NeedlePointers, has Bluebird as the WOW Moment & displayed it on the back cover page of the January/February 2025 issue! Here’s what she had to say about it:
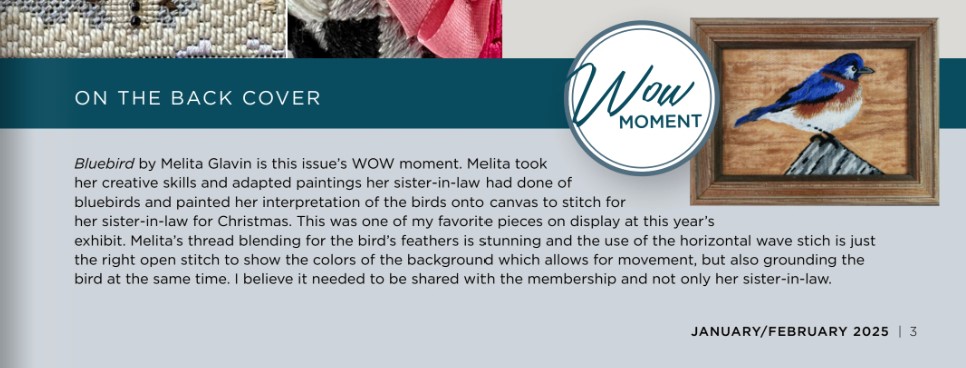
Many thanks to Linda M who gave me her copy of the magazine so that I can present Sher with the issue. I want to keep a copy of the issue myself.
The piece was going to go to Sher for Christmas 2024, but I decided to send it south for the winter to the 2025 Woodlawn Needlework Exhibit where it earned Honorable Mention in Adaptation in Surface Embroidery category. It should not have been reclassified from Canvaswork to Surface Embroidery, but the Judges said it wasn’t them. There were 3 judges listed in the Woodlawn booklet and I had their contact information. Apparently, there is a committee that takes in the pieces, and it must have been them. I didn’t pursue it further.

Here’s the piece, ribbon, and pin from Patty..

We visited Sher for her birthday in May 2025. She was blown away and I can finally post this saga! Here we both are with our gifted bluebirds. Neither Lady nor DeeDee seem impressed.

Filed under: Bargello Books, Books in My Library, Needlepoint Bargello by Dorothy Kaestner
Books in My Library: Needlepoint Bargello by Dorothy Kaestner, 1974

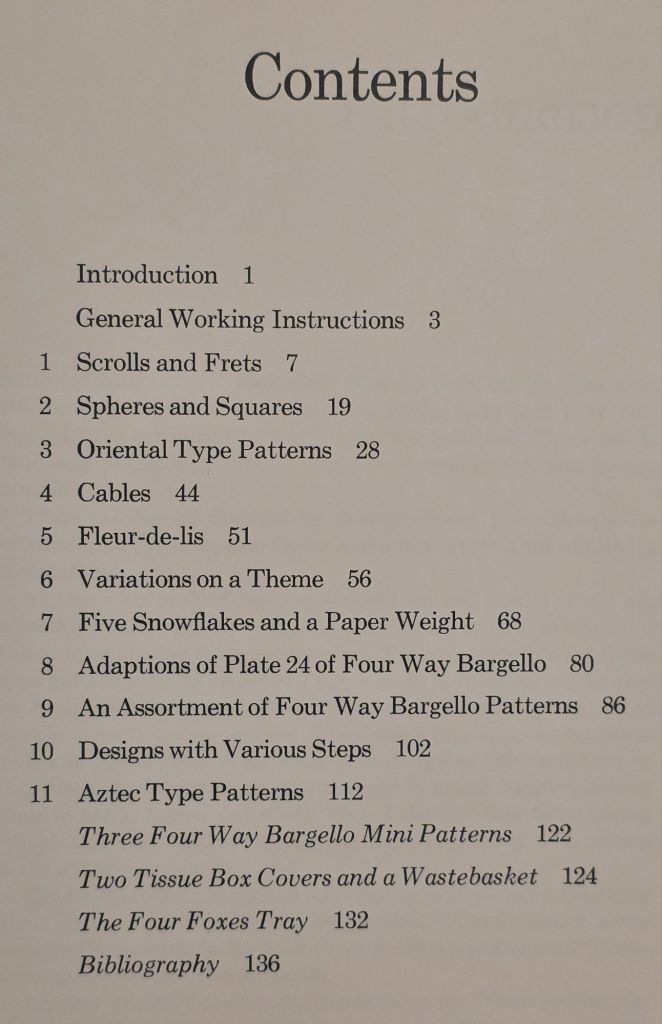

This book is where I found spheres on poles for the center flower of Bargello Bowls (page 20). https://melitastitches4fun.com/2021/04/22/canvas-master-craftsman-program-step-4/
I’m not into Foxes but she creates a fox head with bargello. There are circles, snowflakes, and a fleur-de-lis.
She shows you how to make a tissue box cover. Hmmmm.
I finished the ornament Love, 5th in the series from the Cabochons Series by Susan Portra.
This time, I did it differently. I used a running stitch and cinched it around the magazine board. With the rest of the thread used as lacing to keep it snug.

I added some Craftex as padding. Then, I glued it to the back of the front in a few spots with “Super NEW GLUE” by Euro Tool, Inc. that I picked up at Blue Santa Bead. It’s a small bottle and easy to control. It dries fast and firm.
I had enough of the DMC #5 Pearl 350 and Tiara T115 to use 4 strands of each to make the cording. I stitched the cording to the Craftex before gluing the cording into place while pinching the 2 sides together. I went back and stitched the cording in a few places to be safe.
Goal #21 stitched and finished! I decided to finish these when I take them off the stretcher bars so they don’t get jostled or the stitching skews once removed. Plus, finishing all ornaments together sounds like a worse option.
Filed under: General comments, Painting Needlepoint Canvases with Fancywork Finishing
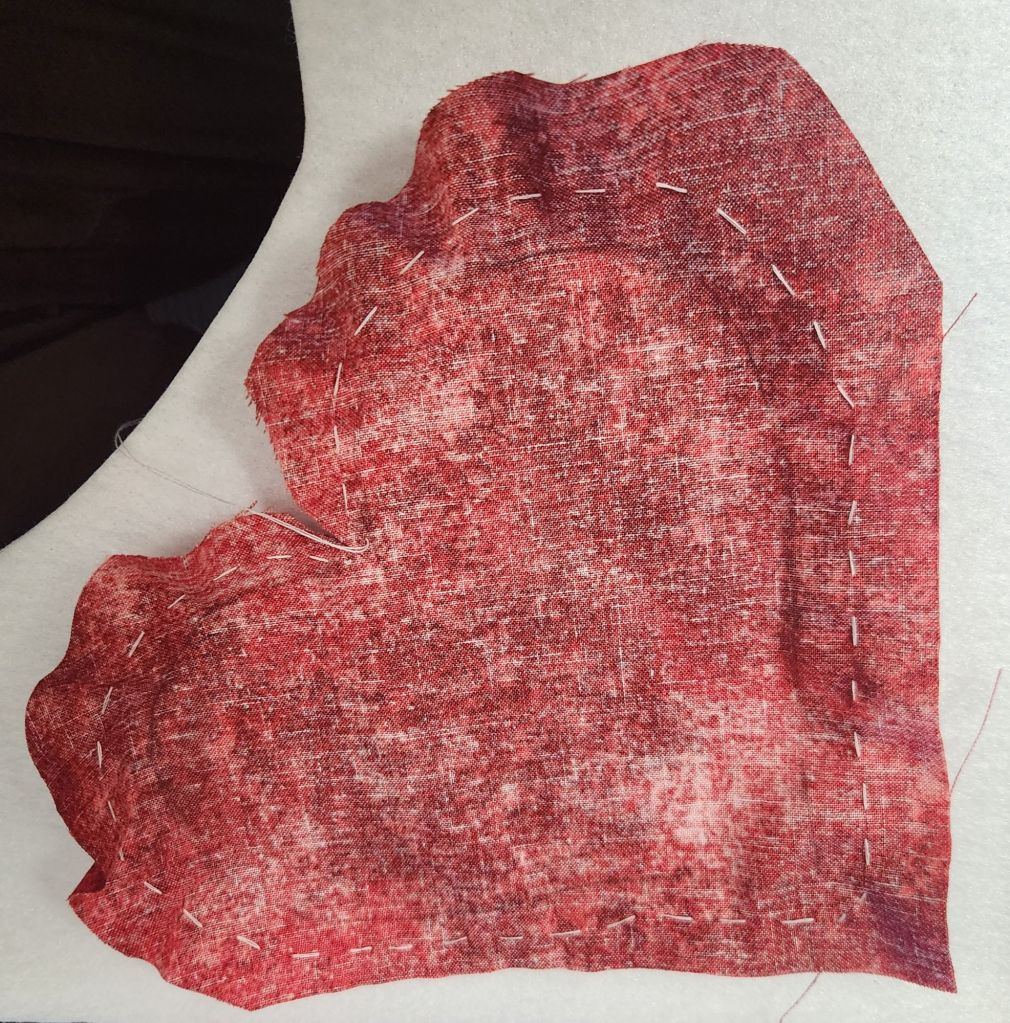
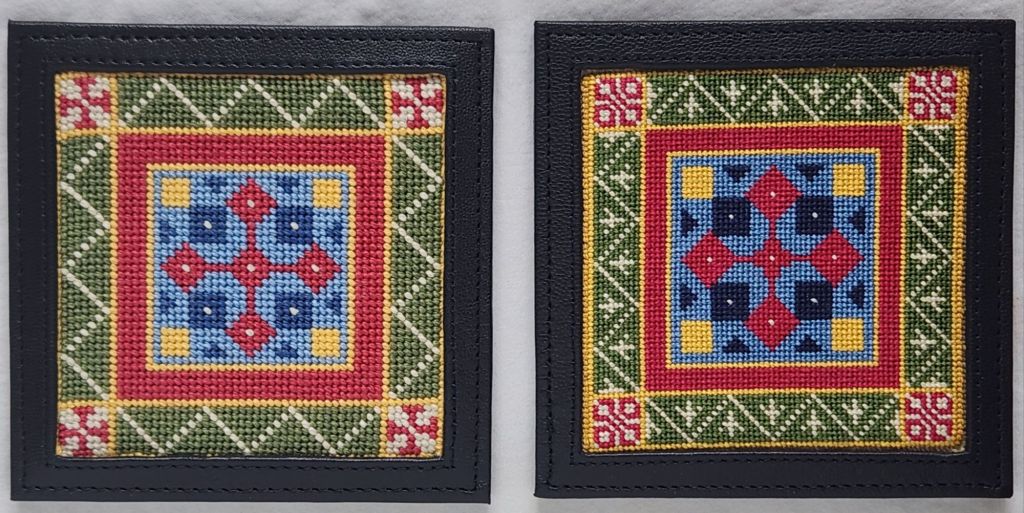
In 2020, I took a painting class with Nancy of Fancywork Finishing on Zoom. I think she may have retired since her website is not active. I painted and stitched a similar original design on 13 count (https://melitastitches4fun.com/2020/11/05/painting-needlepoint-canvases-with-fancywork-finishing/) and on 18 count (https://melitastitches4fun.com/2020/12/02/second-coaster-stitched/). I wanted to find red leather coasters. So, I put them away until I found them.
In September 2024, at KC Needlepoint, I finally found leather self finishing coasters with 4″ square openings. The red wasn’t the same red so I went with a very dark blue. But, when I got home, I couldn’t find the stitched pieces.
Finally, I found them last week while looking for something else! But, the stitched pieces were 3 and 15/16 x 3 and 7/8 on the 18 count canvas and 4 and 1/8 square on 13 count. So, I had to find the proper yellow and add a row on two sides of the 18 count canvas. I lost the outer yellow border on the 13 count canvas. Oh well!
Boy, that was tougher than I expected. Getting the paper off on the first coaster took tweezers to get it out from under the edges. The second one I nudged better and slower so the paper came off in one piece.
I had to cut right up to the stitching on the 13 count canvas and use one tool to lift the edge and a second to shove the canvas underneath. I was afraid the stitching would unravel, but it was fine. I lost most over the outer yellow border, but that’s ok. Both are on and not going anywhere!
So, here are the finished coasters. I had not included this on my list of 2025 goals because I didn’t know that I’d find them. Bill picked the one on the right on 18 count for his.
We’ve got enough coasters now! So, I’m thinking that I will find an acrylic tissue box that I can insert 4 sides. Does anyone have any sources?
