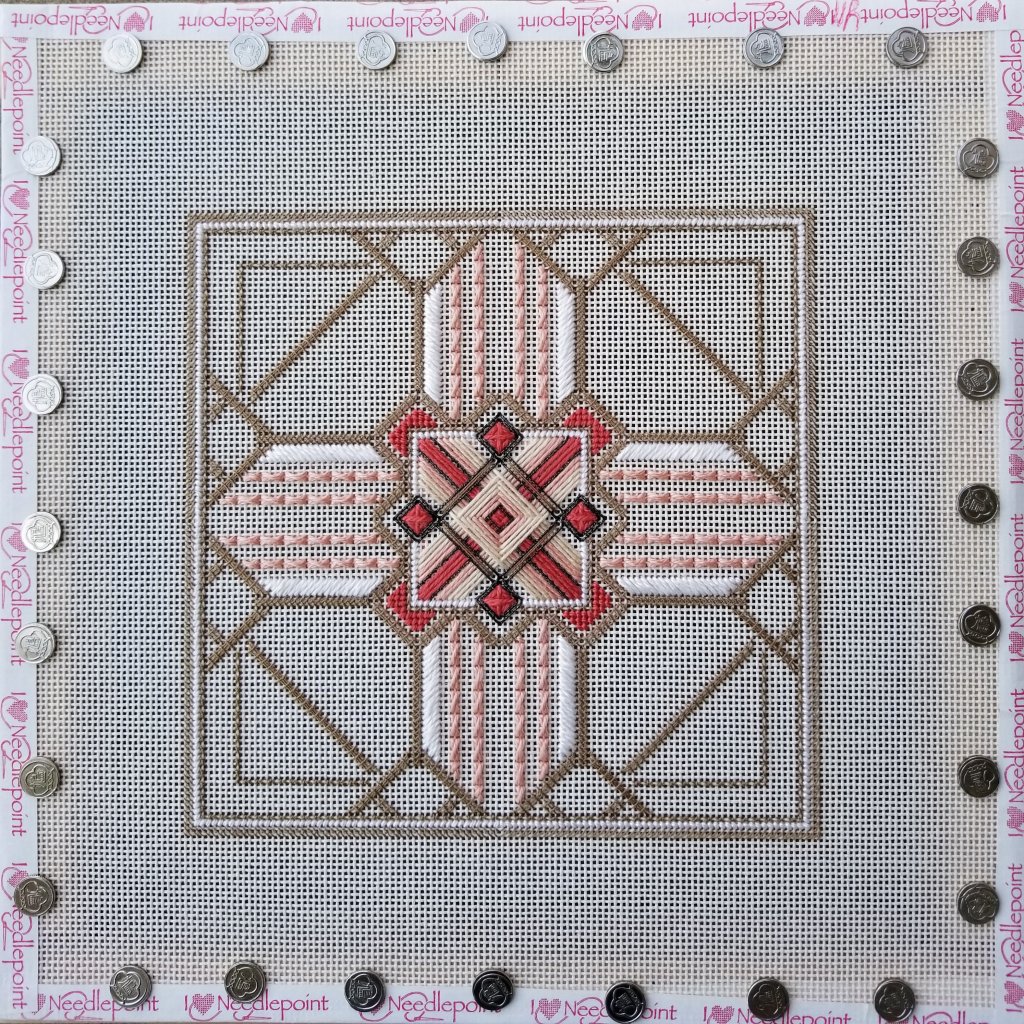
The center waffle has a variation in it because I was watching TV. I have to blame it on something other than I can’t follow well written instructions. This is my first piece from Gay Ann Rogers. Only looking closely at the original would anyone know. I actually like it just as well.
In my opinion, this is not a piece for someone just starting counted projects. In order to get this correct, I had to stitch in a different order than Gay Ann suggested. There was no way I would have counted correctly doing all the Tied Diagonal Stitches without stitching the Plaited, Slanted, and Elongated Cross Stitches first. Working from the center out is safer for me. Also, I am happy that my husband golfed when he did and is reading a 1,000-page book about Abe Lincoln (the period before his presidency) because the TV is off. I am proceeding well. Everything is matching up as expected.
By the time of my ANG Main Line Stitchers chapter Stitch-in yesterday, I had completed the inner brown border of Elongated Cross stitches. So, stitching the rest of Step 1 was easy while we chatted over Zoom. The difficult counting was done.
All this was Step 1! I just love it. It’s broken up into only 2 steps. While I’m anxious to forge onward, I will switch to a different project to be sure that I am ready for our chapter meeting on Monday February 8.
Filed under: General comments
I love these vintage tacks and use them on special projects. I must have gotten them from a past chapter member’s stash, probably Mae V-D. The symbols may be Chinese and I wish I knew what it says. I tried a translate feature that I found online and ‘text ninety soldiers’ is what I get. There might have been 90 tacks in the container at one time but I only have 38 now. They hold up well (don’t bend upon carefully removing them) and I don’t see the wear on the heads like the newer tacks. Another, “They don’t make things like they used to.” example.
If anyone knows what the symbols are, please leave a comment!


Filed under: Gay Ann Roger's, Countess of Granrham, Gay Ann Roger's, Dowager Countess, Gay Ann Roger's, Lady Edith, Gay Ann Roger's, Lady Mary, Other People's Designs
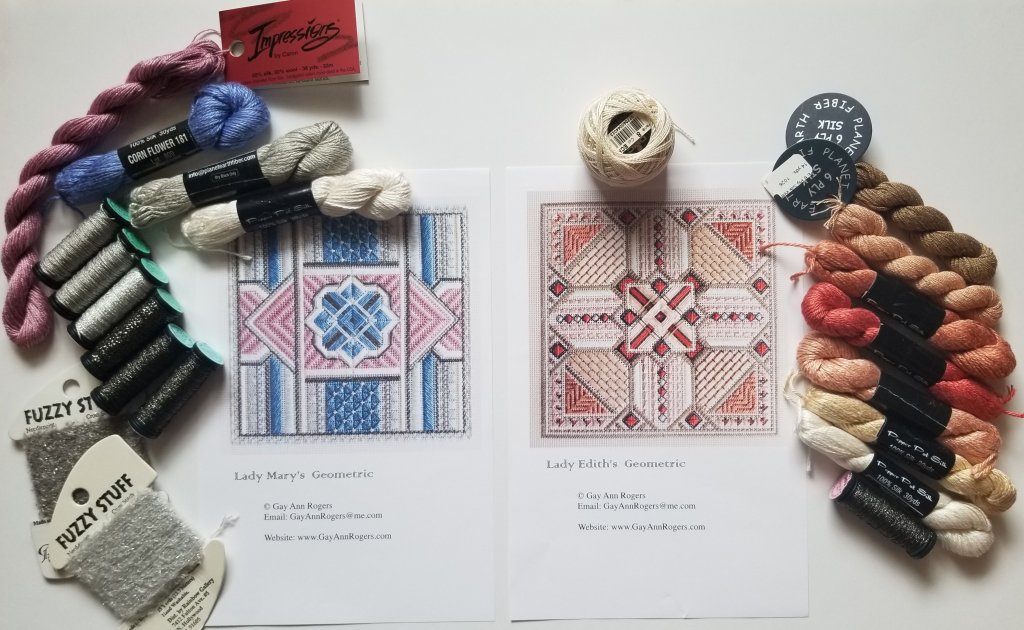
It took ordering from 3 stores to compile the required threads to stitch all 4 Gay Ann Roger’s Downton Abbey pieces. Everything including the 4 pieces of canvas are now ready to go. I only substituted Fuzzy Stuff which I had in my stash for the Planet Earth fiber Furr-Fuzz-Funn. One of the Kreinik colors has been discontinued but I was able to get it. I thought it was interesting that 3 of the 4 pieces use DMC Ecru and Lady Mary’s does not. Nothing as common as Ecru for her!
The next decision is in what order to stitch them? Do I stitch youngest to oldest or vice versa? This decision is based on one key point: The Dowager Countess is the newest design just released in her October sale and I would her done hers first. But, it uses Watercolours Amethyst 006 and I have stitched with Waterlilies Amethyst 006 recently. So, I will start with Lady Edith.

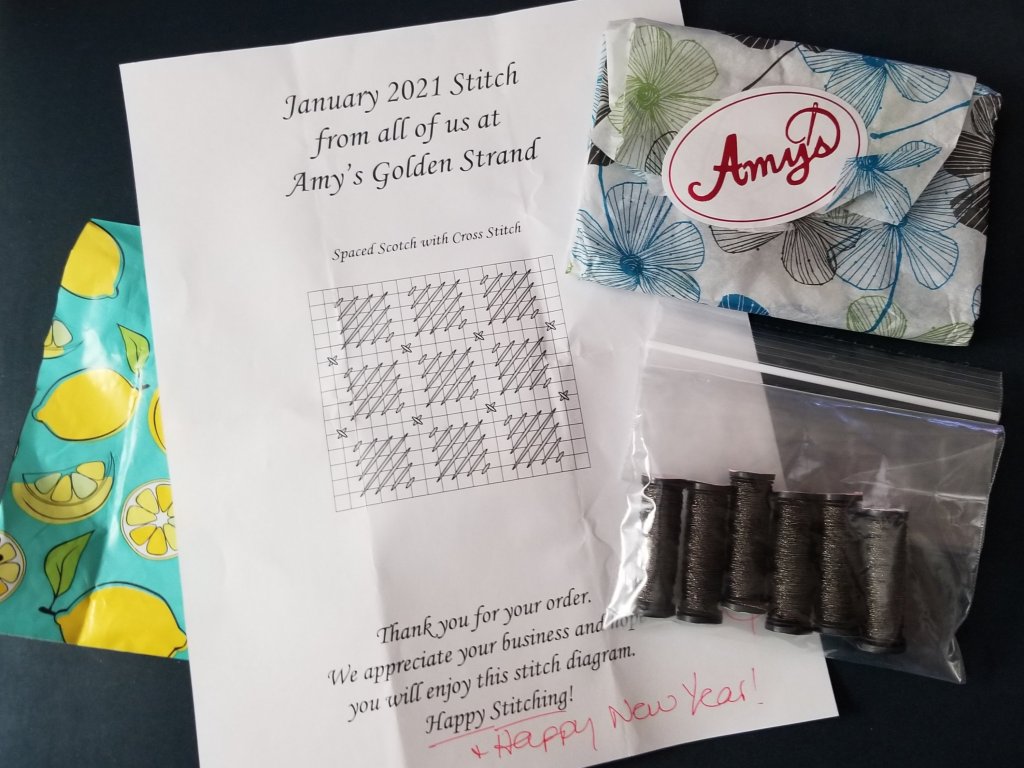
I’ve ordered online from a few needlepoint stores over the years and only a few packages arrive so prettily packaged that I choose to remember them. This order from Amy’s Golden Strand was not a large order but still they took care to place the threads in a sealed plastic bag (essential), wrap in a pretty tissue paper, and a fun plastic envelope. But, they went one step further by adding a thank you note with a stitch diagram saying they appreciate my business and a hand-written note wishing me a Happy New Year! It looks like they change the stitch diagram monthly. Thank you Amy’s Golden Strand for making my day. I look forward to placing future orders with you.
Filed under: ANG Cyberworshop, ANG Main Line Stitchers Chapter, ANG Seminar 2020, Blanton's Bottle, Build Your Own Geometric-Kurdy Biggs, General comments, Interchange by Linda Reinmiller, Needle Me Canvas Contest
Many thanks to Meghan and Rebecca at Michael’s framing department in Pottstown. Meghan did a great job helping my husband and I select the mats and frames. They have a very clever device that displays an image on the computer of your piece in the mat and frame to see how it will look before finalizing. I really liked the shape of the mat for the diamond shape piece. I’m very happy with final pieces.


Kristen, one of my fellow cruisers who knew we’d purchased 4 bottles of Blanton’s, discovered that Rittenhouse Needlepoint sold the Blanton’s Bottle canvas and reminded me while we were on a shopping trip for threads in November 2019. I ordered it, it arrived in December as a Christmas gift to myself last year and it is appropriate that I finish it at Christmas time this year! Recently, we found a bottle of Blanton’s allowing us to save the last bottle from our May 2019 cruise.

I love the mesh bag that comes on the bottle and that influenced my decision on the background to select Chicken Wire from More Backgrounds for Needlepoint by June McNight. Her other book, Decorative Backgrounds for Needlepoint listed the 10 Commandments and the second one surprised me. A dark background brings the main design forward while a light background may melt into it. I held up a dark brown Floche and a light brown Floche next to the bottle and could see immediately that the darker one was better.
Initially, I tried 11/0 Mill Hill seed beads for the rider, horse, and rim but they were too big for basketweave and backstitching (stringing beads in a straight line) on 18 count canvas. So, I reached out to my chapter member Linda and found out that her resources and experience indicated that smaller 15/0 seed beads were better for basketweave.
As it happened, Michael’s only had Miyuki 11/0 in Delica black beads which are more tubular than the round seed beads. So, I bought them because I still wanted the black beads to be bigger than the rider and horse to mimic the actual bottle. And, I thought they would backstitch really well on the black rim which are completely straight rows.
You can see the difference in size and shape between 11/0 seed beads and 11/0 Delica beads in this photo. Four seed beads cover 1/4 inch and five Delica beads cover the same length.

The 11/0 Delica seed beads allowed me to contrast in size and basketweave with the smaller Miyuki 15/0 seed beads in a light bronze for the horse and rider.
Here’s the sizes of 3 different round seed beads 15/0 Miyuki (6 left), 14/0 Sundance (6 center), and 14/15 Sundance (6 right).

It’s not until you use more beads will you start to see a slight difference between the 15/0 (12 left) and 14/0 (12 right). So, when you have a larger area of basketweave, you’ll probably find 15/0 preferable.

No doubt that we will be ringing in the New Year with a wee bit of Blanton’s and toasting to my last finished piece of the year. Happy New Year everyone!

Filed under: General comments
Thanks to the 6,700 visitors from all over the world who took time to visit my blog this year. It’s always nice to see your comments. It’s been a great year of needlepoint and little else due to coronavirus. Thankfully, most everyone I know has avoided this virus.
My blog is 10 years old now. WOW! WordPress gives 3 GB free storage space. It took me 10 years, about 780 posts, and over a 1,000 photos (because each post has one photo & some more) to run out of free space. So, I upgraded to the Premium version with 13 GB. It has lots more features that I don’t understand but I can work on that over the next 10 years!
My first project begun in 2020 was Carolyn Mitchell’s Making Stitches Work For You and it was finished in 2020. I ended up with a 12″ x 9″ design of 21 beautiful bands. The instructions are being proofread by two people in my chapter. Thanks so much Linda & Lori! I just love this design (all stitches and threads were my choice).
Other finished pieces included Blanton’s Bottle, Barbara’s Patchwork (ANG Stitch of the Month 1999), Welcome Fiona (great niece baby piece), Build Your Own Geometric with Kurdy Biggs (ANG Cyber Workshop), and Vases with Curly Bamboo (Sharon G canvas stitch guide and class begun in 2012 with several members of my ANG Main Line chapter and restarted in 2019 as we compared with 2 other stitch guides).
I also completed Steps 2 and 3 (with distinction) of the EGA Master Craftsman Canvas Certification program. Steps 1, 2, and 3 will be on display in the Education area of the Chicago EGA National Exhibit.
Two pieces finished in 2019 were published in articles in ANG’s Needle Pointers magazine including Lotus Kimono (Jan/Feb 2020, A Tale of Two Stitchers) and Flying Cranes Wedding Kimono (Mar/Apr 2020, Constructive Criticism and How’d She Do That?).
As always, a few pieces got started and not finished: Klimt Kimono with Toni Gerdes (ANG Cyberpointer’s Cyberworkshop), ANG 2020 Stitch of the Month called Star of Stitches by Kathy Rees), and Rainbow Ribbons by Kam Wenzloff using wonderful threads from Lorraine at Color Complements. I didn’t have time to start Hearts of Gold from Michele Roberts (ANG Correspondence Course) but it looks like a lot of fun and they are wonderful instructions.
The ANG National Seminar moved to an online venue (as most things did due to coronvirus). I learned a lot from Susan Hoekstra from her Teaching Needlework 101 class (which I would not have been able to take in person because it conflicted with my other classes). I proposed Overdyed Spools to EGA THaP (Take Home a Project) intended to let a person get used to teaching (a 2-hour class). It is taught to as many as 30 people to take back to their chapters for teaching as group class similar to the ANG Chapter Project Book. It was accepted and now I can use tools learned in Susan’s class to prepare for the Regional EGA meeting in the Fall of 2022. The design is in the 2017 ANG Chapter Project Book.
The other two classes I took at the ANG Seminar were with Linda Reinmiller: 21st Century Designer (learned publishing tools) and Interchange (learned pull work and designing a stitch sampler on the diagonal). Interchange was fun stitching and I finished it (one of the benefits of a virtual seminar which allowed class to last a month).
The last class of 2020 was Painting Needlepoint Canvases with Nancy at Fancywork Finishing. Another great class. I painted and stitched a geometric design on a 13 count and 18 count canvas. A floral piece was more challenging and has not been stitched yet. I have another project in the works to be painted and stitched too.
My EGA Brandywine chapter invited Ann Strite-Kurz to talk about the history of EGA and Lois Kershner discussed achieving perspective in stitching. Both were excellent.
Instead of vacationing (Branson, MO & Whistler, BC, Canada will have to wait for coronavirus to subside), I spent money on getting many of my finished pieces framed (even splurging on museum glass for most of them). These are now framed: Crazy Quilt, Sisters, Vases, Lotus Kimono, Wedding Cranes Kimono, A Dusting of Snow, Scotch Flower and Hearts, and Crescent Journey Beach colorway. I’ve been keeping Romeo’s & Reppening’s busy this year! I took Fiona to Michael’s (in Feasterville) and Interchange, Build My Geometric with Kurdy Biggs, Blanton’s Bottle, and a small geometric to Michael’s (in Pottstown where our newest chapter member, Meghan, works in the framing department).
Although travel was limited this year, I did manage to visit a new store Needlepoint For Fun in Lititz, PA.
While I have done well using Excel to create diagrams, I believe I need to take diagramming my designs to the next level. Thanks to Marilyn O and Needle Pointers, I have the opportunity to learn Adobe Illustrator by becoming an Assistant Graphics Editor for the magazine. It’s great to learn and give back to the ANG organization that I enjoy so much. And, it’s a perfect time to learn a new tool.
The EGA Seminar is being held in Chicago (drivable and my husband’s favorite city). I signed up for some great classes including learning how to manipulate overdyed threads from Gail Stafford in a notebook class, learning stumpwork from Alison Cole by making one small flower, and learning ribbon embroidery from Deborah Mitak on Congress cloth by making a 9″ x 9″ bouquet of flowers. I won’t be going to ANG’s Seminar this year because I don’t want to fly to Kansas City, MO and because there is a magic convention being held in Pittsburgh (drivable, one our favorite cites, and my college town) in July. Bill enjoys magic (I dabble in it) and he deserves a special event too. As long as we get vaccinated by then, wear masks, and the new strain doesn’t make things much worse, we’ll be traveling in 2021.
As we start 2021, I am starting Step 4 of the EGA Master Craftsman Canvas program. It’s a bargello design and I am working out the design as I practice using Adobe Illustrator. Here’s a sneak peak of my border.

I am hopeful that May 2021 will be a better year for all of us. Stay well everyone!
A very Merry Christmas indeed. My needlepoint gifts included a pair of string art earrings my husband found in the Signals magazine!

The Dowager Countess design from Gay Ann Roger’s is based on a plum and black dress. I started ordering the threads for the other three designs and now can finish my shopping for the rest of the threads! These look like very enjoyable projects for 2021.

Best wishes to you and your families!
Filed under: ANG Main Line Stitchers Chapter, ANG Stitch of the Month, 2020
My ANG Main Line Stitchers chapter is stitching Rainbow Ribbons by Kam Wenzloff published in Nov/Dec 2019 issue of Needlepoint Now. We’re each using different threads from Colour Complements and they all look great.
The woven plait stitch and tied oblong cross stitch worked up quickly. Several members have gotten further along but I’ve got other projects going and it’s fun to switch from project to project.
With Saturday’s (December 26th) Zoom Stitch-in, I will be working on the next band. Happy Holidays to all!!
Filed under: Swirling Leaves
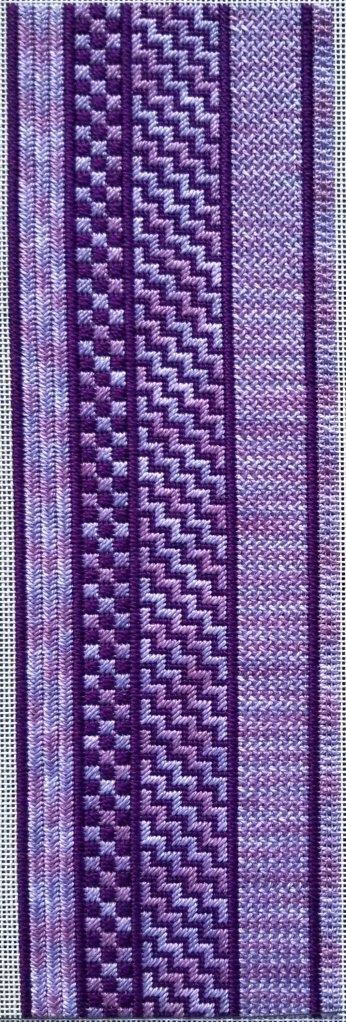
I always feel I have to recap this project because it started in 2015 when I took Janet Perry’s (NAPA Needlepoint) online/cyber Stitch Guide class (offered annually I think). I actually started the background in May 2017 and finished that in October 2019. The blue bubbles got done quickly enough in October 2019 but then the piece was put away for other projects. In my ANG Main Line Stitchers chapter this year, we are encouraging members to bring a painted canvas to the group as we stitch it. We discuss the stitch guide we have for the canvas or discuss options for a painted canvas that doesn’t have a stitch guide. It brings a lively discussion to the meeting. We now have 5 members sharing their canvases at our upcoming Monday Zoom meeting. This is mine and is a wonderful way for me to stay motivated to finally finish my painted canvas!
When Janet discussed perspective, she points out that the green leaves are behind the red ones. Also, cool colors like green recedes while the warm color, red, advances. Since they are related shapes, a similar but a smaller stitch should be behind a larger stitch. So, Janet recommended offset Mosaic for the green and offset Scotch for the red. I started at the top of the green leaves and worked my way down compensating as I went around the swirls. It got a little tricky in the small areas and compensating the red leaves were tougher. I’m so glad that I started at the bottom of the truck and worked up.
Of the threads Janet suggested, I used Pepper Pot Silk 75 Cilantro and 019 Claret.

Believe it or not, I have to put this piece away now because I am waiting for a special order of threads for the swirls that I have never used before to arrive. And, it’s not going to be here until January 2021 at the earliest. But, more on all that in what I hope will be my last post for this piece when I finish stitching.

